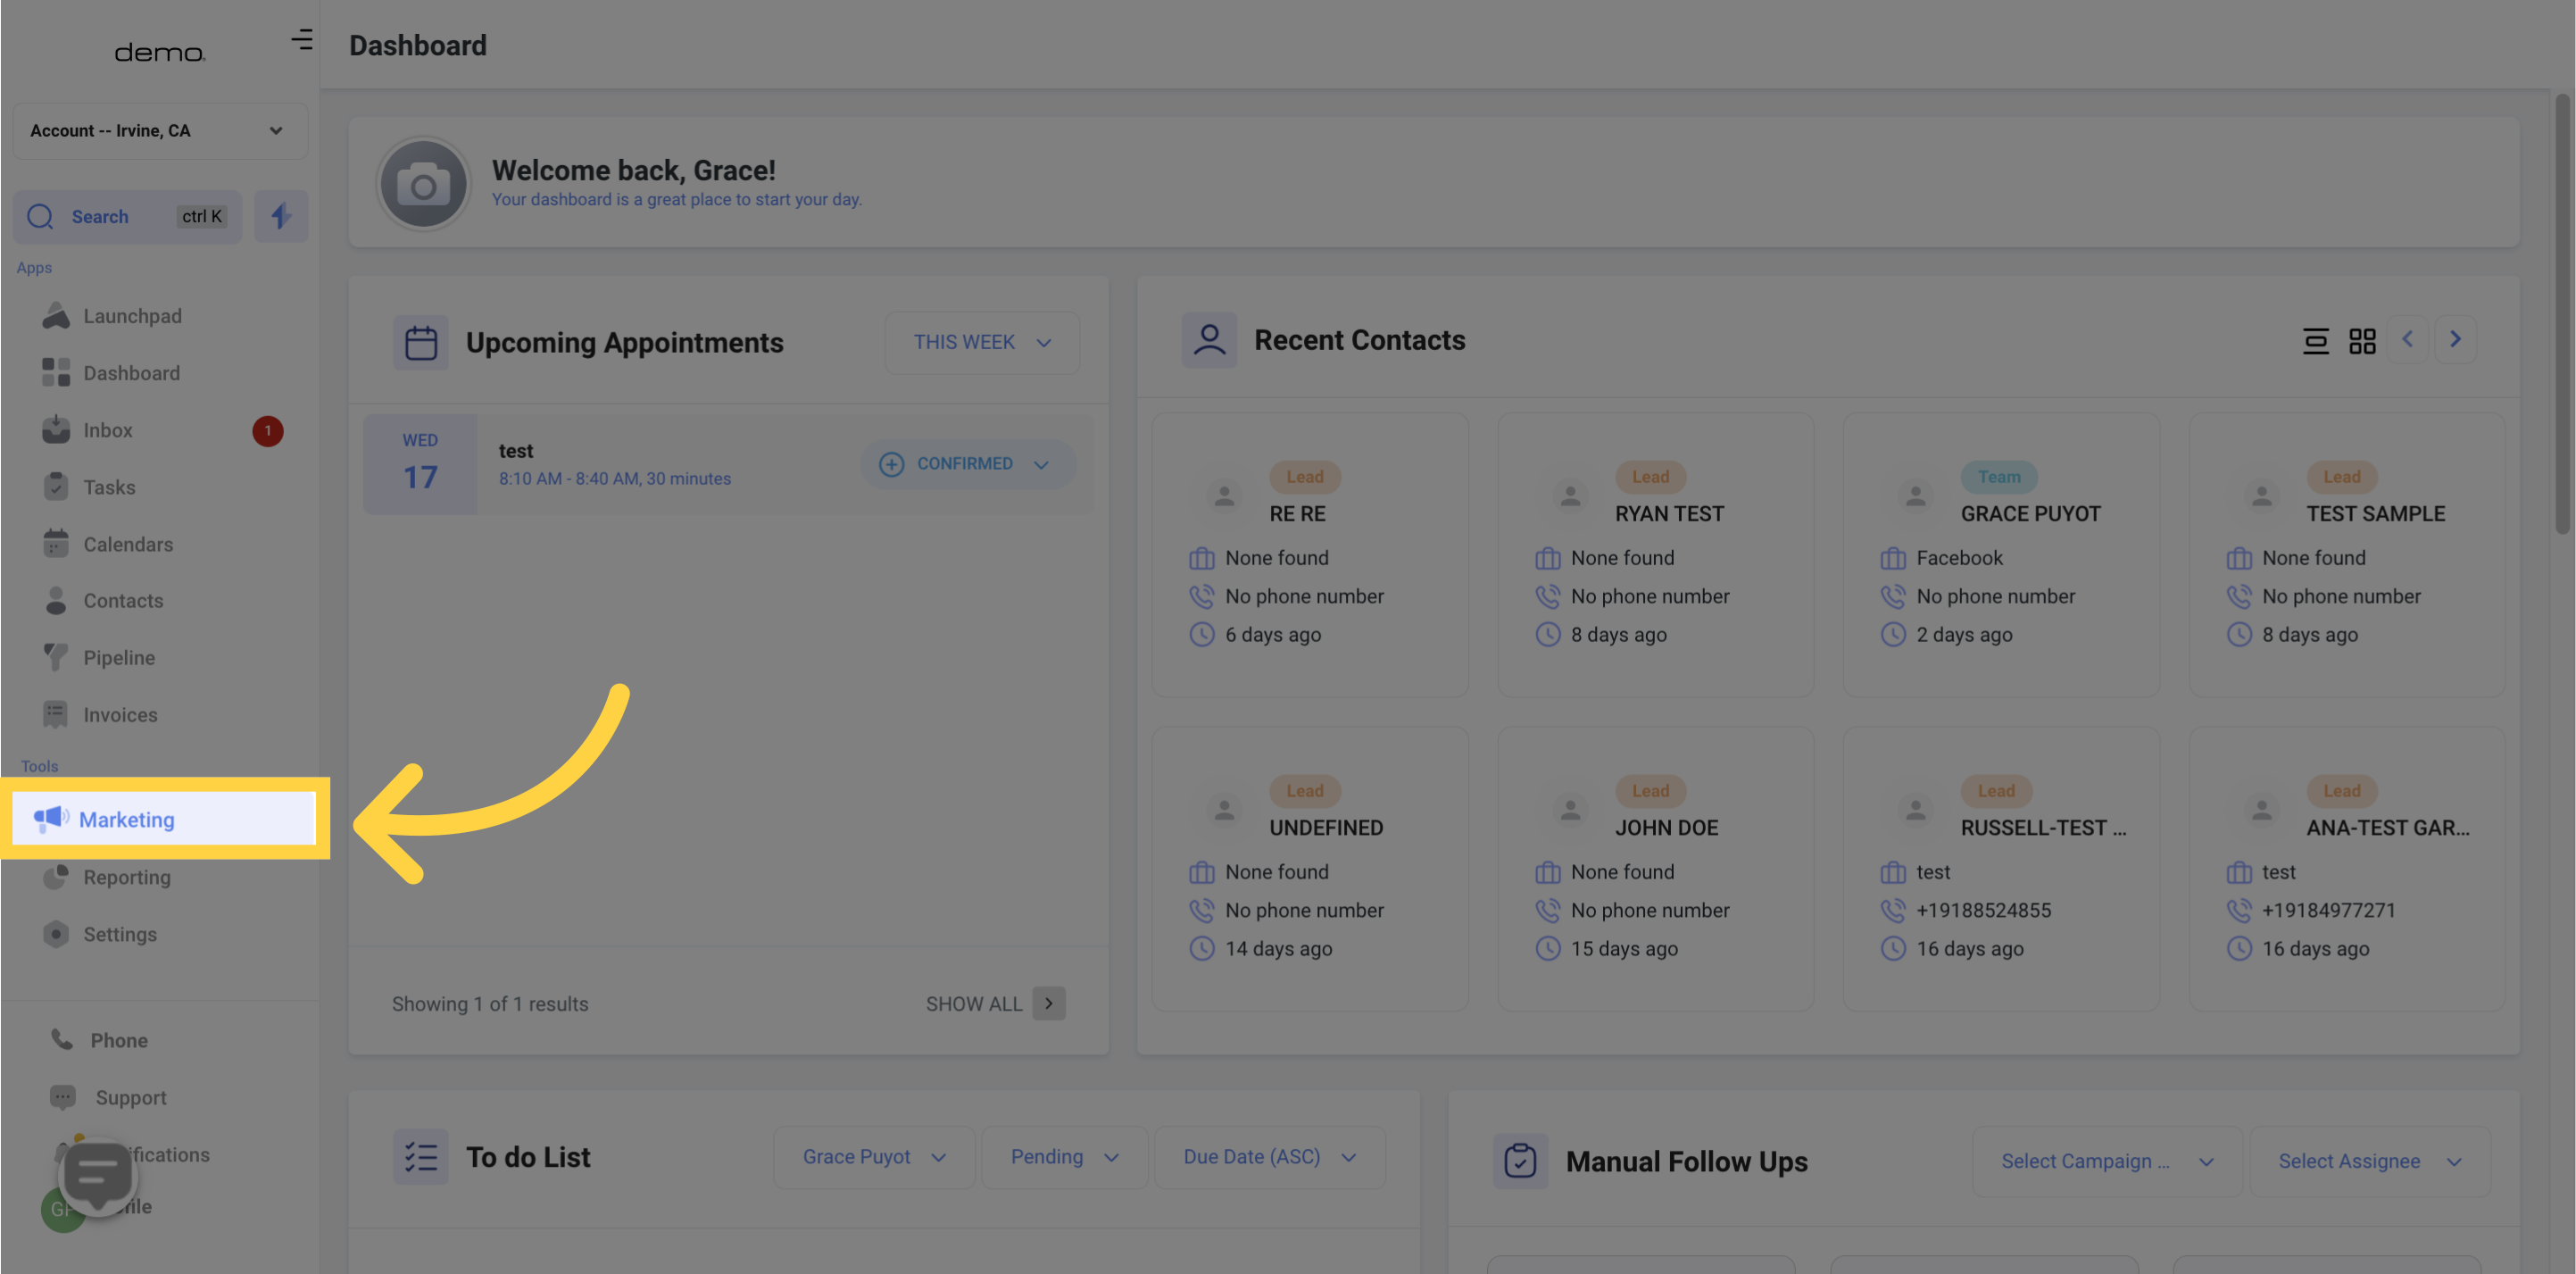
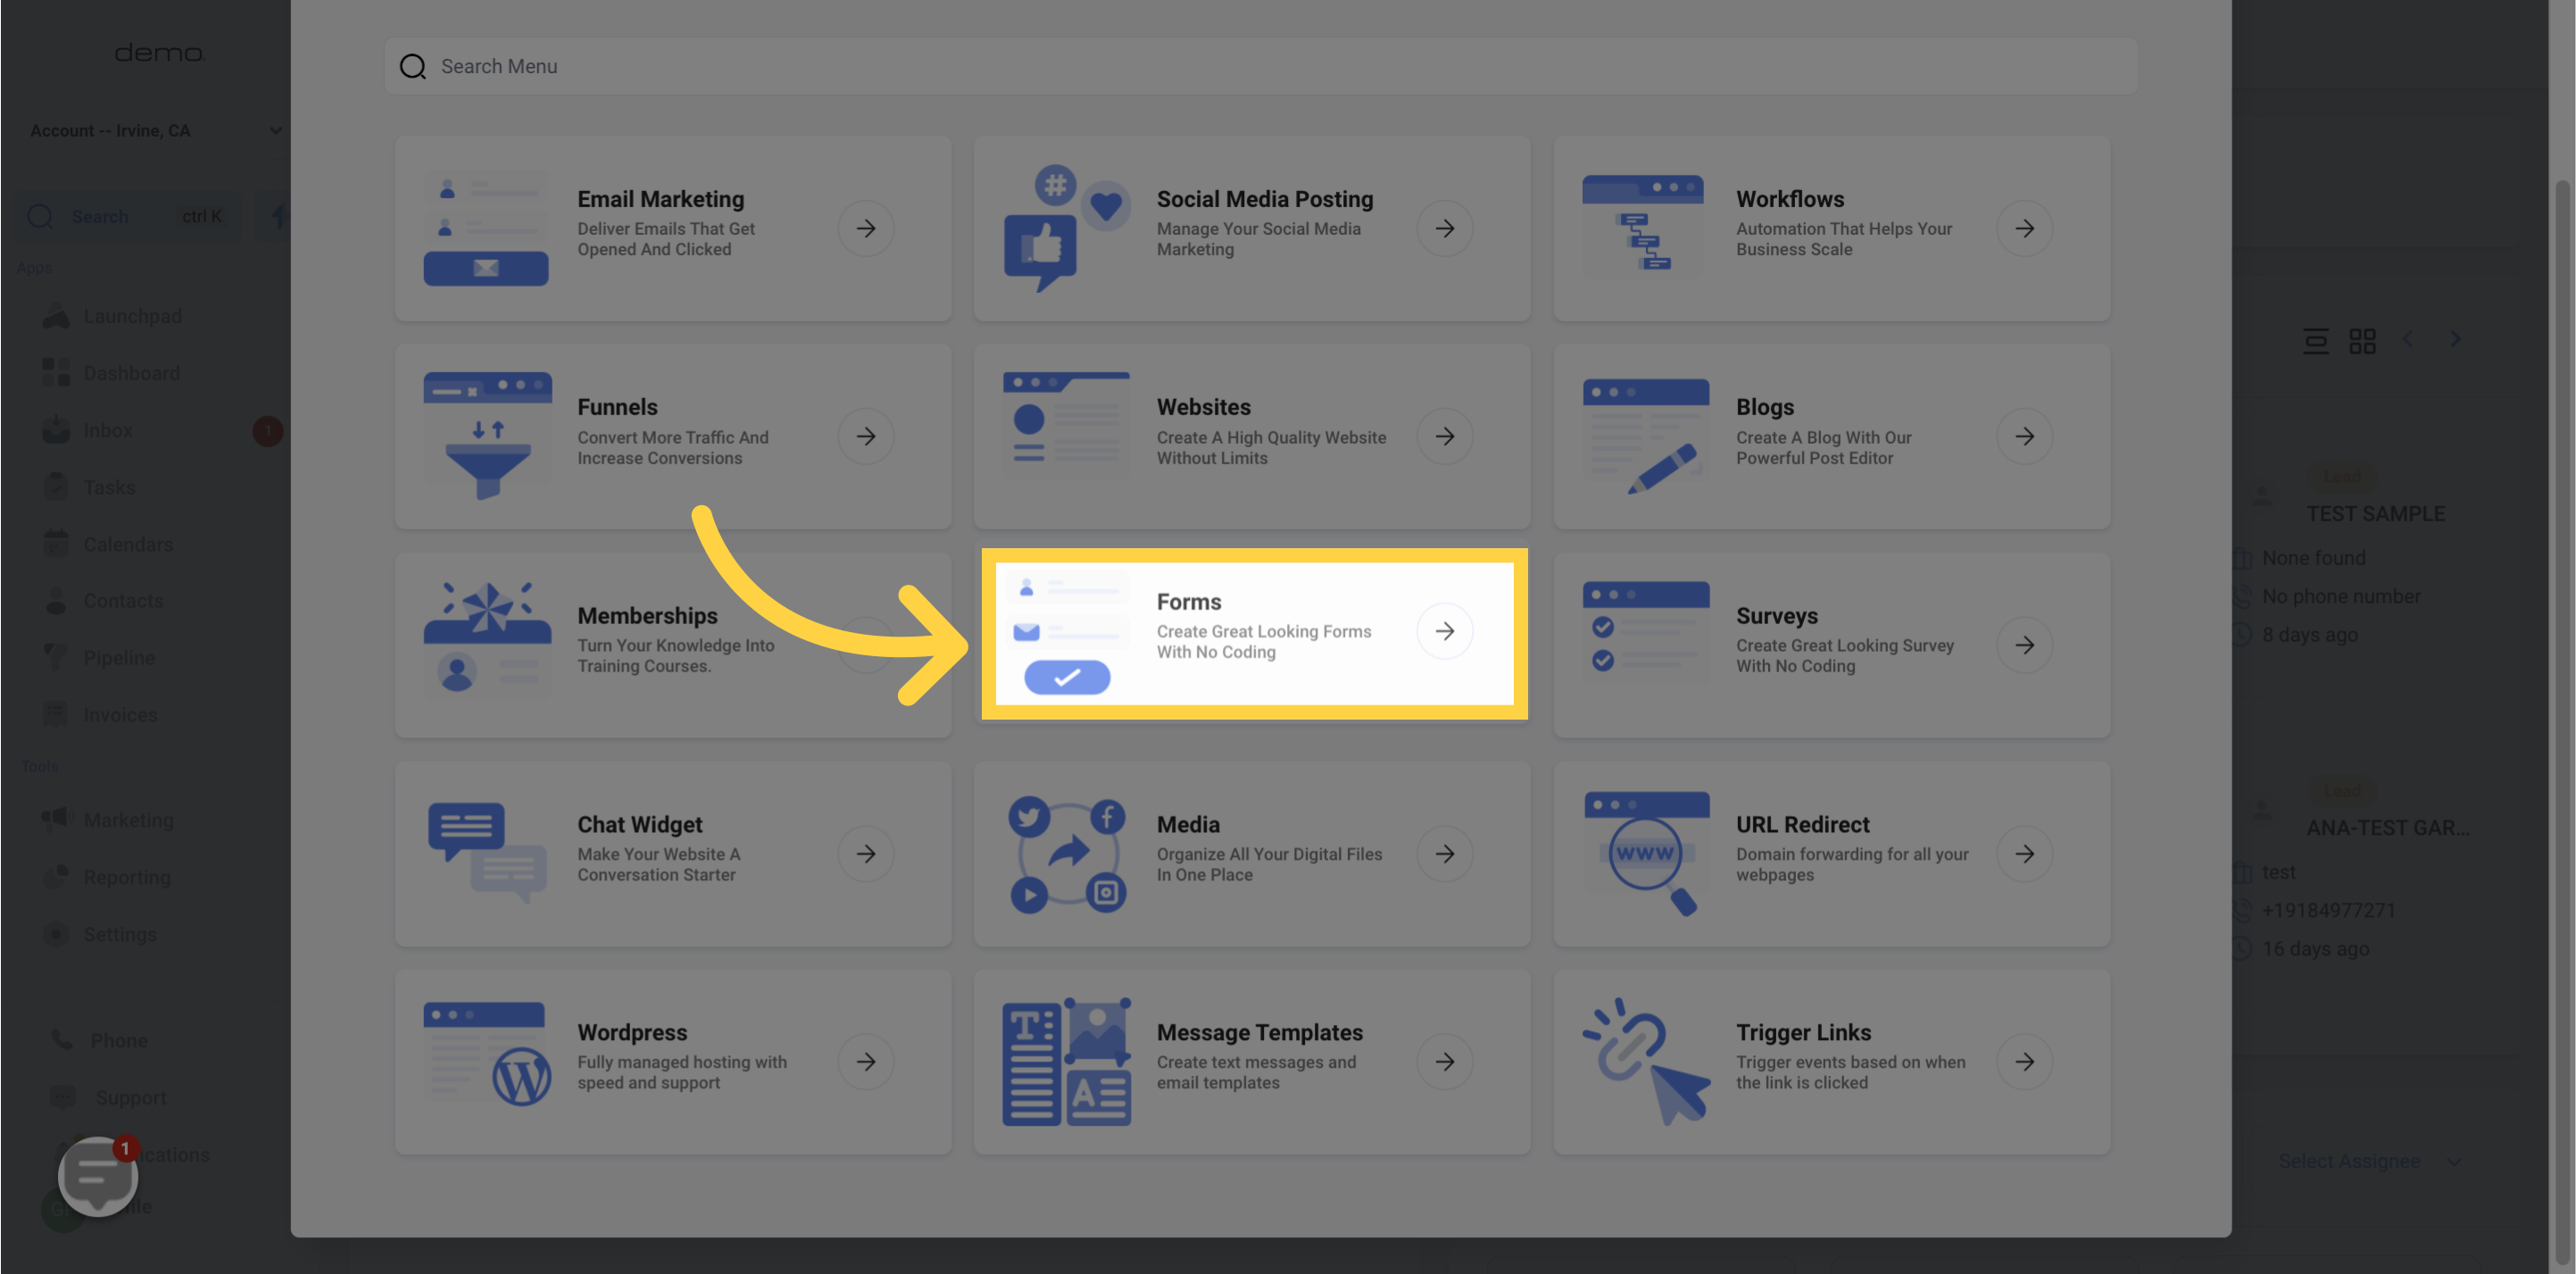
Navigate to the Marketing section
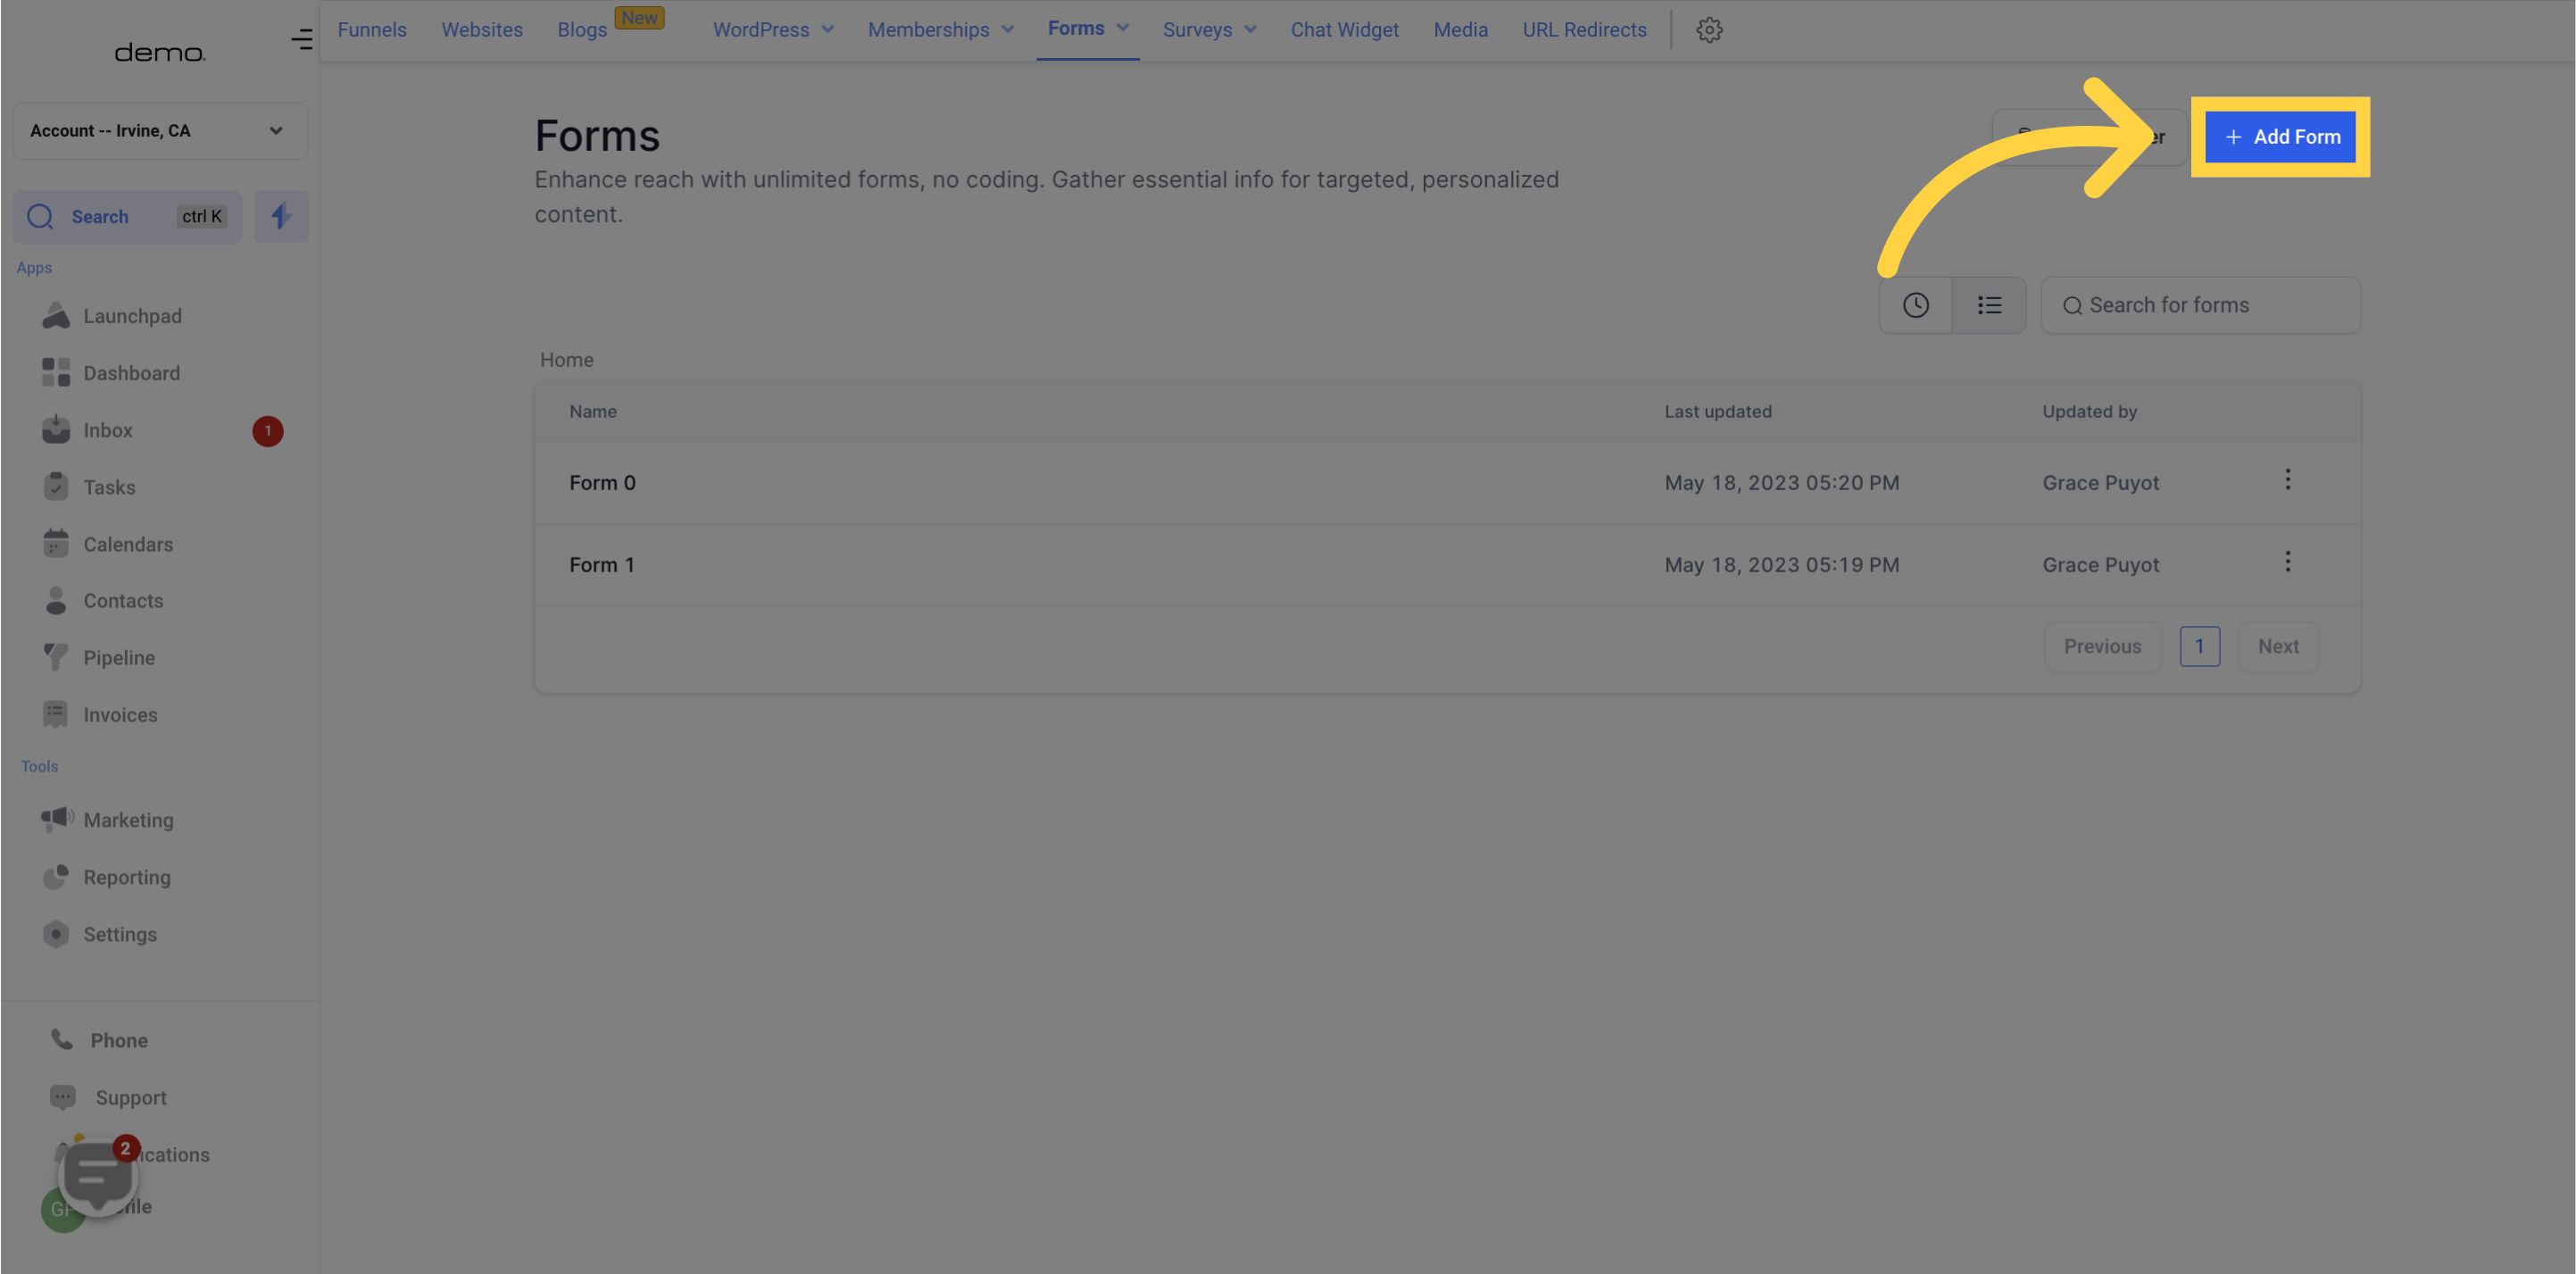
Create a new form by clicking on the Add Form button
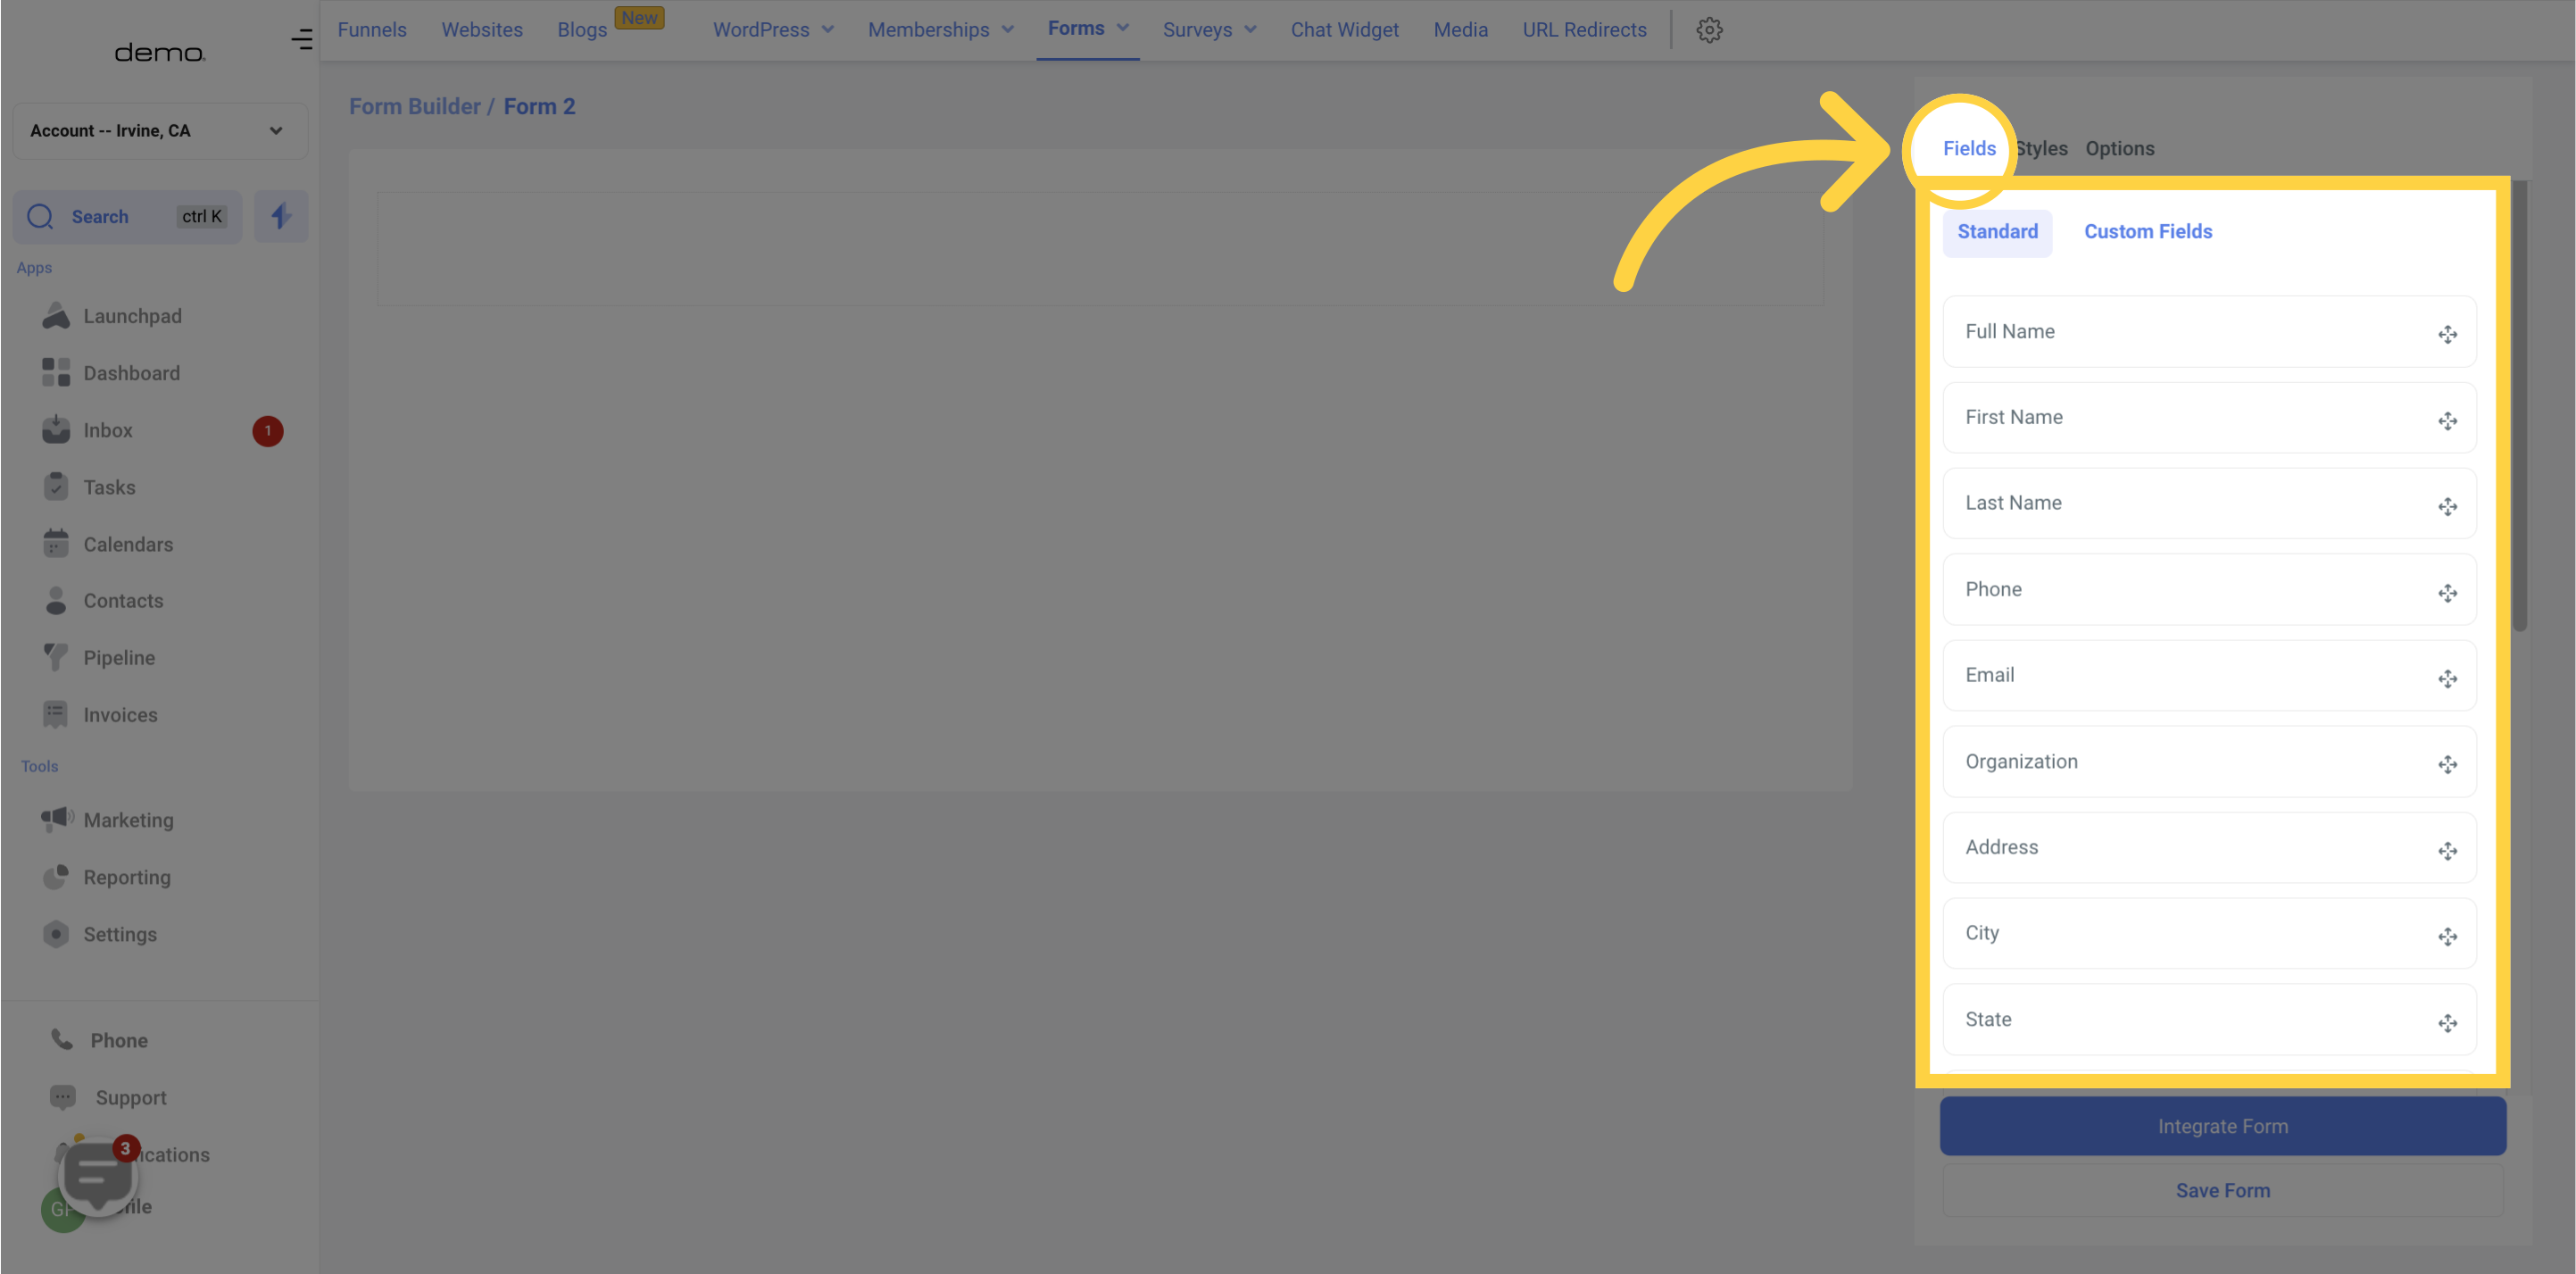
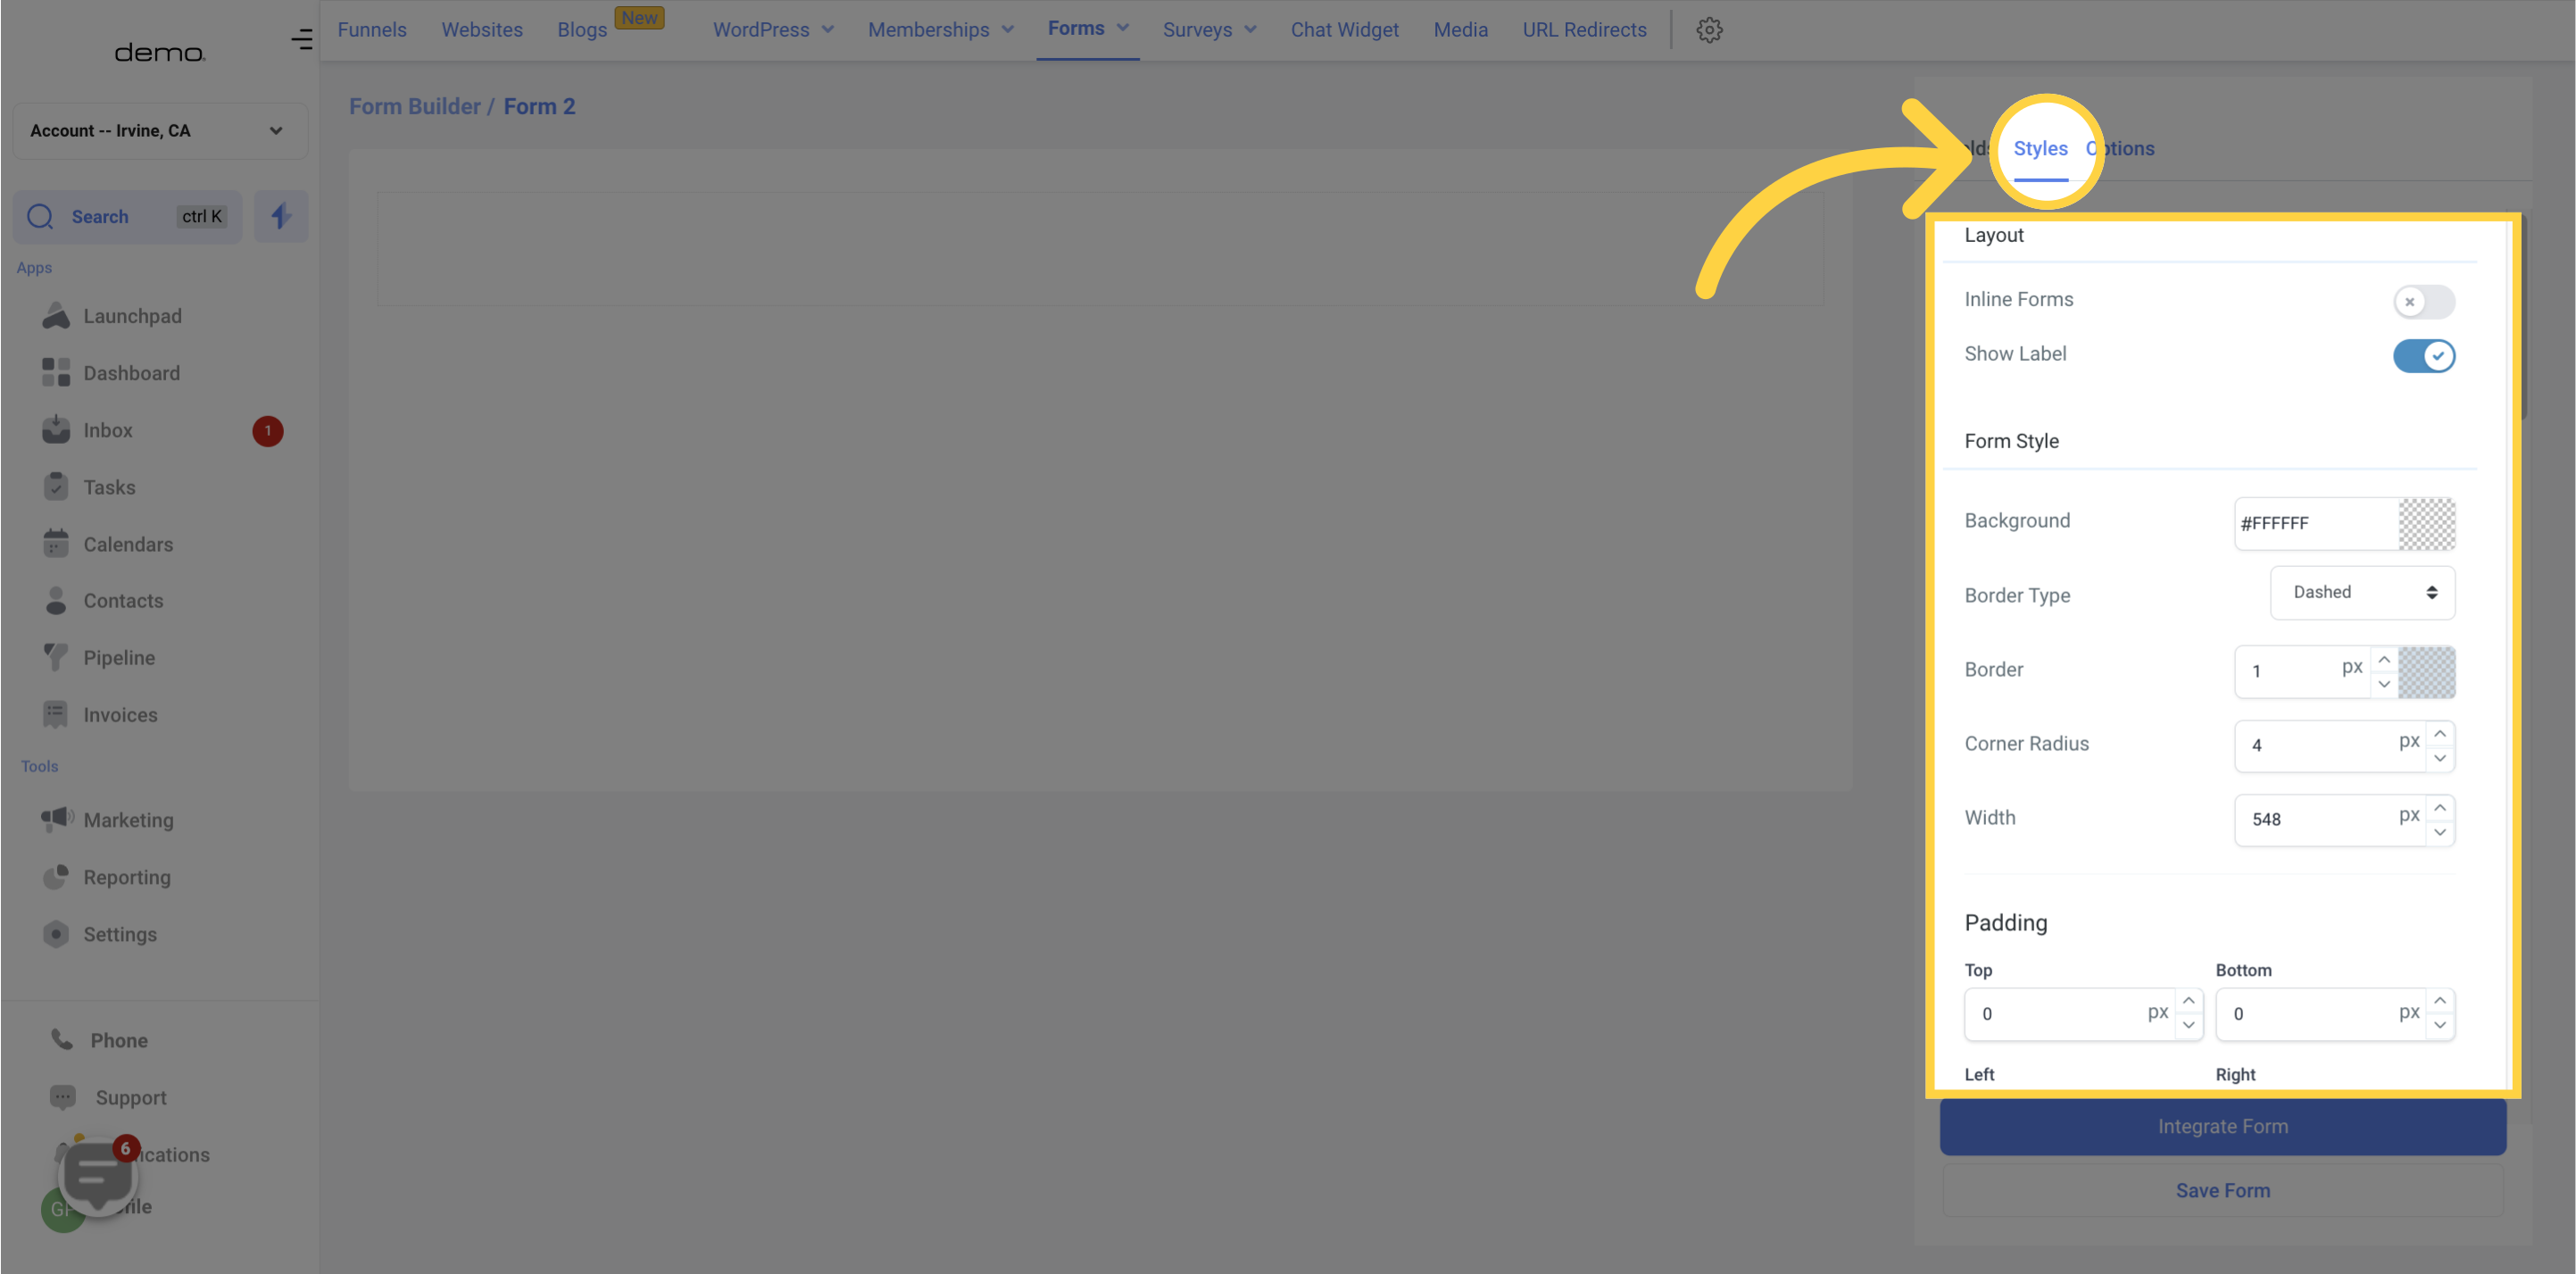
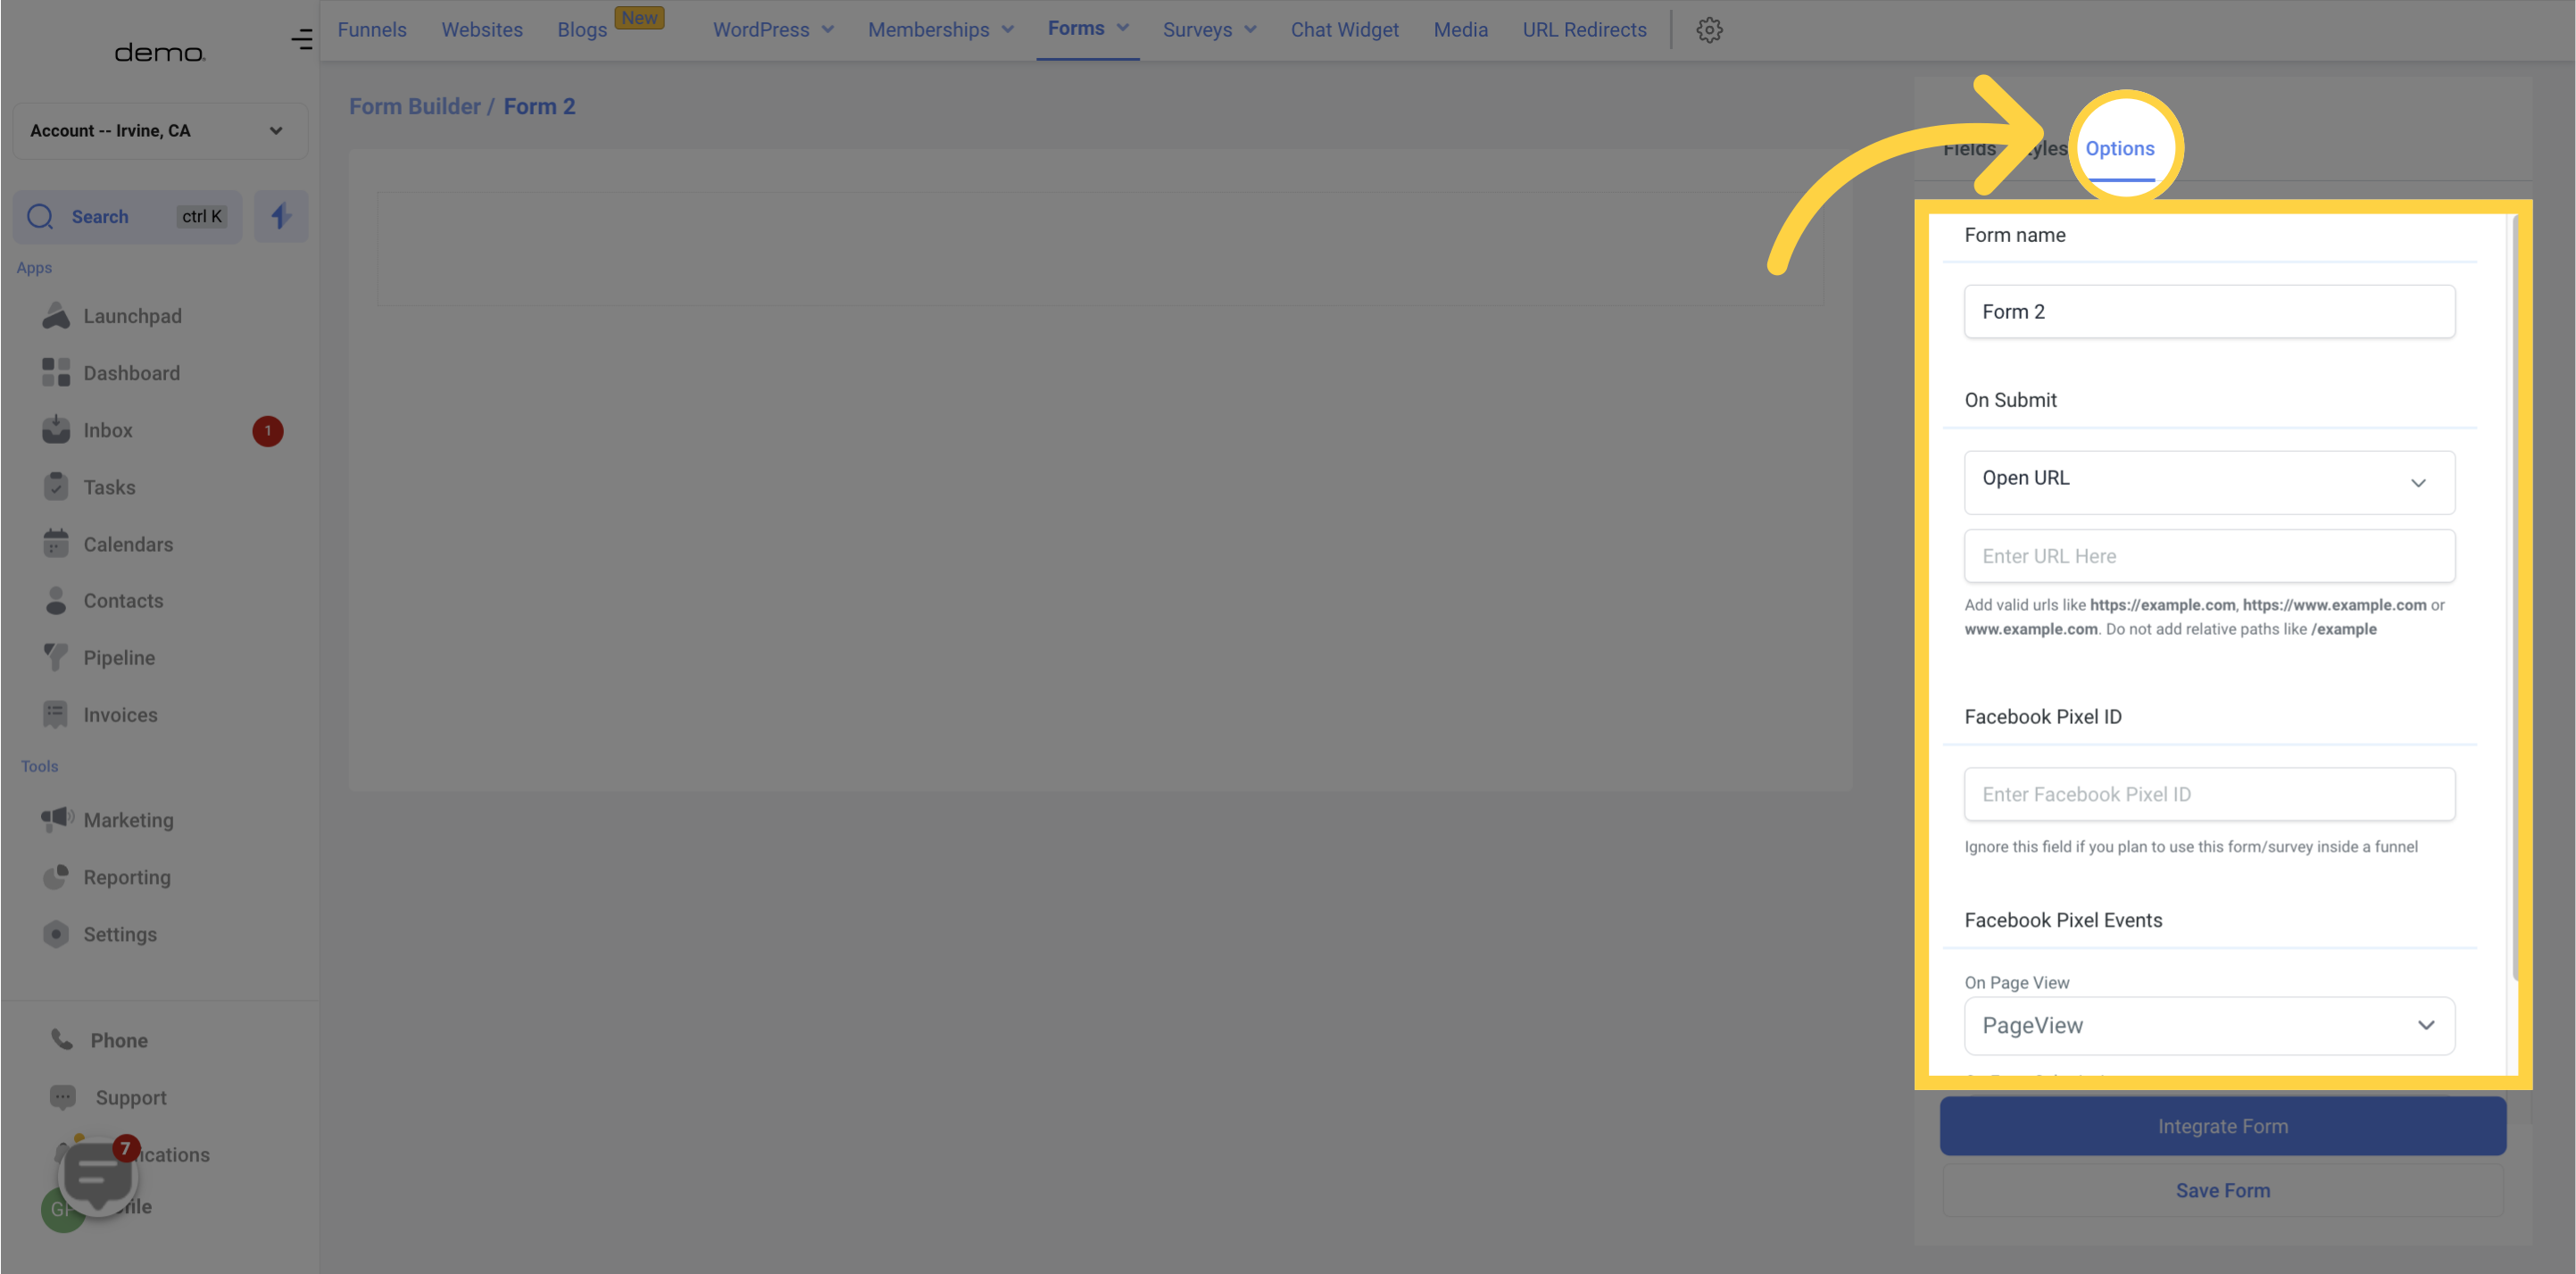
When creating and editing forms, you have three different tabs to navigate between:
You can use the Fields tab to easily add new fields and components to your form. From dropdown menus and text boxes to checkboxes and radio buttons, this tab offers a wide range of options to choose from.
The Style tab enables you to tweak the visual appearance of your form to make it look more professional and aesthetically pleasing. You can customize the background color, form width, font style, and other design elements to suit your brand or website's style.
The Settings tab allows you to perform various actions related to your form's performance and functionality. From managing notifications and confirmation messages to customizing the form's tracking data and field settings, this tab has it all.
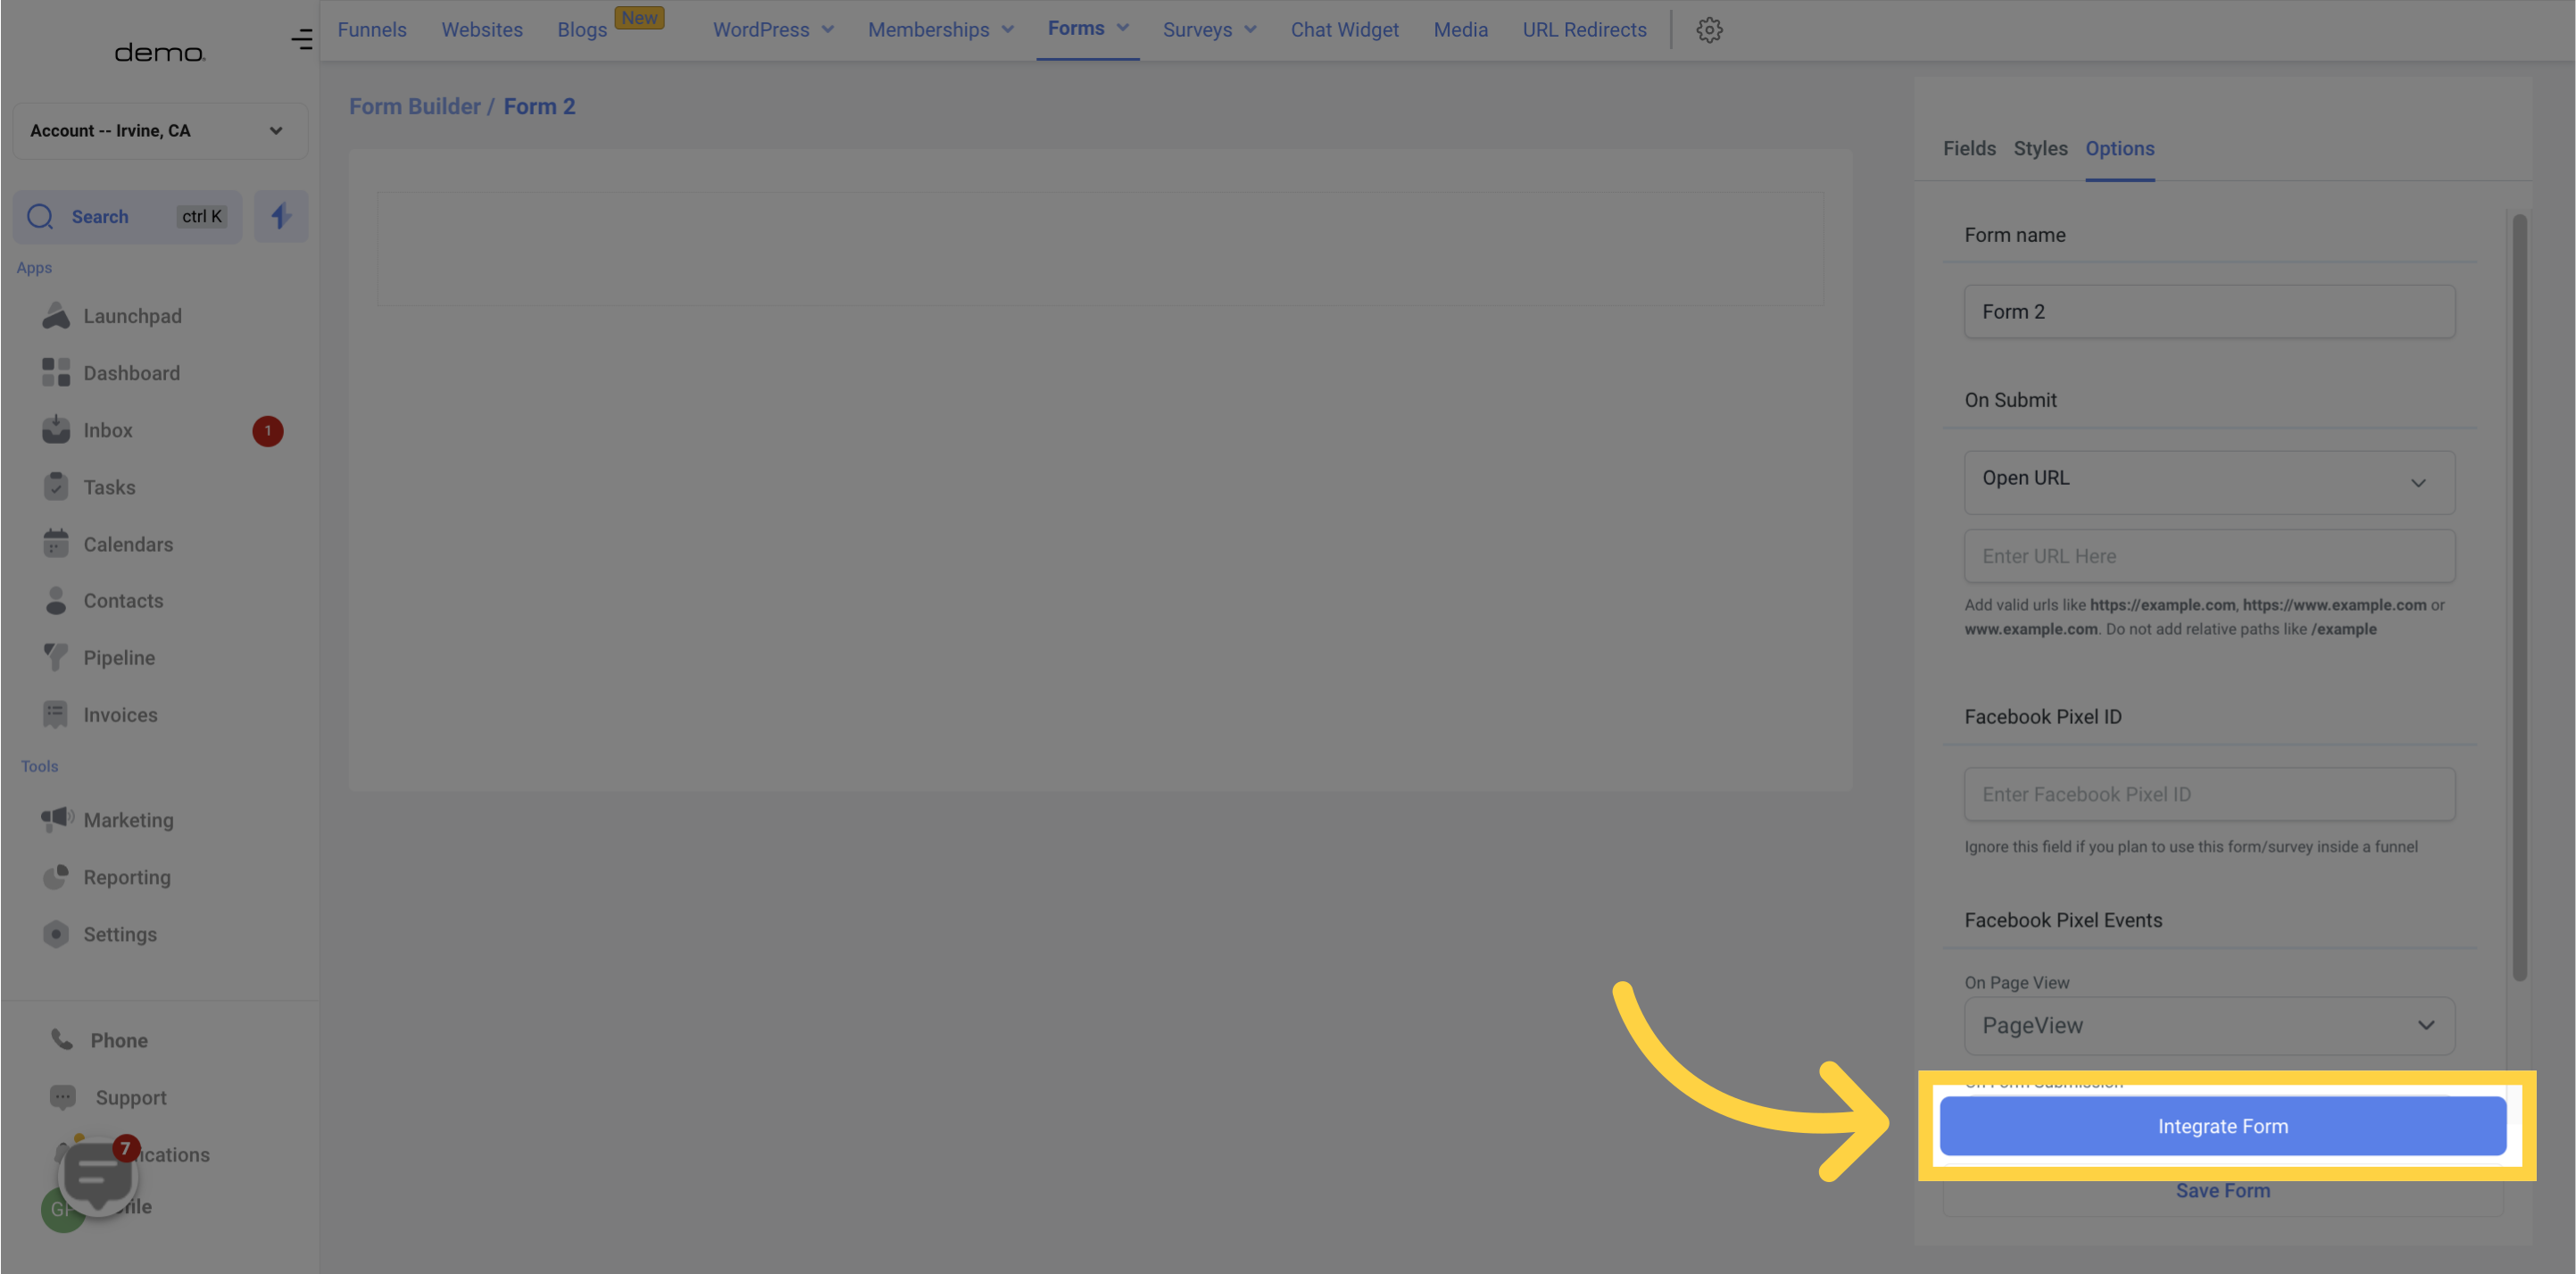
There are two ways you can make your form available to visitors: you can either integrate it into your webpage or provide them with a custom form link that they can use to access the form.
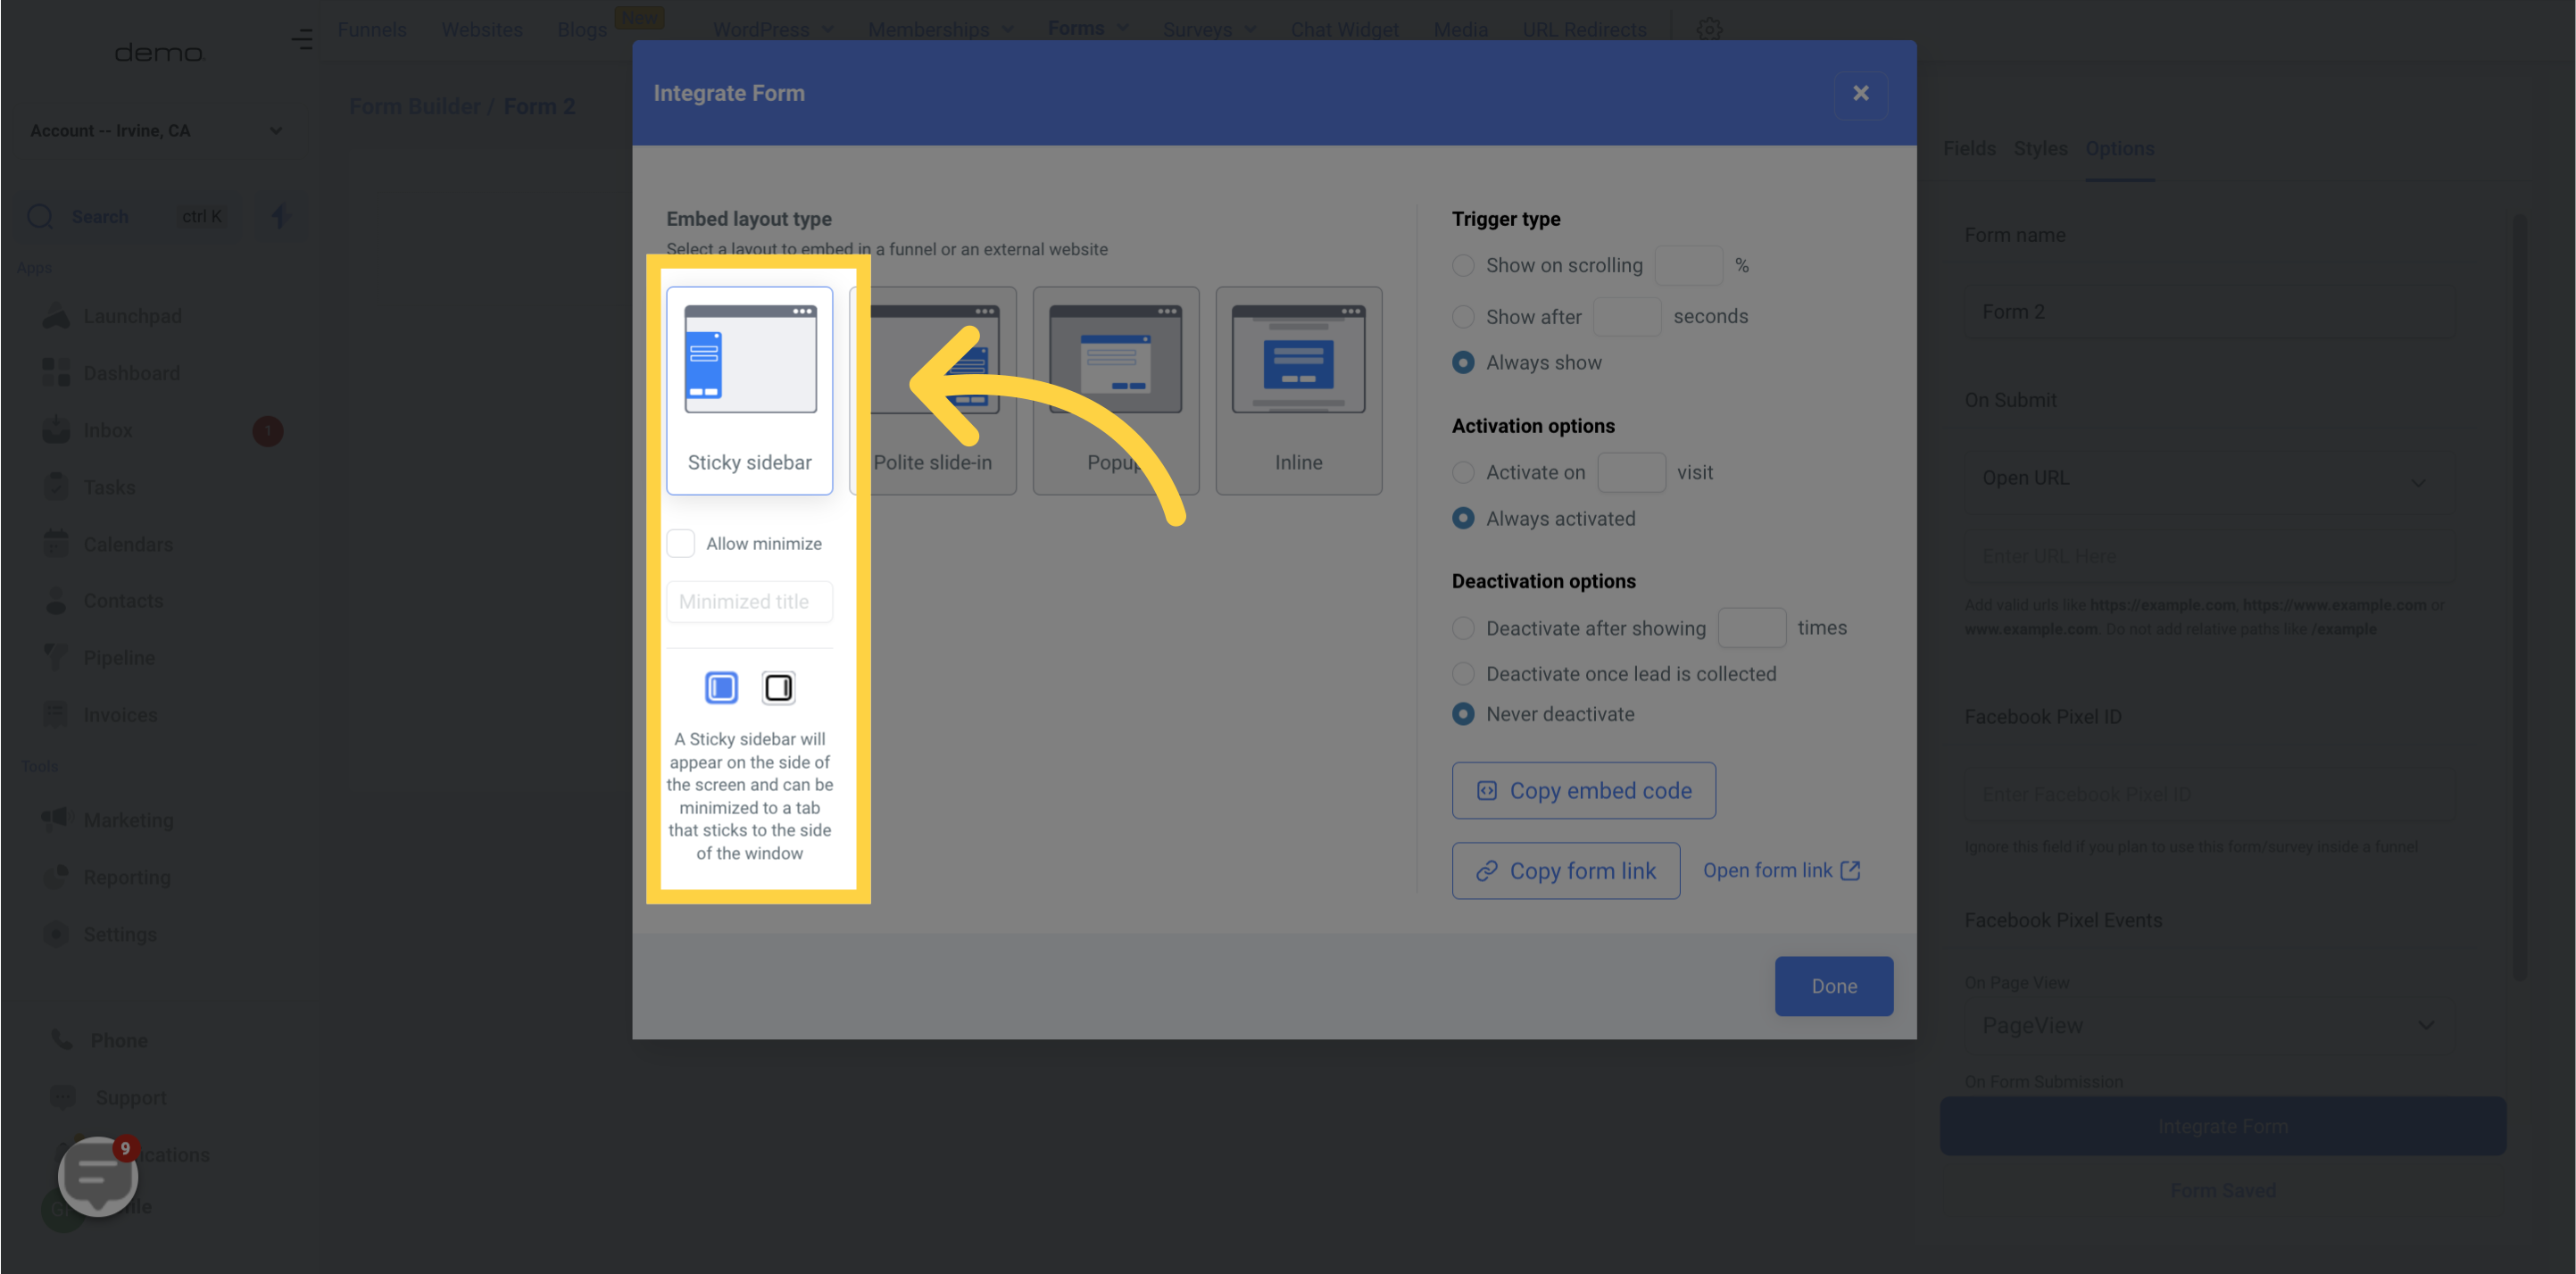
The "Integrate Form" tab offers four layout options to choose from when creating a form. These options give you the flexibility to design the form based on your preferences and how you want it to appear on your website. The available options include:
The Sticky Sidebar layout option creates a form that always sticks to the side of the screen, and the user can choose whether it appears on the right or left side of the screen. To further customize this layout option, you can choose to minimize the sidebar and even set a specific title that appears when it is minimized.
To set up the preference to minimize or not, use the checkbox provided in the image below the sticky sidebar. And to give a specific title, simply enter the desired text in the "Sidebar Title" field.
Make sure to choose the settings that complement your website design and optimize the form's functionality for the best results.
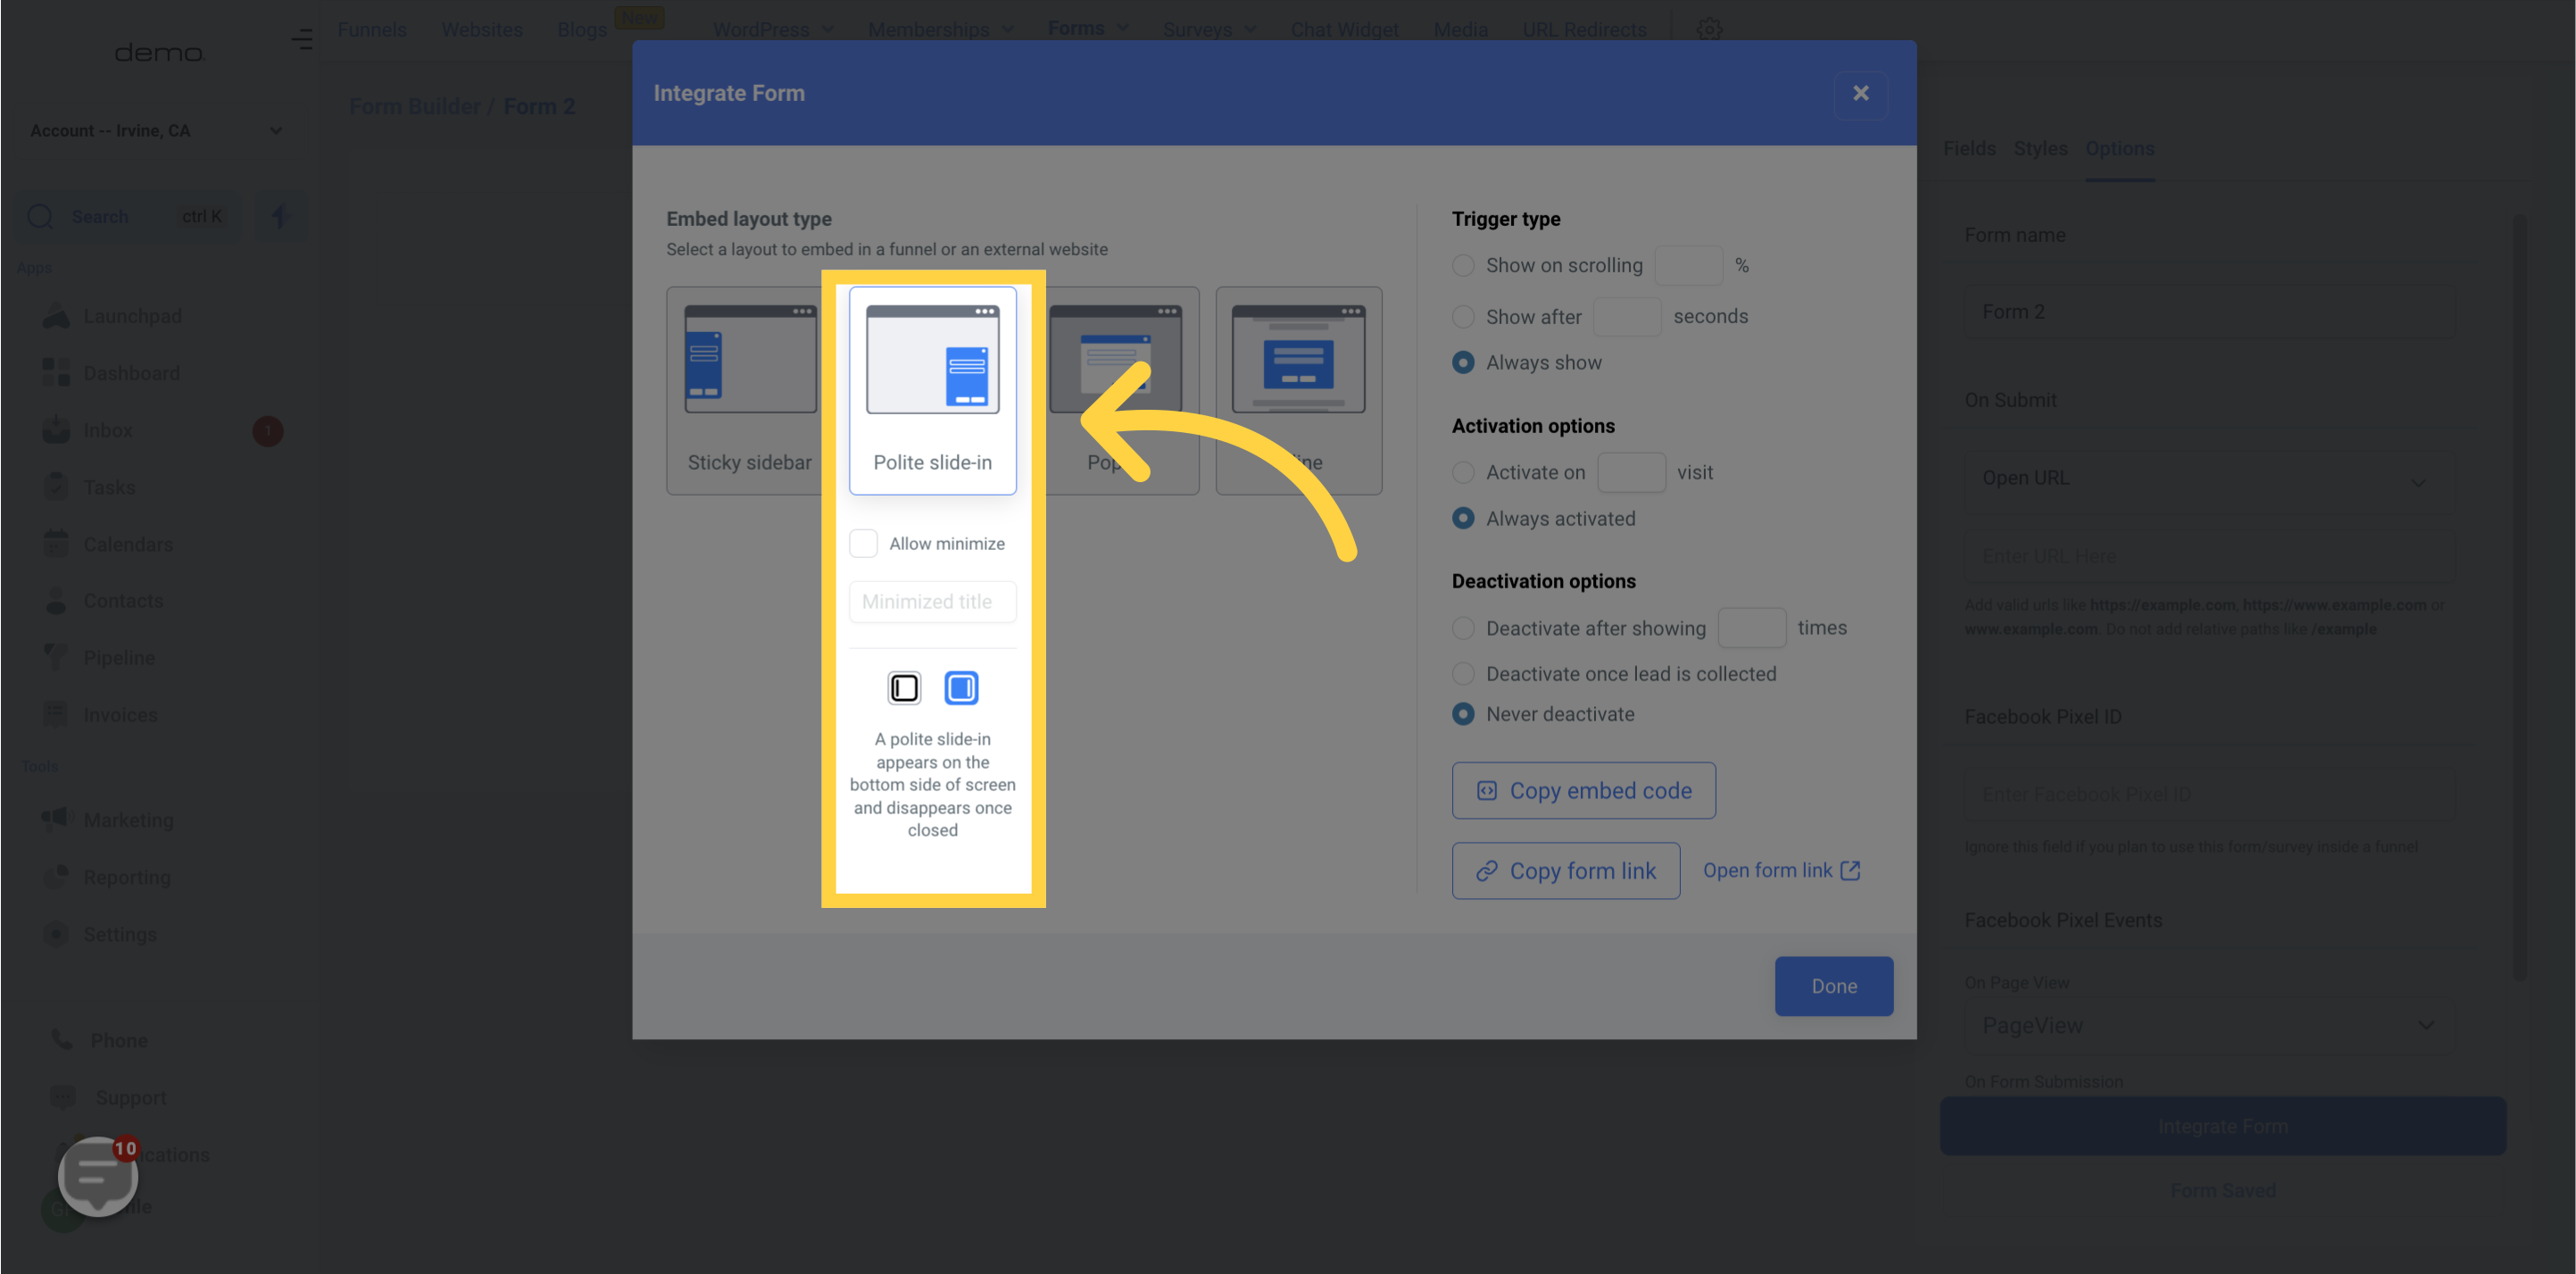
The "Polite Slide-In" layout option displays a form that appears on the bottom of the screen, and the user can choose whether it should display on the left or right side of the screen. These forms stay visible for a short time and disappear when the user is done with them, giving the user more space to browse through the website content.
Like the Sticky Sidebar layout option, you can choose to minimize the form after use by using the checkbox in the form-builder UI. This preference allows you to improve the user experience by removing the form from view once the user has completed their interaction with it.
Pop-up forms are a common way to collect visitor information on a website or landing page. This type of form generally appears as an overlay on the current page, often triggered by a button, link, or a specified amount of time.
Unlike the Sticky Sidebar and Polite Slide-In layout options, a Pop-up Form cannot be minimized.

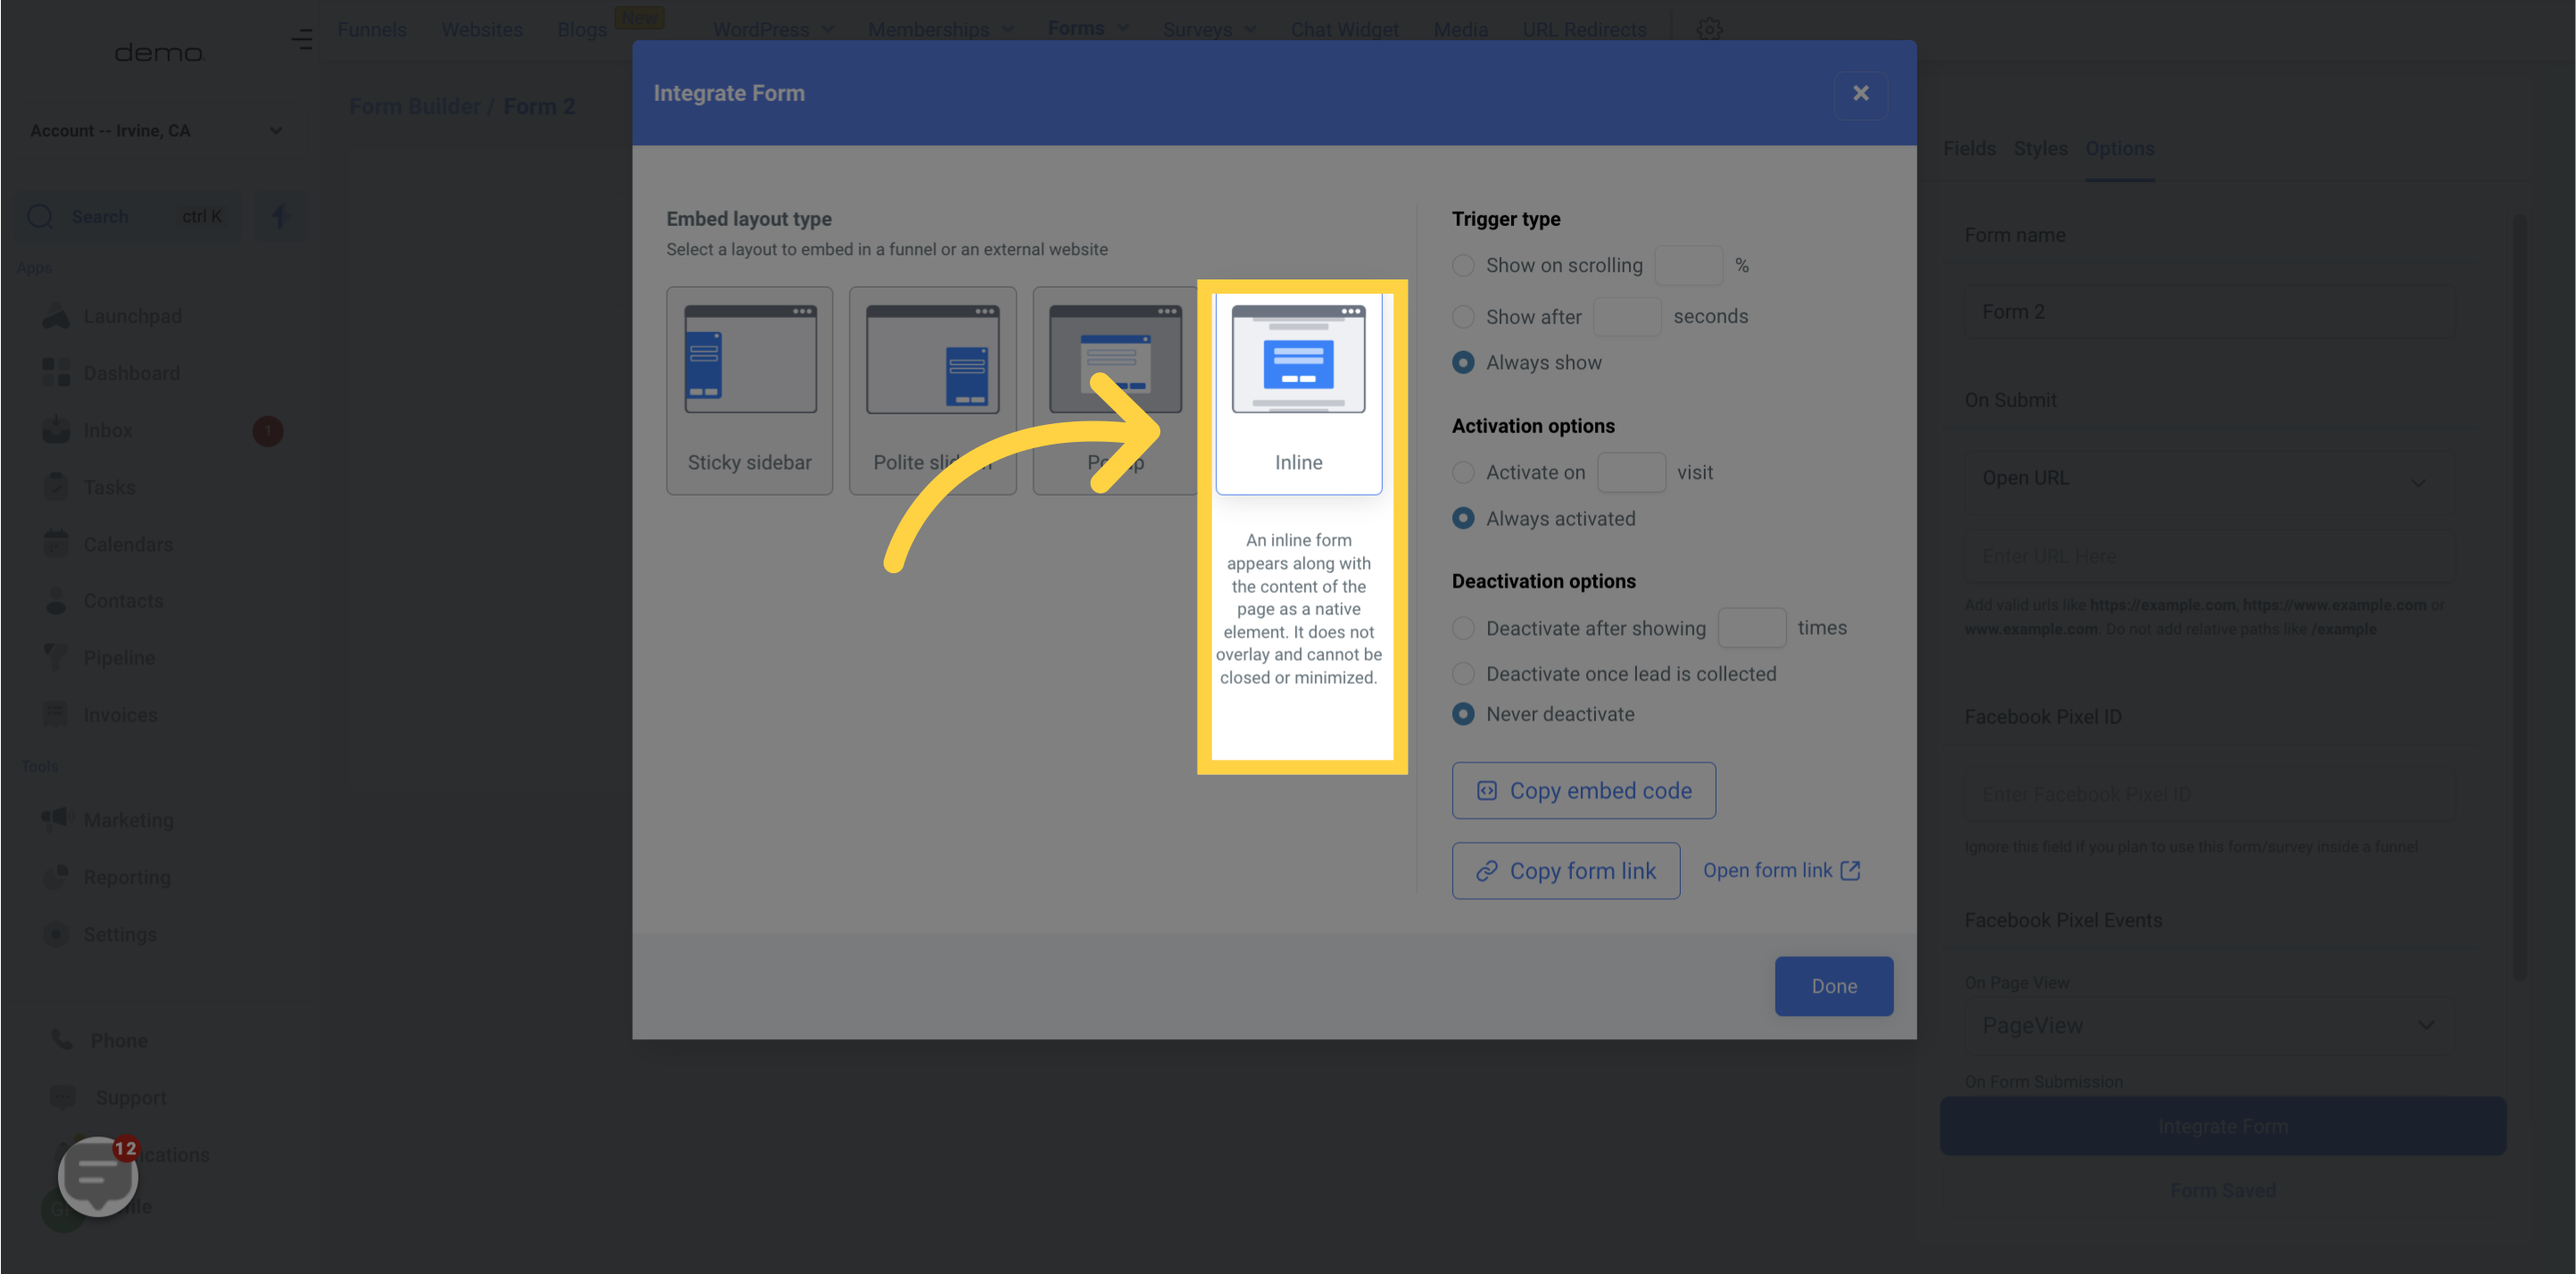
In an Inline Form, all the elements of the form are left-aligned, and the labels are displayed alongside each form field. The form appears alongside the rest of the page's content instead of as an overlay.
Unlike Sticky Sidebar and Polite Slide-In layouts, Inline Forms cannot be closed or minimized.
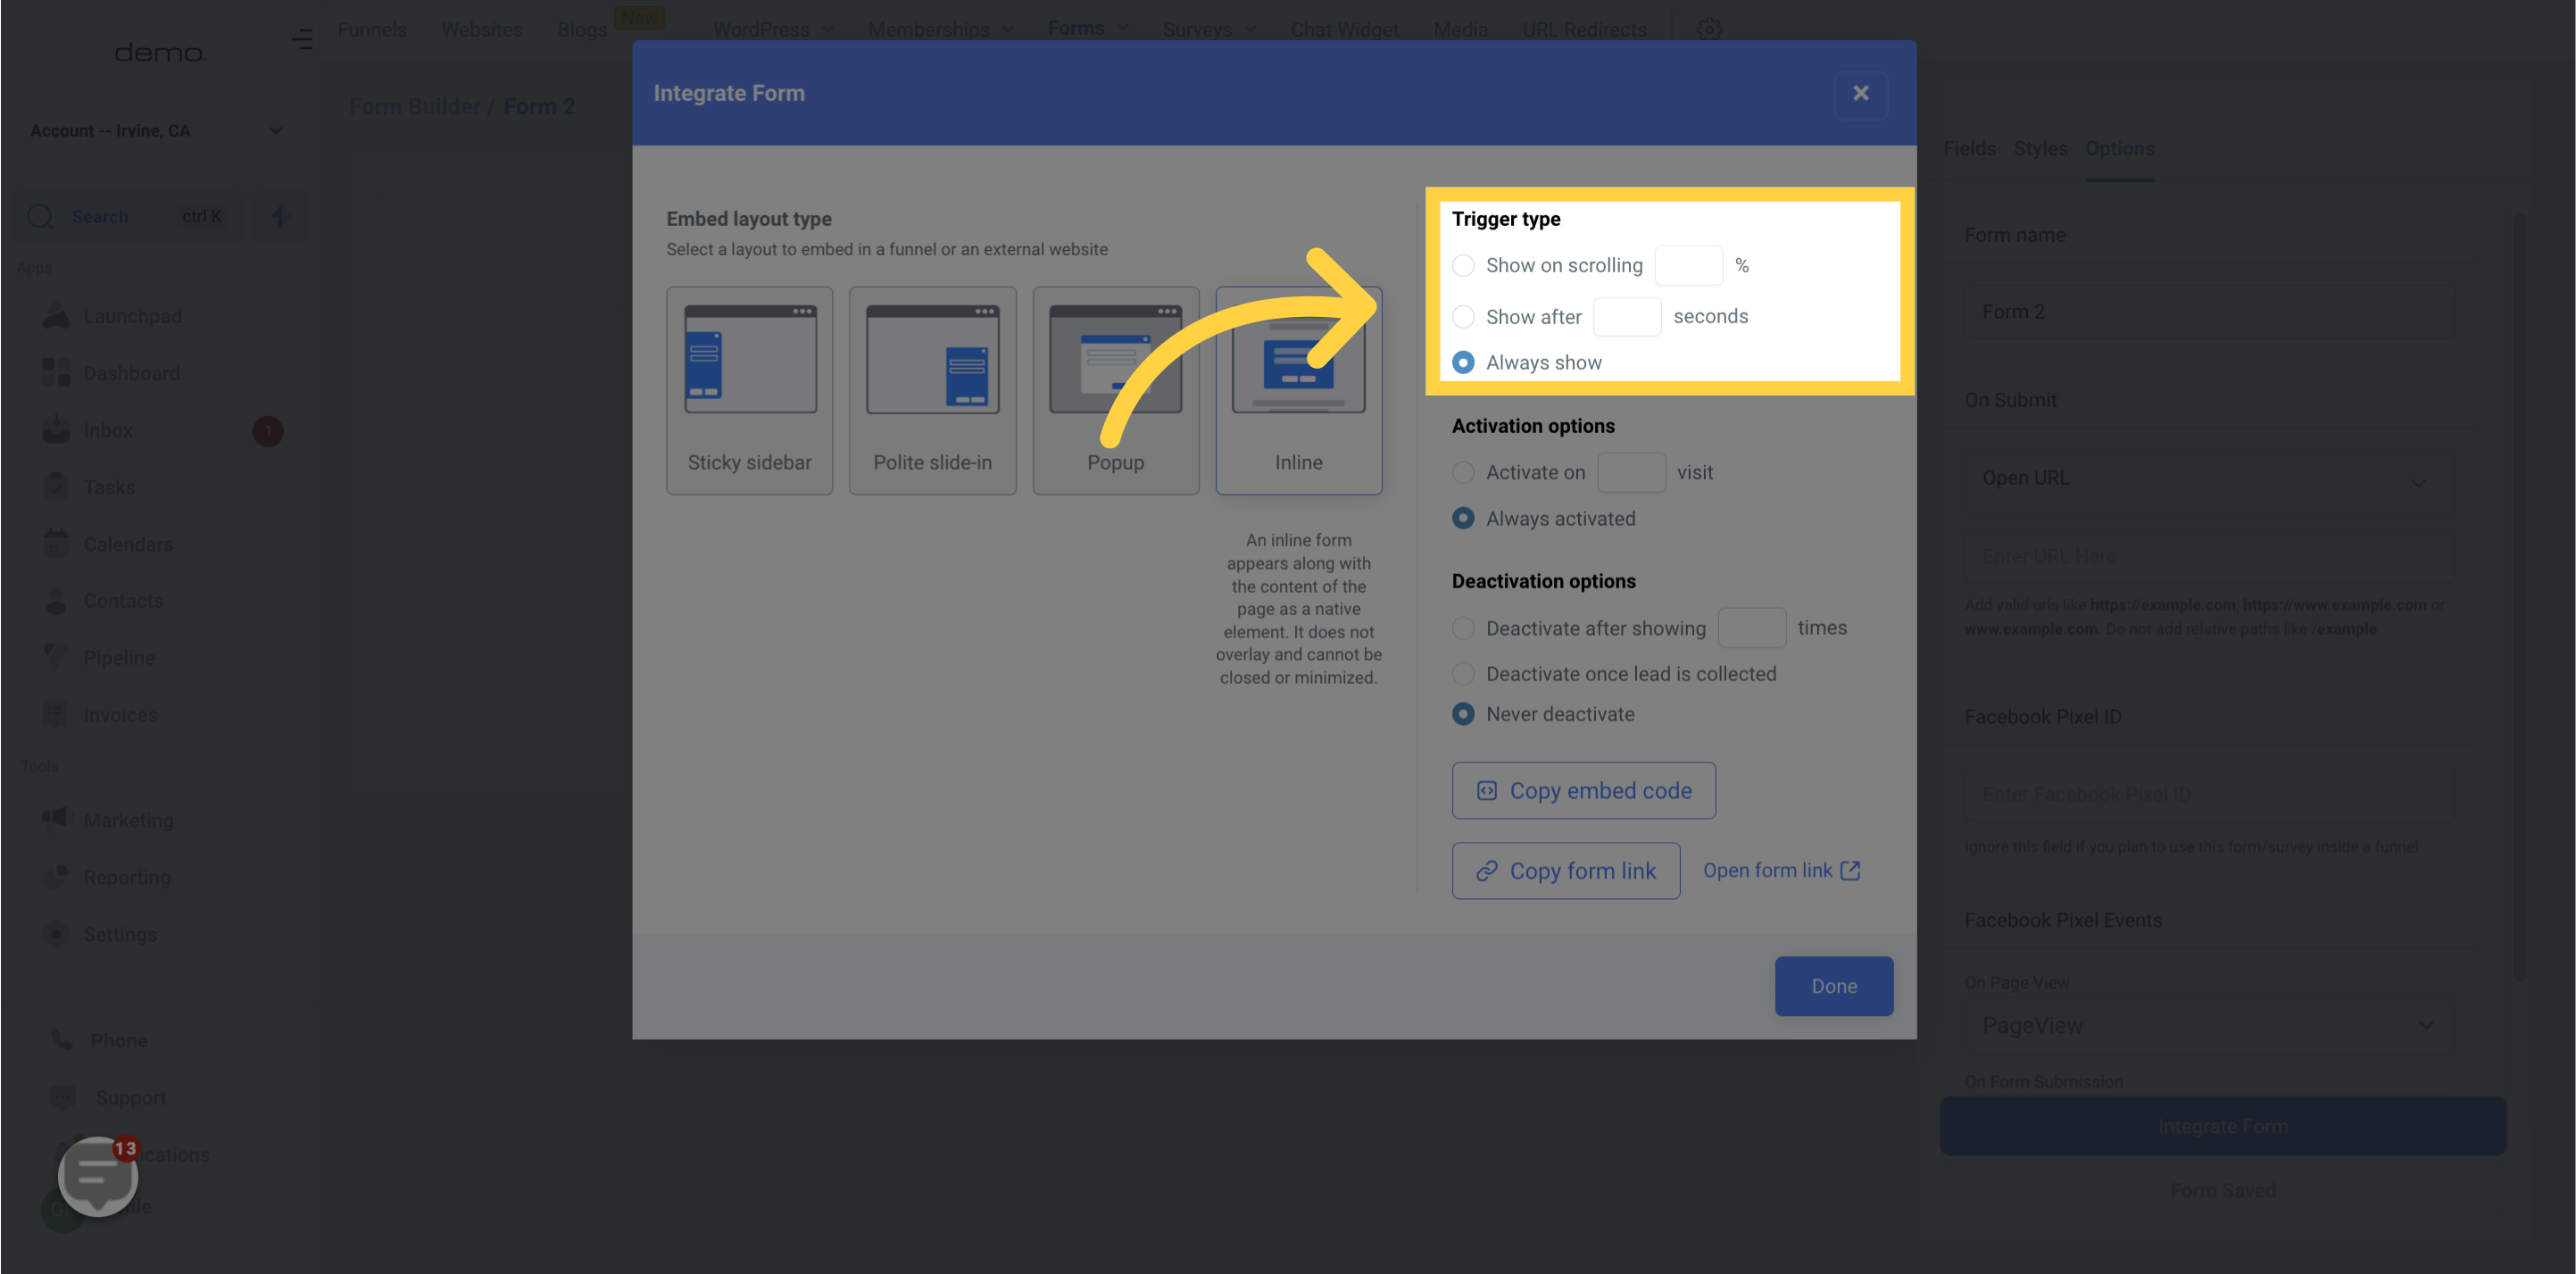
Trigger types give the user control over when and how the form will appear on the external webpage. There are three different trigger types available:
Show on Scrolling - The form will appear based on how much the visitor has scrolled on the website page
Show after _ seconds -With a time-based trigger, you can set the amount of time a visitor spends on a page before a form appears.
Always show - An Immediate Trigger allows the form to appear as soon as a visitor lands on the
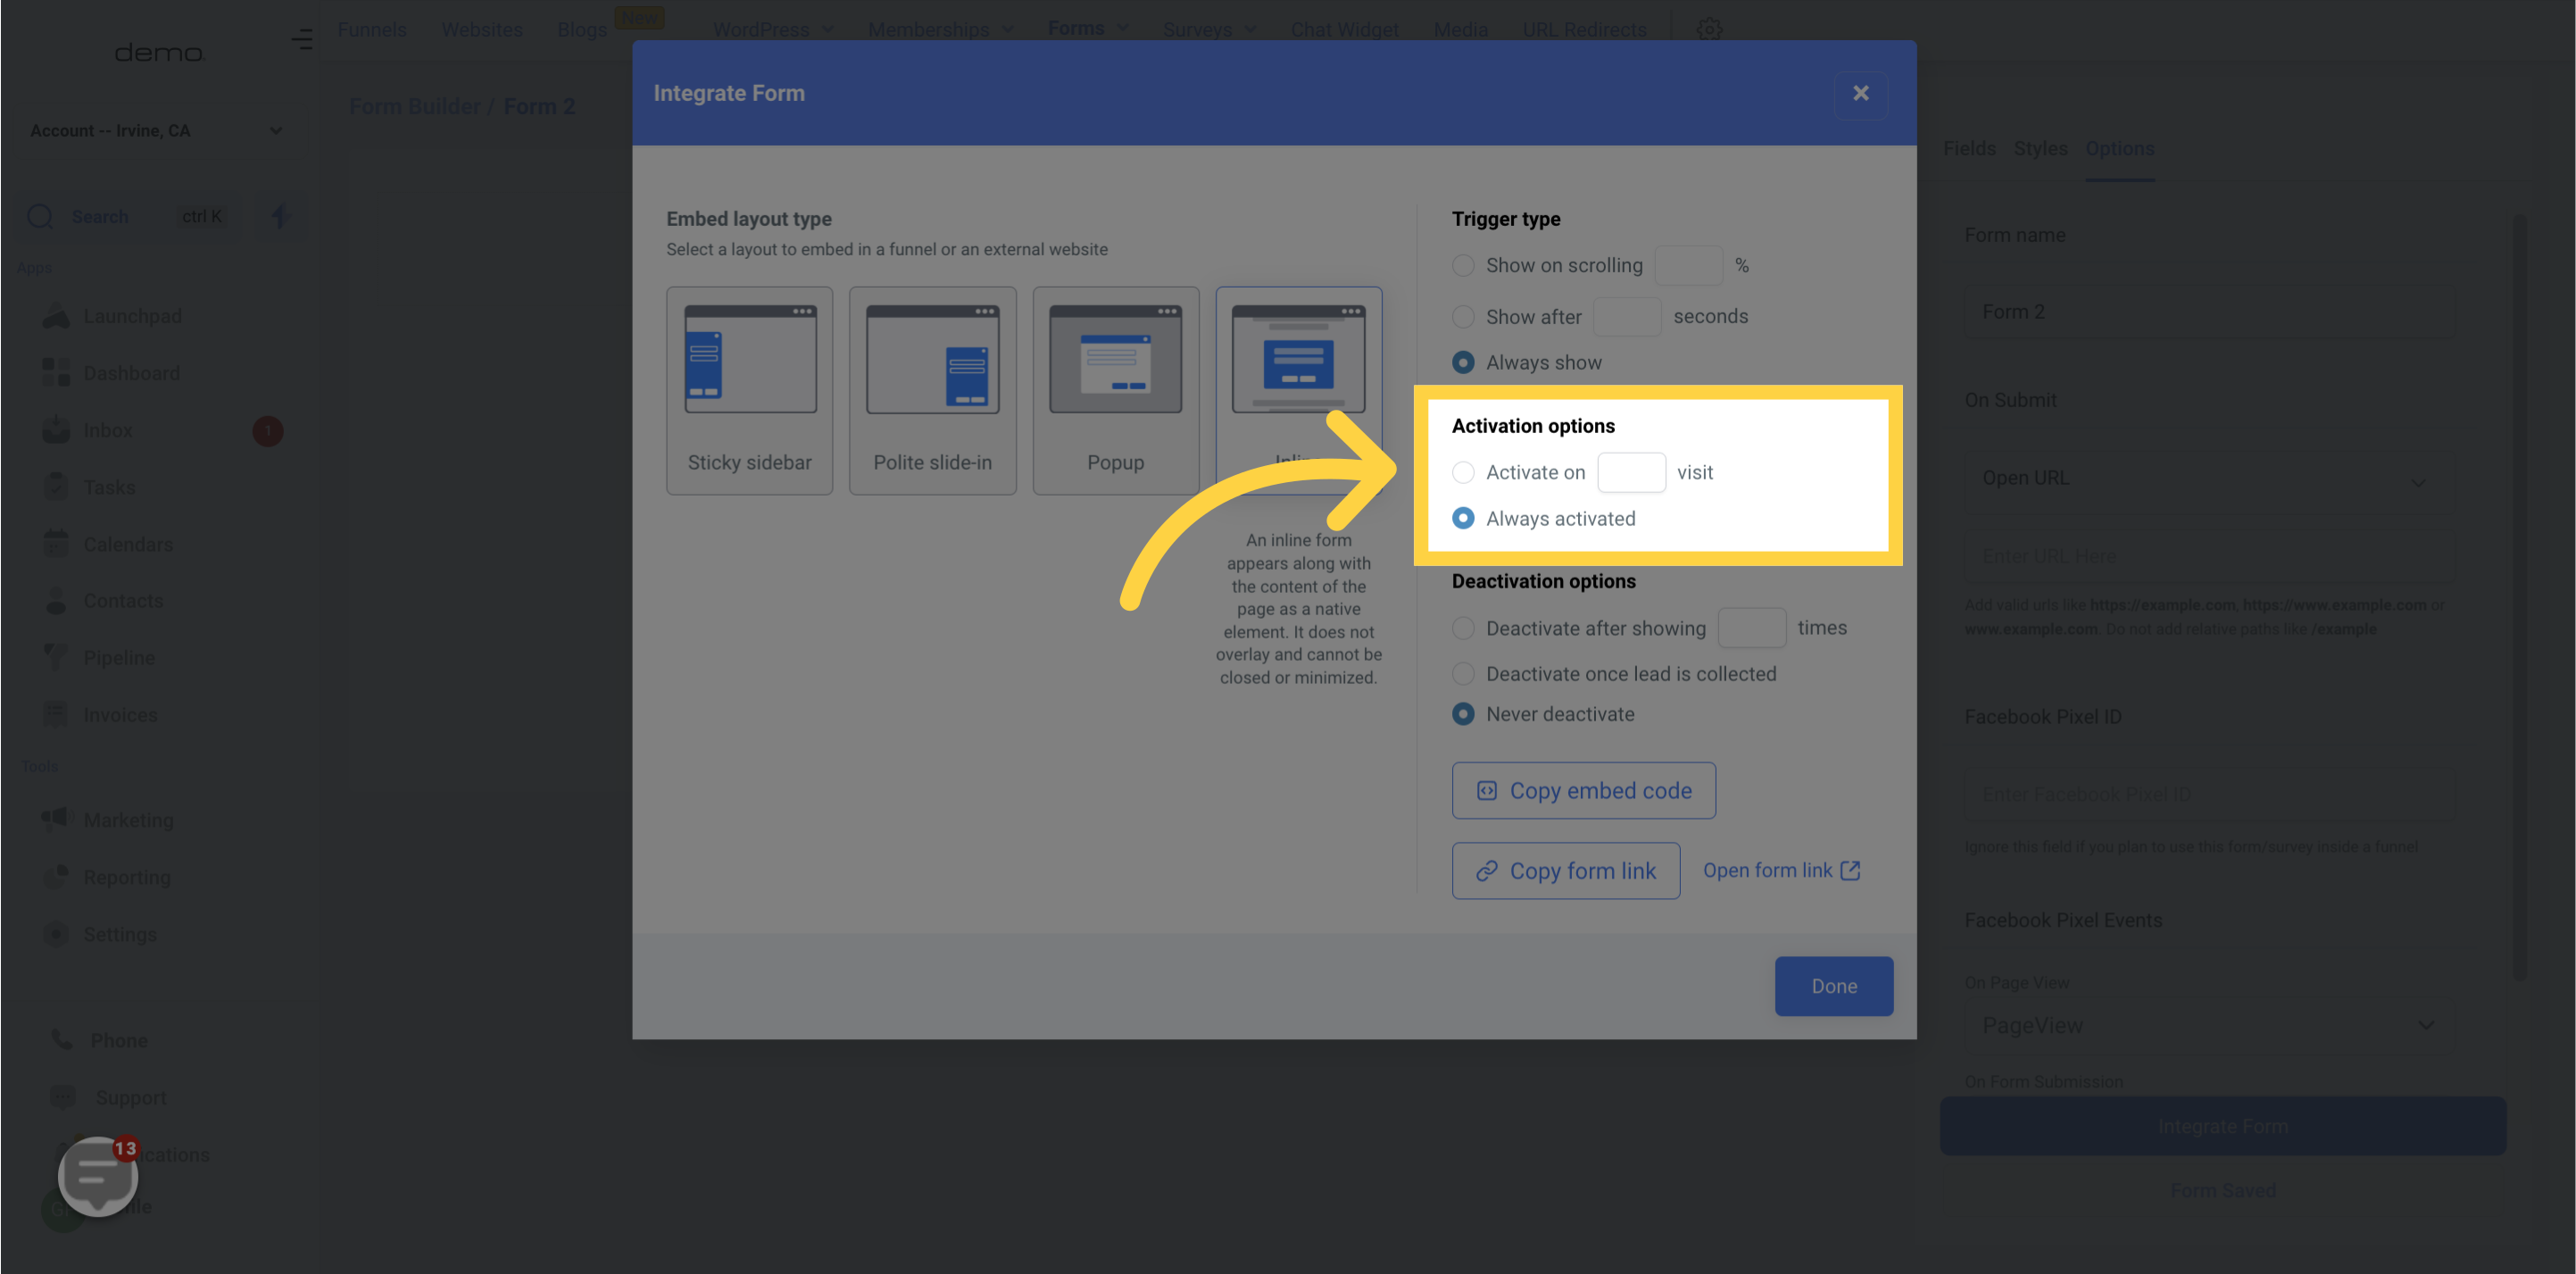
You can customize how the form appears to the visitors by setting up an activation option. There are two different ways to activate a form:
Activate on visit - If you want to activate a form based on the number of times a visitor has come to your website, you can choose the "Activate on visit" option in the form builder. You can set the form to appear when a visitor has come to your page for the second or third time. This way, the form will be shown starting from the nth visit (depending on the number you have set).
Always Activated - The "Always Activated" option allows the form to remain activated no matter whether the visitor has come to the page for the first time or is a repeat visitor.
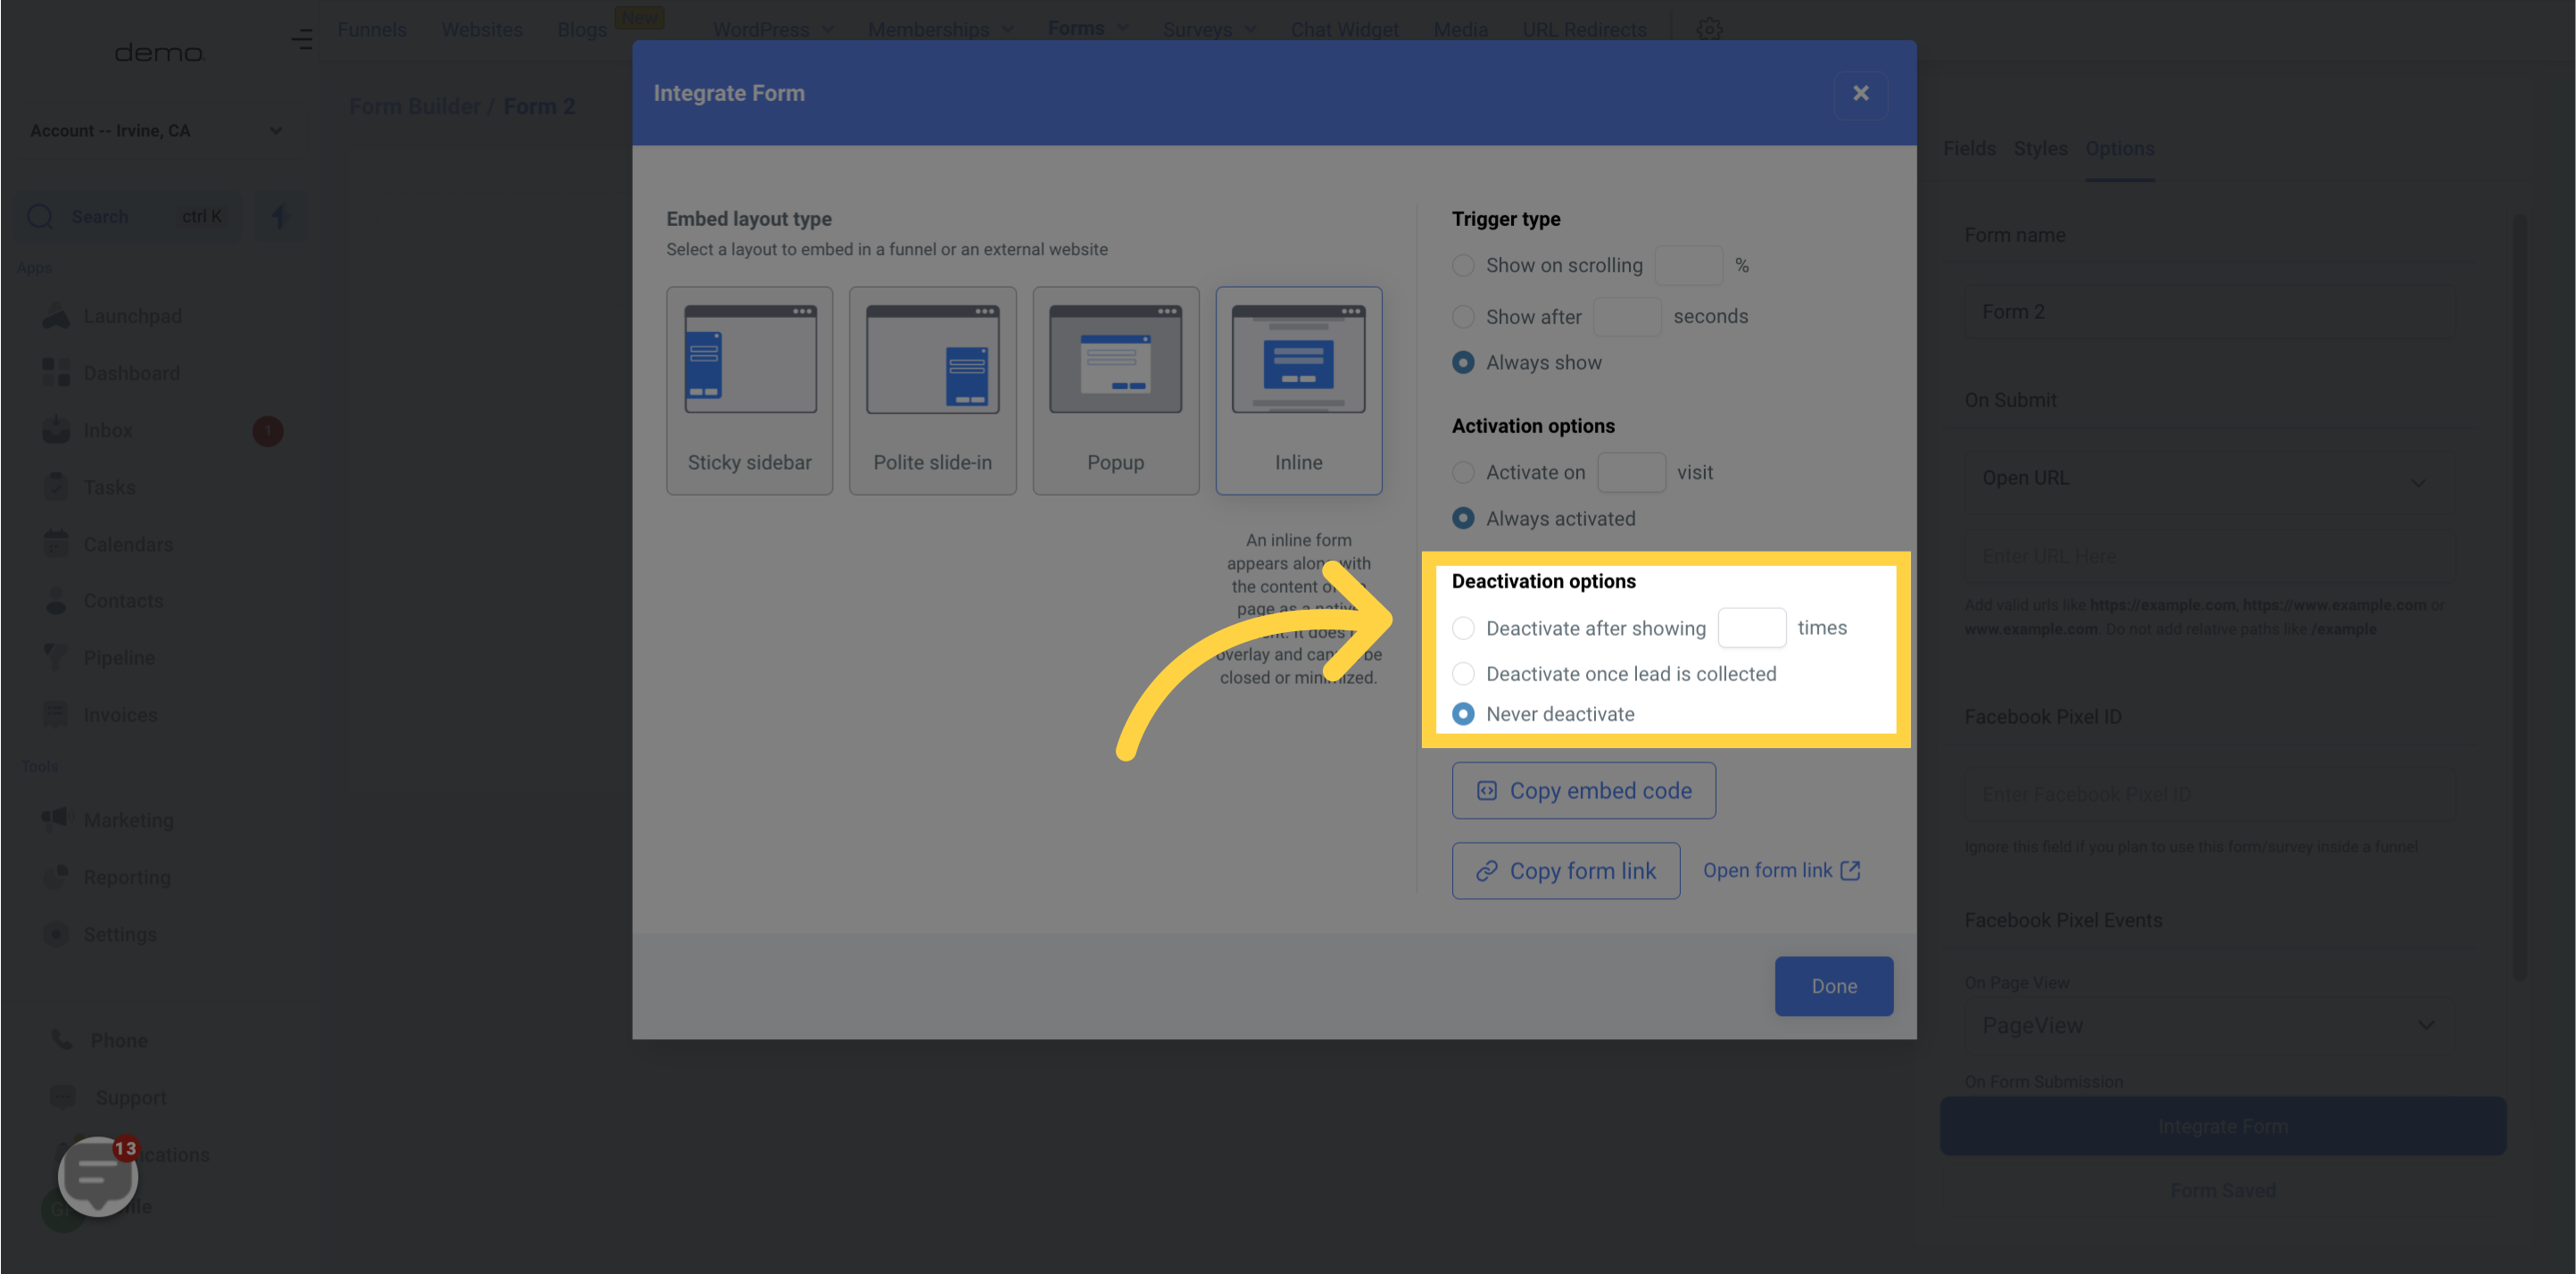
Once the form has served its intended purpose or requires to be disabled for specific reasons, you can set up the deactivation of the form by choosing one of the options available:
Deactivate after showing _ times - This option enables you to set a limit on the number of times the form is displayed. The form will be deactivated automatically after a set number of times. However, to make this function, a cookie is required to track the visits and the form views.
Deactivate once lead is collected - This option deactivates the form immediately after lead collection. It is an ideal choice when the main objective for displaying the form is to capture leads.
Never deactivate - This option simply means that the form will never be deactivated once activated
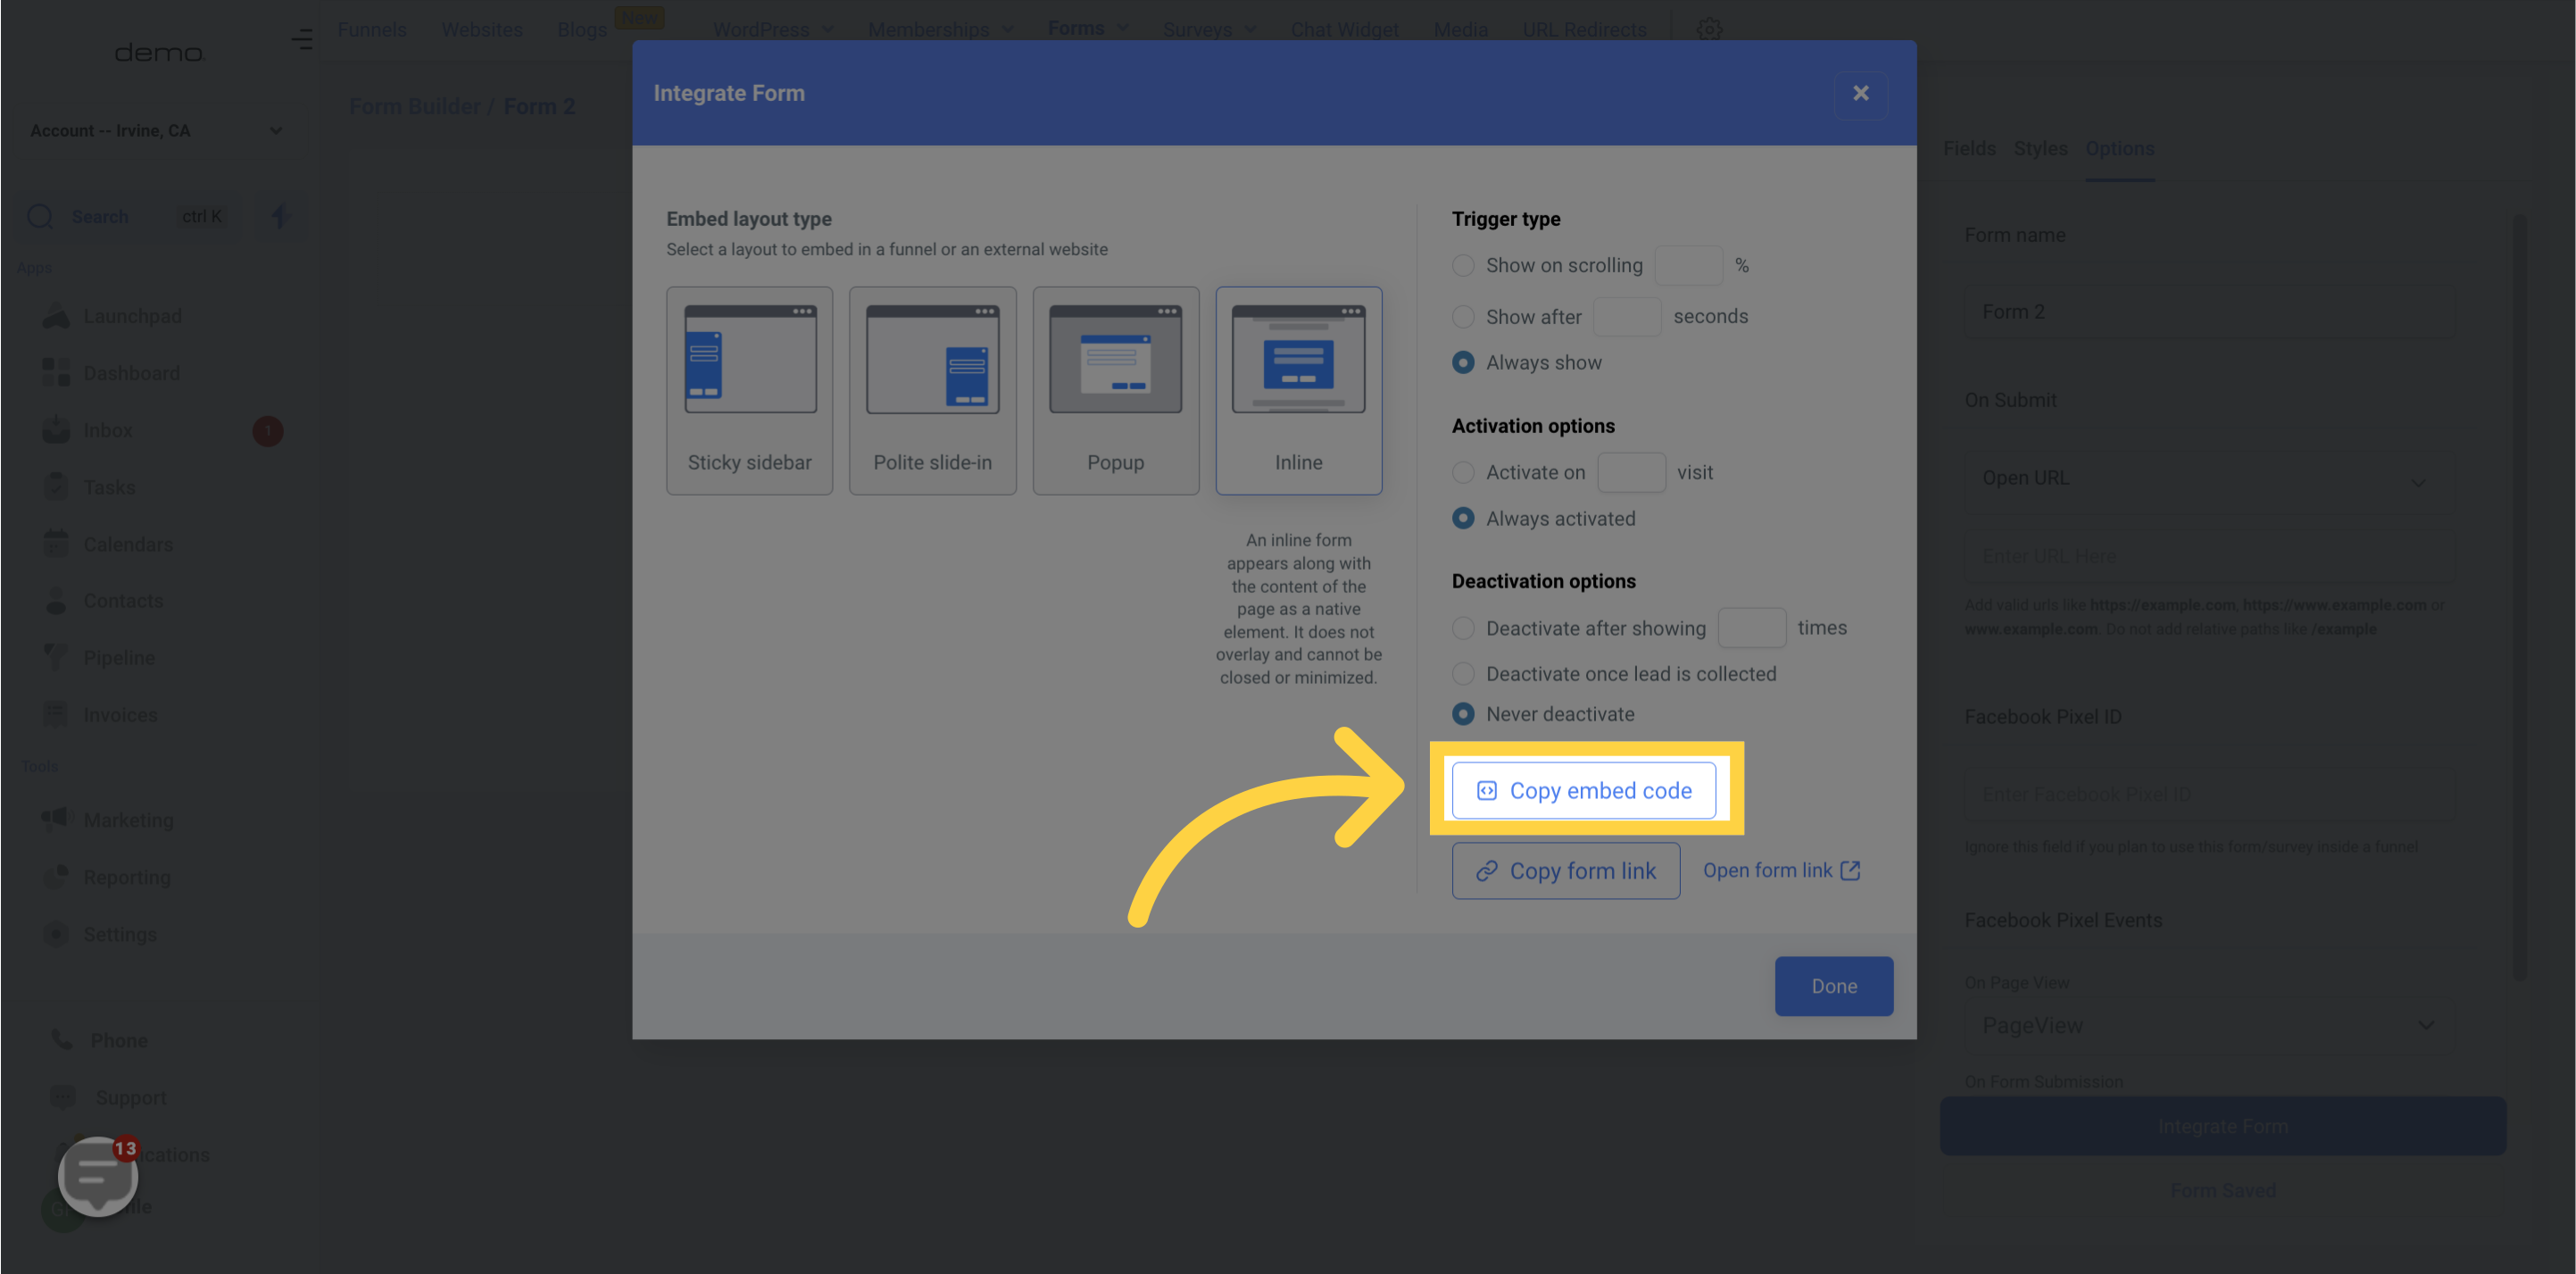
Once you have created a form, you can embed it on an external website or landing page. To do this, you can copy the embed code provided in the form builder UI and paste it onto your external page.
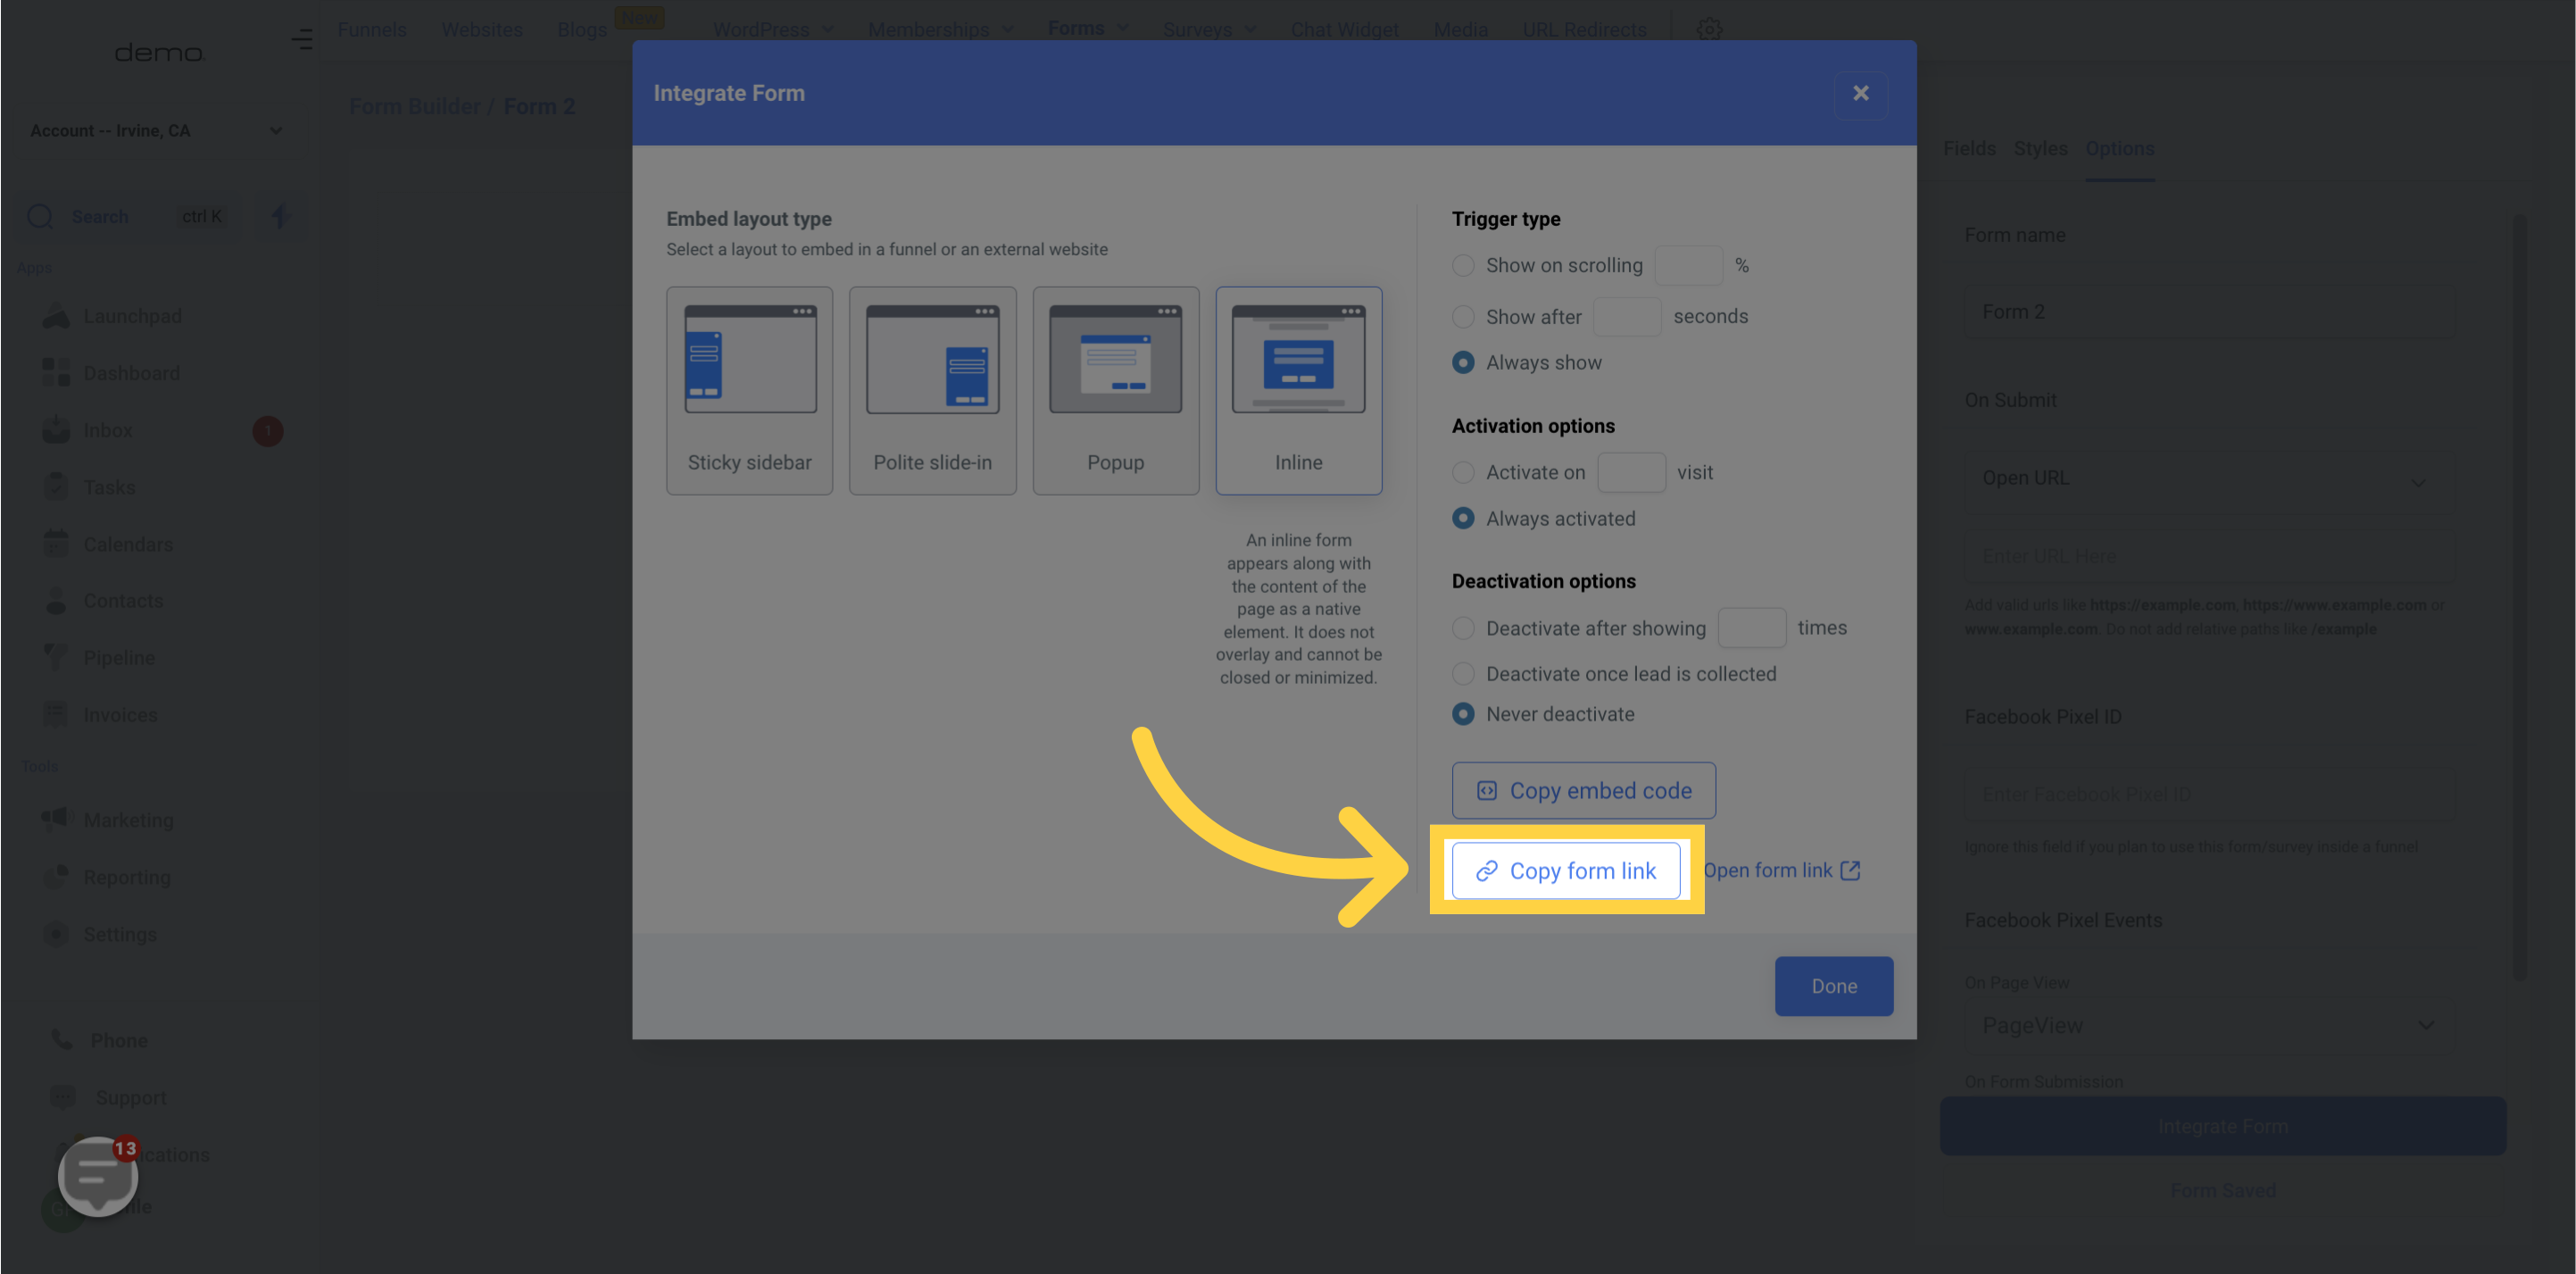
You can obtain the unique link for the form in this section.
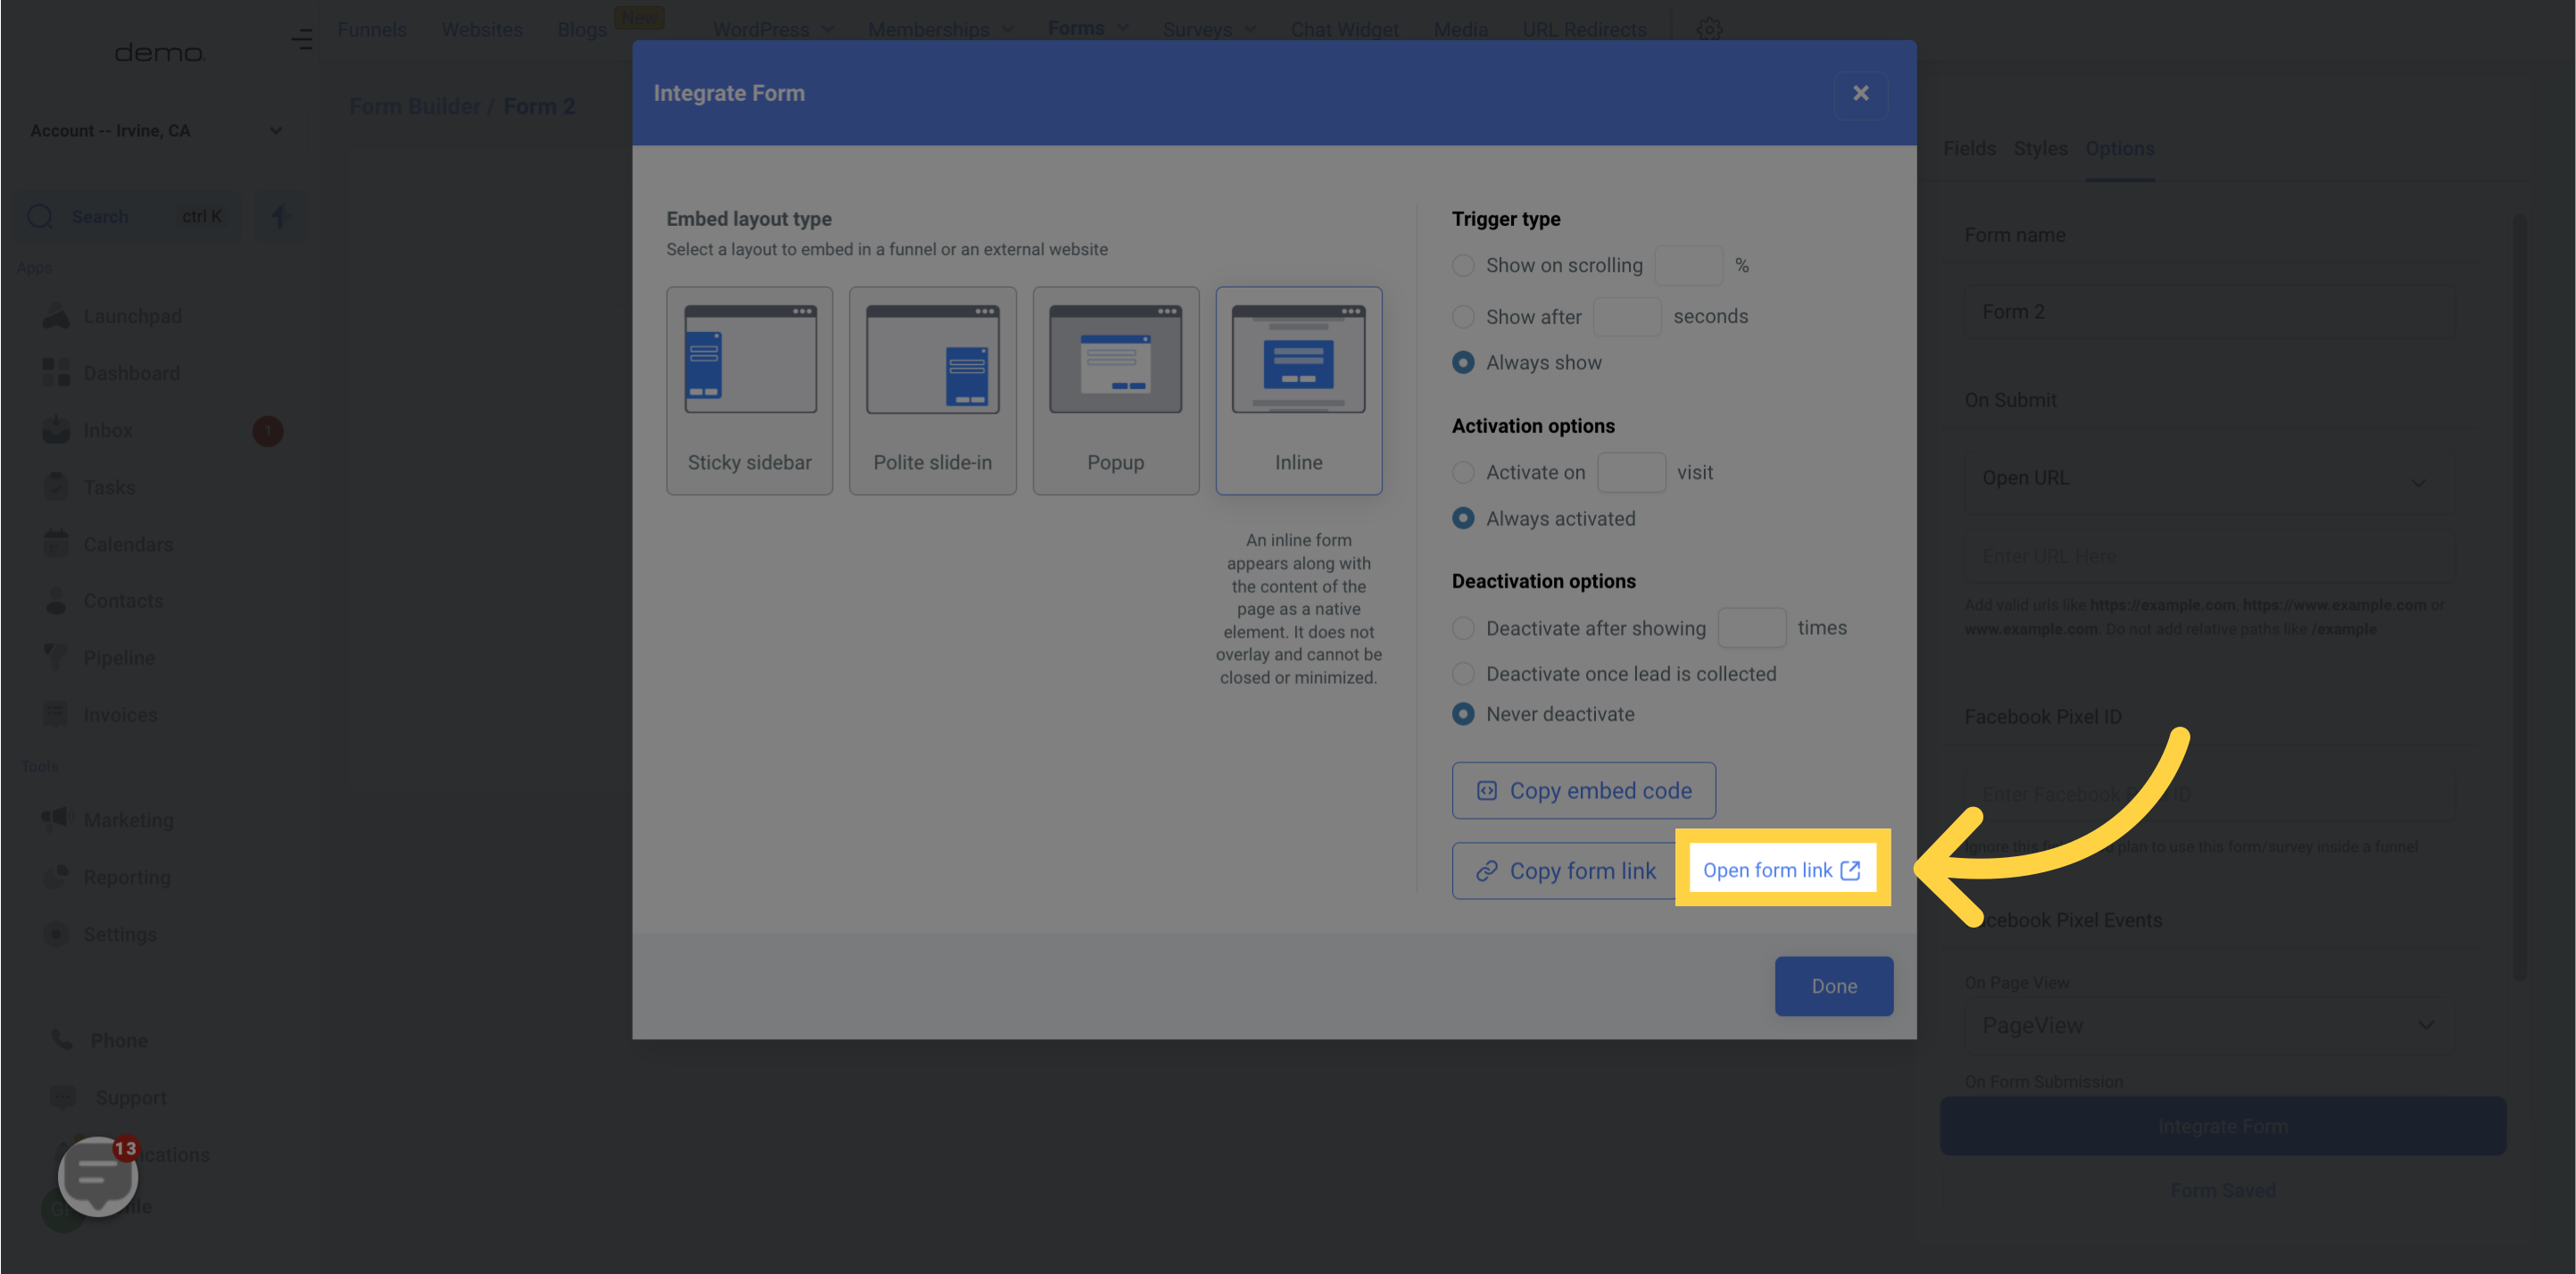
With this you can view the form in a new tab and check how it appears to the visitors.
It is important to save your form progress as you go along. When you select the "Save" option in the form builder, everything you have done so far will be saved and you will remain in the form builder. This is a good practice that can help ensure that your work is not lost.

