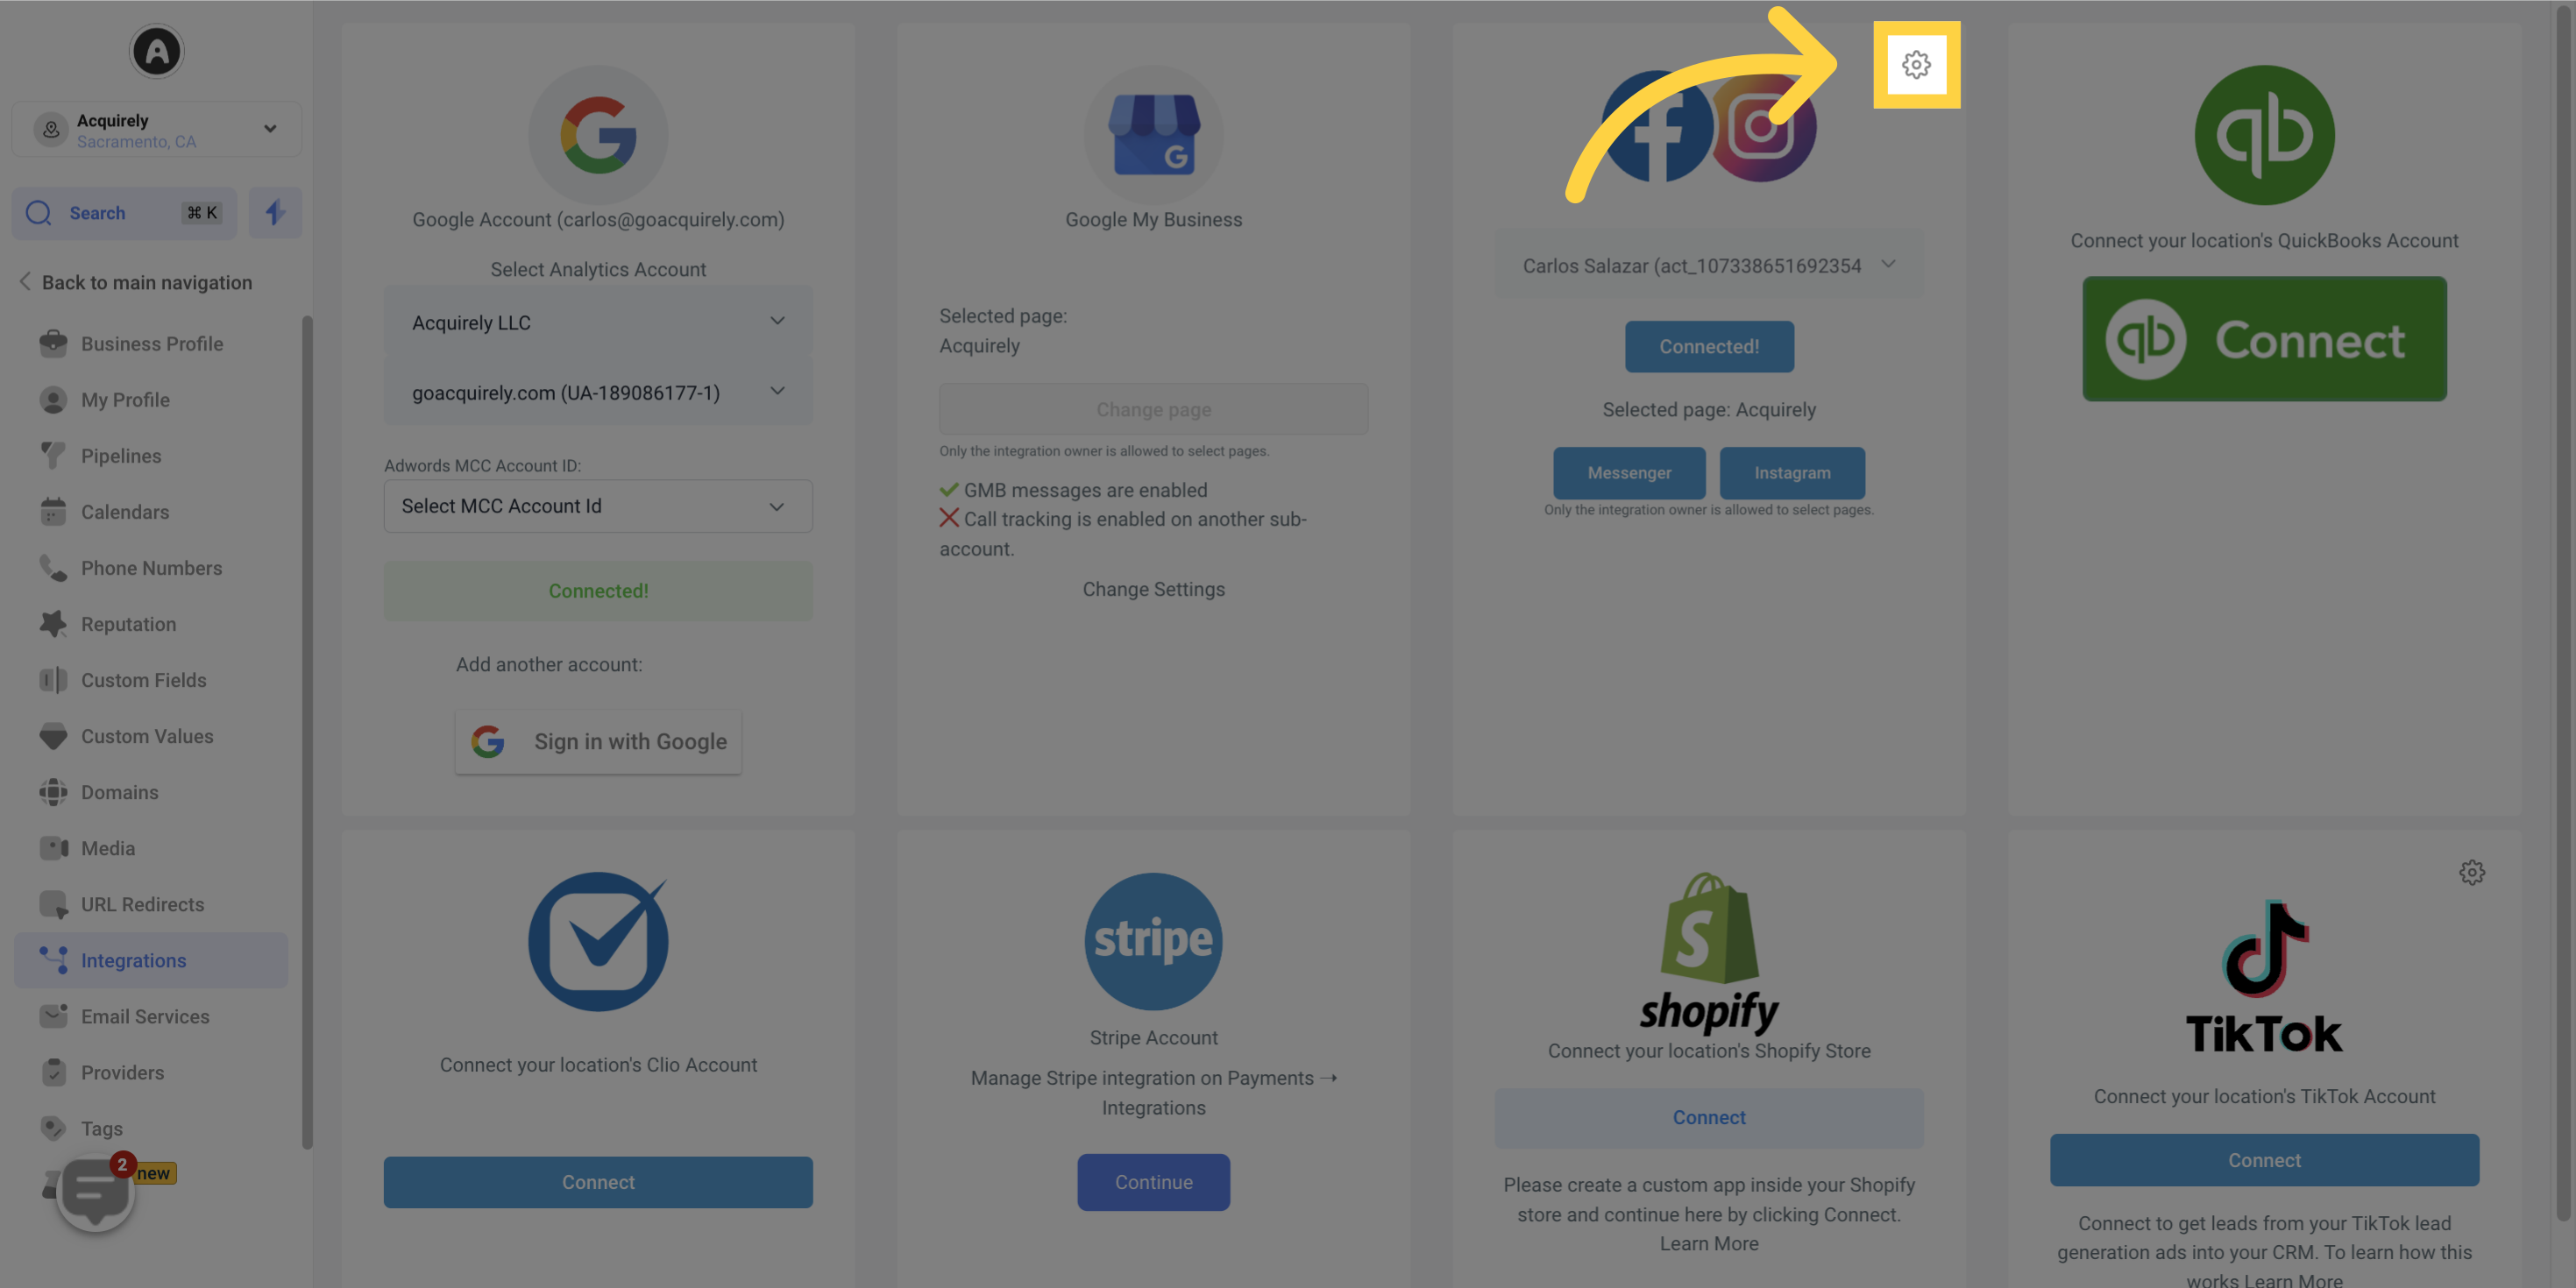
If you haven't mapped any Facebook form fields yet, select this option to begin the mapping process. It is crucial to map these fields for a successful integration. Before starting the mapping process, make sure to create the necessary custom fields within your CRM's custom fields area.


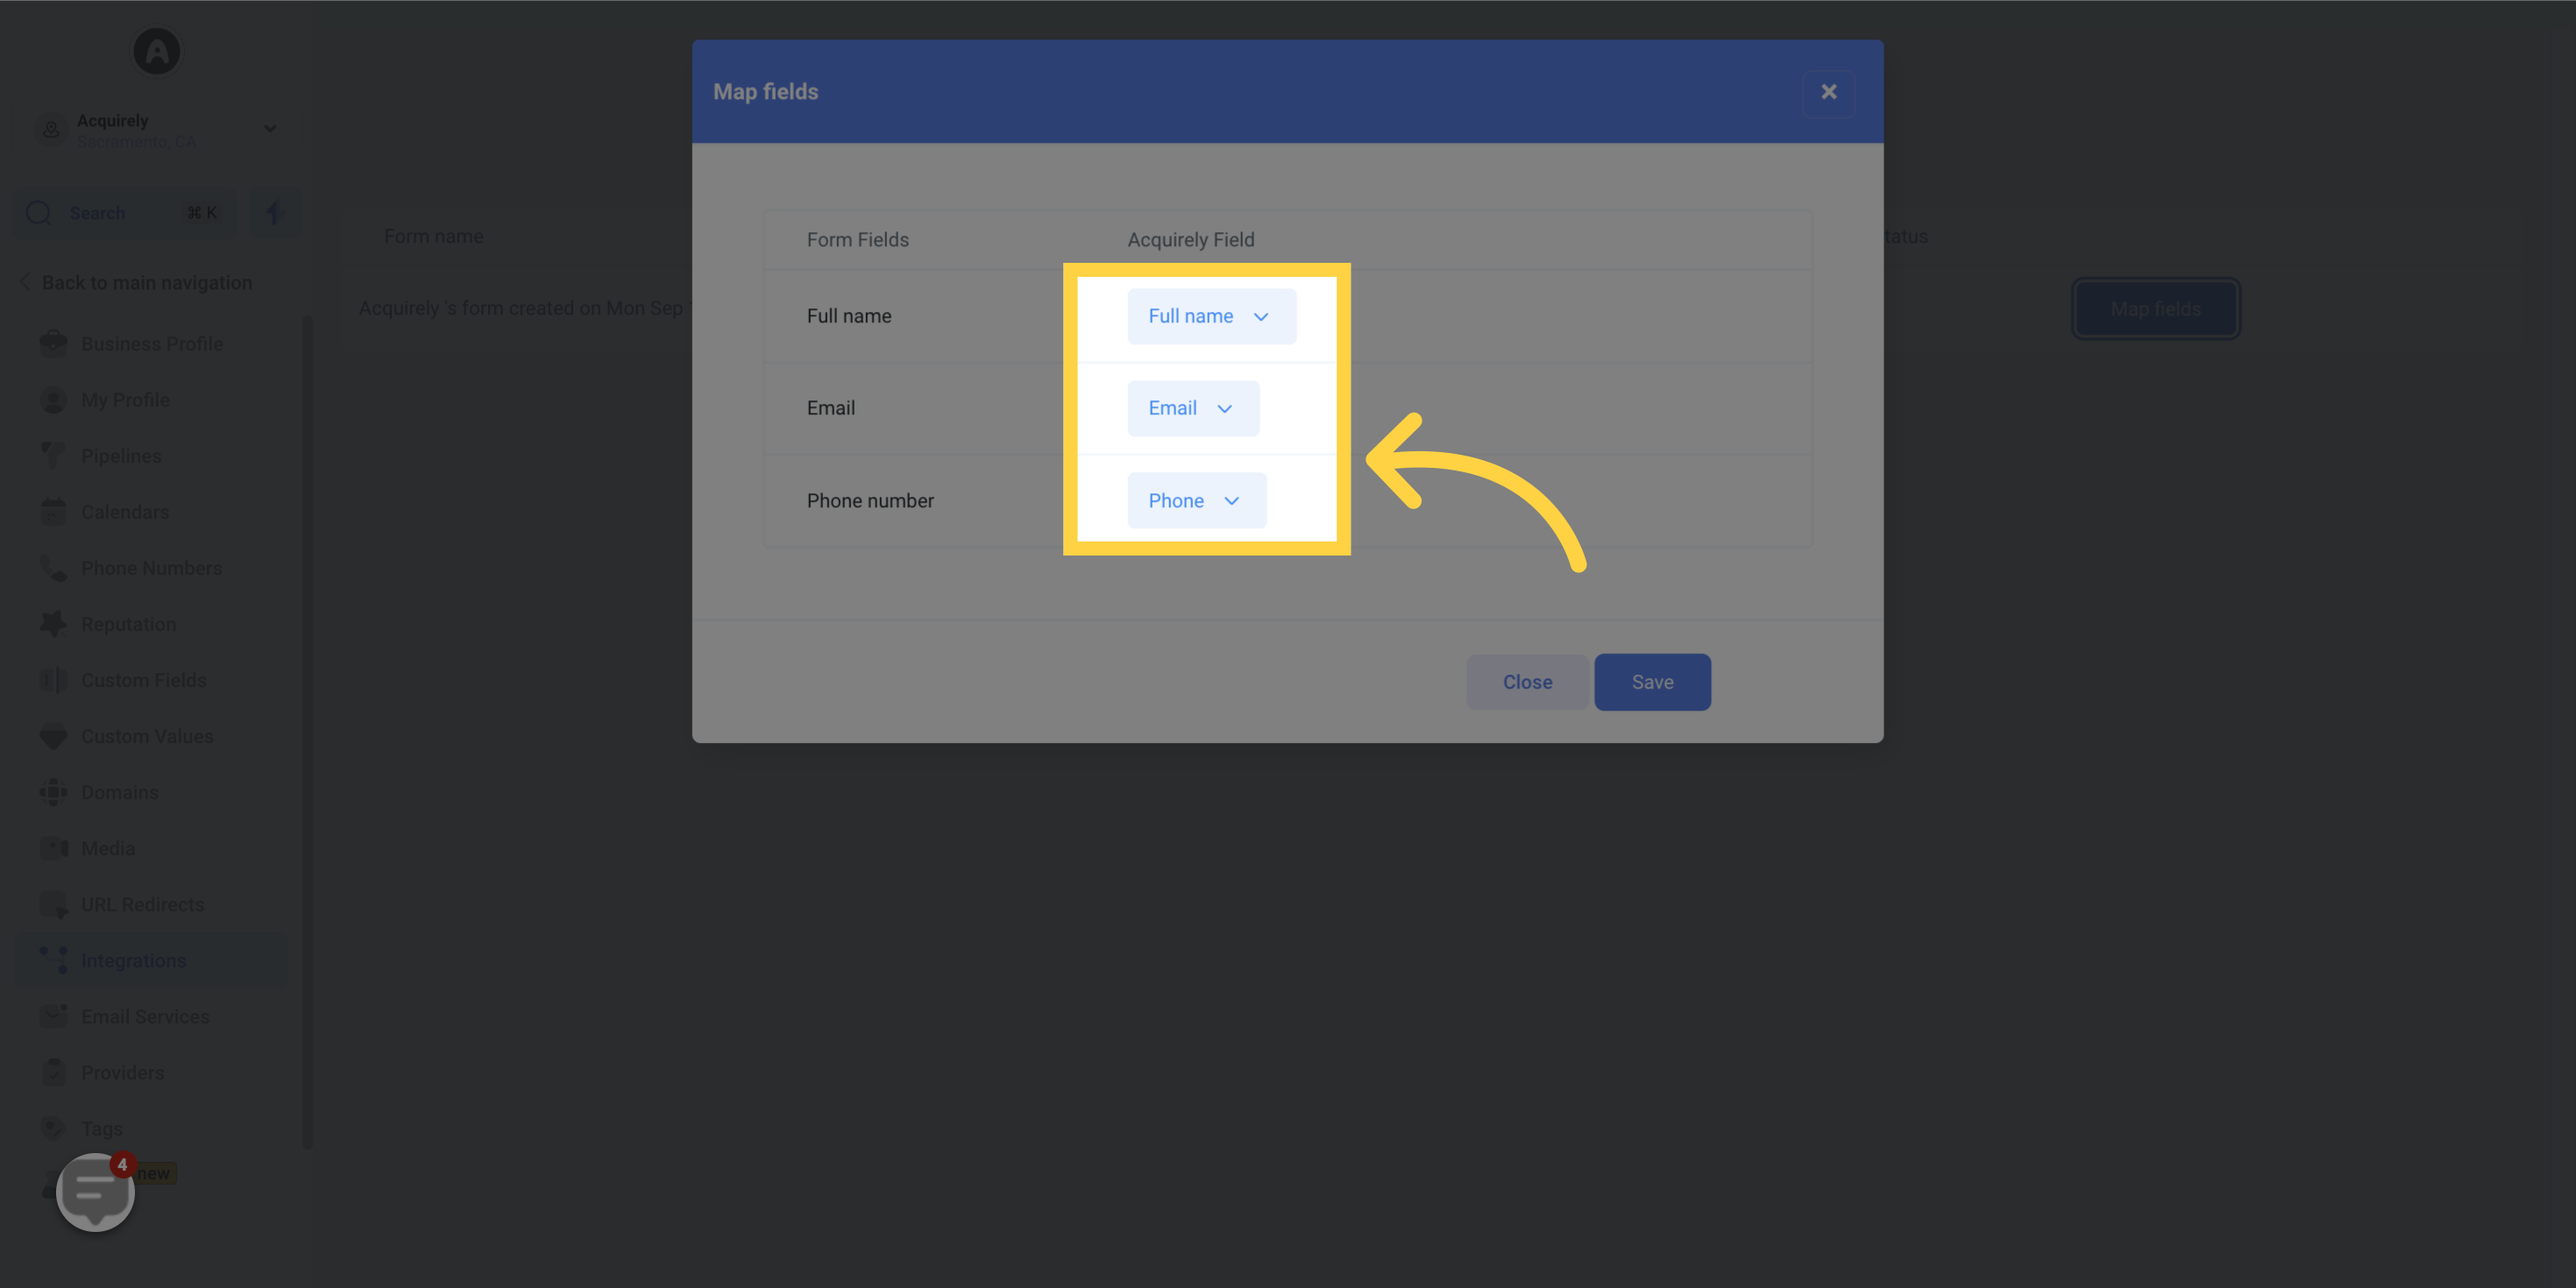
This section displays the fields from your Facebook form, allowing you to view and manage the data input elements within the form

In this section, you will find the fields from your CRM platform that need to be mapped with the corresponding fields in your Facebook form. Take note of the bottom three fields in the provided screenshot, where the Email field from the Facebook form is accurately mapped to the Email option in your CRM system. By aligning these fields correctly, you ensure a seamless transfer of data between the two platforms.
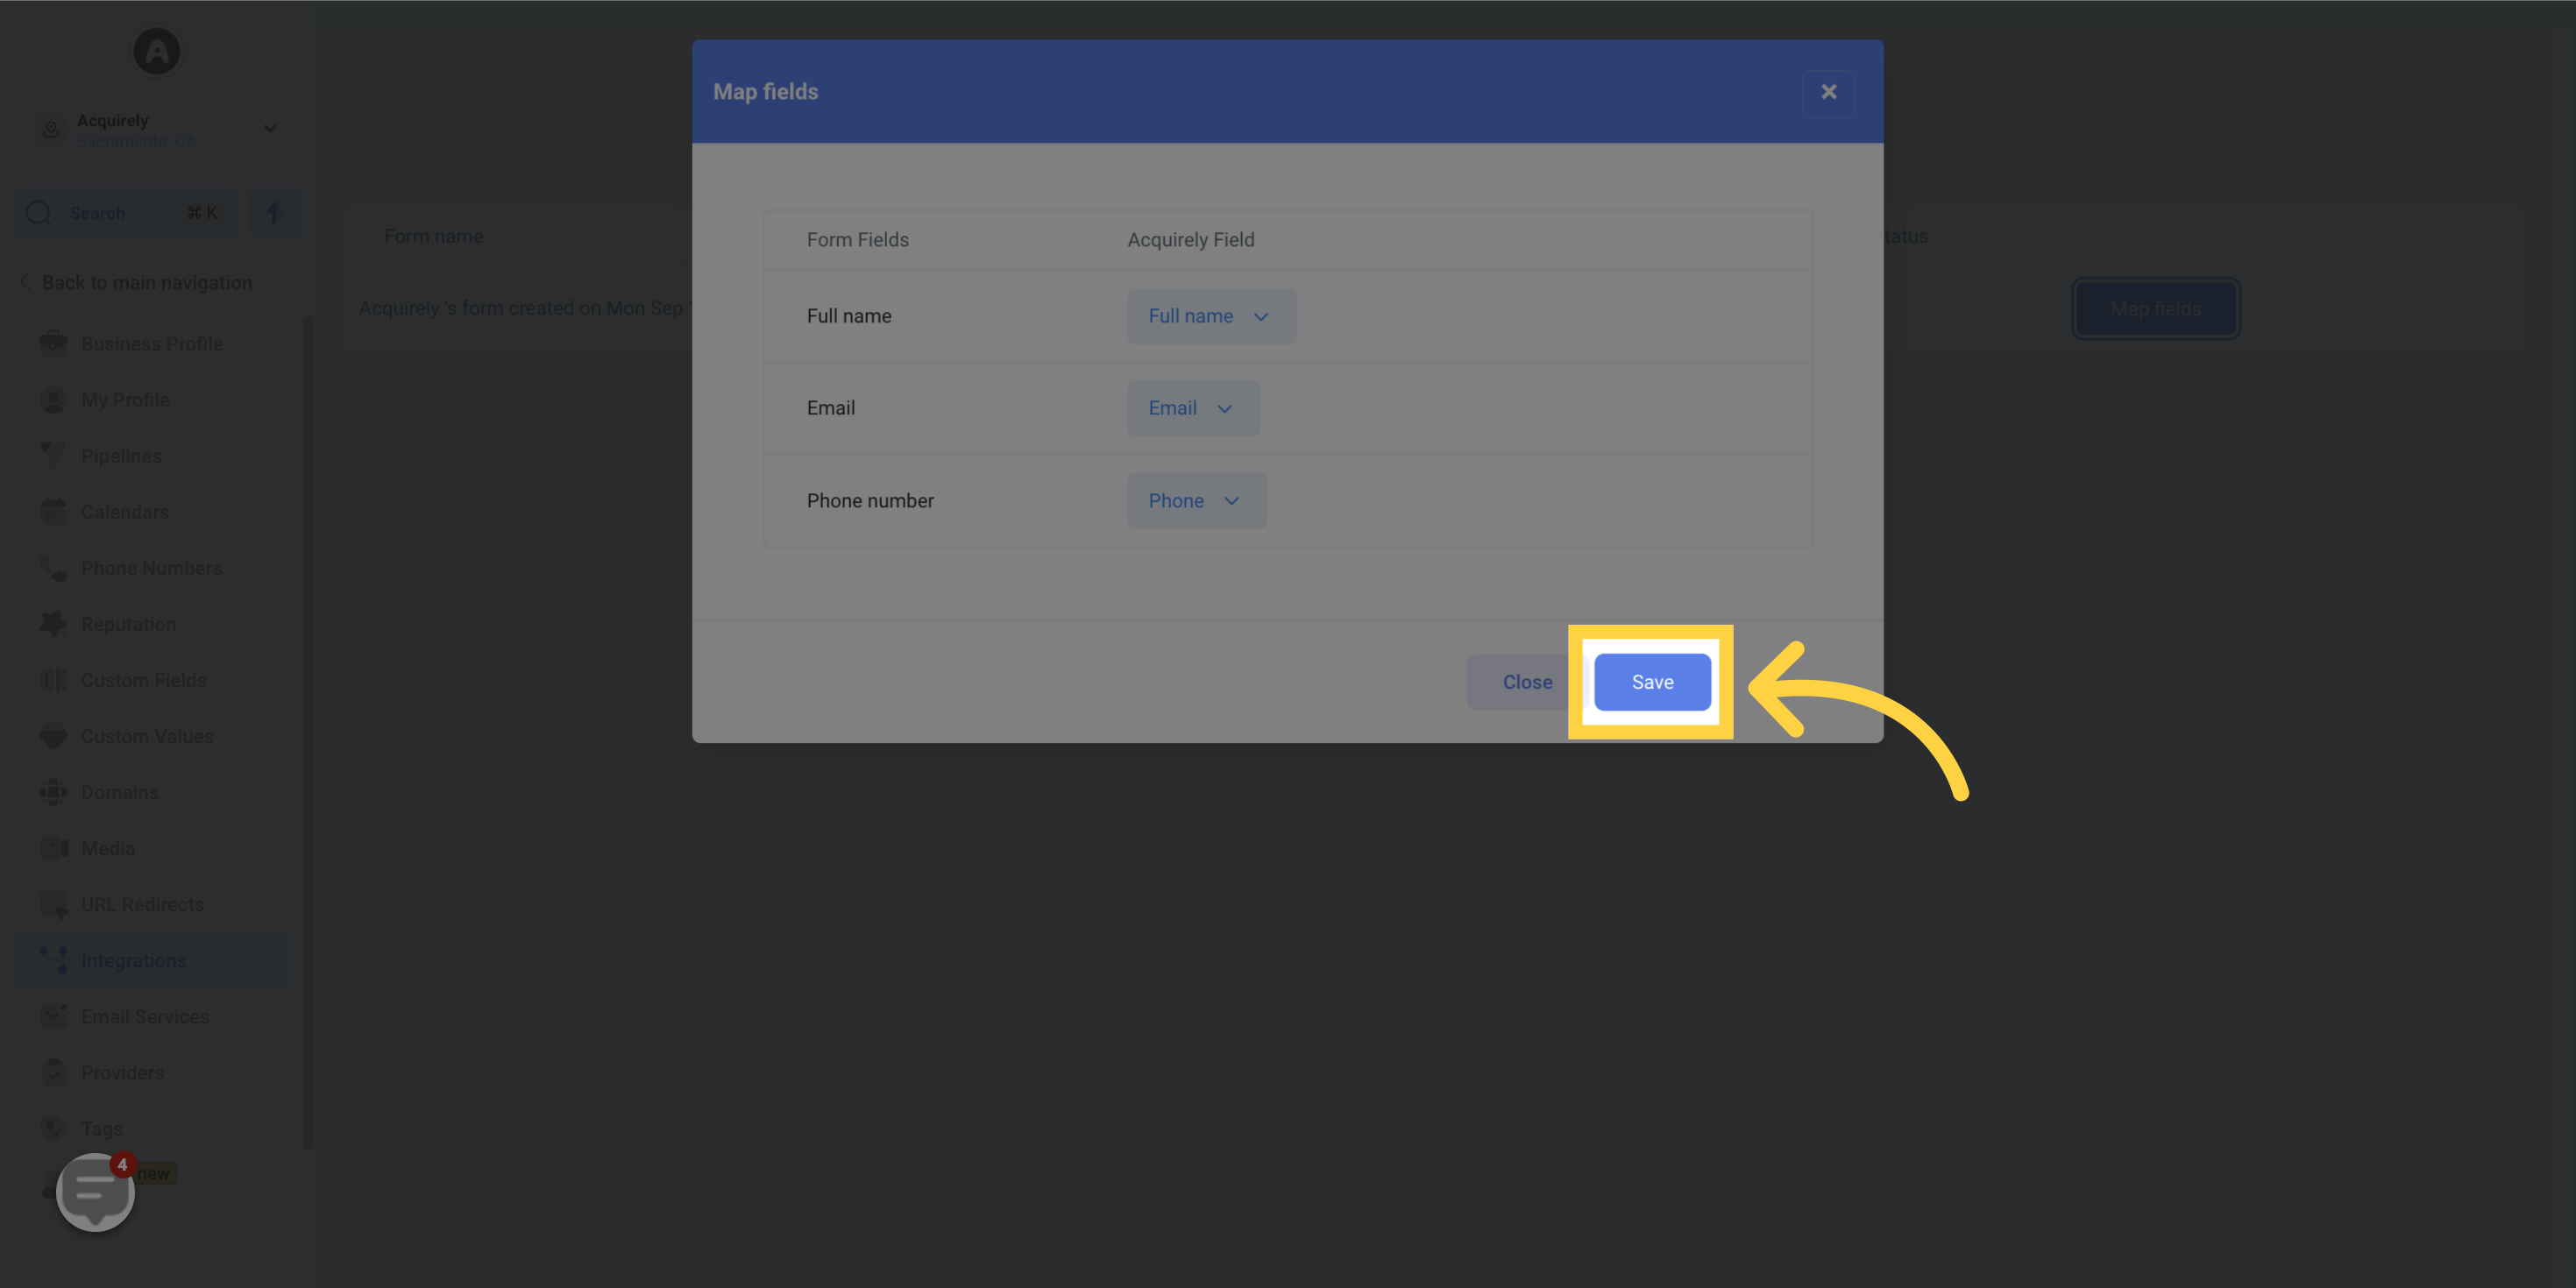
After making any changes to the field mappings, it is important to save the settings. This ensures that your desired configurations are saved and ready for efficient and successful use of Form Fields.