How to Set Up Call Tracking (Number Pool)

Learn how to set up call tracking using number pools in CRM

Number pools offer a fantastic method for monitoring call activity generated by paid campaigns. By utilizing number pools, you can accurately attribute call-tracking conversations to specific phone numbers visible to leads who visit designated landing pages and websites. These unique numbers are exclusively displayed on particular pages and are only shown to leads who perform specific actions. Sometimes referred to as "call tracking codes," we prefer to call them "number pools."

1. Click "Settings"

Click 'Settings'

2. Click "Phone Numbers"

Click 'Phone Numbers'

3. Click "Add Number"

Click 'Add Number'

4. Click "Add Number Pool"

Click 'Add Number Pool'

5. Select "Visitors Activity"

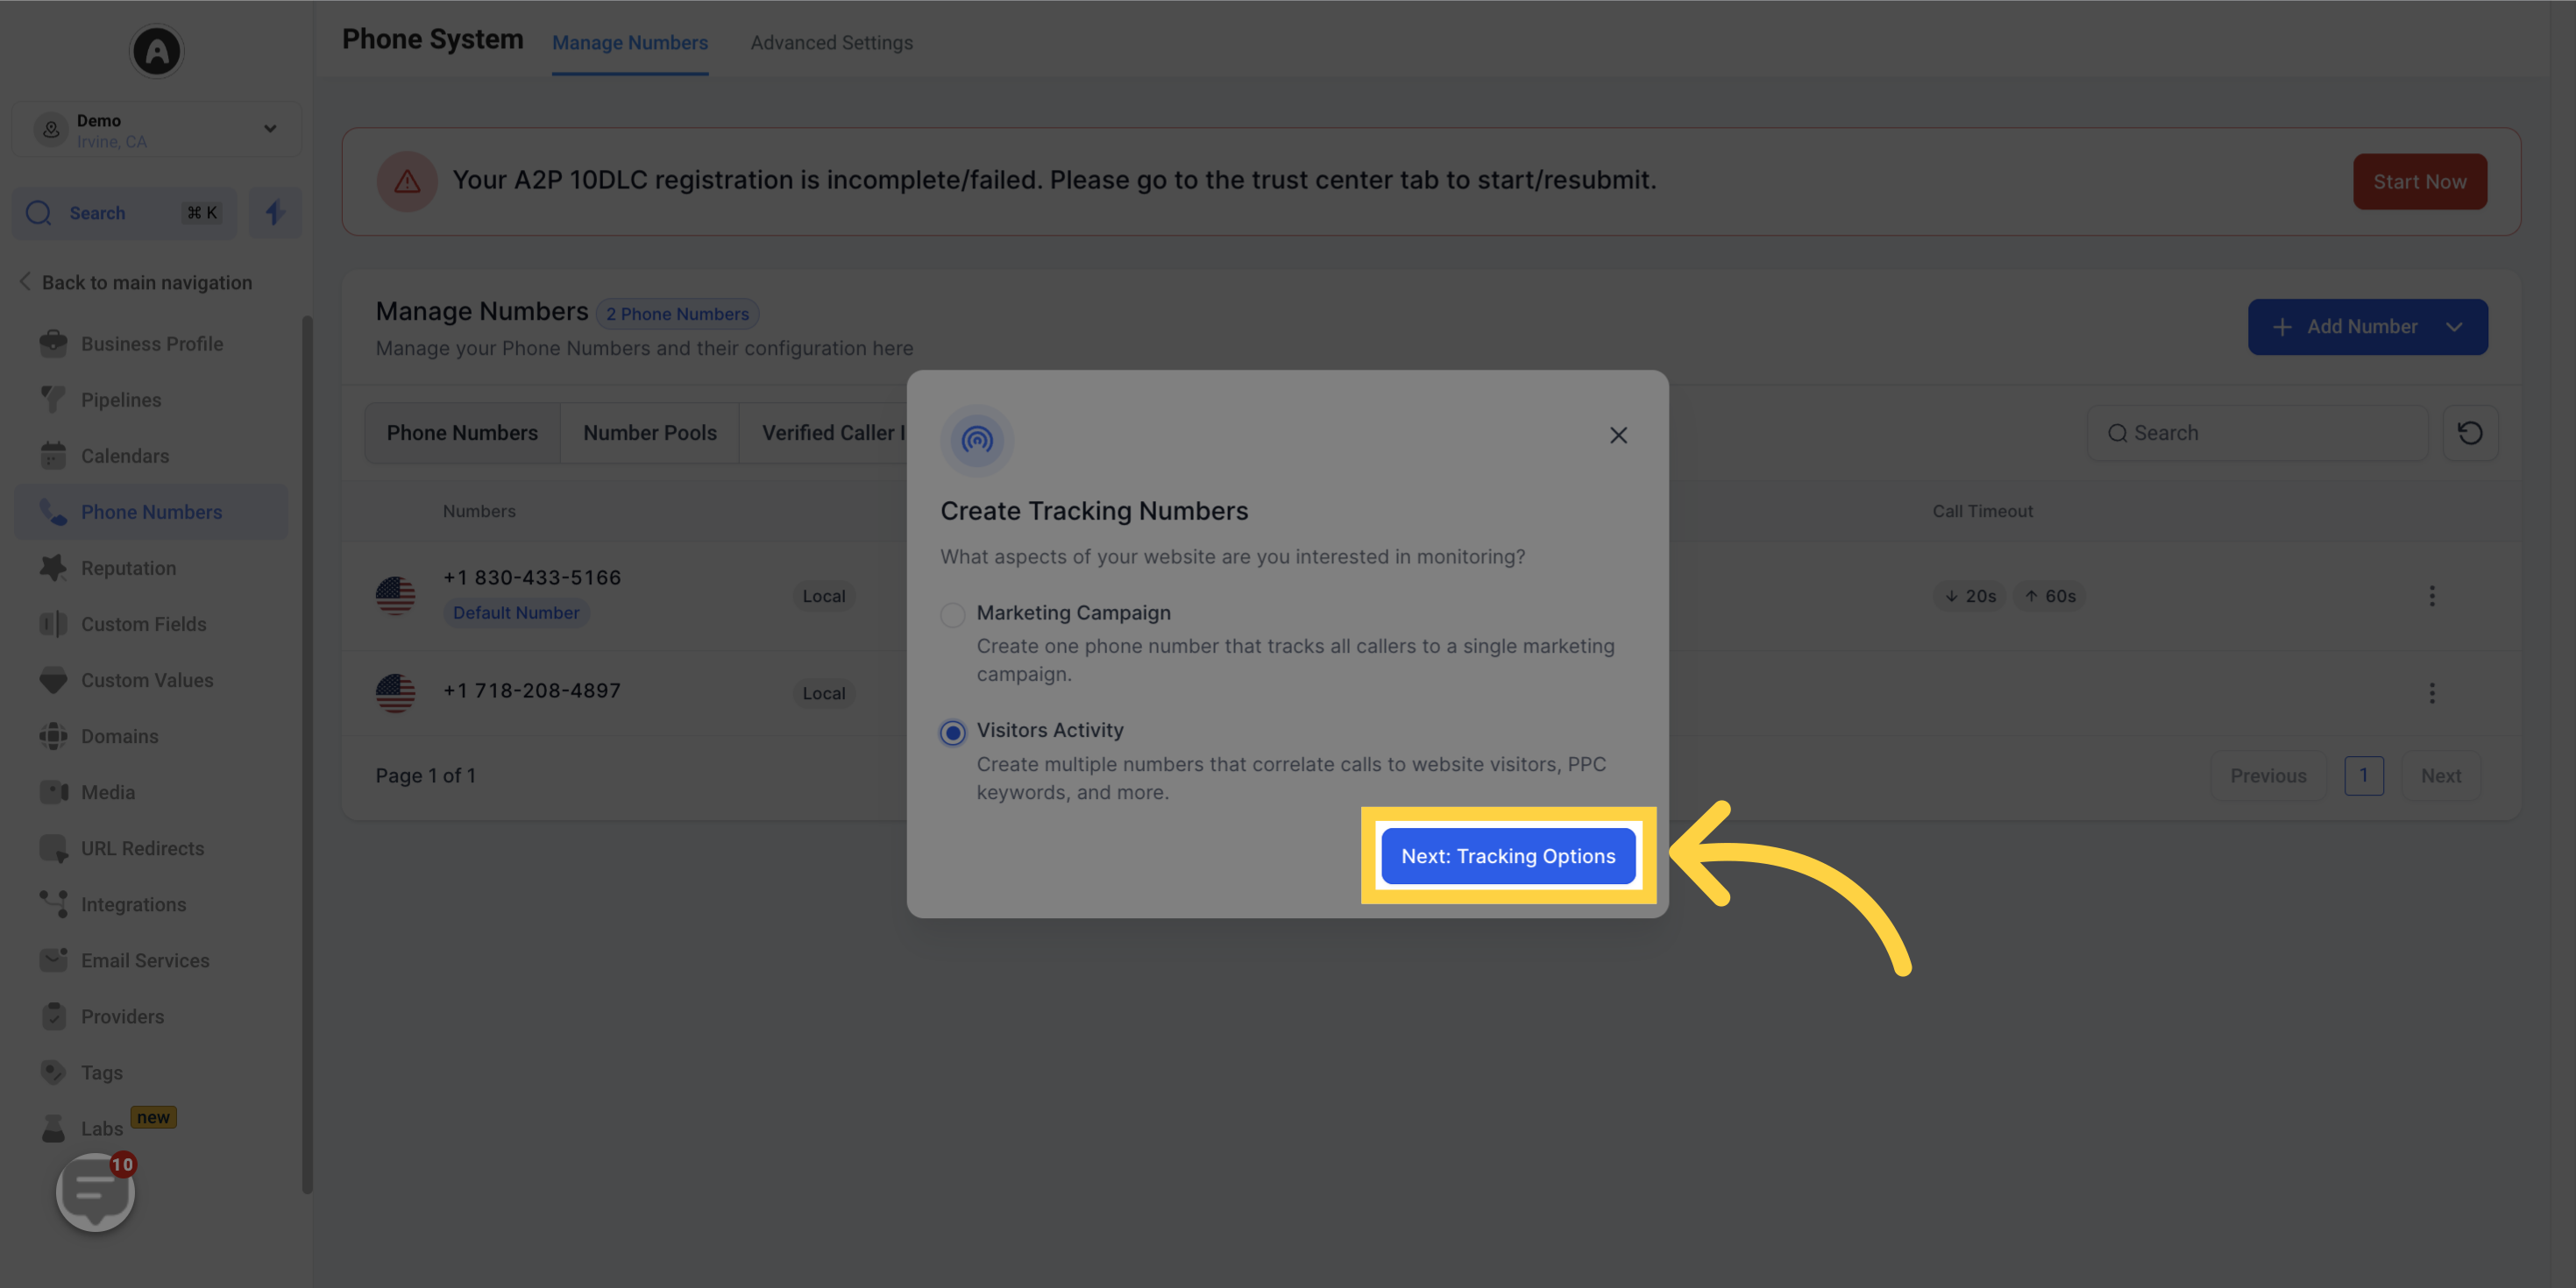
If desired, enable "Track visitor activity".

Select 'Visitors Activity'

6. Click "Next: tracking options"

Click 'Next: tracking options'

7. Click "All Visitors"

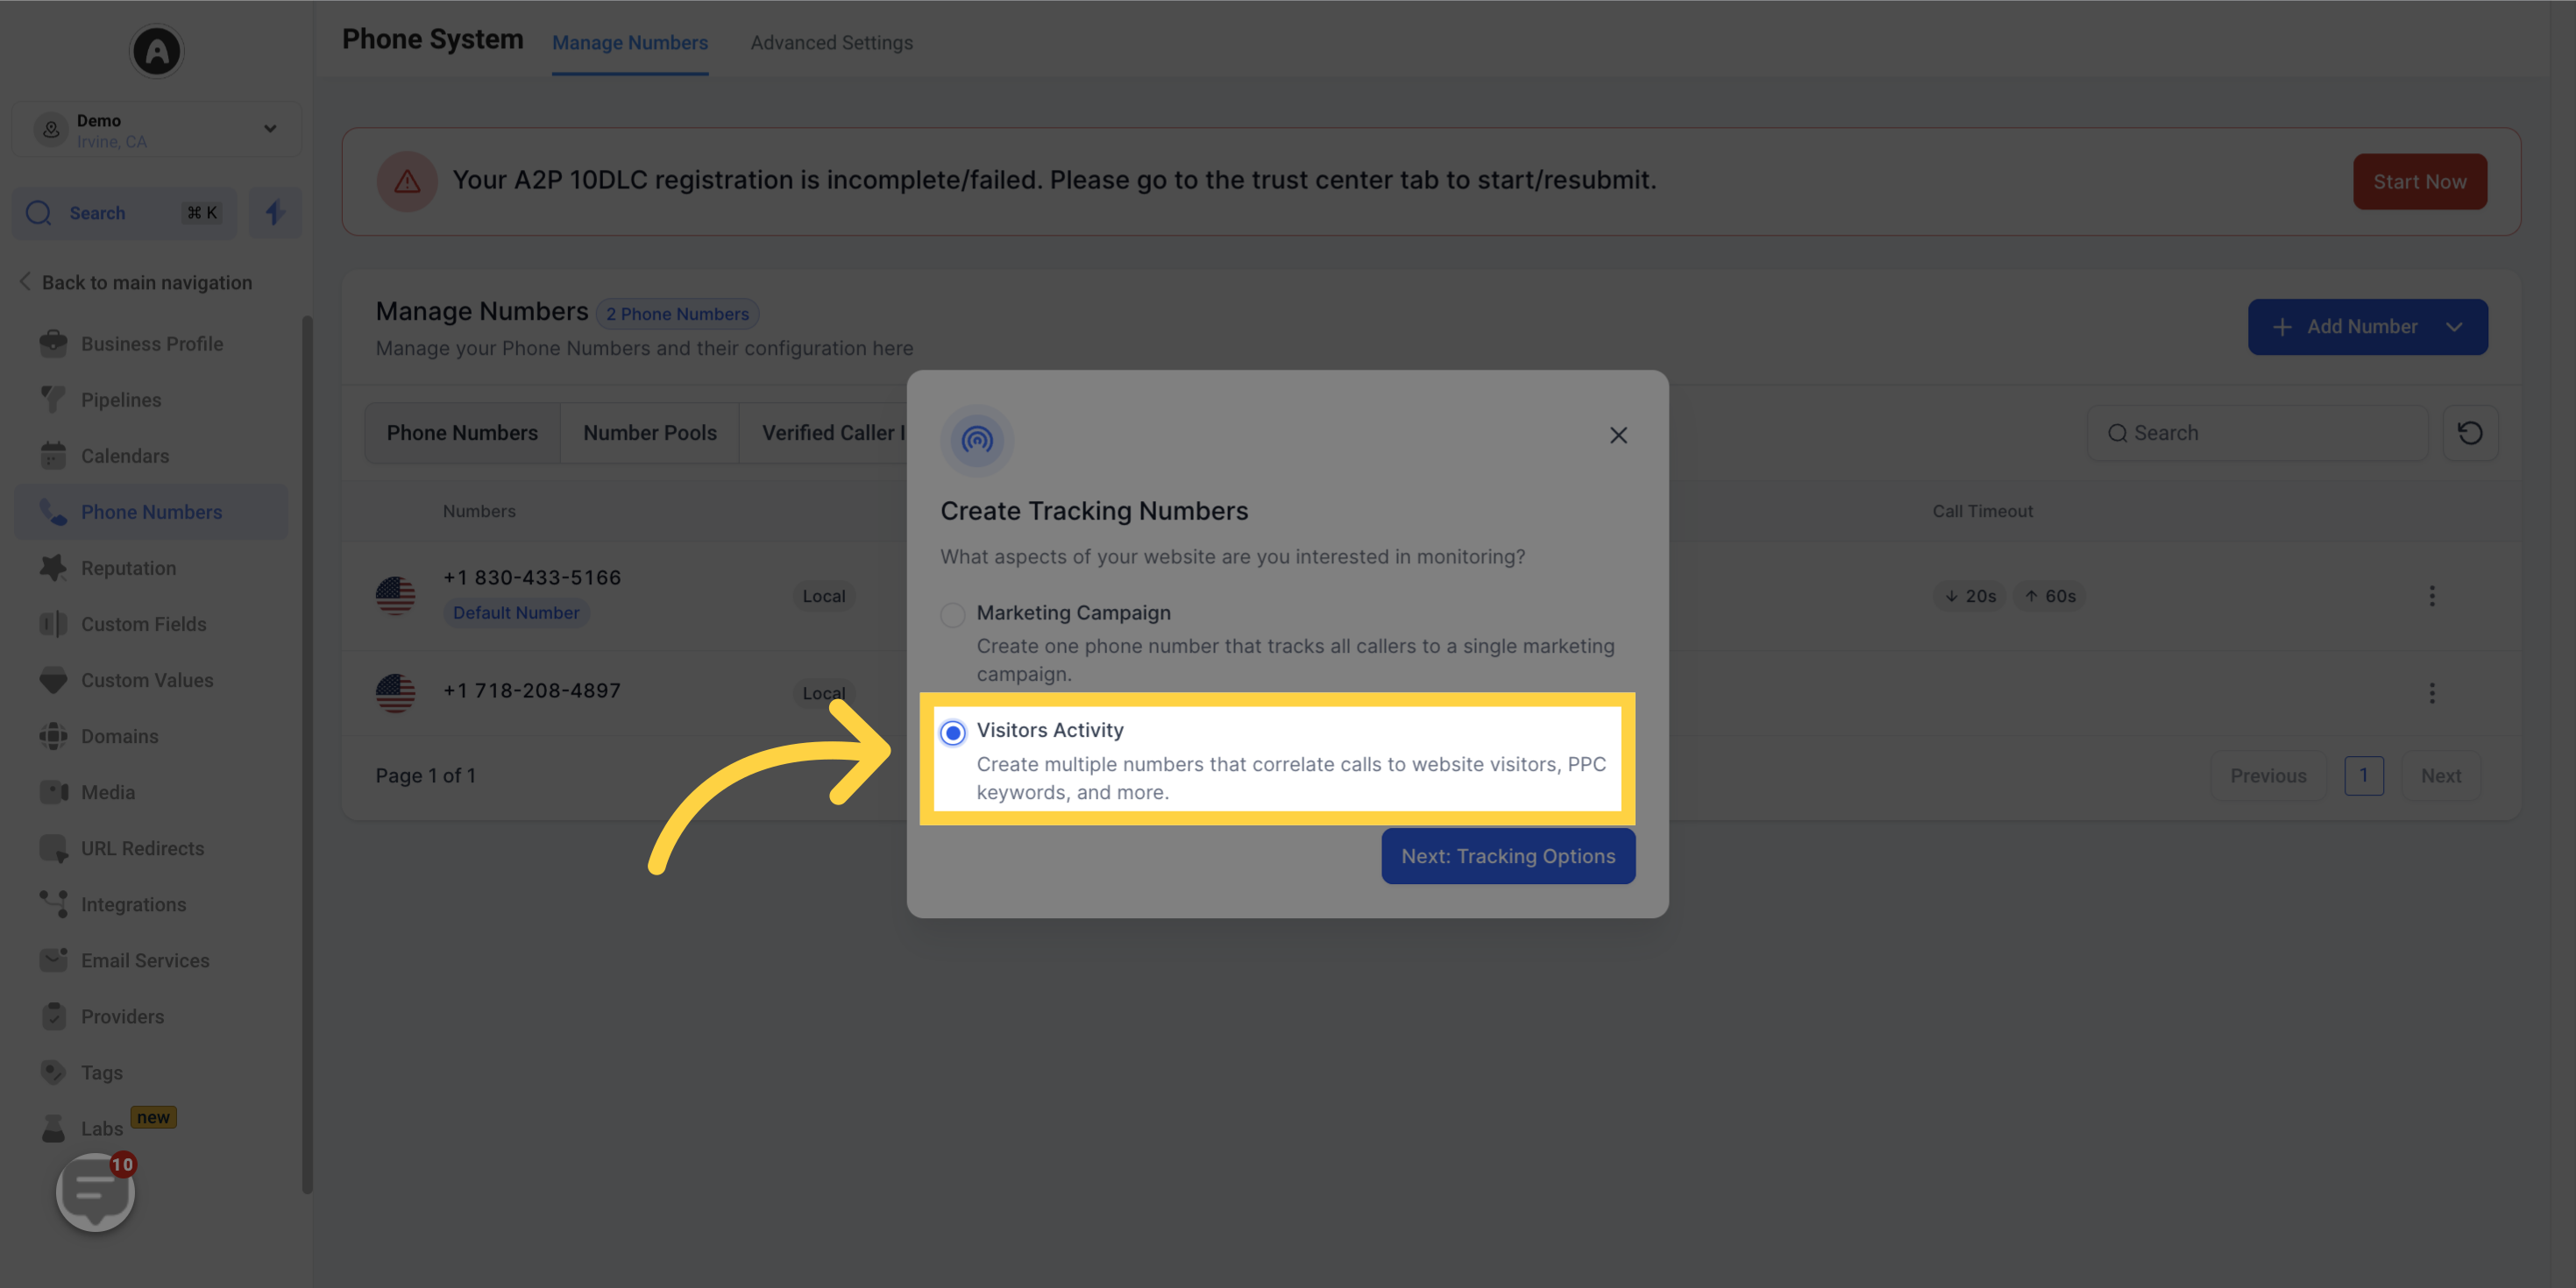
Choose the visitors you want to track and click on "Next: Create Pool". We recommend tracking all visitors.

Note that if you select PPC search, the number on the website will only switch when visitors arrive from a paid ad
Click 'All Visitors'

8. Click "Next: Create Pool"

Click 'Next: Create Pool'

9. Click "Next: Choose Numbers"

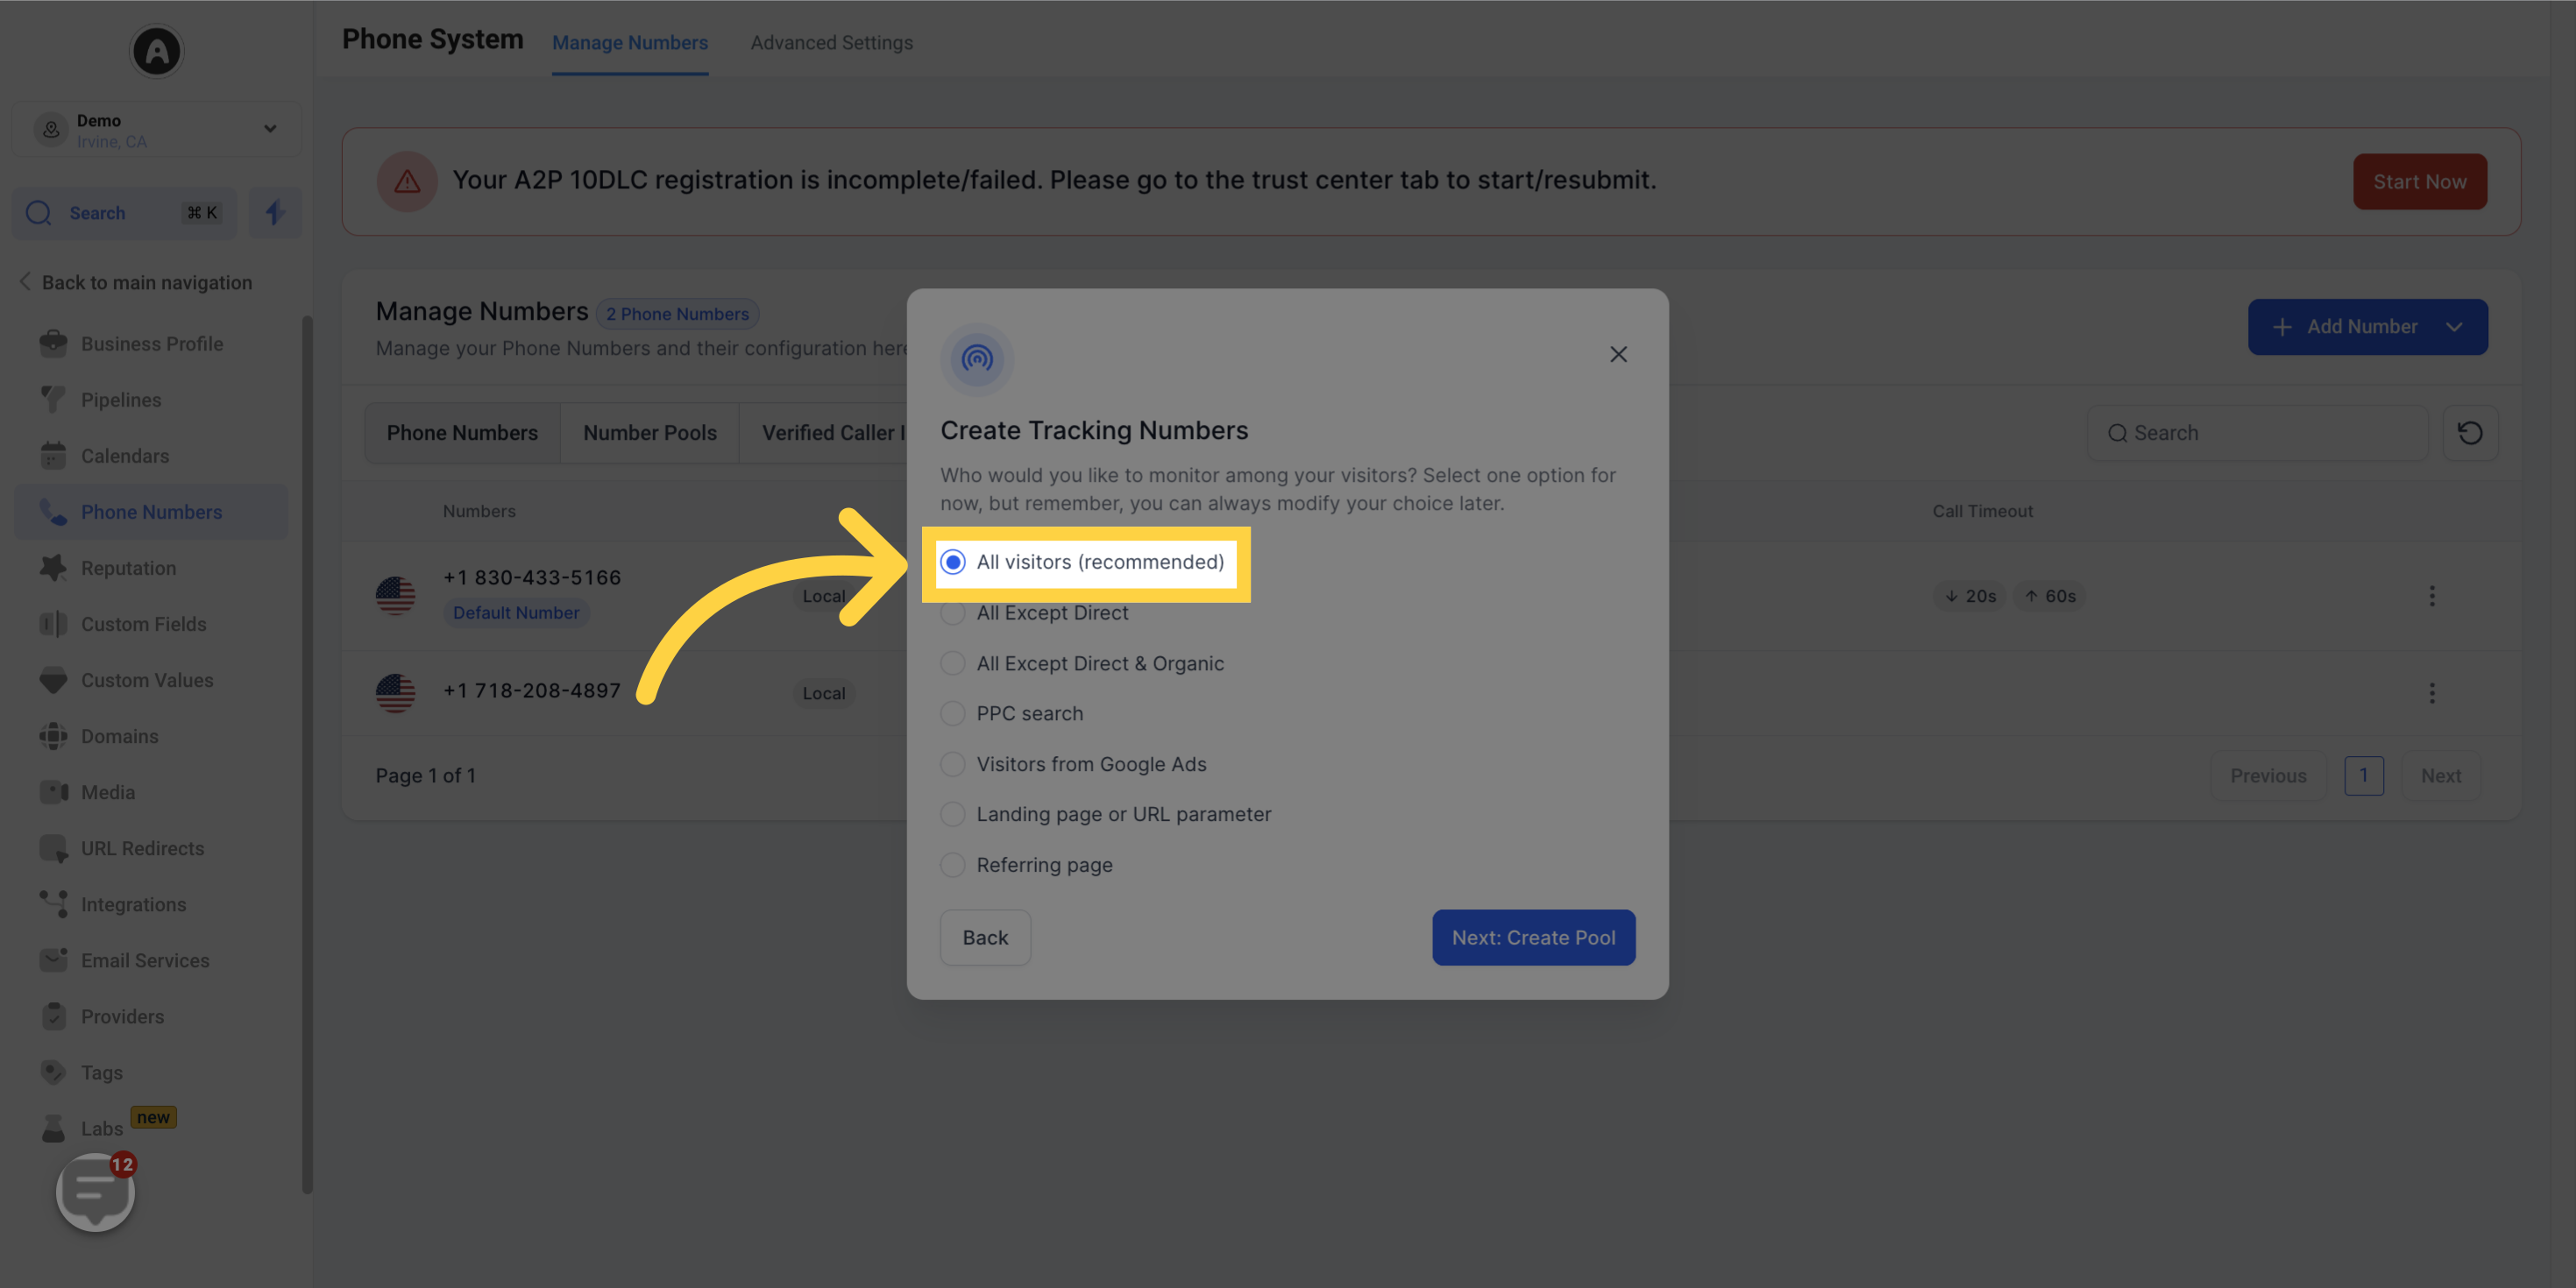
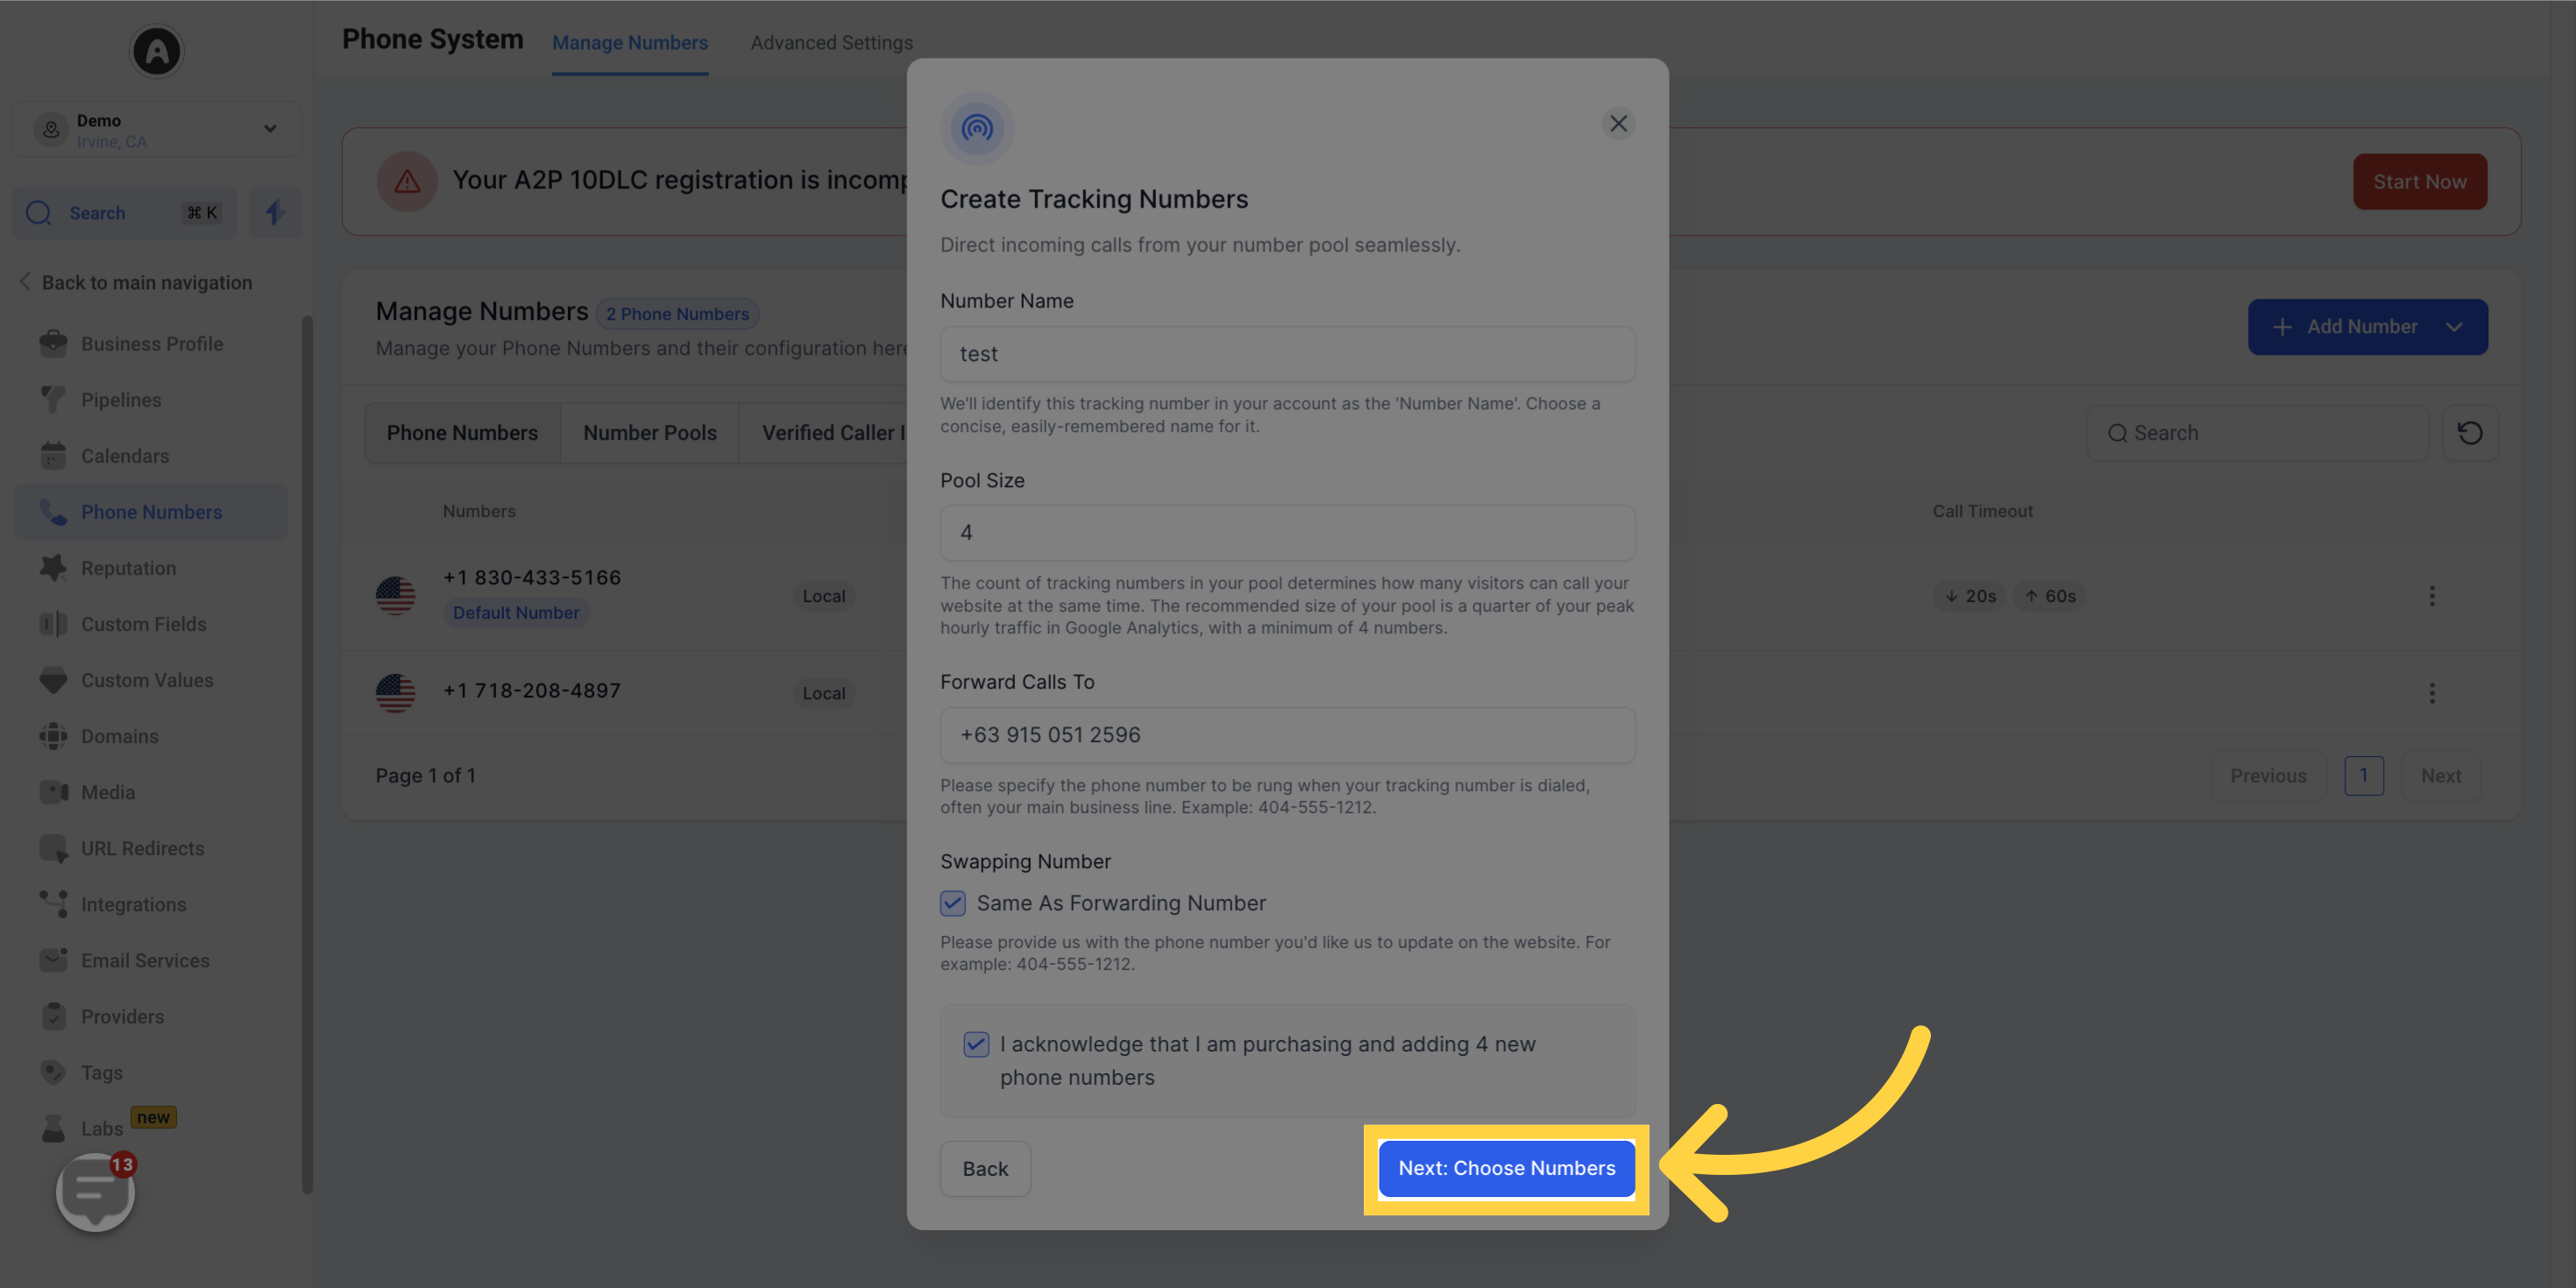
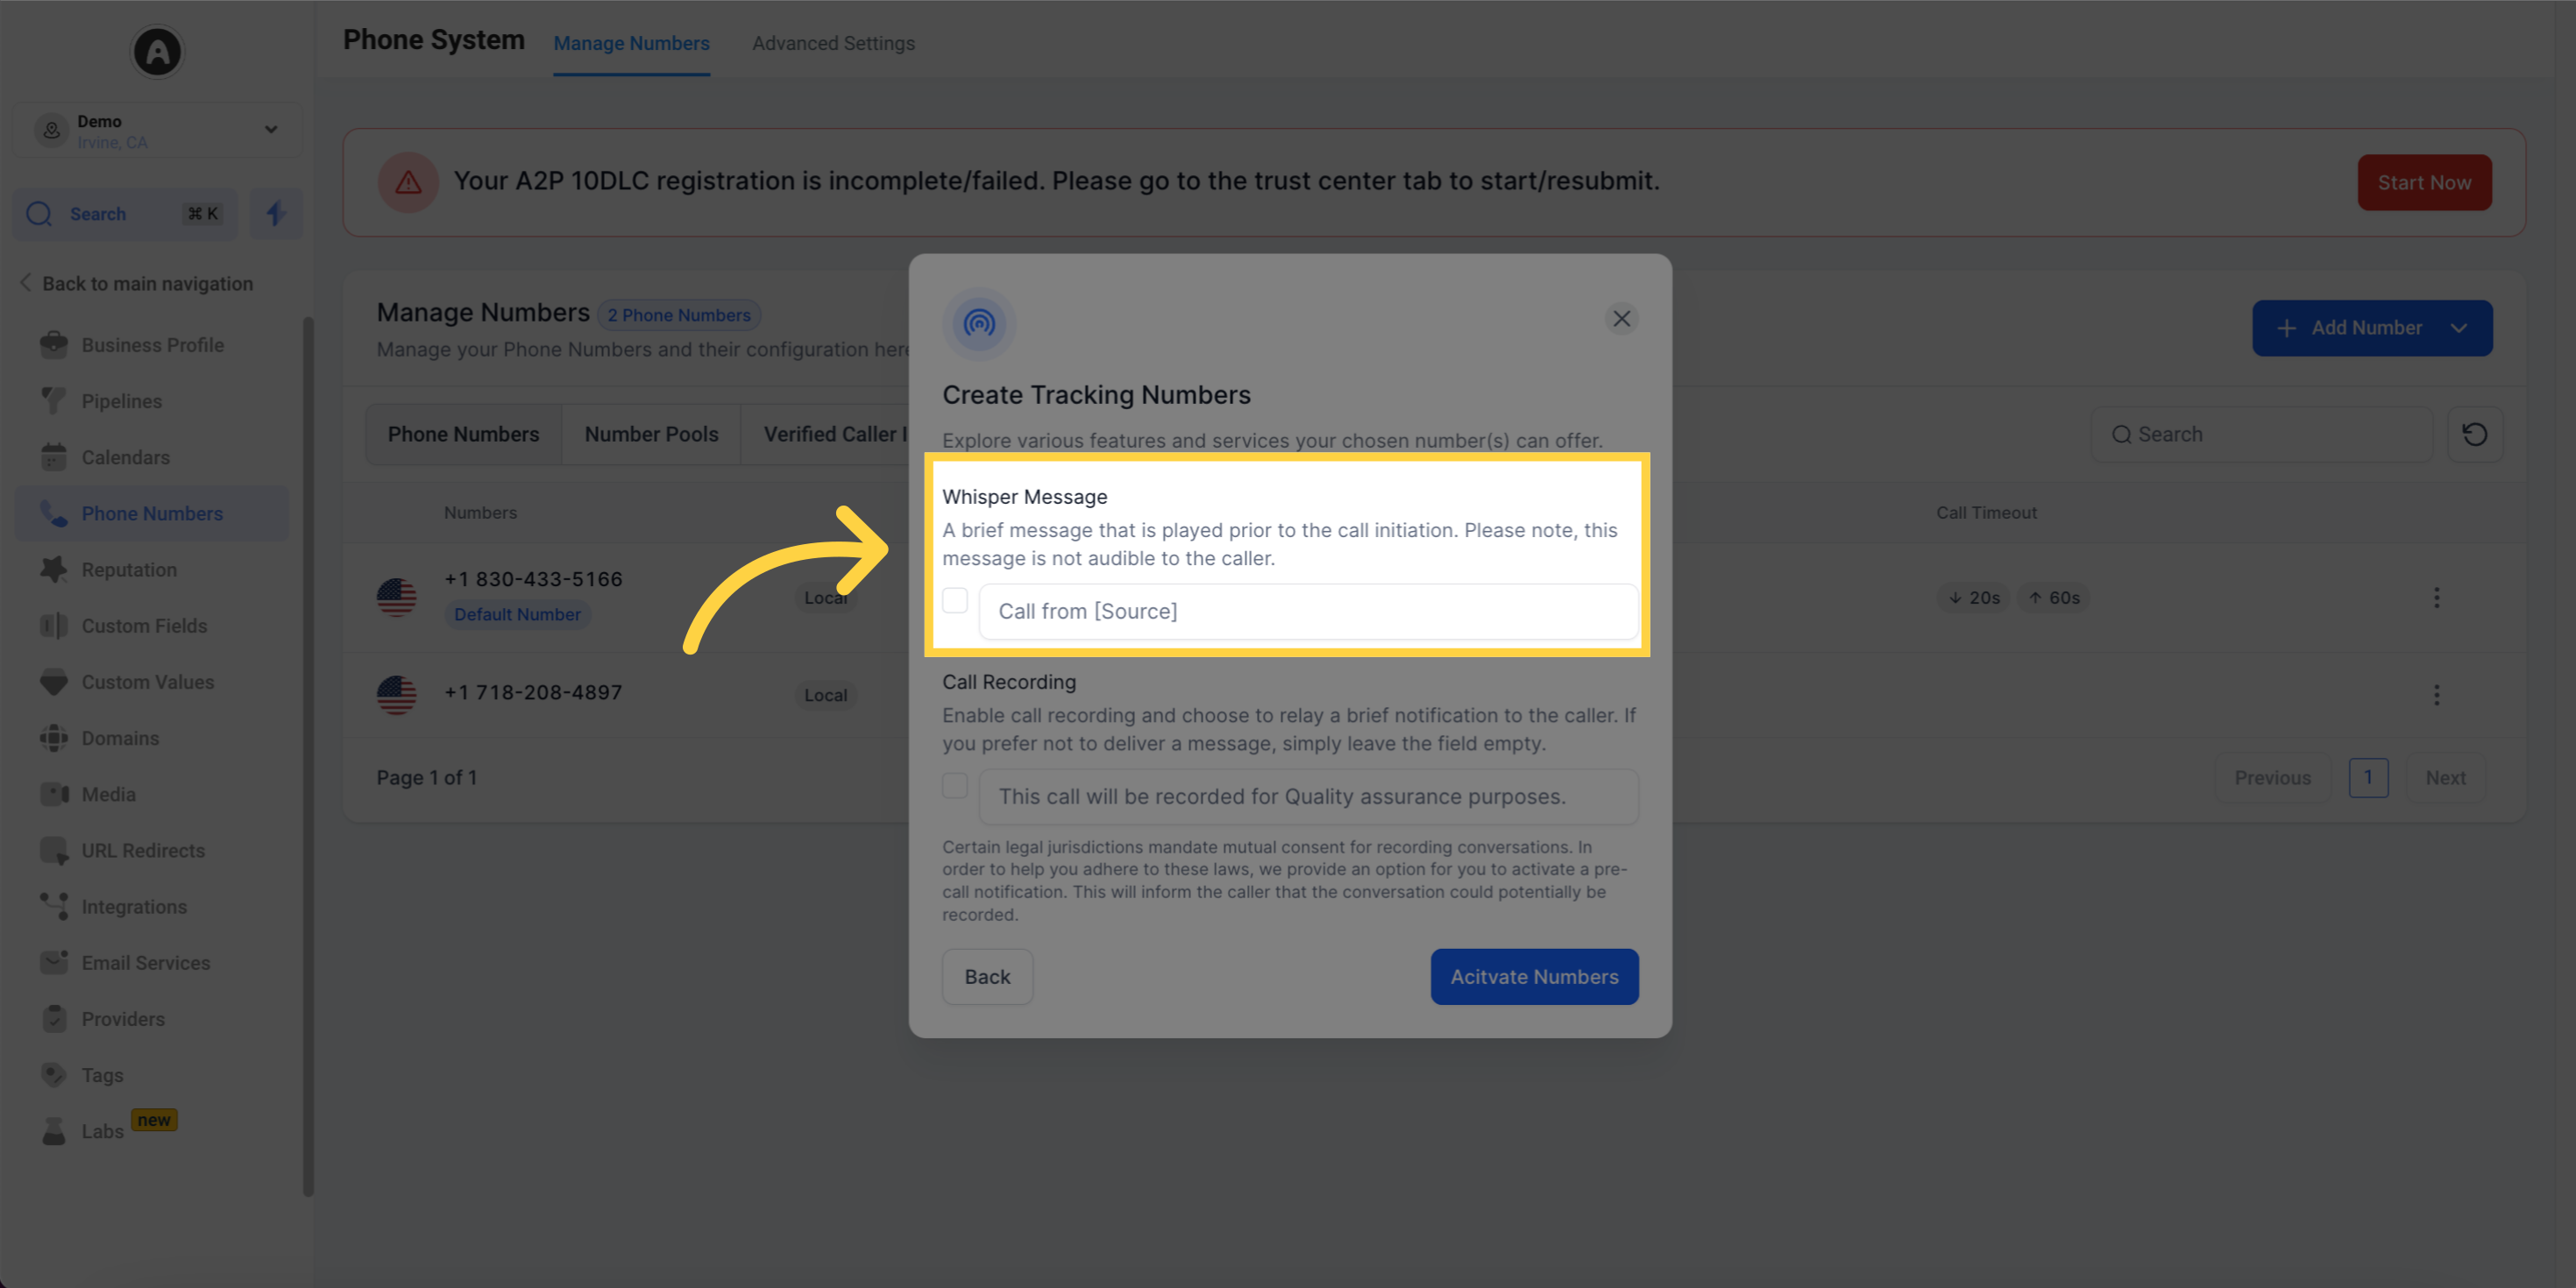
Fill out all the necessary information and click on "Next: Tracking Options".

Click 'Next: Choose Numbers'

10. Click here to "Choose Phone Numbers"

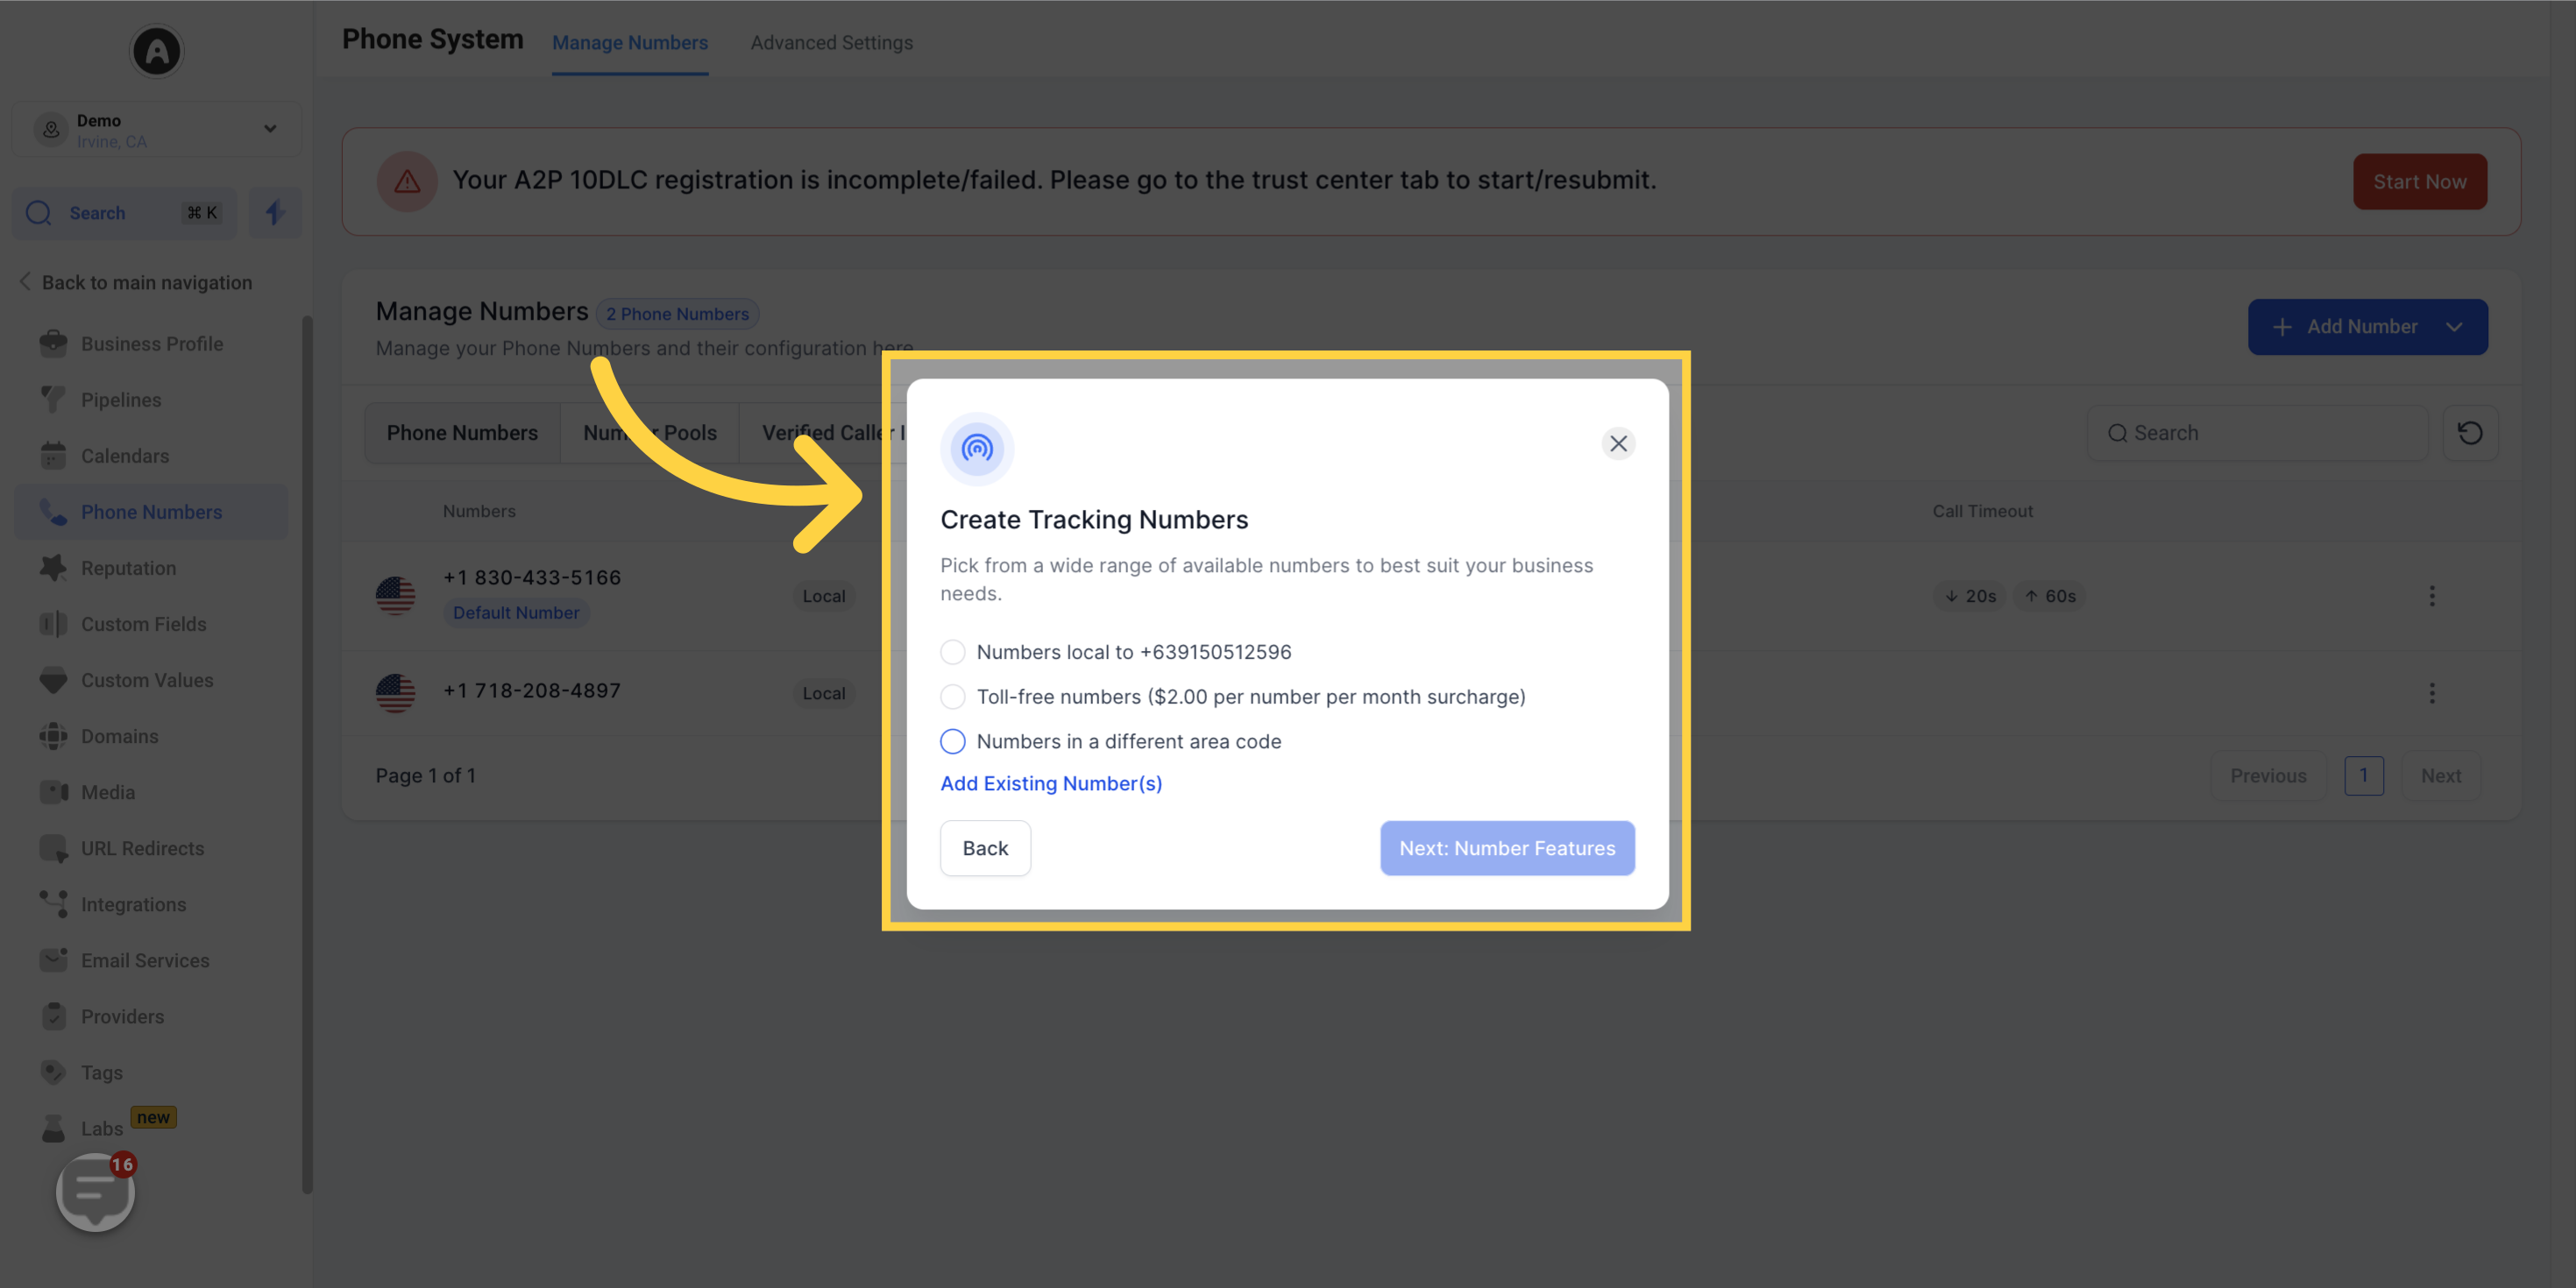
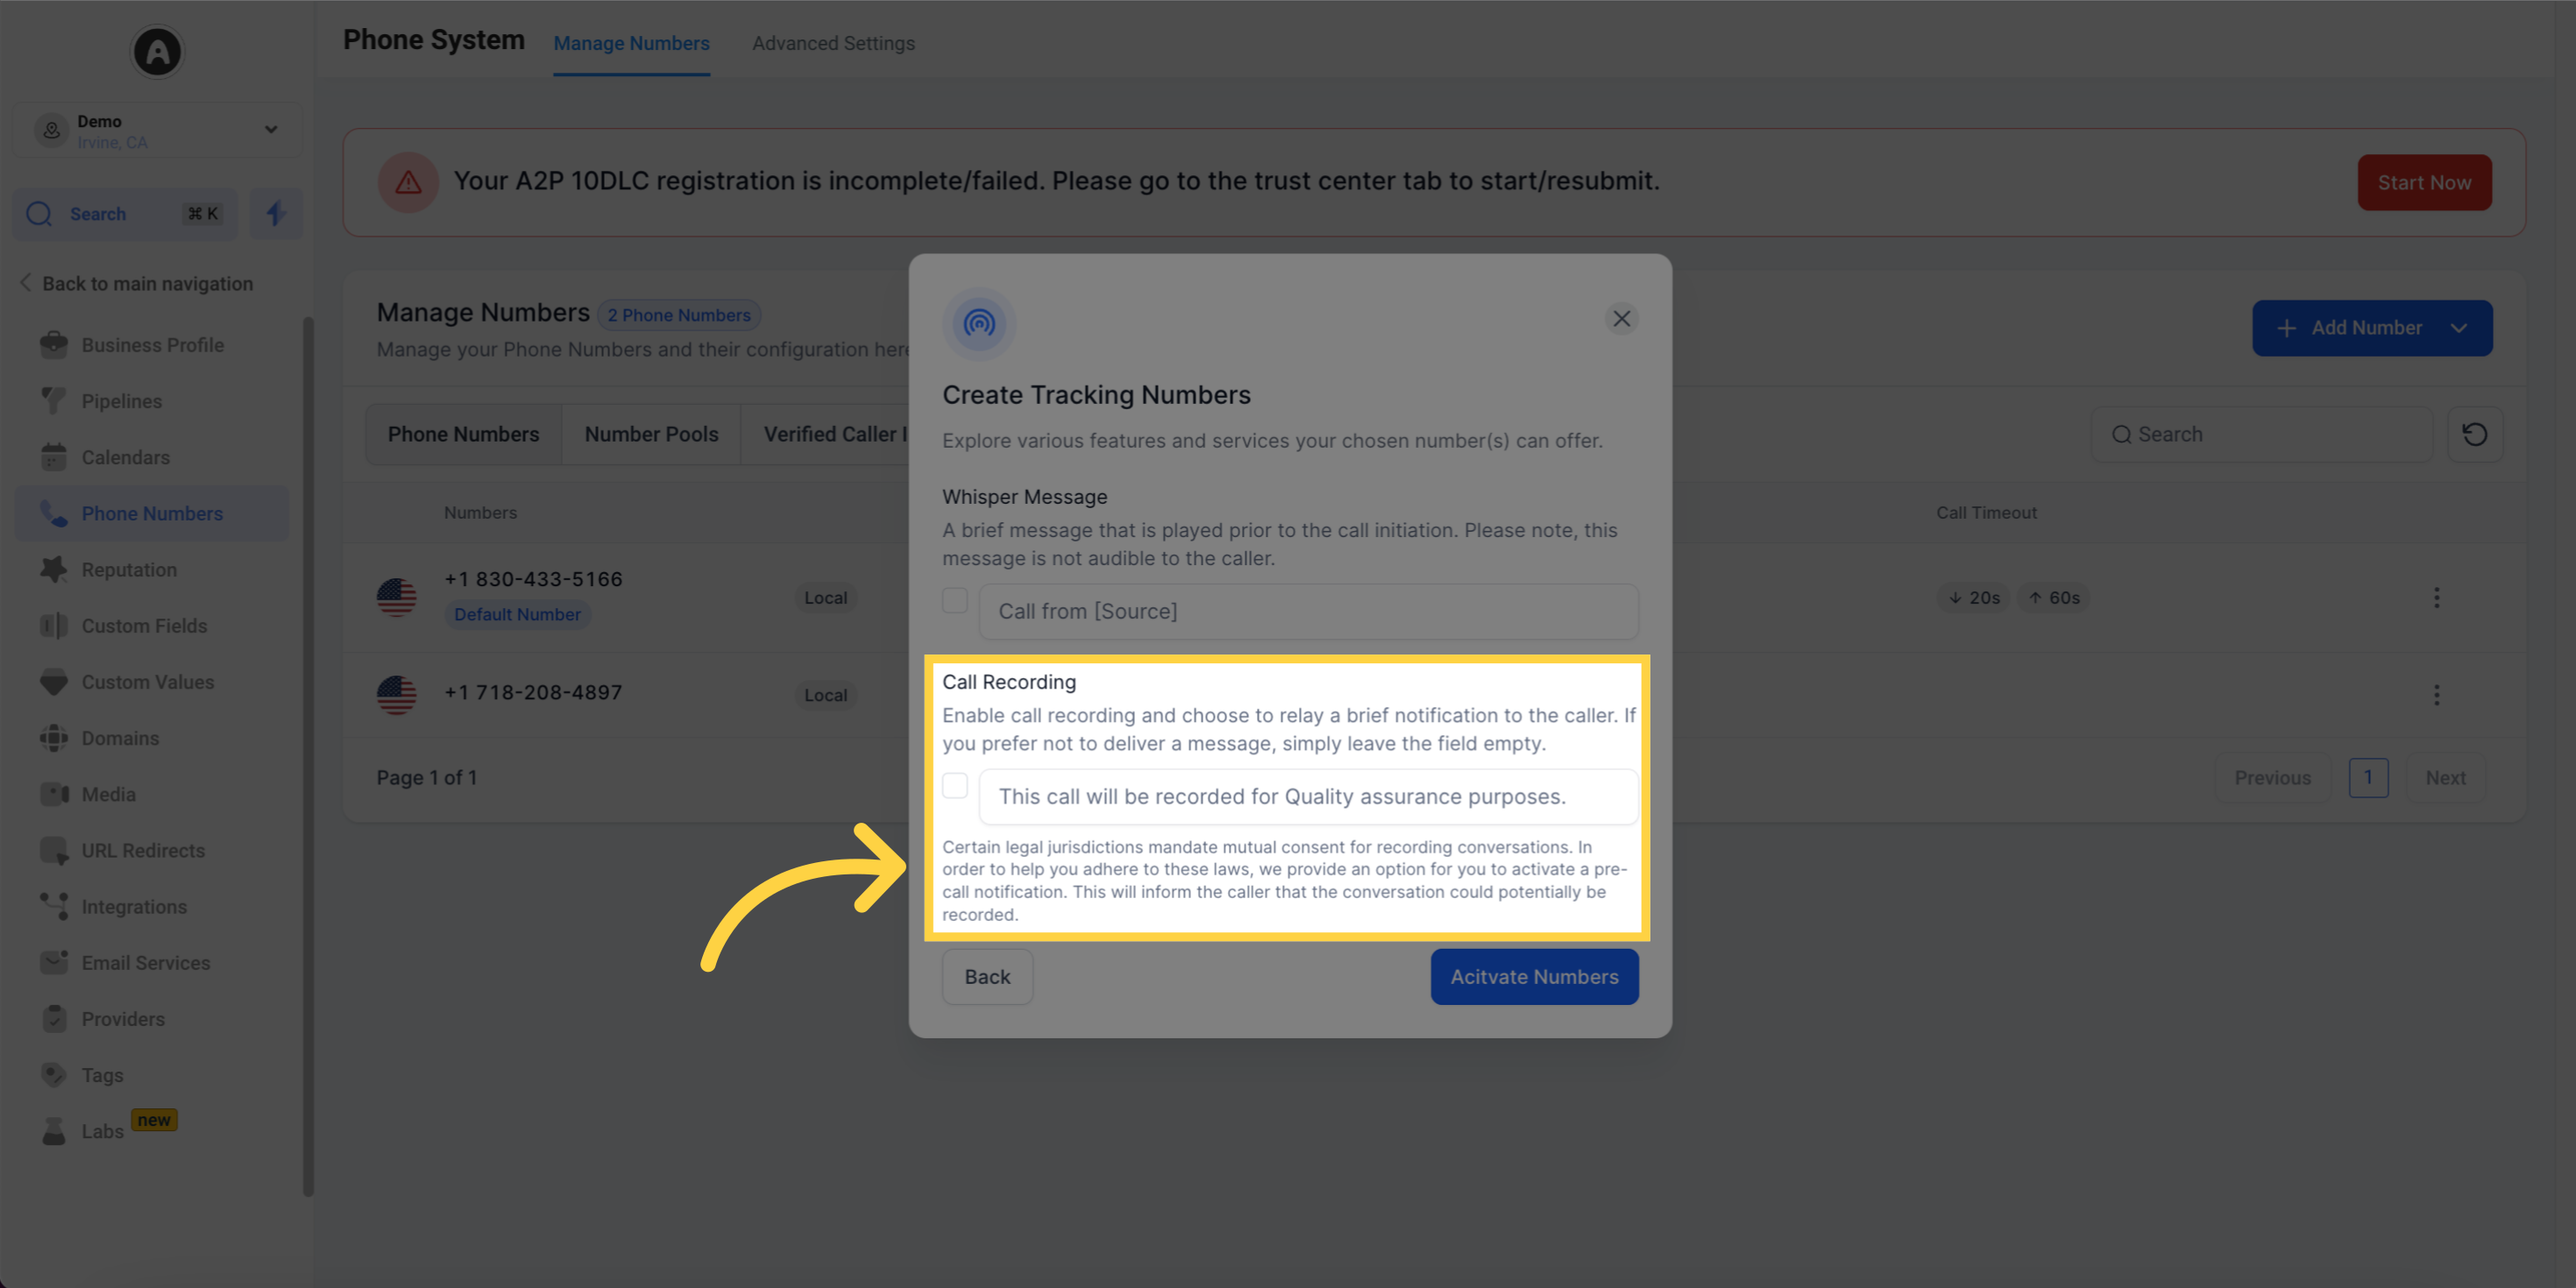
Select the phone number(s) you want to use.

Click here to 'Choose Phone Numbers'

11. Click here for "Whisper Message"

Click here for 'Whisper Message'

12. Click here for "Call Recording"

Click here for 'Call Recording'

13. Click here for "More Actions"

Click here for 'More Actions'

14. Click "Update tracking number"

Click 'Update tracking number'

15. Click here to copy "Normal Snippet"

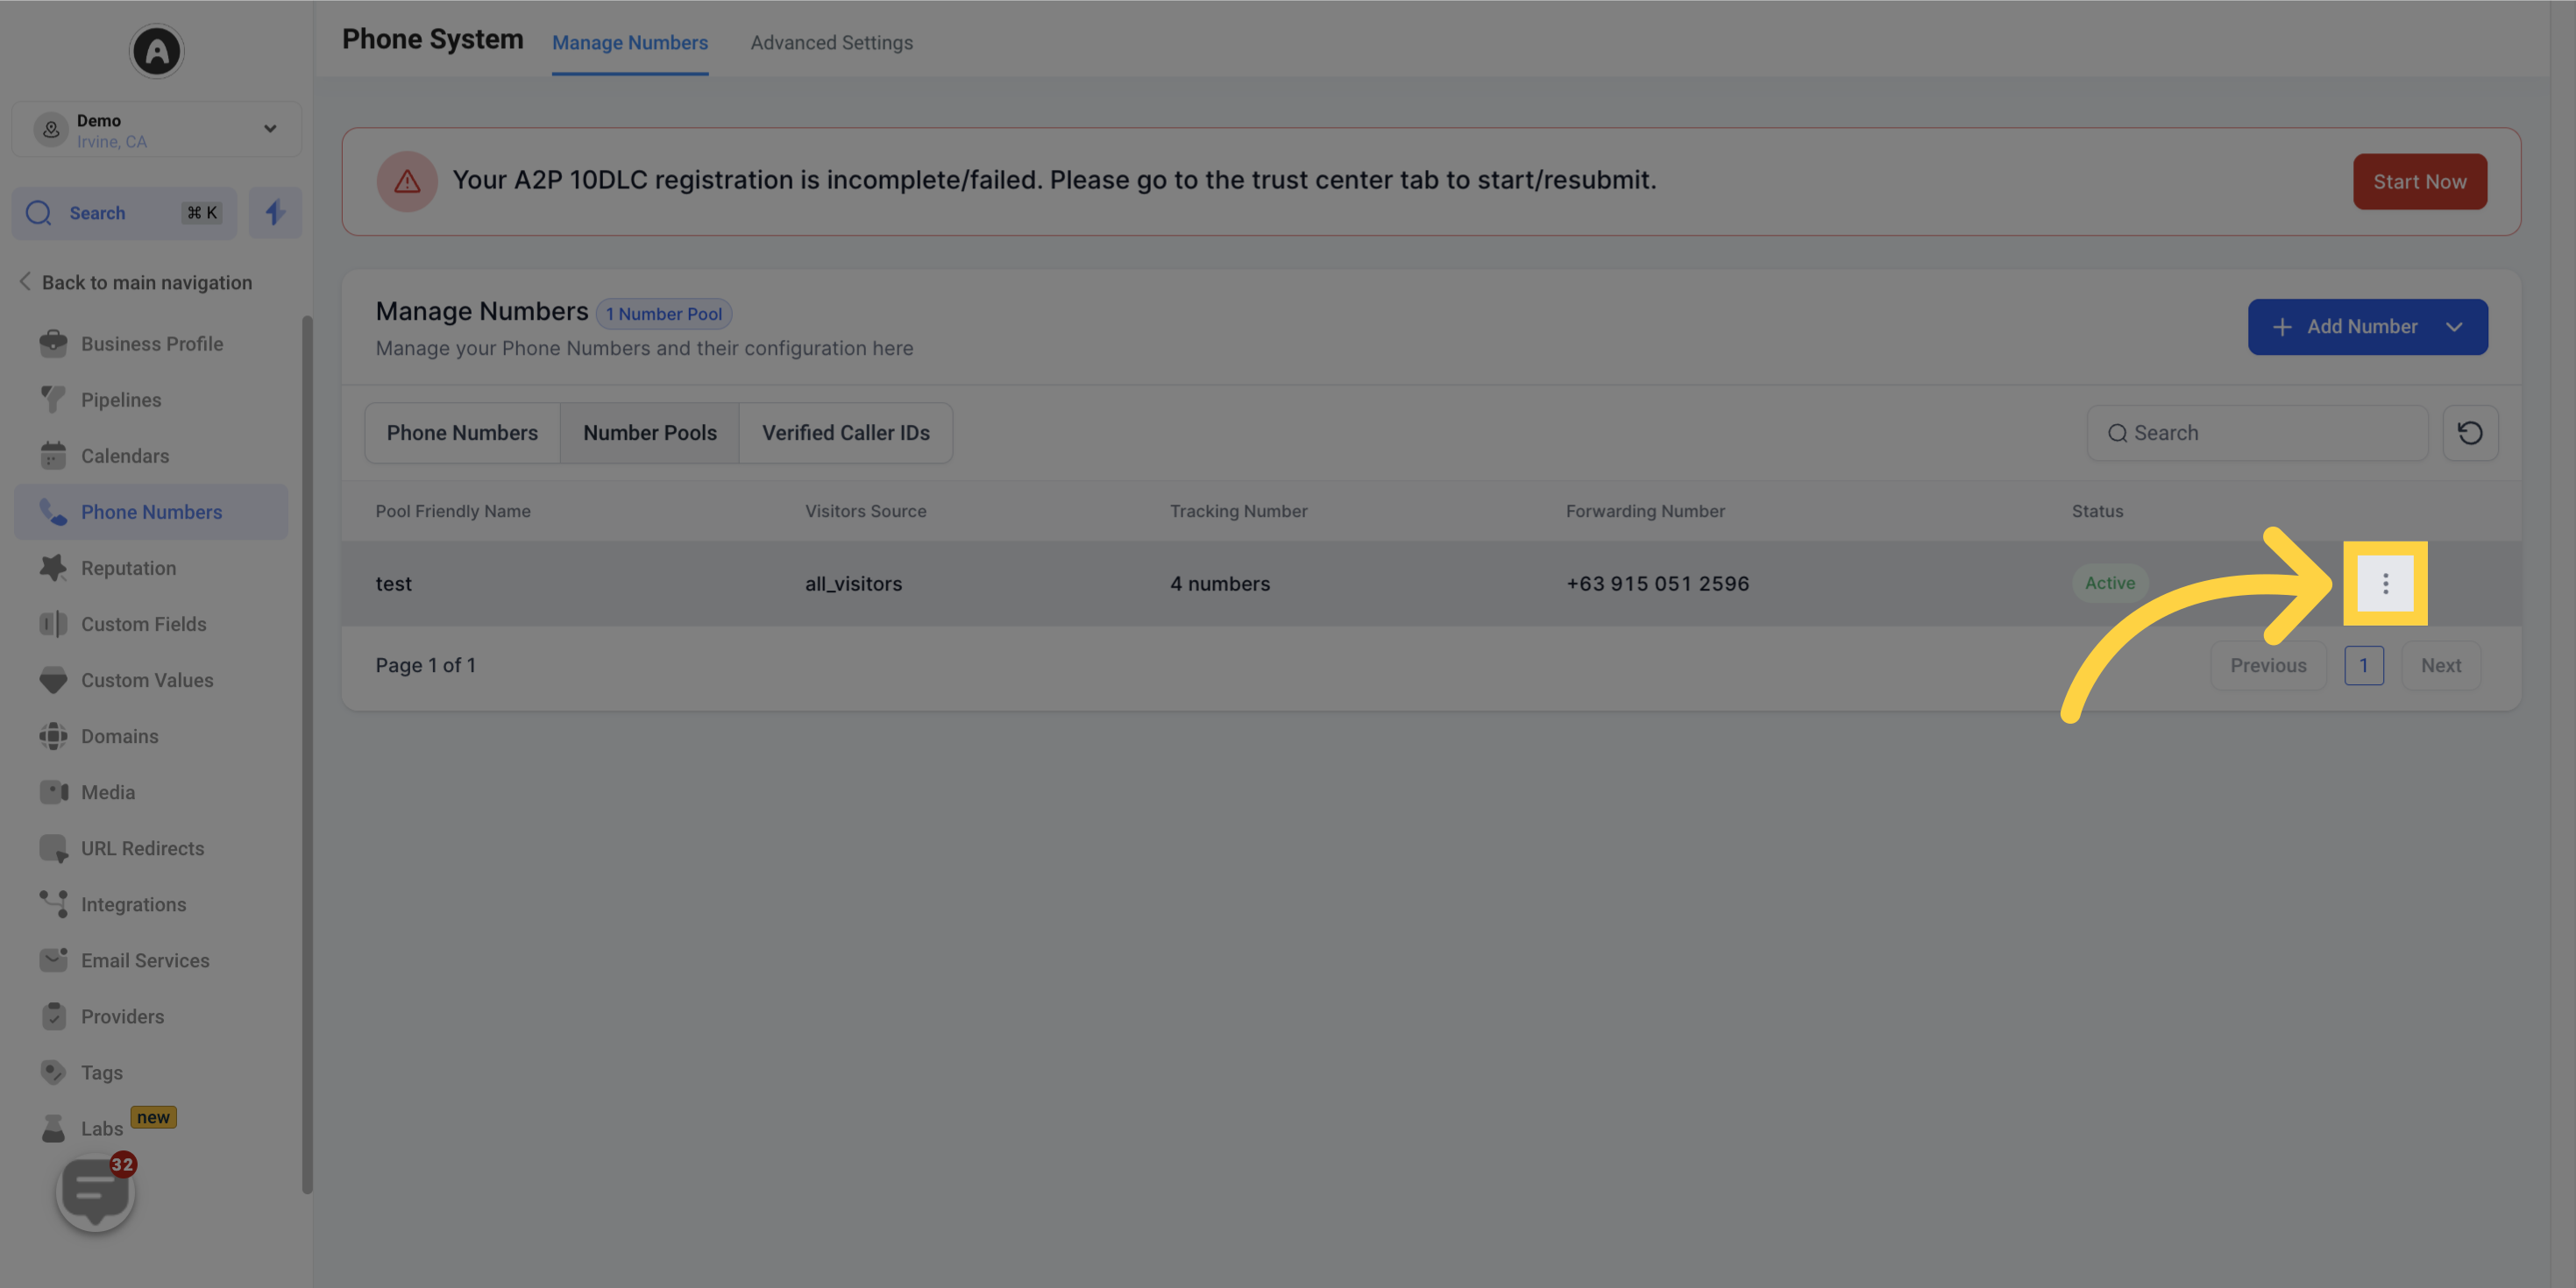
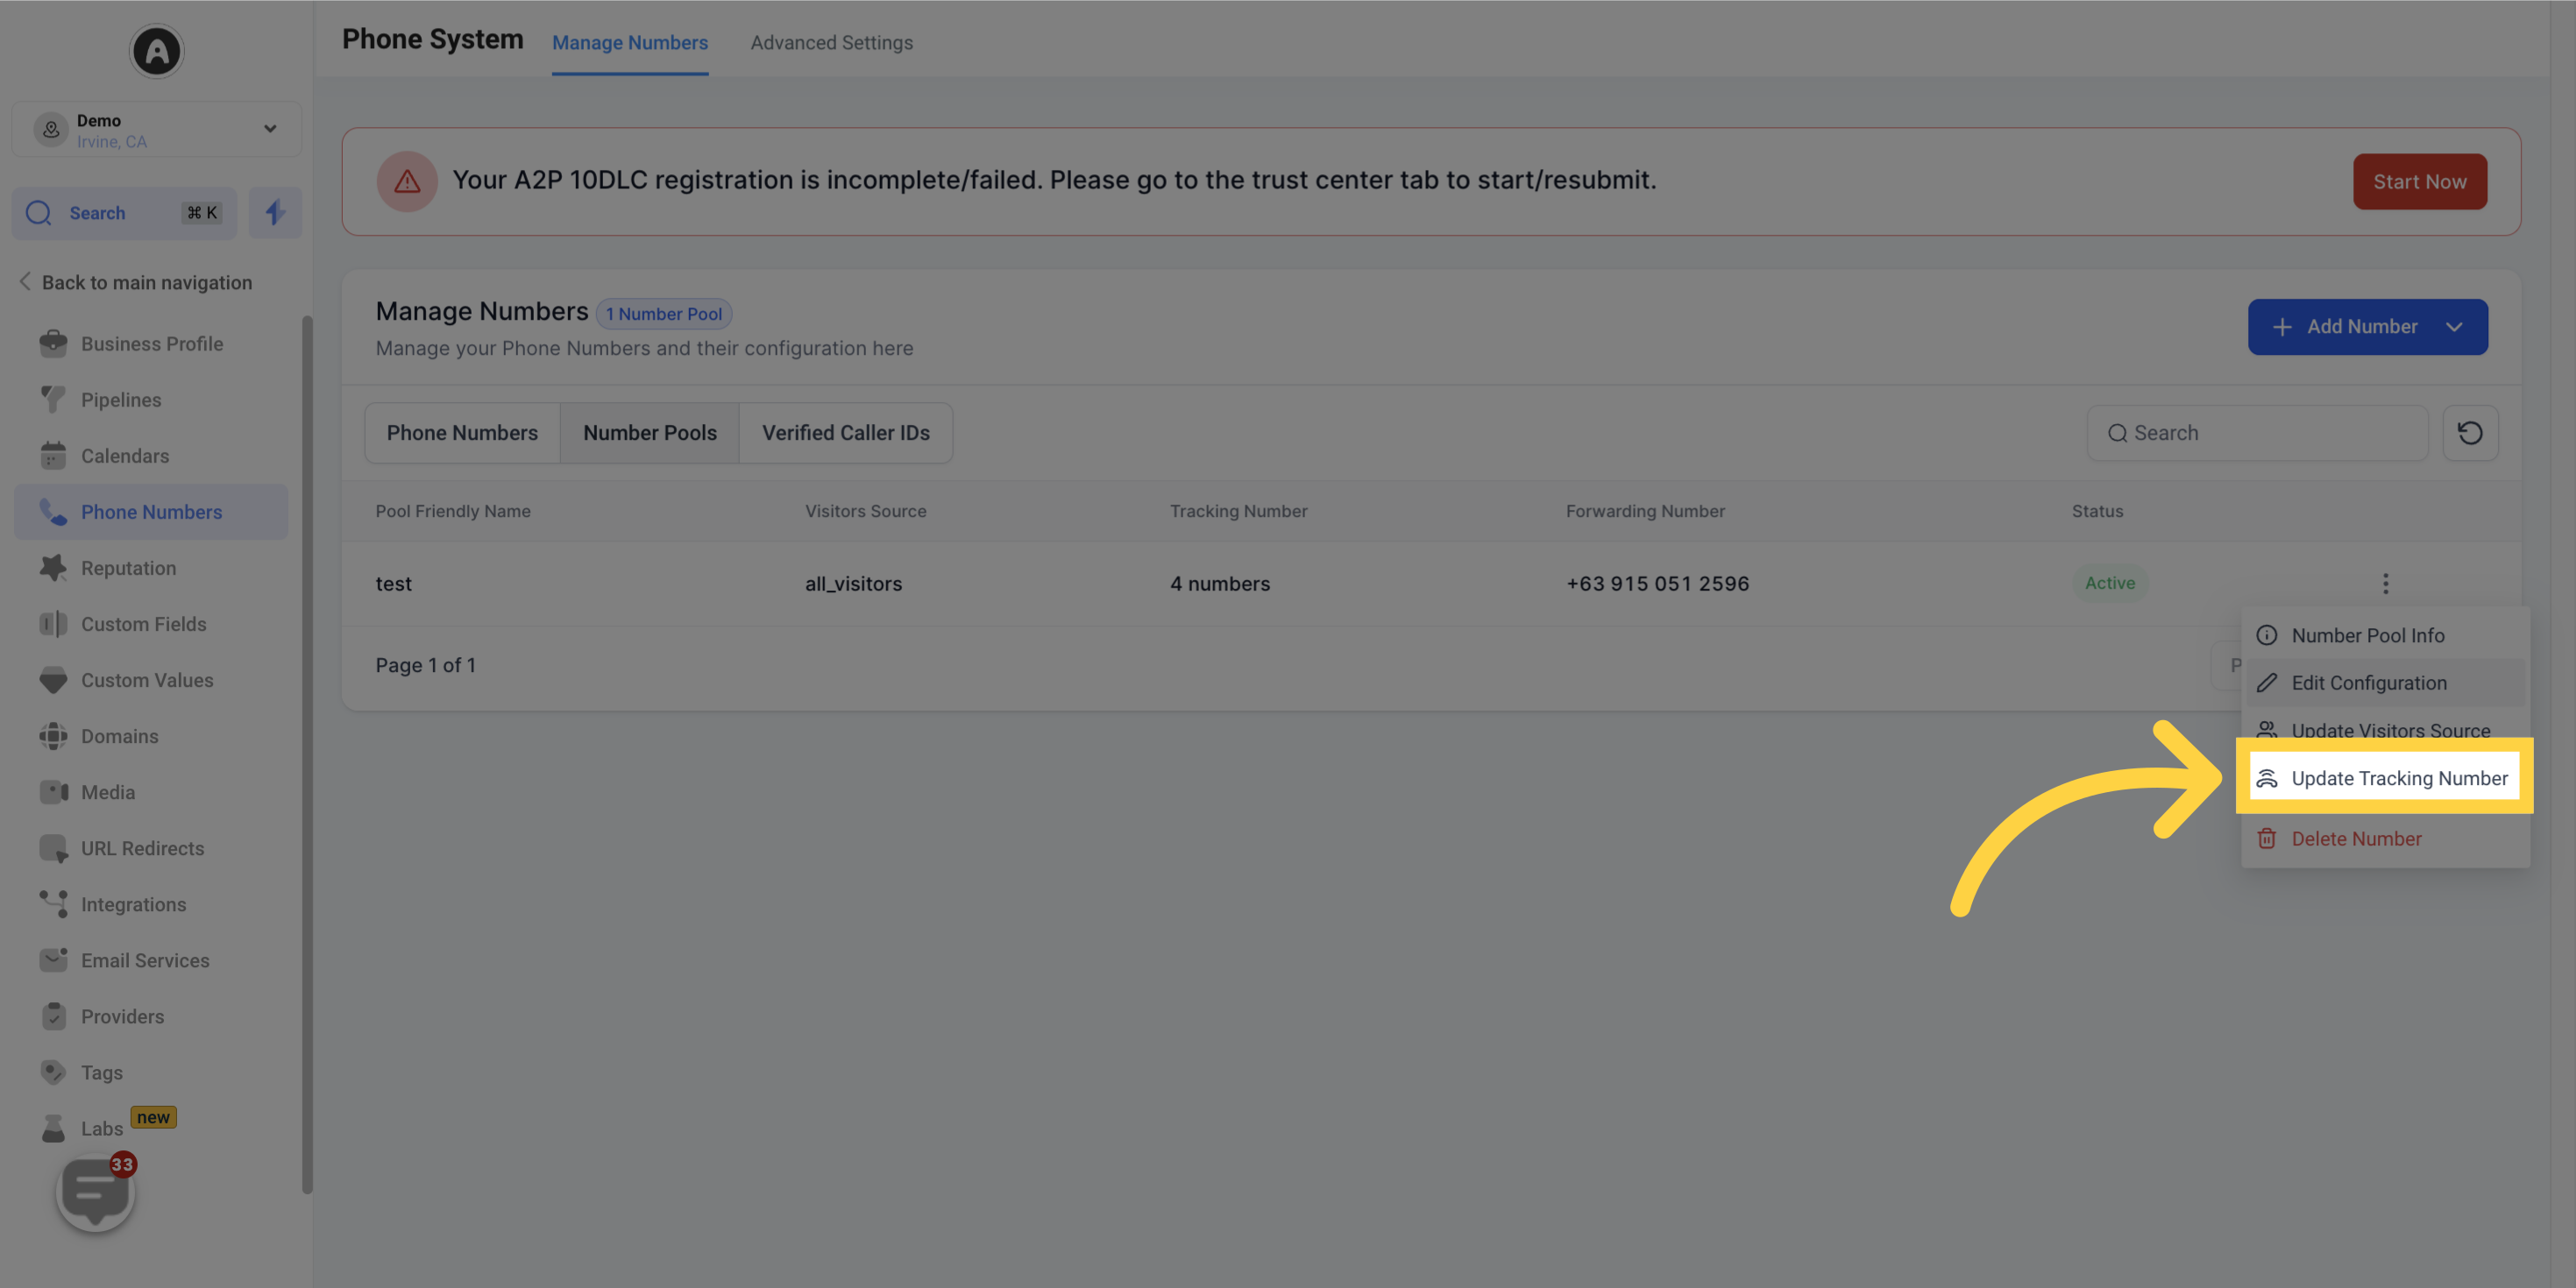
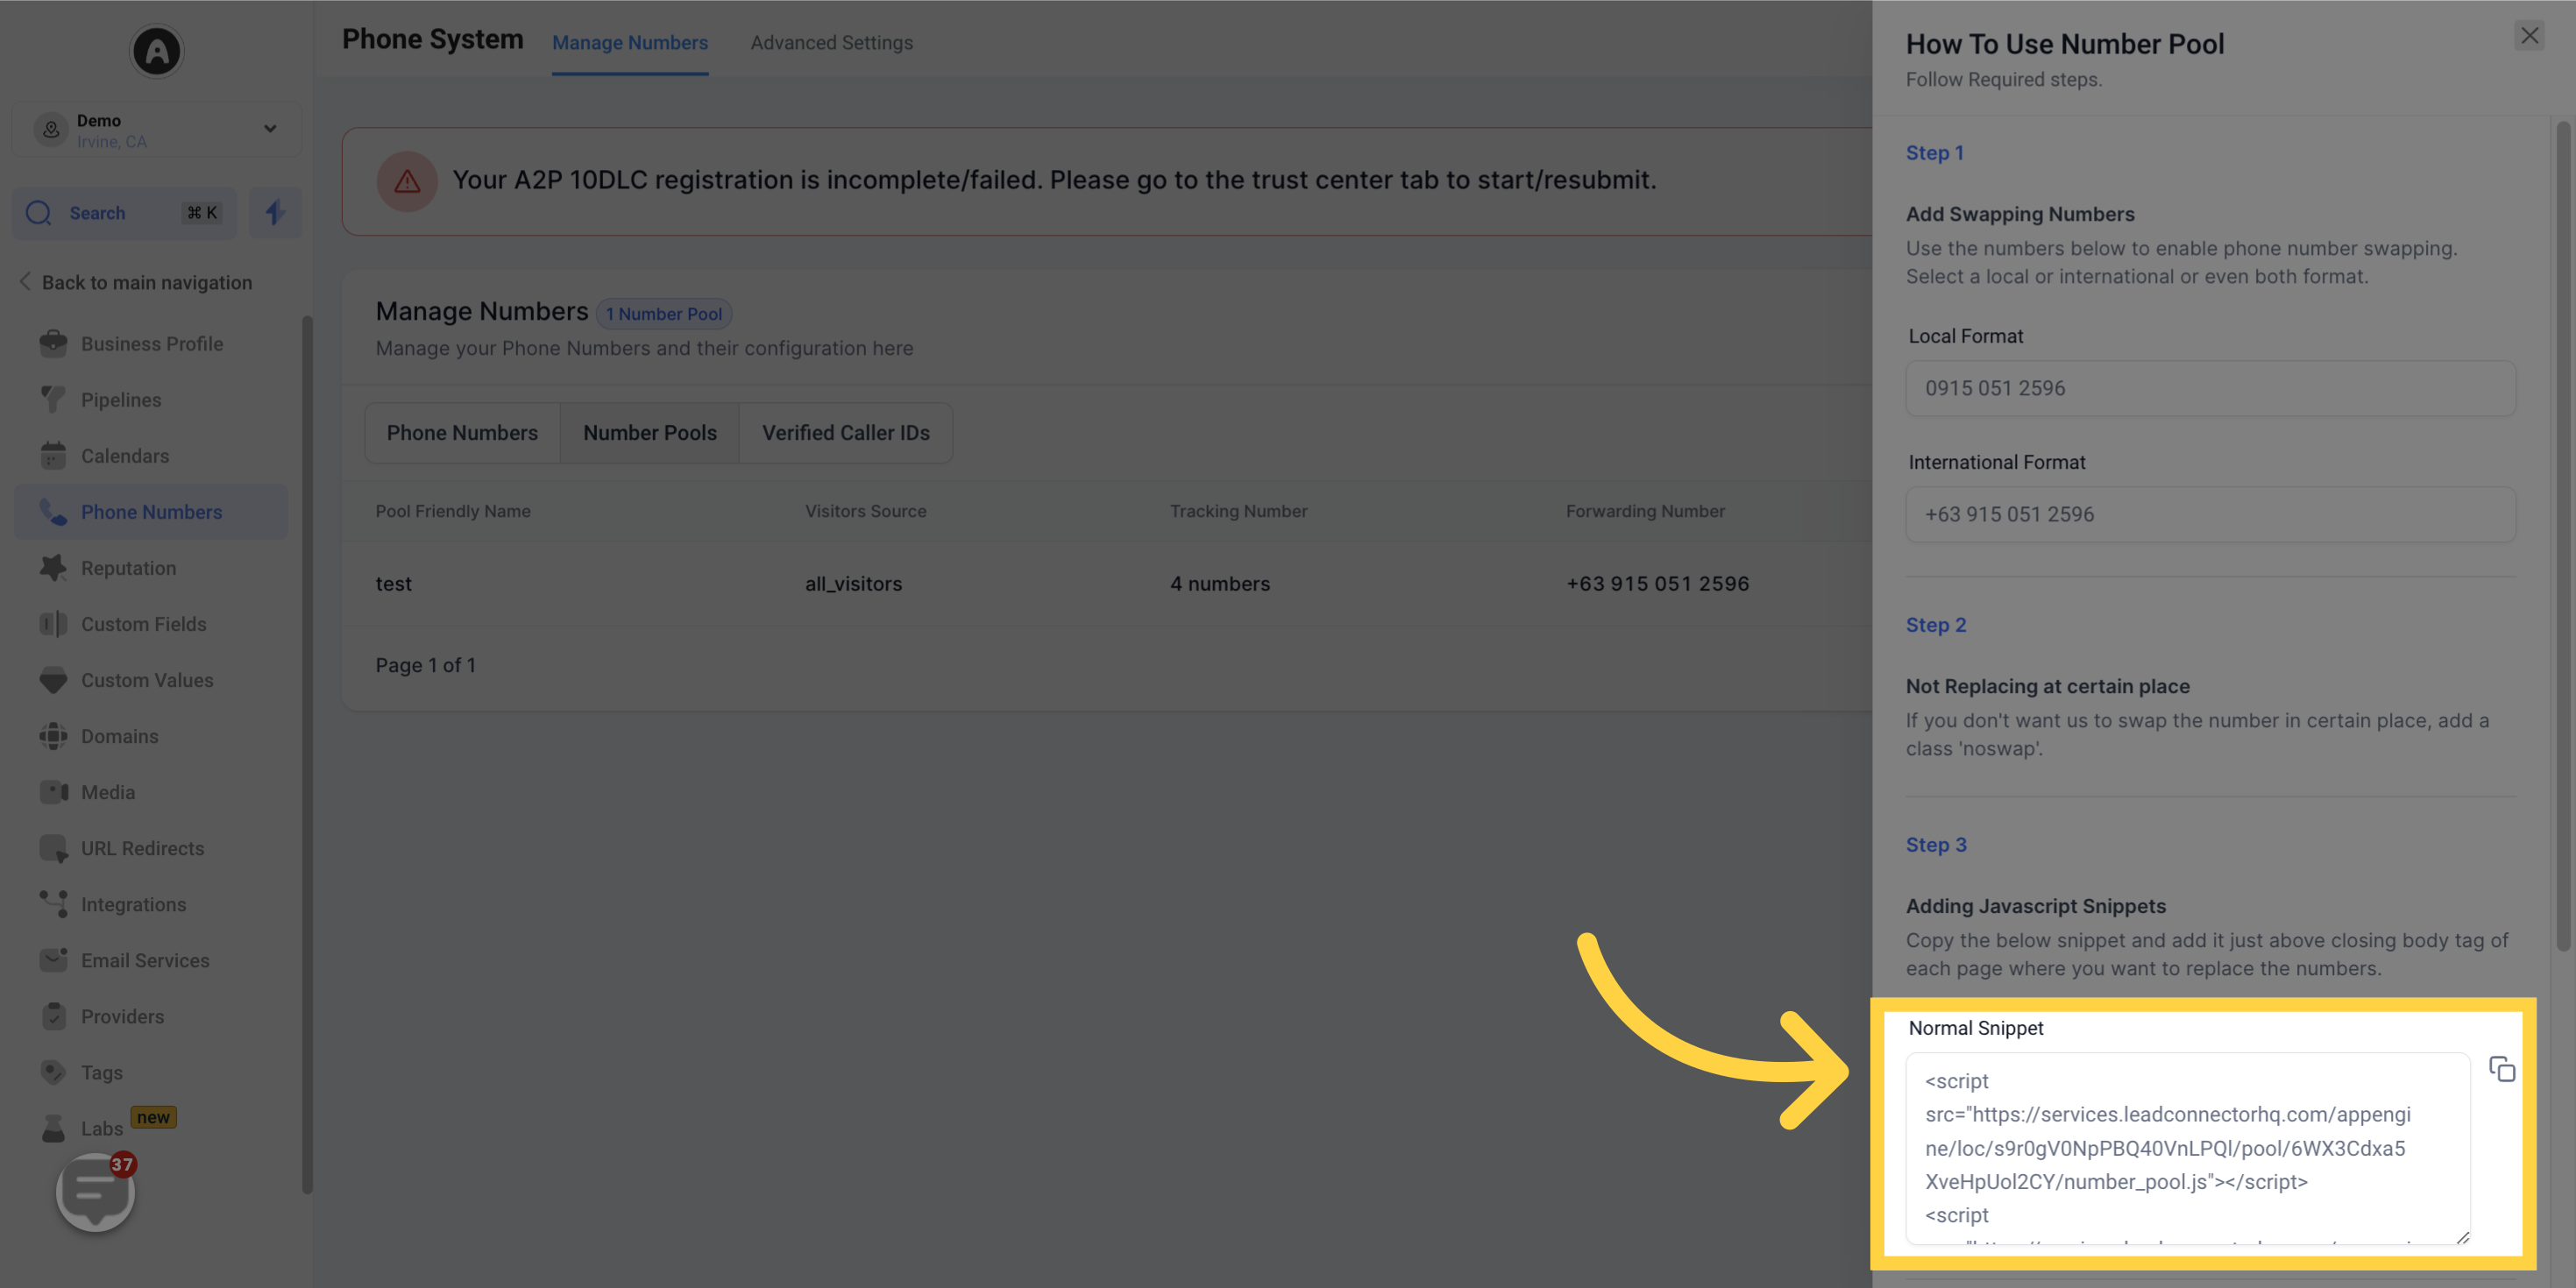
After setting up the number pool, integrate the snippet on your website by clicking on the information icon

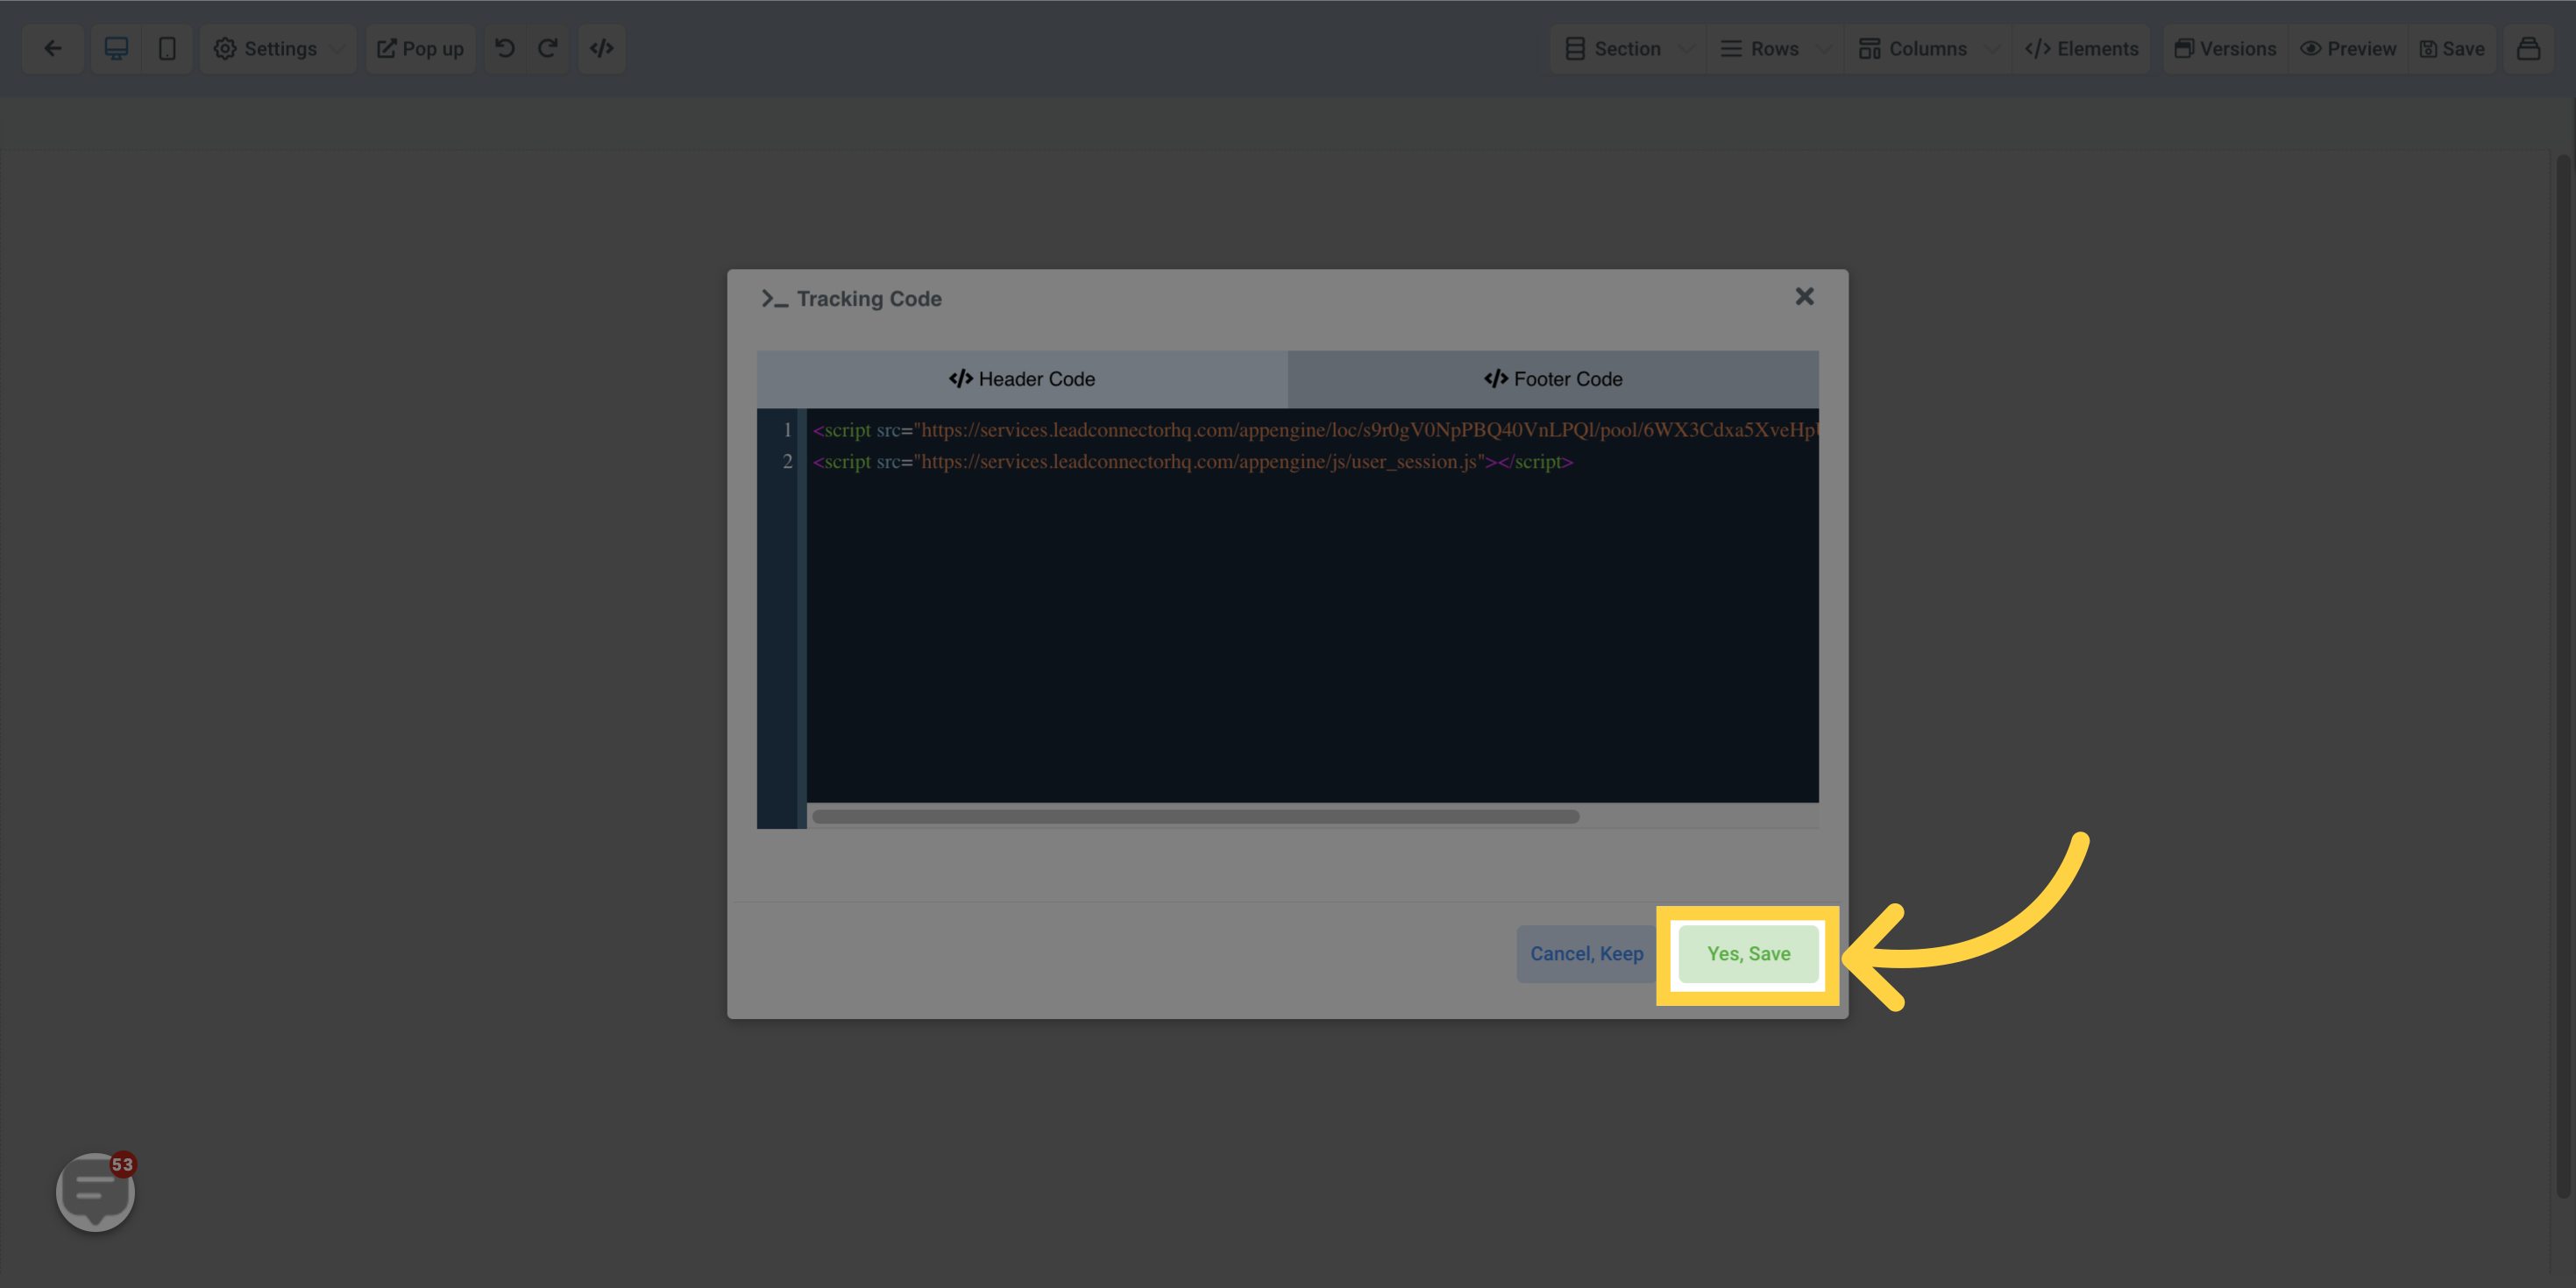
Copy the normal snippet provided.

Click here to copy 'Normal Snippet'

16. Click "Marketing"

Click 'Marketing'

17. Click "Funnels"

Click 'Funnels'

18. Click "Settings"

Paste the Copied Normal Snippet here

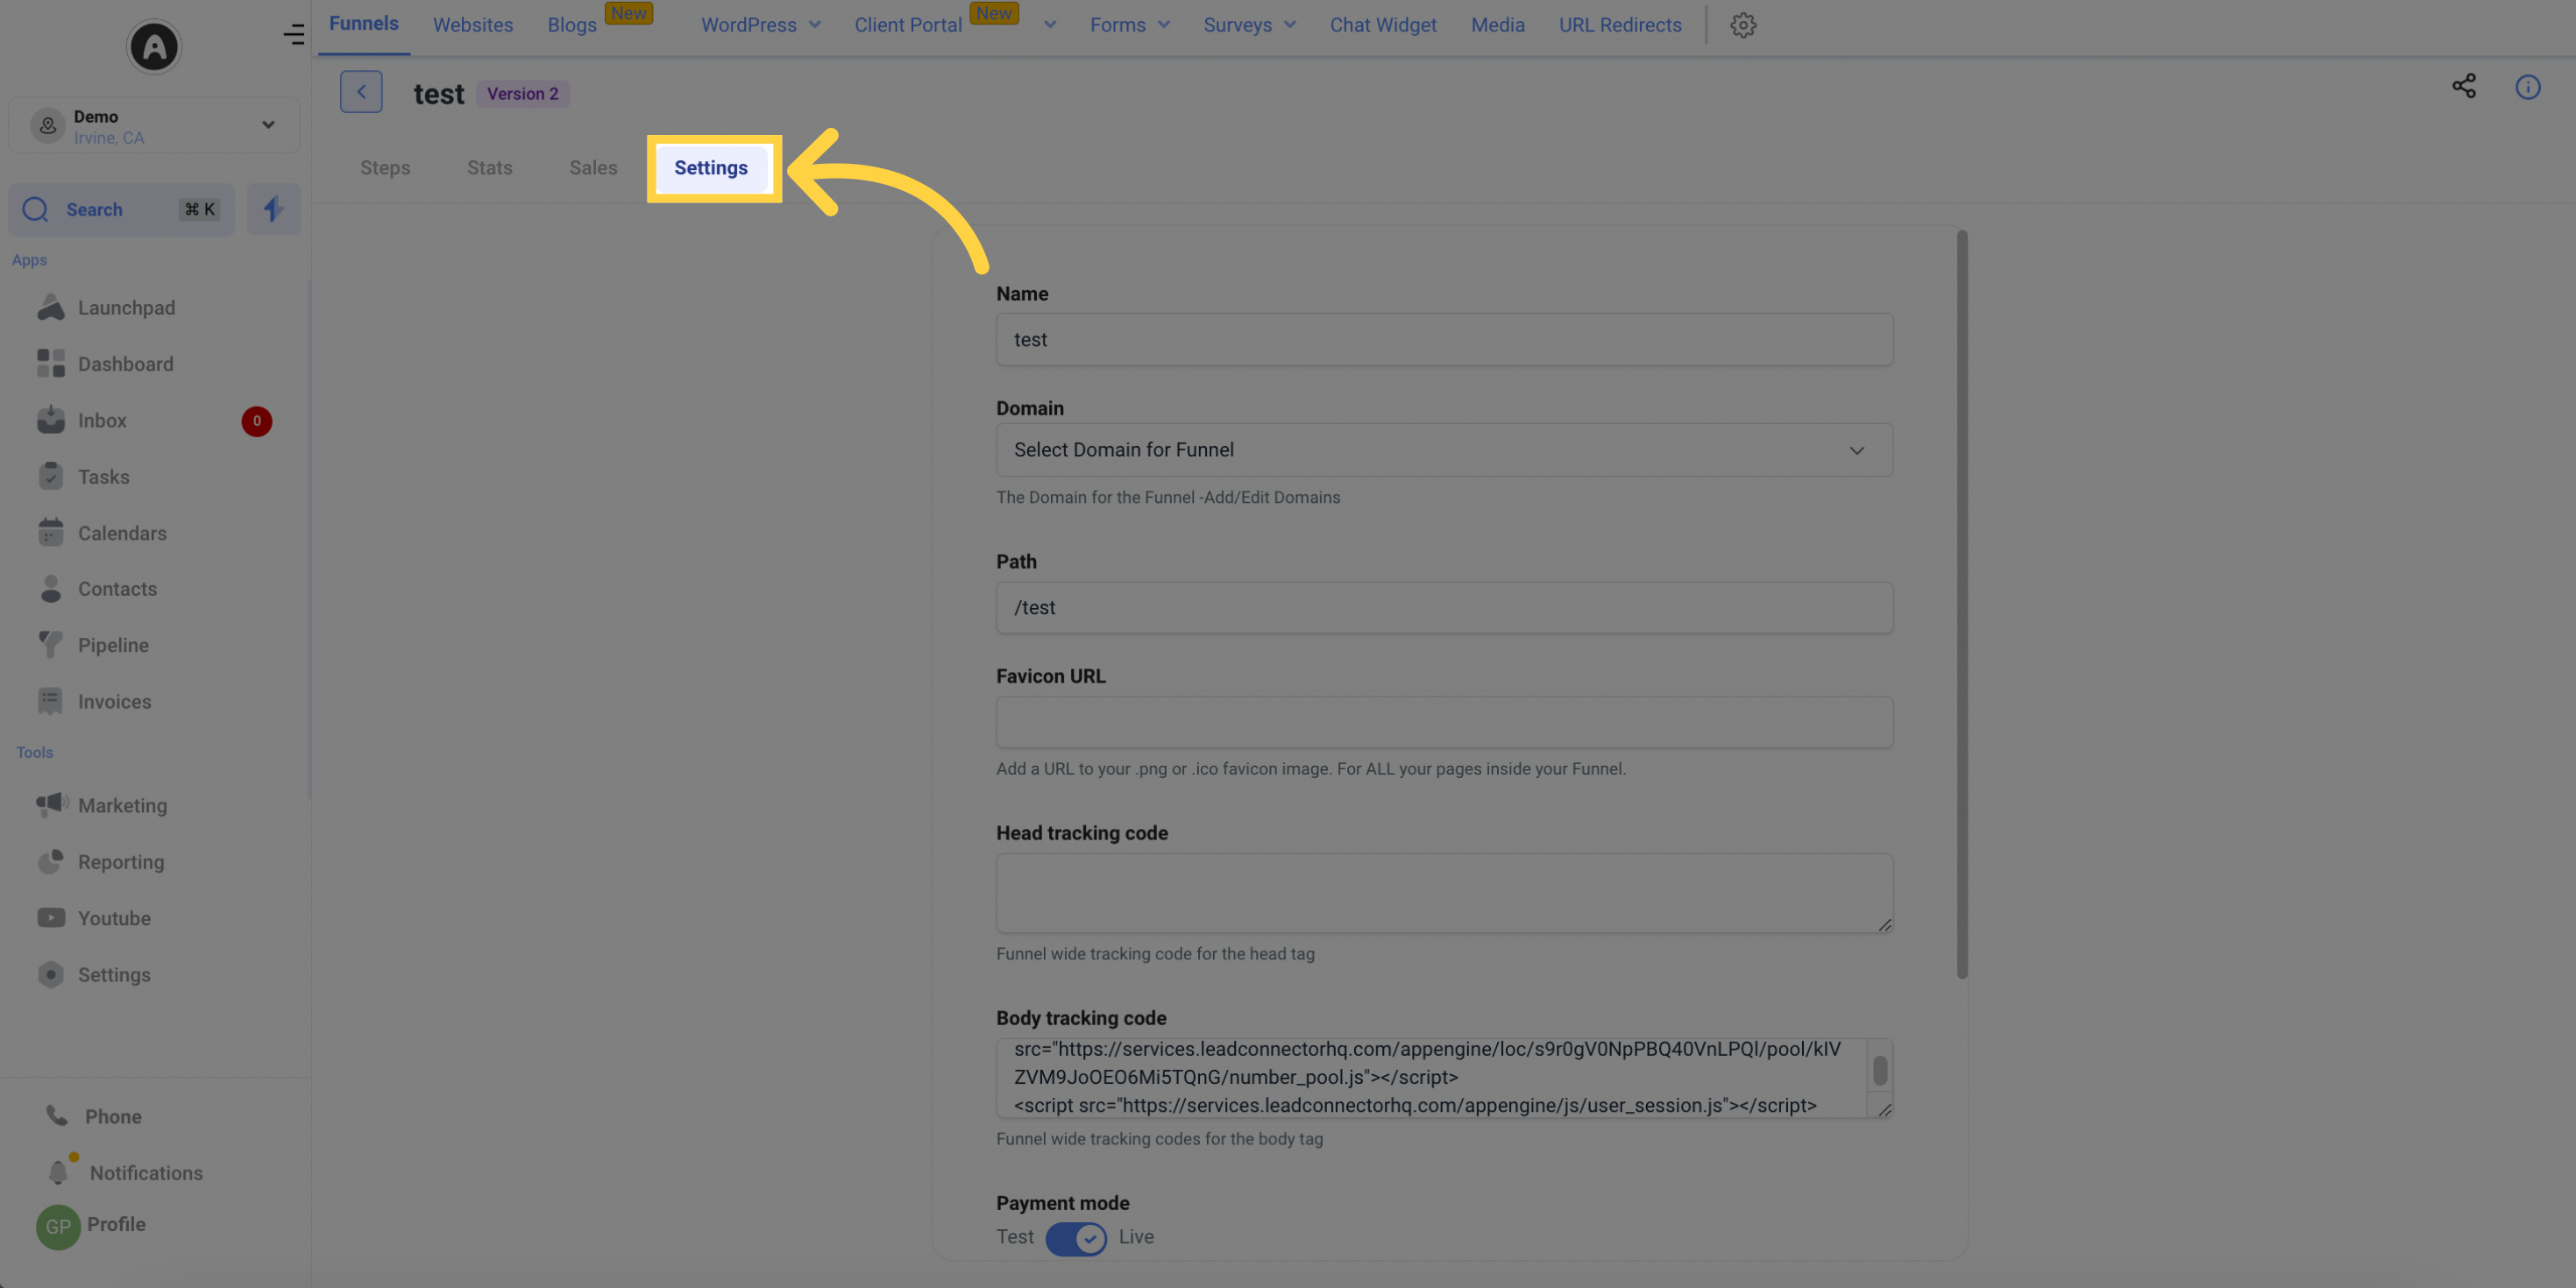
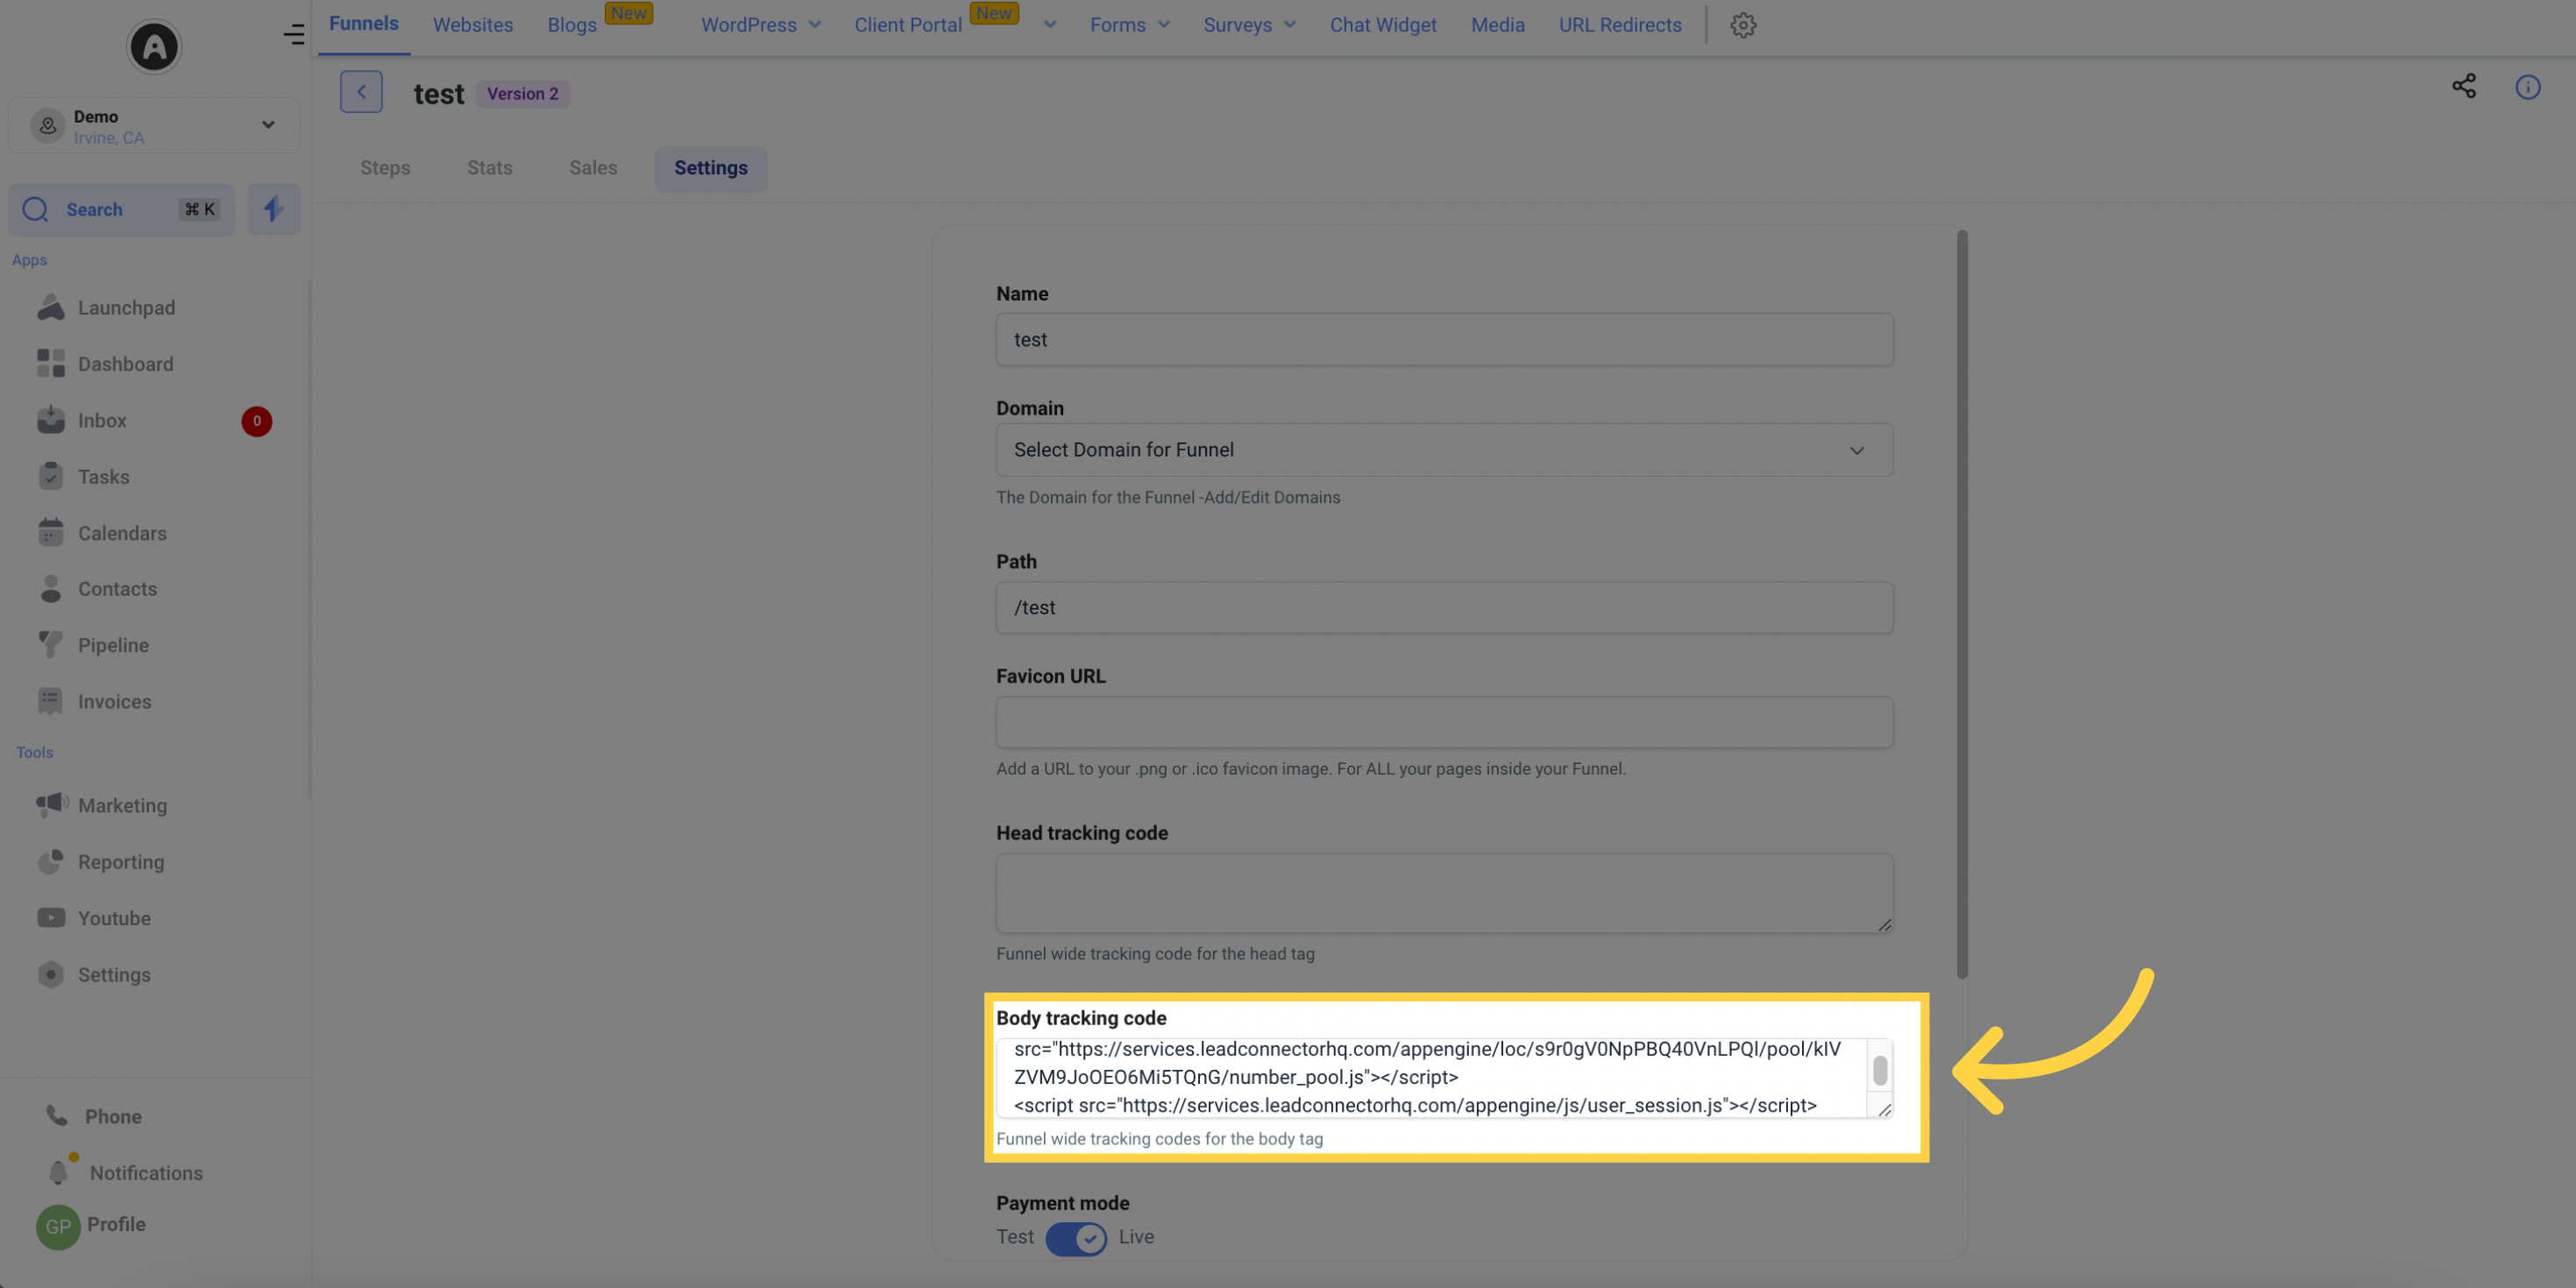
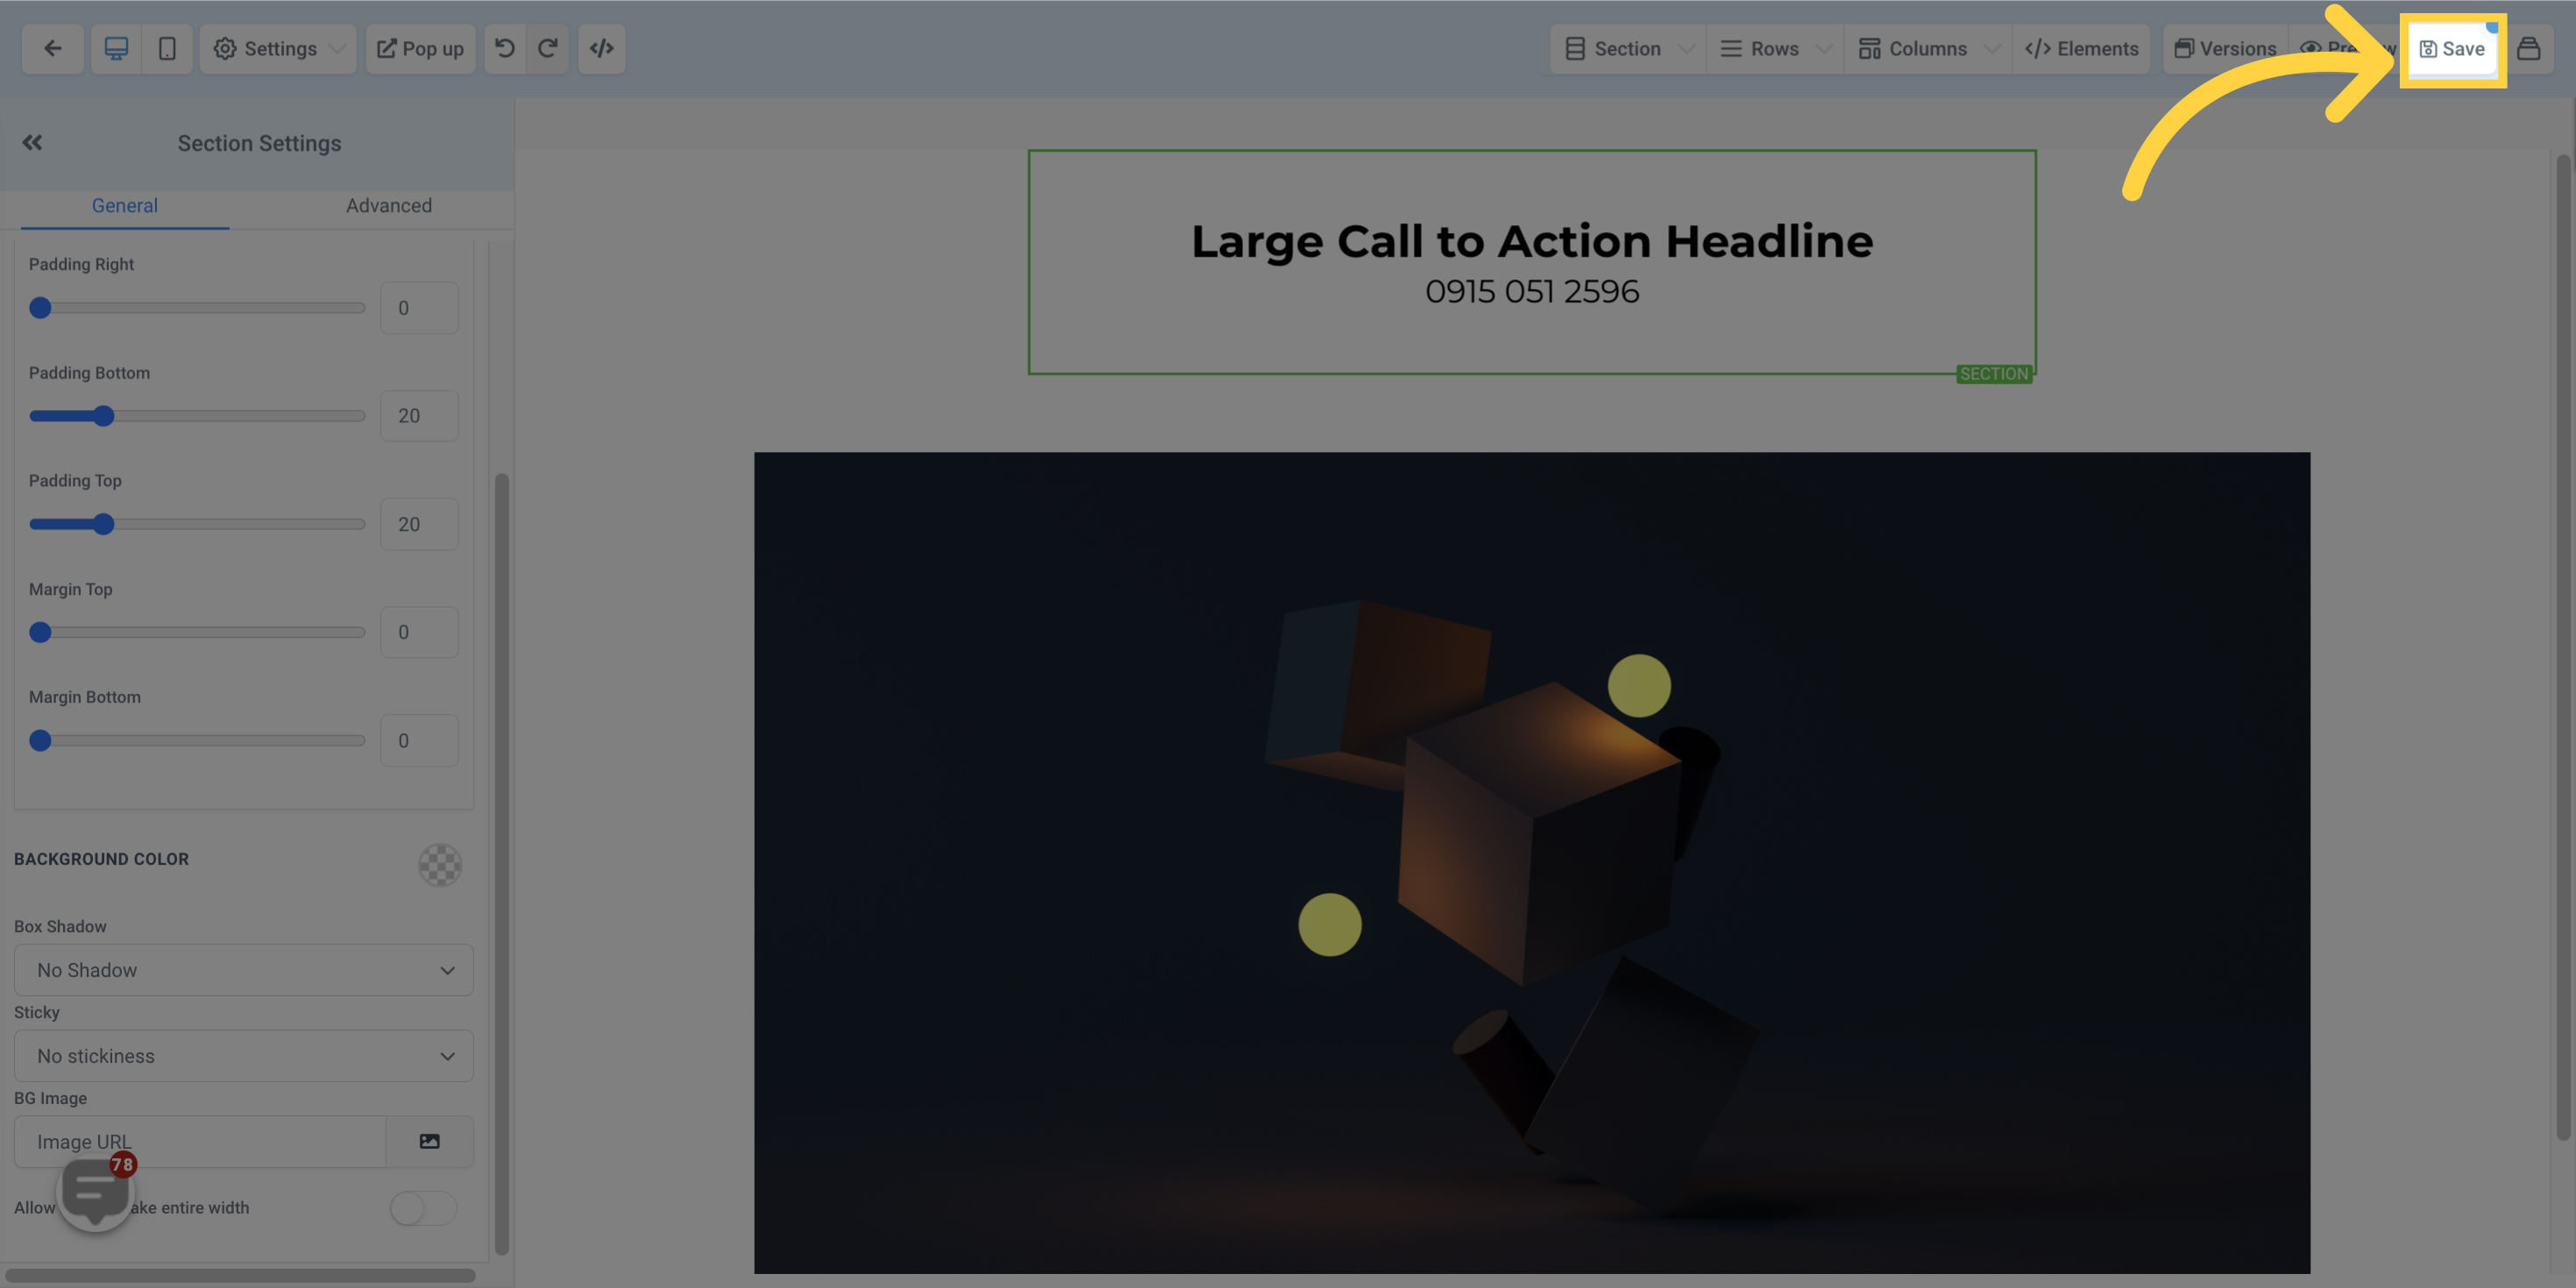
Save your changes. This will swap the number within the entire funnel/website.

19. Click "Edit Page"

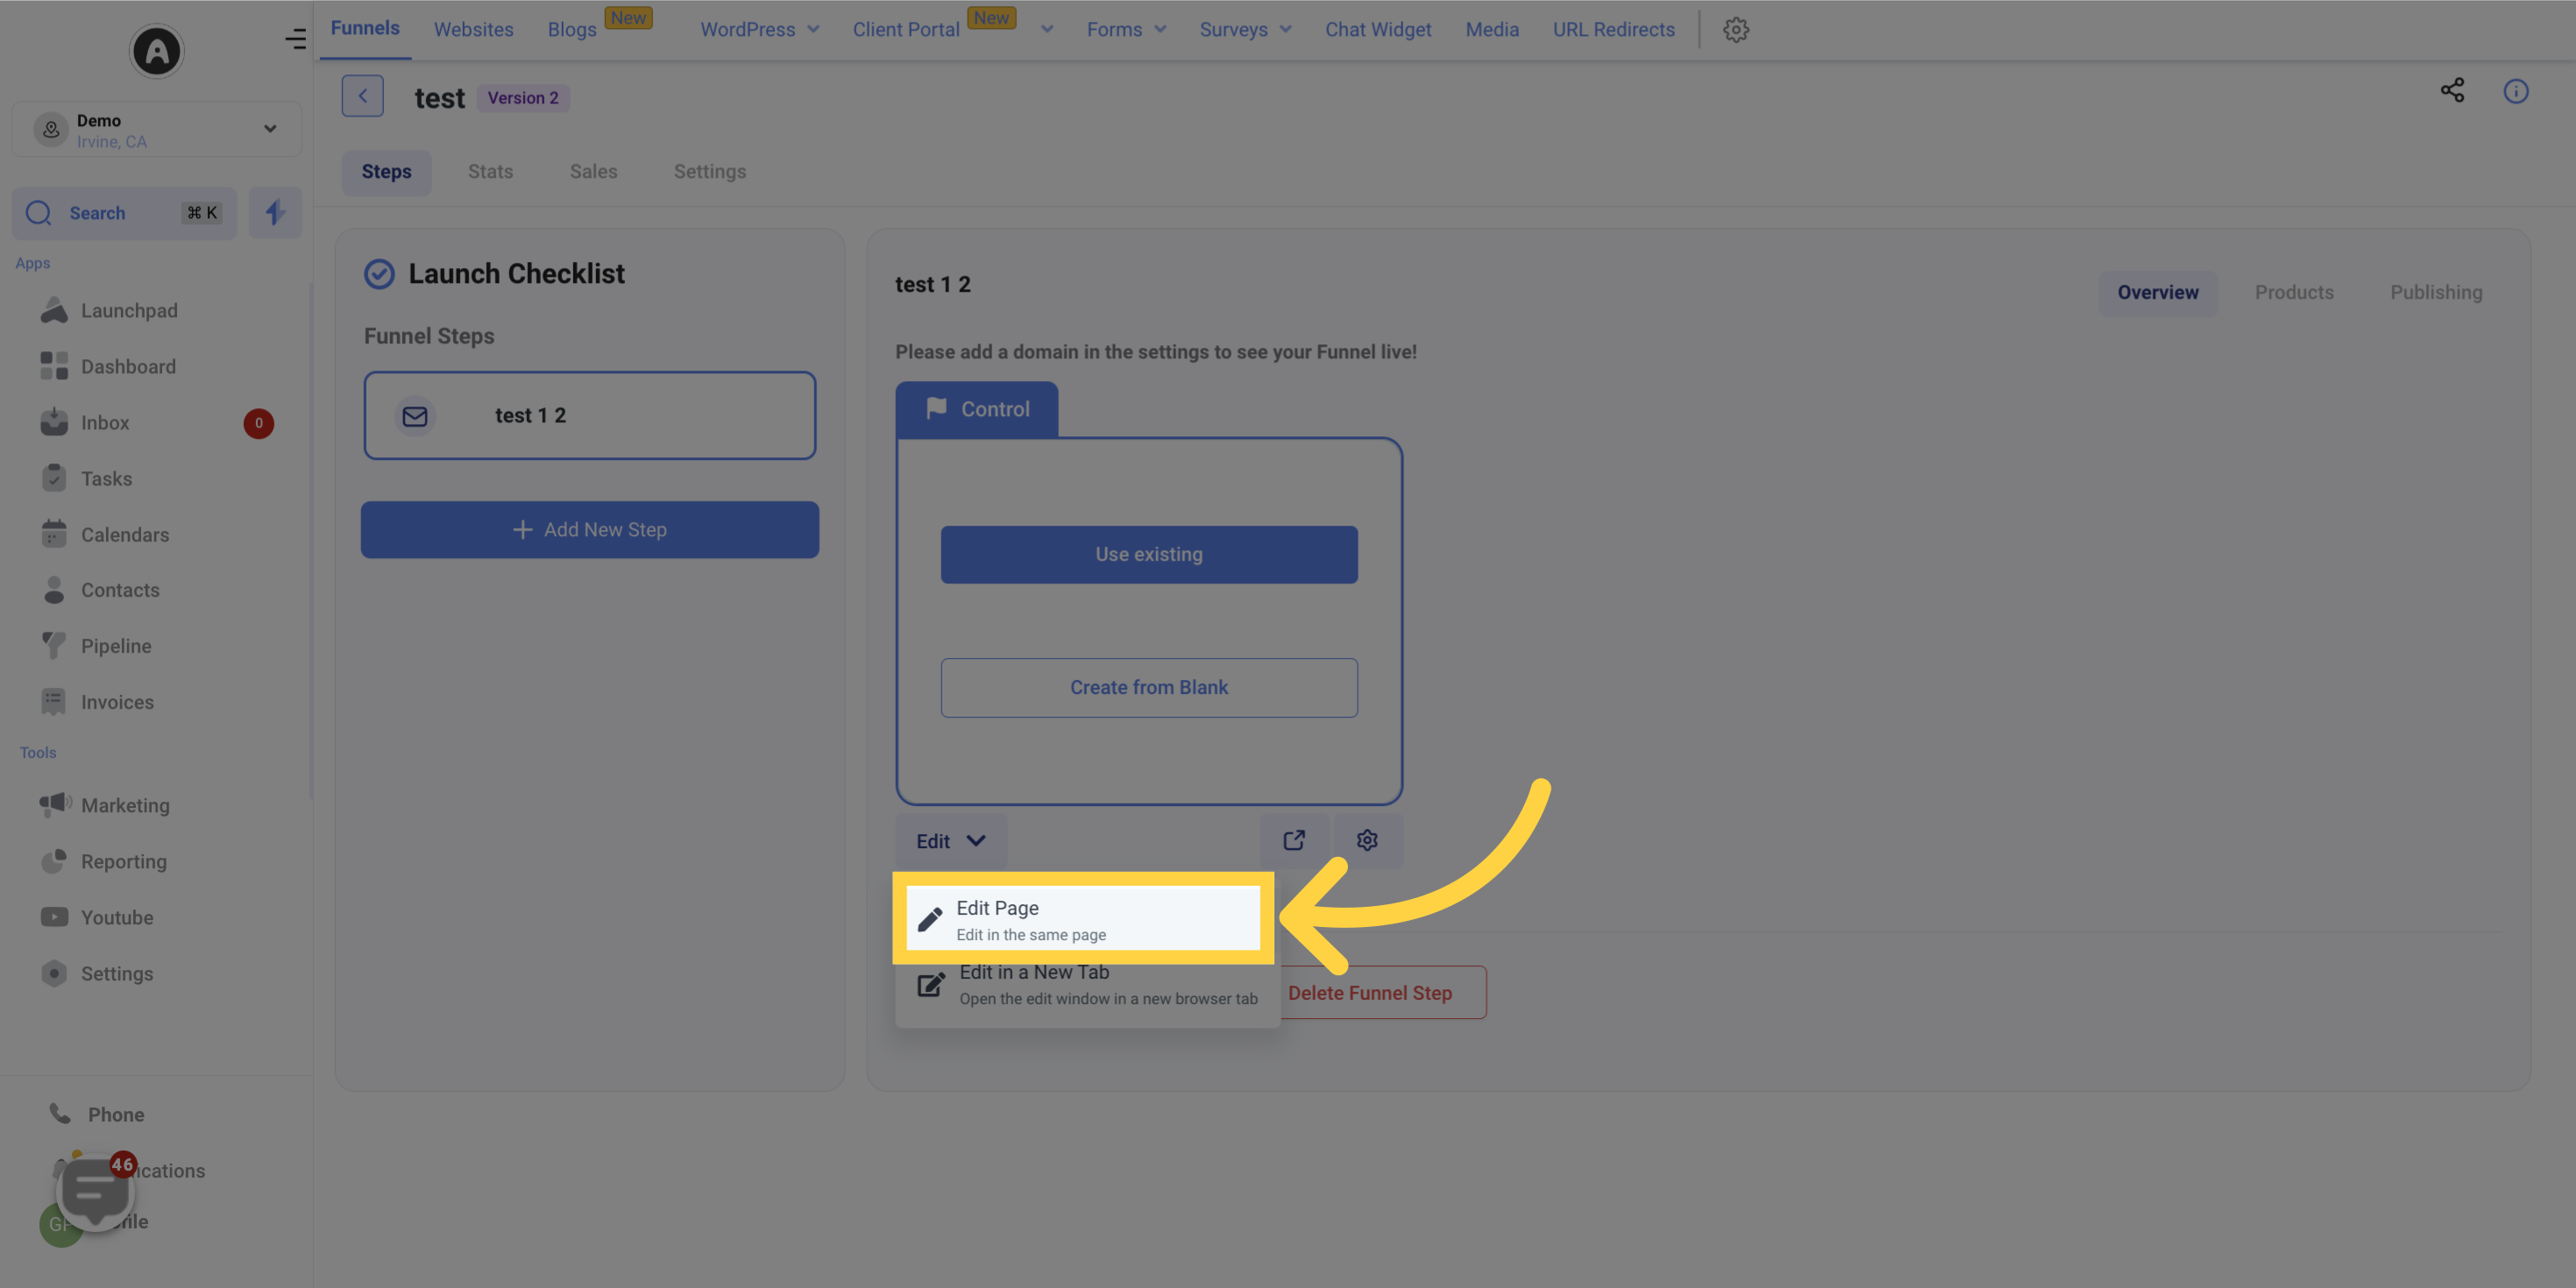
If you want the number to swap on a single page, click on "Edit Page"

Click 'Edit Page'

Click "Tracking Code"

Click 'Tracking Code'

Paste the Copied Normal Snippet here

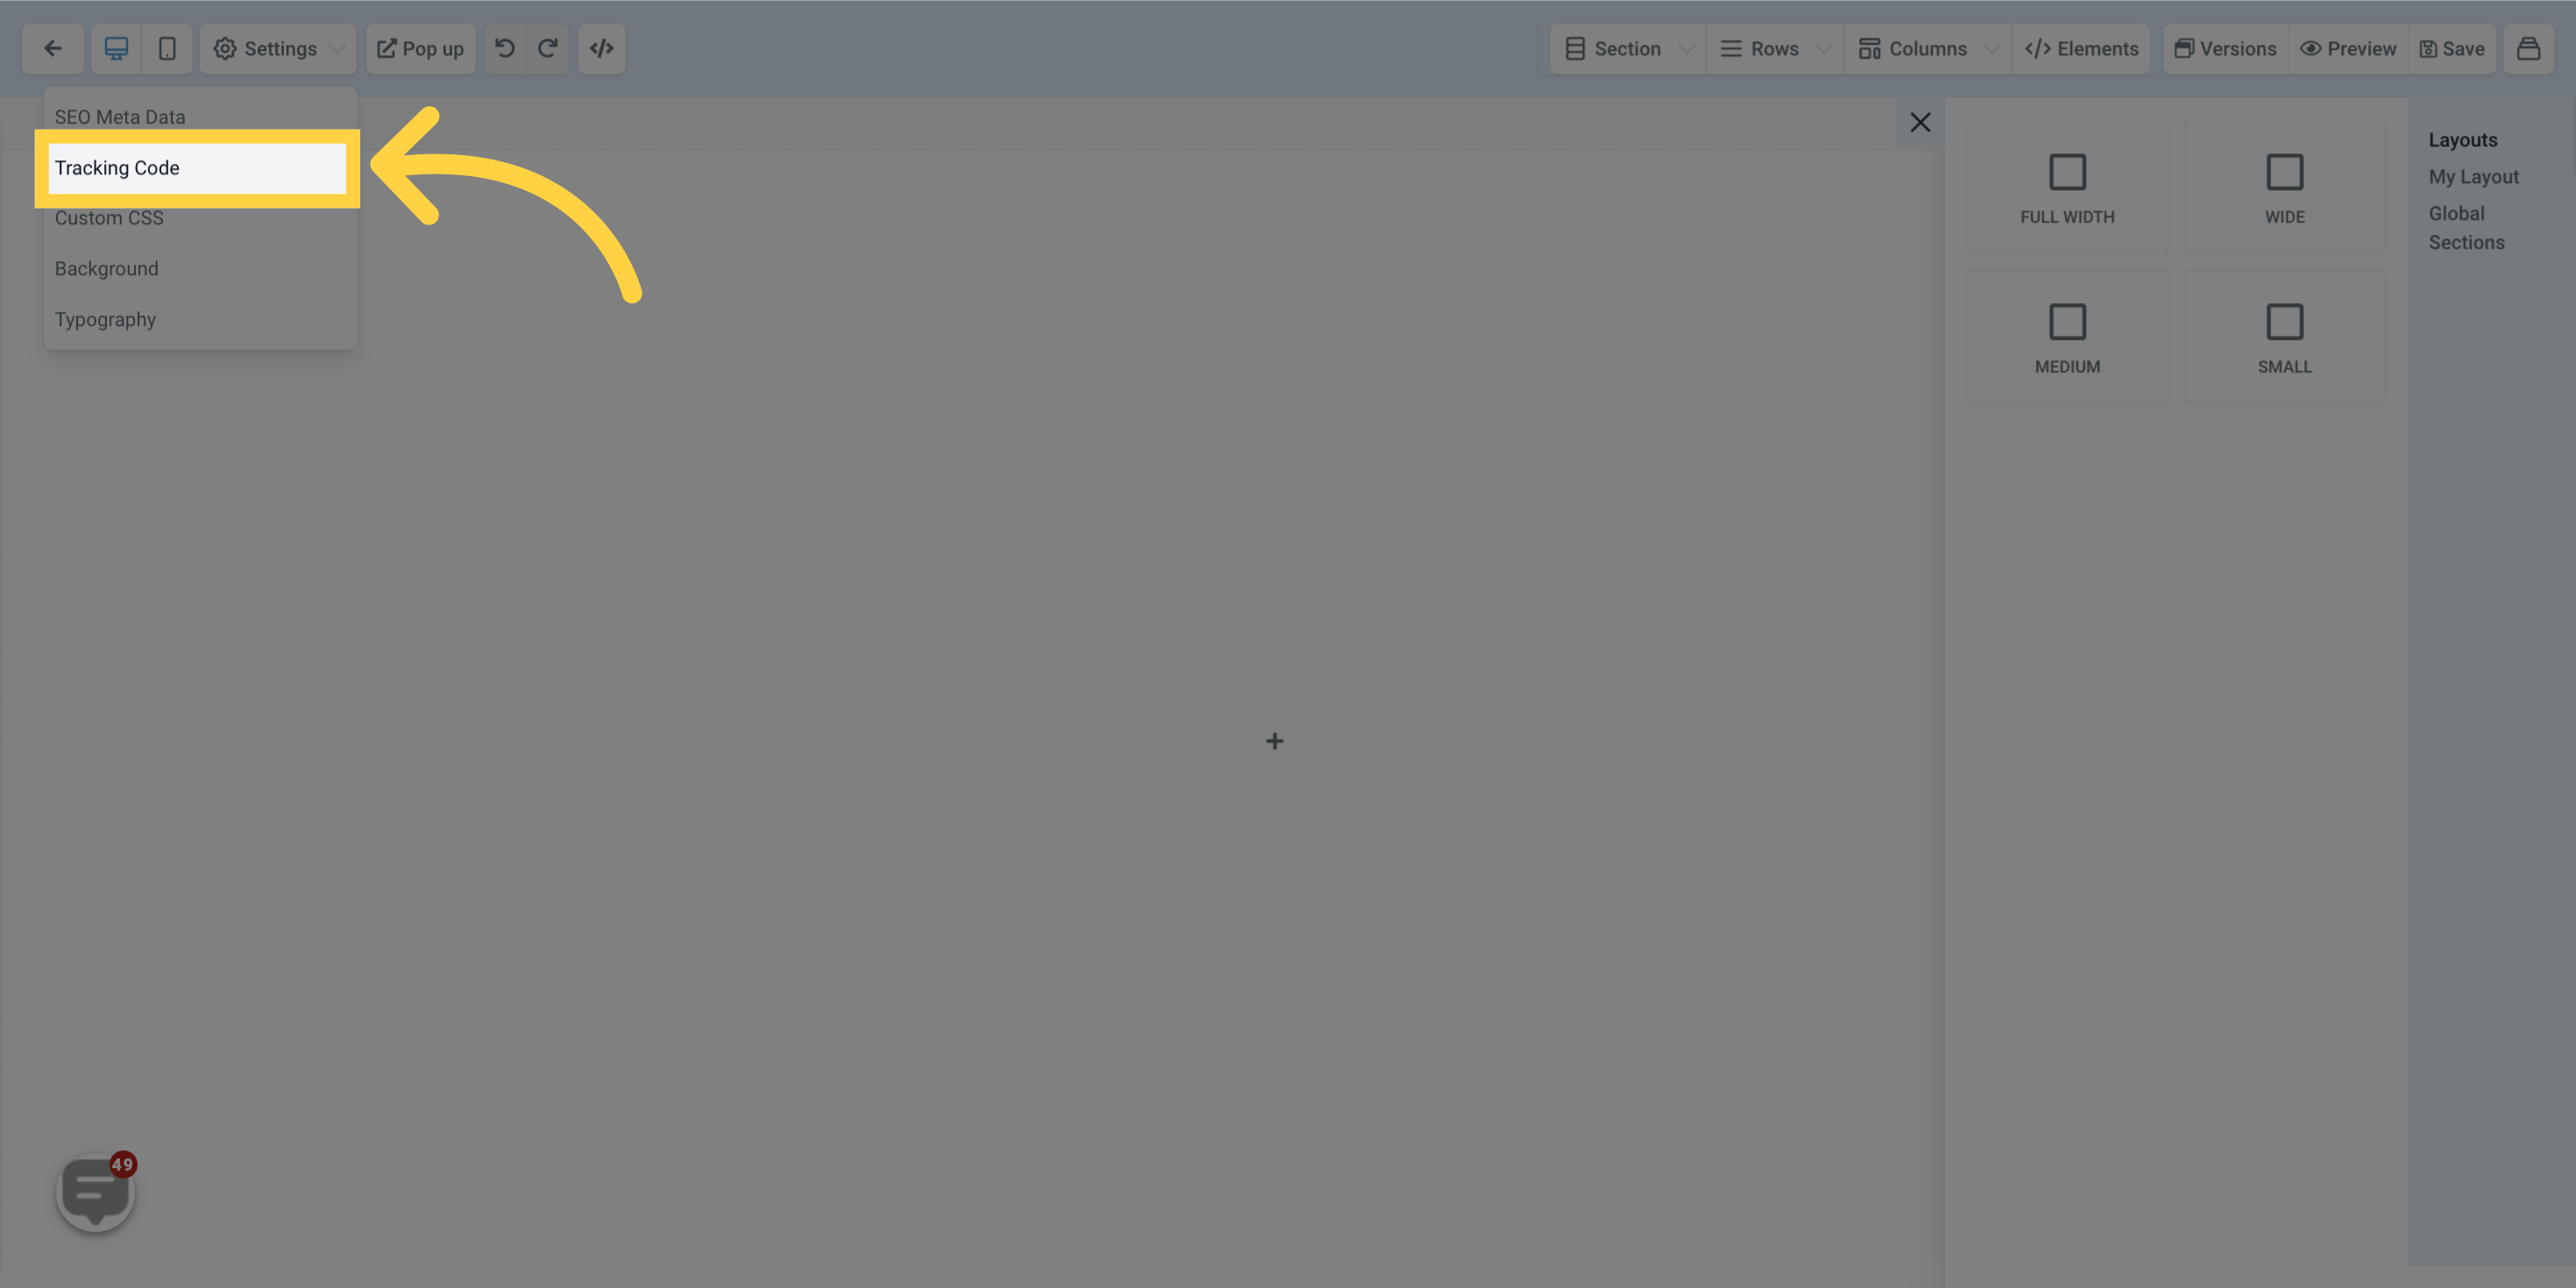
Paste the copied normal snippet at the bottom of your body tracking code.
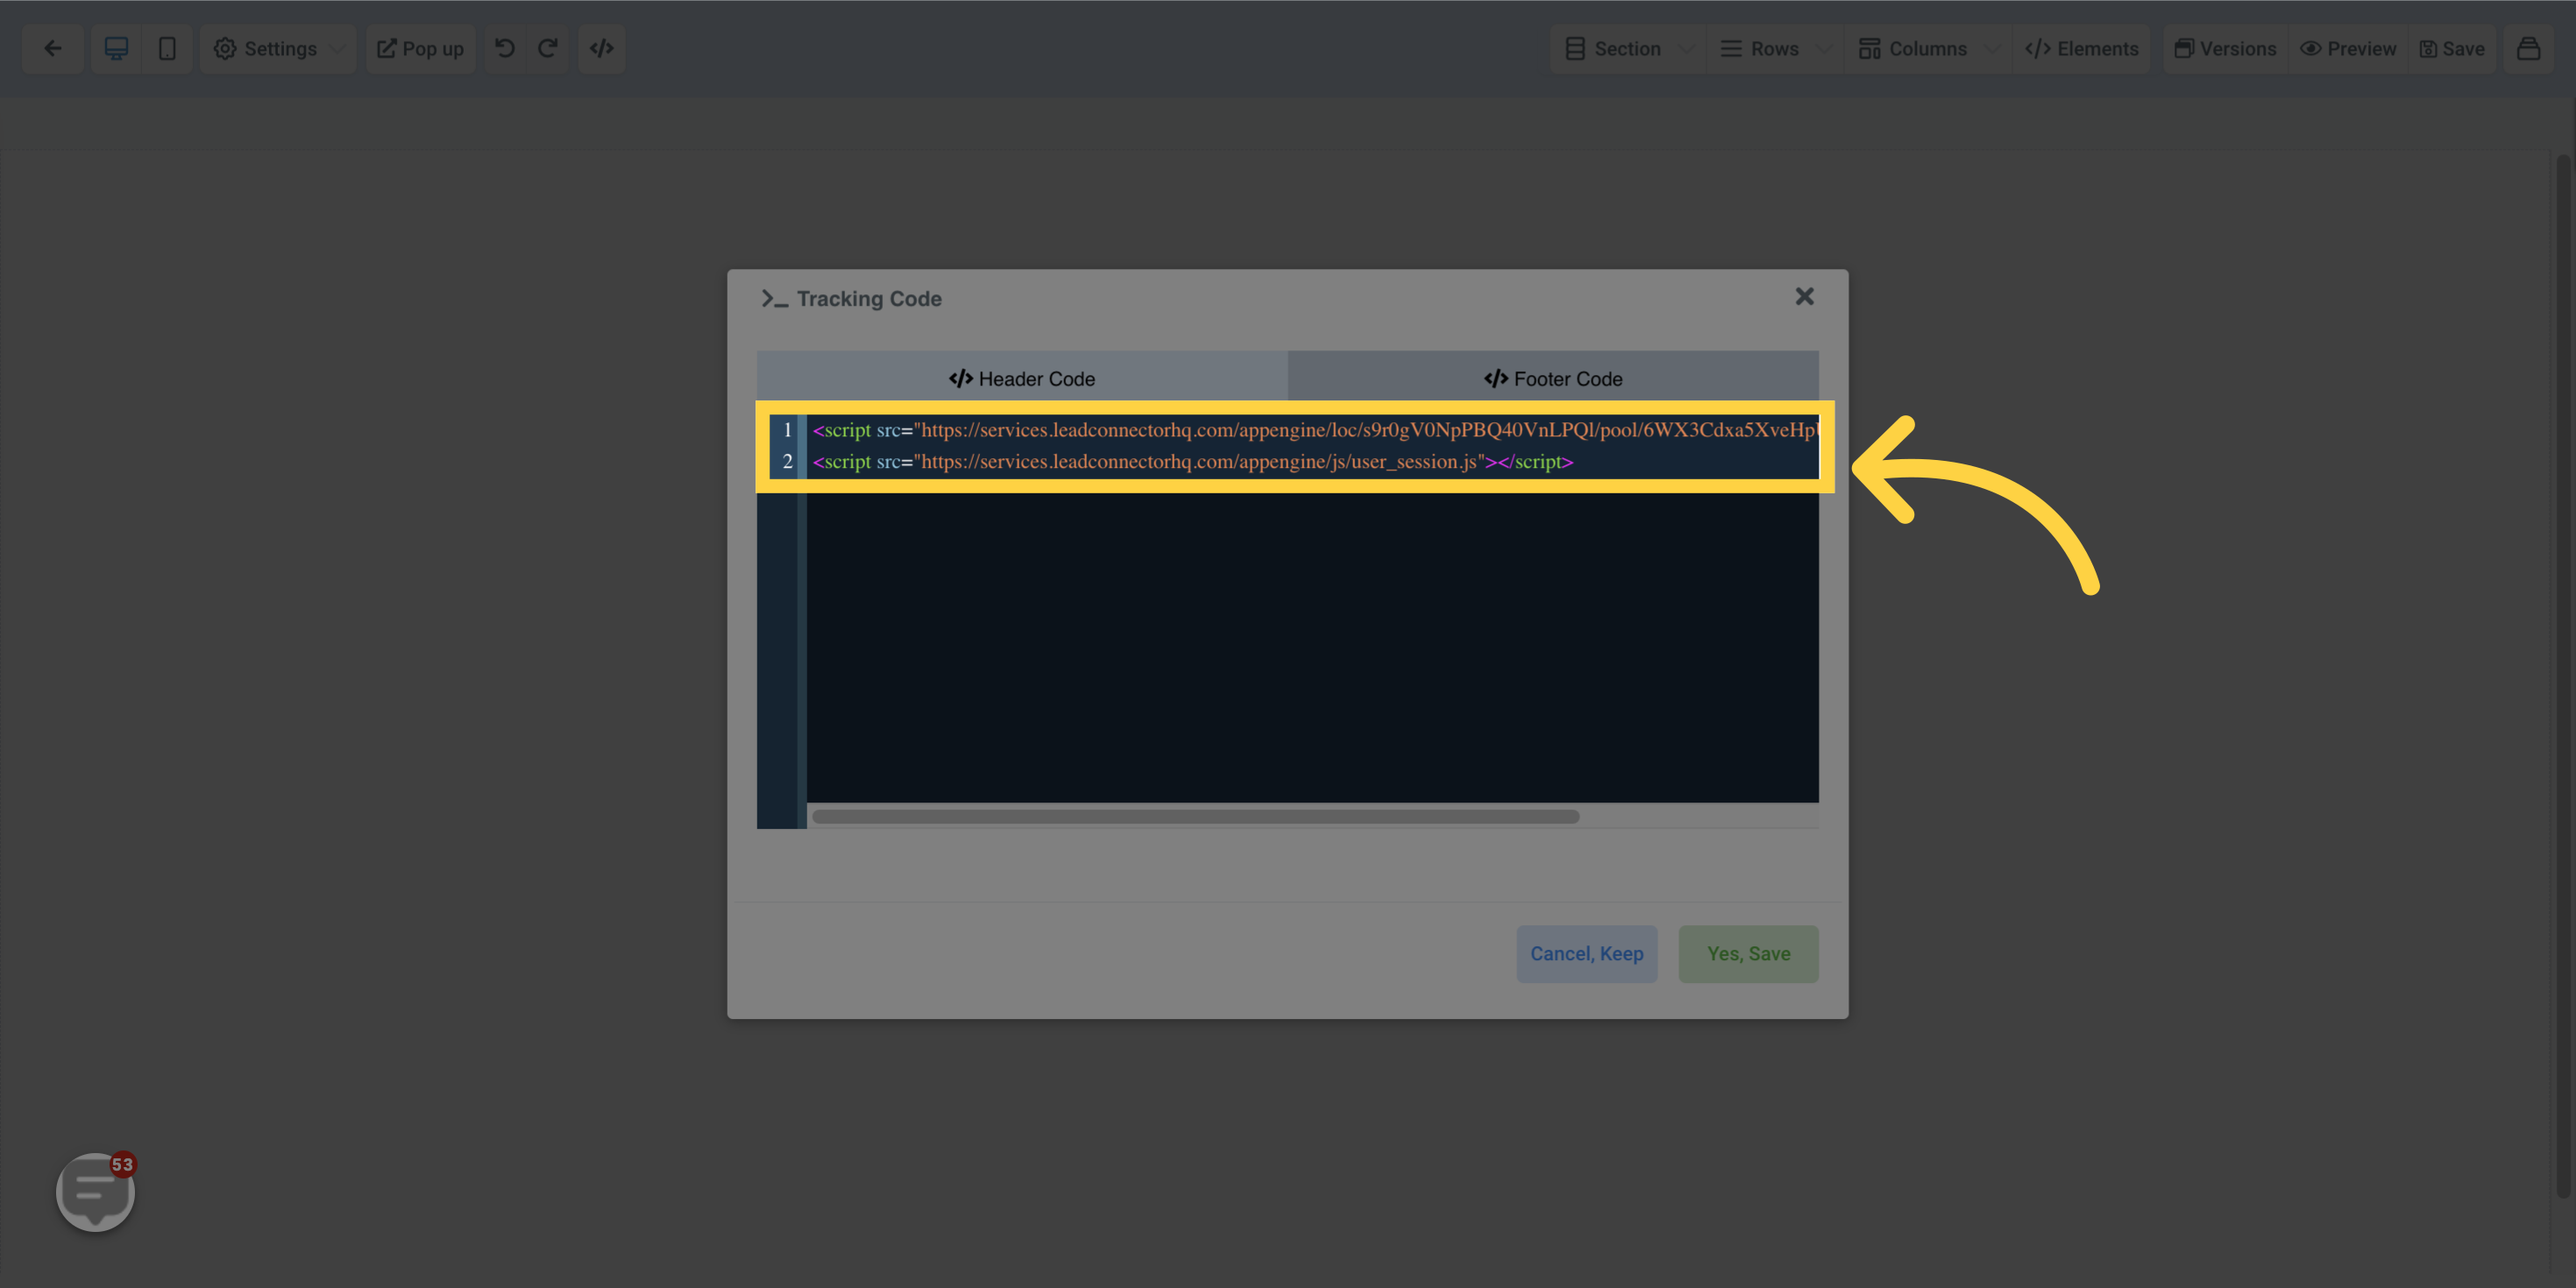
Paste the Copied NormalSnippet here

Click "Yes, Save"

Save your changes.

Click 'Yes, Save'

20. Click "Phone Numbers"

Click 'Phone Numbers'

21. Click "Phone Number"

Click 'Phone Number'

22. Click "Update Tracking Number"

Click 'Update Tracking Number'

23. Copy the "Swapping Number"

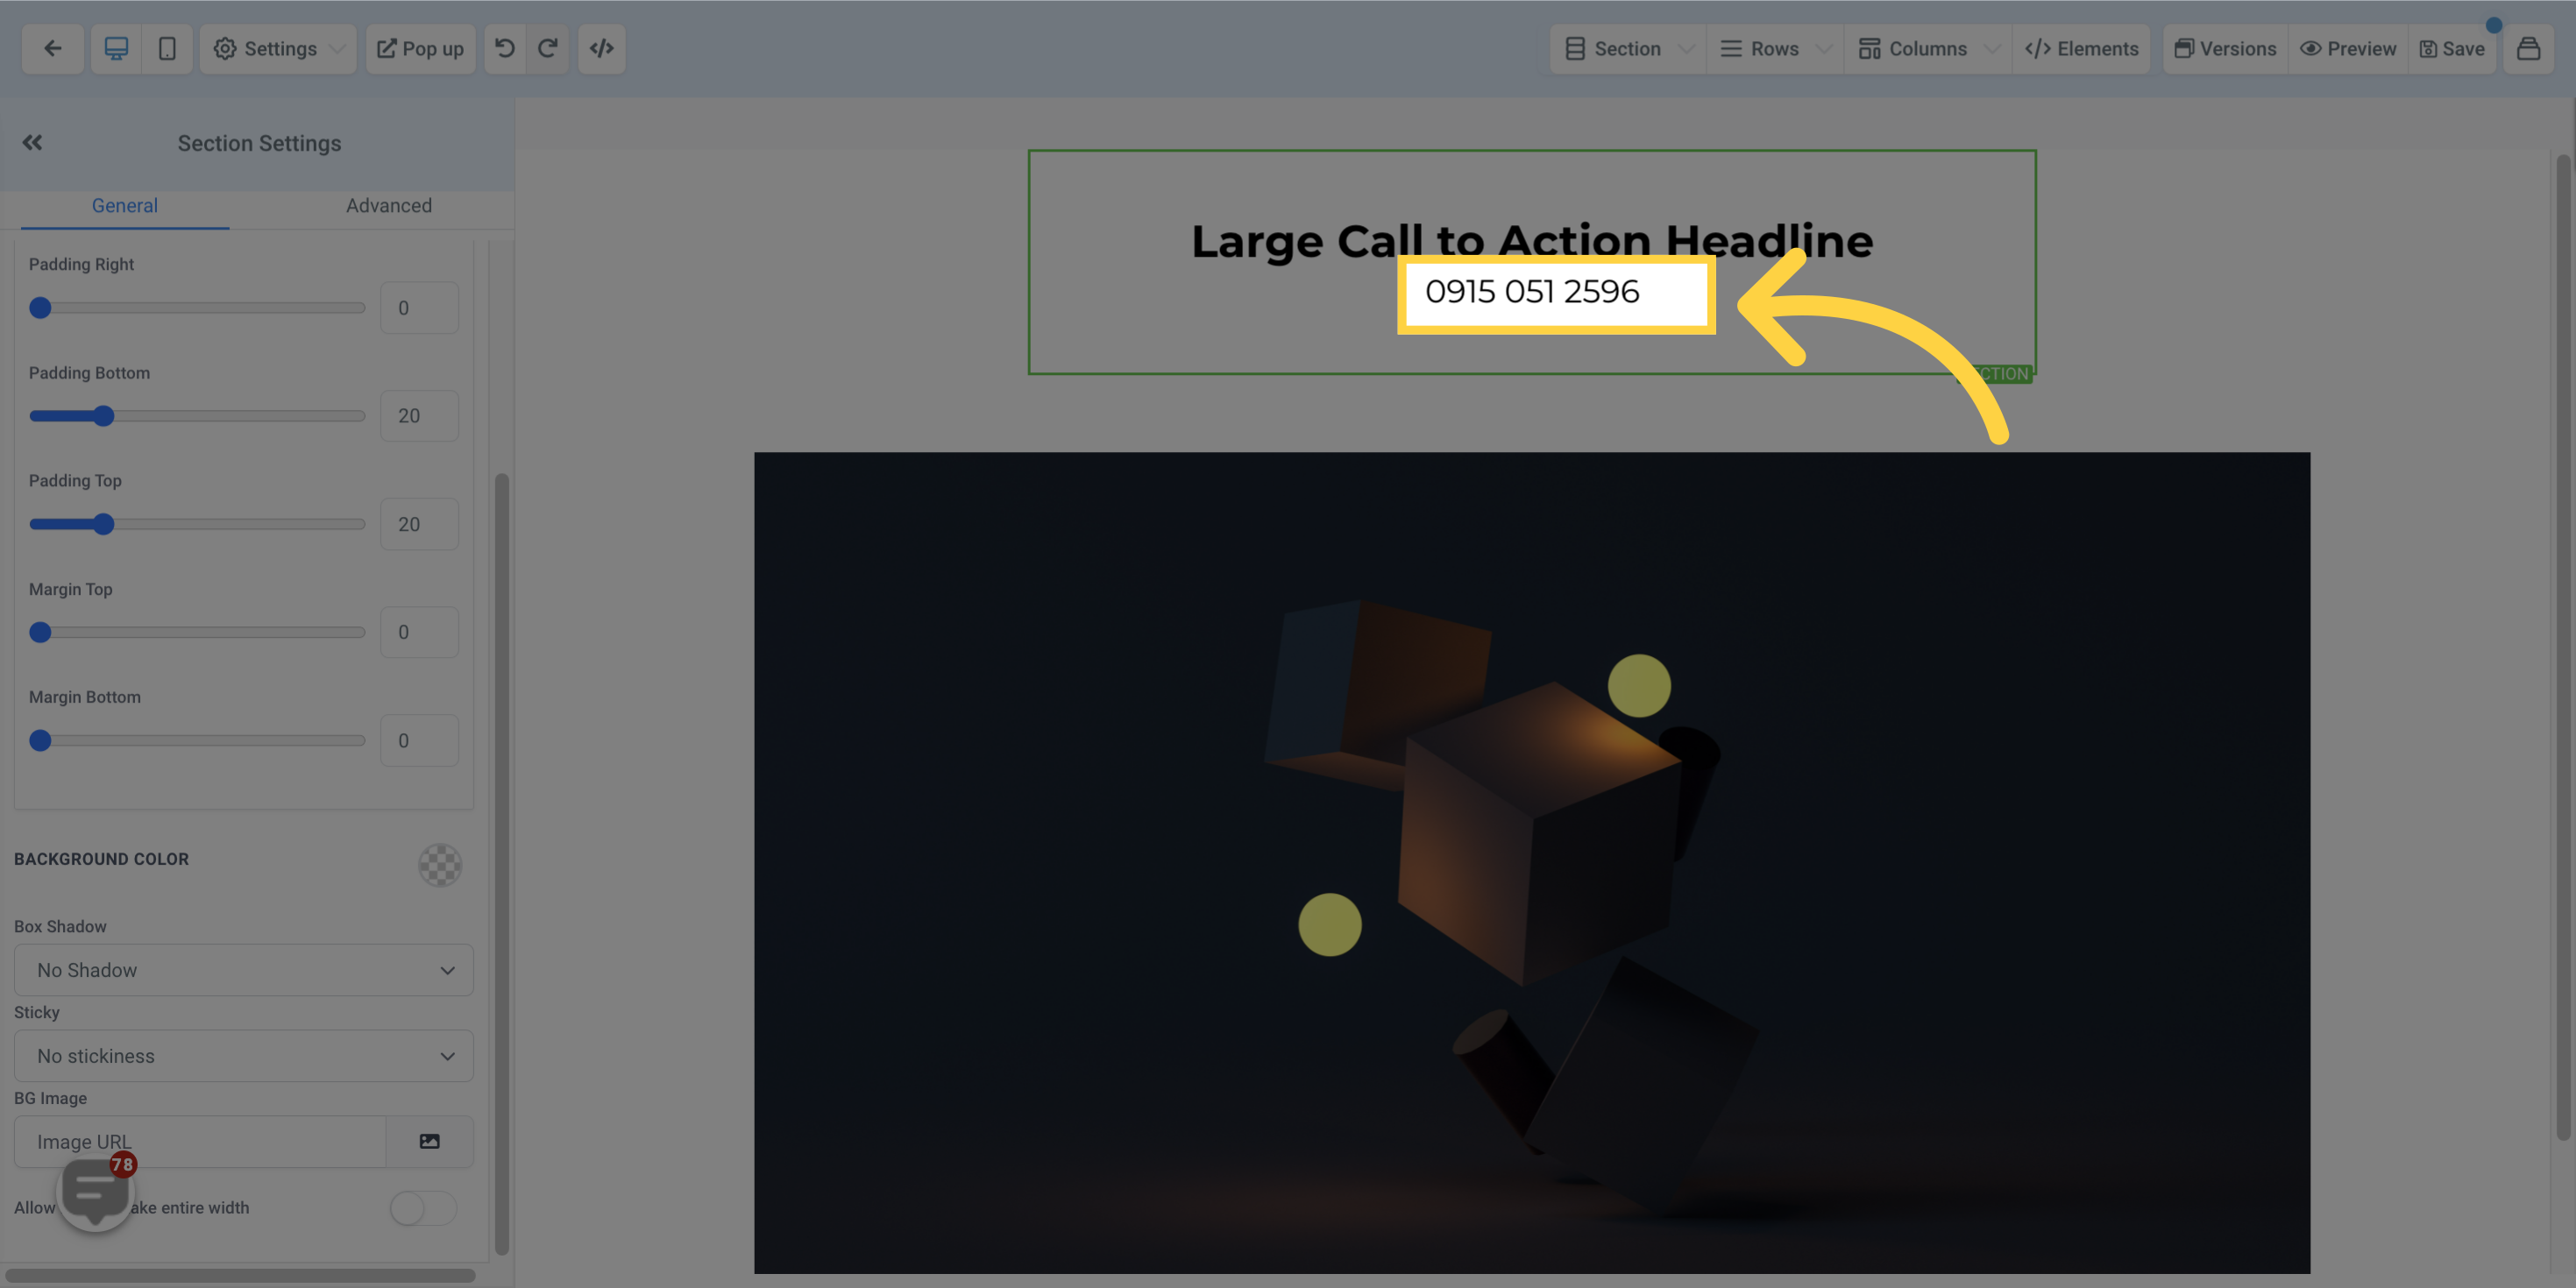
Copy the swapping number and paste it on the desired funnels/websites.

Copy the 'Swapping Number'

24. Paste the Copied Swapping number here

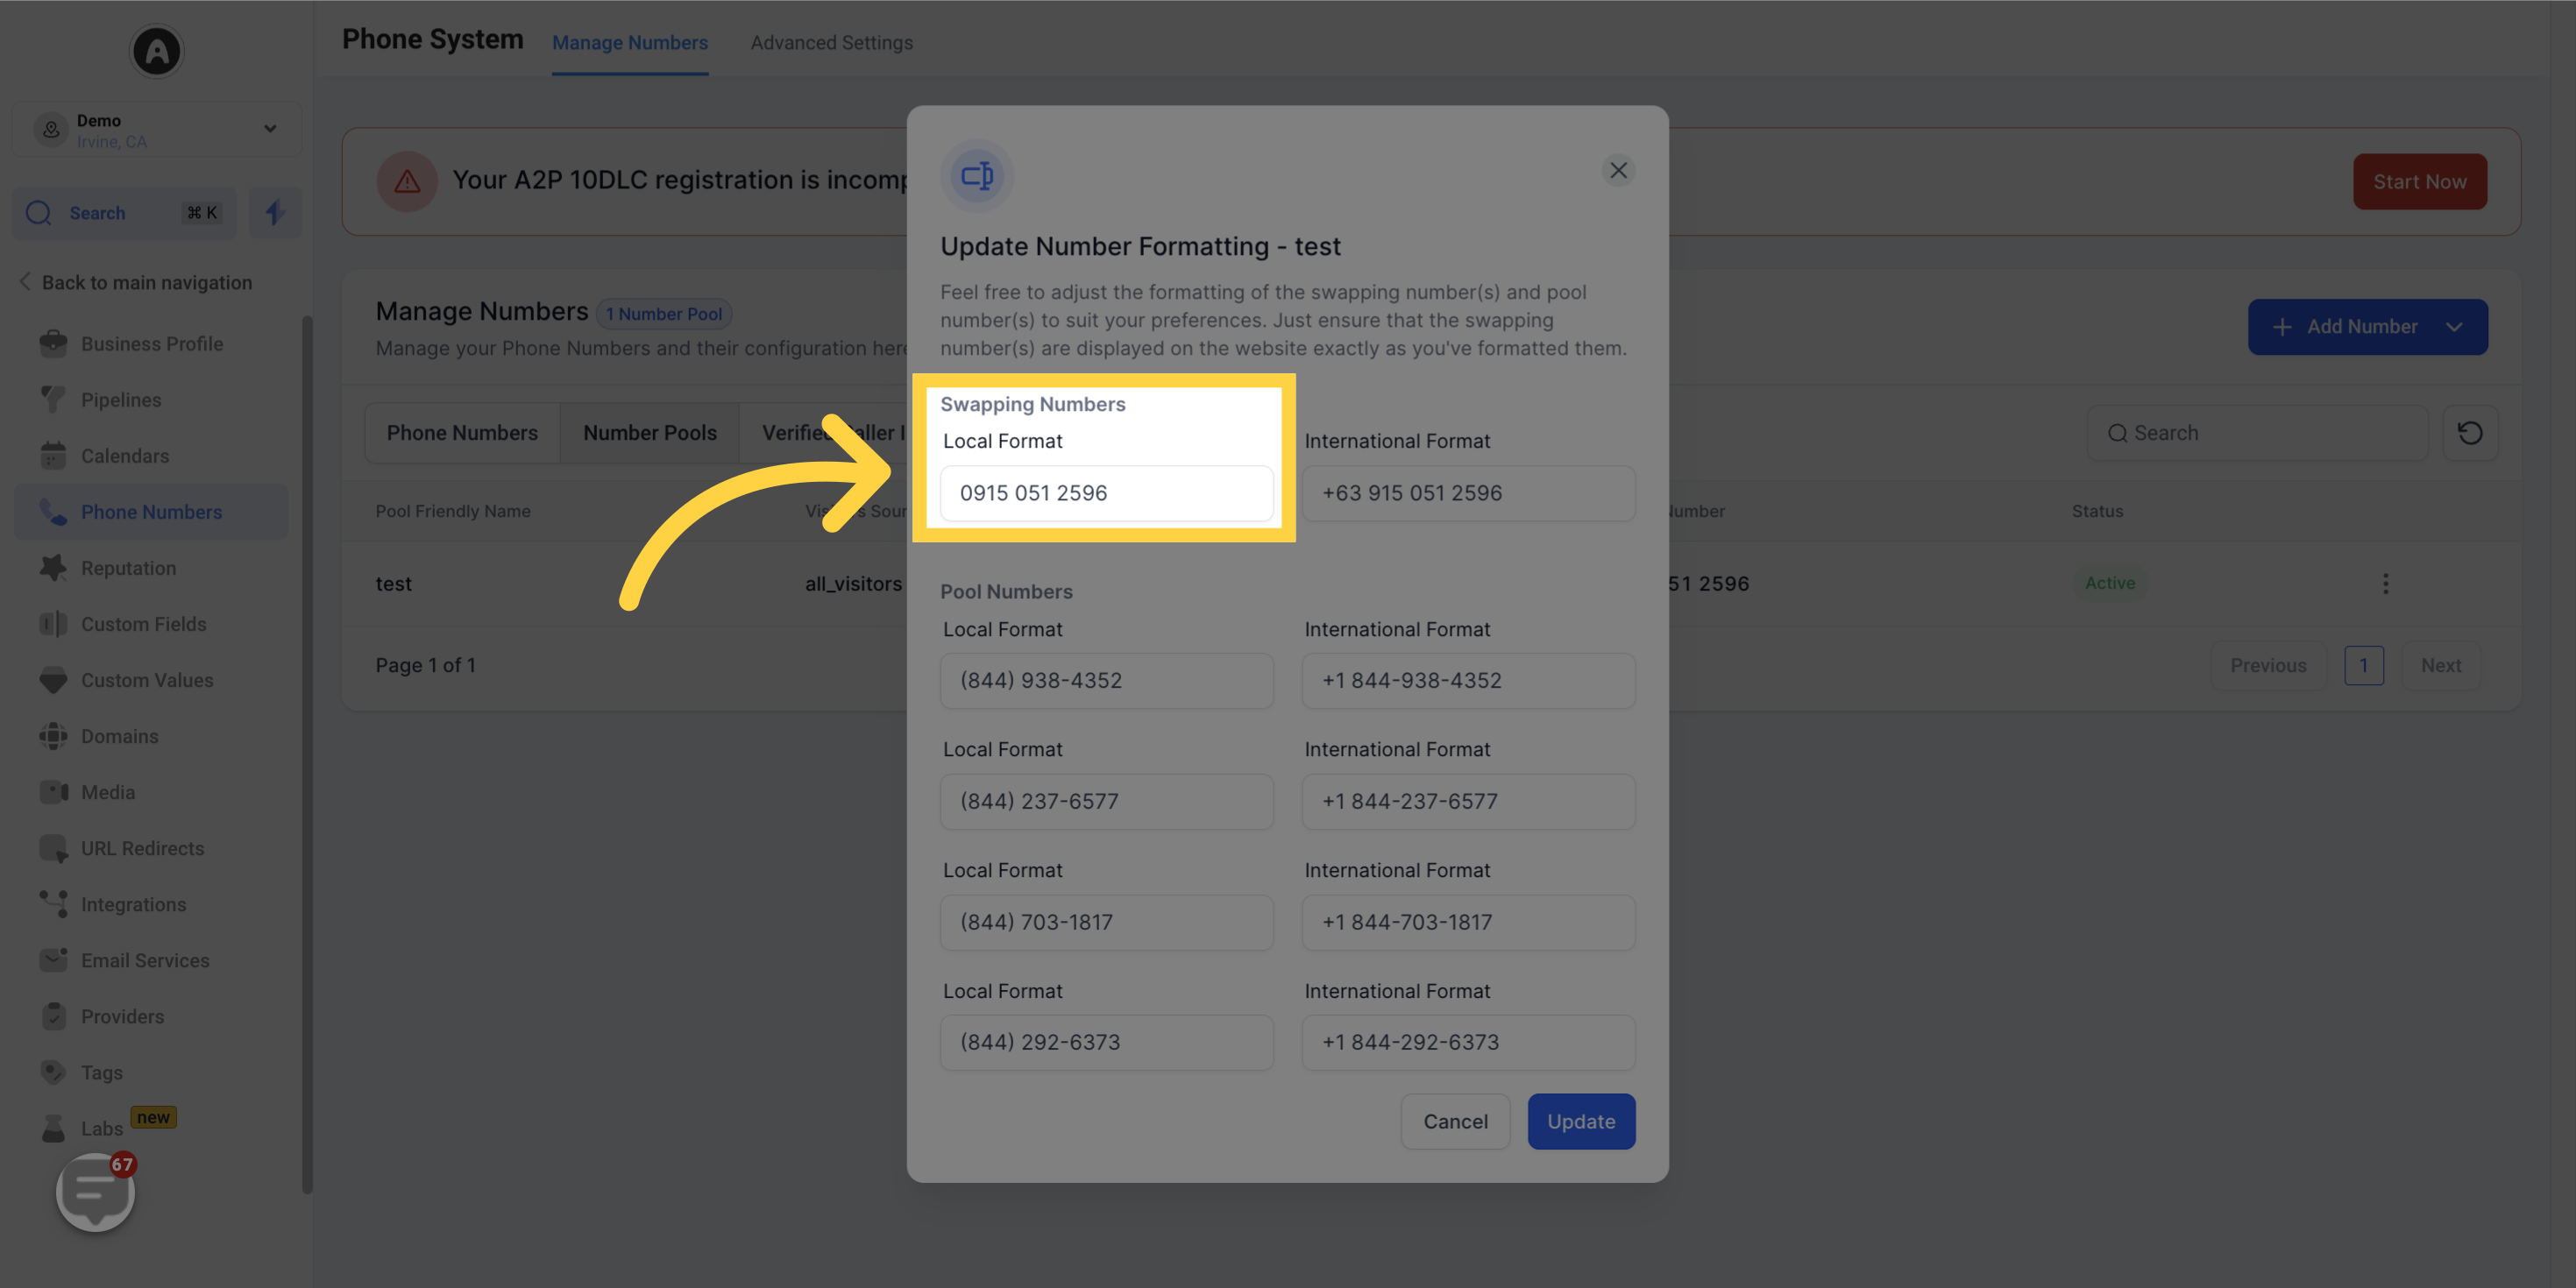
Finally, paste the swapping number on your website.

Paste the Copied Swapping number here

25. Click "Save"

Click 'Save'

These steps will help you set up and configure your number pool for effective tracking.

Did this answer your question?
😞
😐
😁