Domain Connect revolutionizes the intricate process of connecting domains, making it a seamless and effortless experience. With just a simple click, it automatically detects and configures domains, eliminating the need for manual DNS record adjustments. Whether it's a root domain or a subdomain, Domain Connect exemplifies efficiency and adaptability, ensuring a long-lasting and hassle-free domain management experience.
Quick and Convenient: Now you can effortlessly link your domains to various services and applications.
Safe and Reliable: Benefit from the security and reliability of established providers for a secure connection. Future-Proof: Domain Connect is continuously expanding, with plans to support more providers and integrations including popular platforms like WordPress and email services.
The domain connection feature is distinct from domain hosting. Prior ownership of the domain through providers like Google Domains, Go Daddy, or Cloudflare is necessary for this feature to function. If using Cloudflare proxy, ensure that the automatically generated DNS records have the Cloudflare proxy disabled.
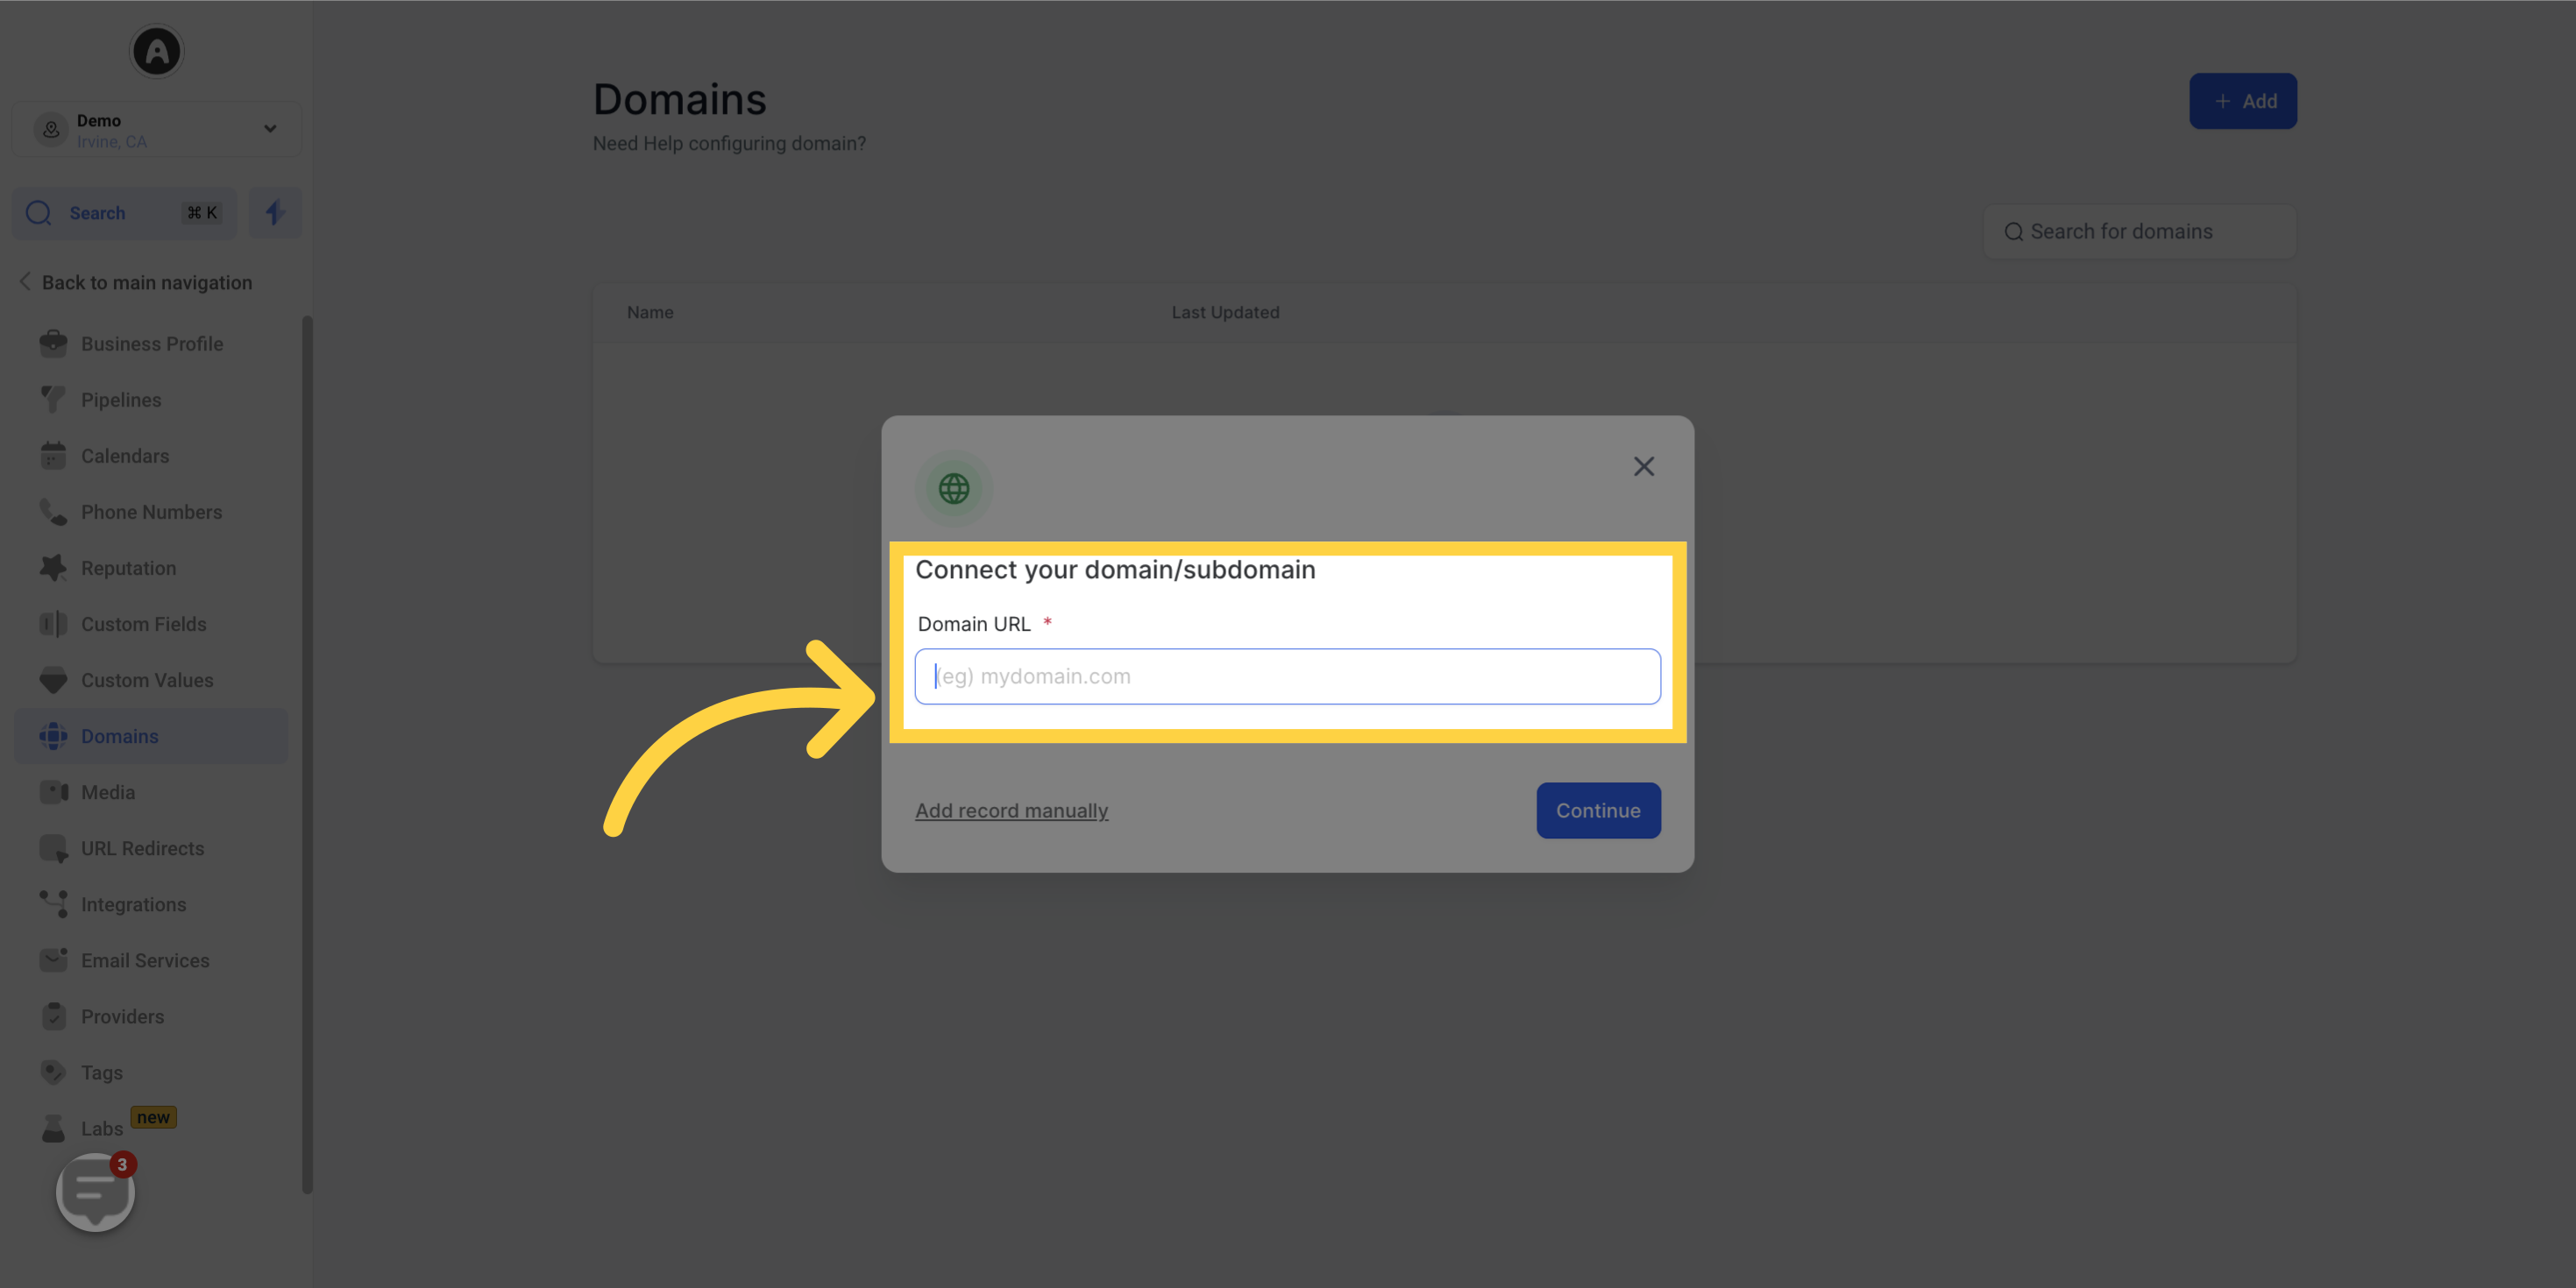
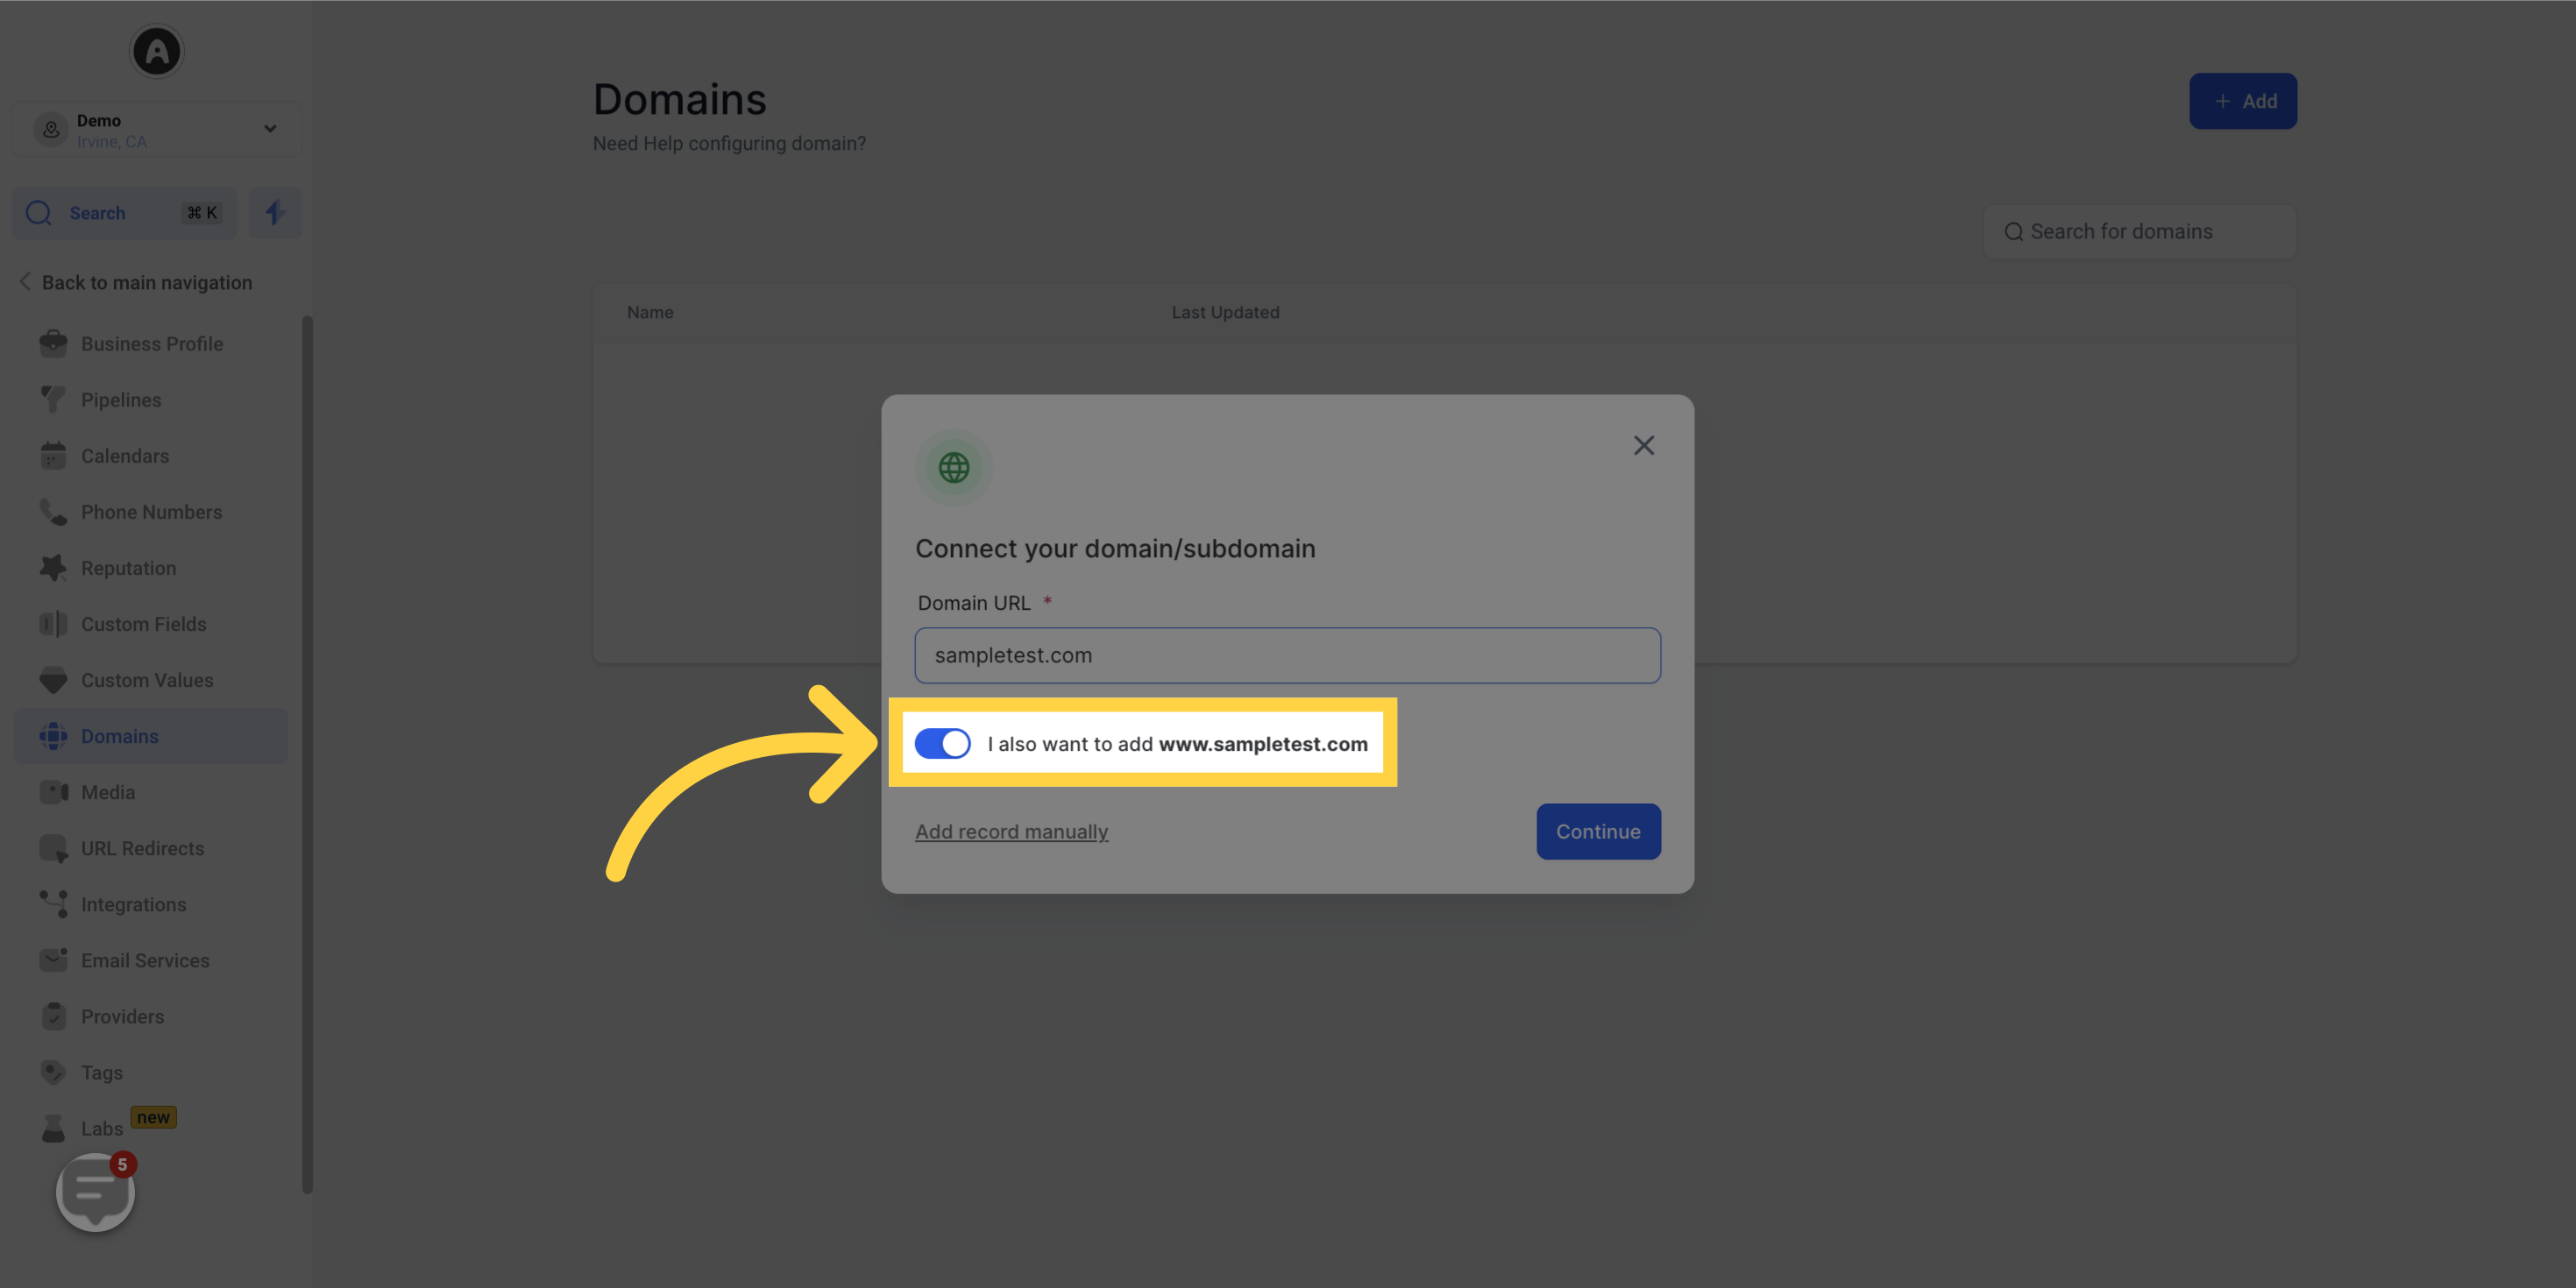
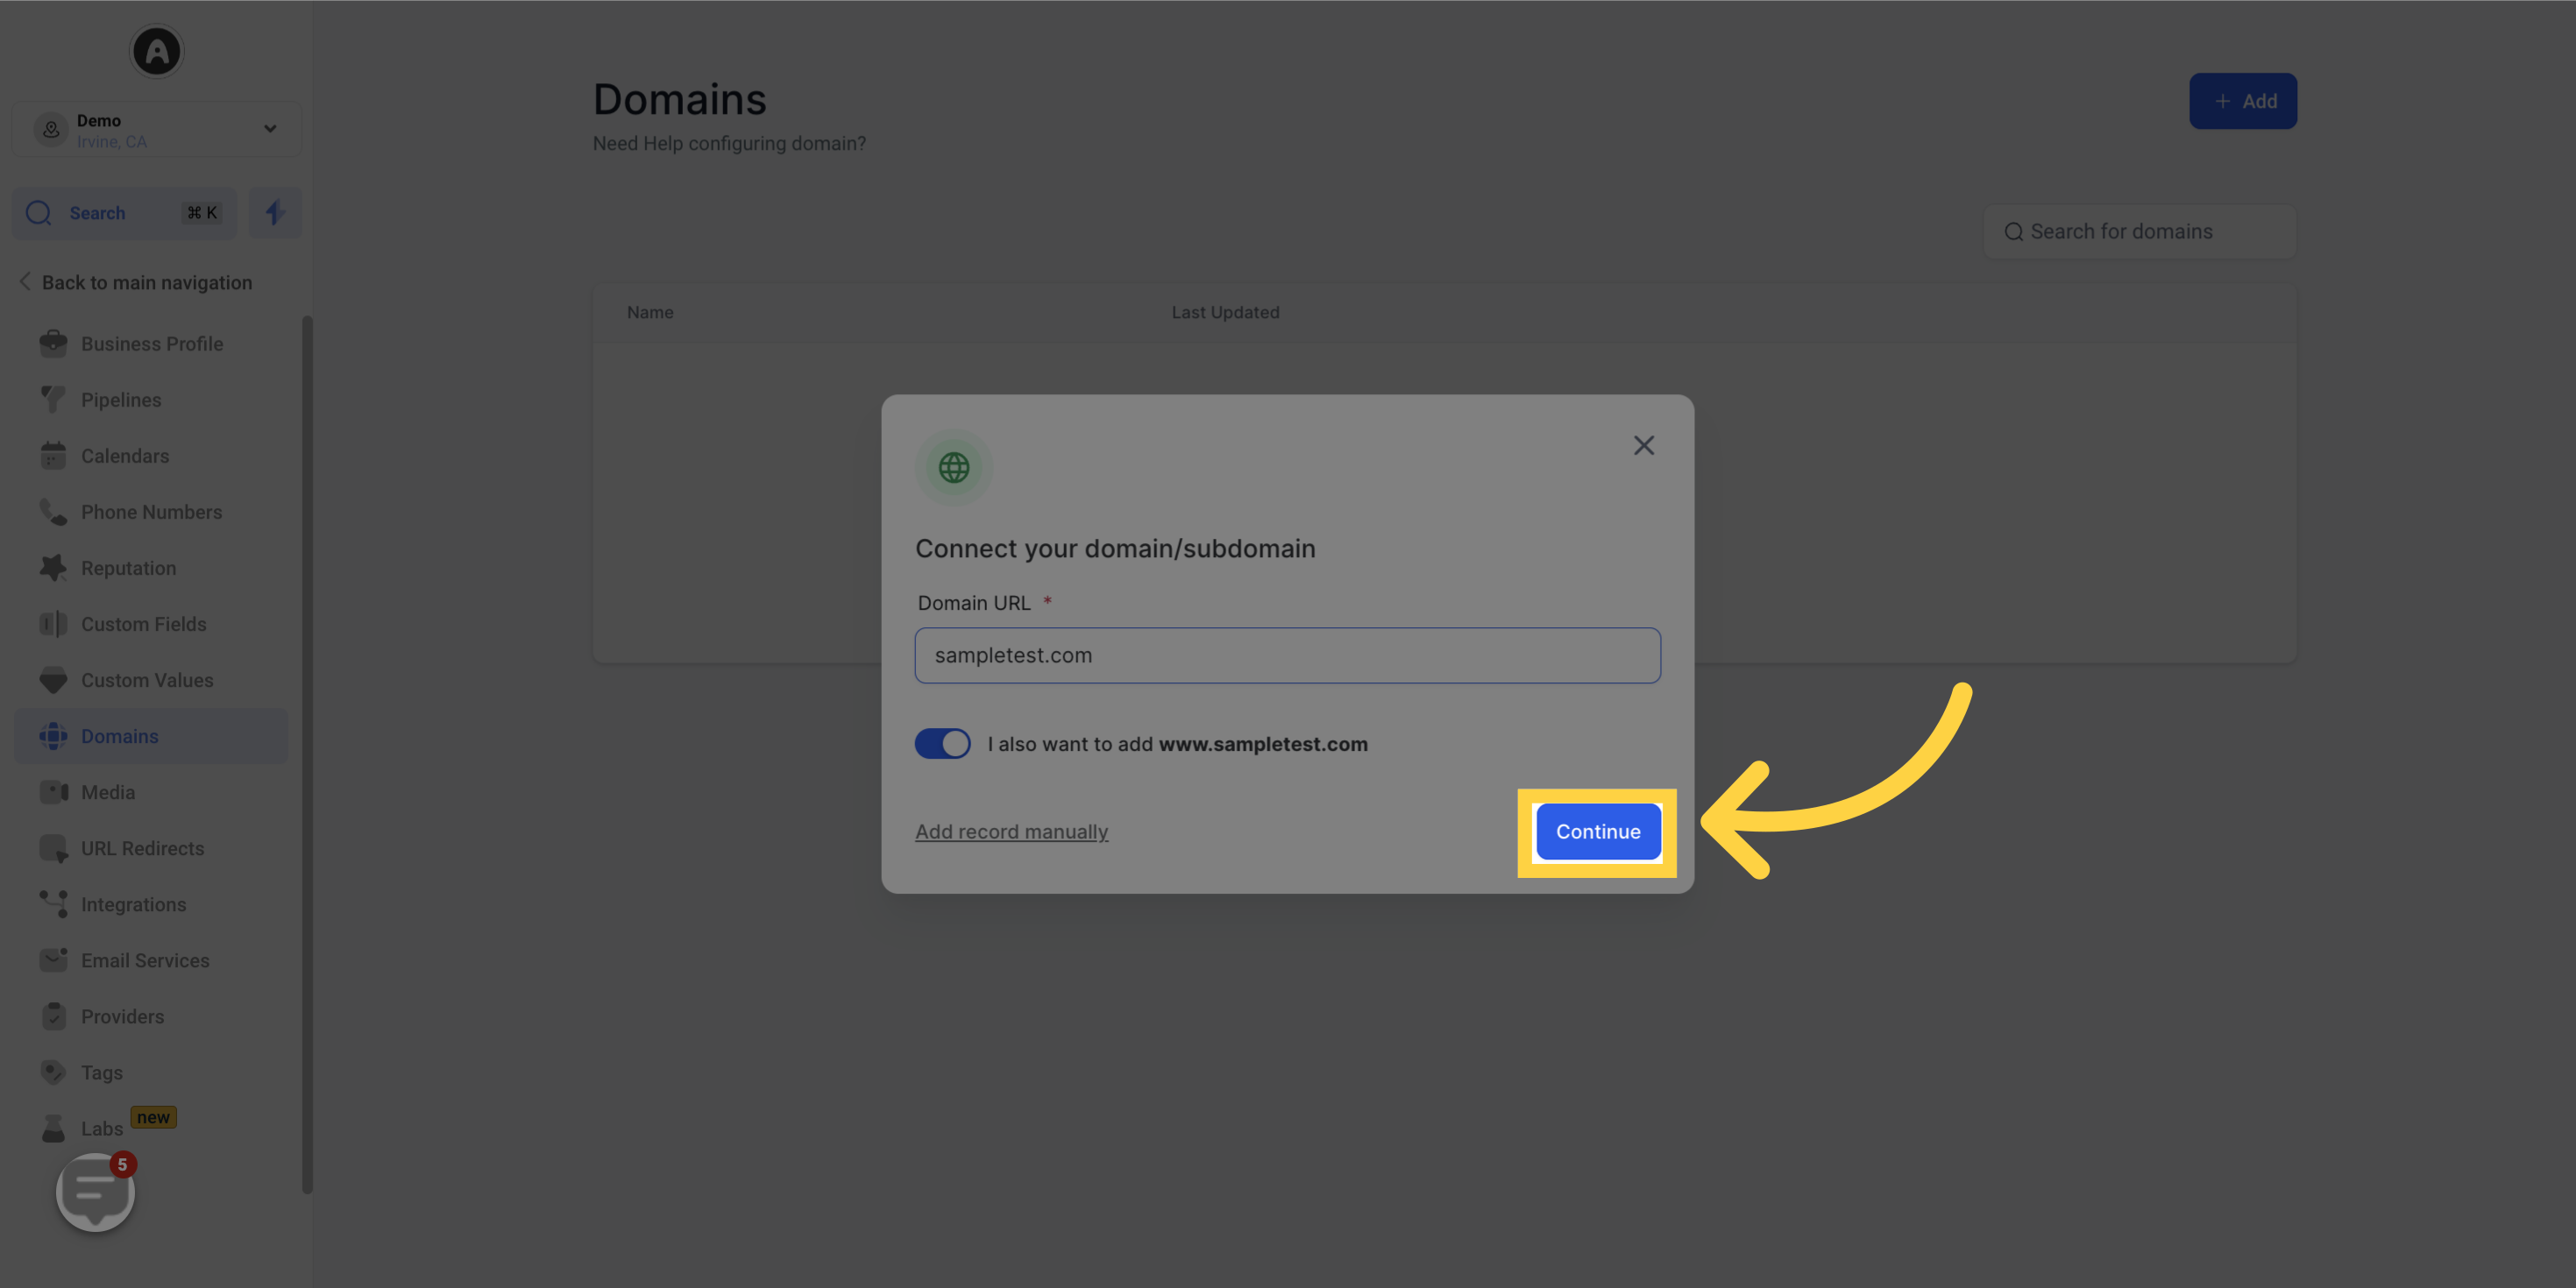
Enter your root domain or subdomain in the designated field
If you want to add the "www" subdomain as well, you'll have the option to include the root domain
If your domain is registered with Google Domains, Go Daddy, or Cloudflare, you'll see an Authorize button. Click on it to grant Domain Connect access to your DNS settings
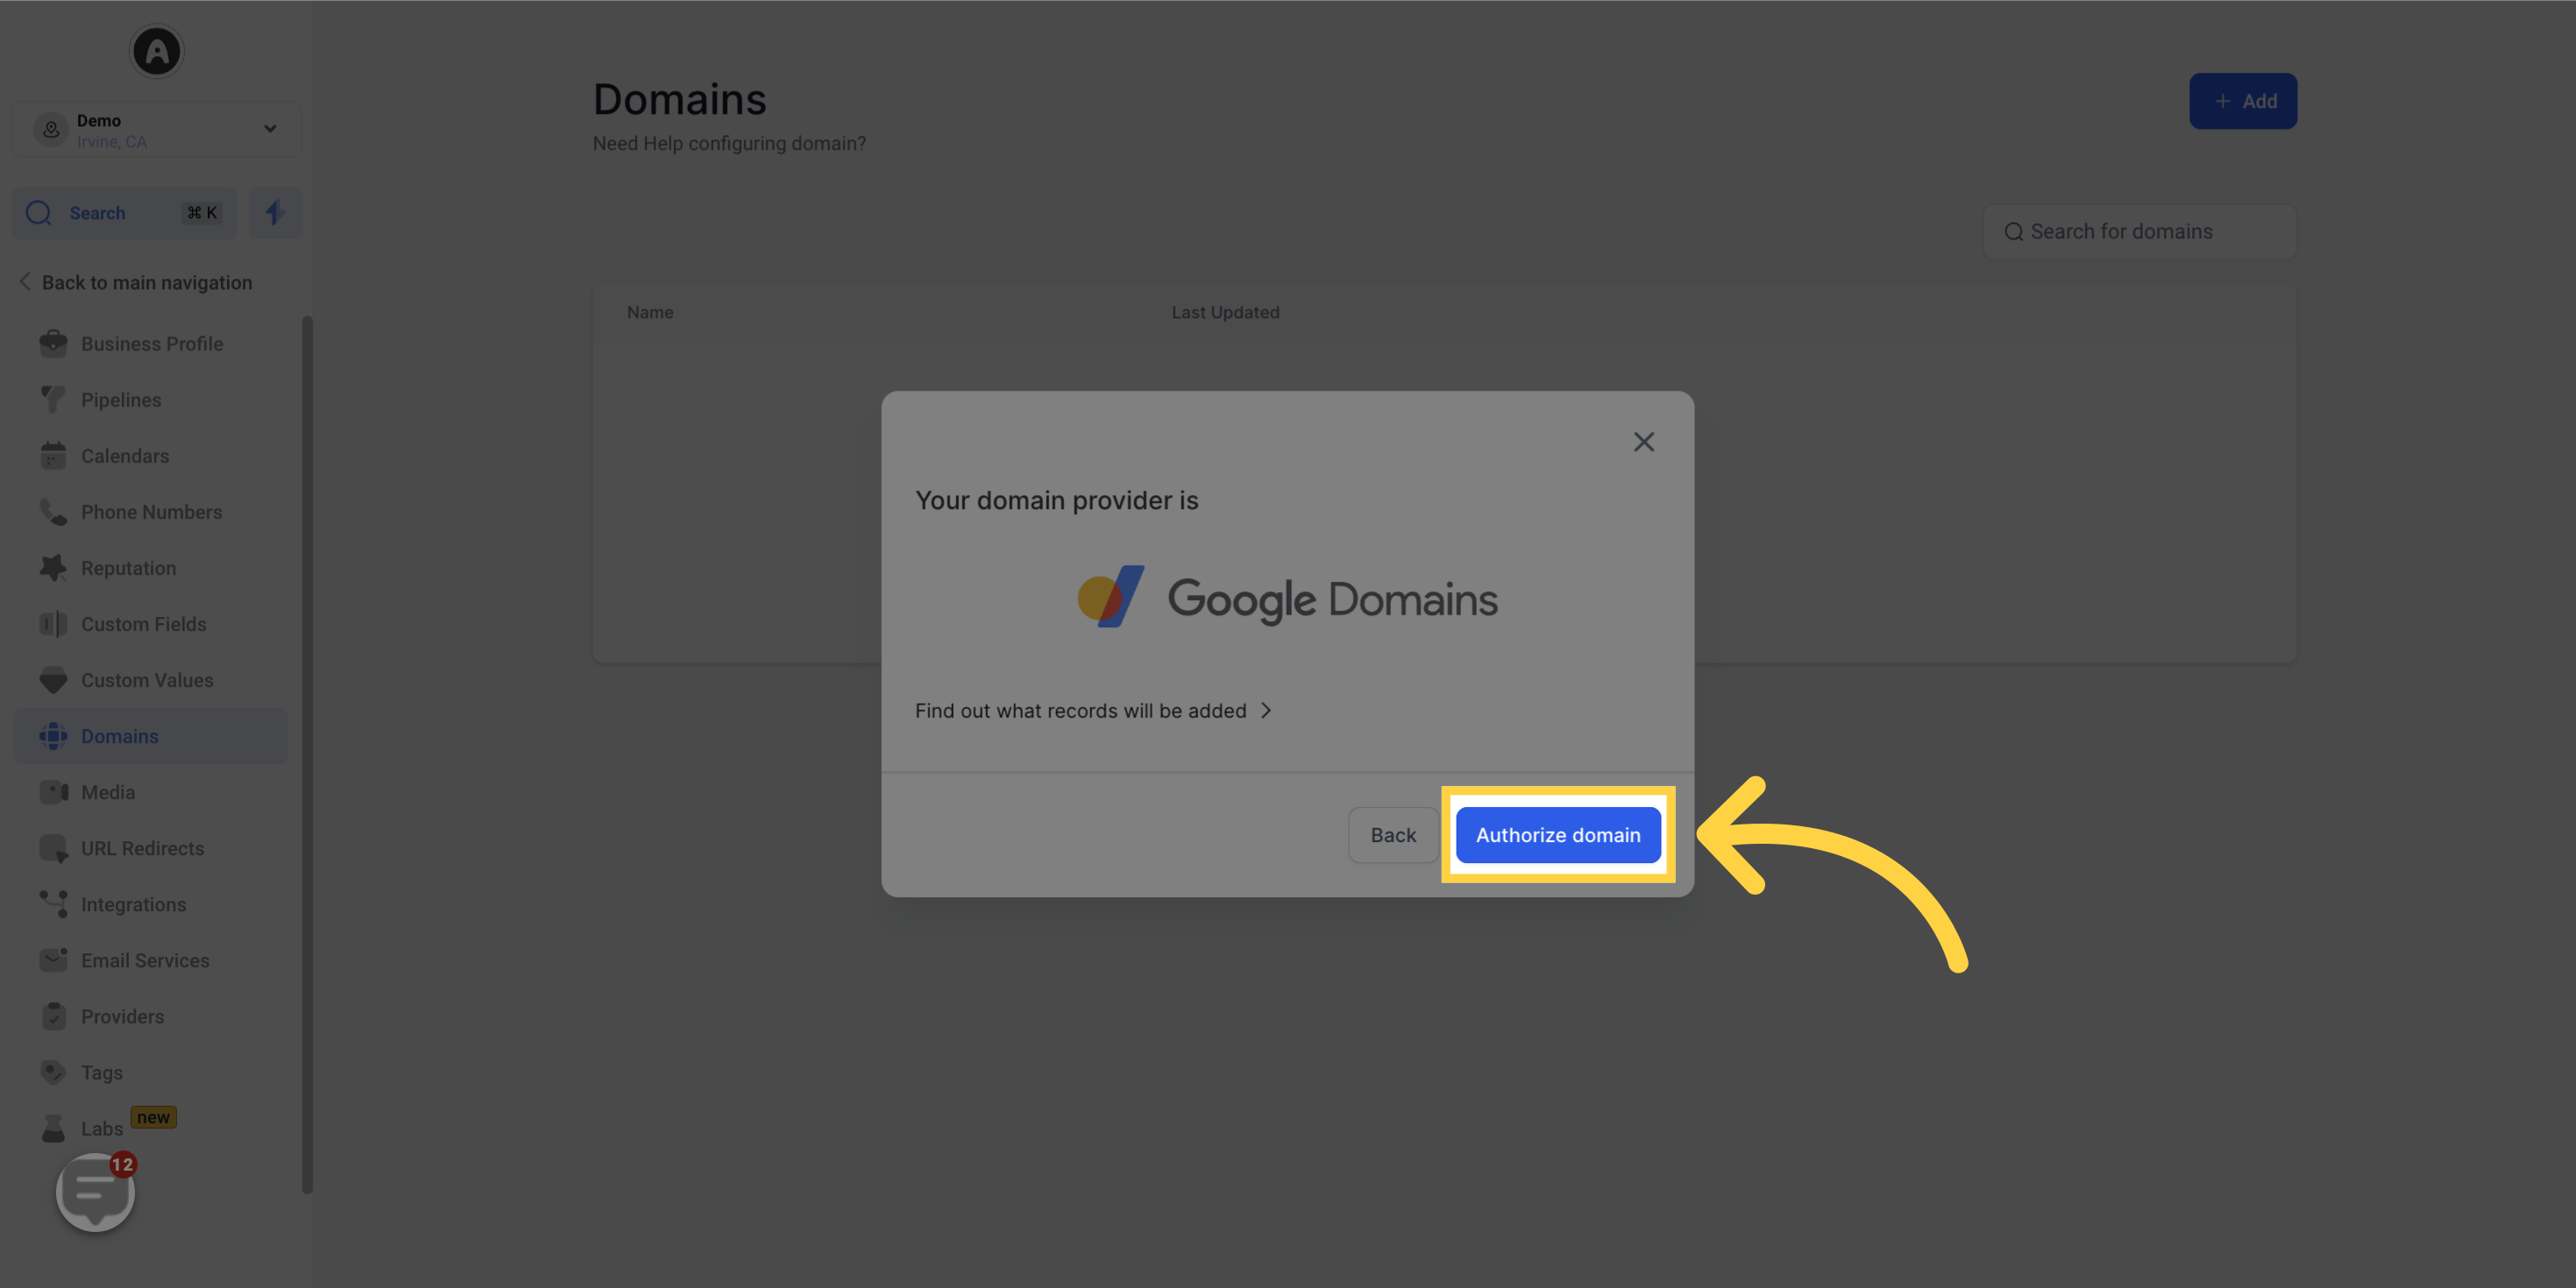
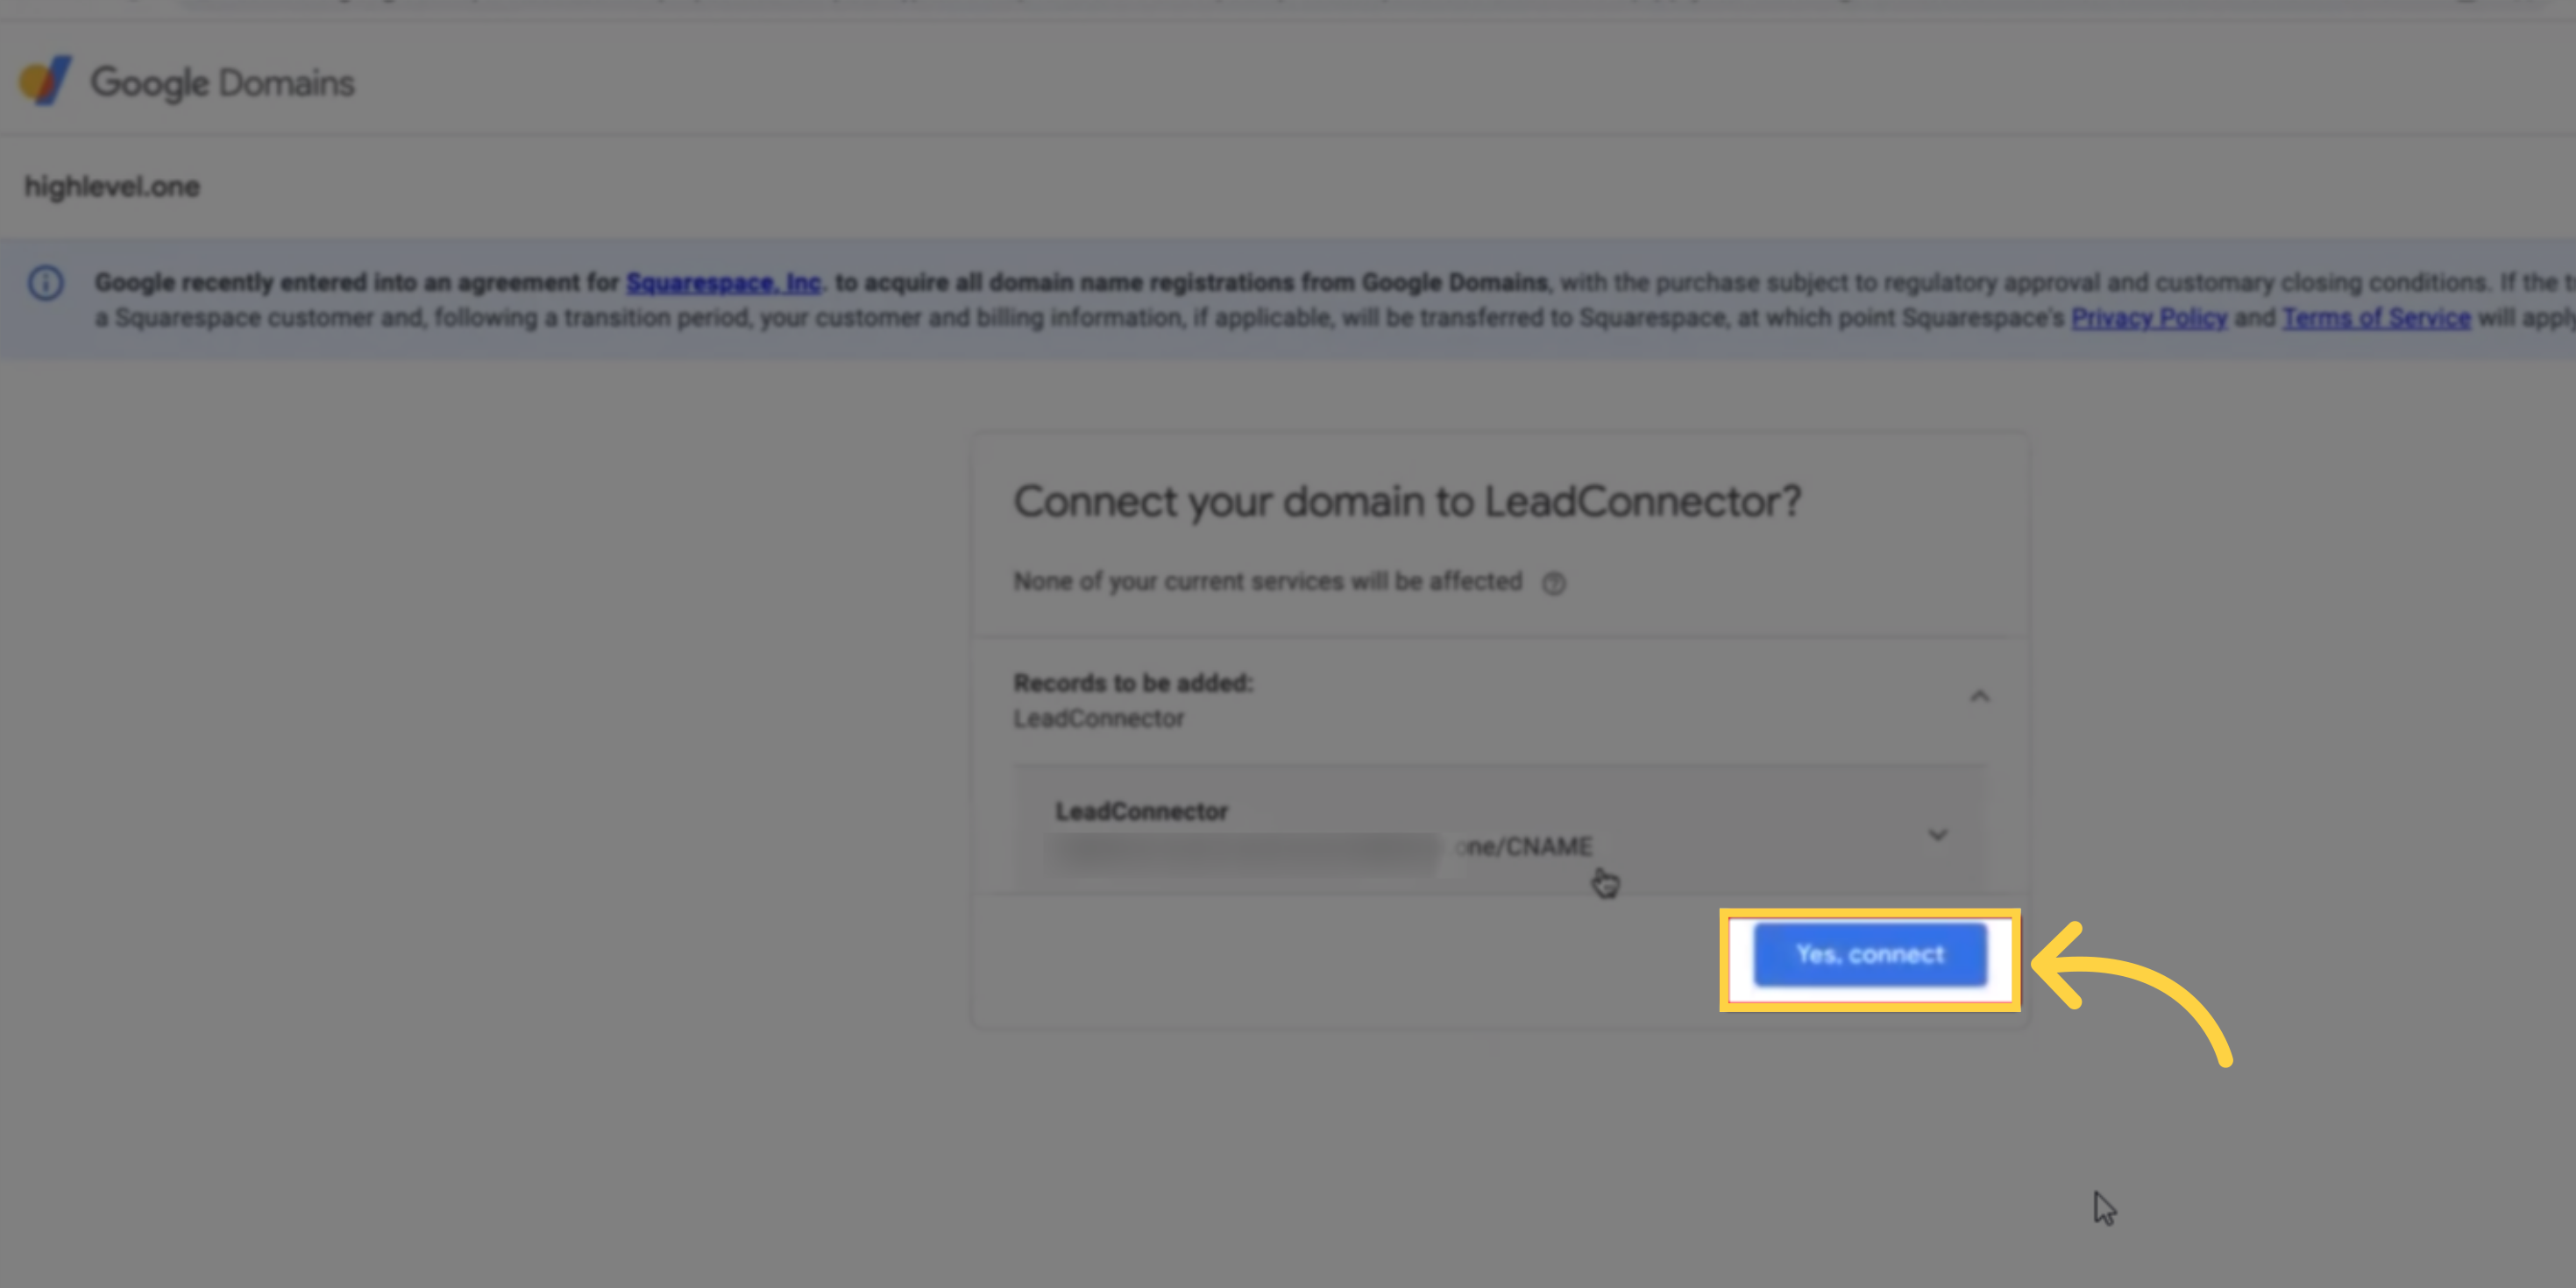
Follow the on-screen instructions to complete the authorization process on your domain provider's interface. This will automatically add or connect the necessary DNS records
After authorization is complete, close the tab and return to the Domain Connect interface
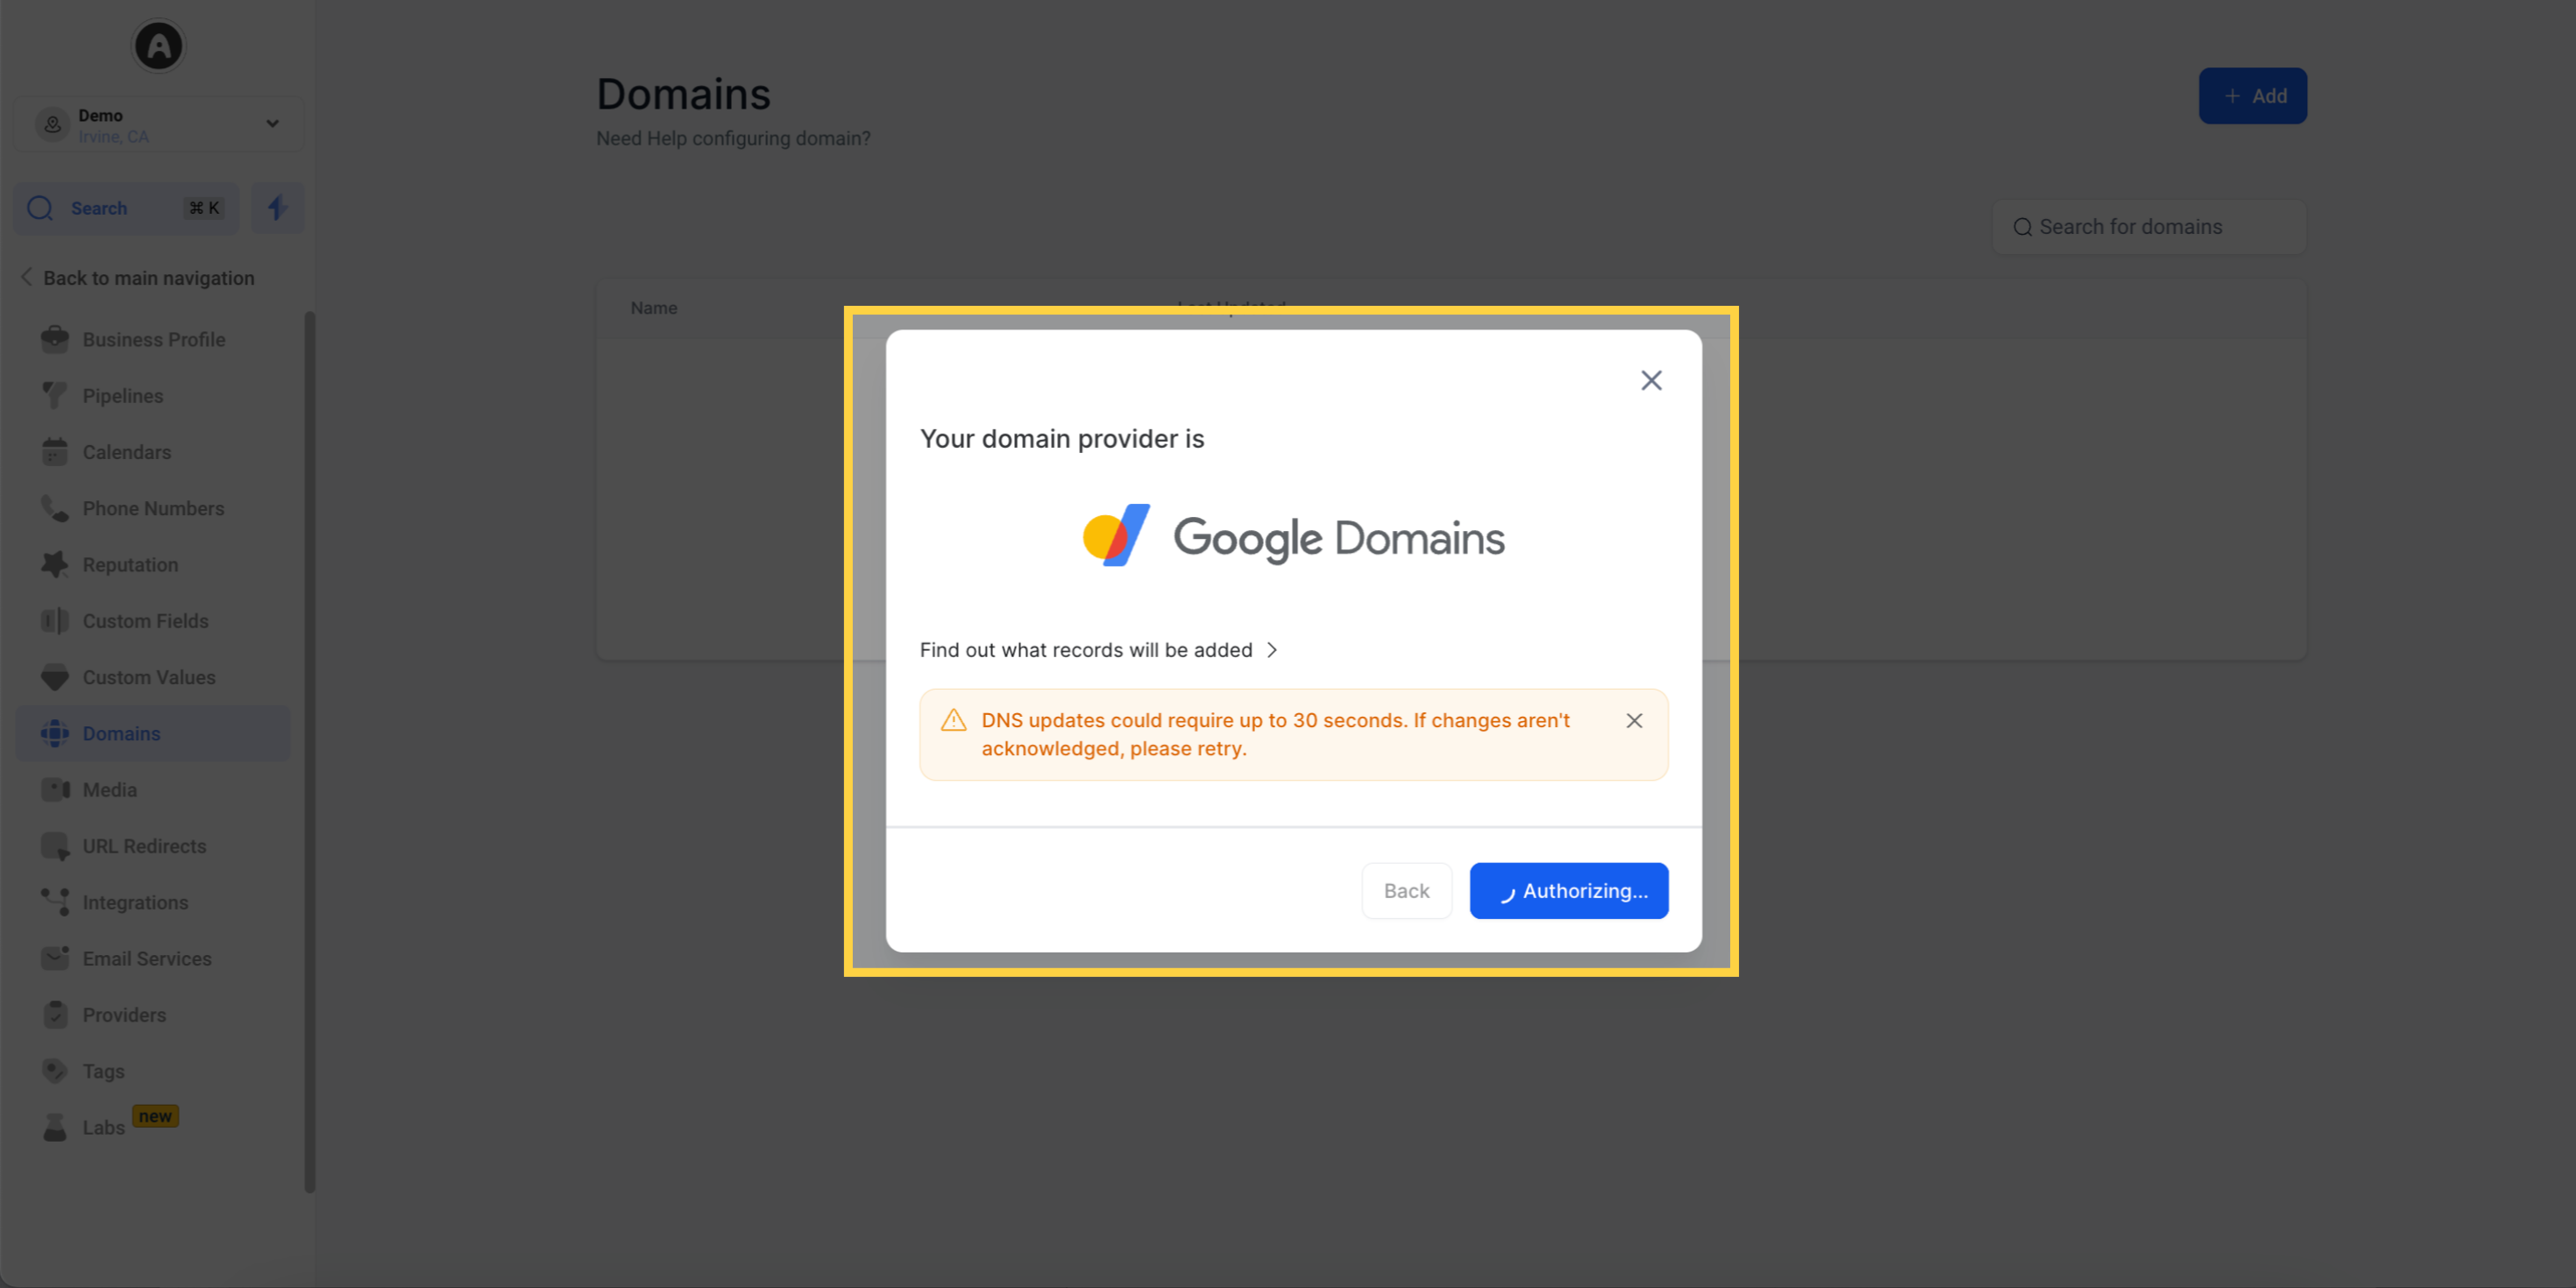
PLEASE NOTE:
If you're using Google Domains, the authorization process will only be completed once you close the tab and return to your sub-account.
The system will add the required entries, confirming the connection between your domain and the CRM.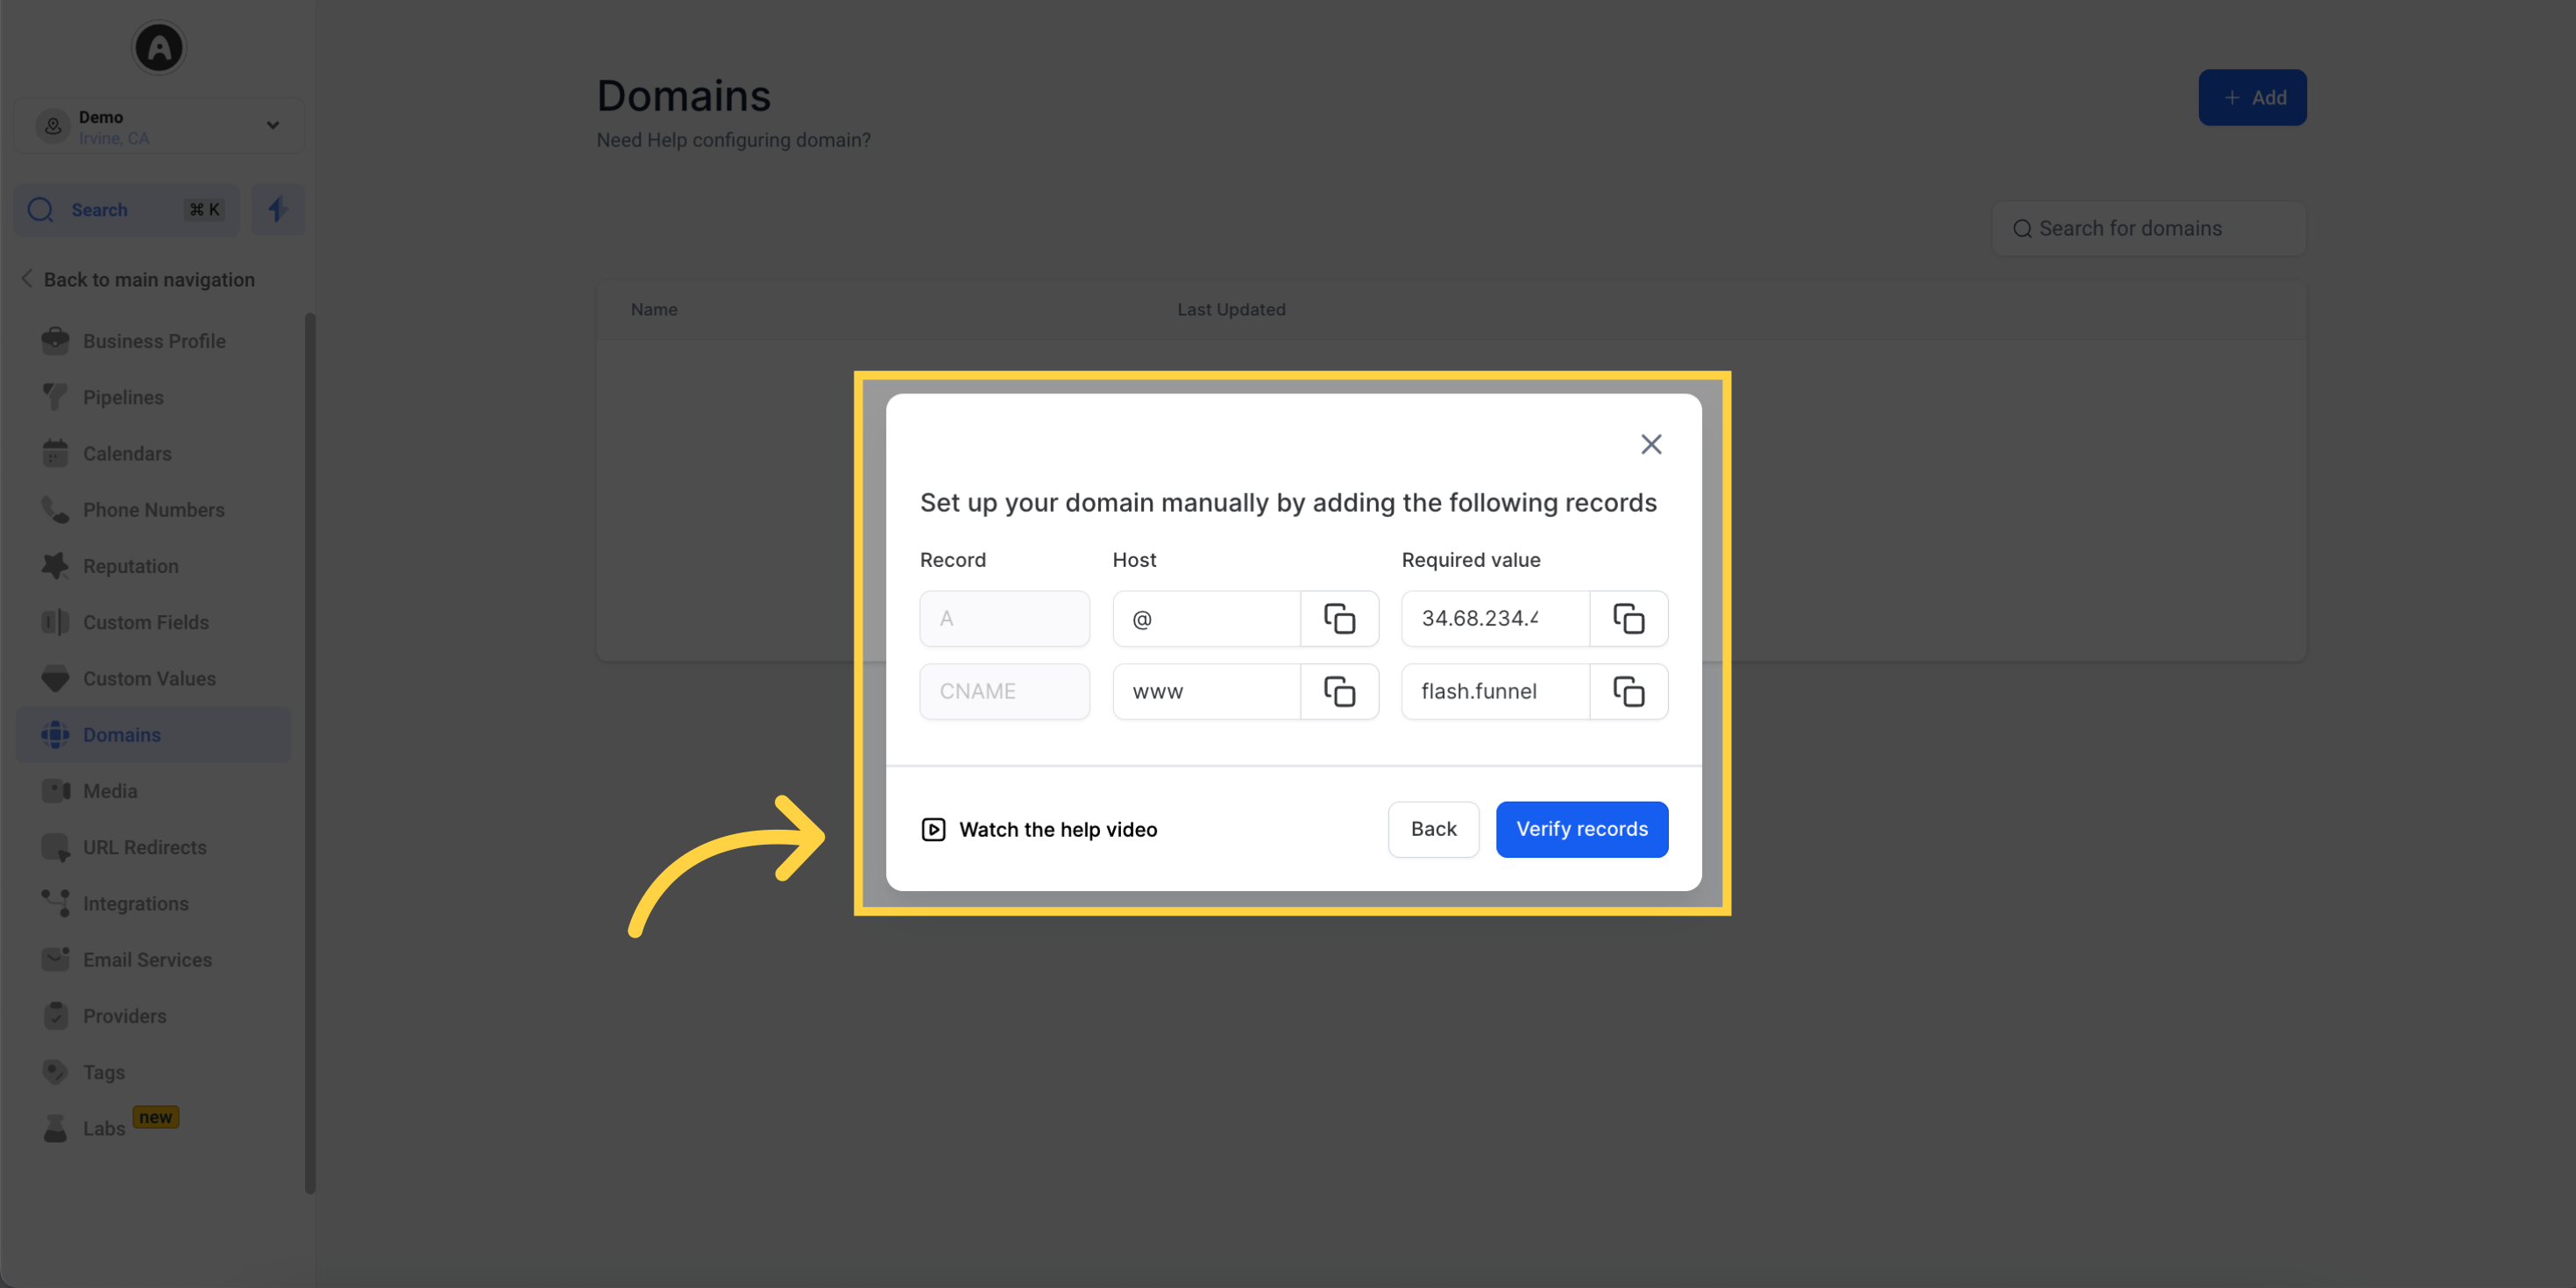

A: Absolutely! If you prefer to set up your DNS records manually or if your domain provider is not currently supported by Domain Connect, manual configuration is still an option for you.
A: No worries! Even if your domain provider is not currently supported by Domain Connect, you can still manually add the necessary DNS records. The manual configuration process remains unchanged.
