)
)
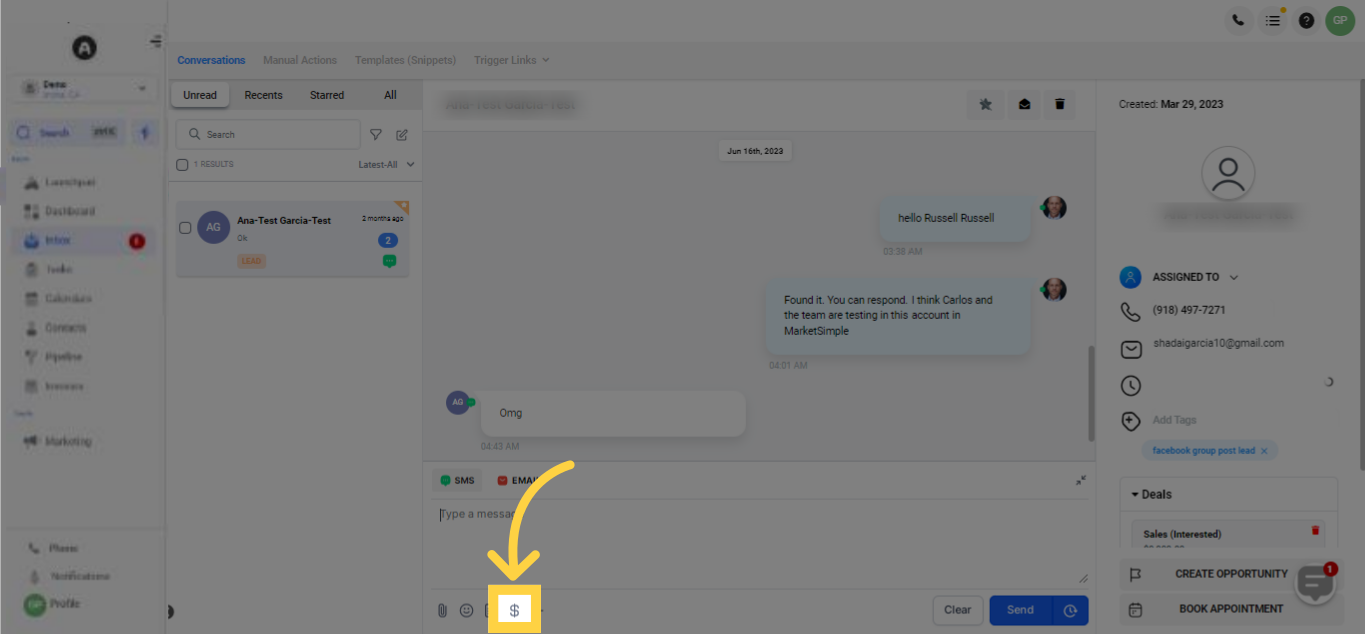
For a swift request of payment from a client, just hit the money symbol located at the lower left corner of your active chatbox. Clicking on the icon prompts a popup window where you can enter the needed payment request details. This efficient mechanism facilitates quick and effortless payment requests.
)
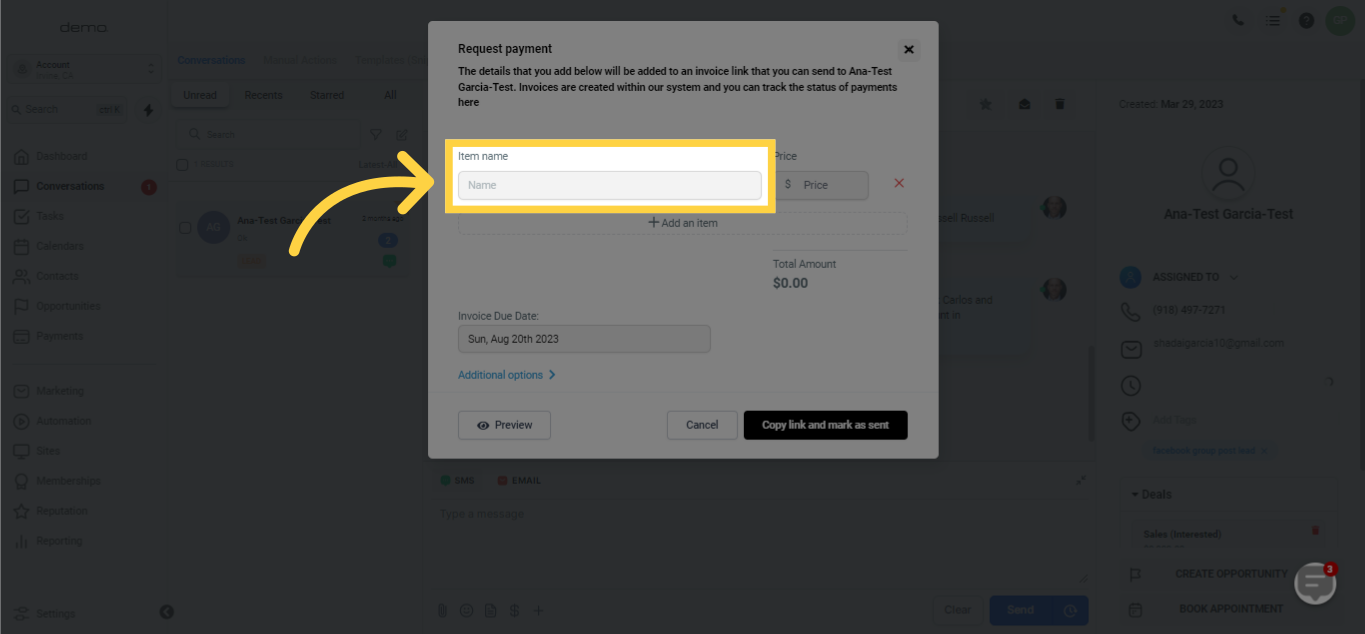
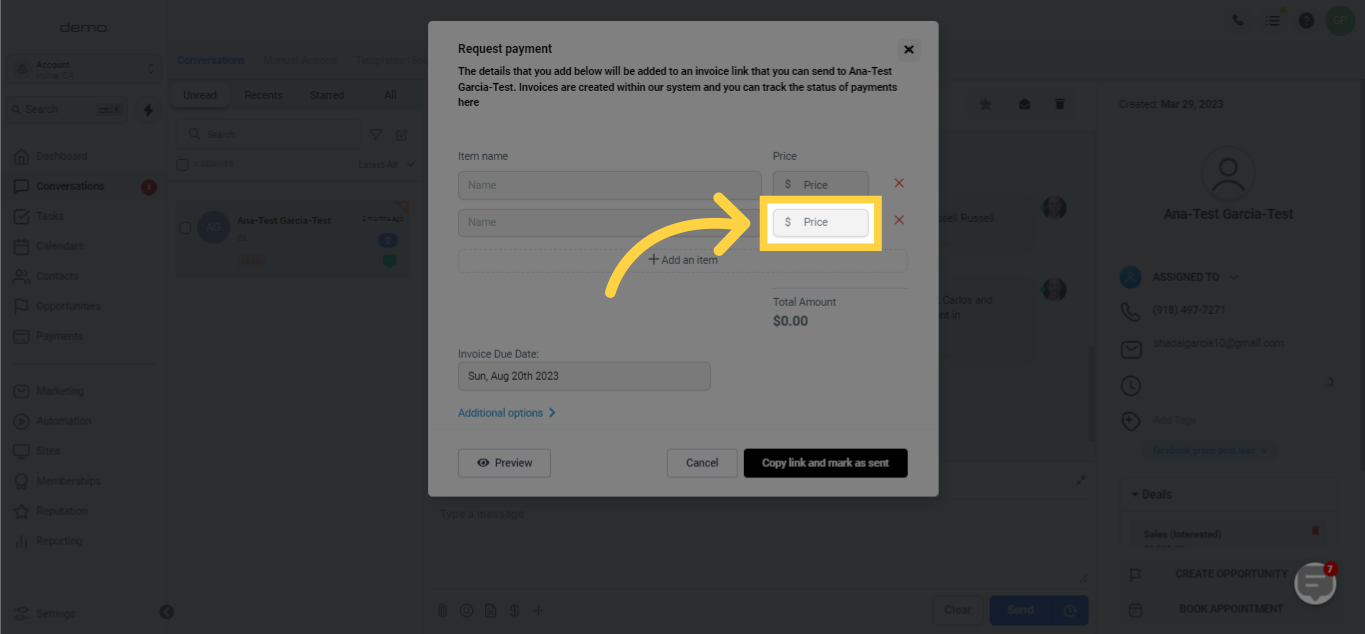
In this segment, you are given the chance to specify the product or service relevant to the invoice creation. By outlining these particulars, you guarantee clear and correct billing data, thereby simplifying the comprehension of charges for your clients and facilitating prompt payment processing.
)
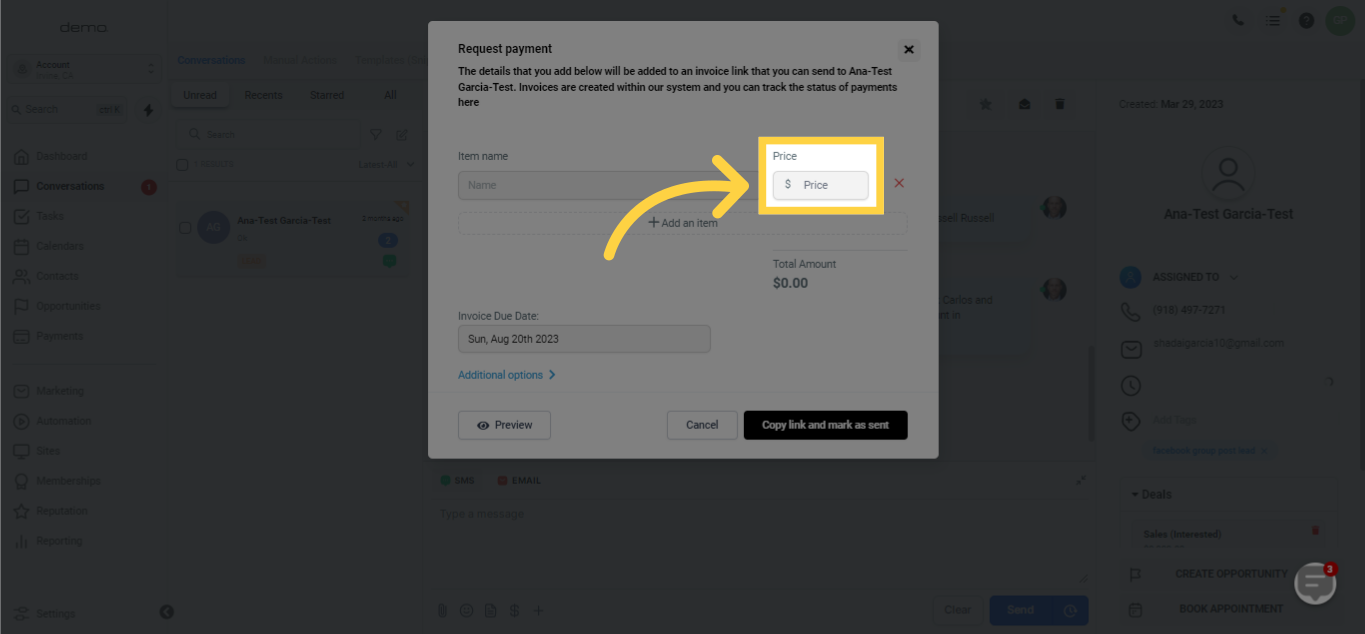
In this marked field, you can enter the expense associated with your offering, be it a product or service. By presenting this crucial information, you foster transparency and ease your clients into the transaction, thus helping them grasp the charges they are to reconcile.
)
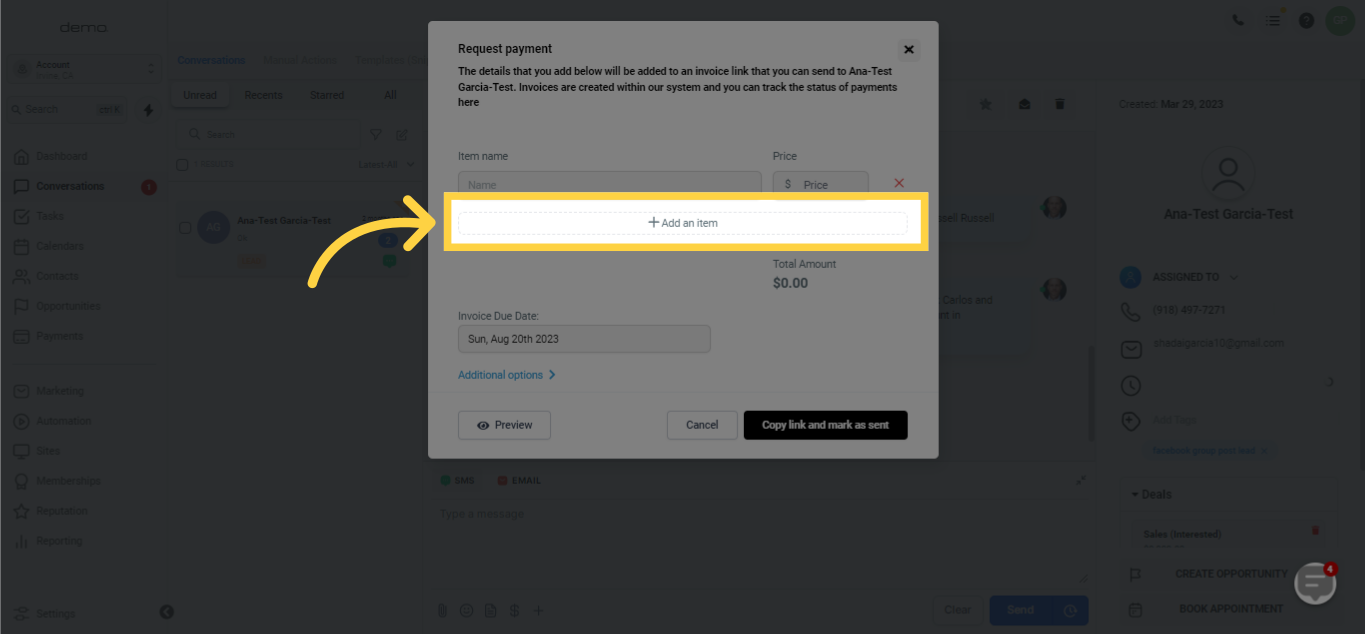
If your payment request involves multiple products or services, simply hit the '+ Add an Item' button located beneath the filled item and price field. This will prompt another section for you to input an additional item name and price. Continue this step for each product or service included in your current payment requisition.
)
)
)
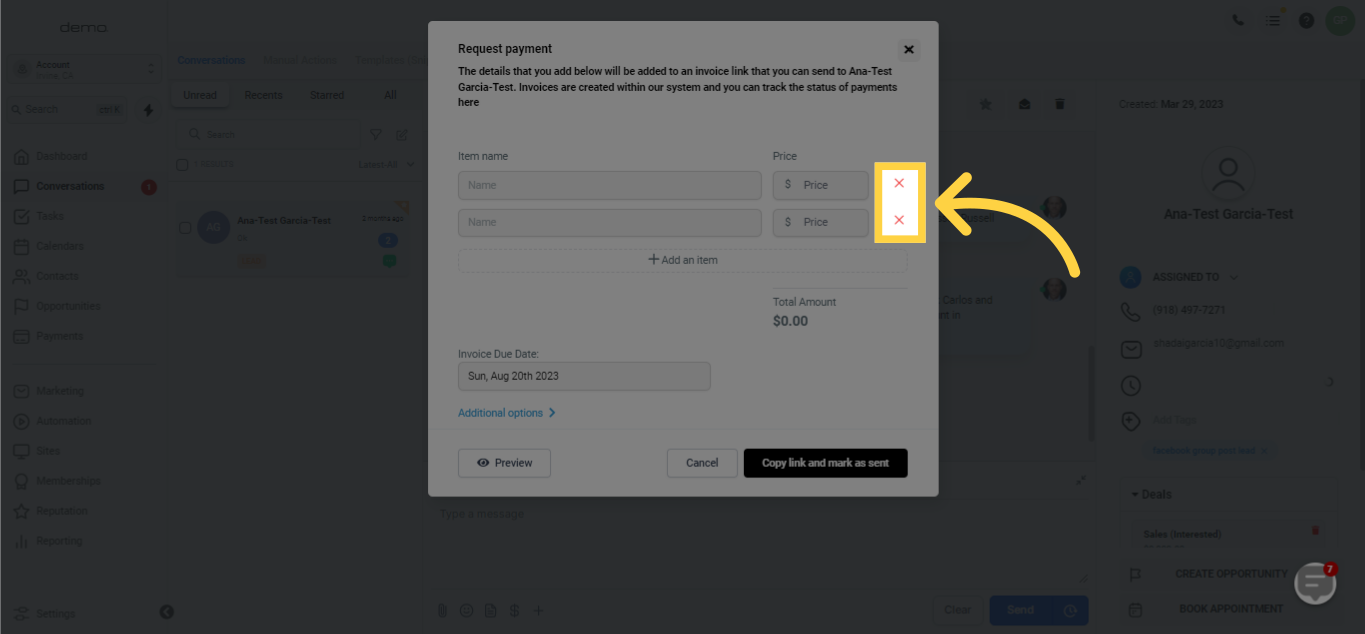
To remove an item you've included in the invoice, click on the large red 'X' button situated to the right of the item in question. Before proceeding, ensure you want to make this change as it's irretrievable once completed.
)
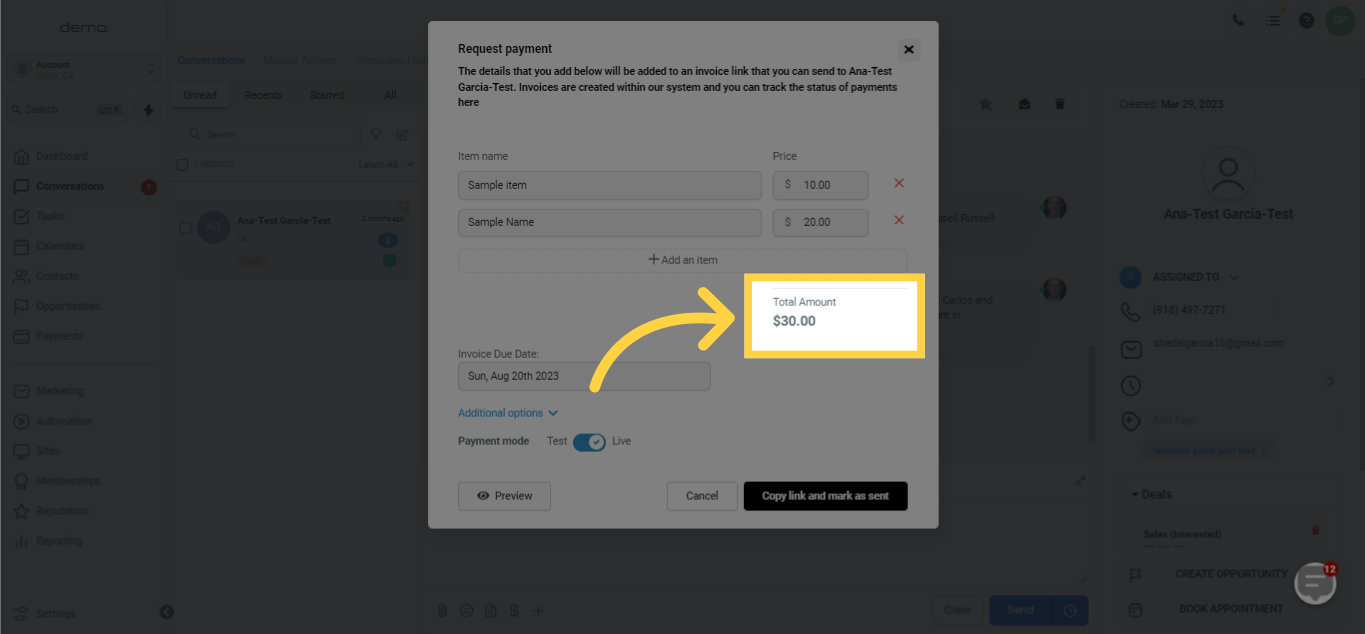
Once you've incorporated all the requisite items on the invoice, it's vital to double-check the total sum being asked from your client. This step aids in maintaining billing precision and builds confidence between you and your clientele by showcasing an unambiguous and exact summary of the charges they are to settle.
)
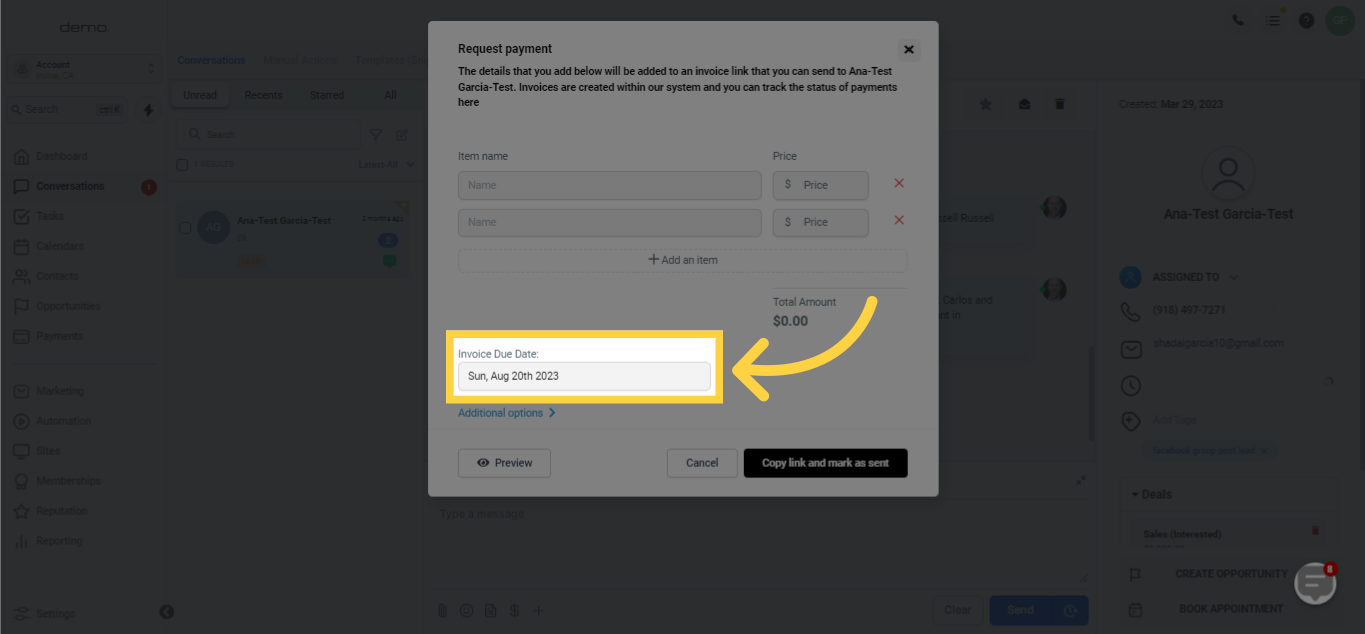
You can specify an invoice due date by clicking on the box labeled 'Select date' under 'Invoice Due Date'. A calendar will pop up, allowing you to select the intended due date for the payment.
)
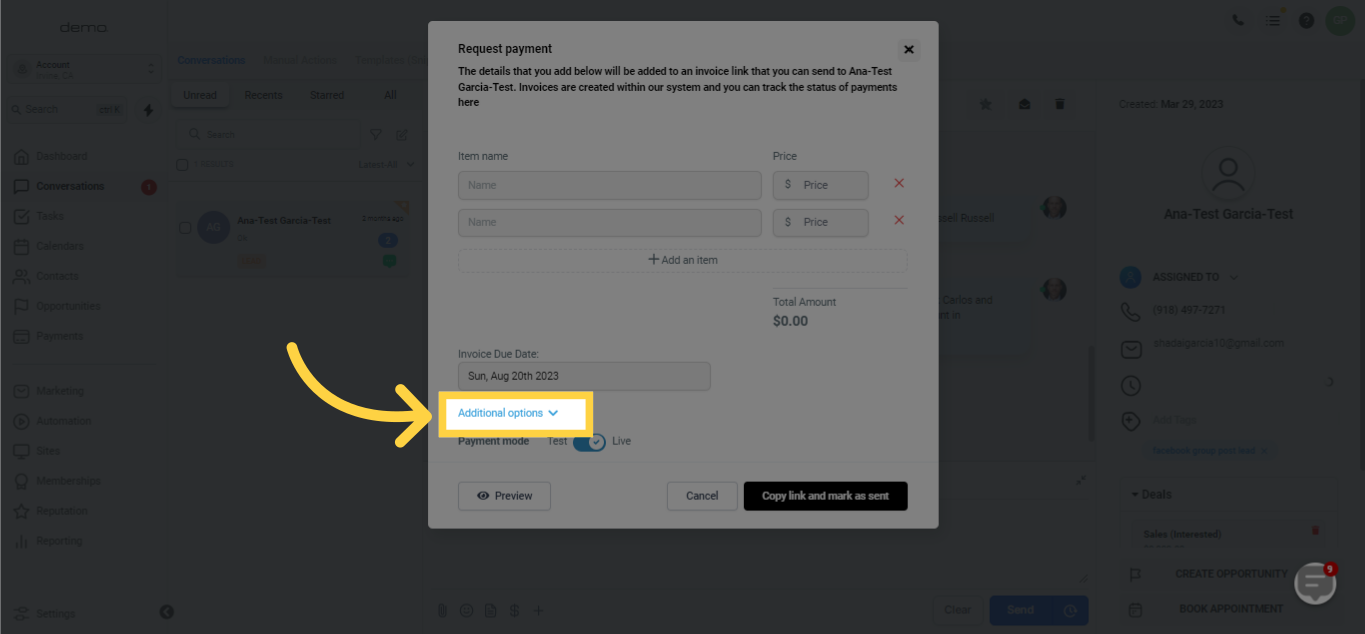
Beneath the 'Invoice Due Date', you can select the blue 'Additional Options' button. This will reveal more choices in relation to the invoice.
)
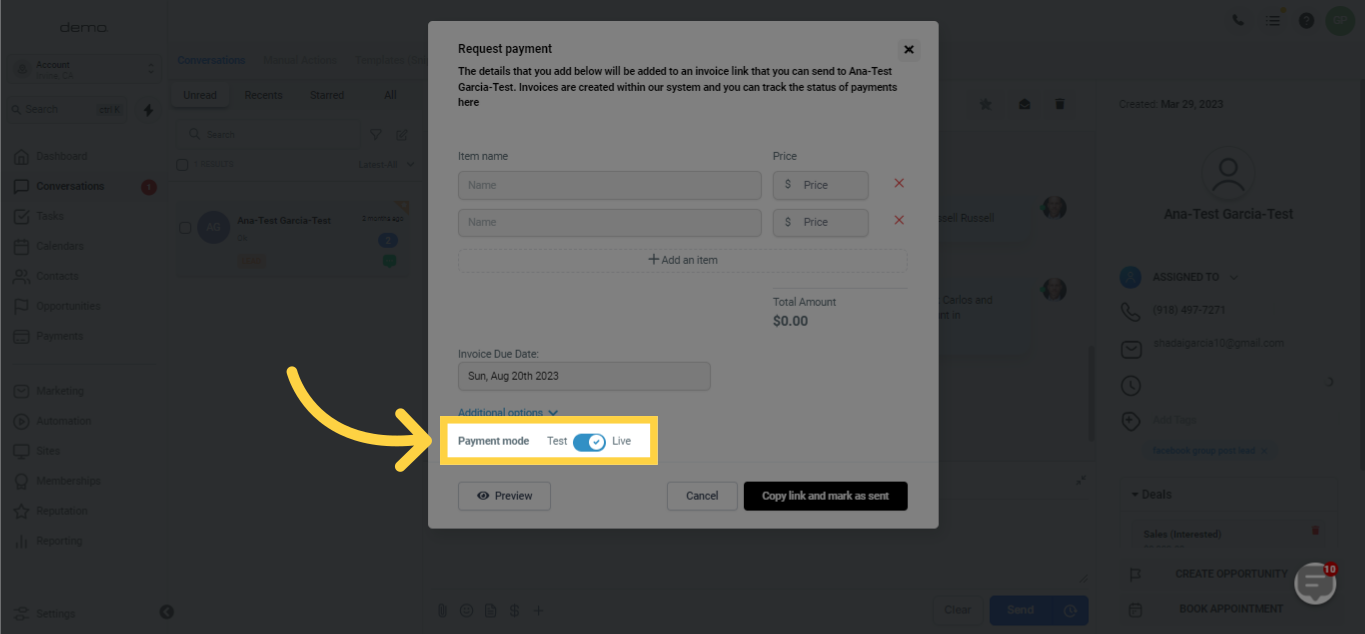
Using the provided toggle switch, you can set the payment mode to either 'Test' or 'Live'. After settling on your desired mode, remember to save your changes. This function allows you to test the payment process in a controlled environment before transitioning it to a live platform, guaranteeing an effortless experience for your clients.
)
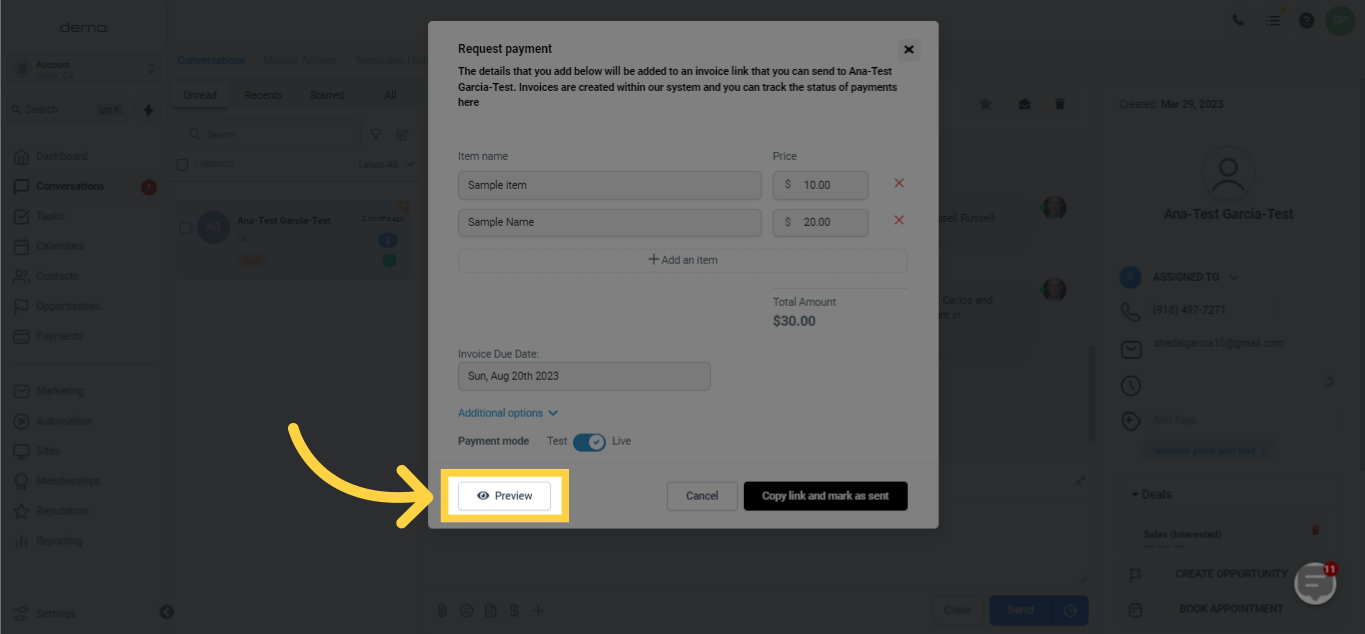
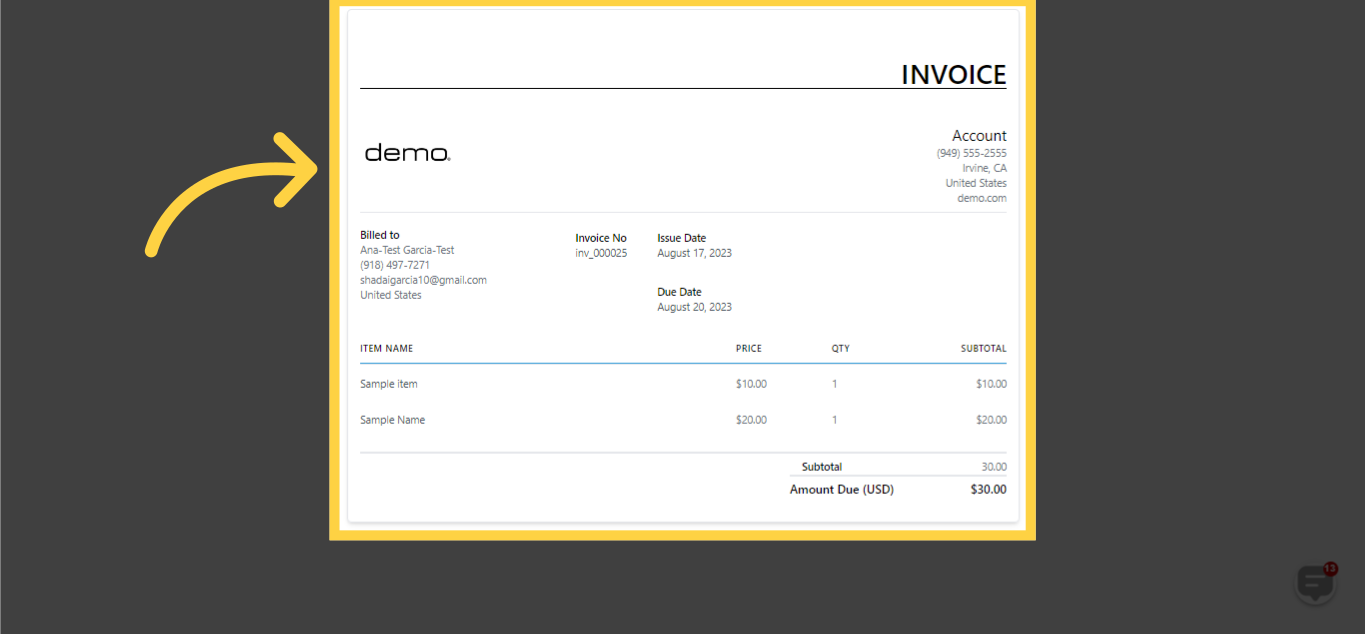
If you desire to view the quick invoice you've just drafted to get a glimpse of how it will appear to your client upon receipt, simply hit the 'Preview' button. This will guide you to another web tab where you can preview the invoice.
)
)
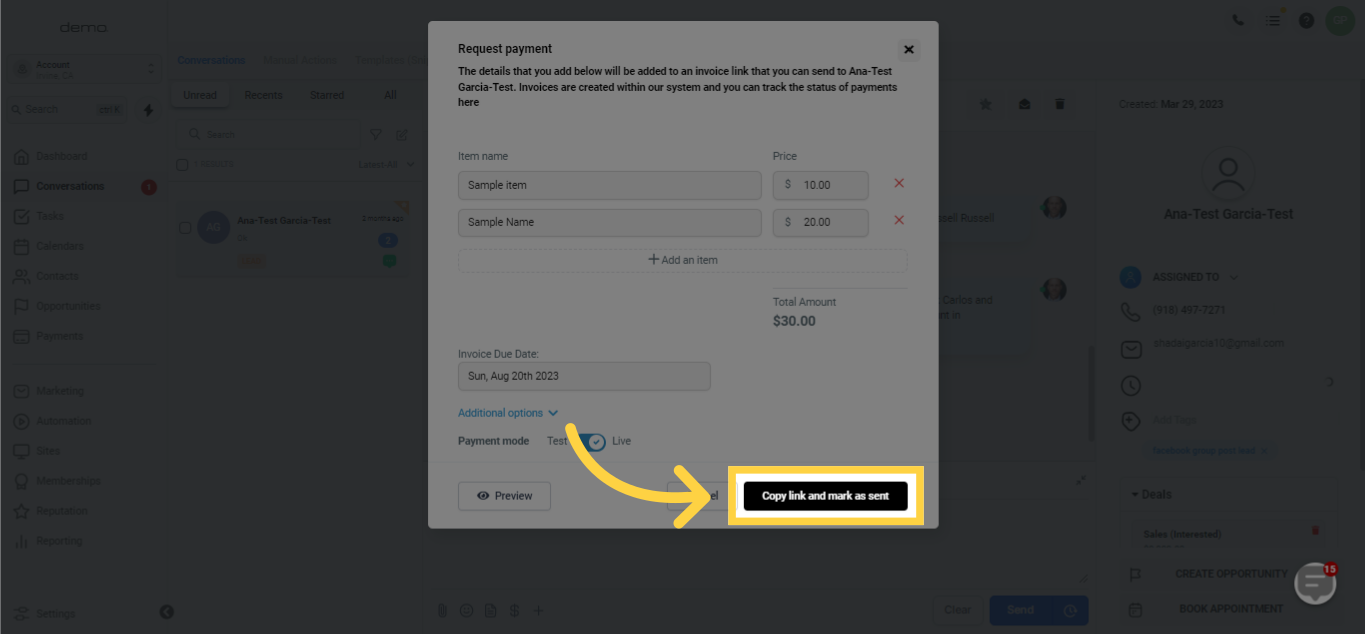
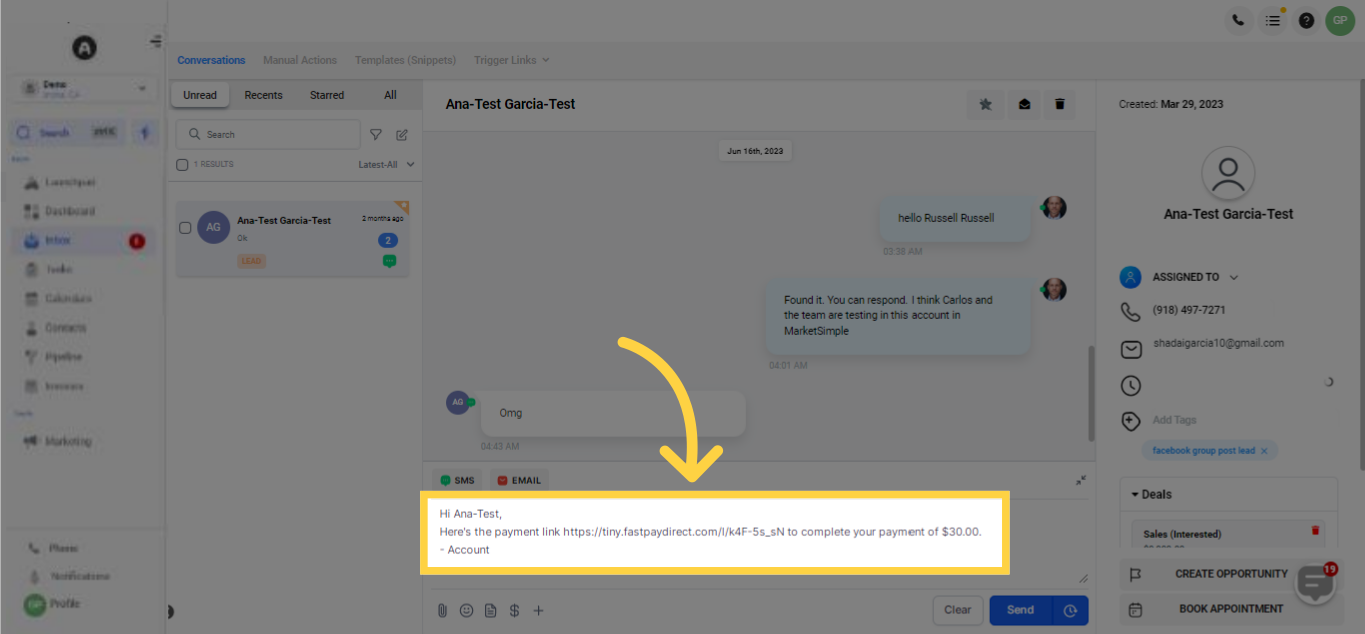
Hit the "Copy link and mark as sent" button to produce the link for payment requests sent via both Email and SMS.
)
This link is designed for distribution to your client through Google My Business (GMB) or SMS chat. To ensure the link operates as expected, you can copy and paste it into your web browser or send it to yourself via SMS as a trial run. This action affirms an uninterrupted and effortless experience for your clients during their payment procedure.
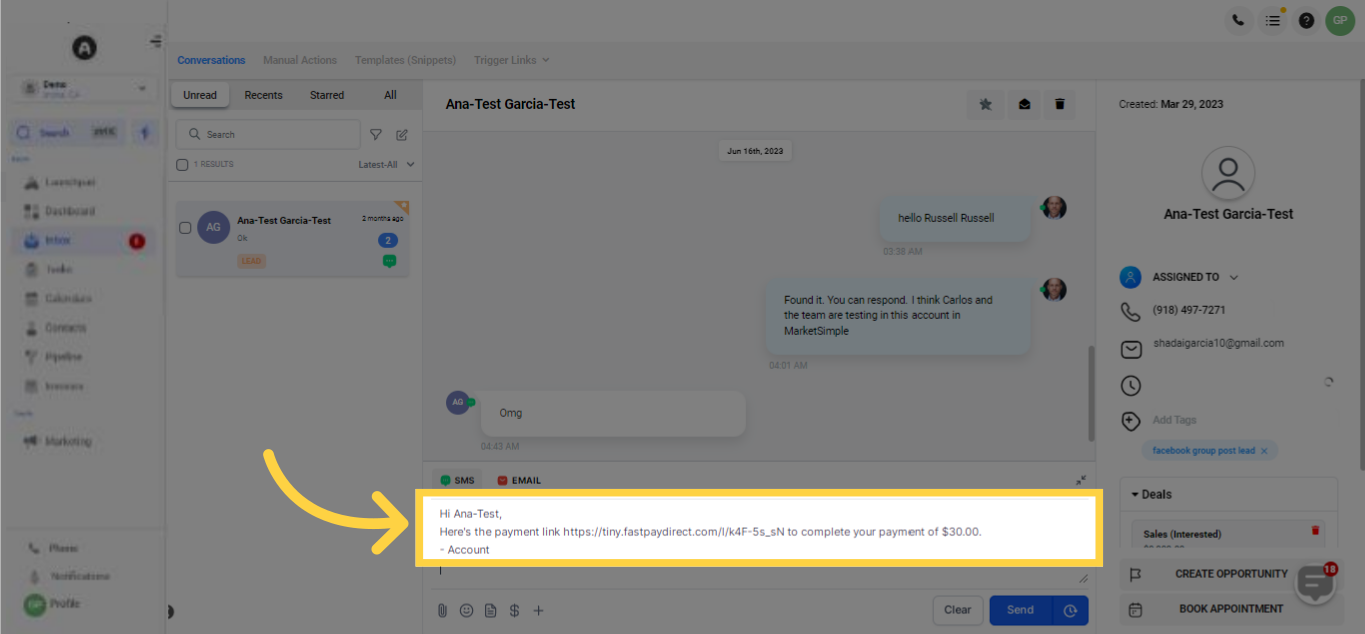)
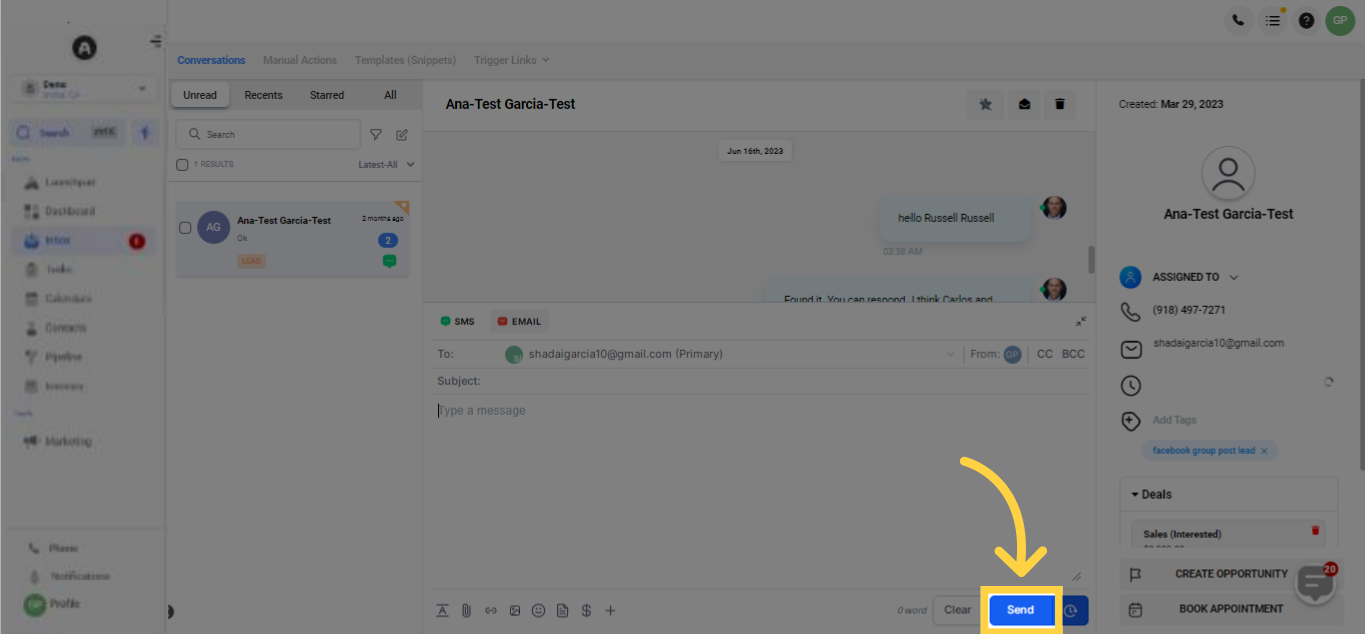
If email is also selected as an extra means of communication, the payment link will be sent to your client via their Email. To ensure the link works correctly, place the link in an Email and send it to a demo account as a test run. This method guarantees a smooth and uncomplicated experience for your clients during their payment procedure.
)
)
)
)
)
