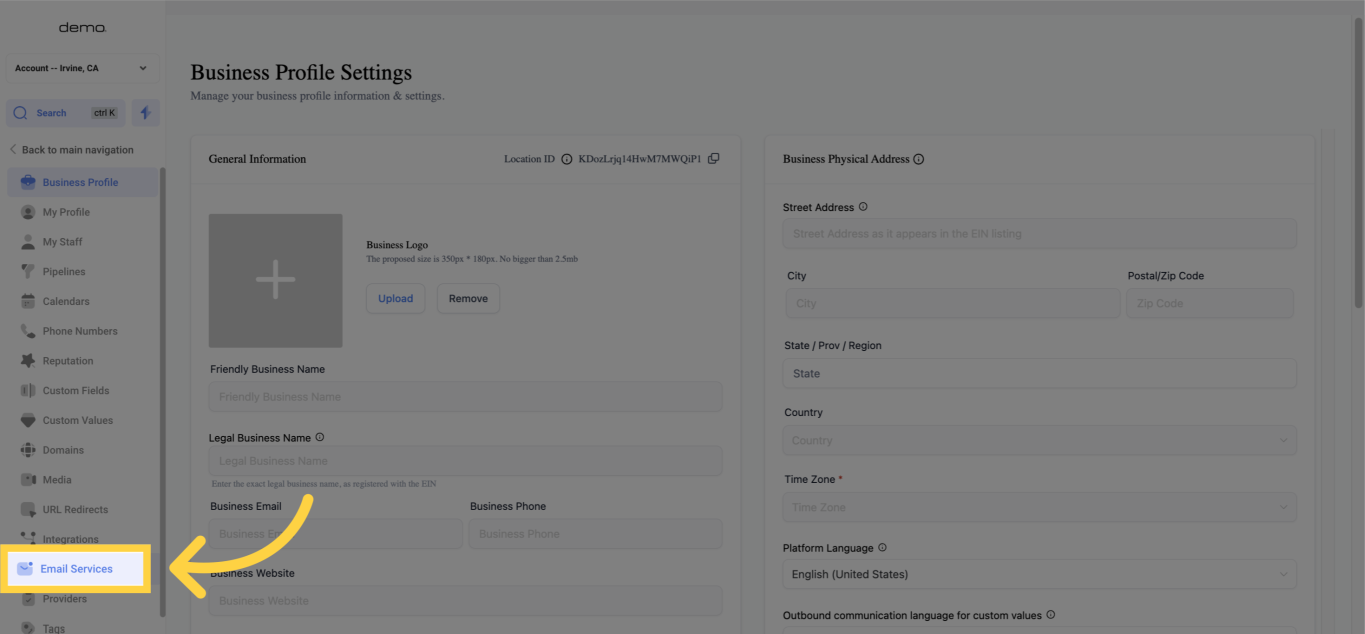
This article will guide you through a detailed procedure to configure a Gmail account, enabling the management of your email inbox within your CRM.
)
)
)
)
)
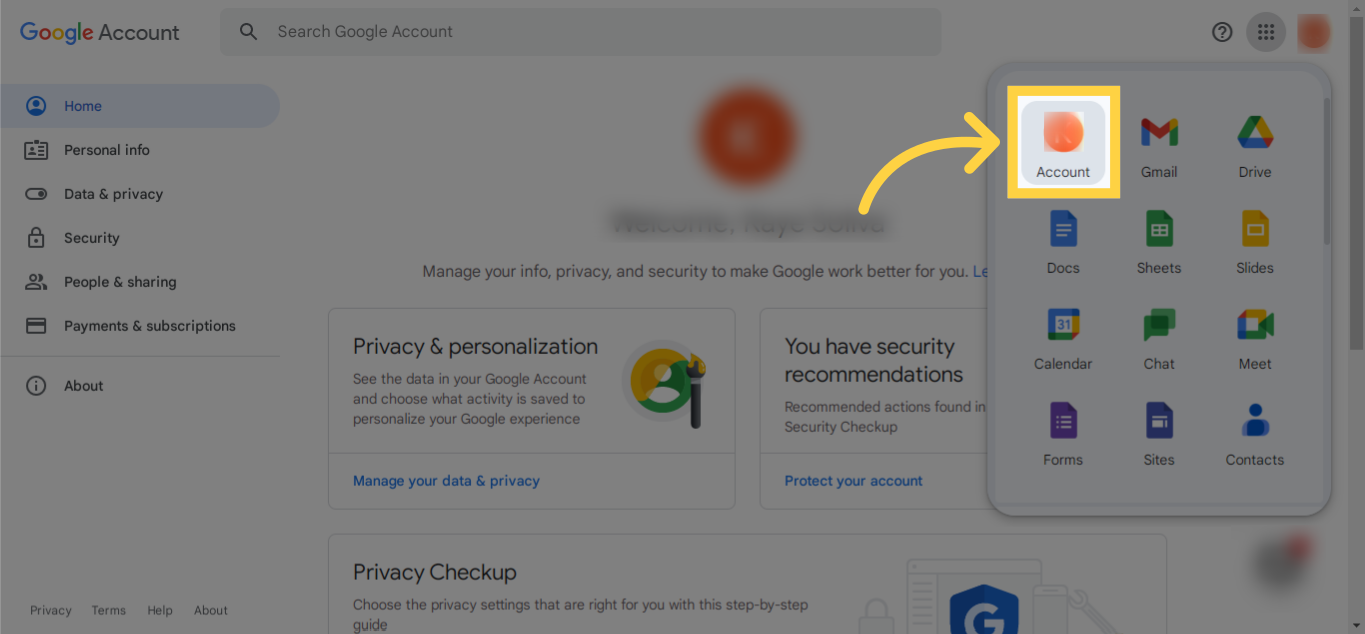
To establish a connection between your Gmail account and your CRM system, you'll initially need to create an "App Password" from your Google account. This can be done by navigating to the Google account associated with the Gmail email you wish to link with your CRM. Subsequently, you can adhere to the following steps provided below:
In order to integrate your Gmail account with your CRM, the initial step involves generating an "App Password" via your Google account. This necessitates accessing the Google account associated with the Gmail address you're attempting to connect to your CRM. Upon reaching your Google account, you can proceed by following the steps illustrated below:
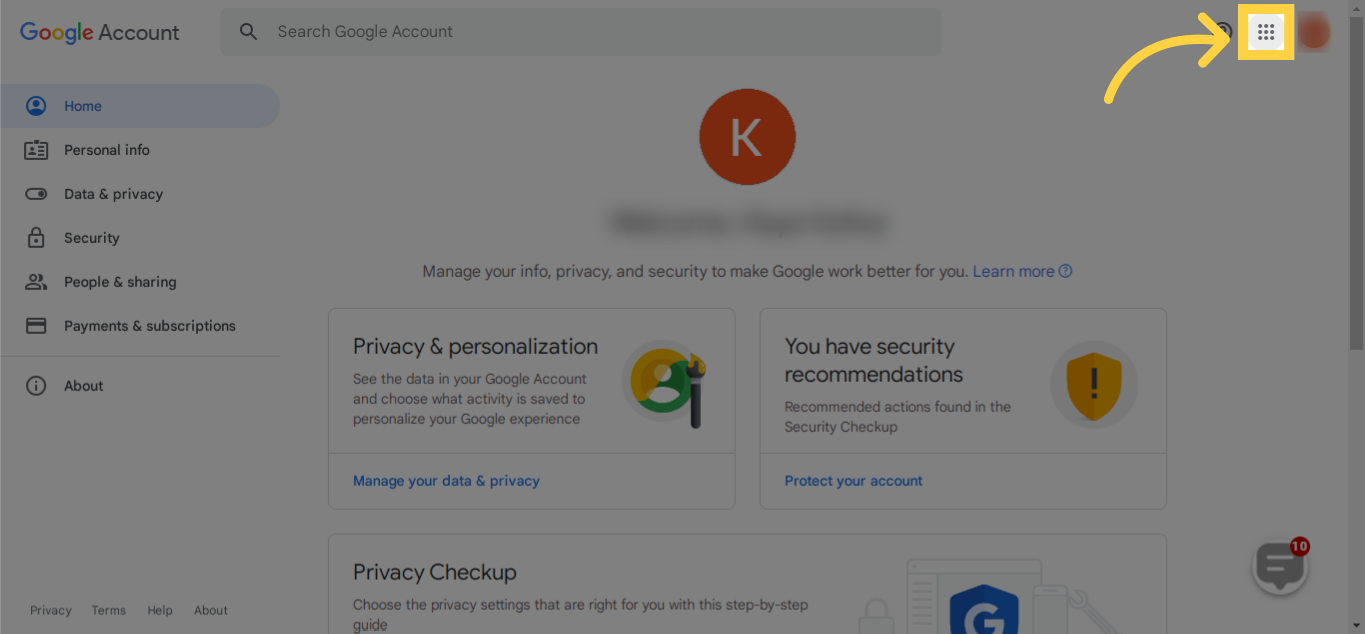
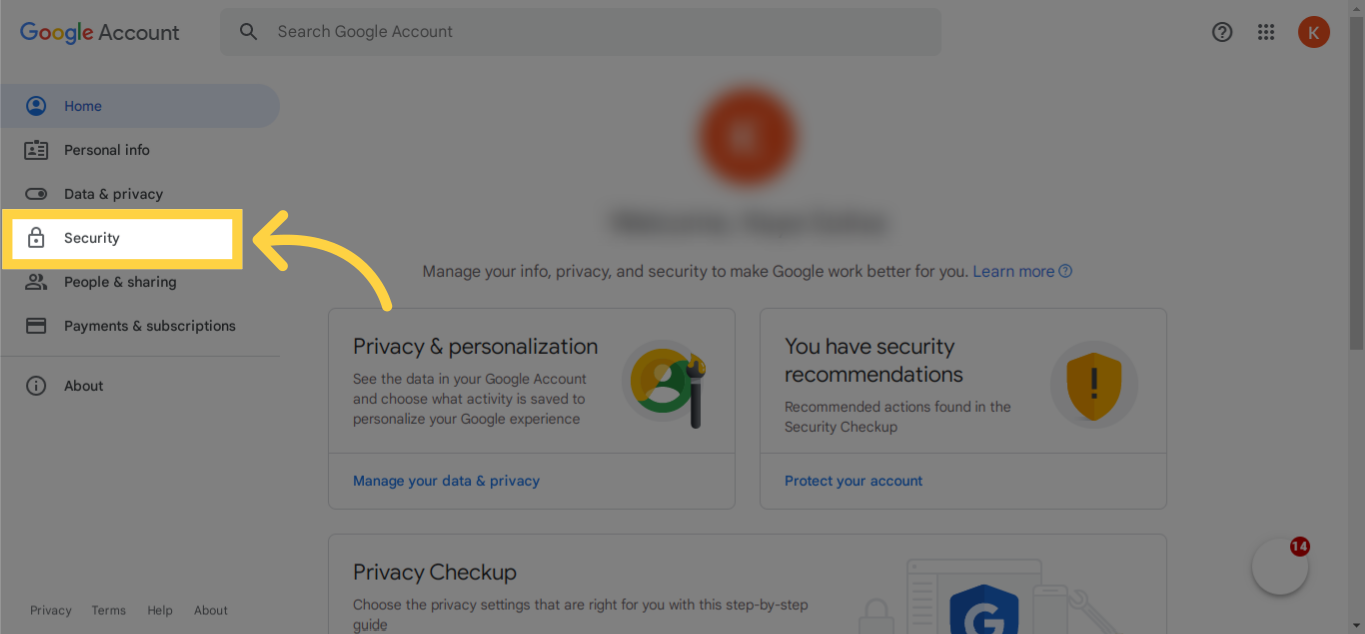
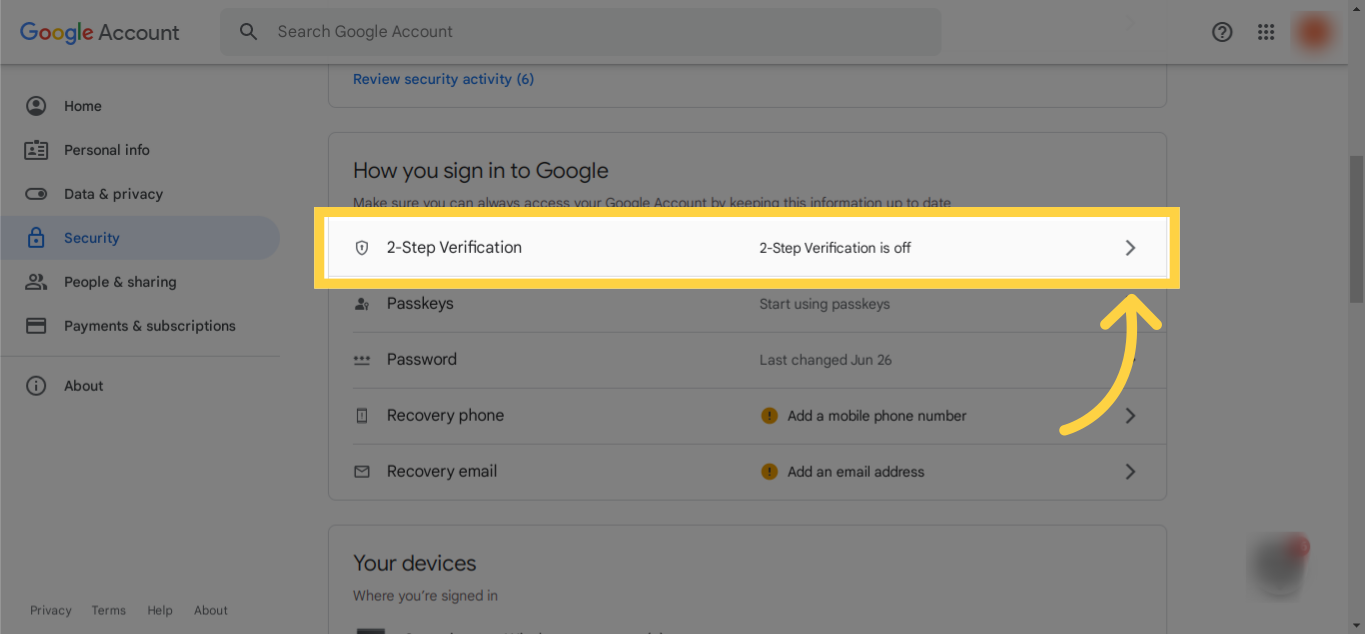
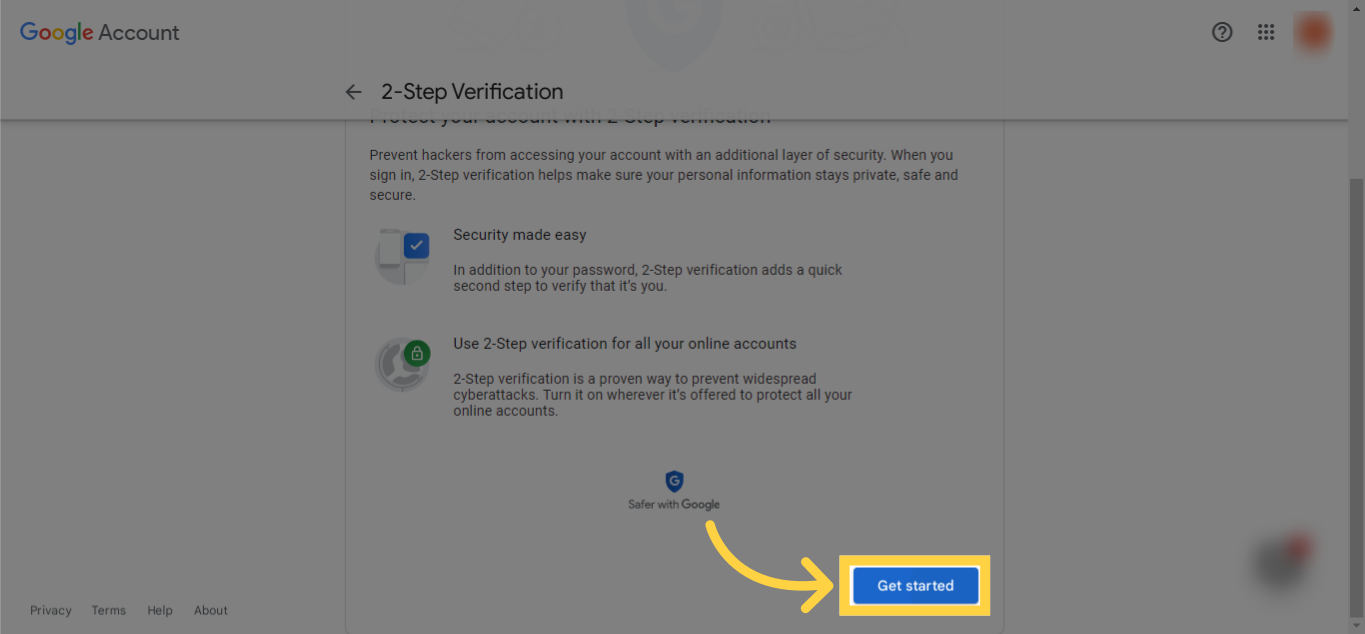
After clicking on "Account", head over to the Security Section of your Google account. From there, proceed to the "Signing in to Google" section and enable the 2-step verification. Next, click on the "Get started" button to progress to the subsequent stage.
Up next, input your Gmail password and click on "Next" to continue with the process.

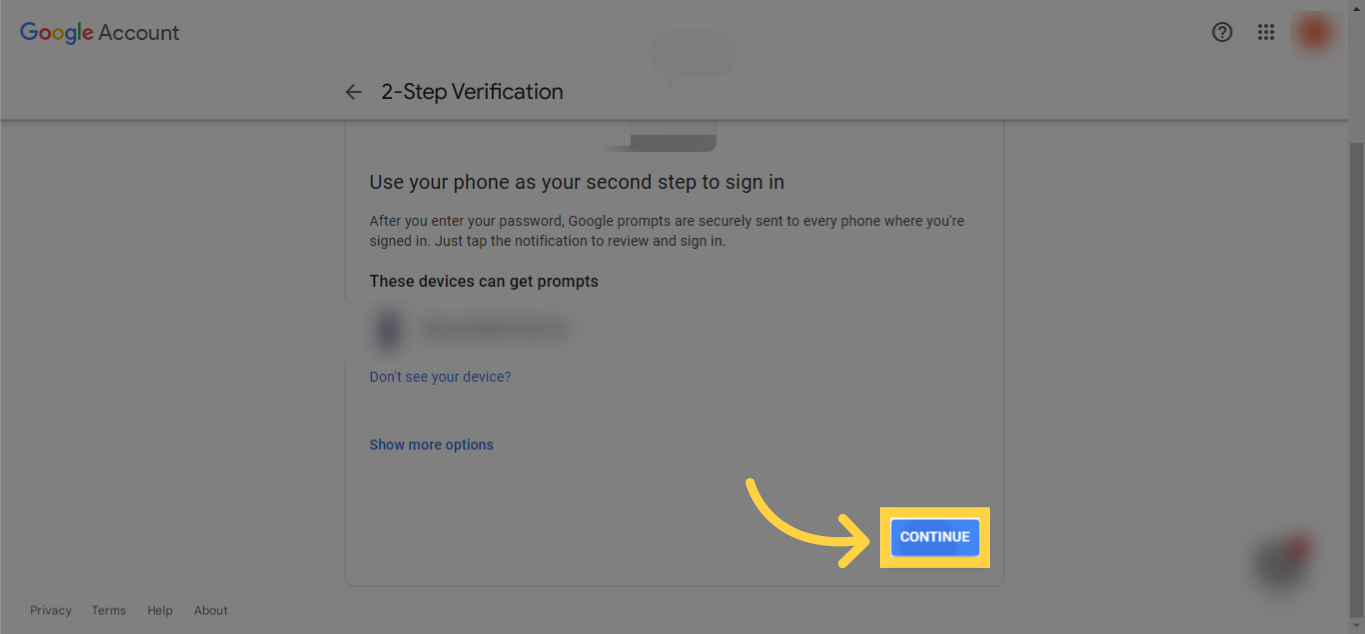
As a second verification step, add a device and then click on the "Continue" button. This selected device will receive notifications to approve new device logins and subsequent log sessions.
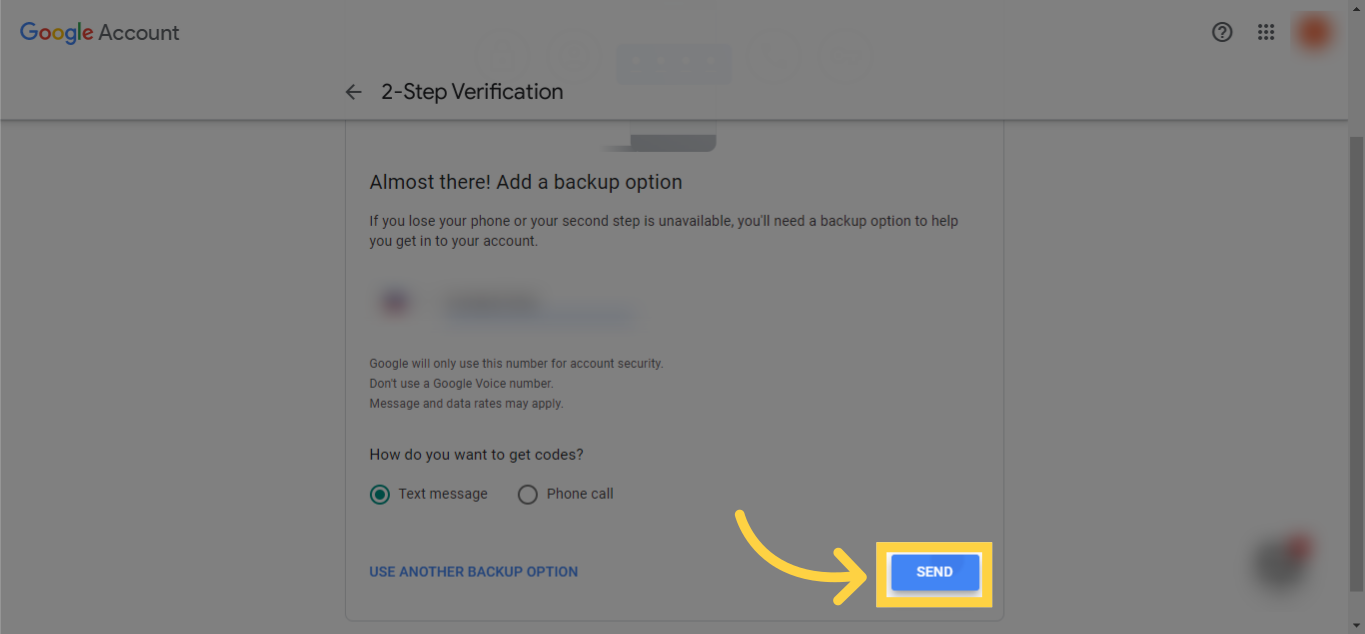
Include a phone number for backup purposes and then select the send option for Google to dispatch a verification code to this backup phone number.
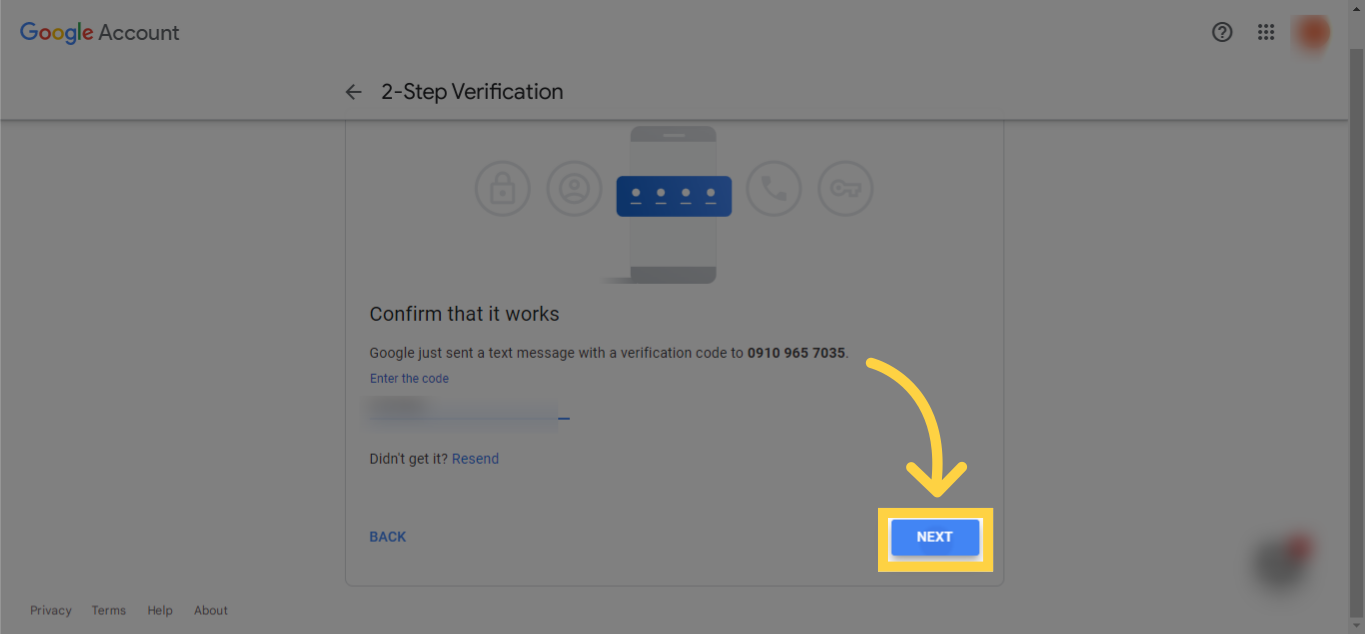
Key in the code you've received via text message. Once that's complete, select the next option.
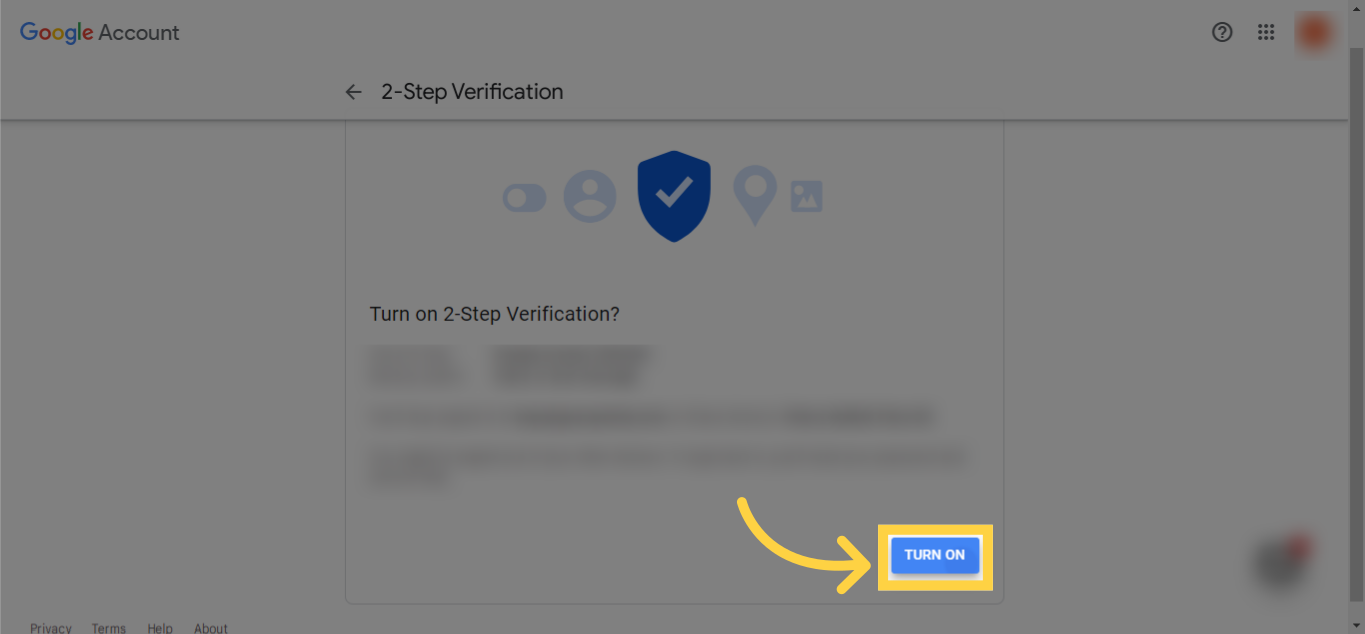
To activate the two-step verification, click on the "Turn On" option. Enabling this feature is necessary for using Gmail on third-party applications
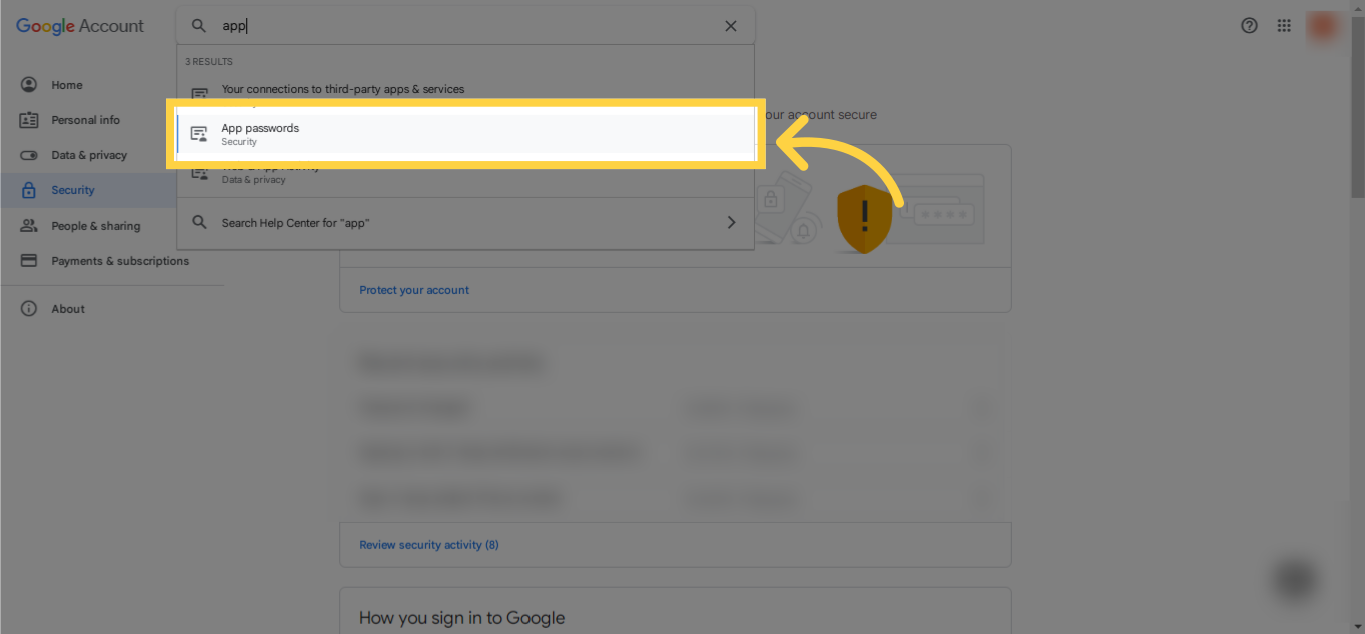
Now, navigate back to the Security section of your Google account and scroll down to the 2-step verification. Beneath it, you'll discover a tab named "App Passwords". Click on this tab to establish the app password.
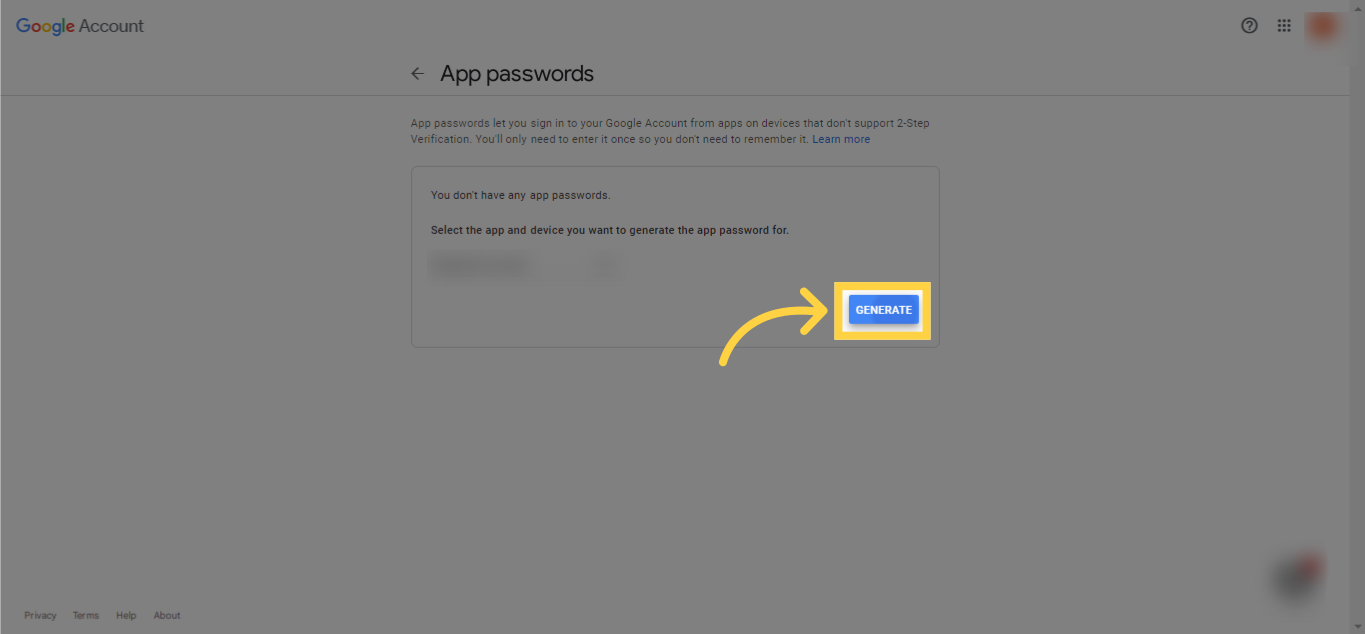
From the dropdown menu, choose the "other" option. This will allow you to assign a specific name to your CRM account for easier recognition.

After assigning a name, click on the "generate" option. This will prompt the system to create a unique password used to forge a connection between Gmail and your CRM.
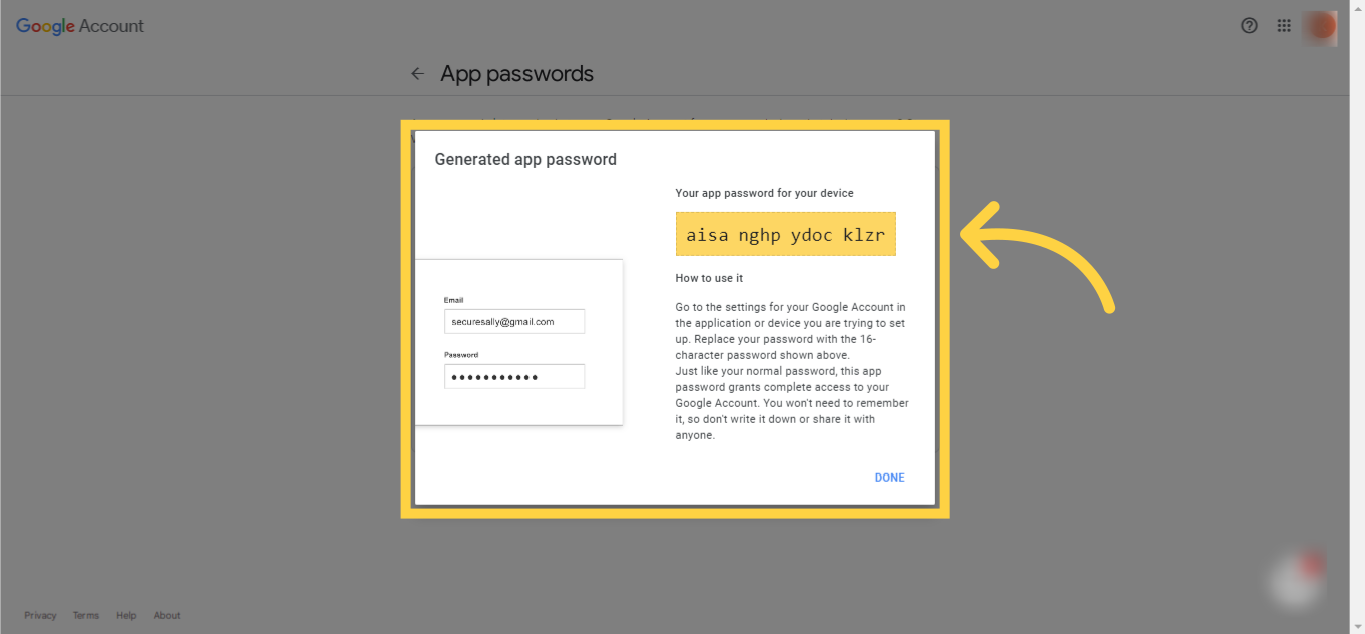
Copy the generated unique password and click on "Done". Ensure to save this password safely as you may require it in the future.
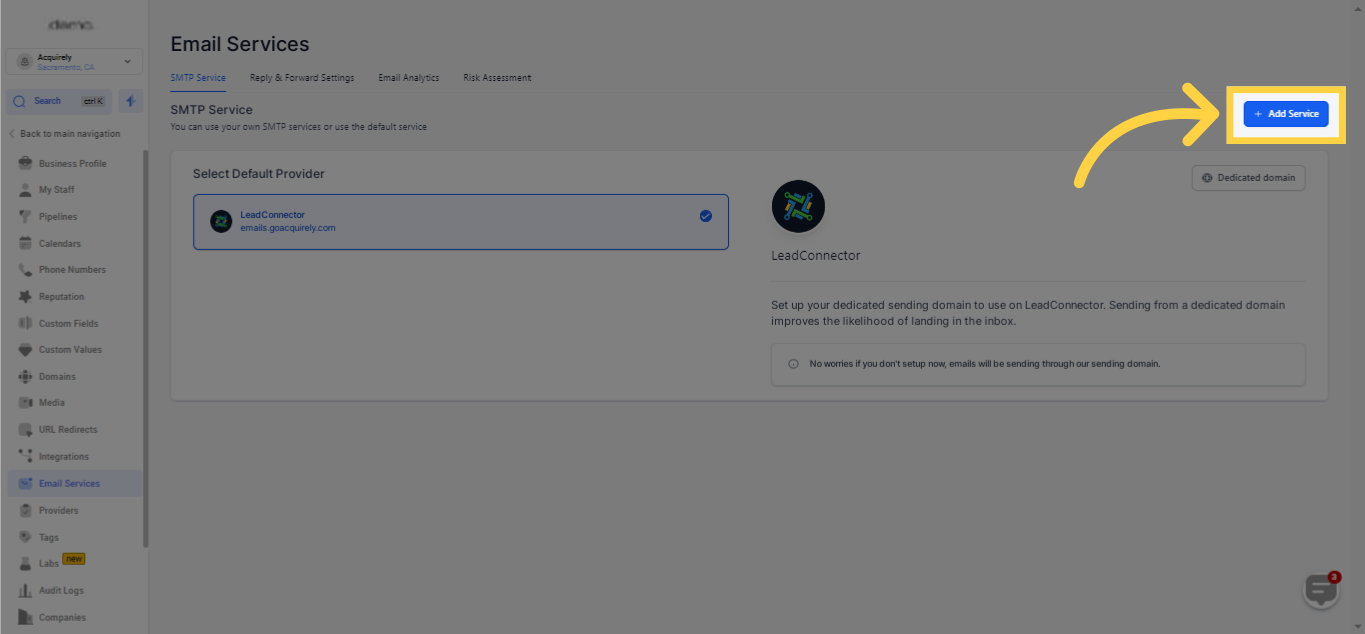
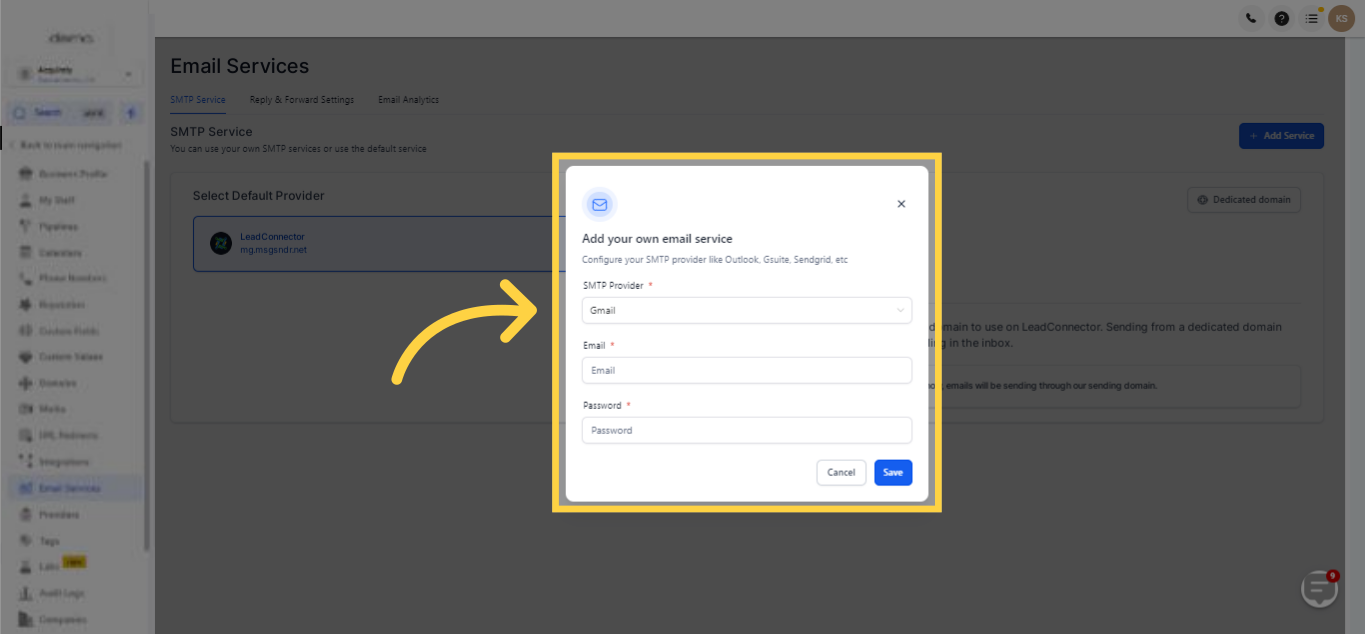
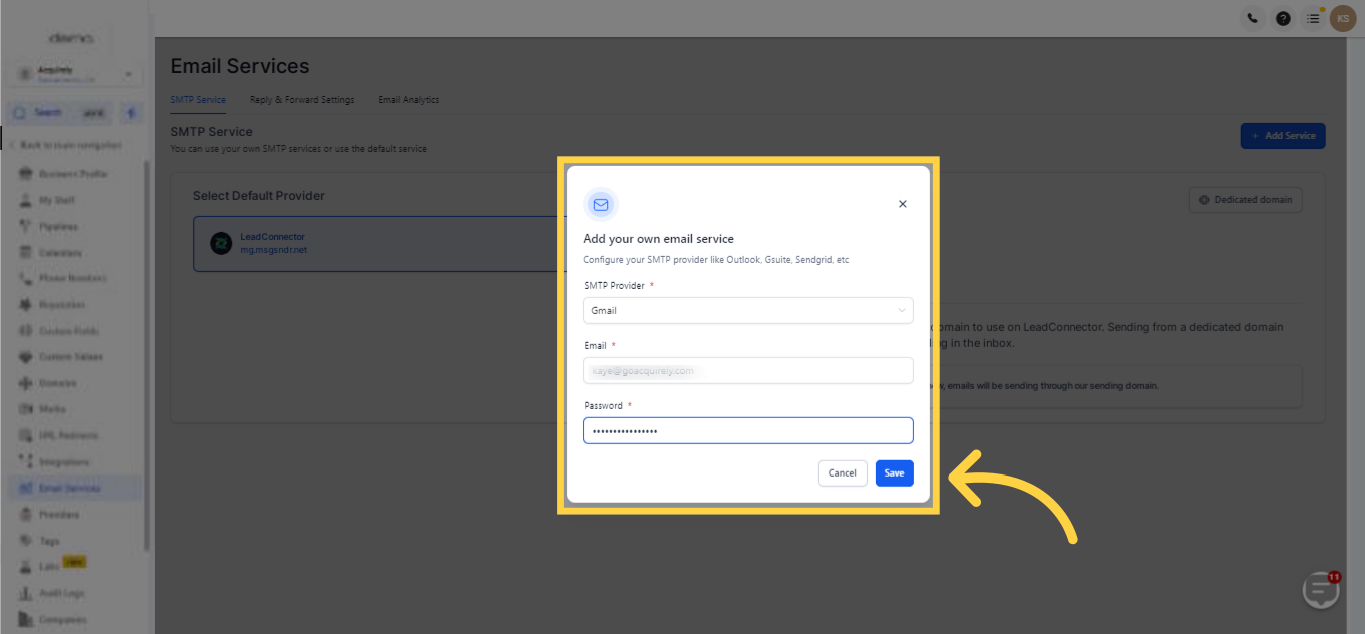
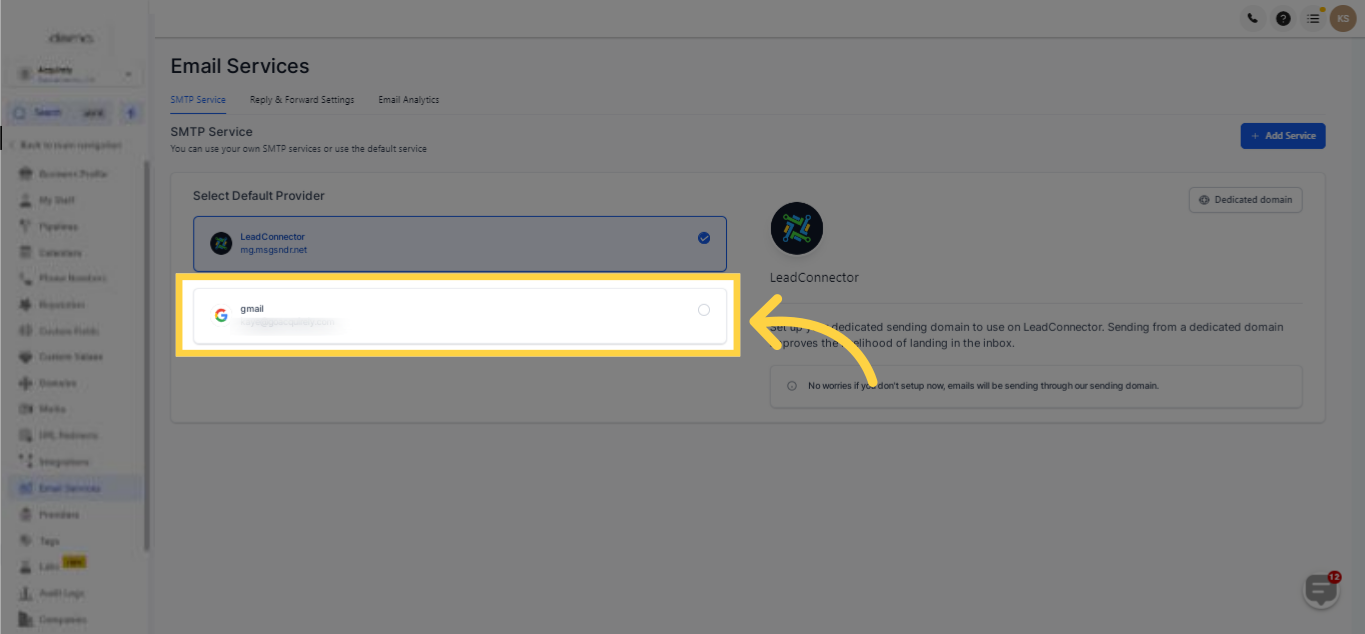
Now, return to the email service section of your CRM and paste the password you copied from the Google account. After doing so, click on the "Save" button.
)
Upon successfully establishing a connection between your Gmail account and your CRM, your screen should display as follows.
)
