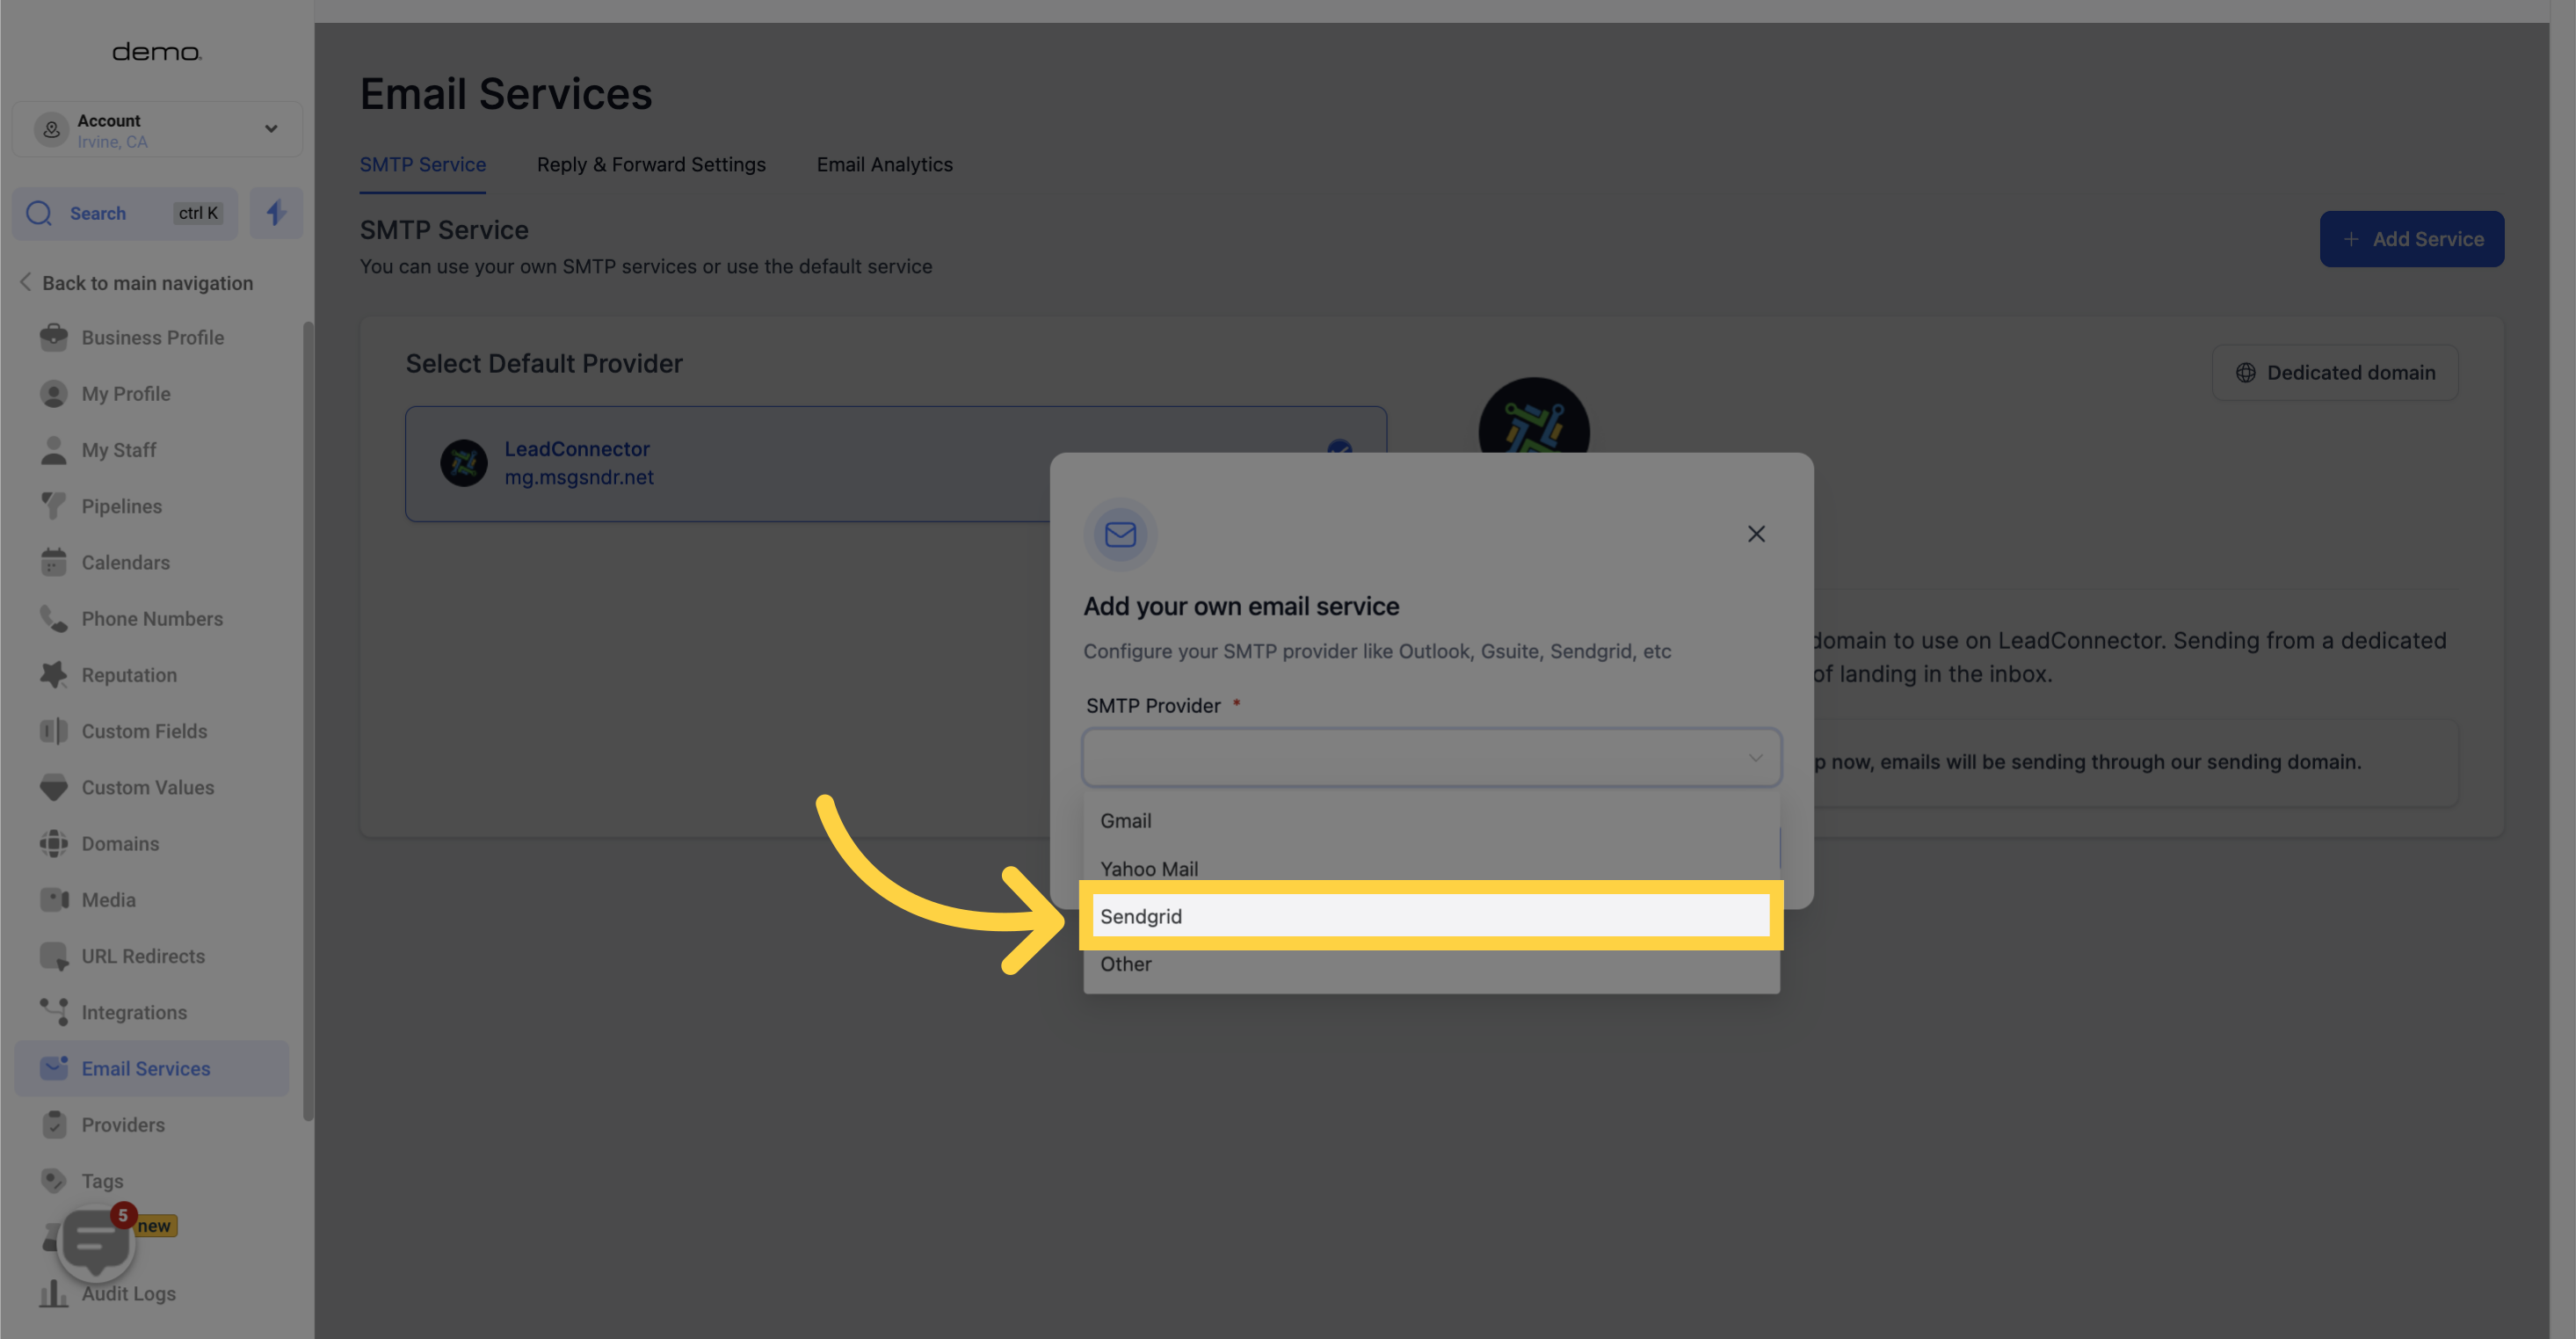
To quickly set up Sendgrid as your email service provider and connect it to your CRM, follow these steps:
Go to the API Keys section: Login to your Sendgrid account and navigate to "Settings" on the left navigation bar, then select "API Keys".


Give your API key a name.
Select Full Access, Restricted Access, or Billing Access. If you choose Restricted Access or Billing Access, specify the permissions for each category. For more details, refer to Sendgrid's API key permissions documentation.
Click on "Create & View".

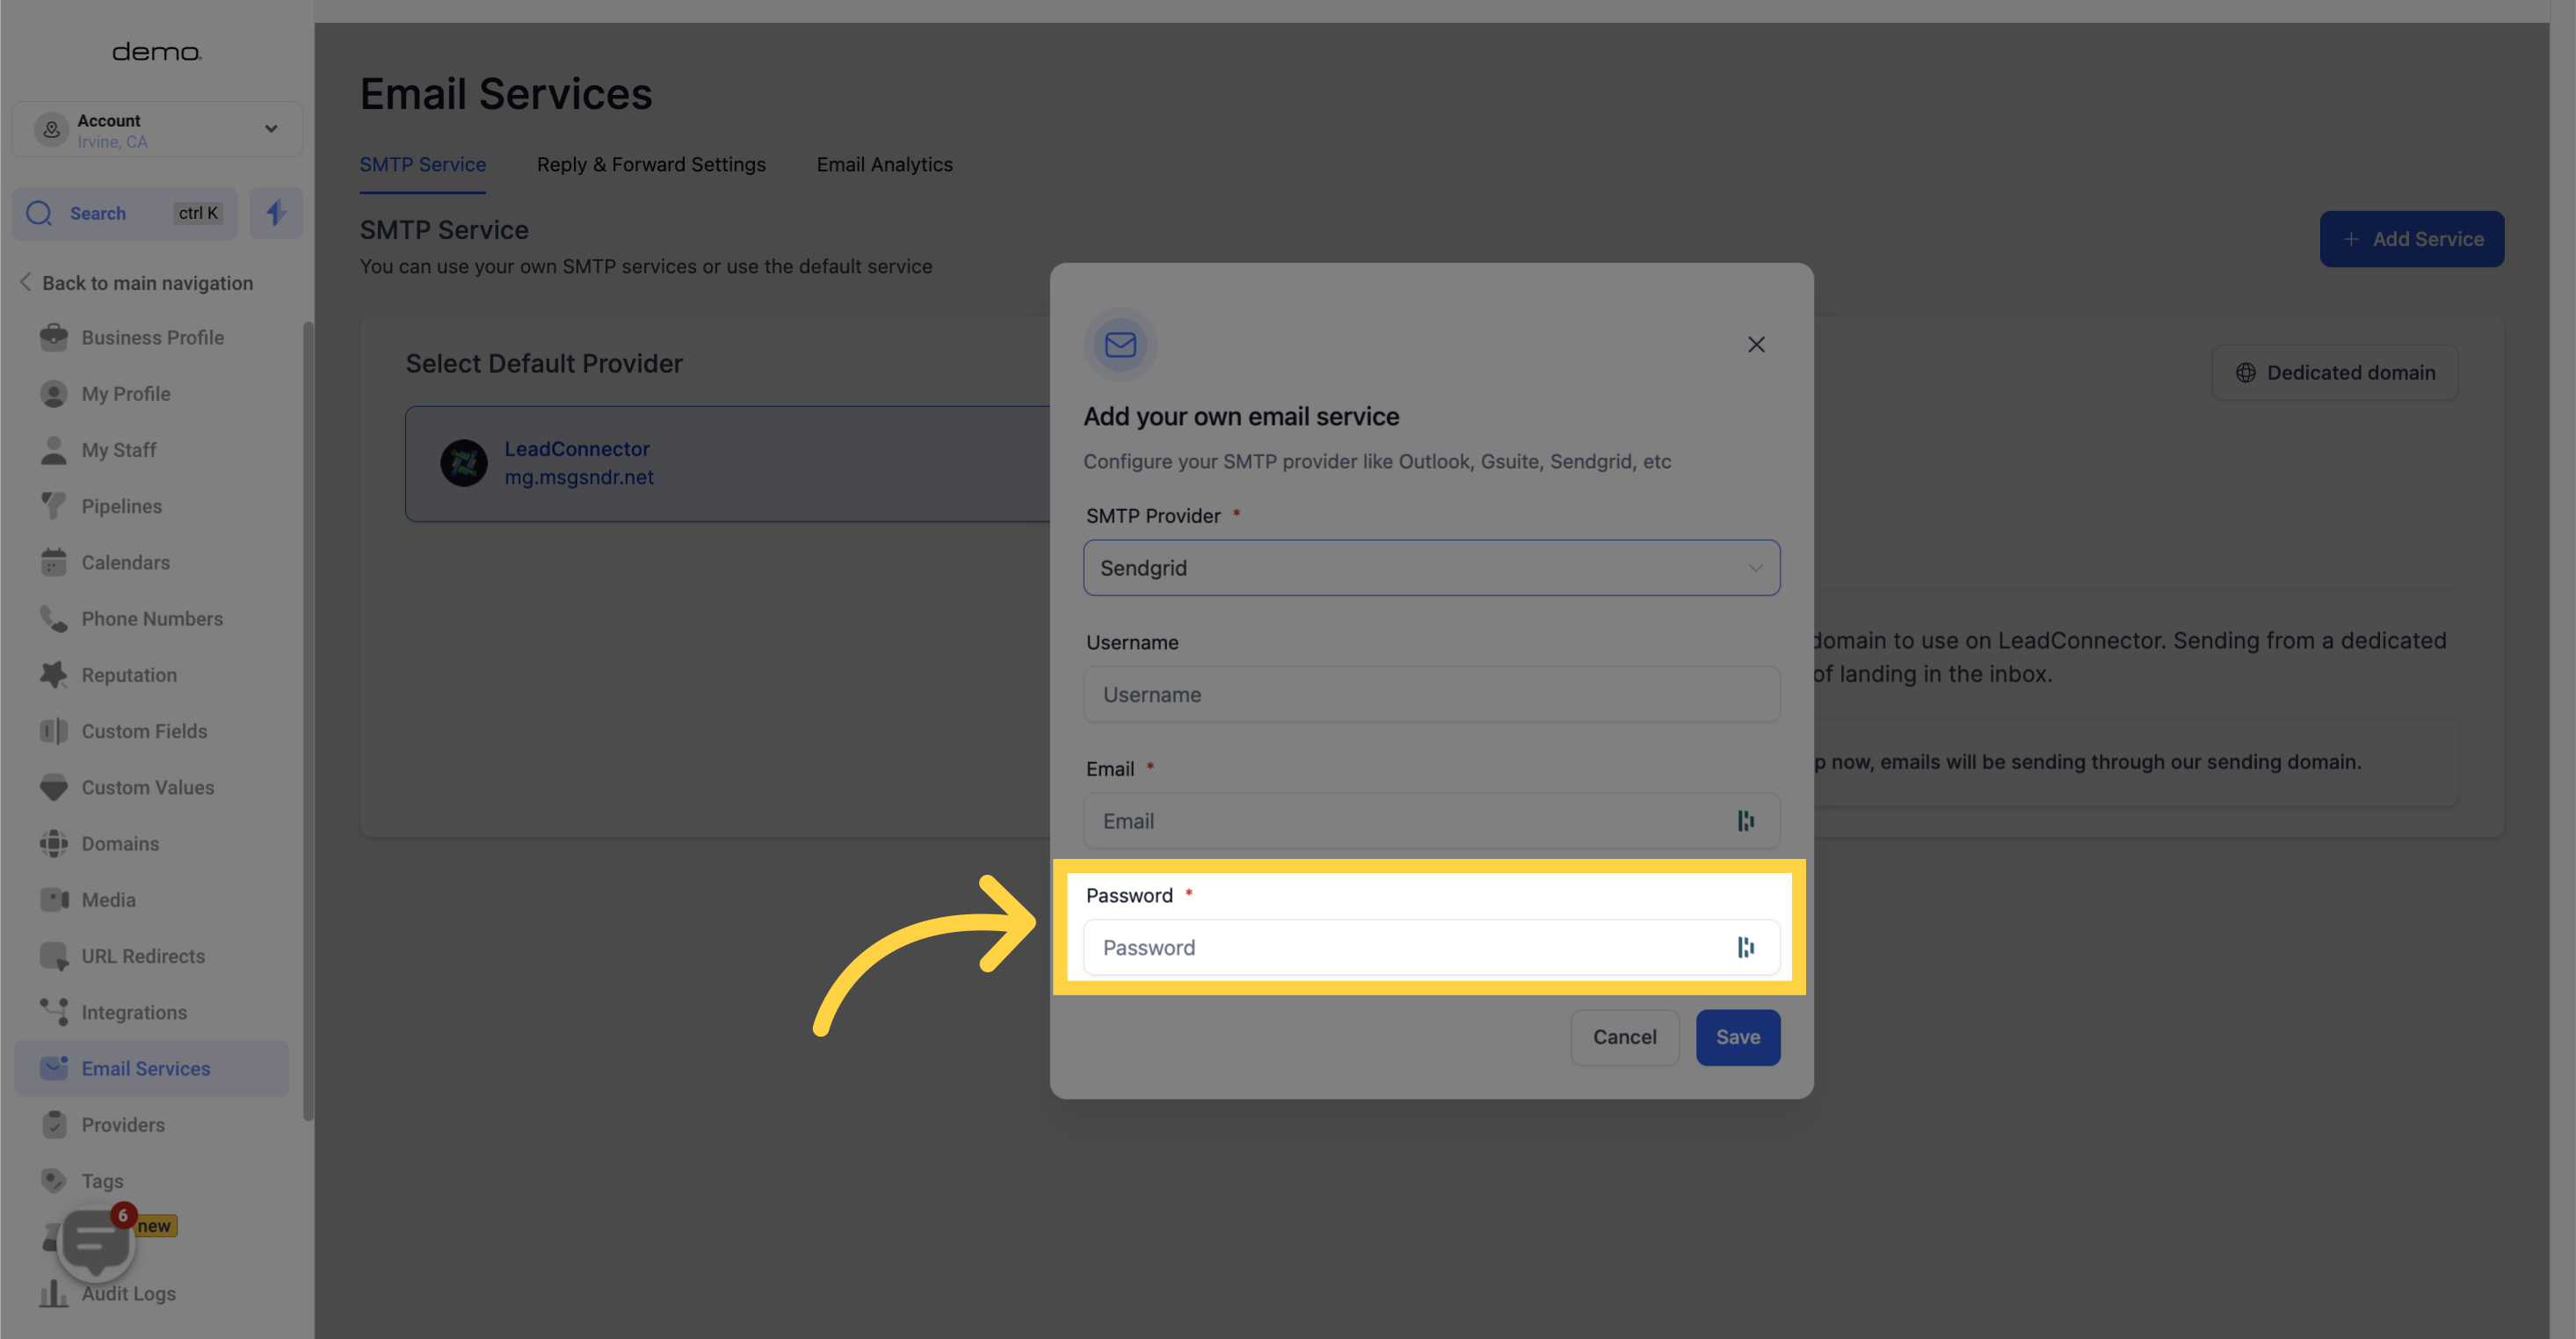
This API Key will serve as the password for the Sendgrid connection. Click on the code to automatically copy the entire key. Remember to store it in a secure place. Avoid putting it directly in your code or making it publicly accessible for security reasons.

Select Sendgrid from the dropdown menu.
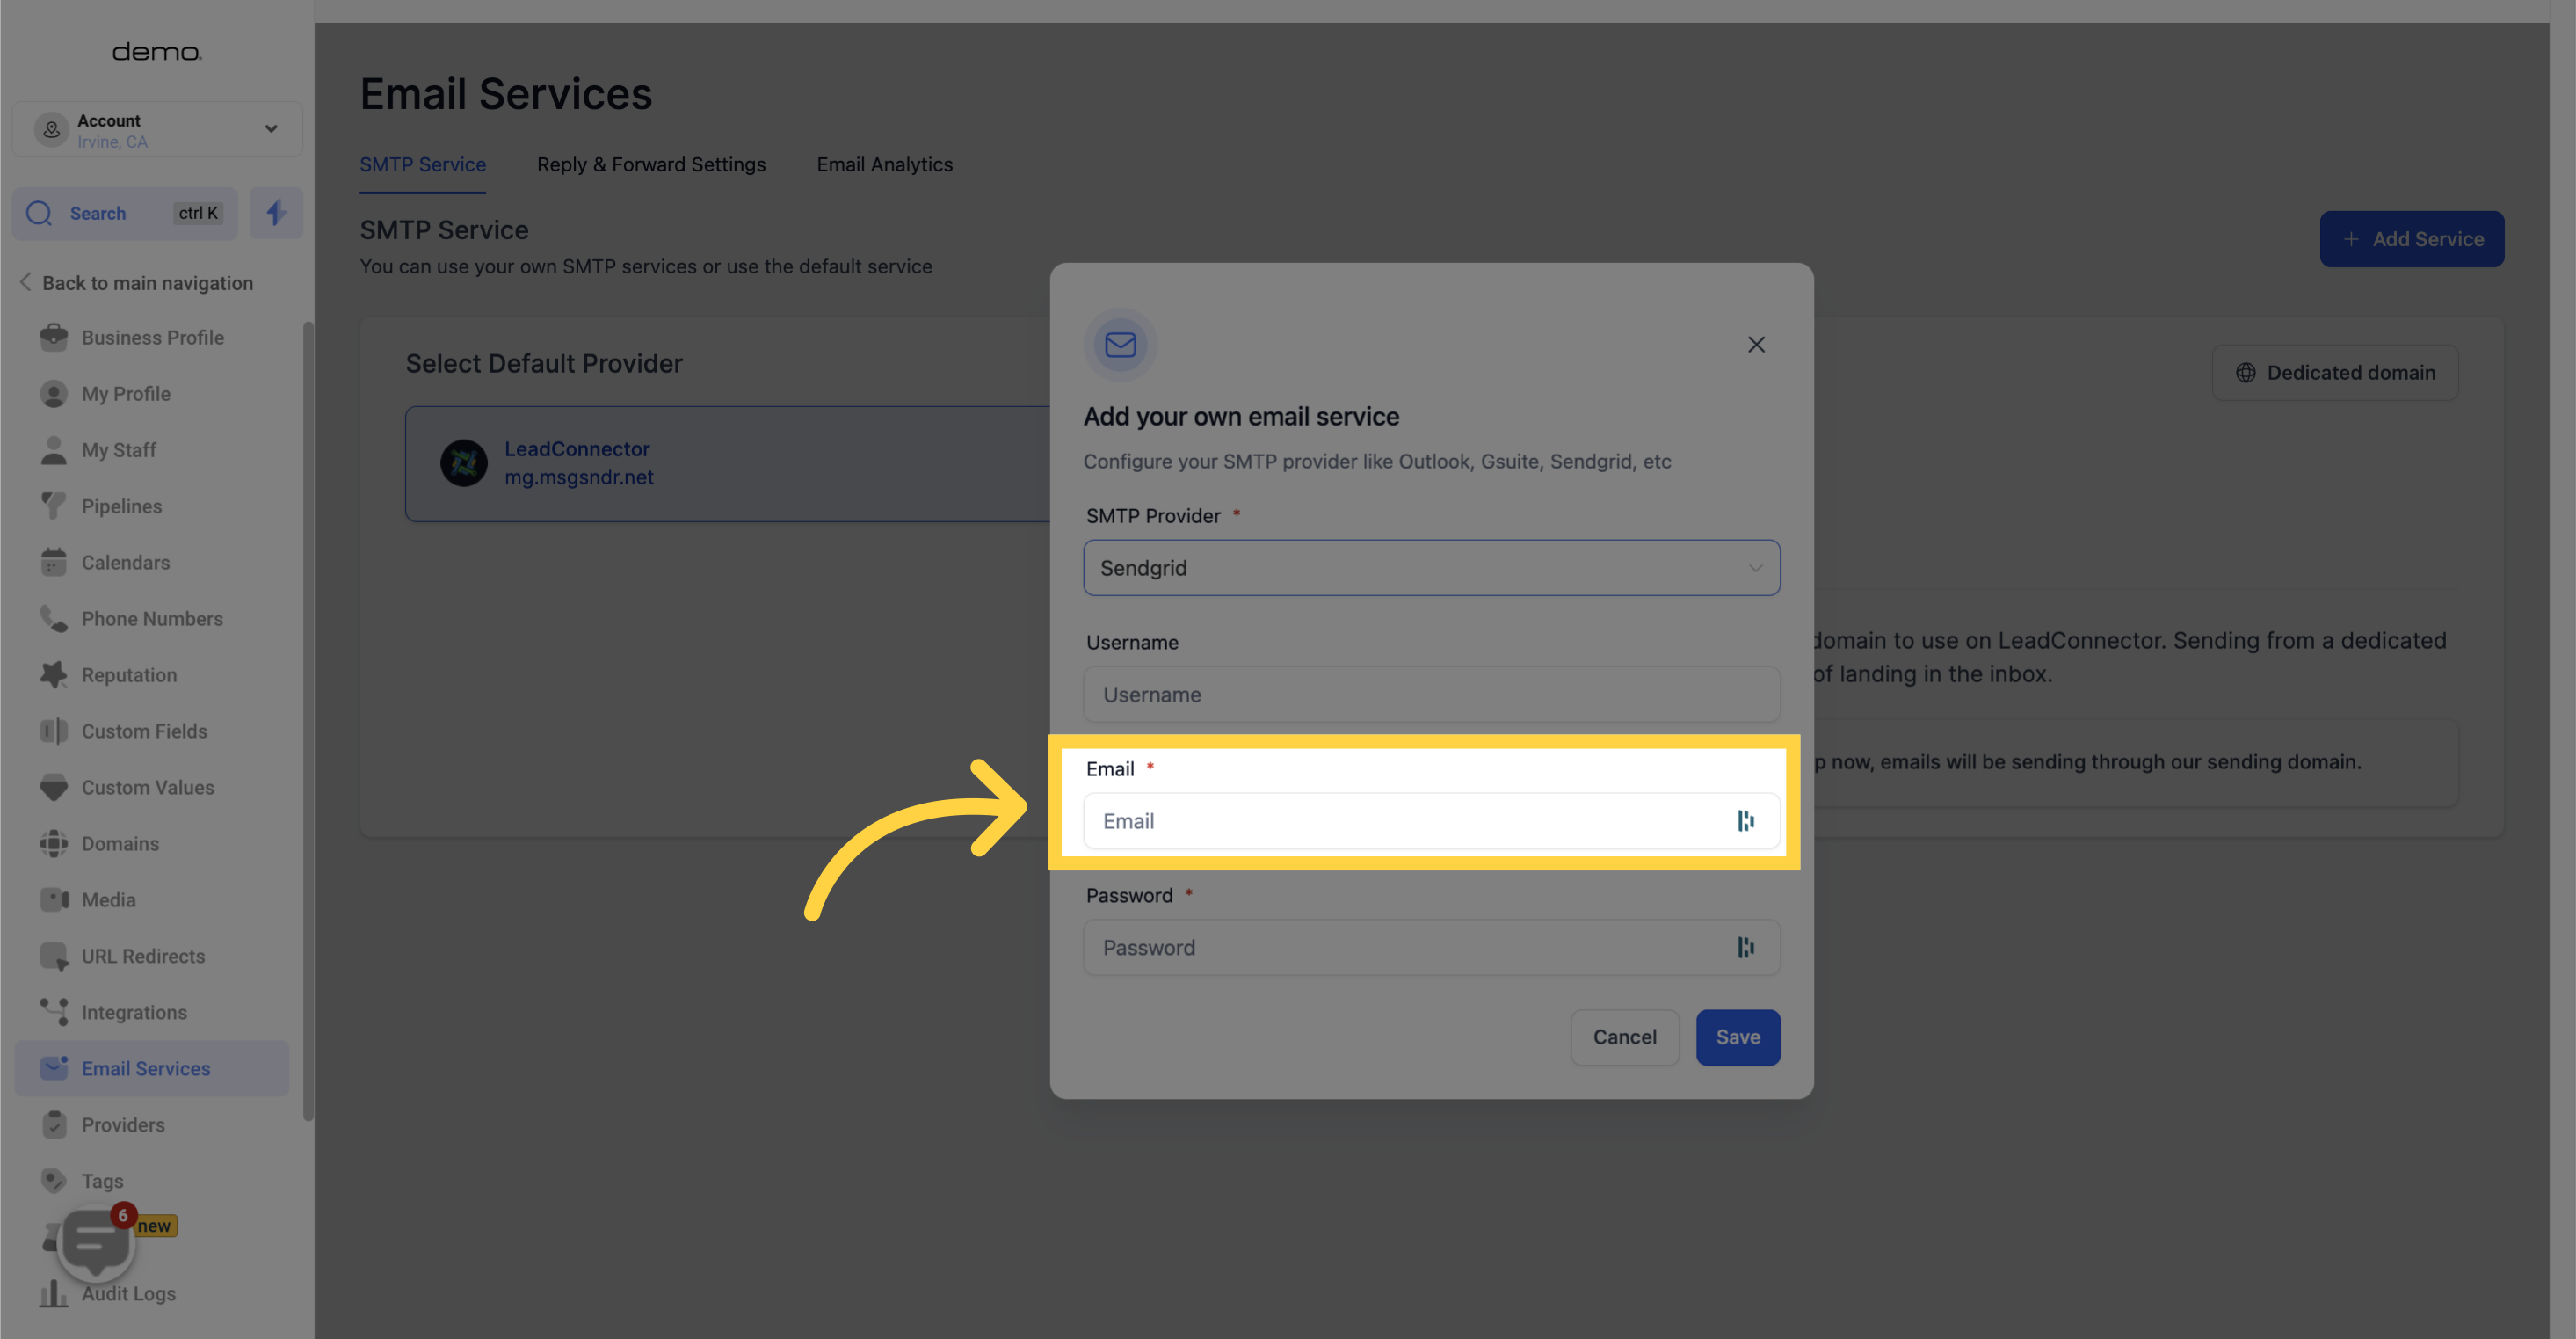
Set the username as "apikey"

Add the email address you want to associate with the CRM.
Paste the API Key you copied from your Sendgrid account
Save the settings.

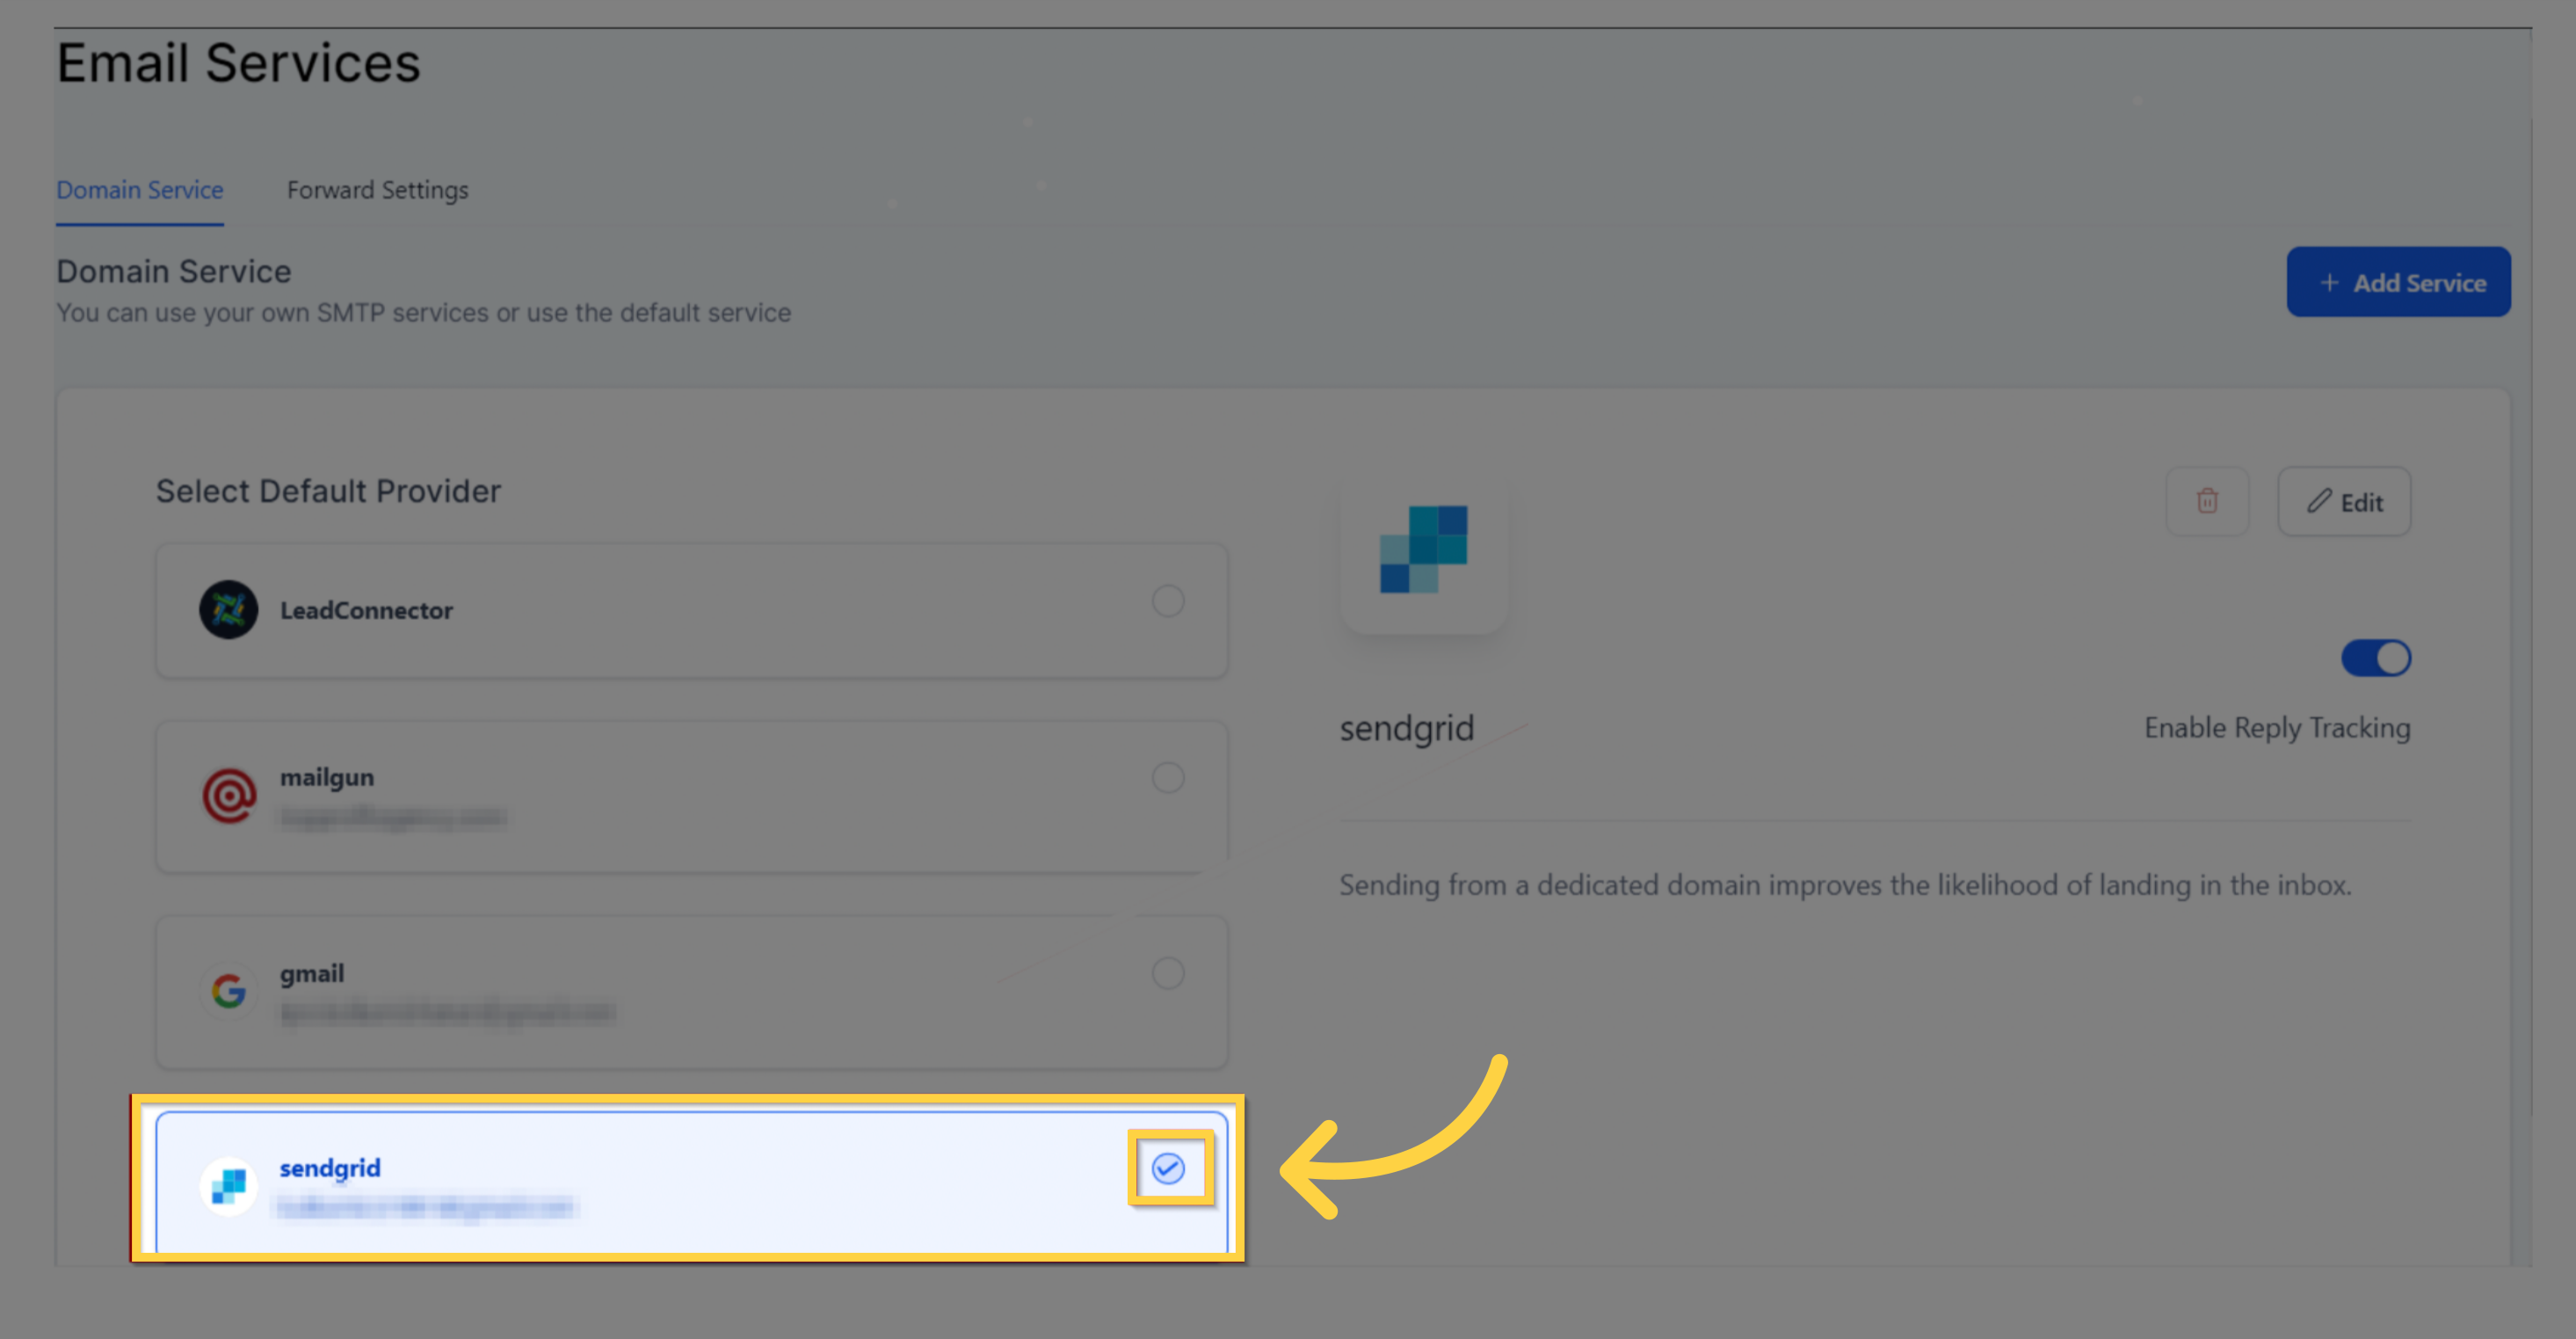
Once you have successfully connected your Sendgrid account with your CRM, your screen should resemble the example provided. Remember to select Sendgrid as your default email service provider.