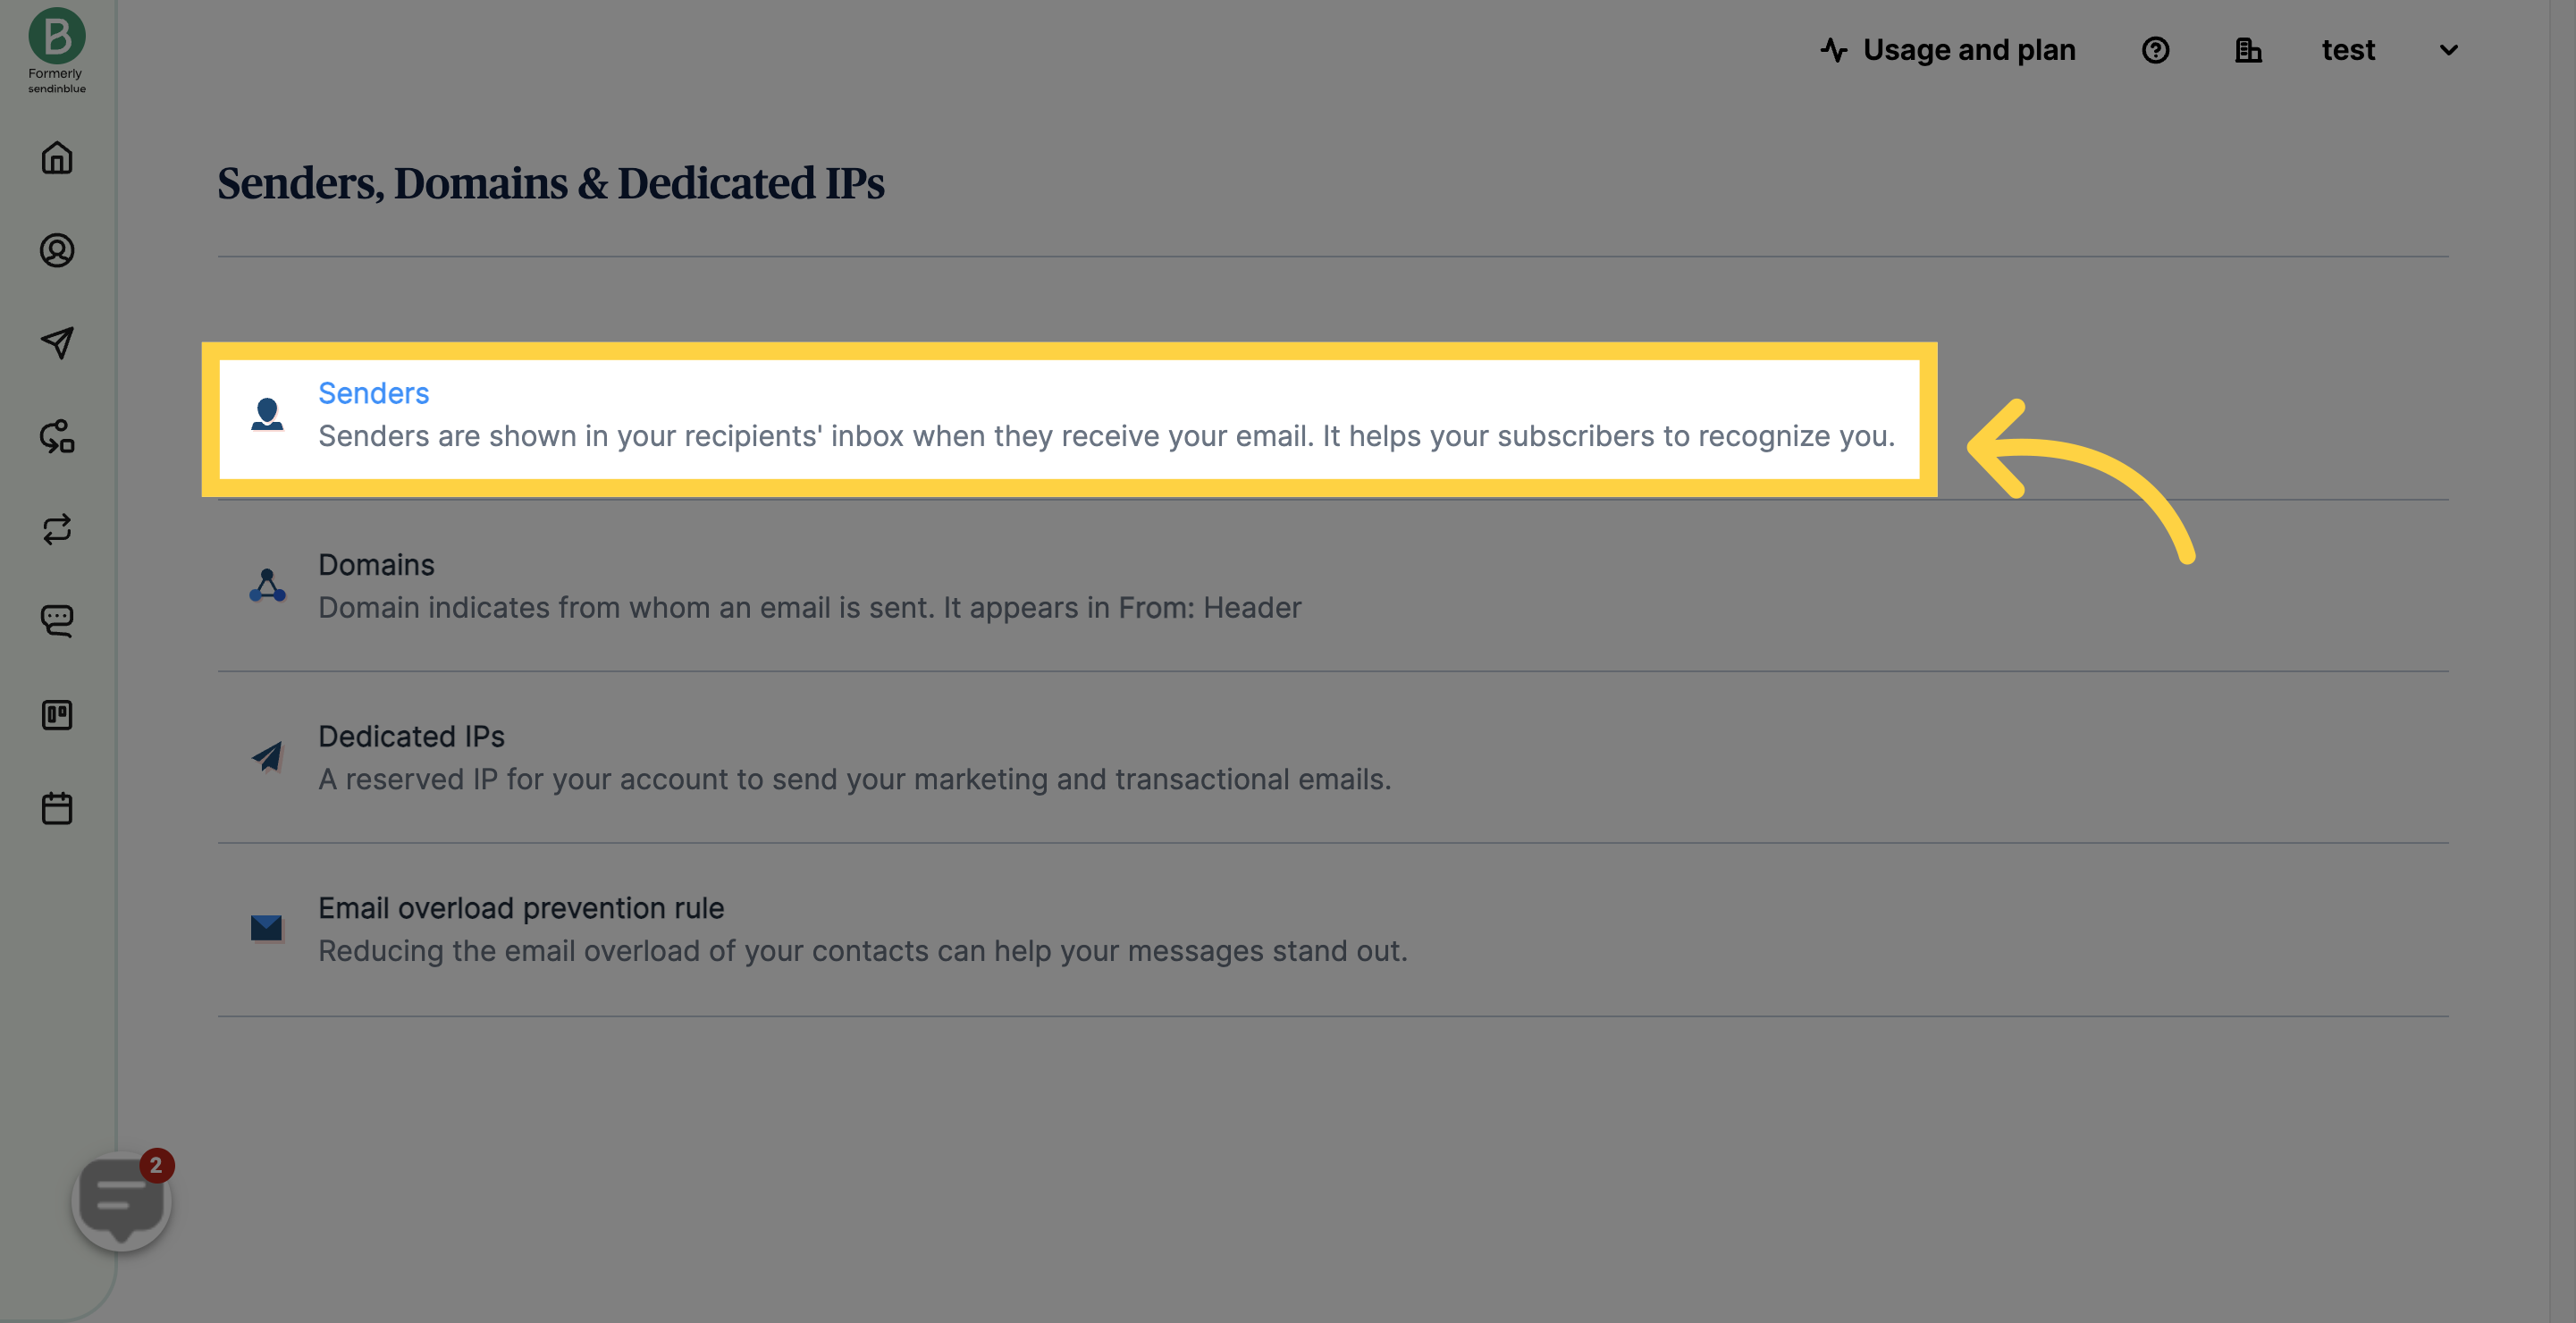
Note: This guide provides instructions specific to connecting Sendinblue SMTP to your CRM. If you are interested in connecting other email service providers, you can follow a similar process using the "Other" option.Before you get started, make sure you have created a new sender in your Sendinblue account. Once that's done, you can retrieve the necessary SMTP details from the Sendinblue settings area to connect it to your CRM.
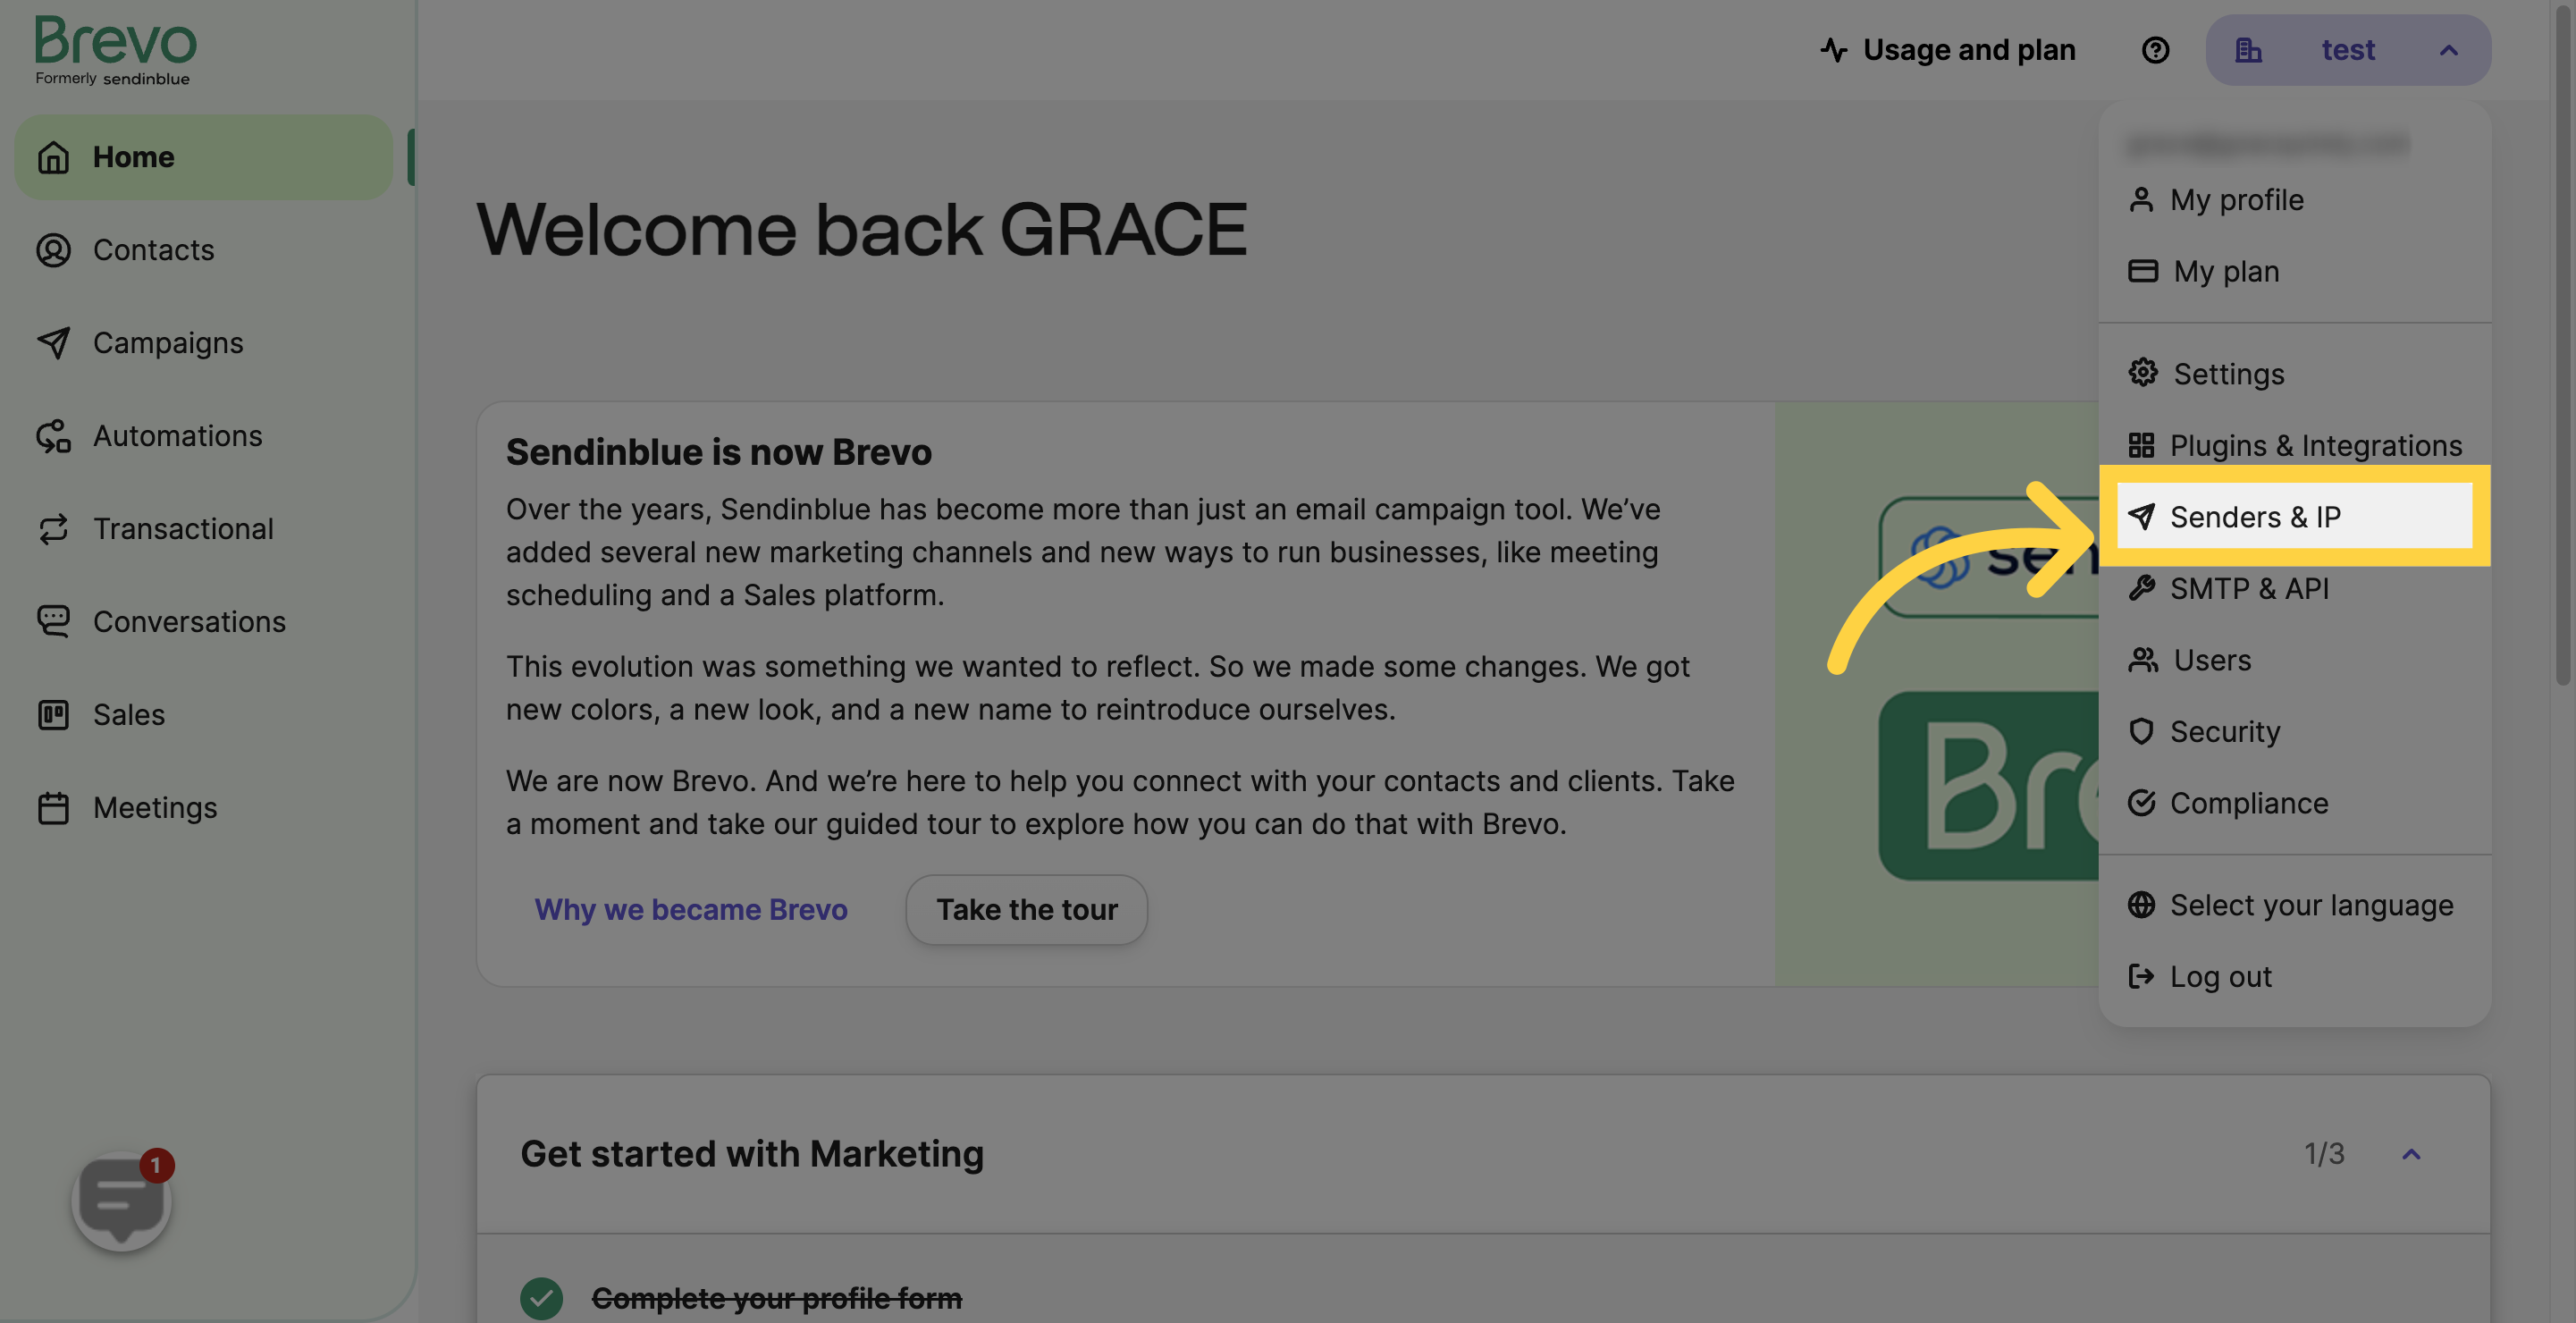
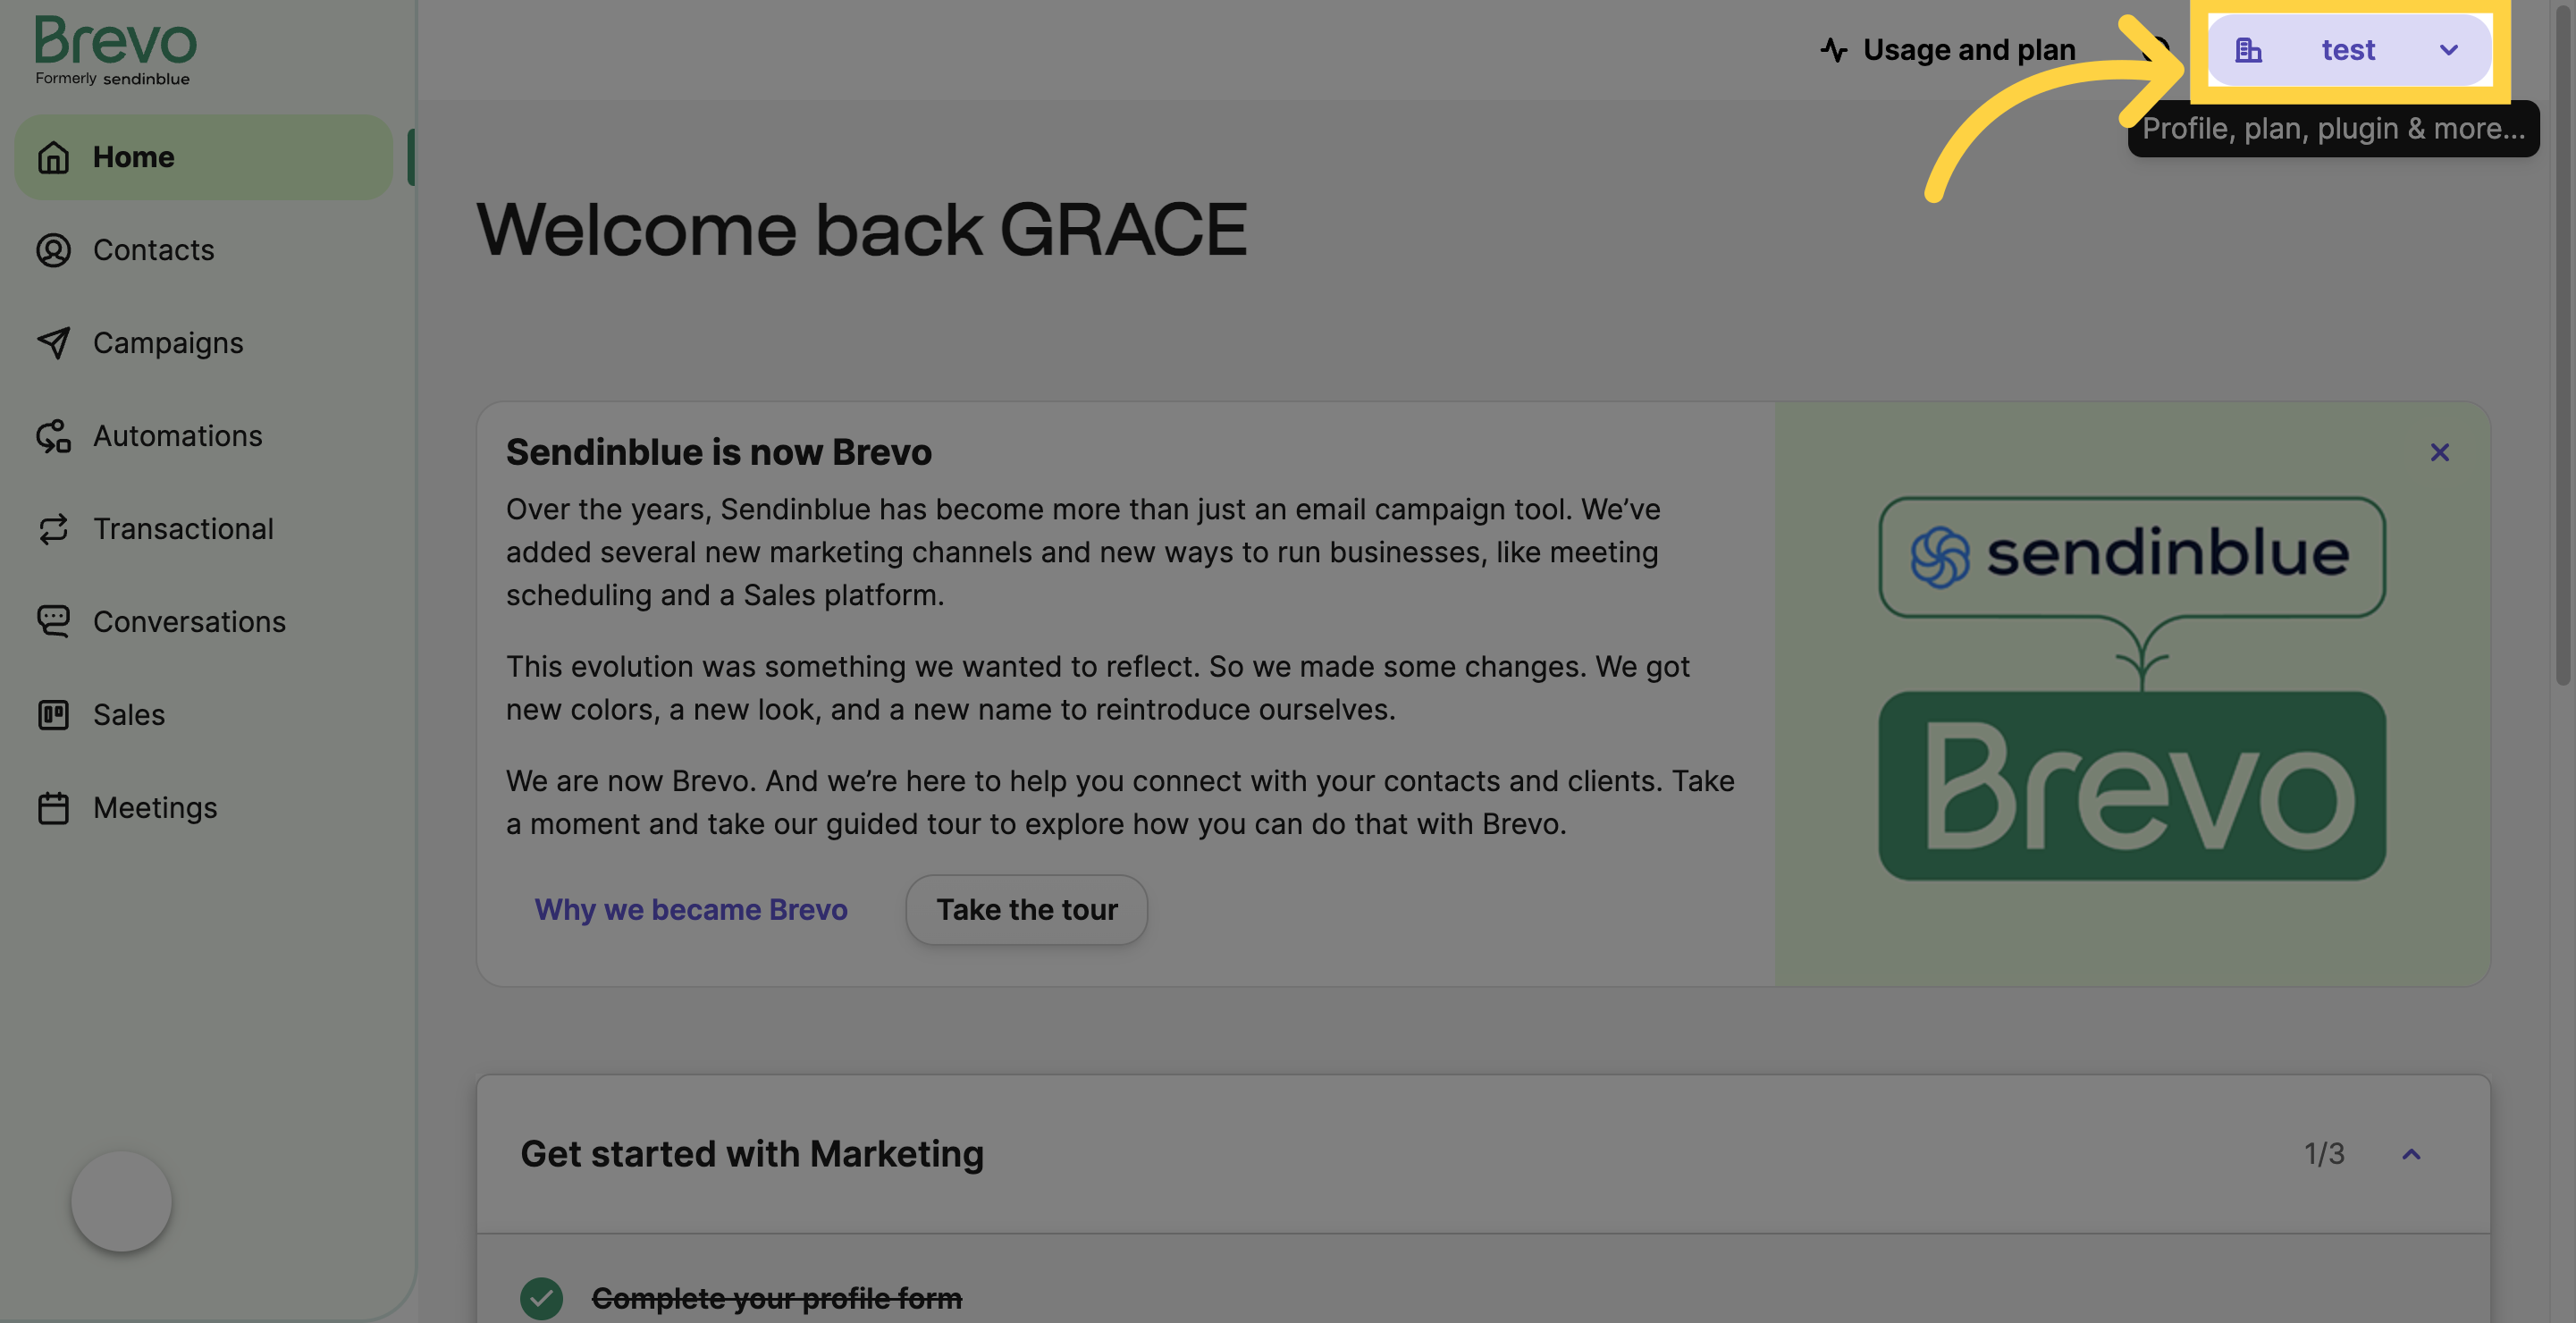
Click on your name at the top-right side of the screen

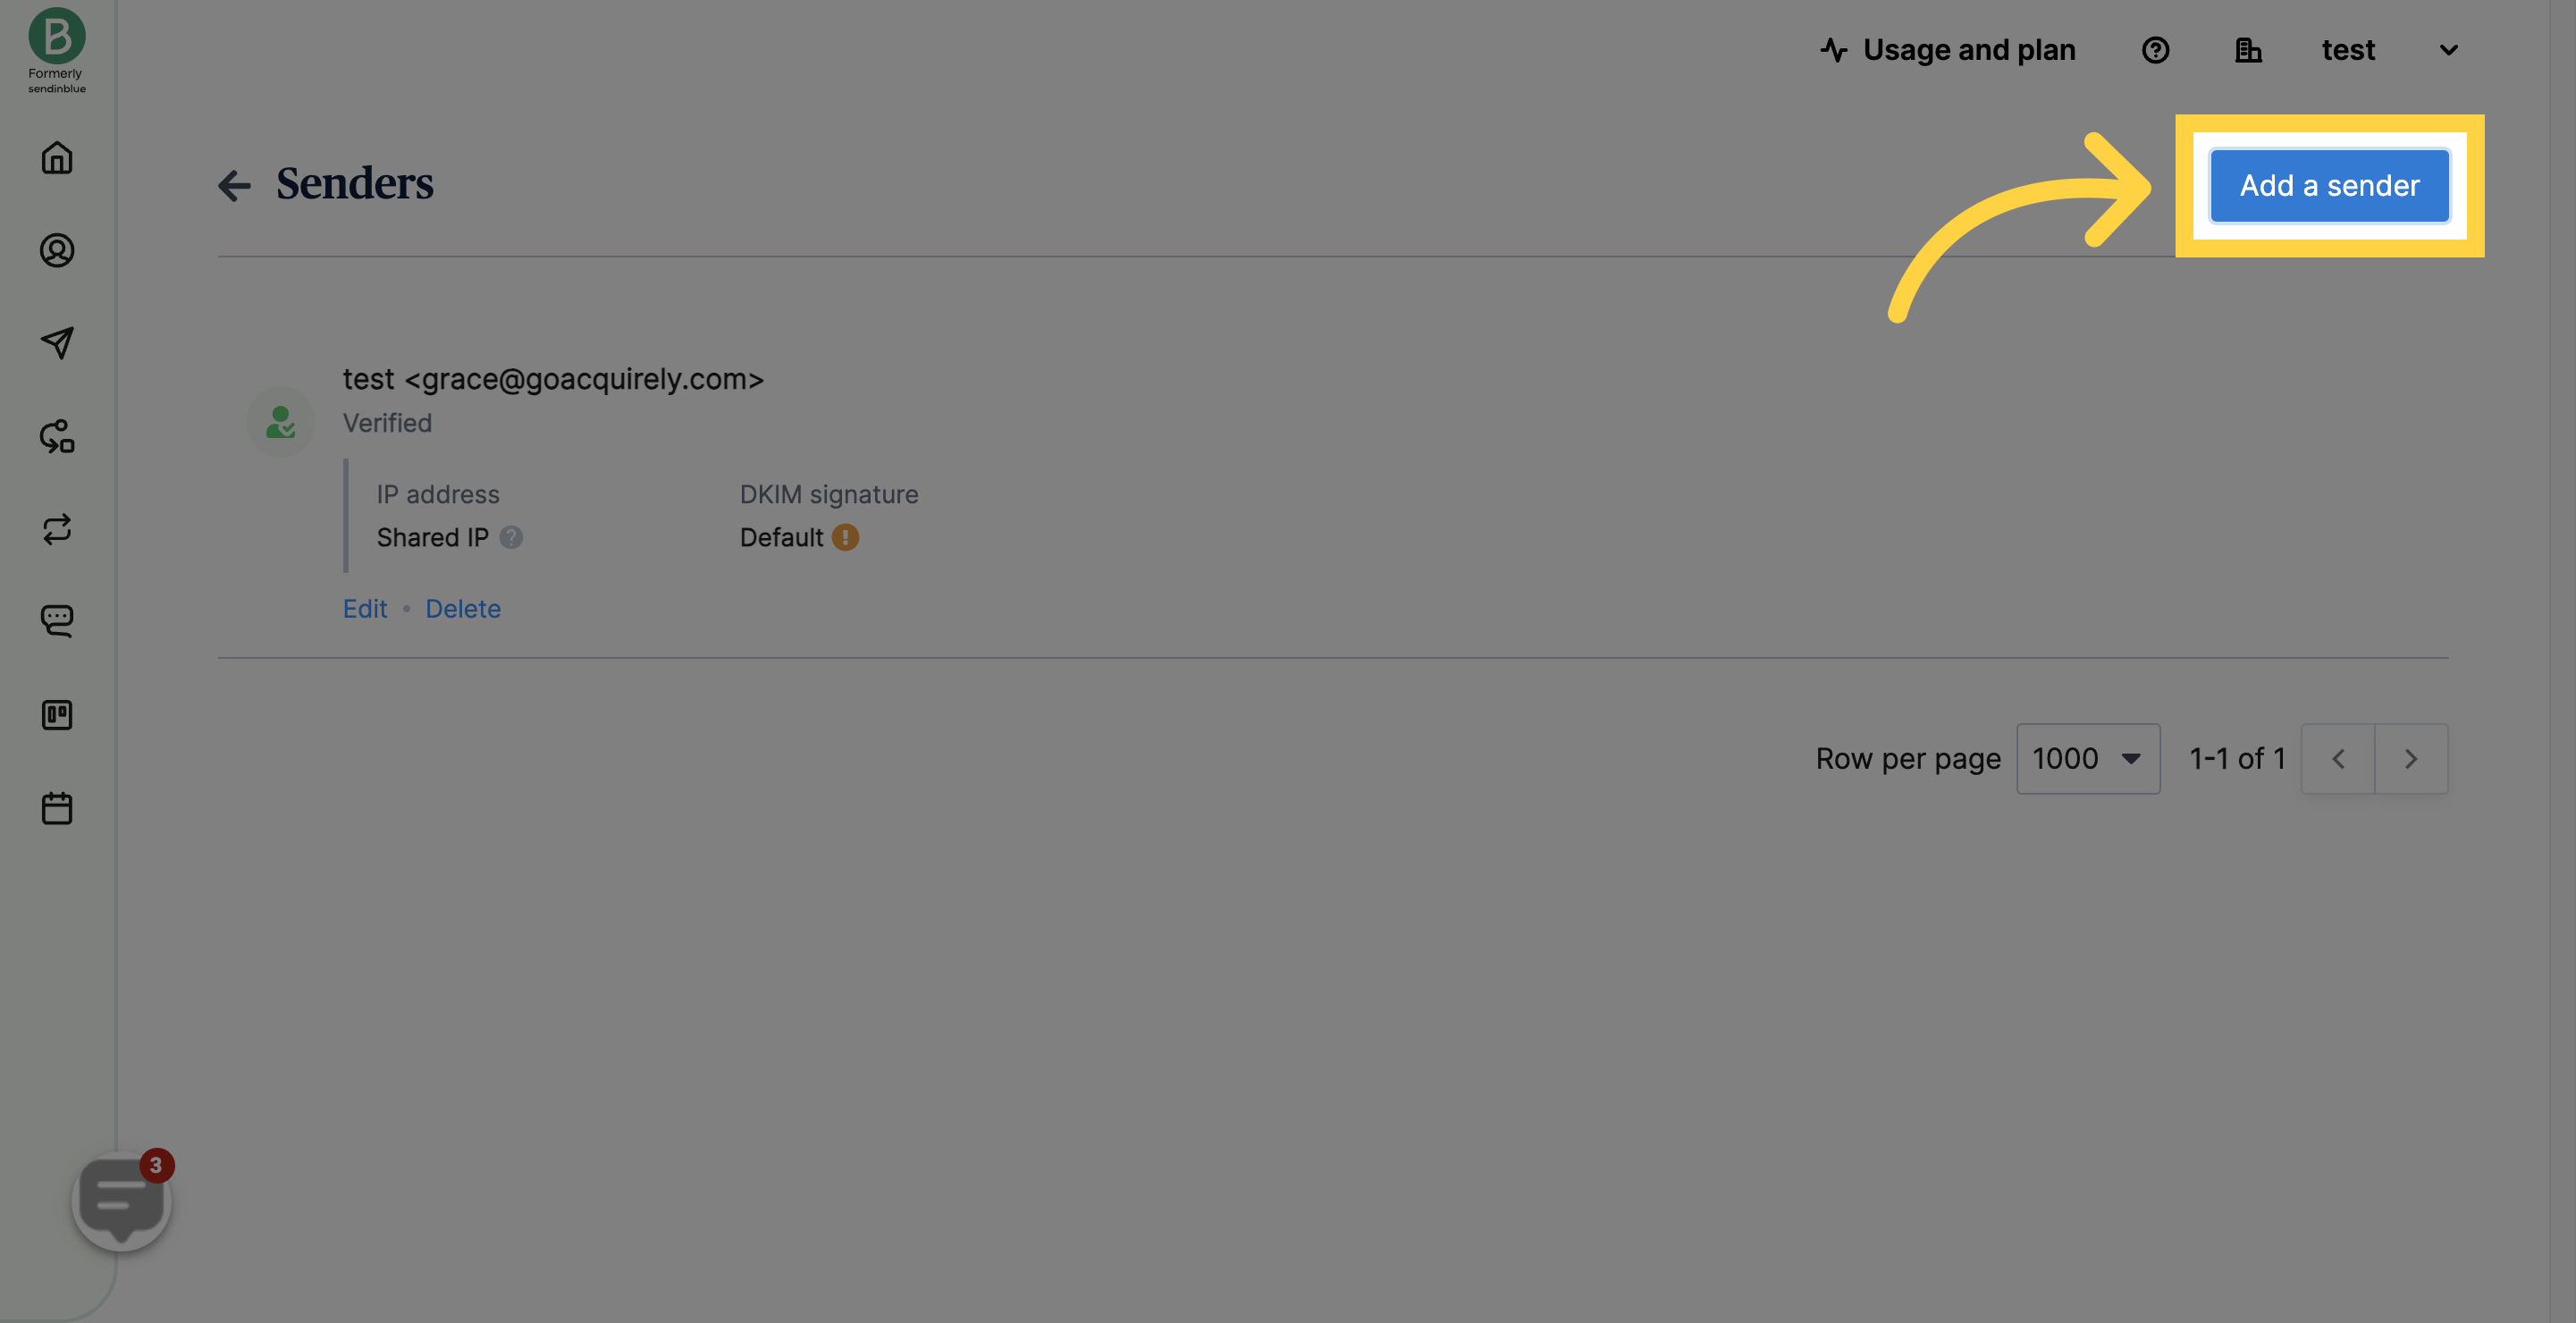
Enter the From name and From email that will appear as the sender name and email in your recipient's mailbox.

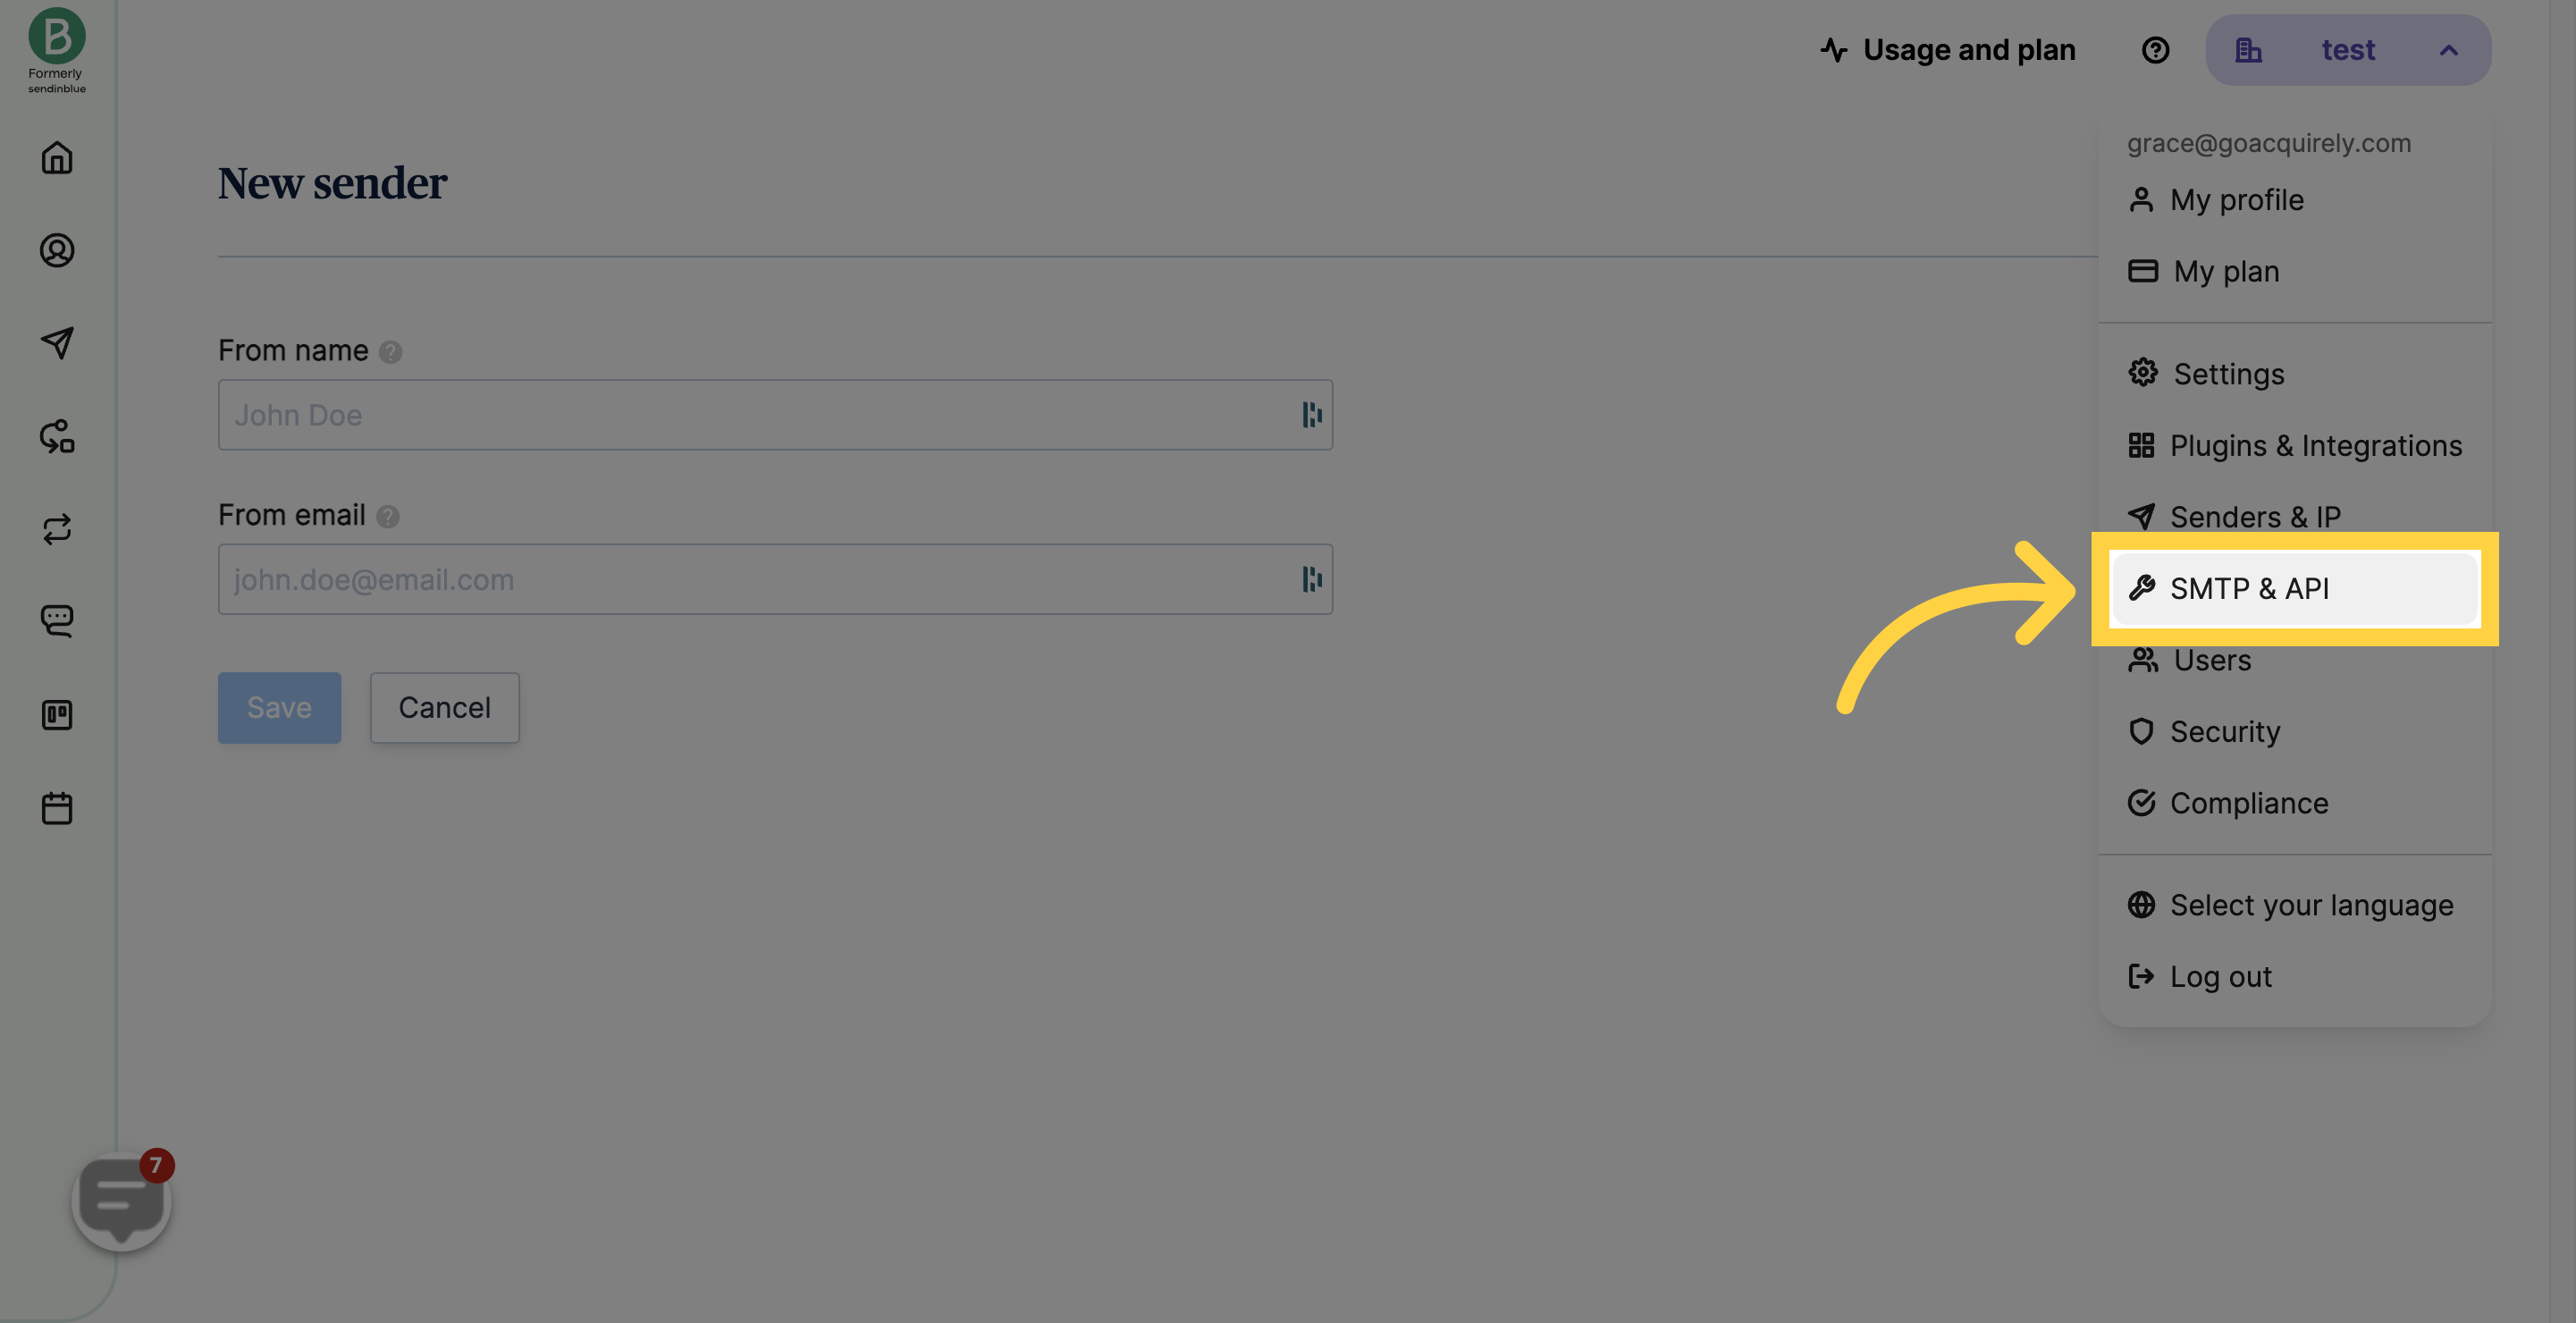
Click your name on the top-right menu.

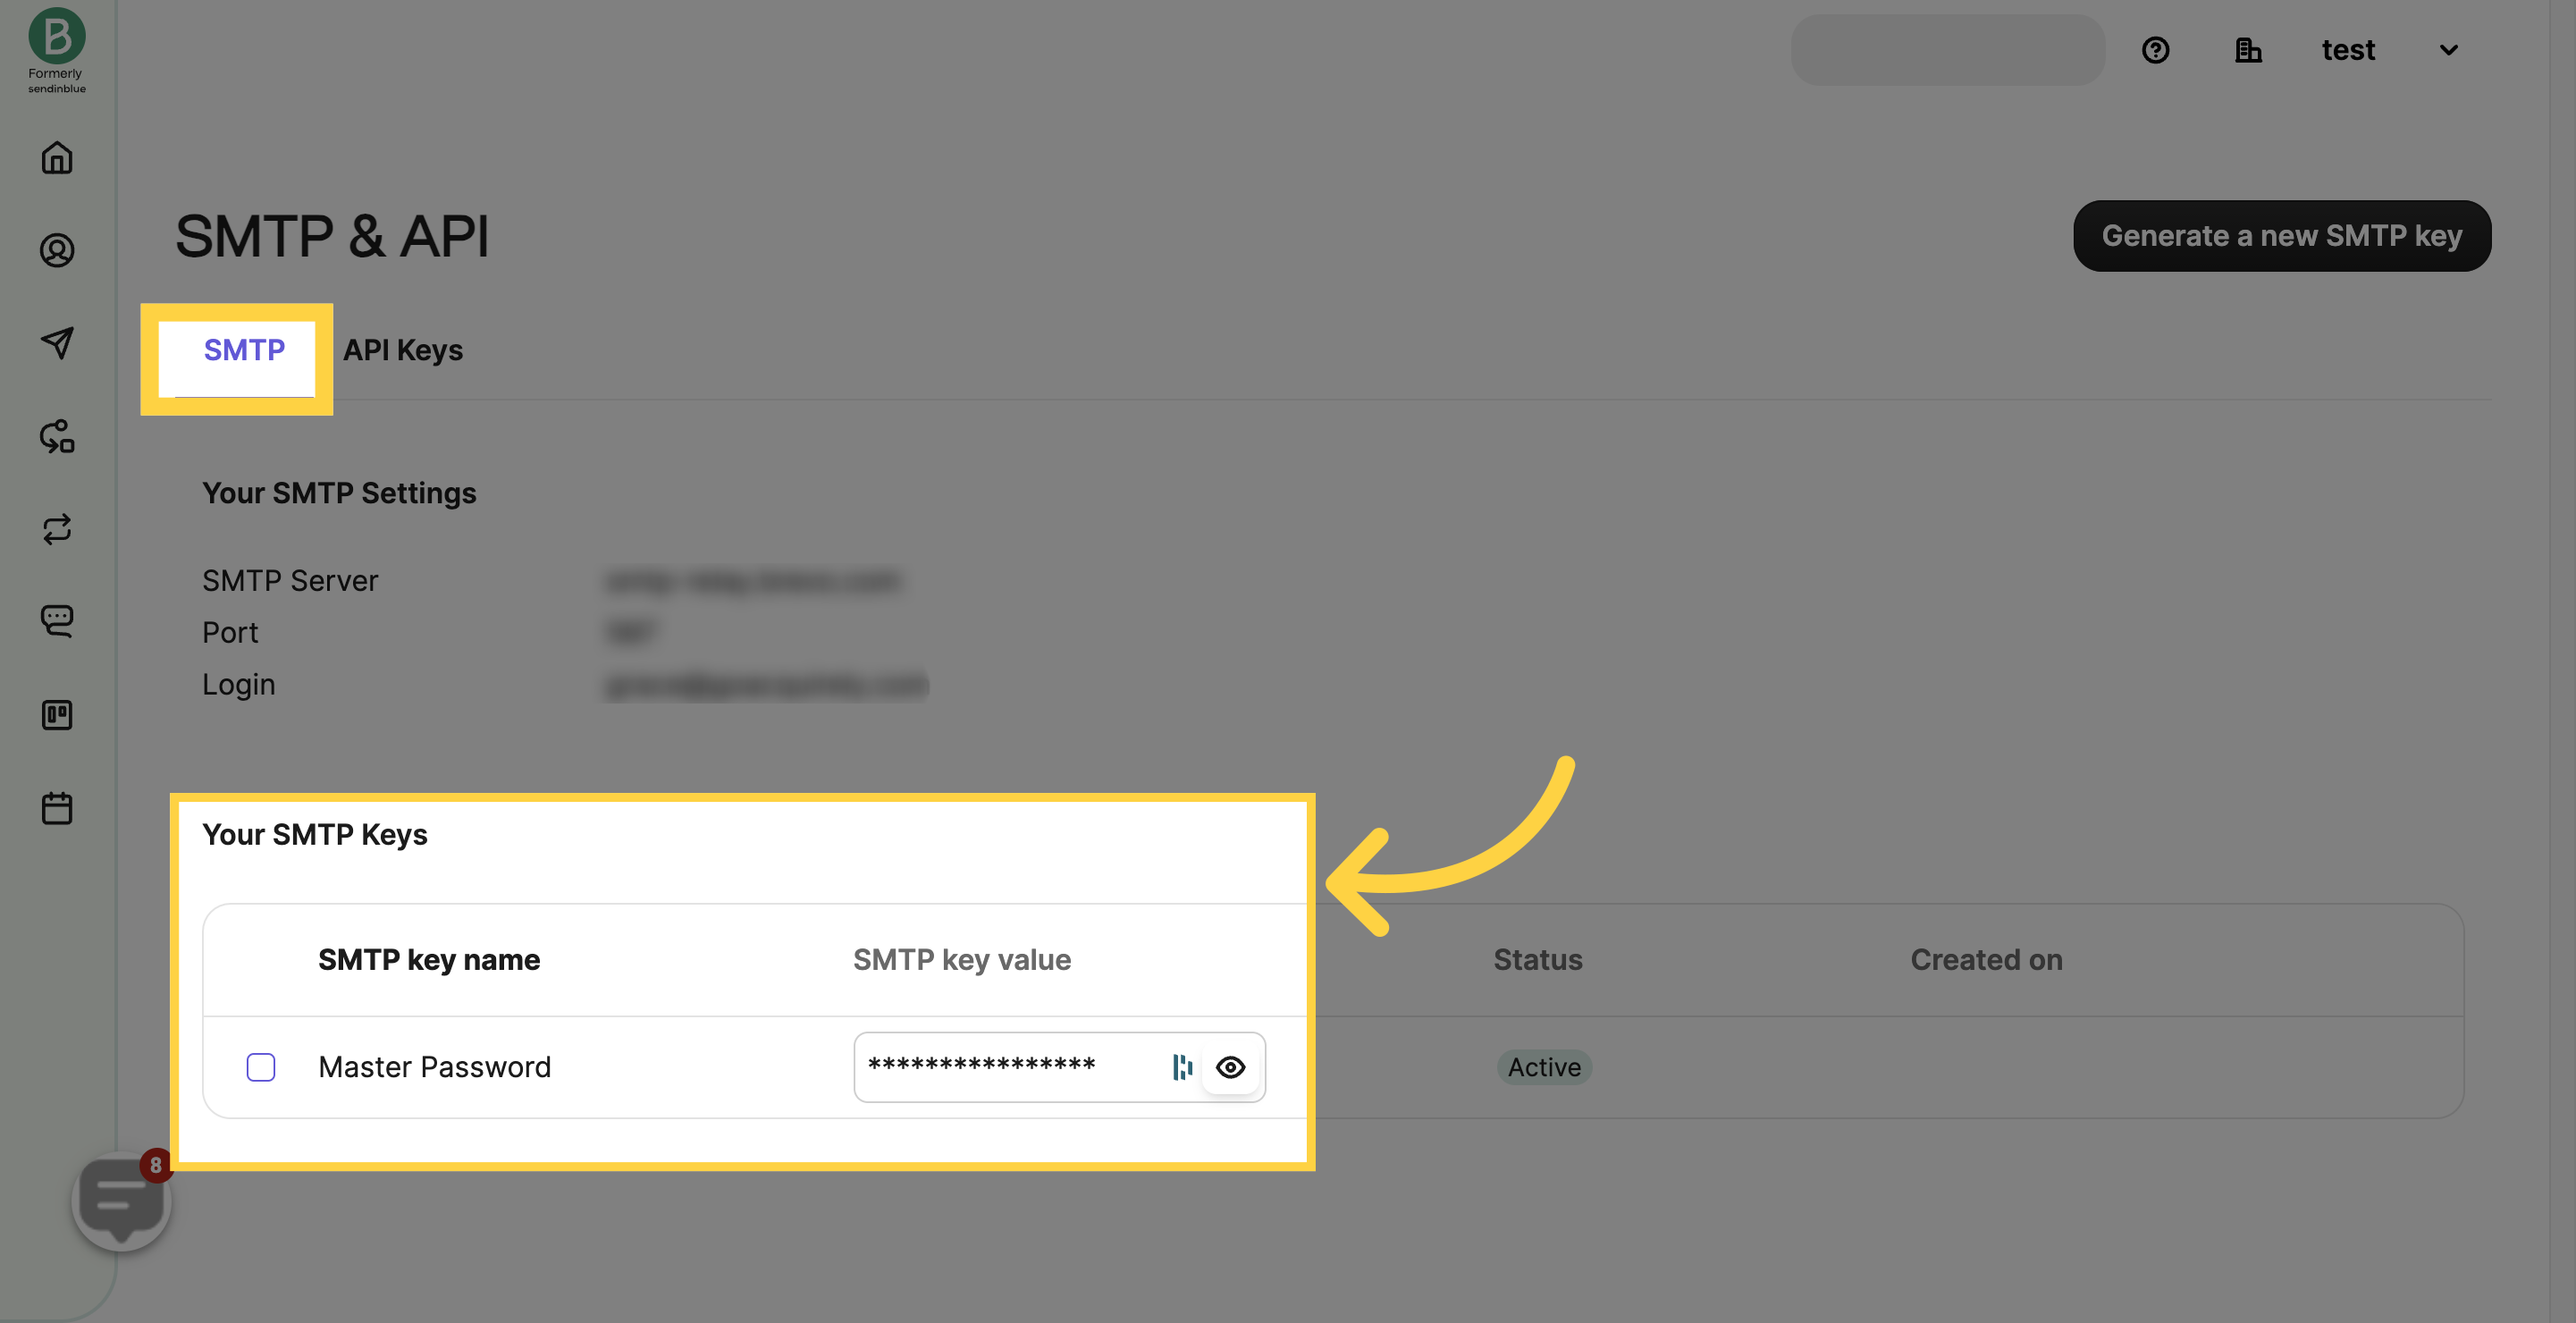
Look for "SMTP Keys" and retrieve the key.
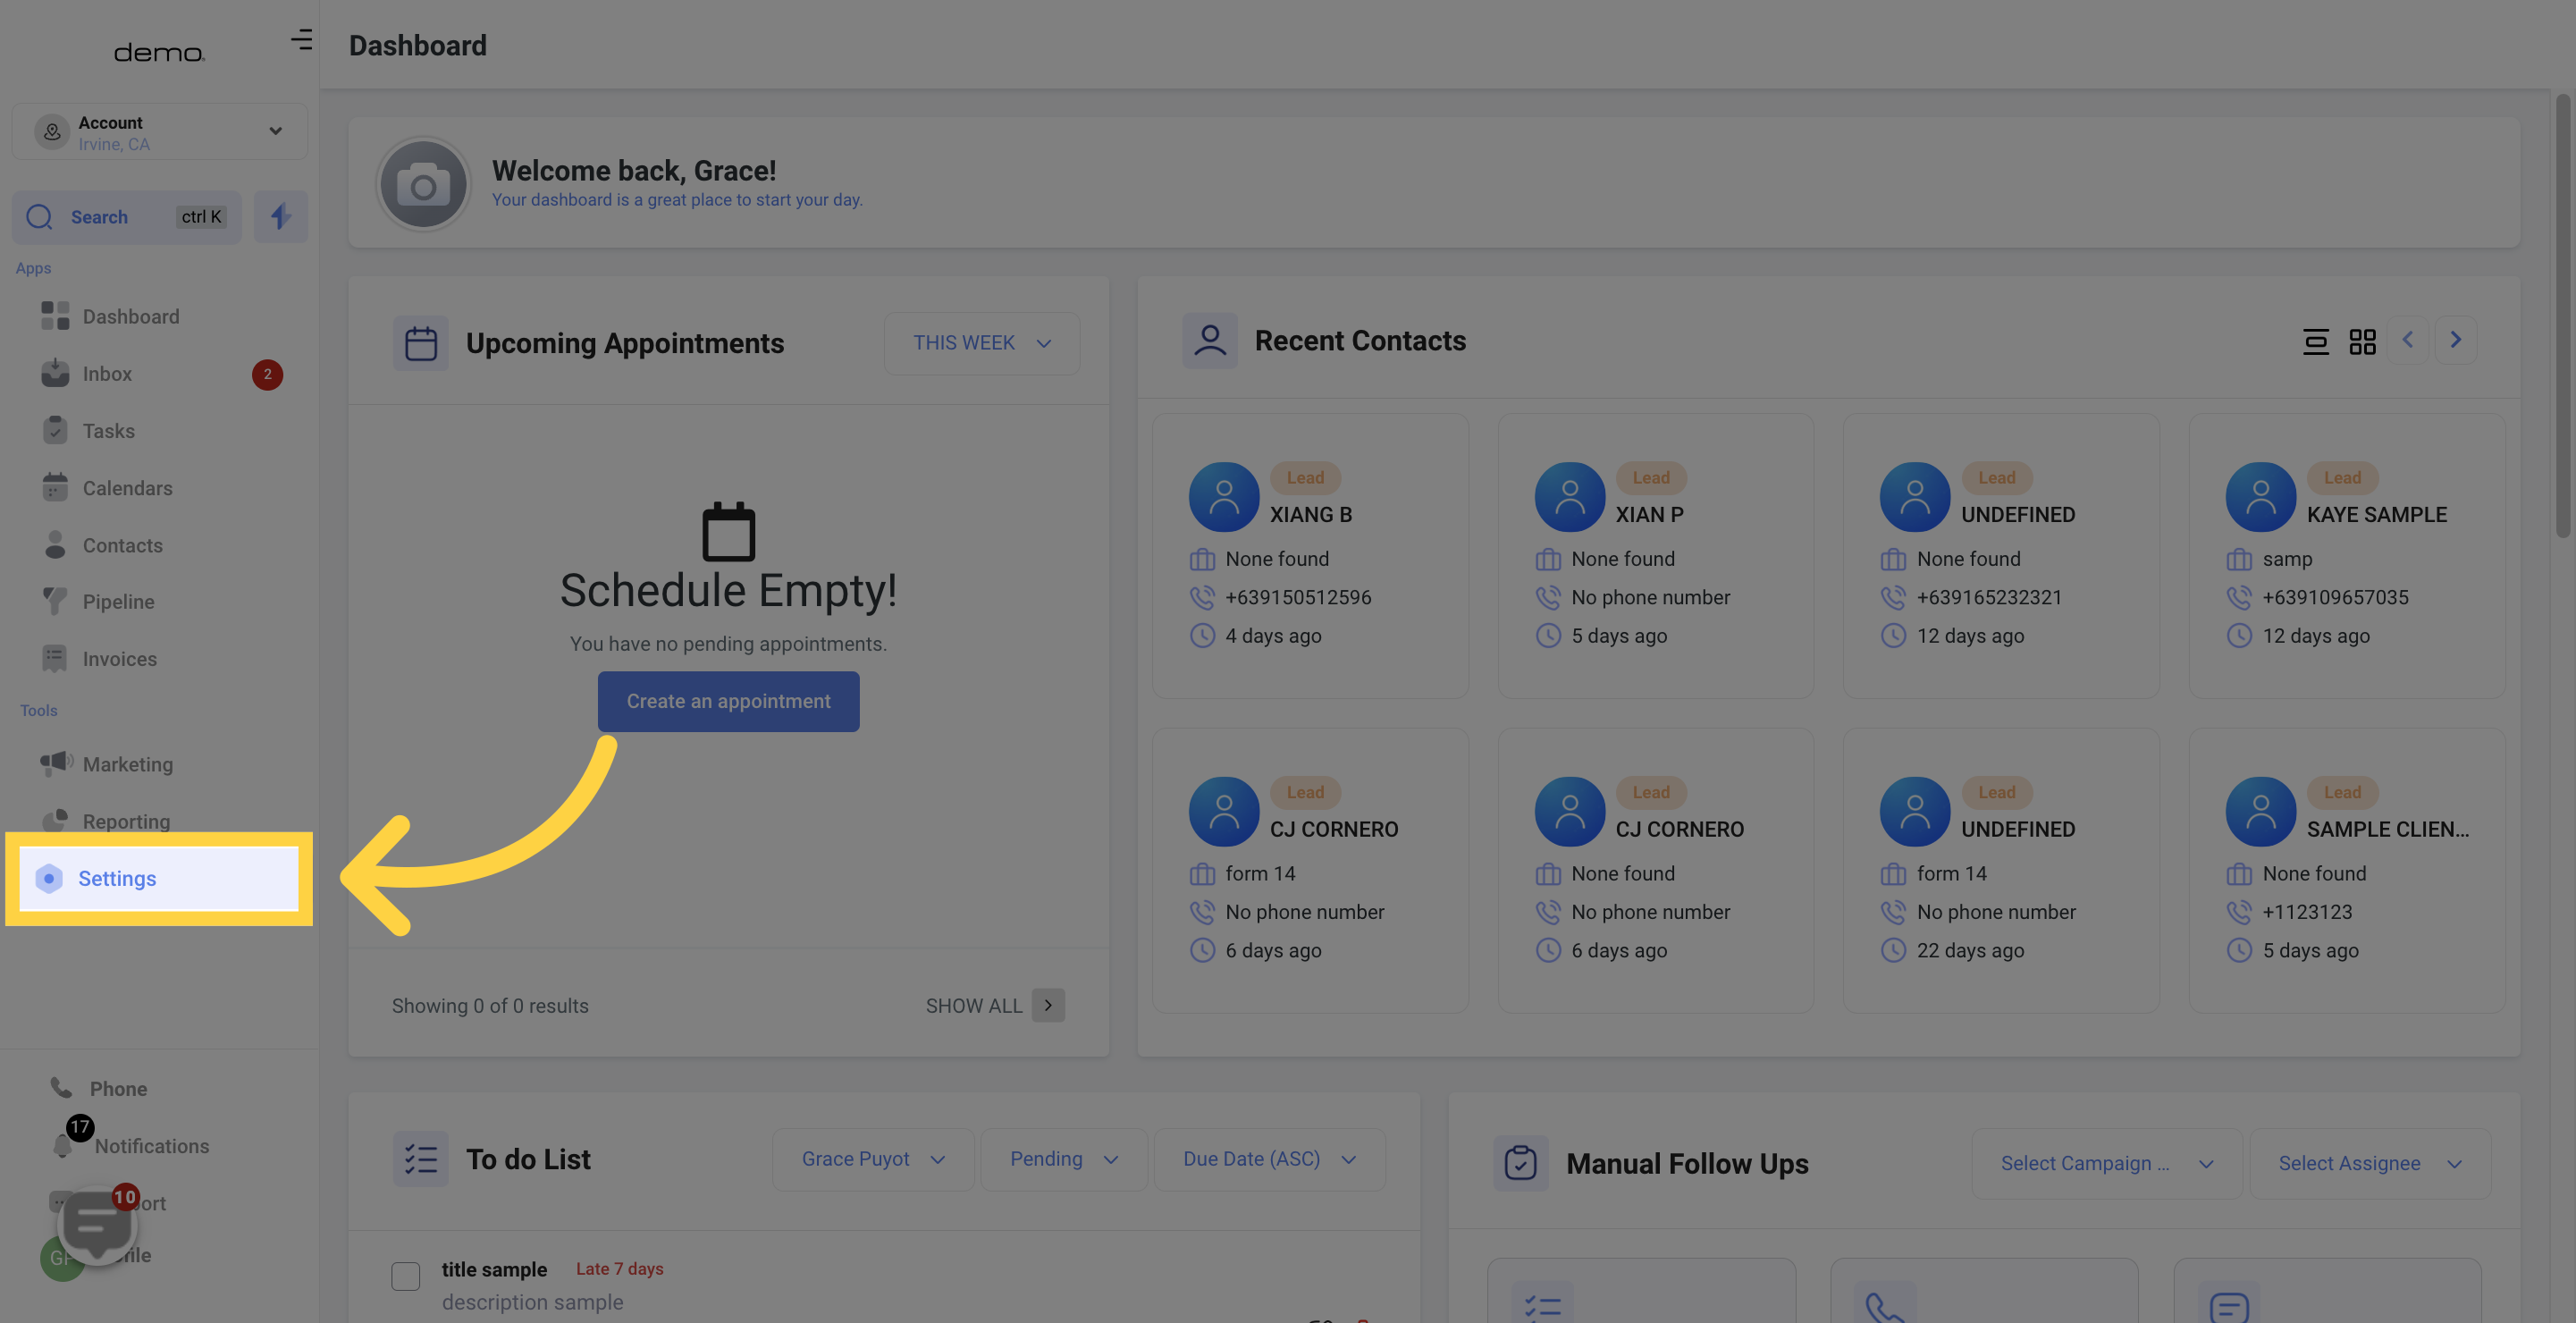
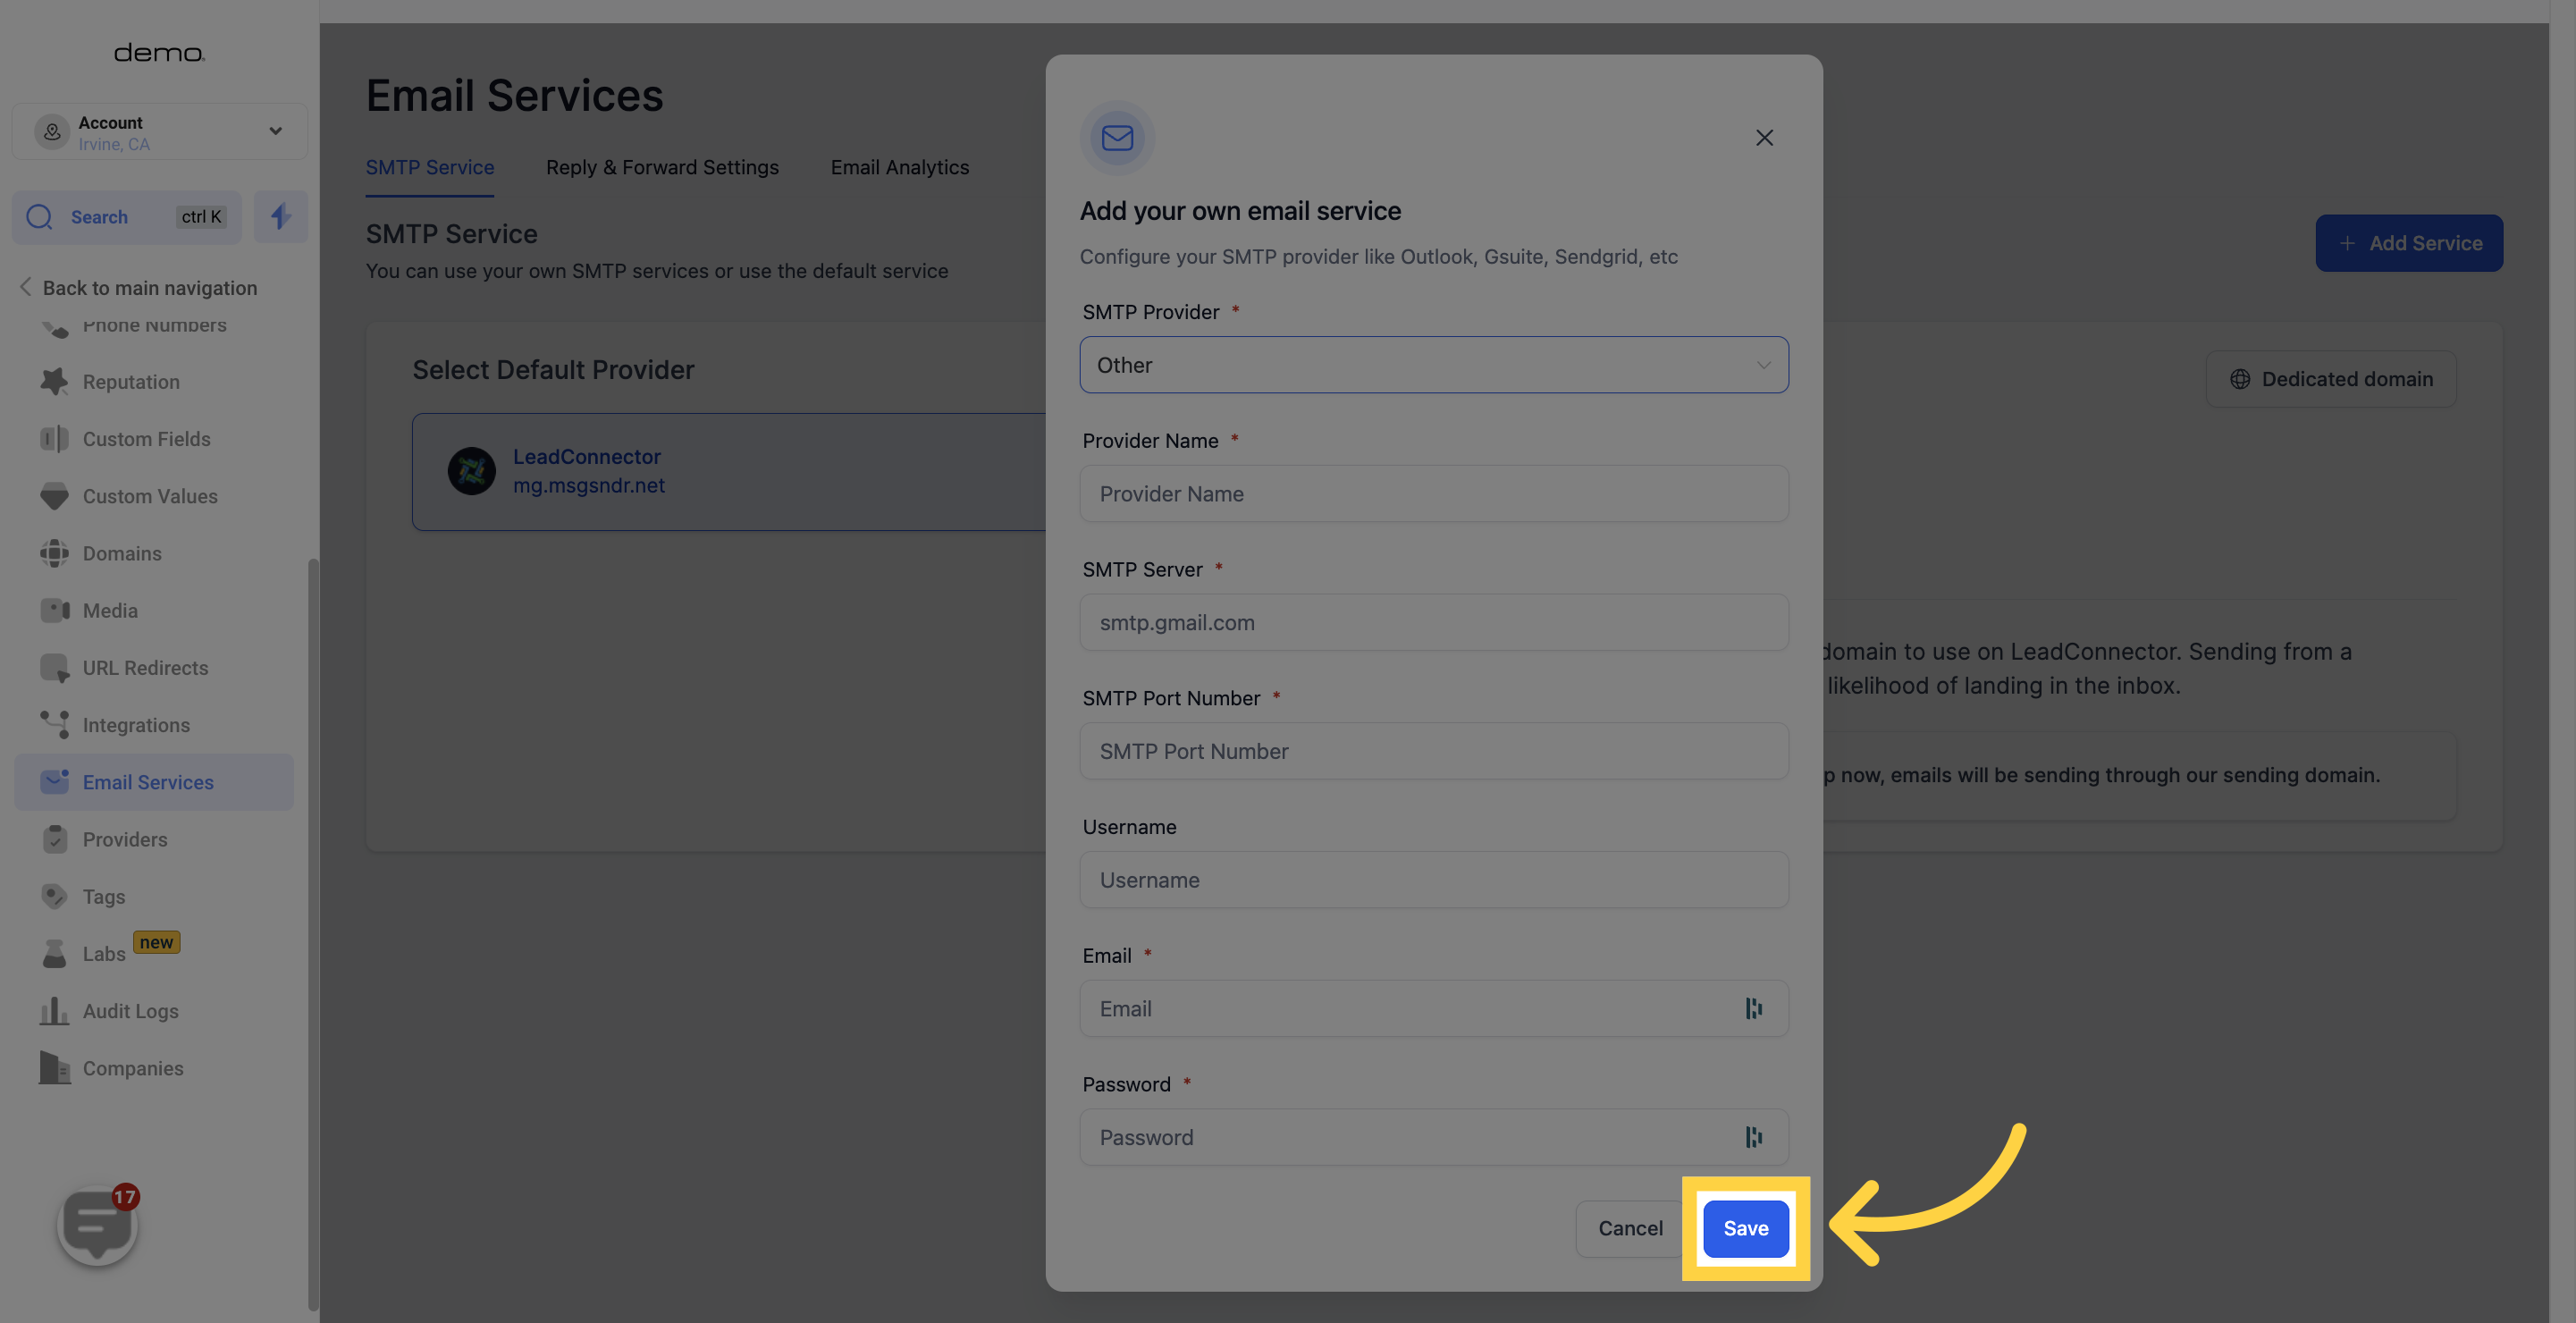
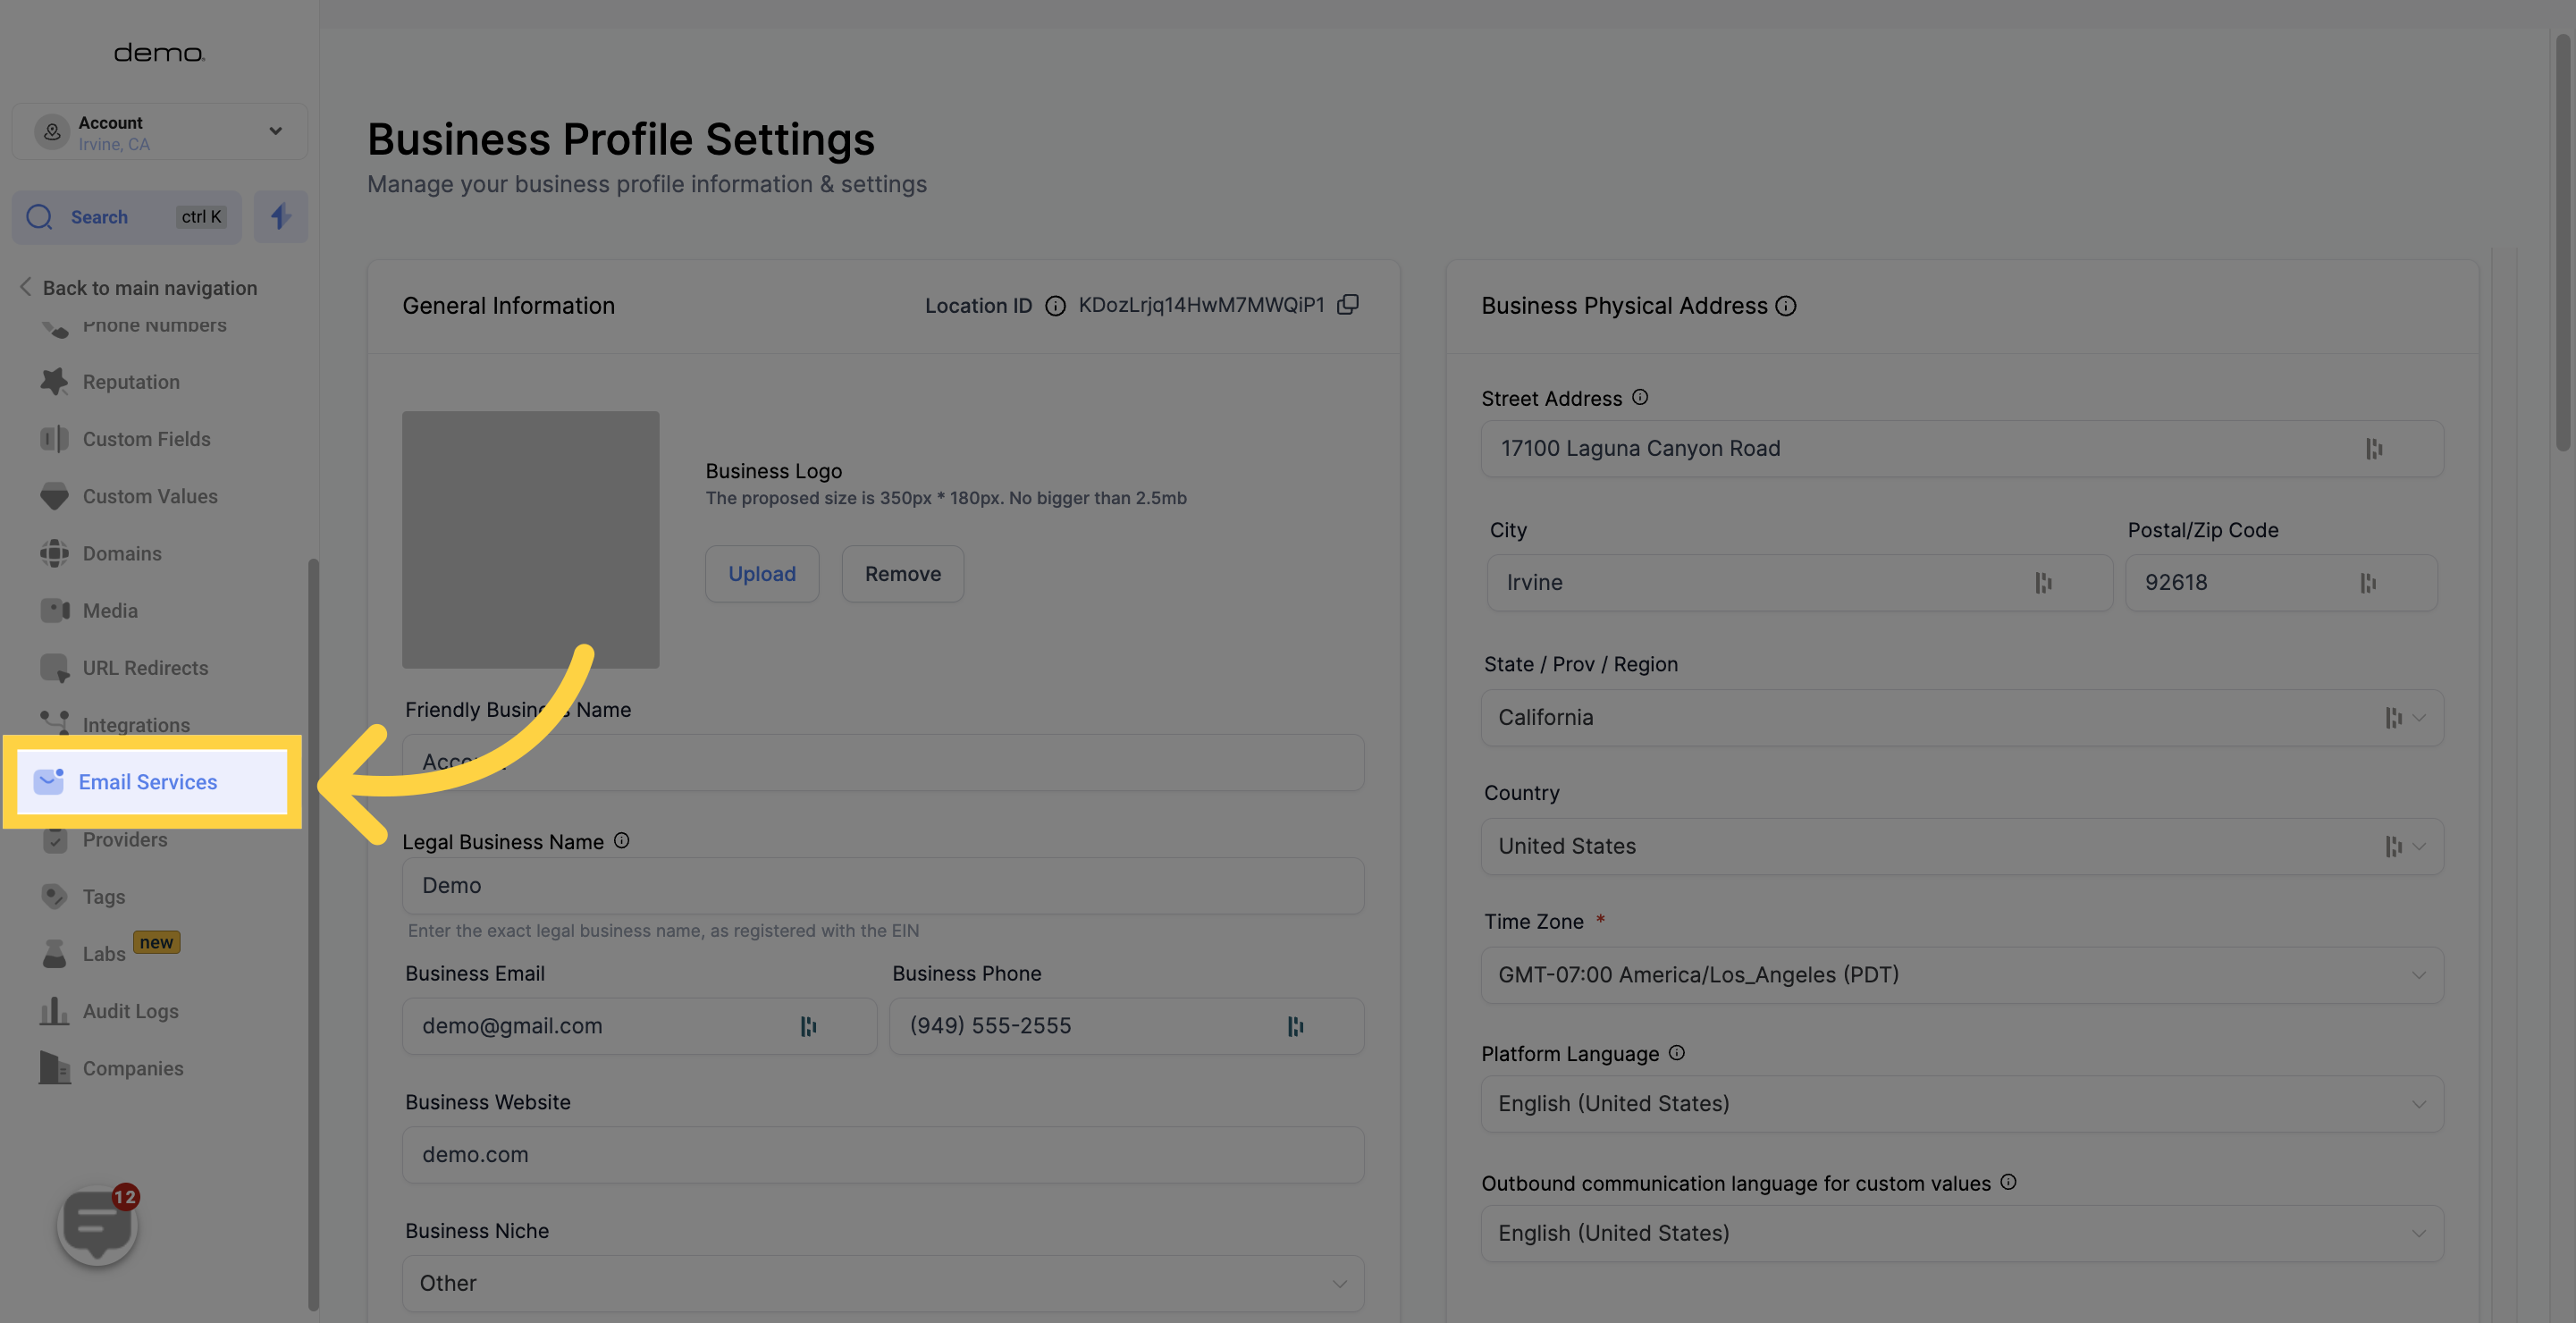
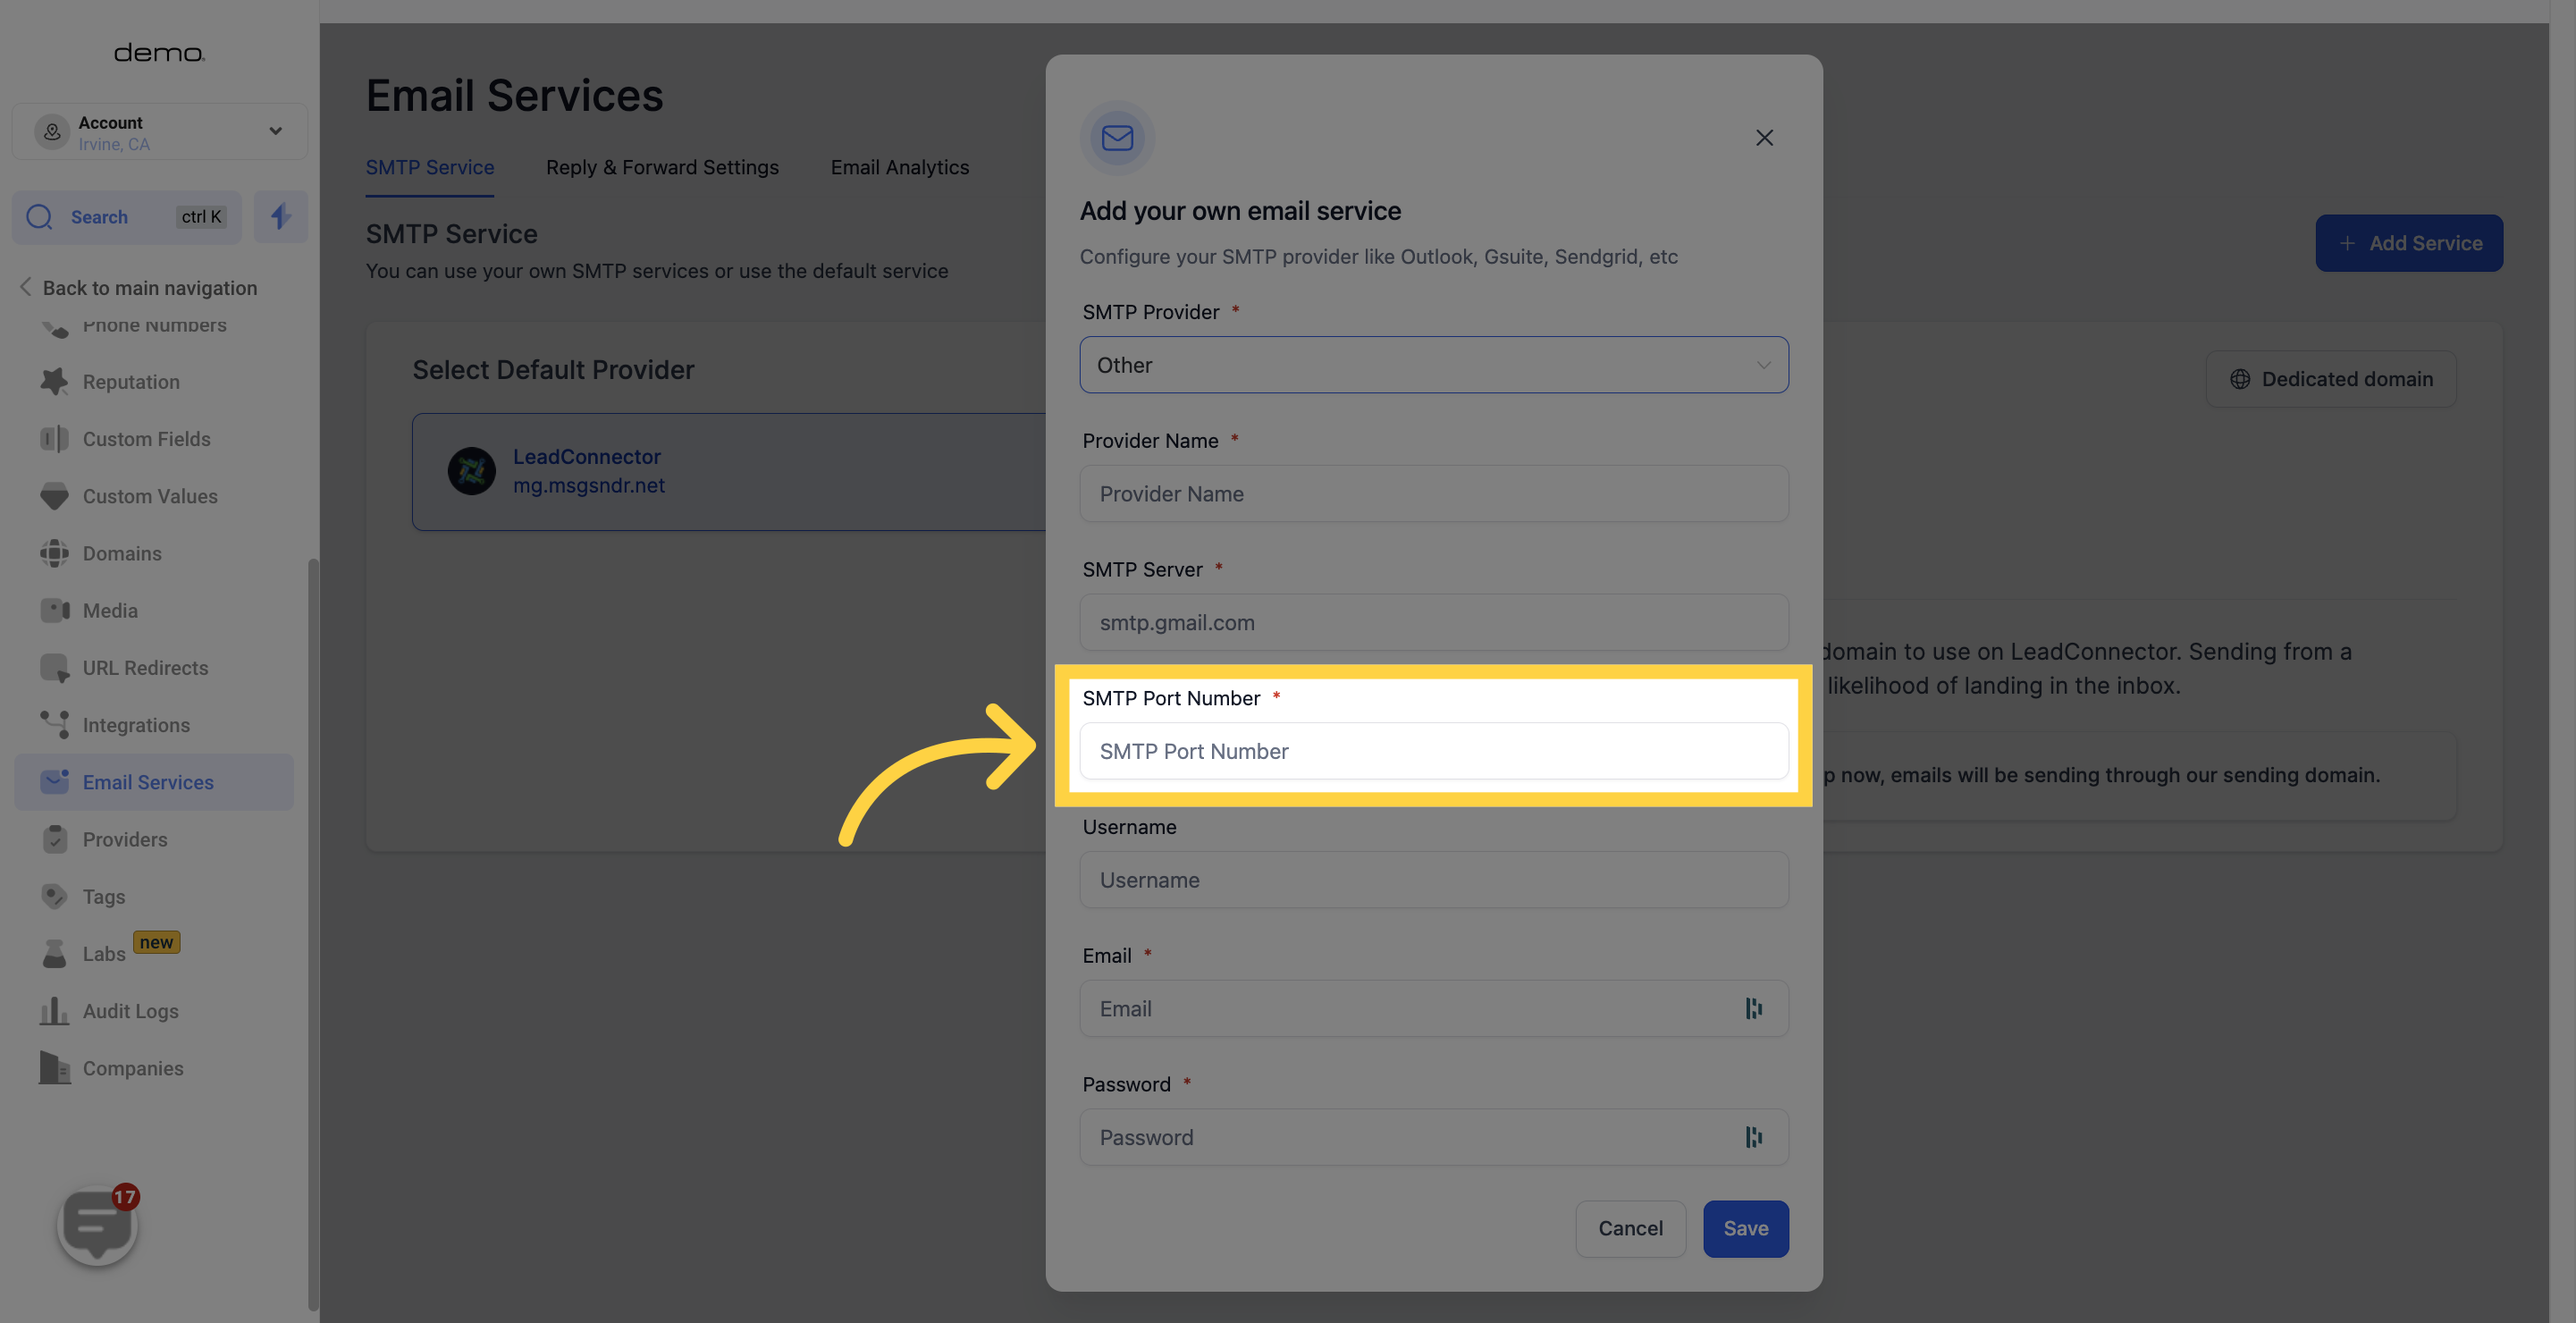
Go to the "Email Services" section under the "Settings" area of your CRM location

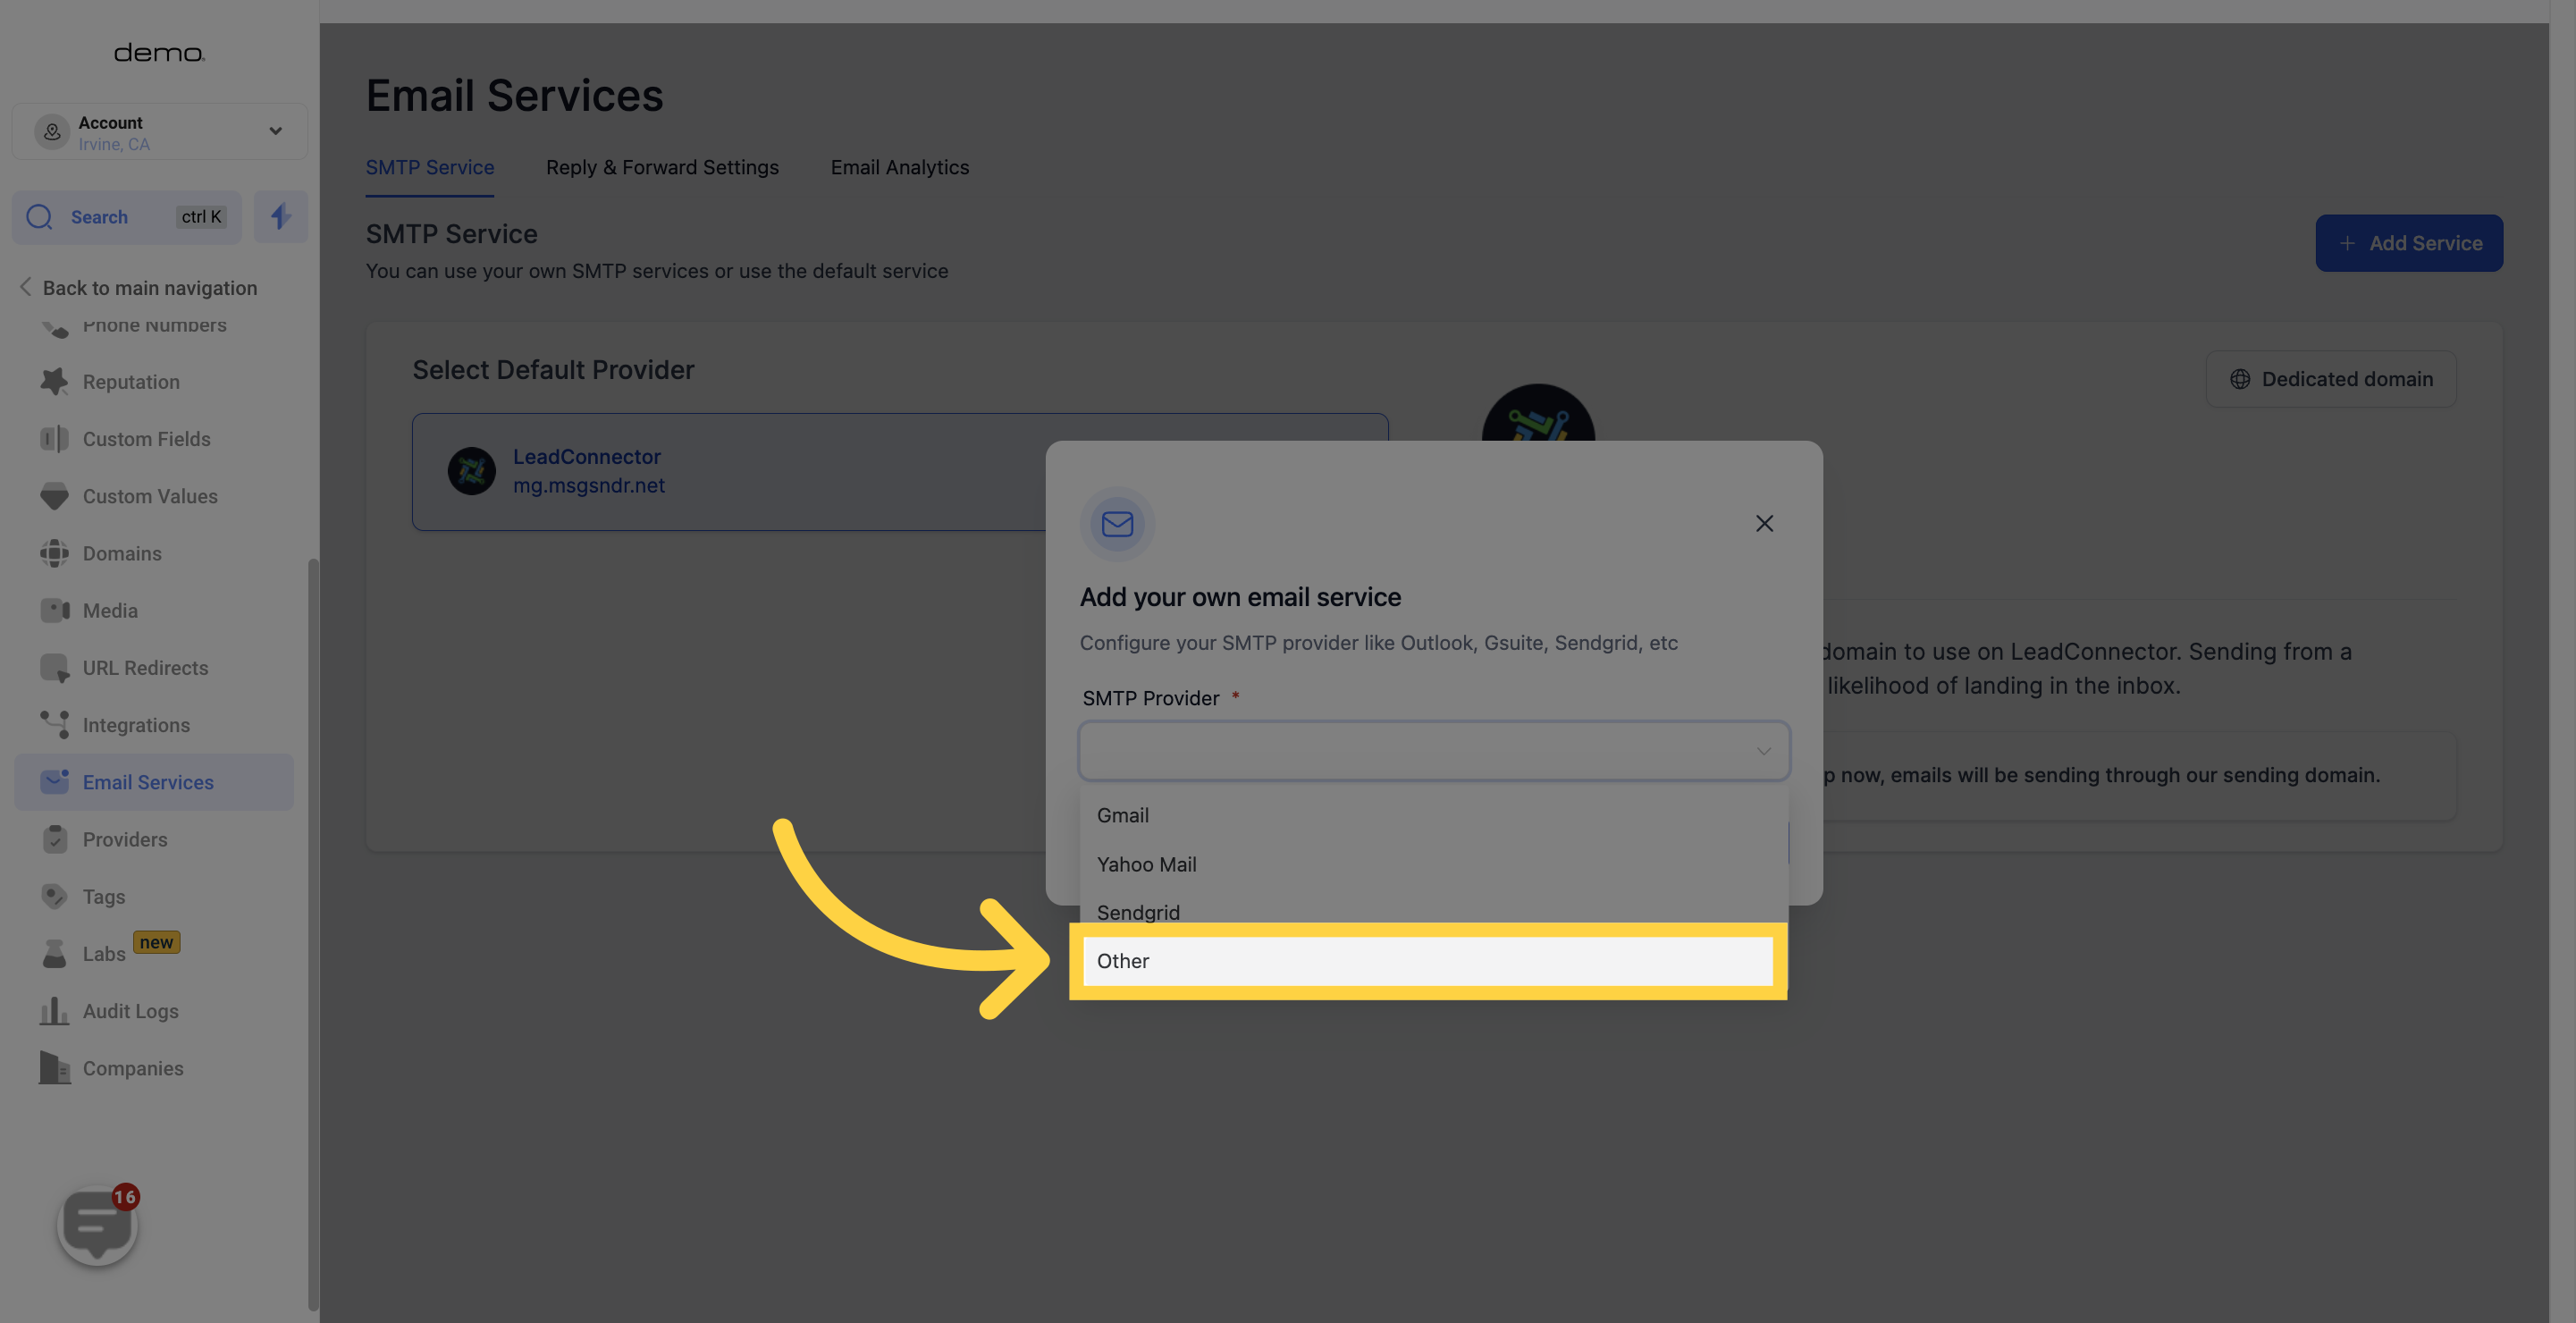
Find the "Other" option to select Sendinblue as your SMTP provider.
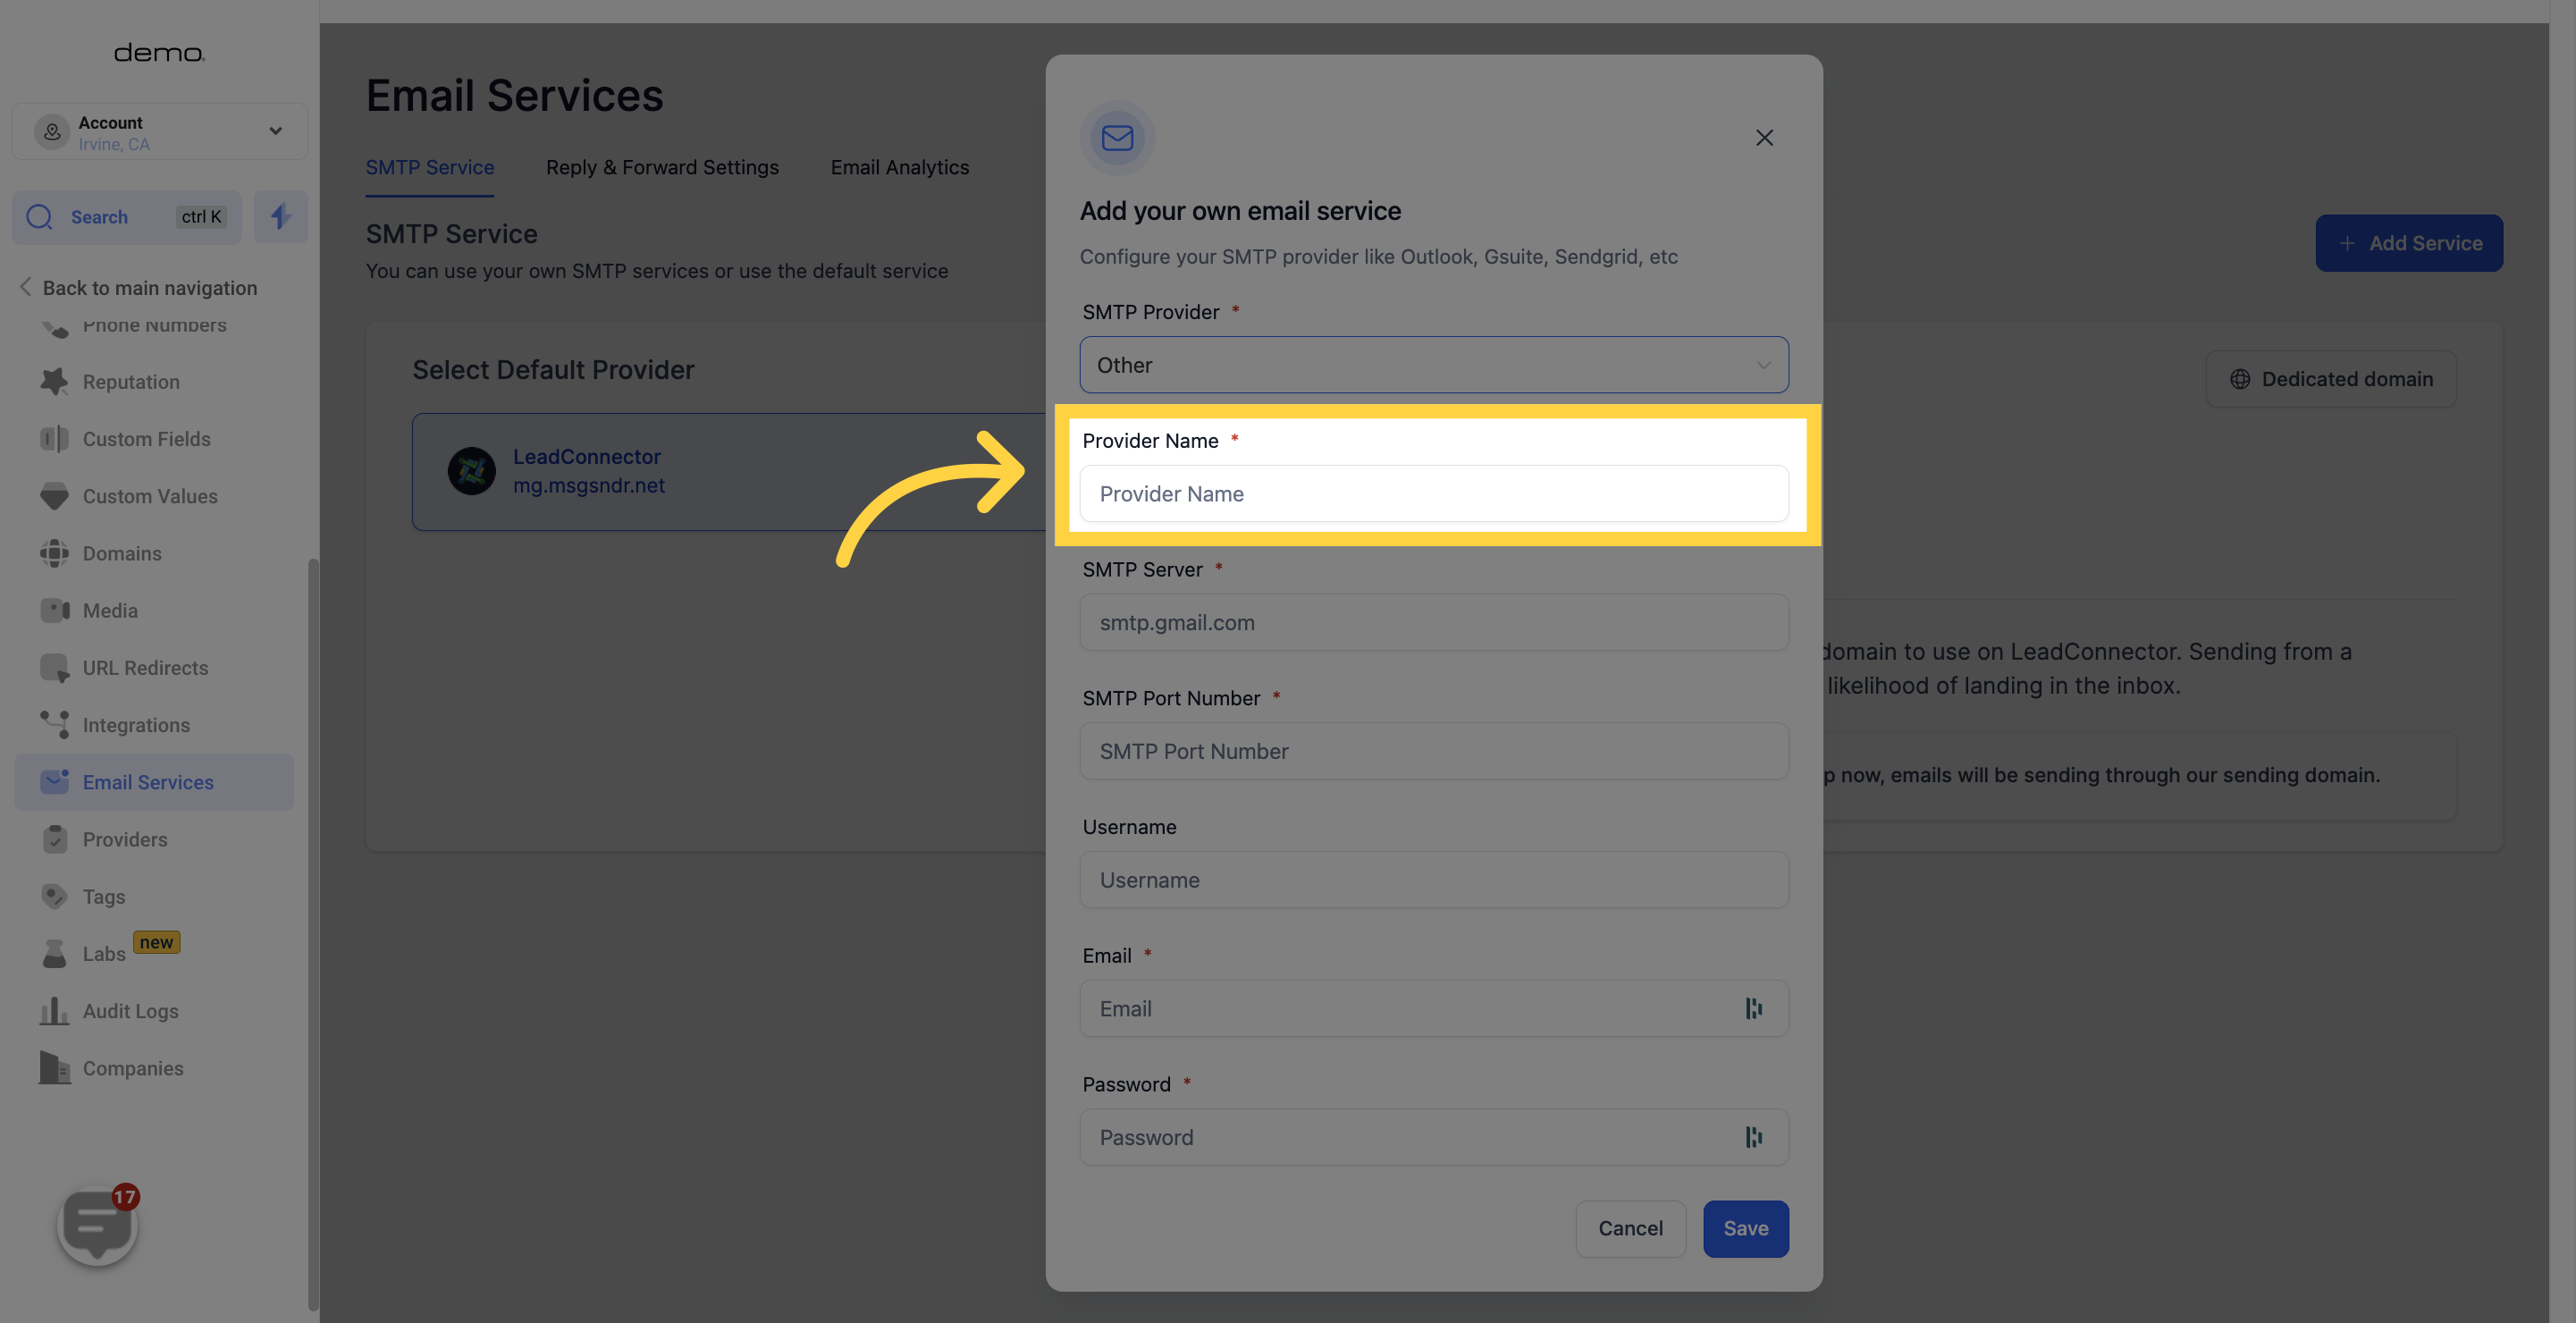
Give a name for identification purposes.
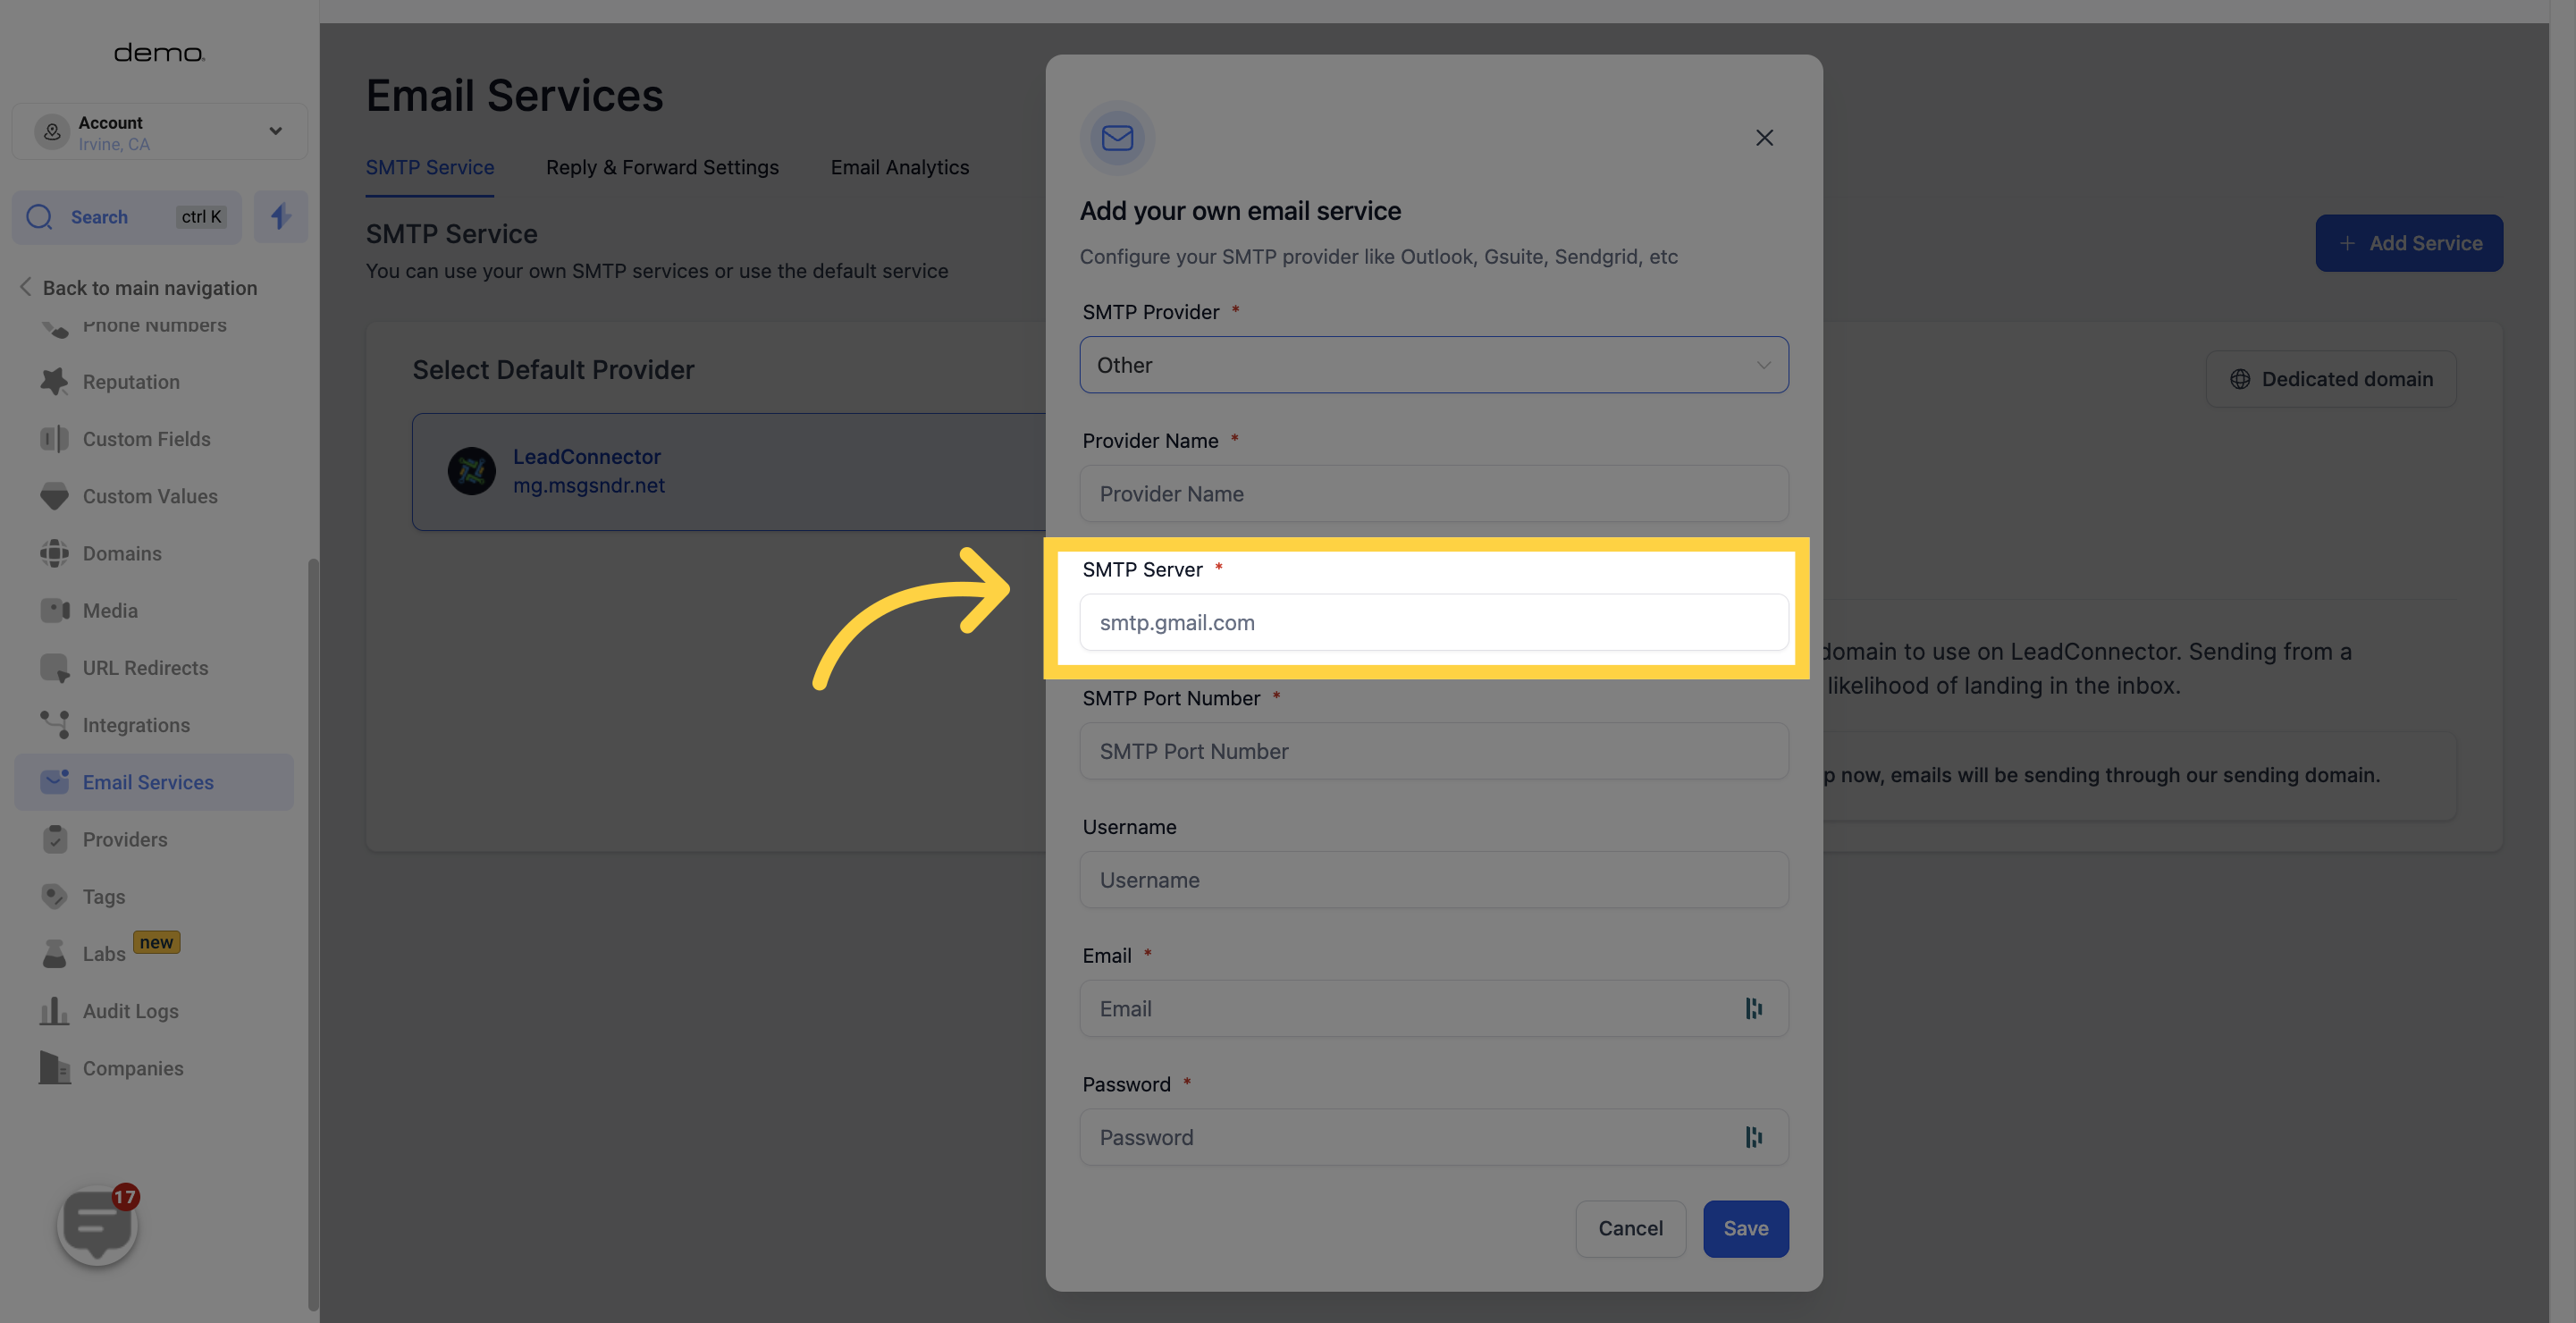
Get the SMTP from the Sendinblue SMTP settings area.
Enter the port number.
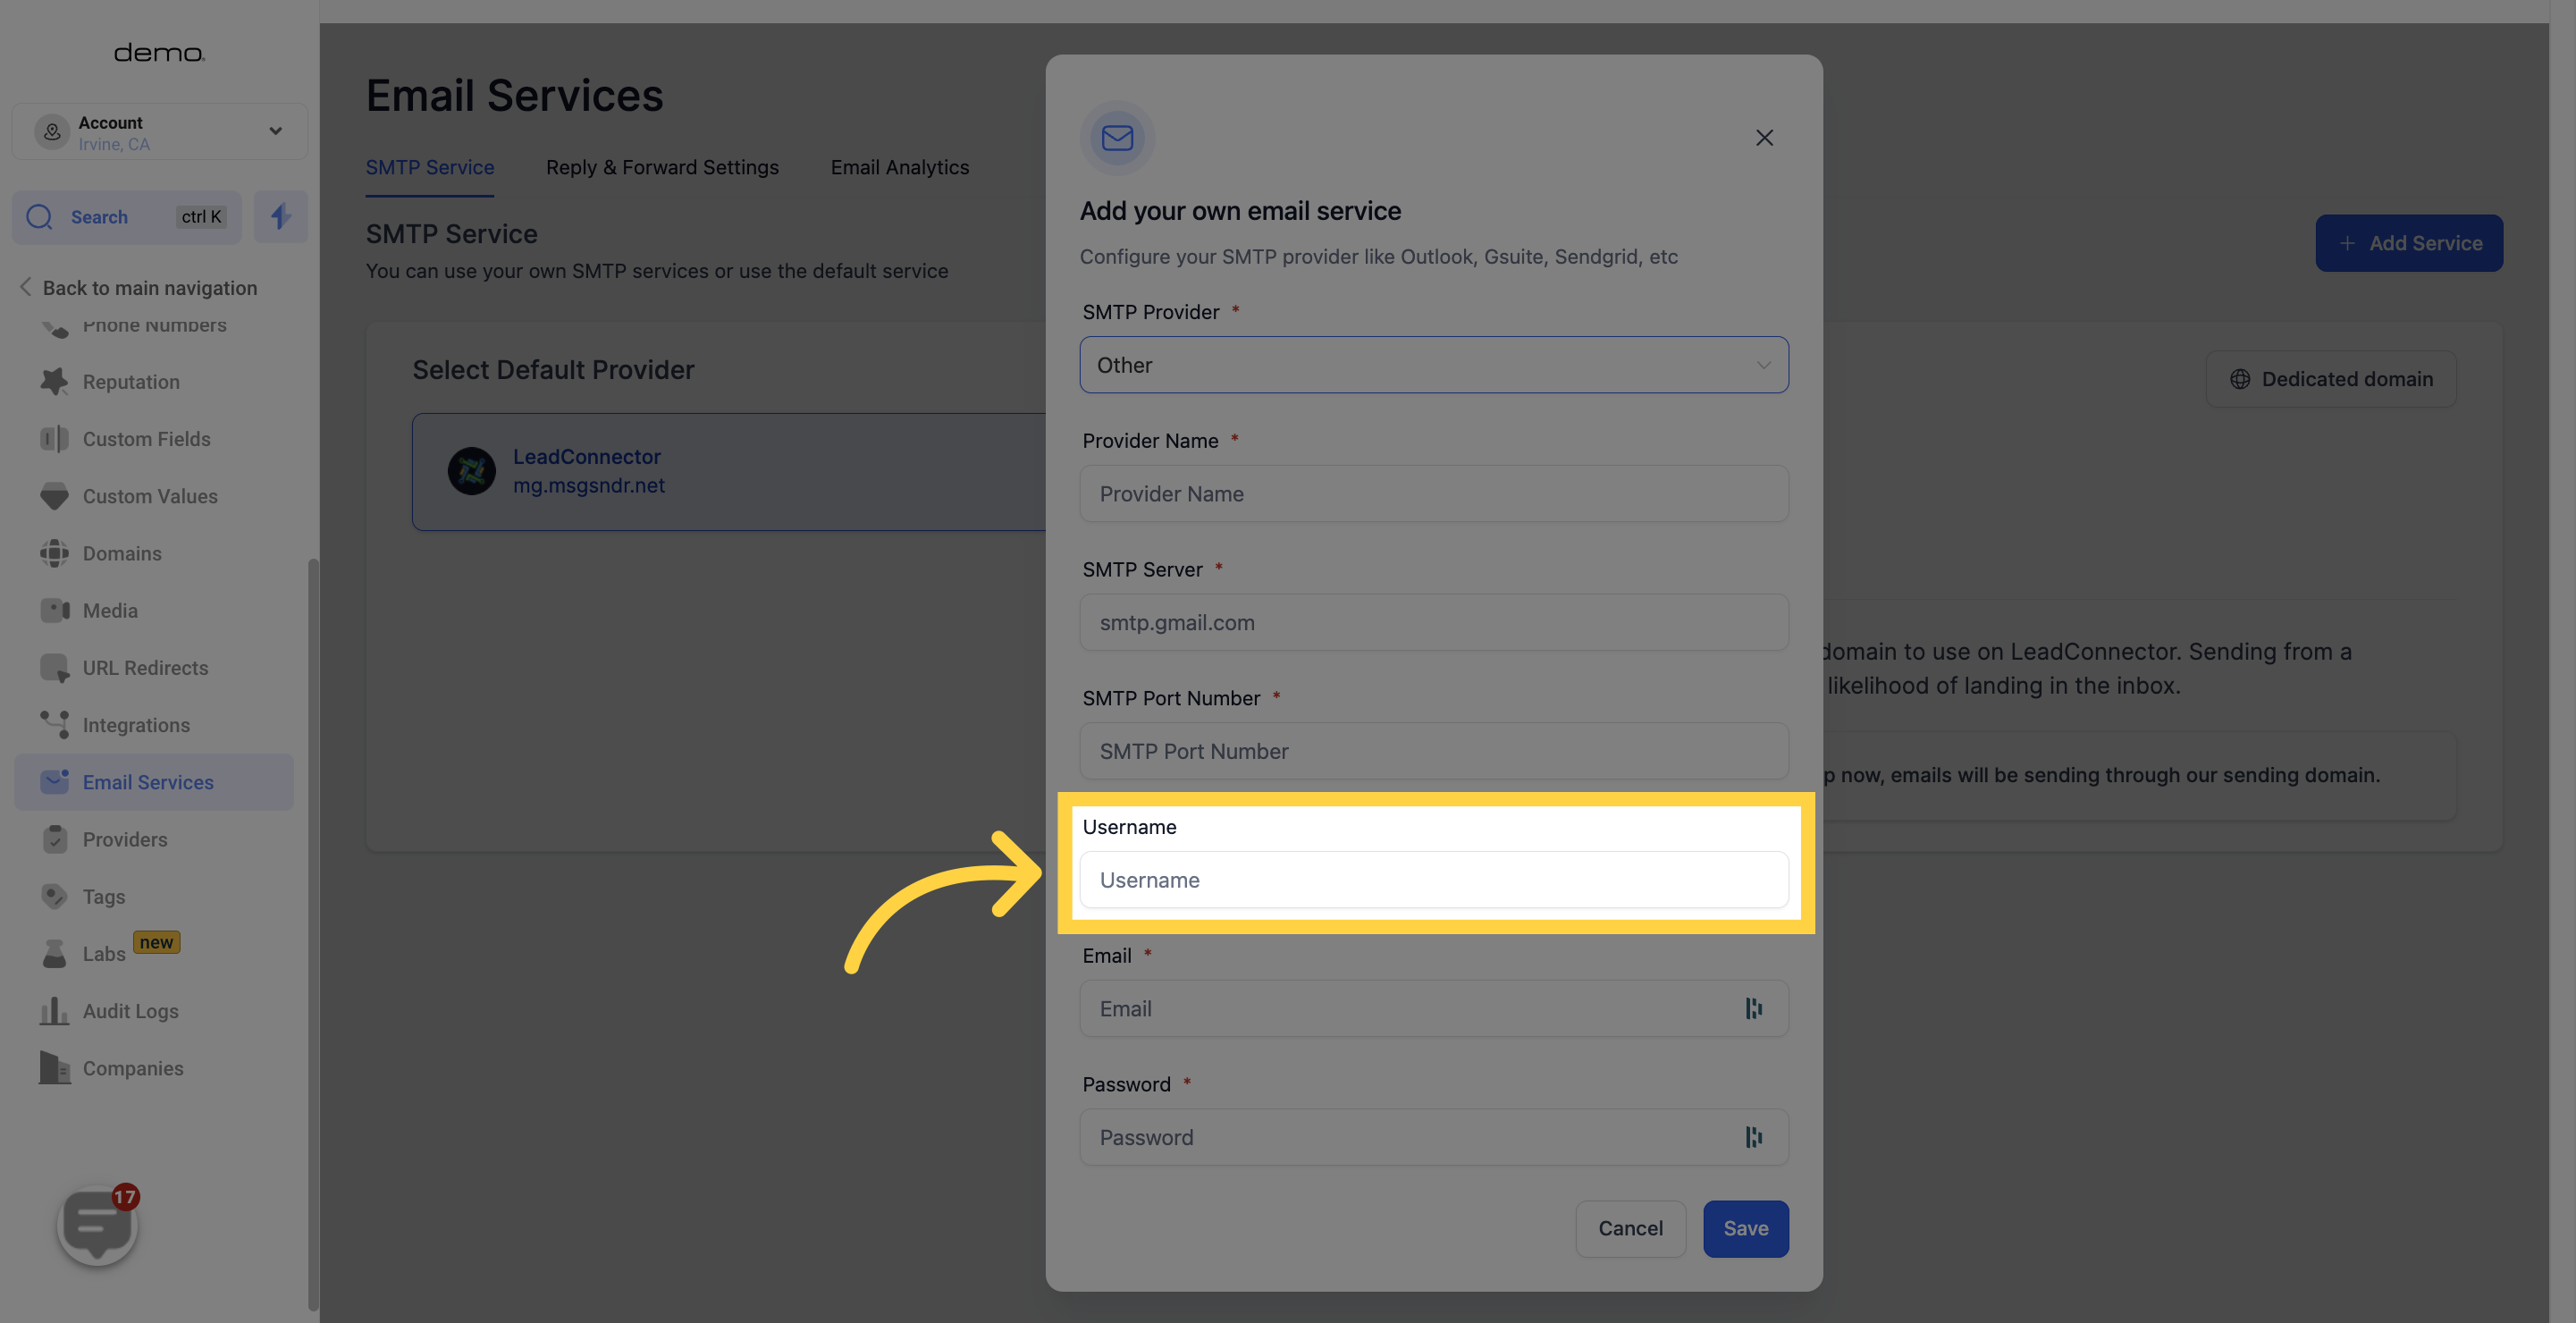
Use the email address you used to create your Sendinblue account.
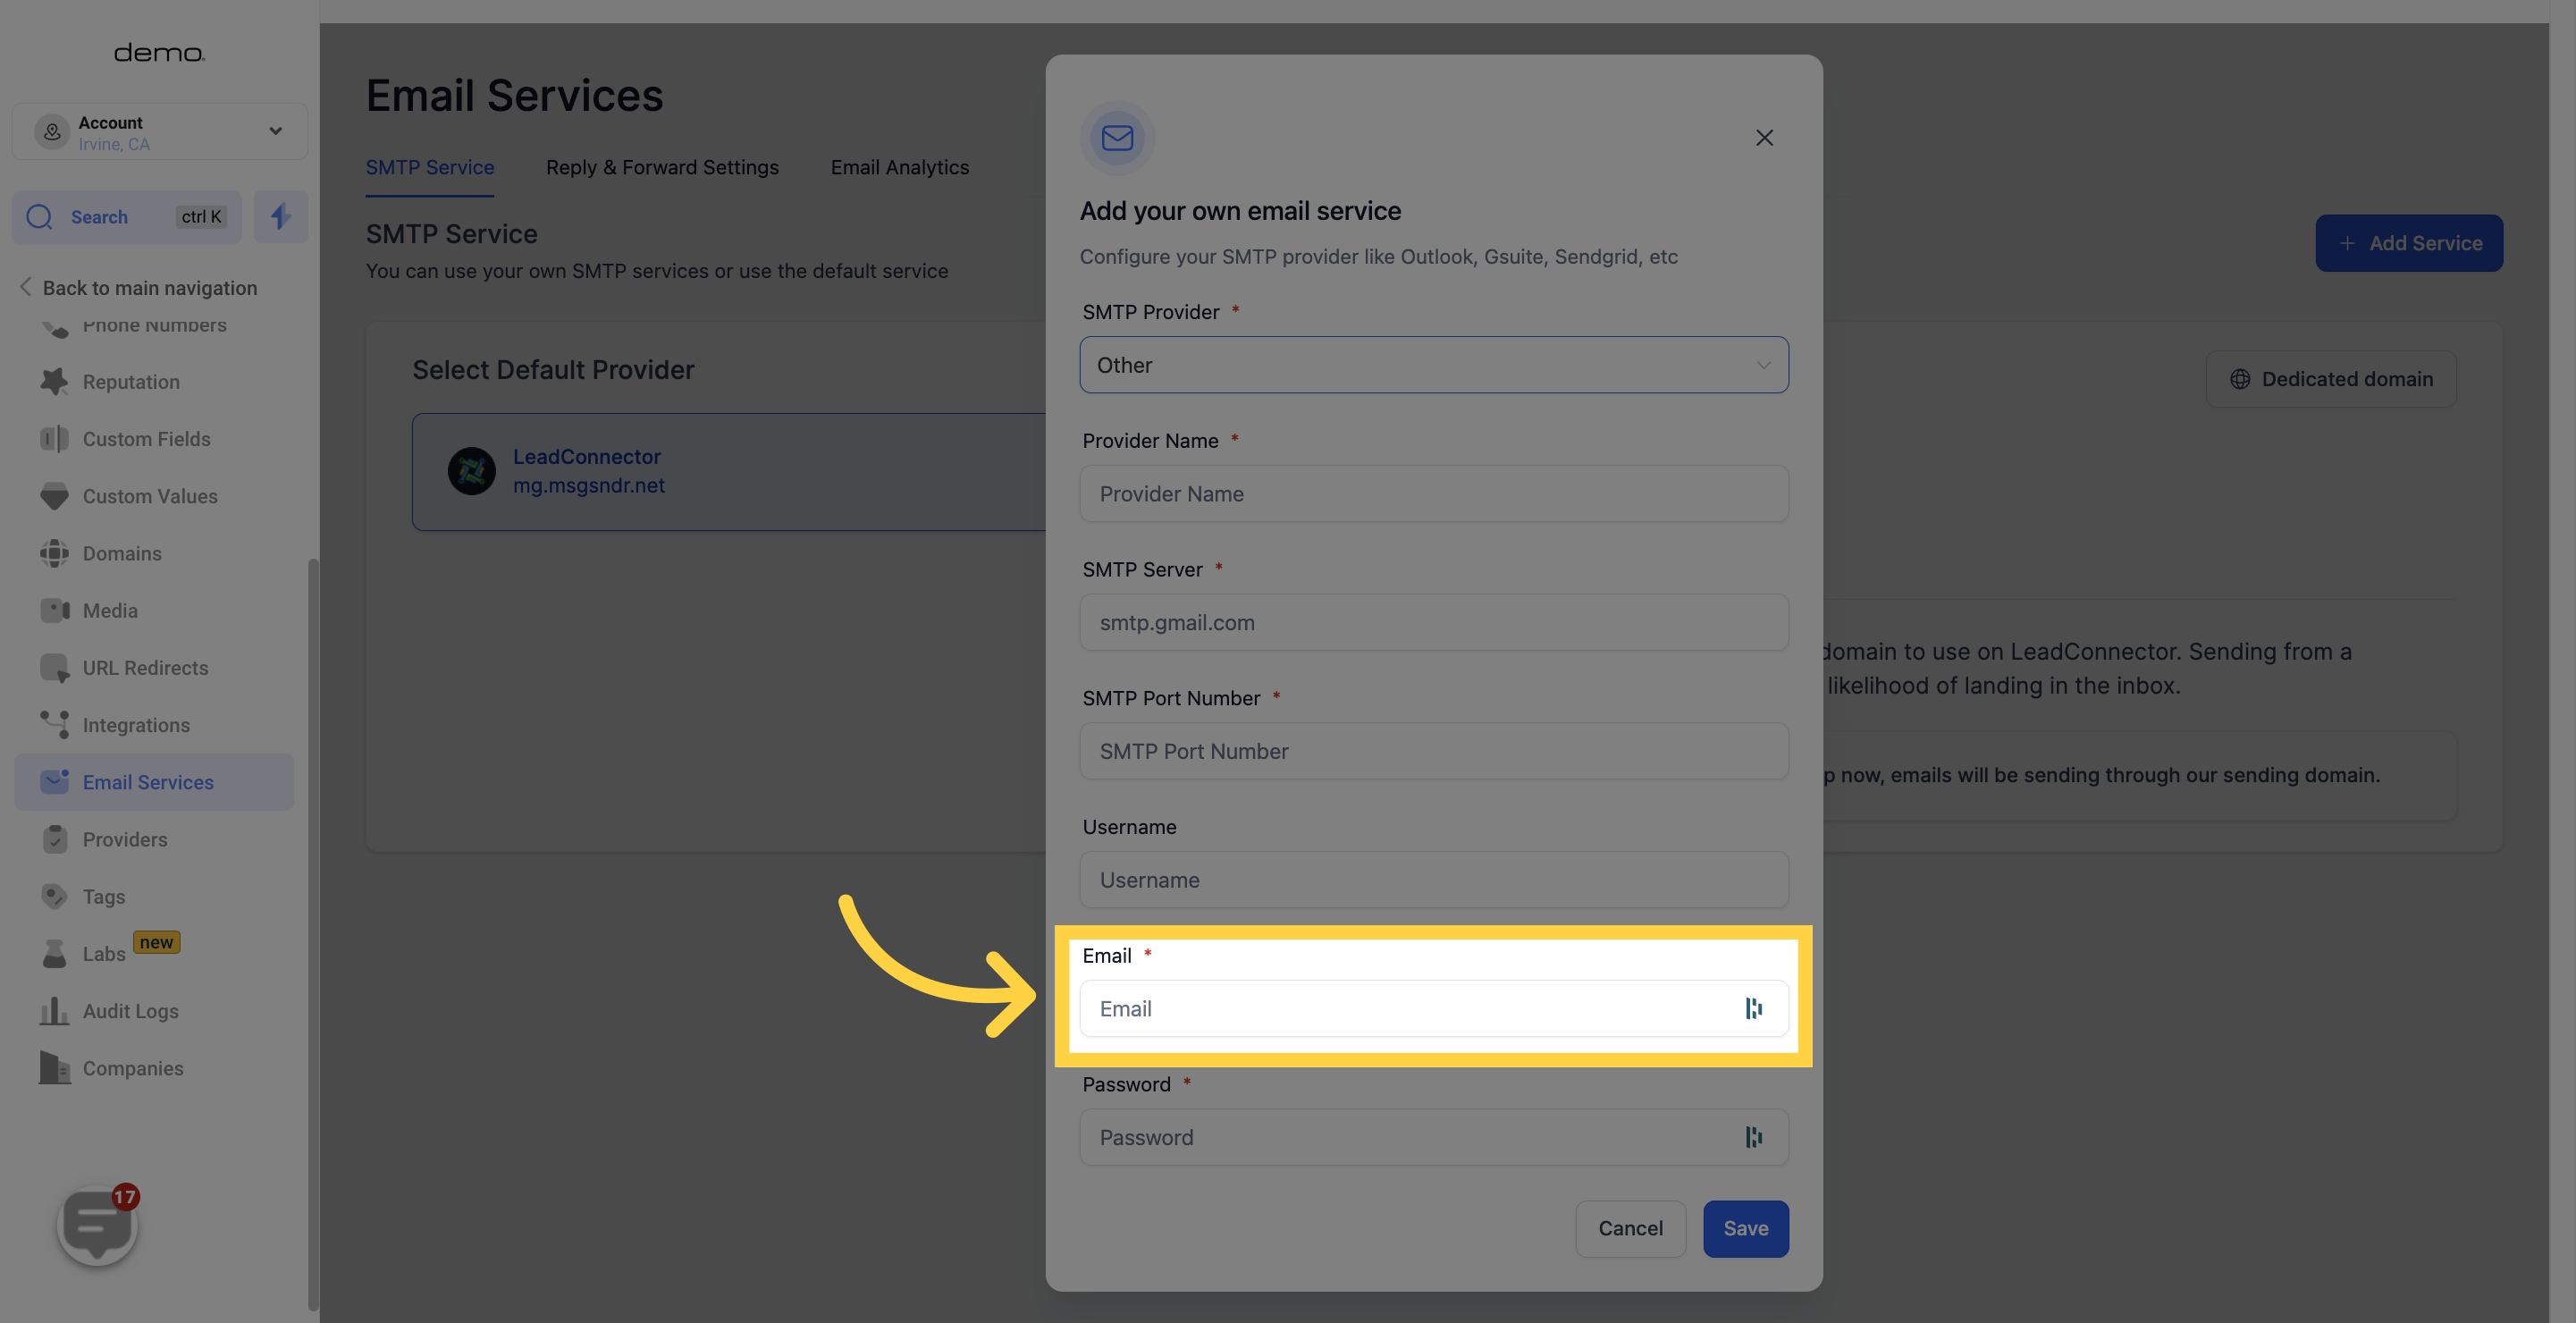
Enter the email address you would like to use for email sending.
Retrieve the password from the "Master Password" area in Sendinblue SMTP Keys and paste it here.
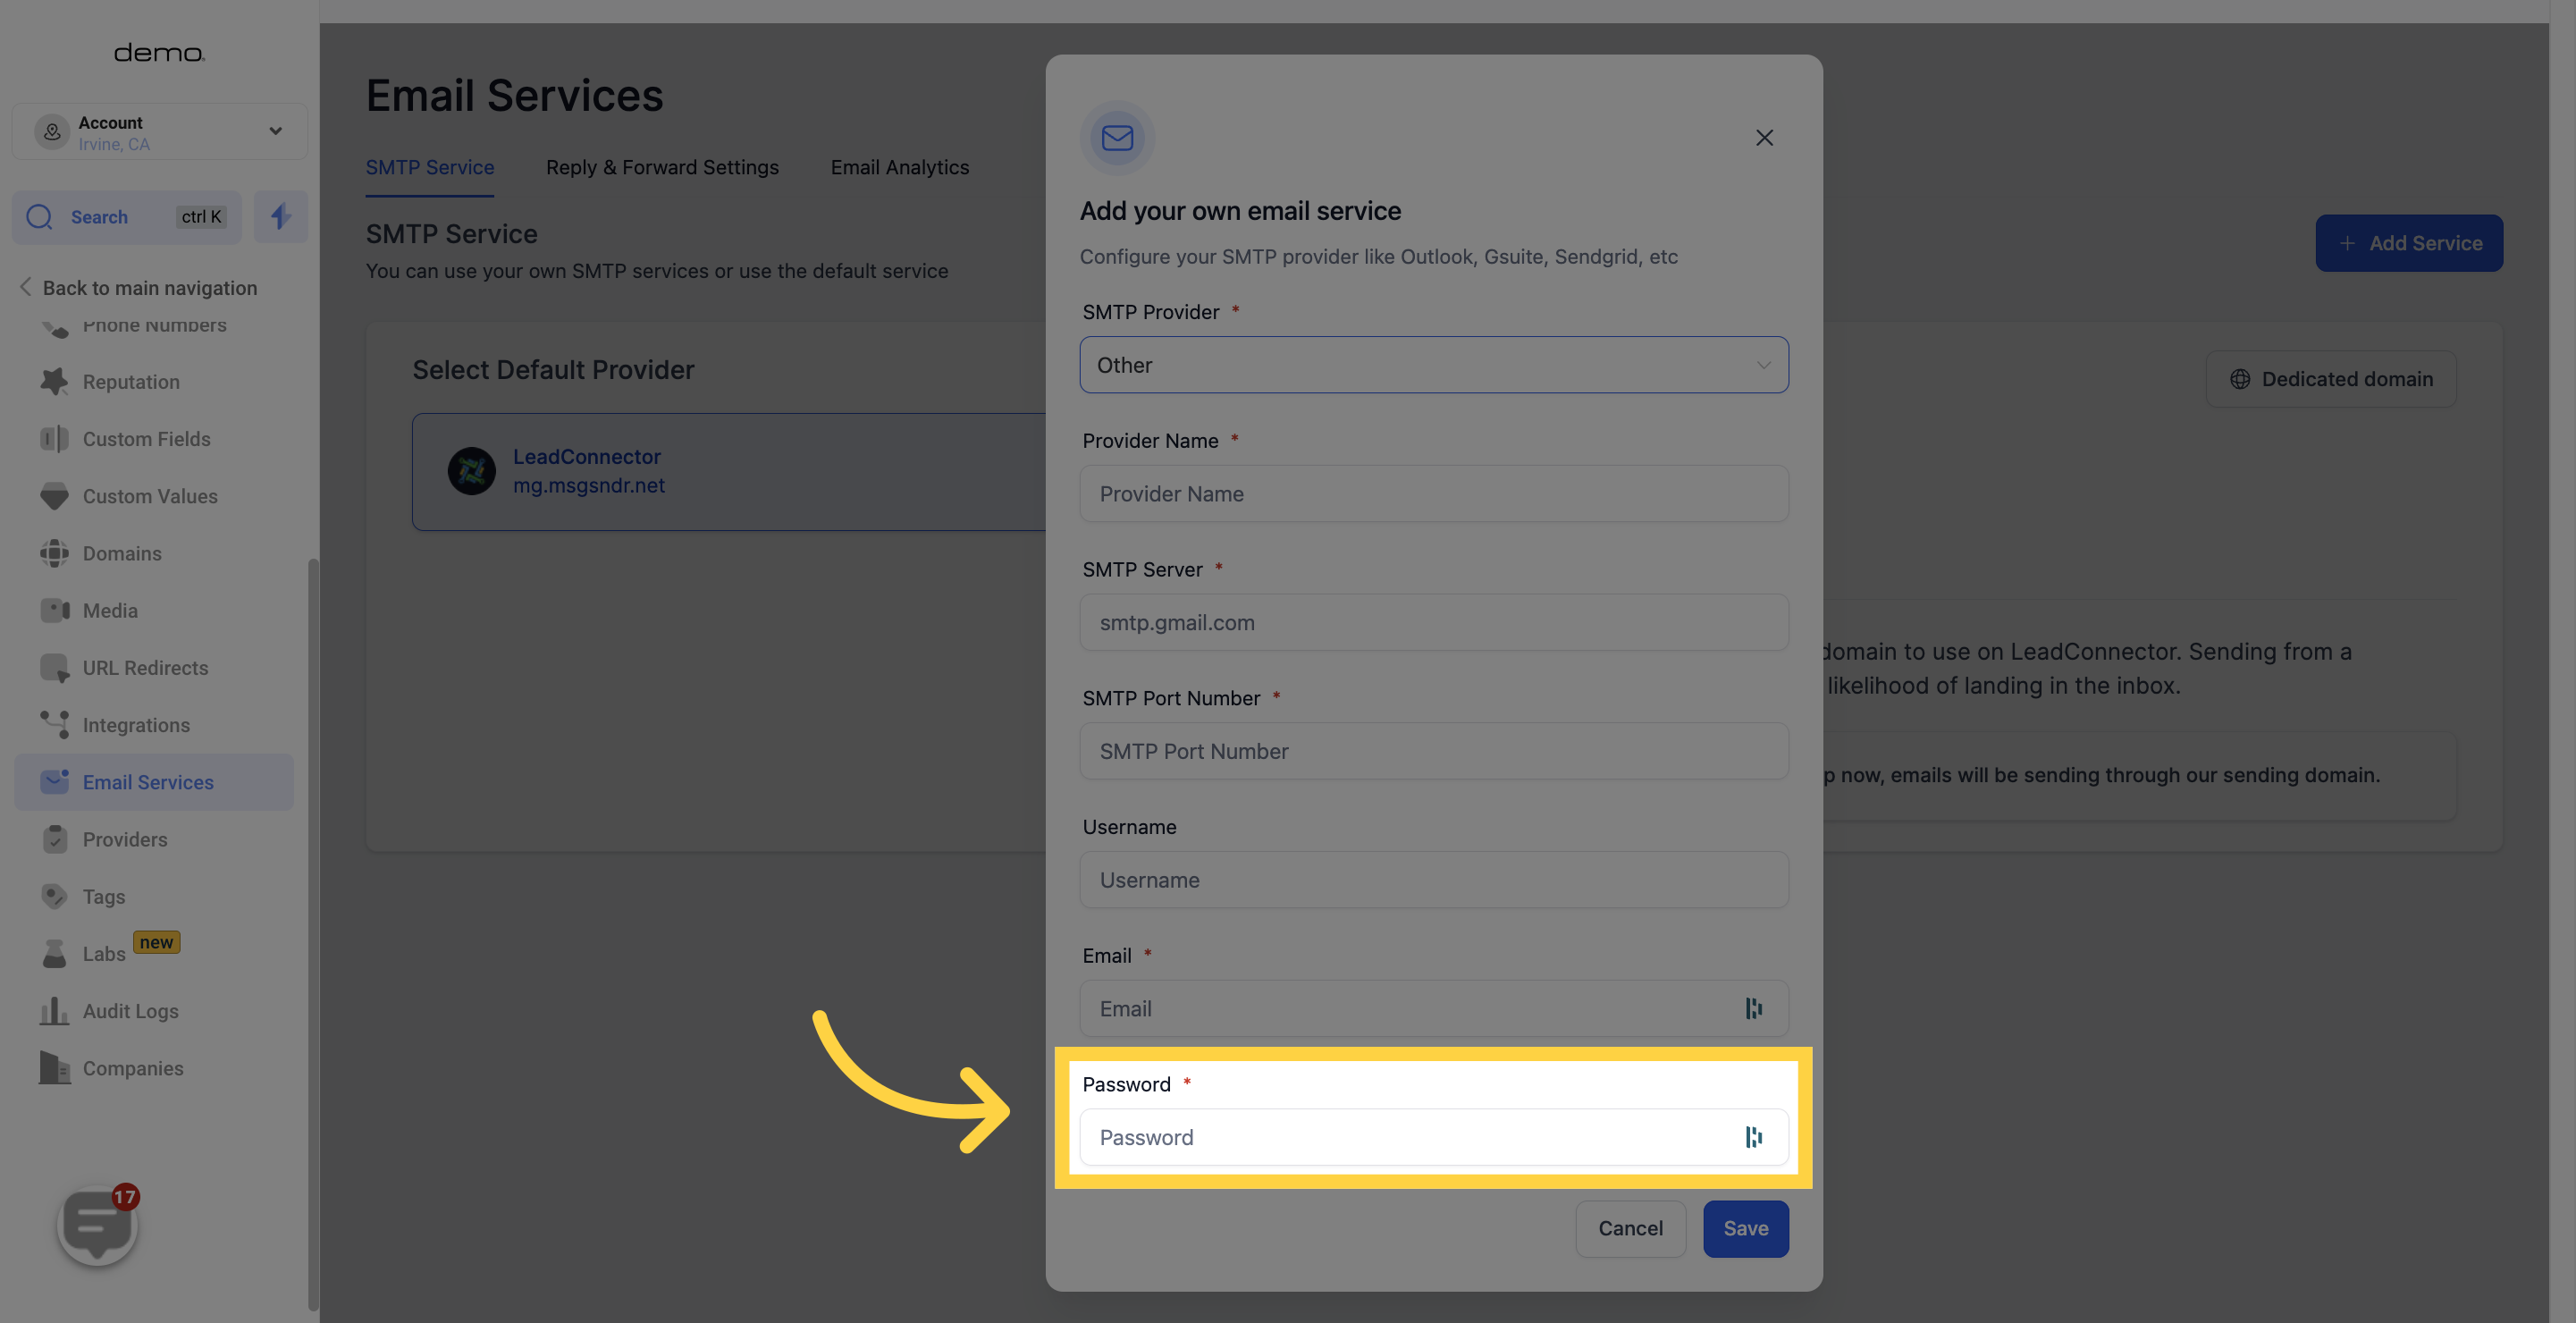
After configuring and making necessary changes to your SMTP provider settings, don't forget to save the changes. Once saved, you are all set to use your newly connected SMTP service provider.