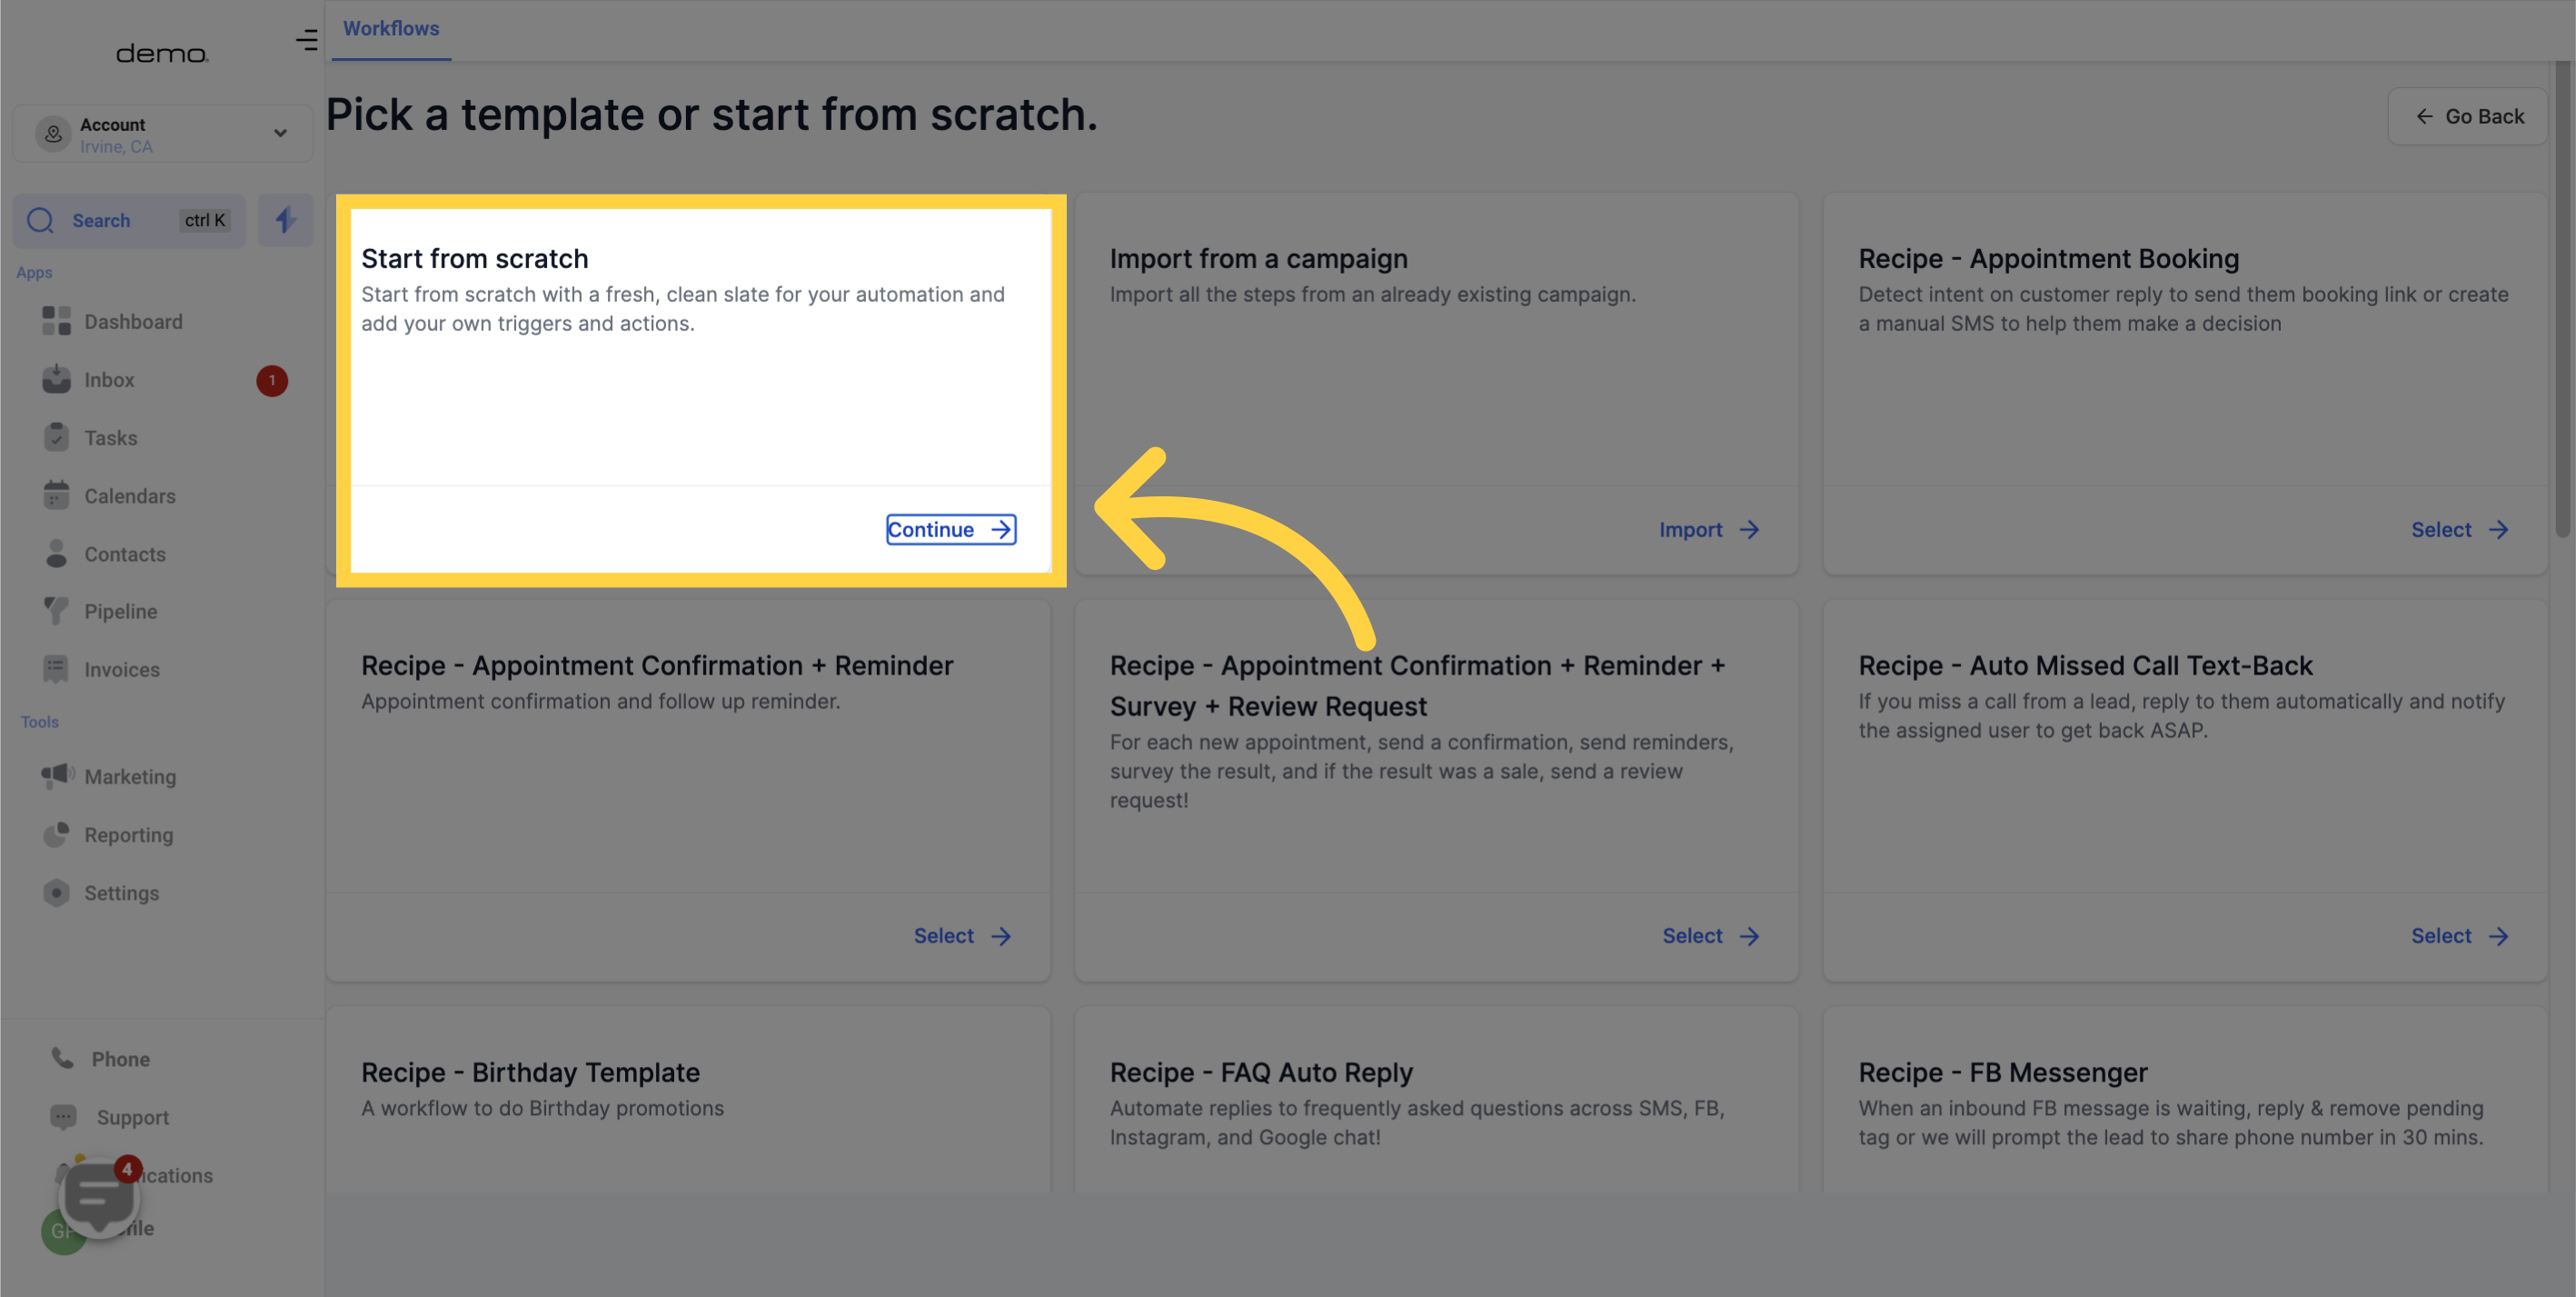
To PUBLISH workflows, it is essential to set up a workflow trigger and a workflow action. Without these two components, the workflow can only be saved and not published.
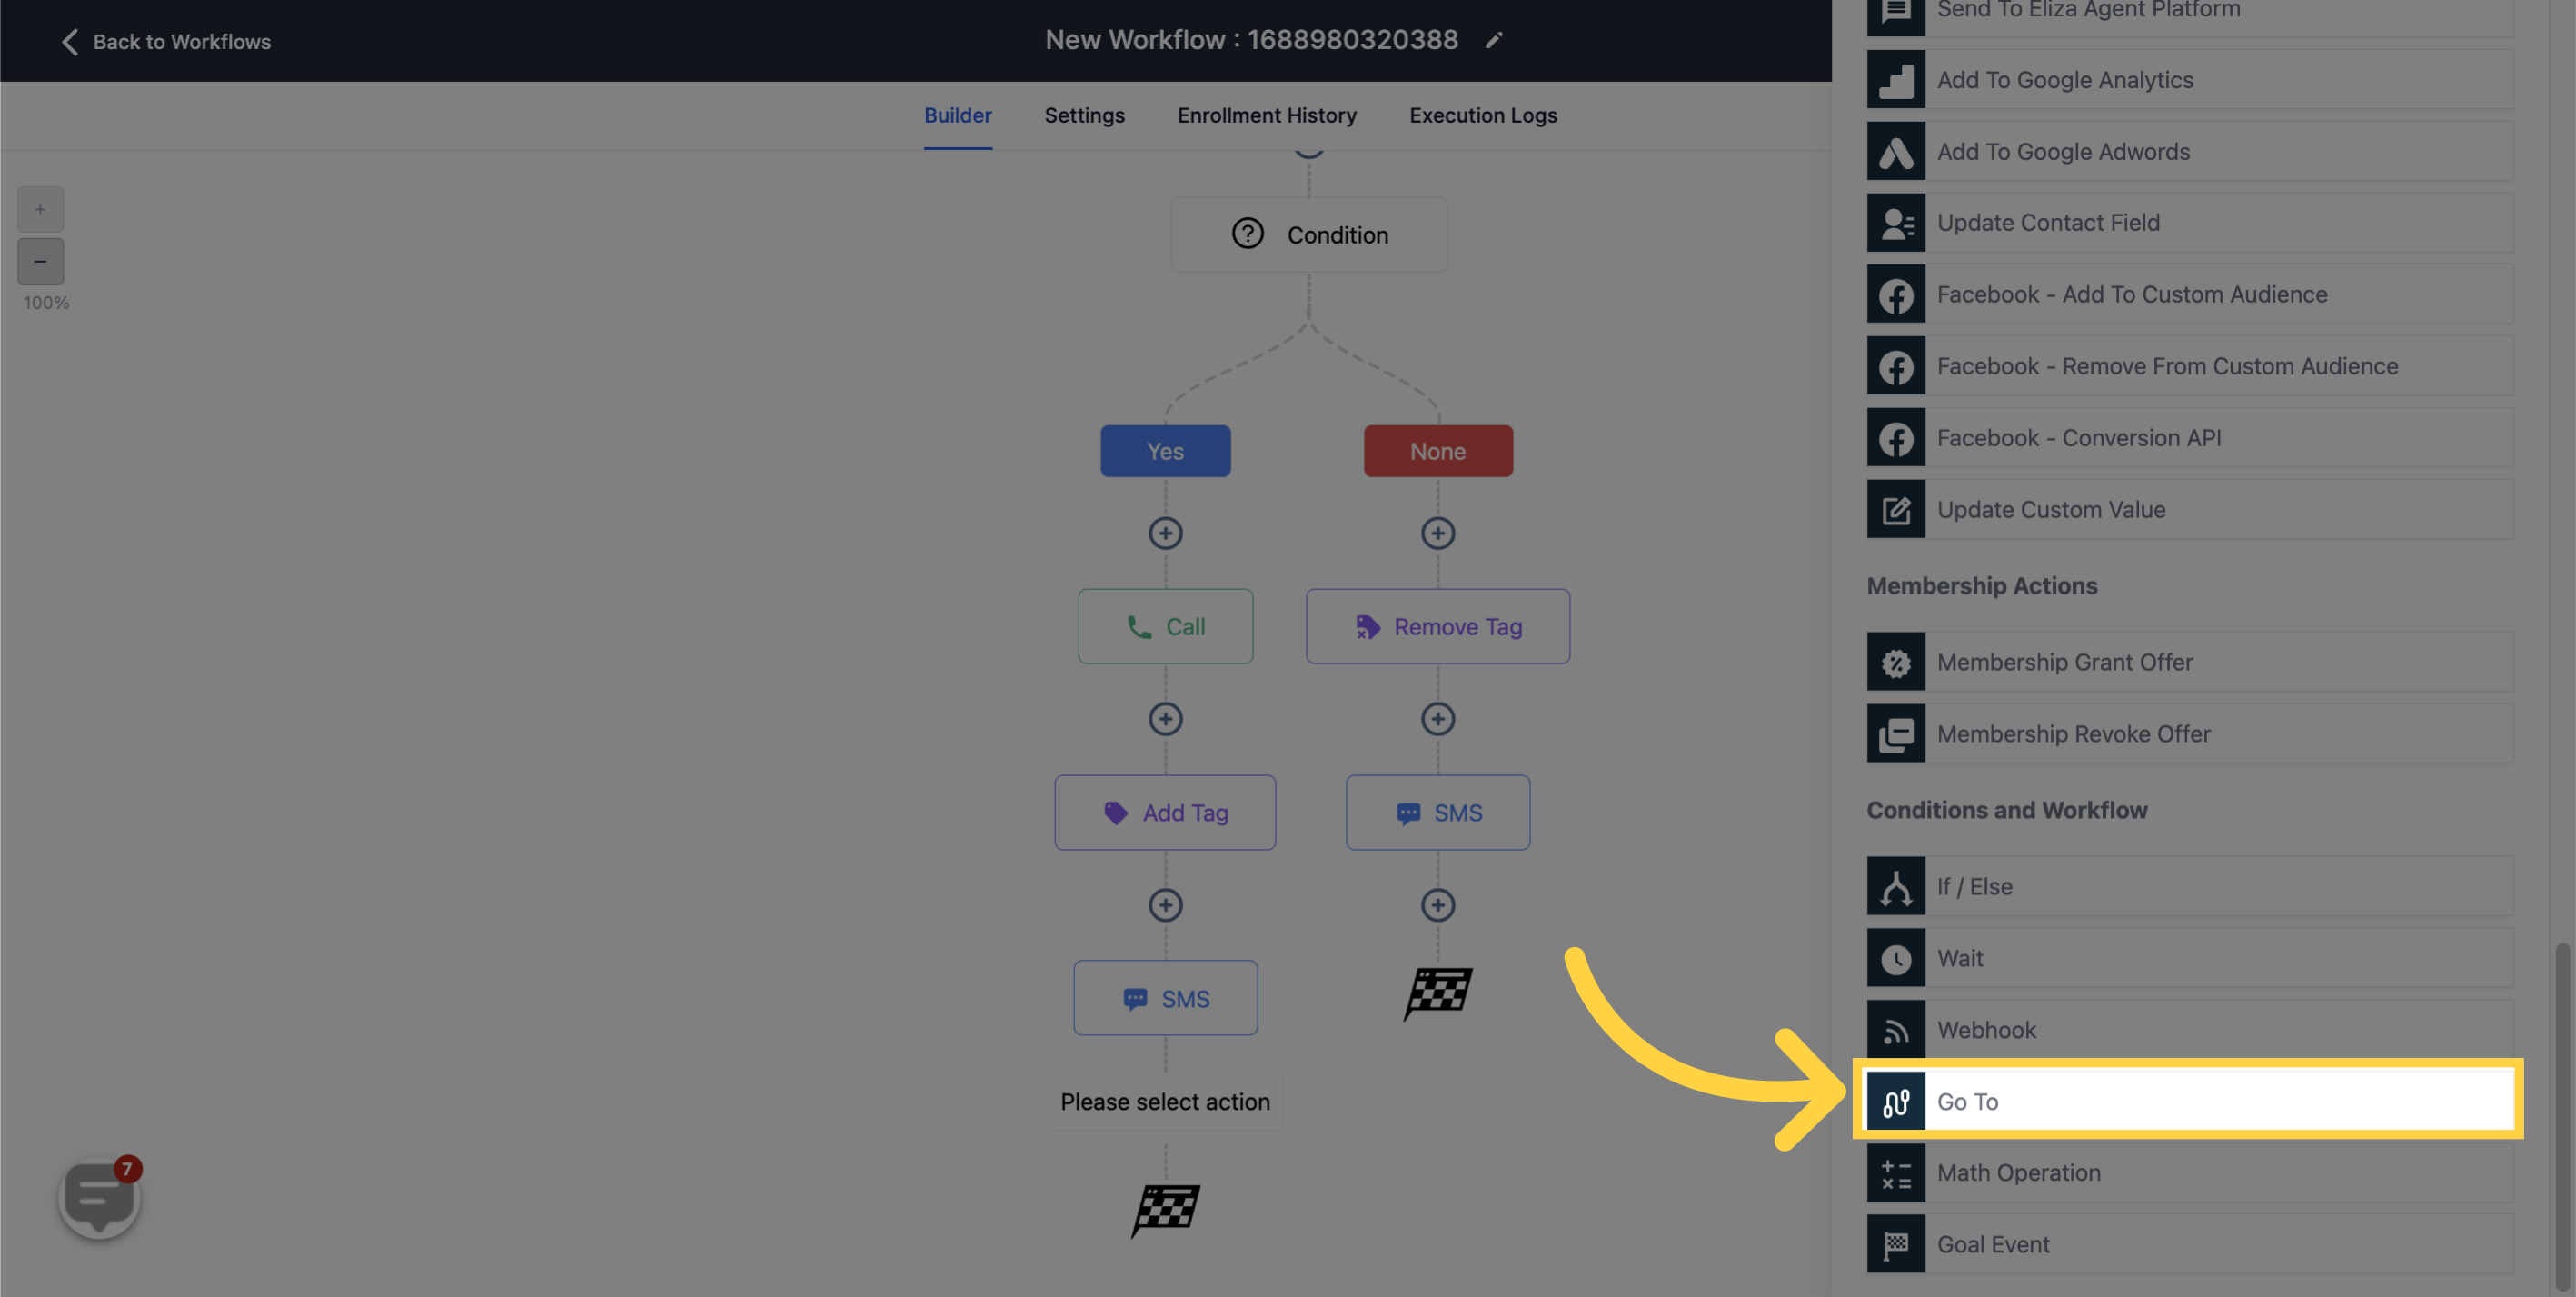
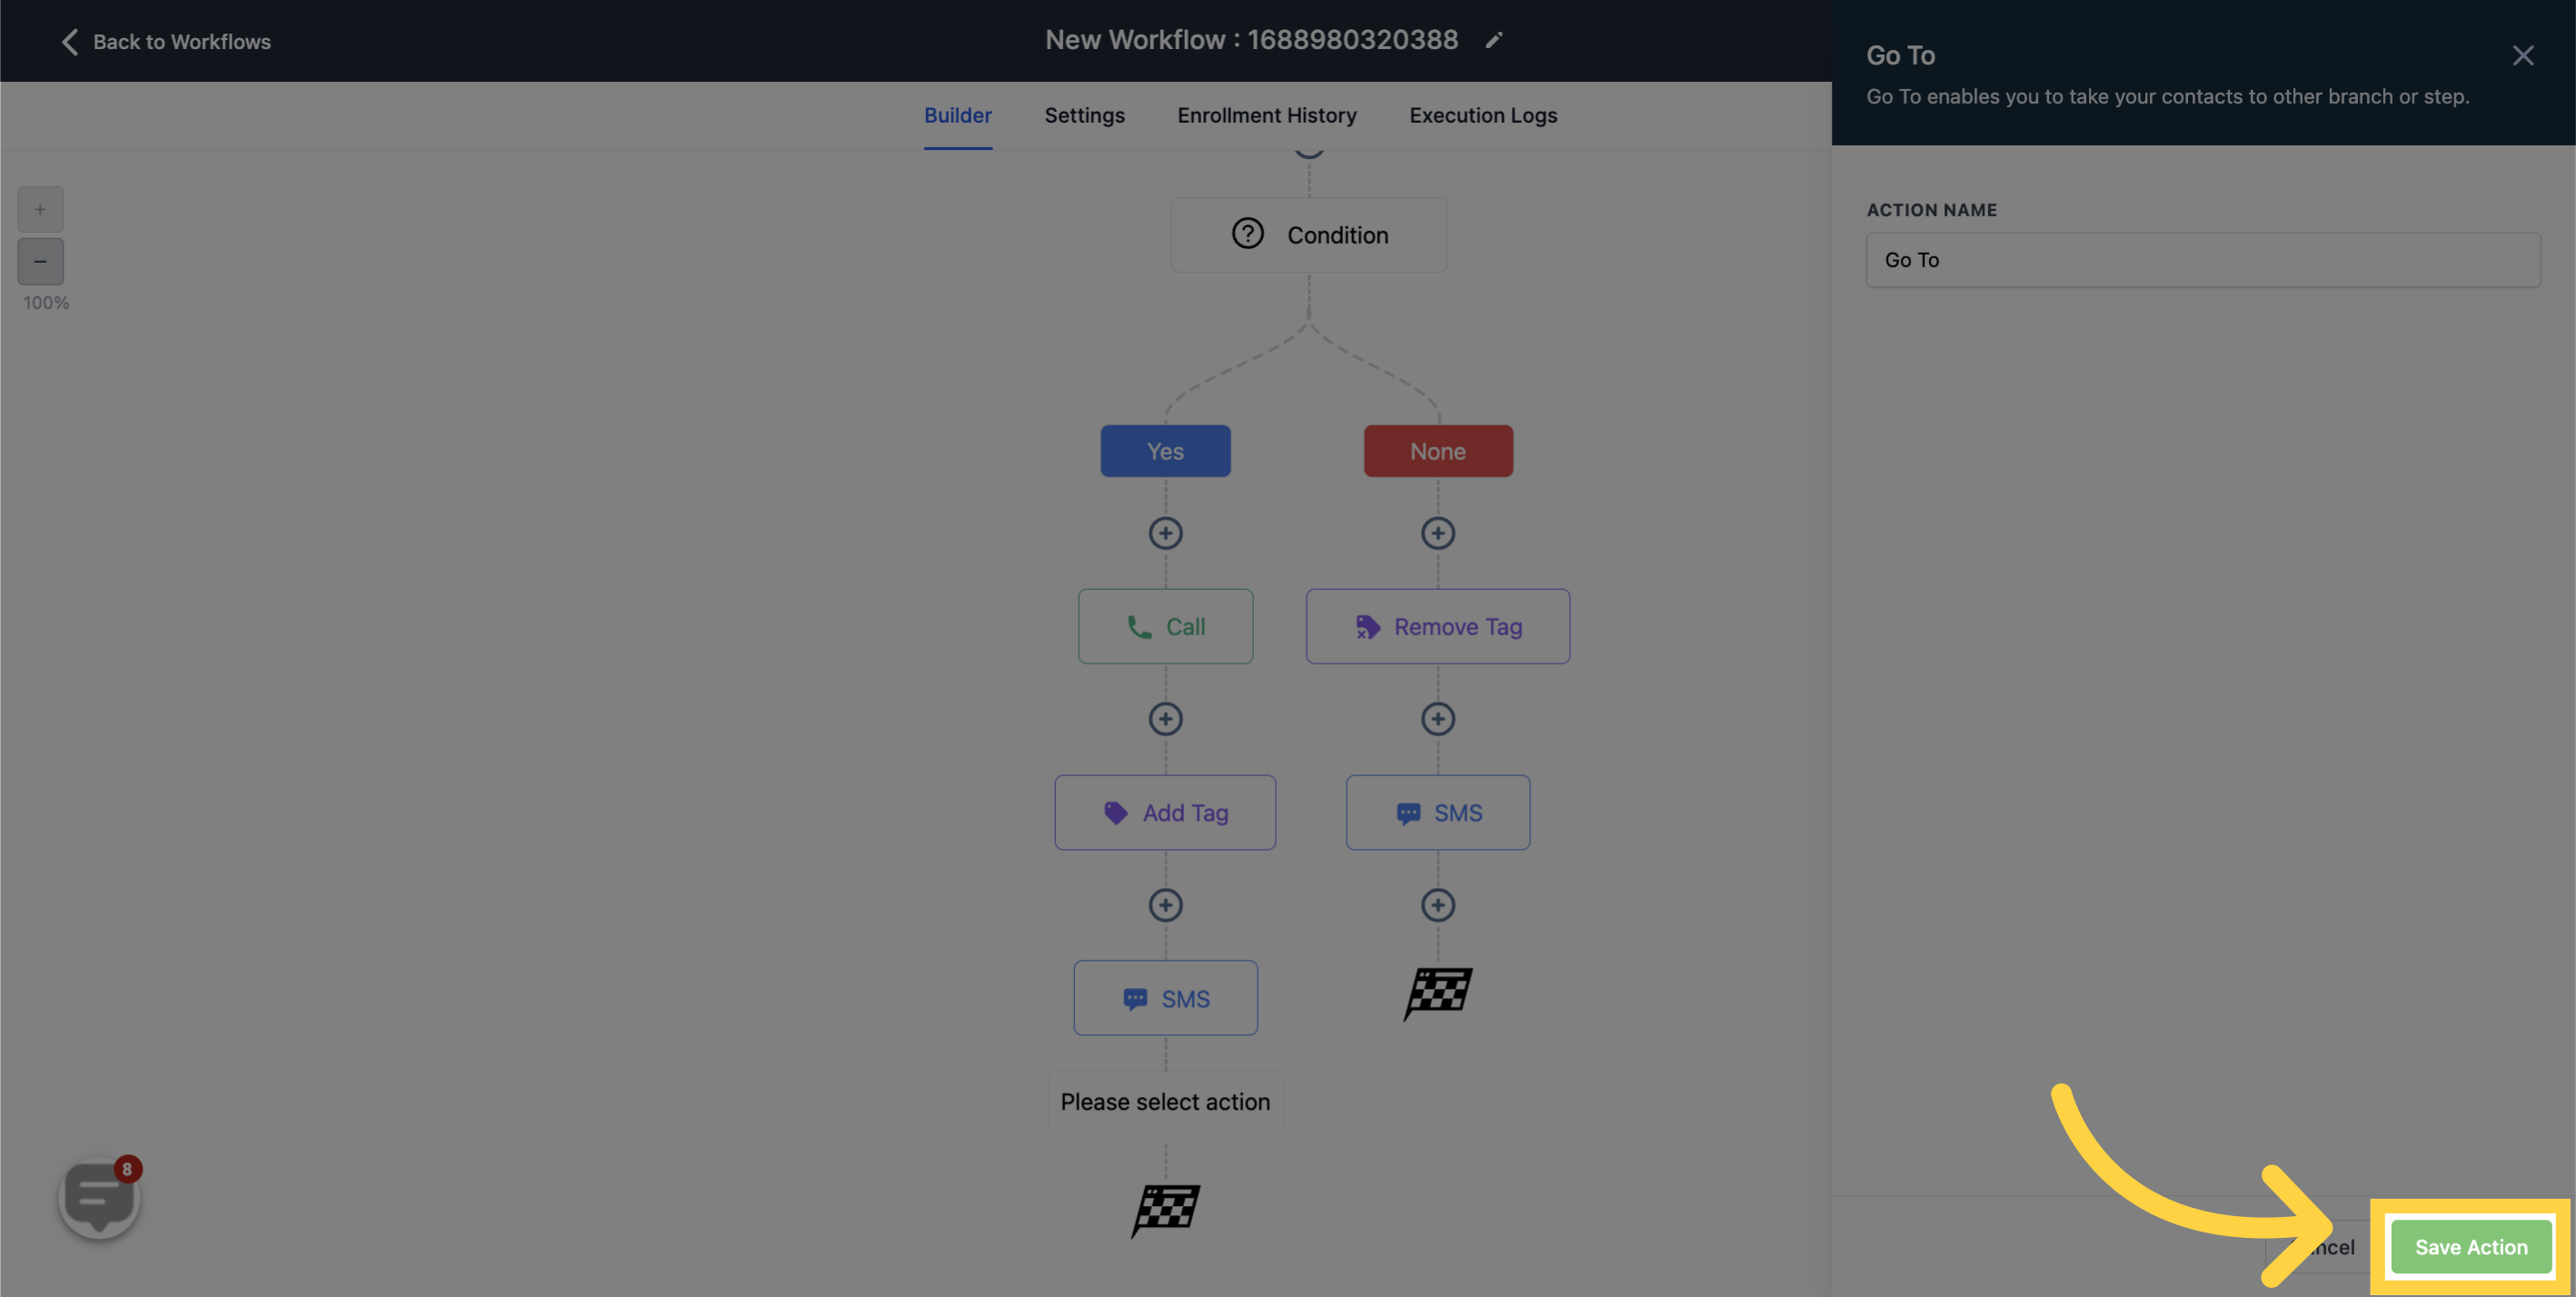
The Go-To function in Workflows allows you to navigate contacts from one event to another. To utilize a Go-To step, simply incorporate a Go-To event and then draw a line to the desired destination of the contacts - that's all there is to it!

Creating a path can be done by pulling the Light green dot towards any of the dark green dots you wish to leap to, or by simply clicking on the dark green dot you want, which will automatically generate the path.

Once the dots are linked, a path is formed as shown below. When a contact reaches this GoTo step, they will instantly move to whichever event you've linked with the dashed line. For example, the image below shows that contacts will immediately jump to the "Remove contact tag" event.
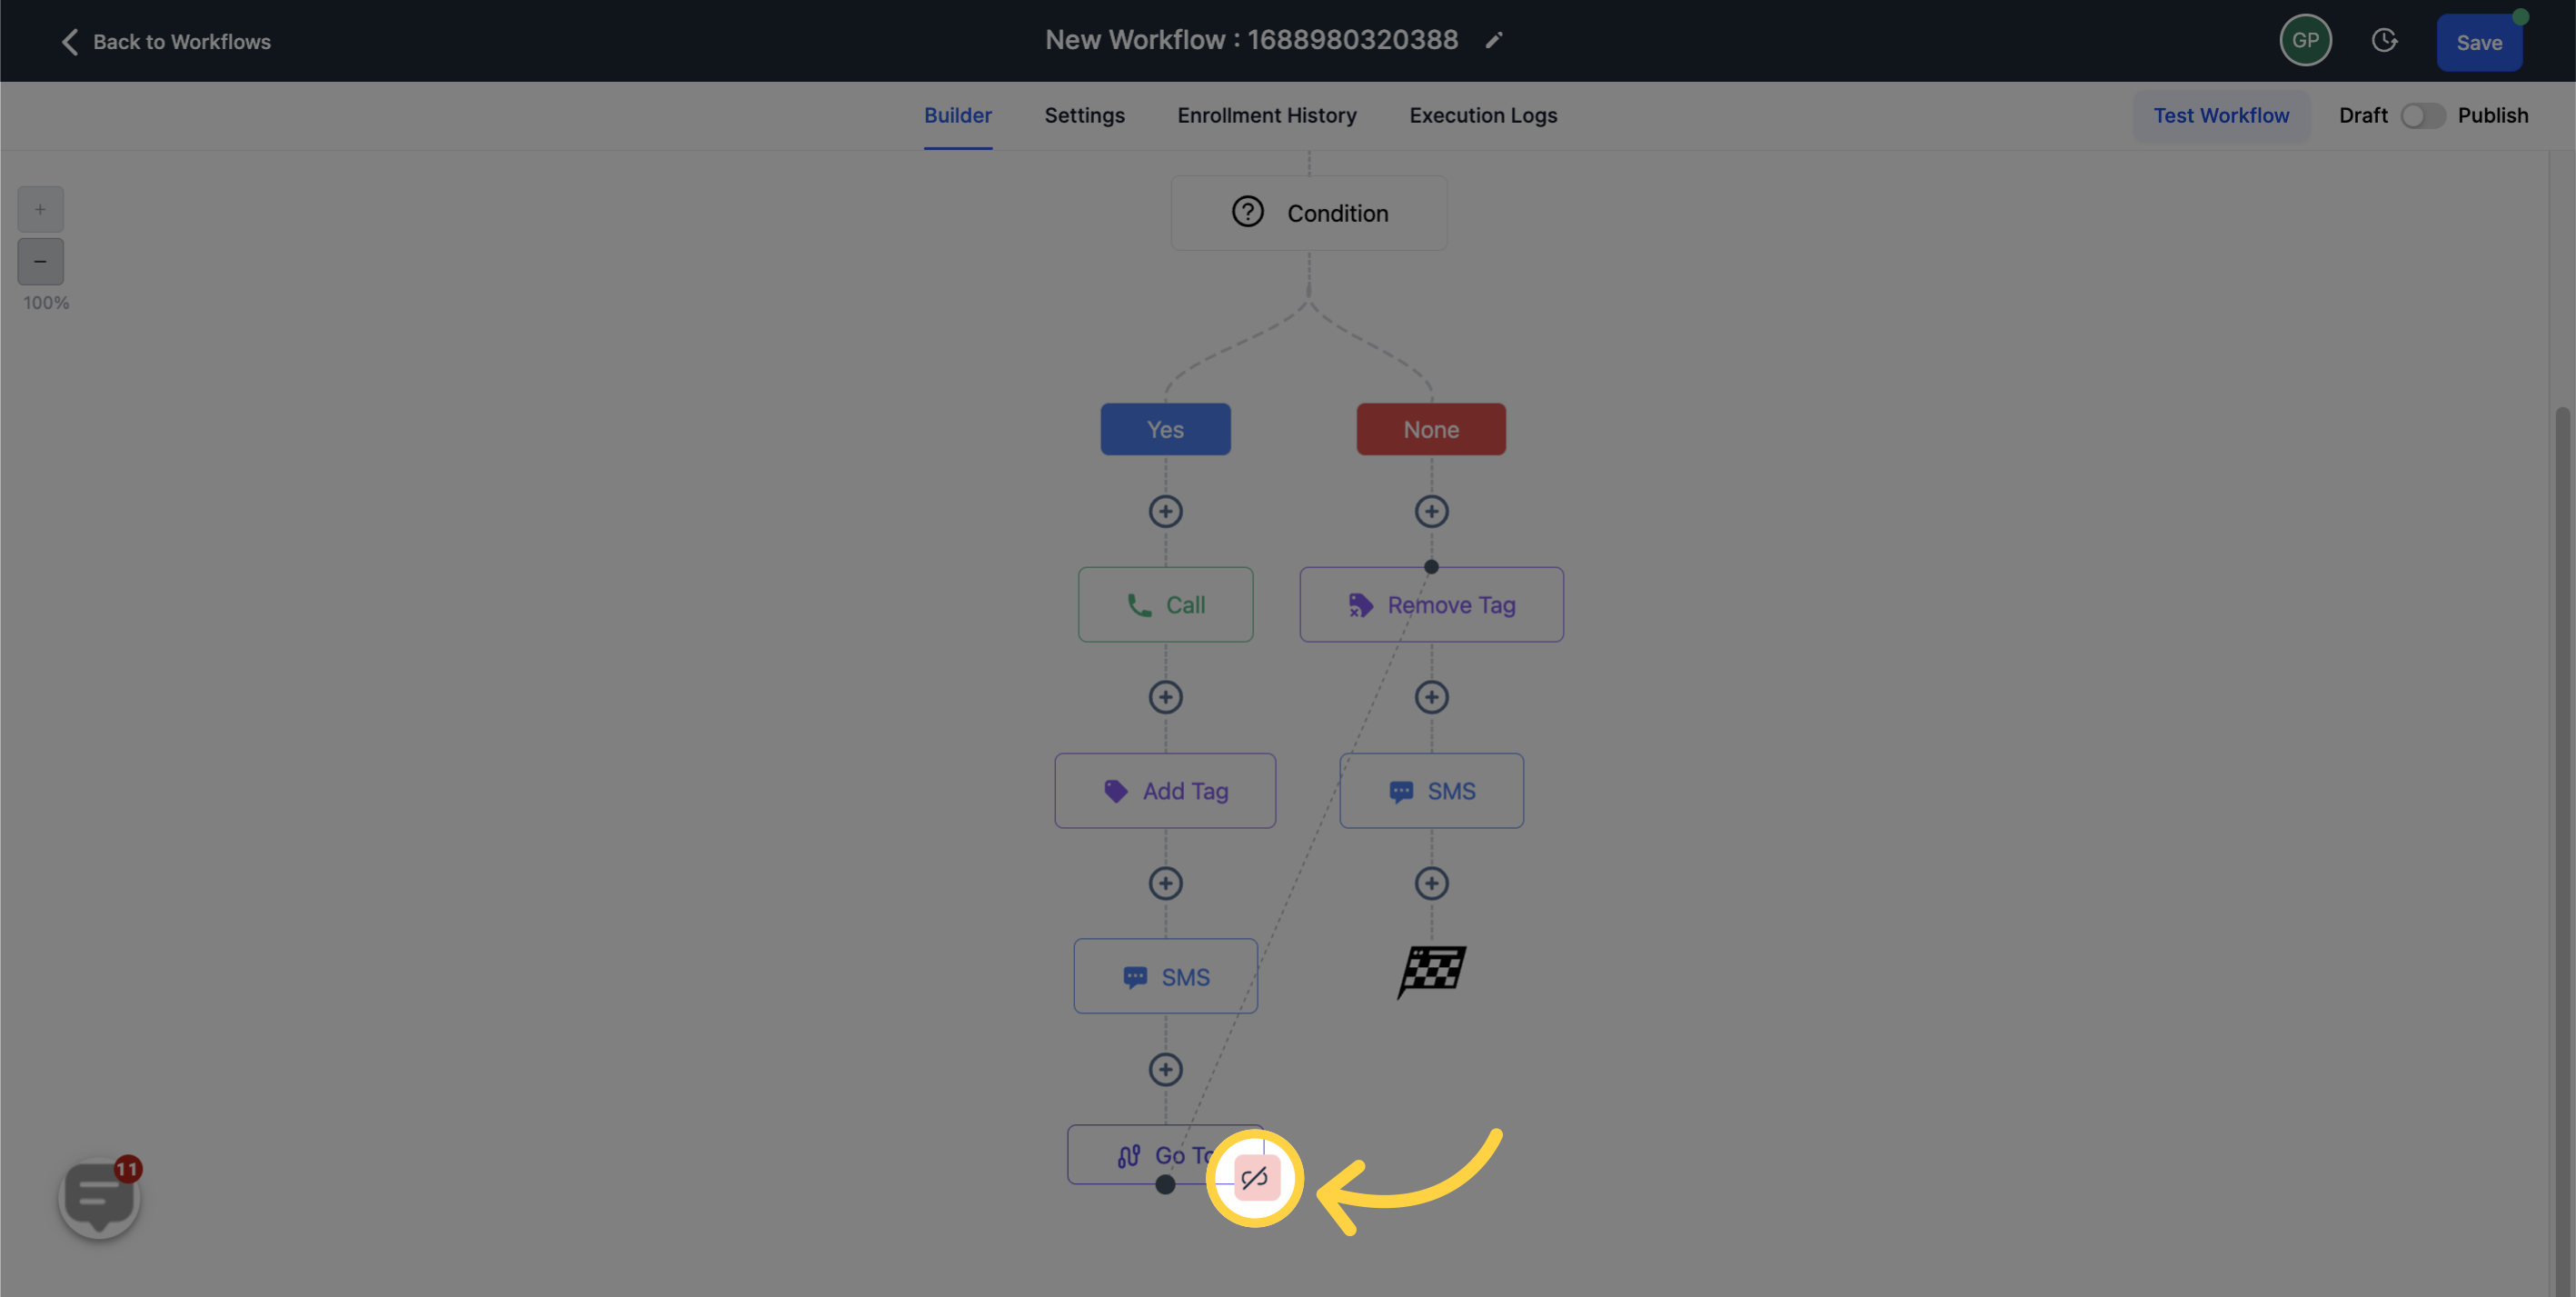
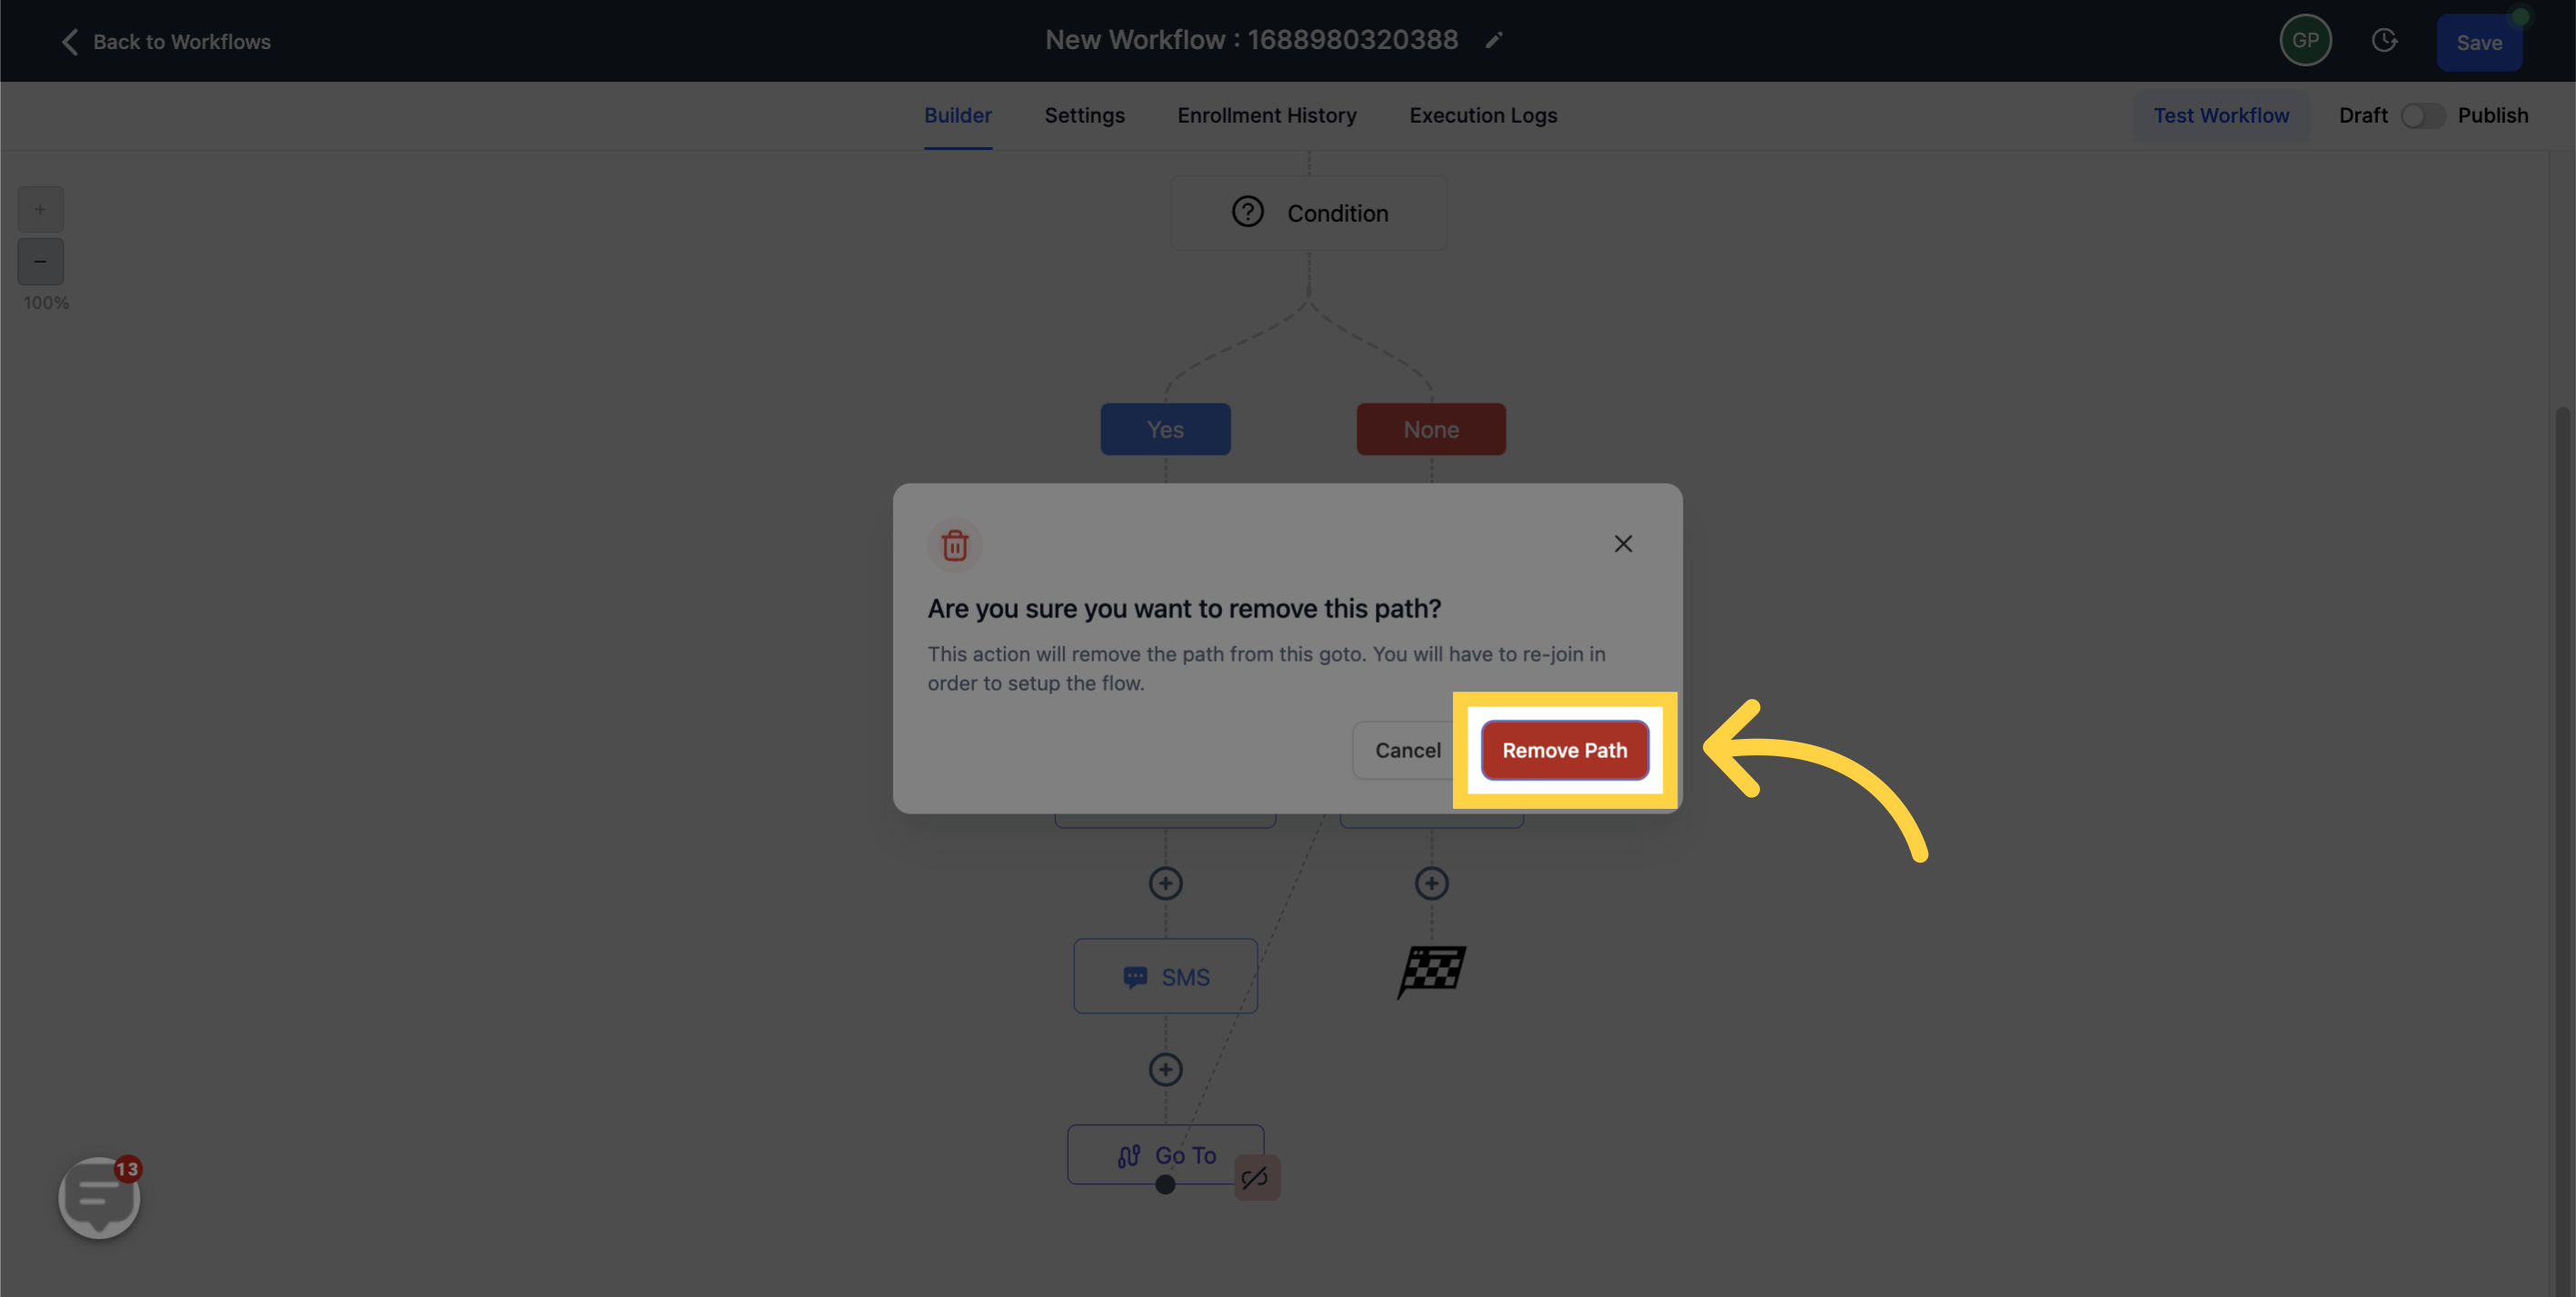
To erase a path, click on the pink unlink icon, followed by the "Remove path" option.