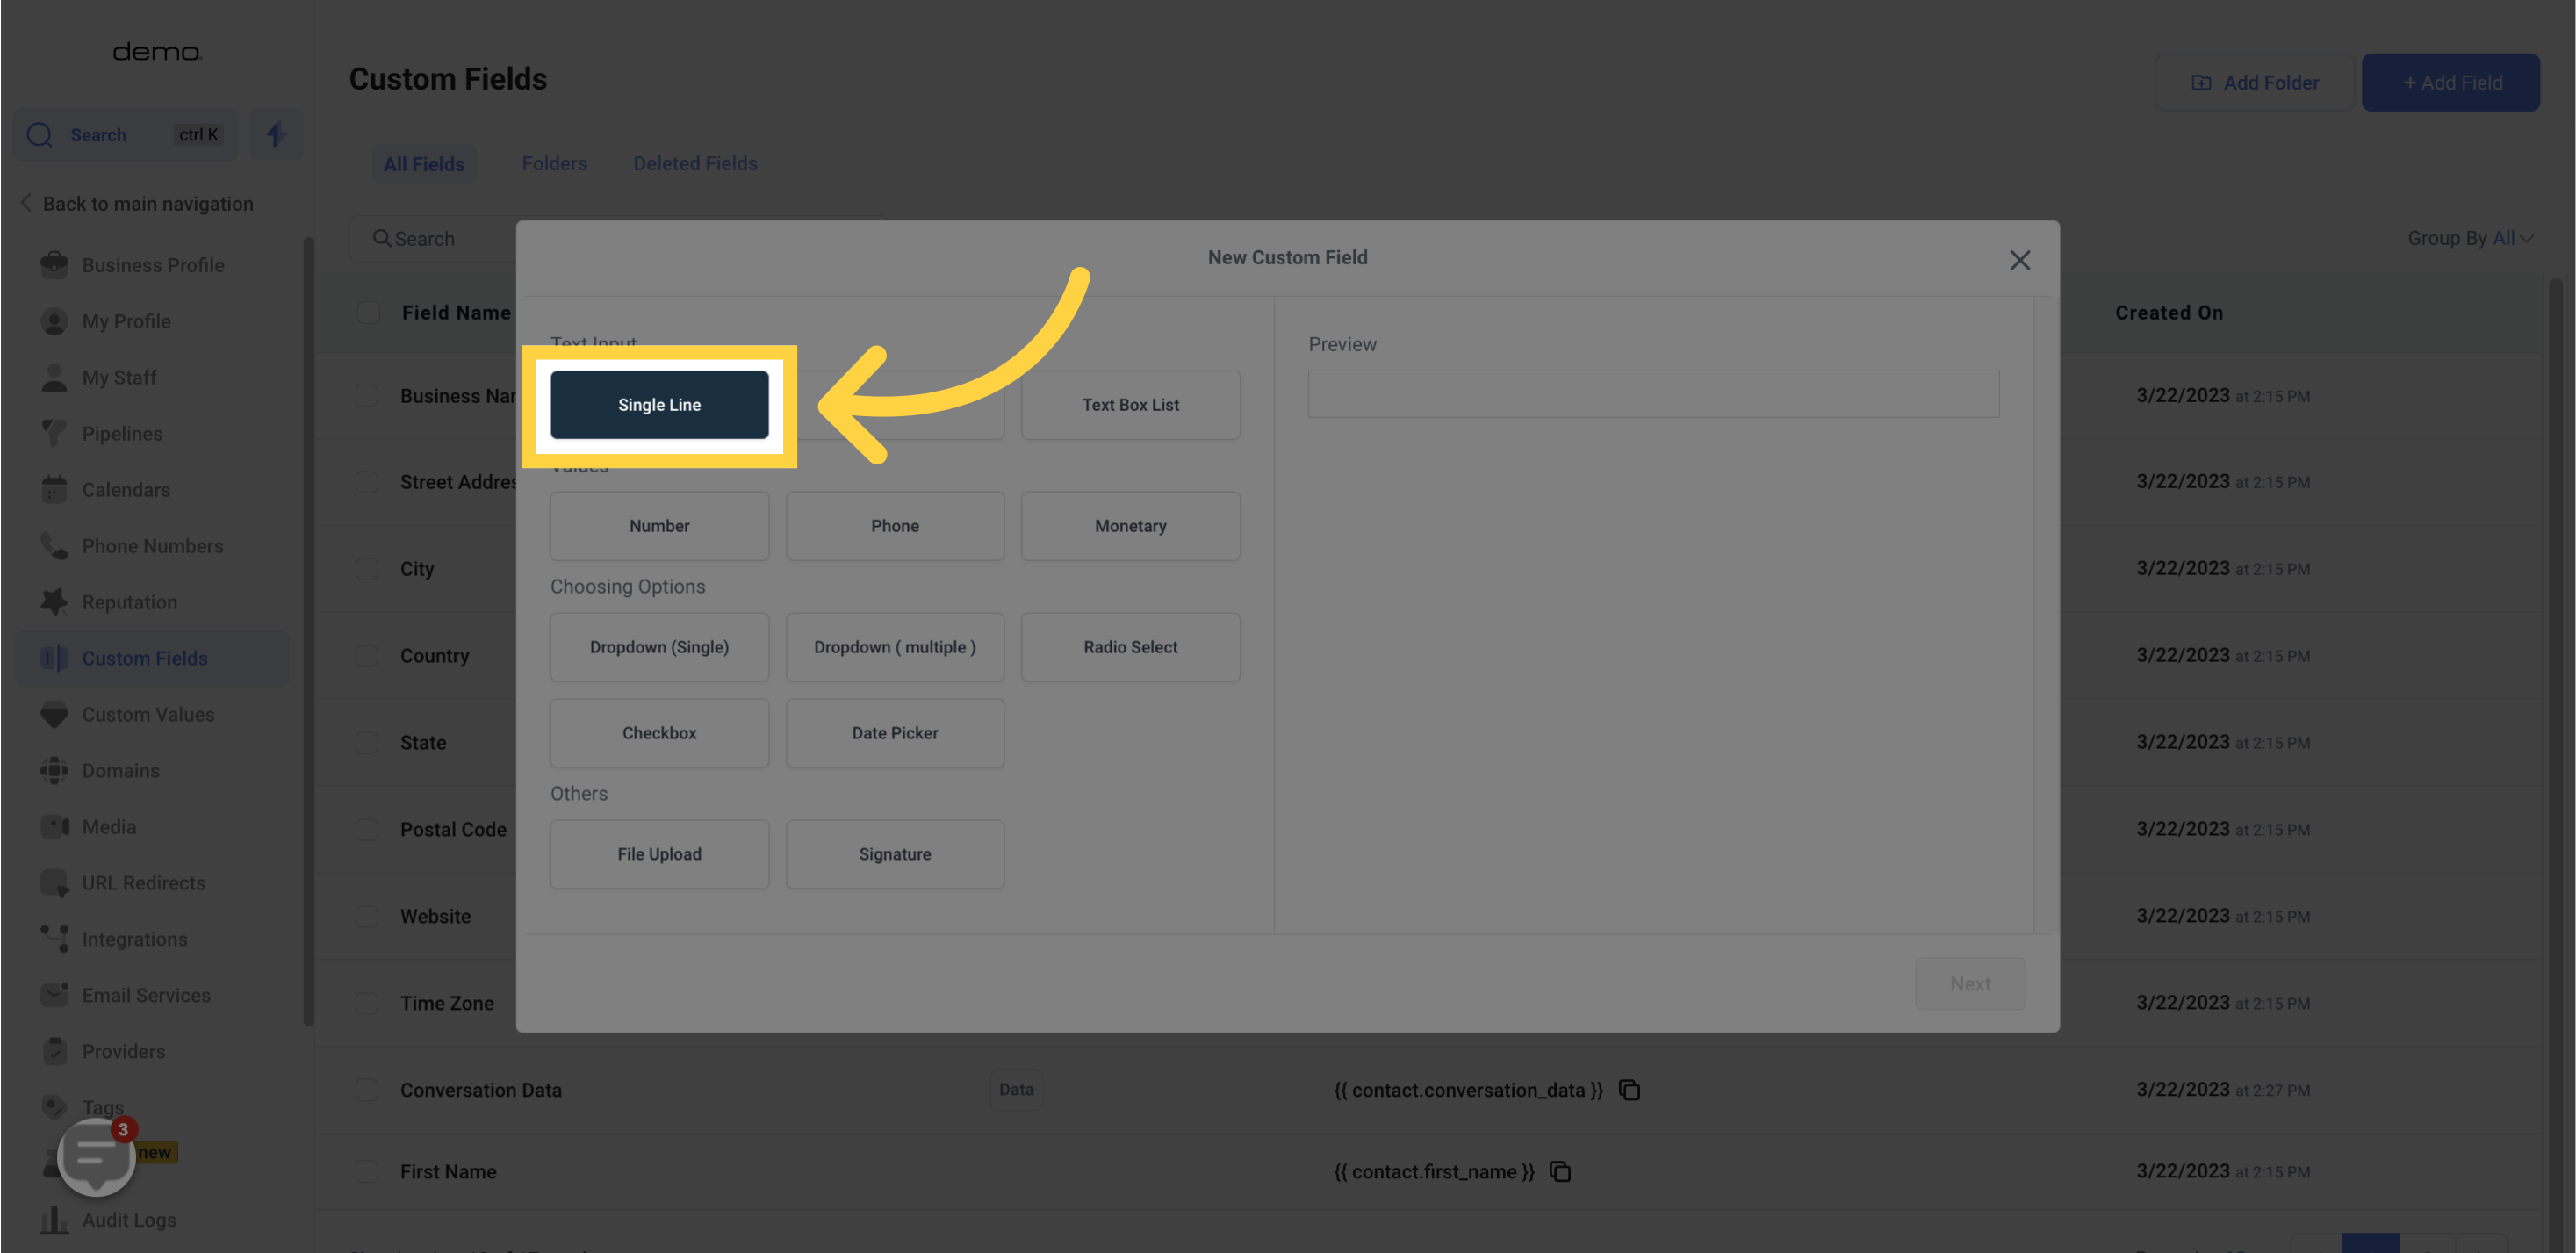
Used for small text inputs.
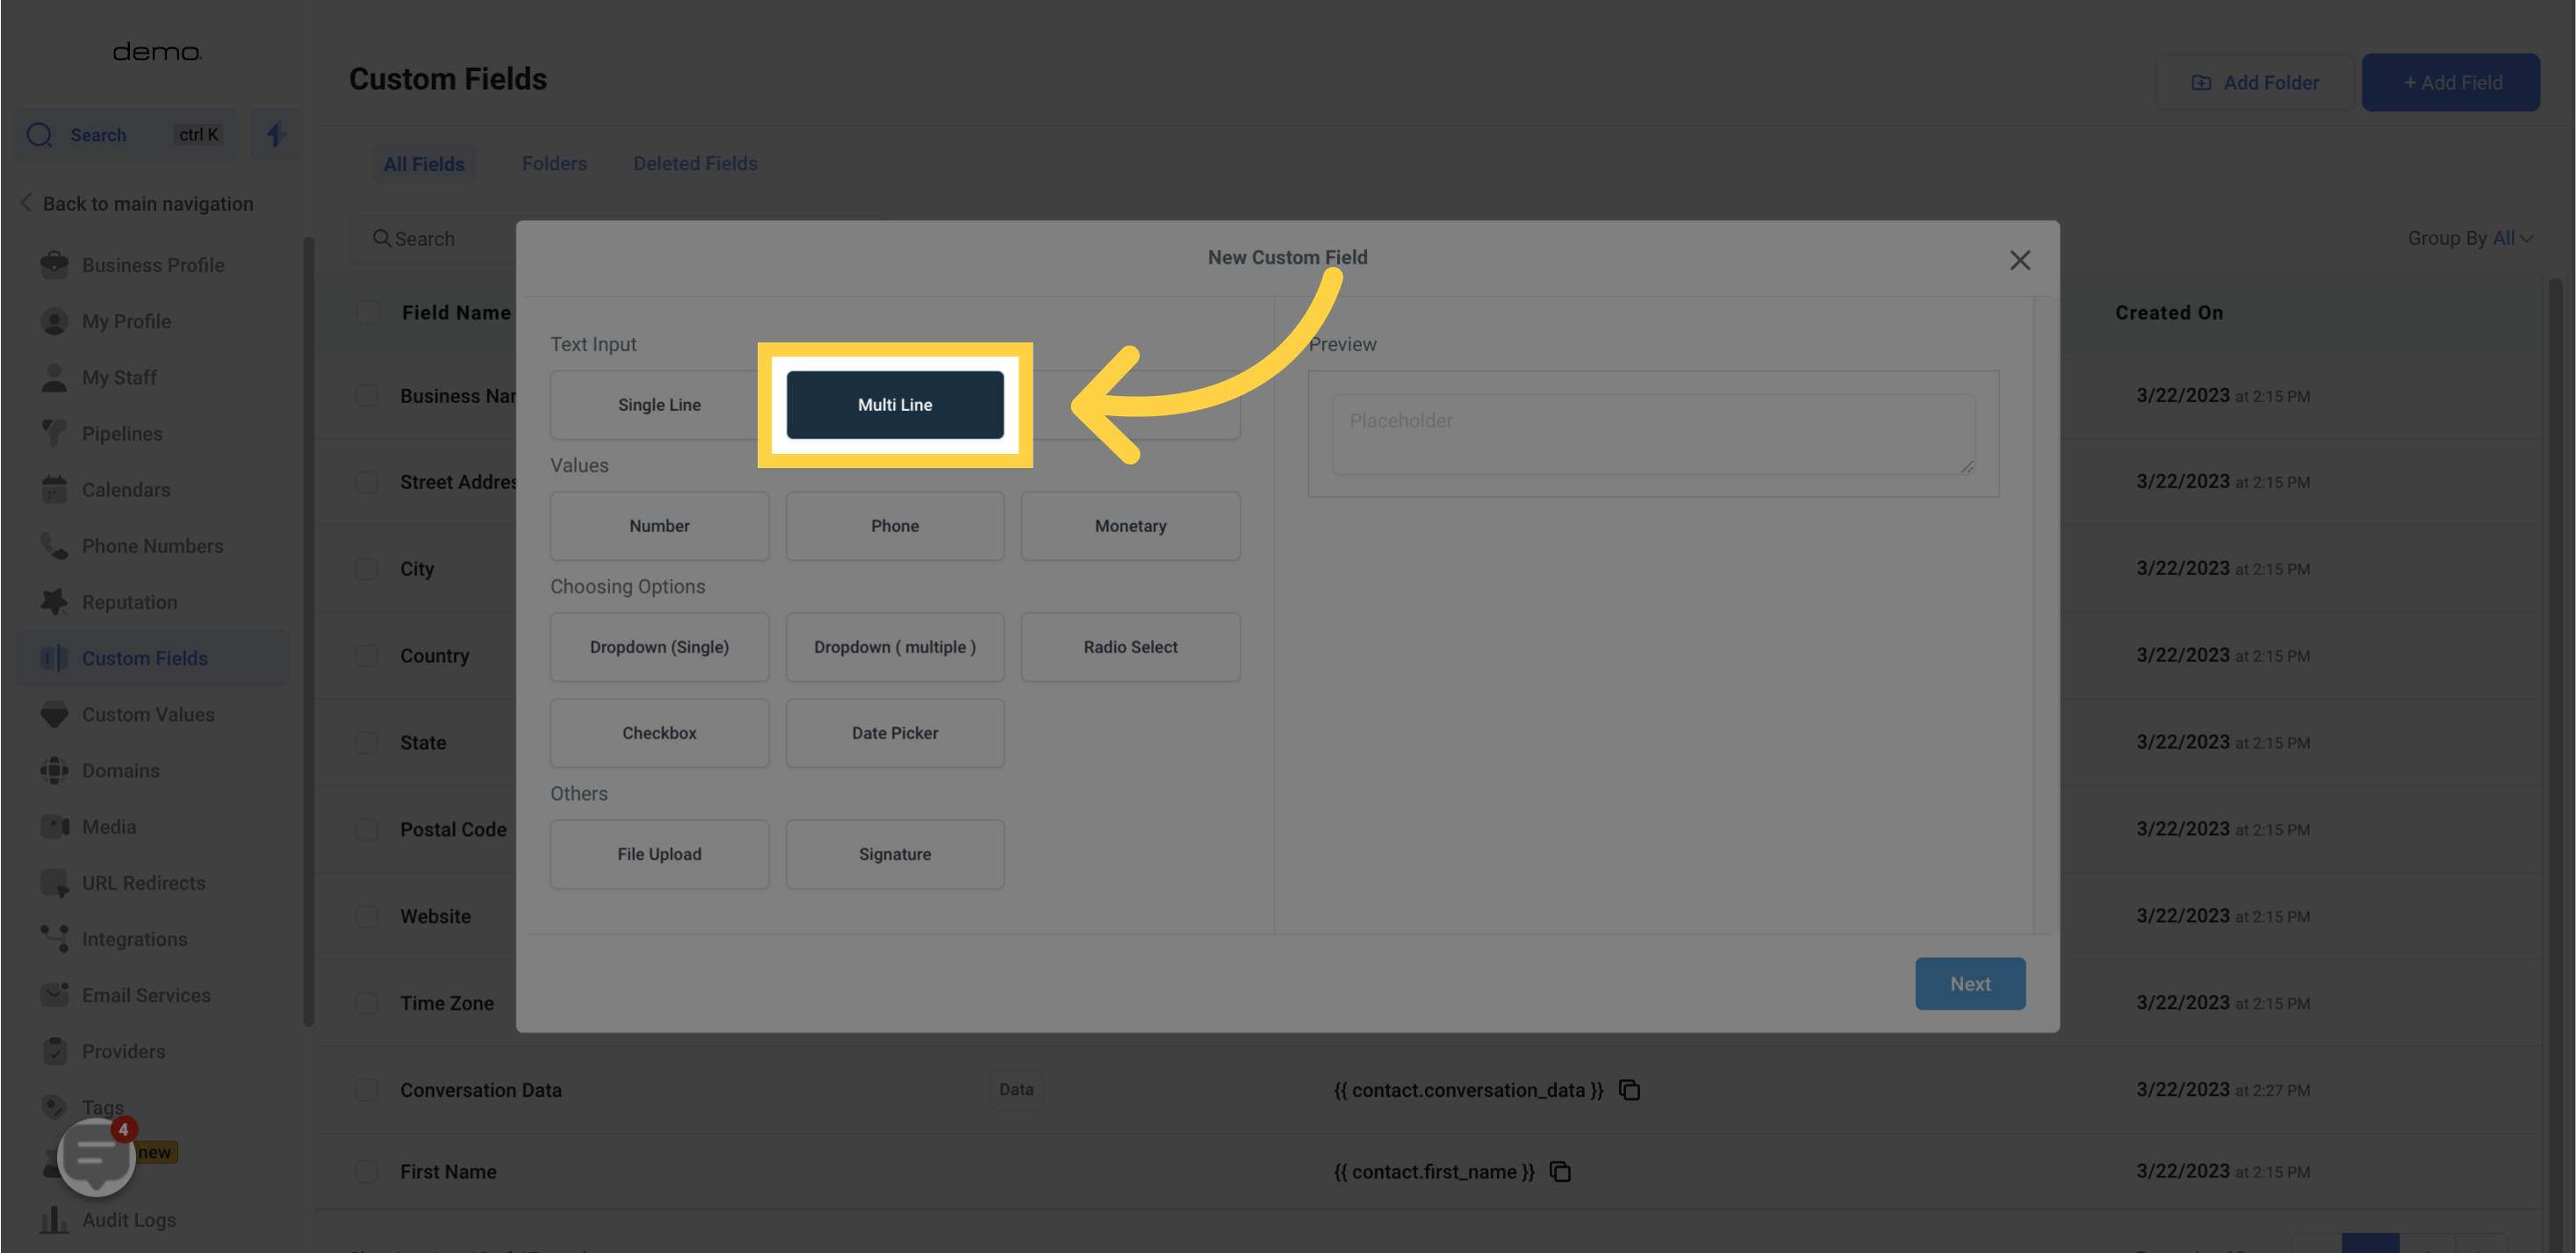
Used for larger text inputs.
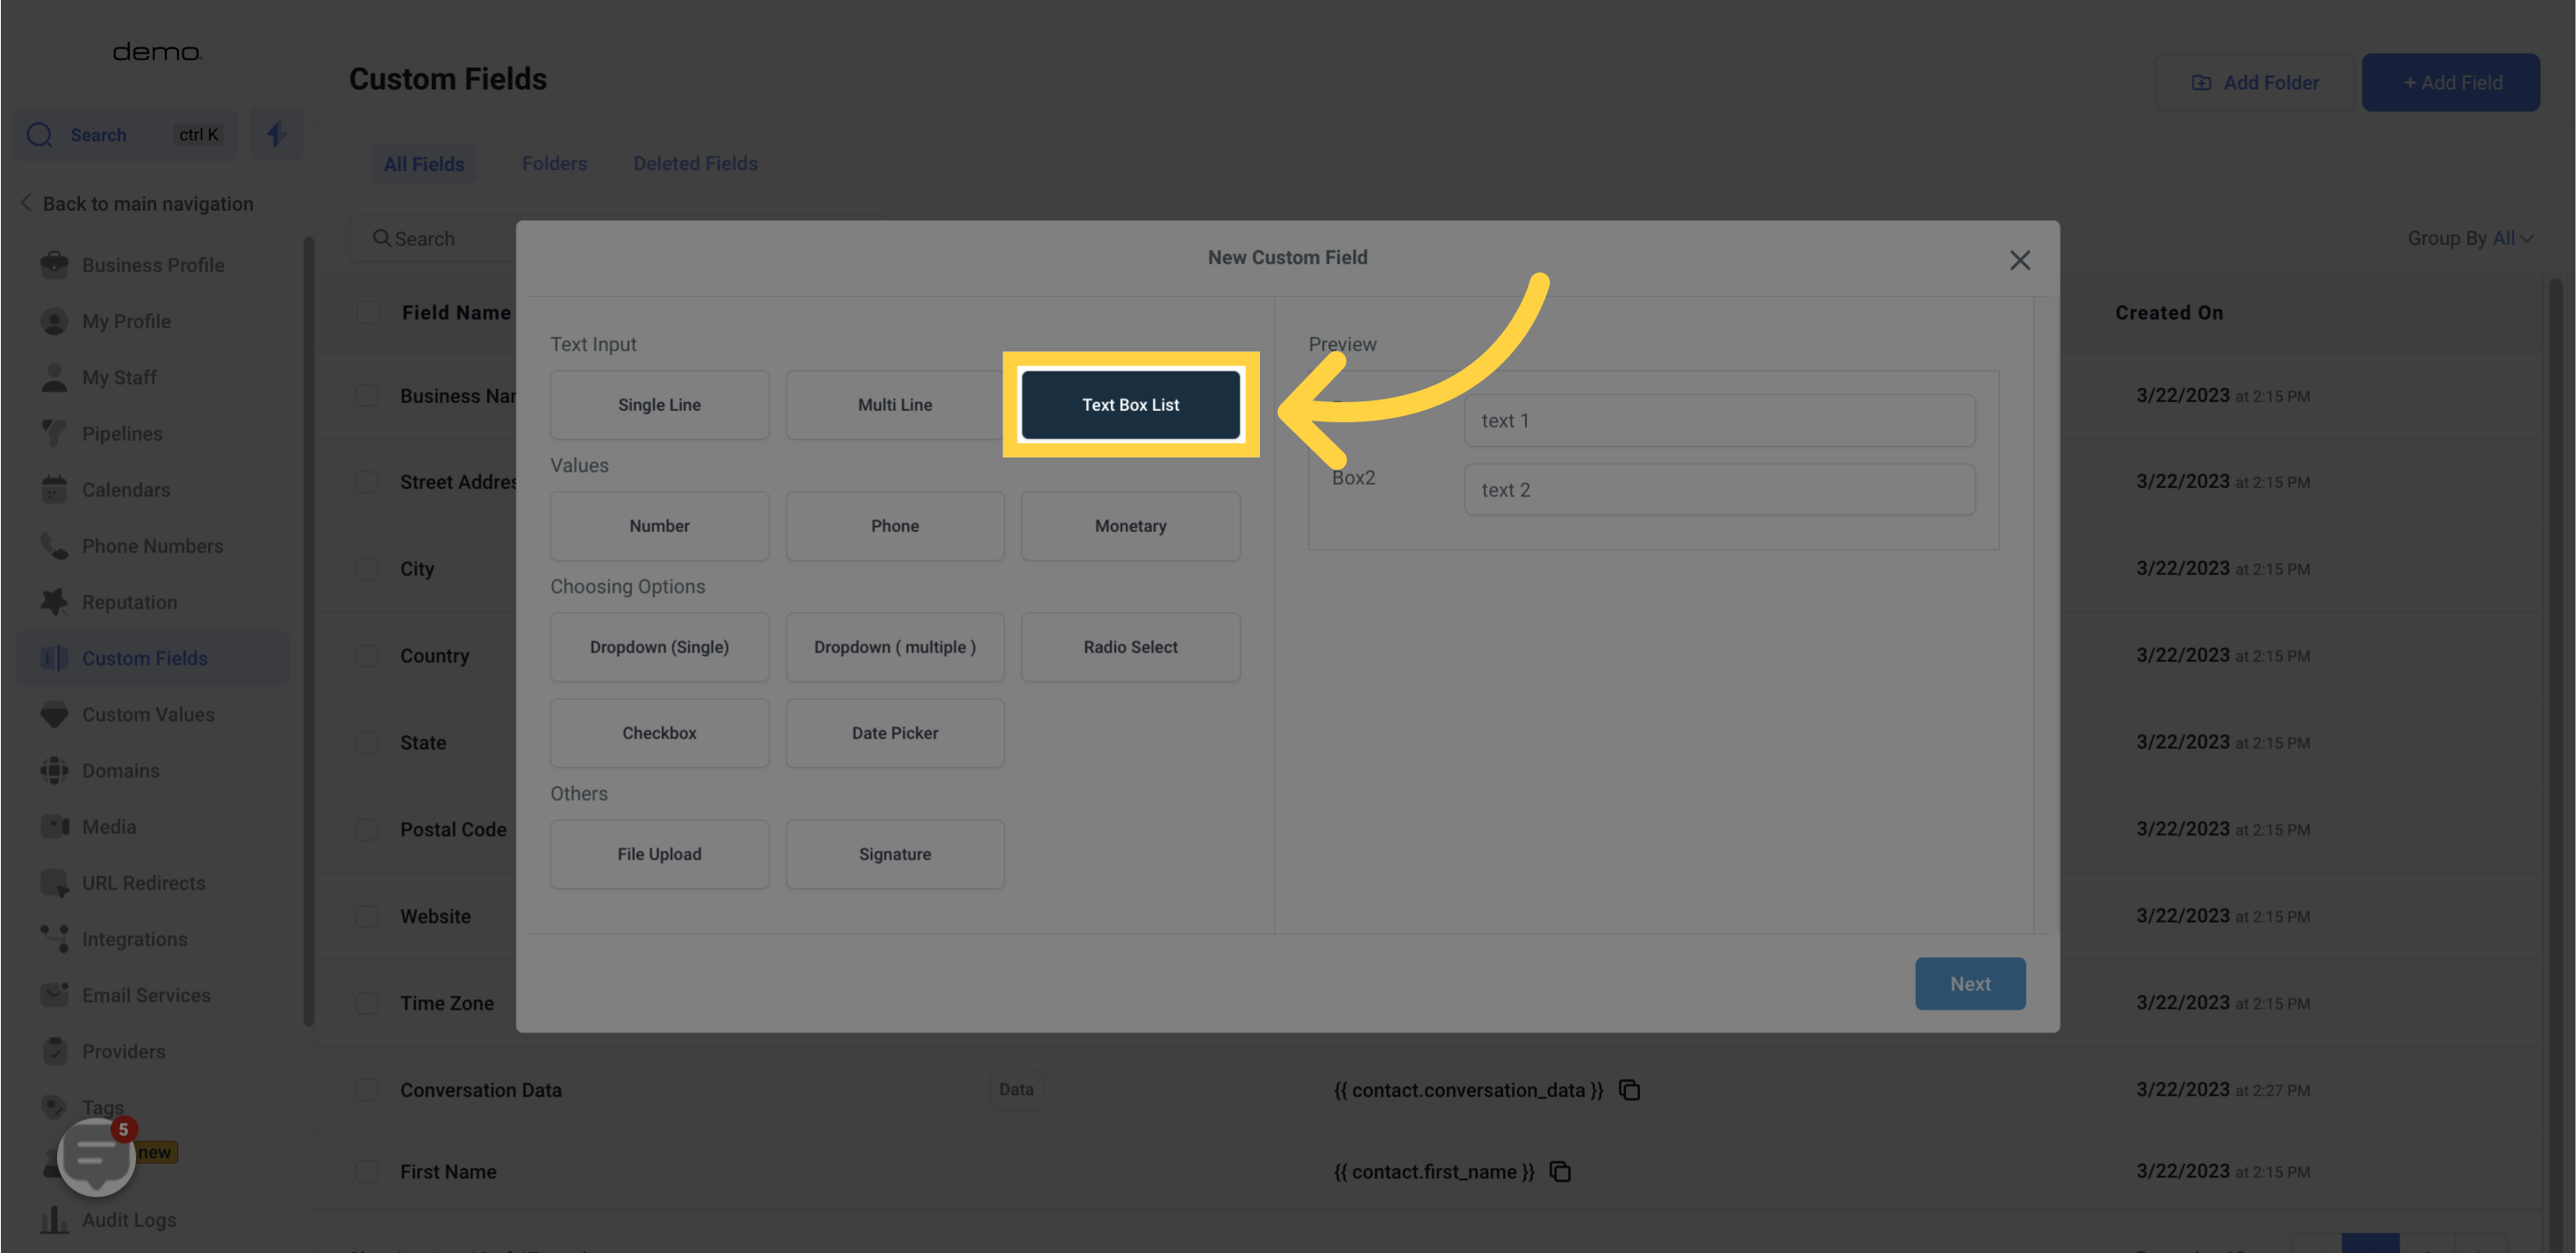
Offers a list of inputs that need to be filled.
Must be a numeric input, including decimal points if needed.

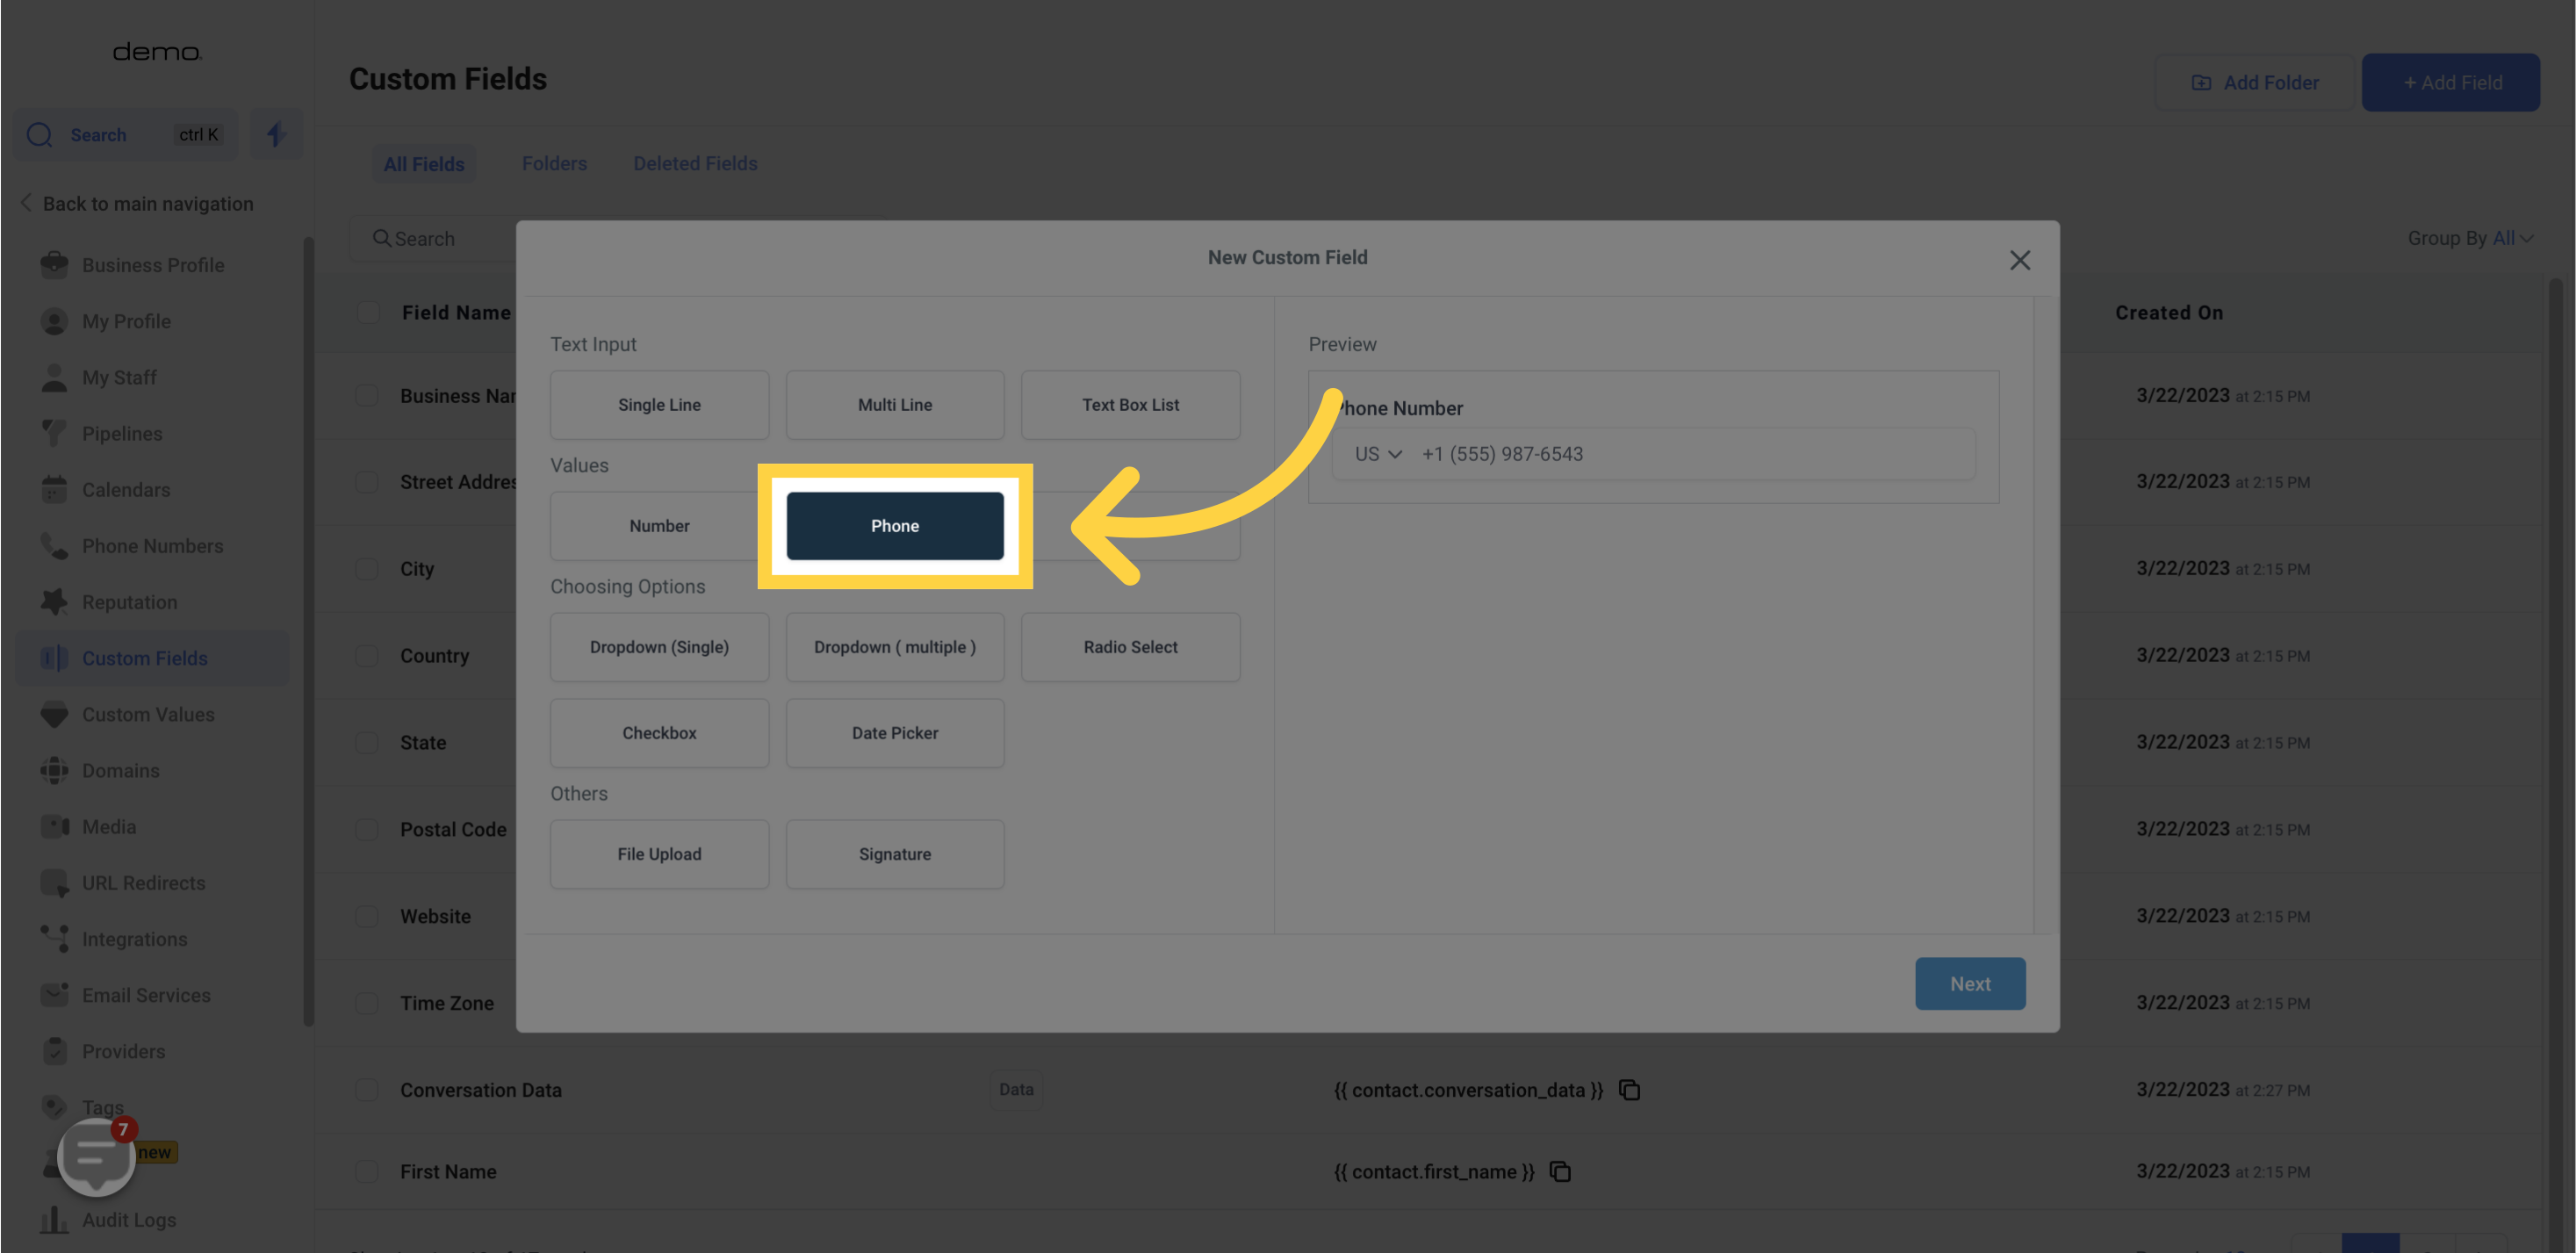
Used for capturing phone numbers, with a selector for country code.
Only for currency inputs, such as salaries or hourly wages.

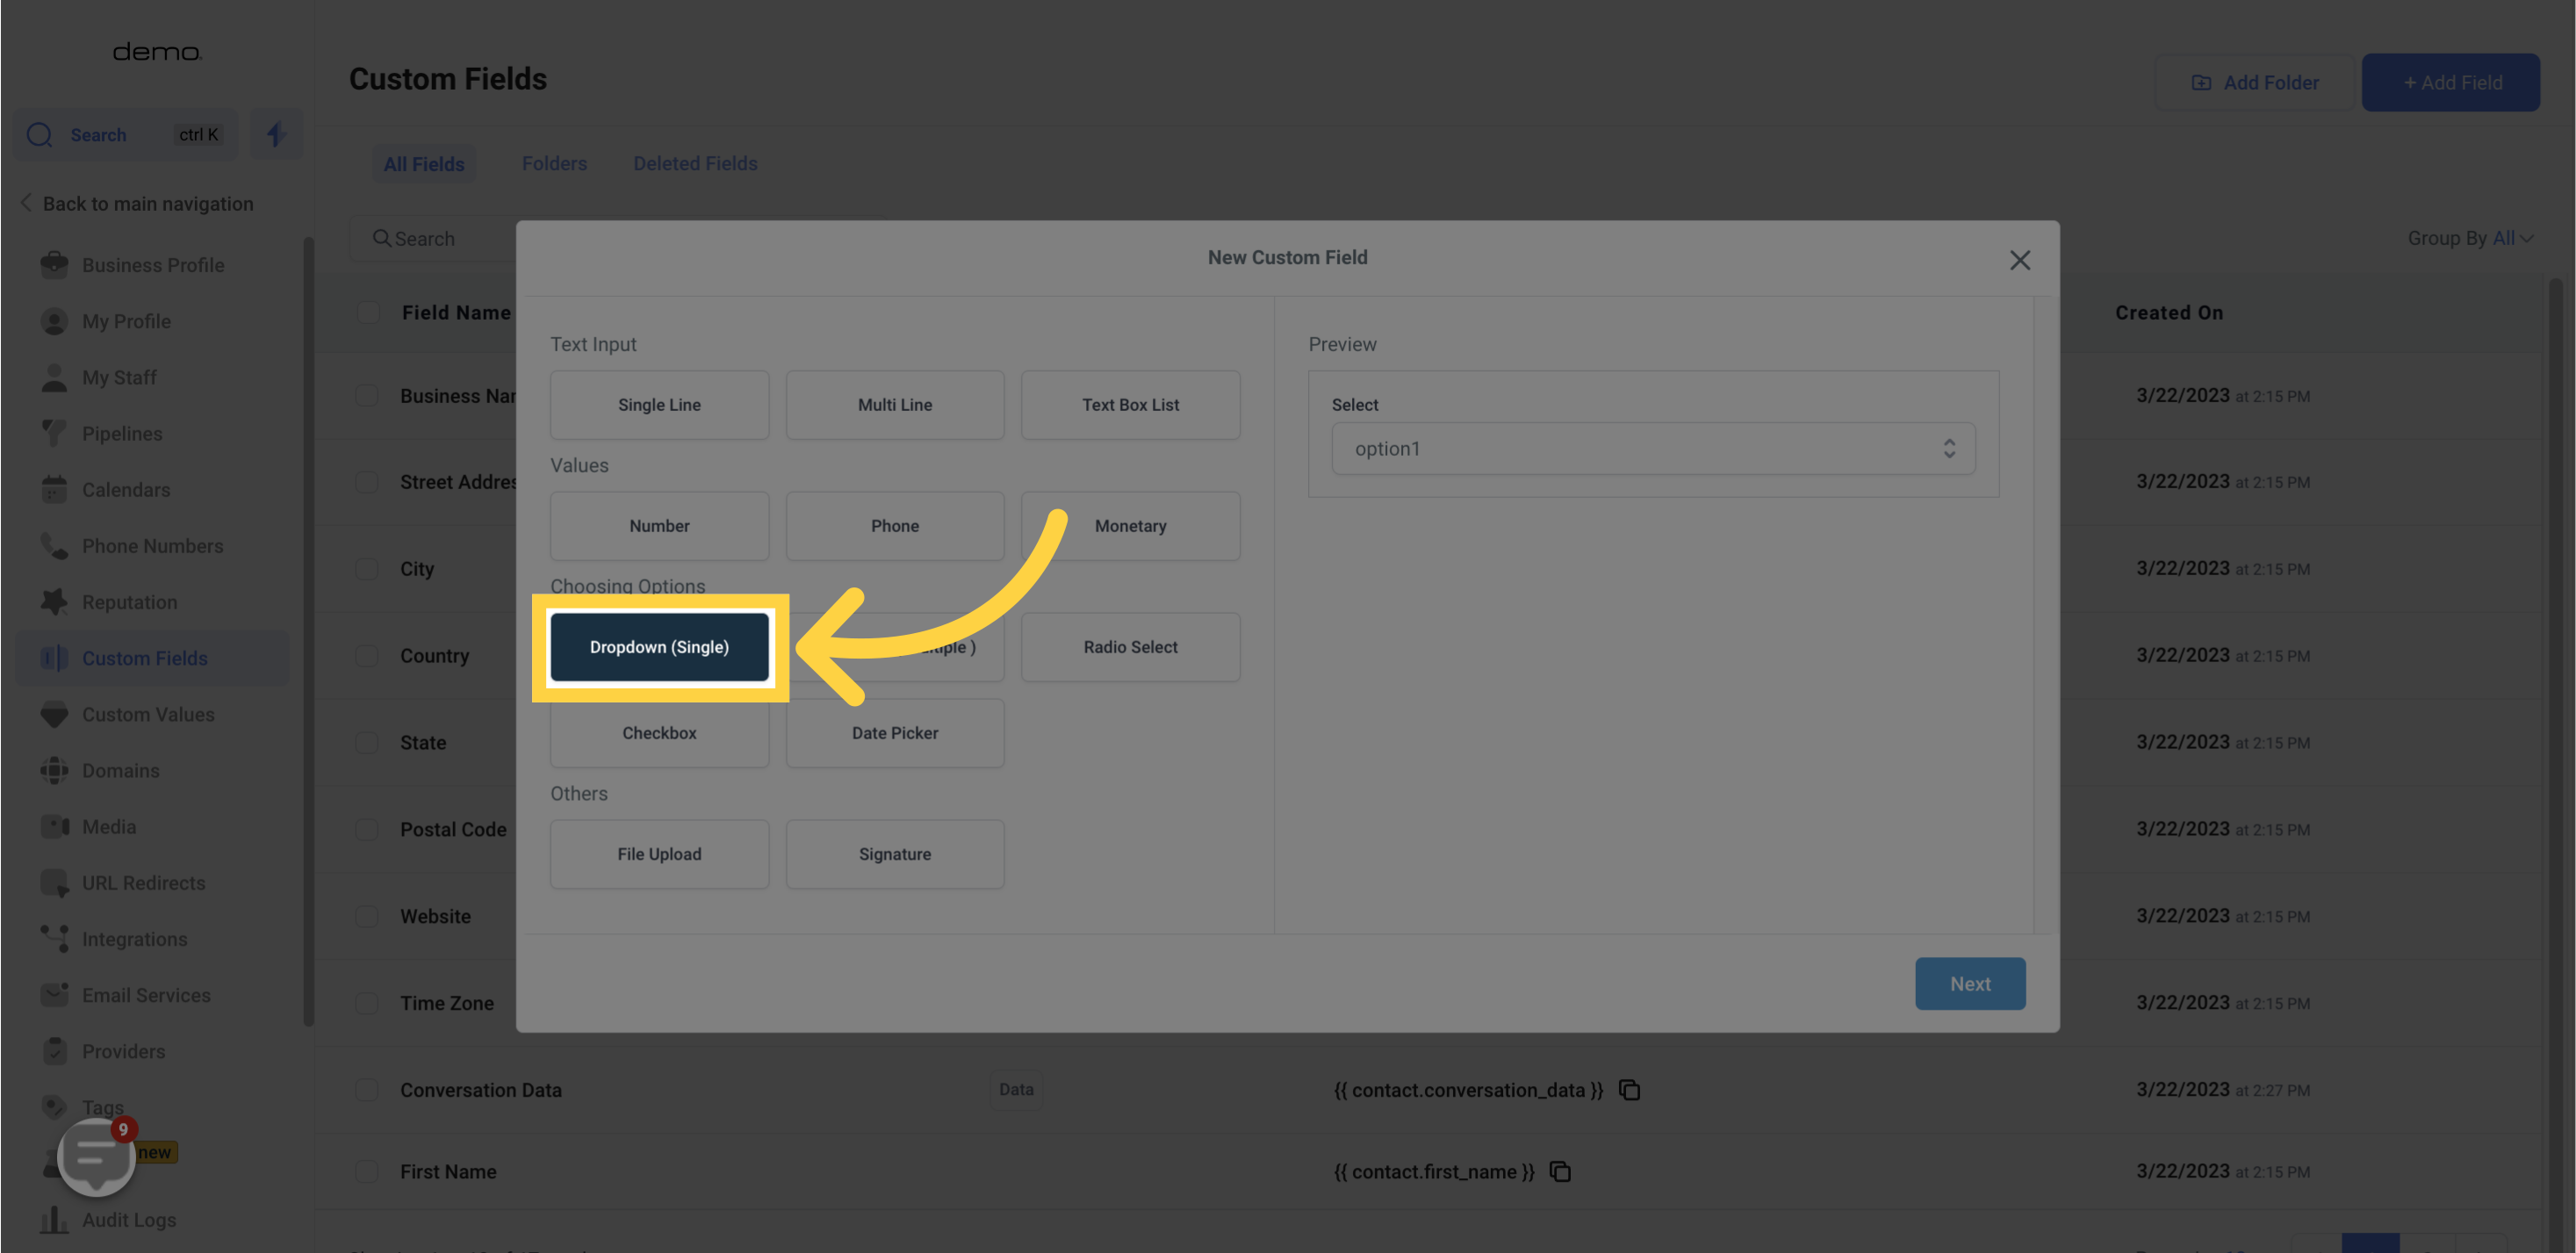
Presents a list of options to select from, with only one option allowed.
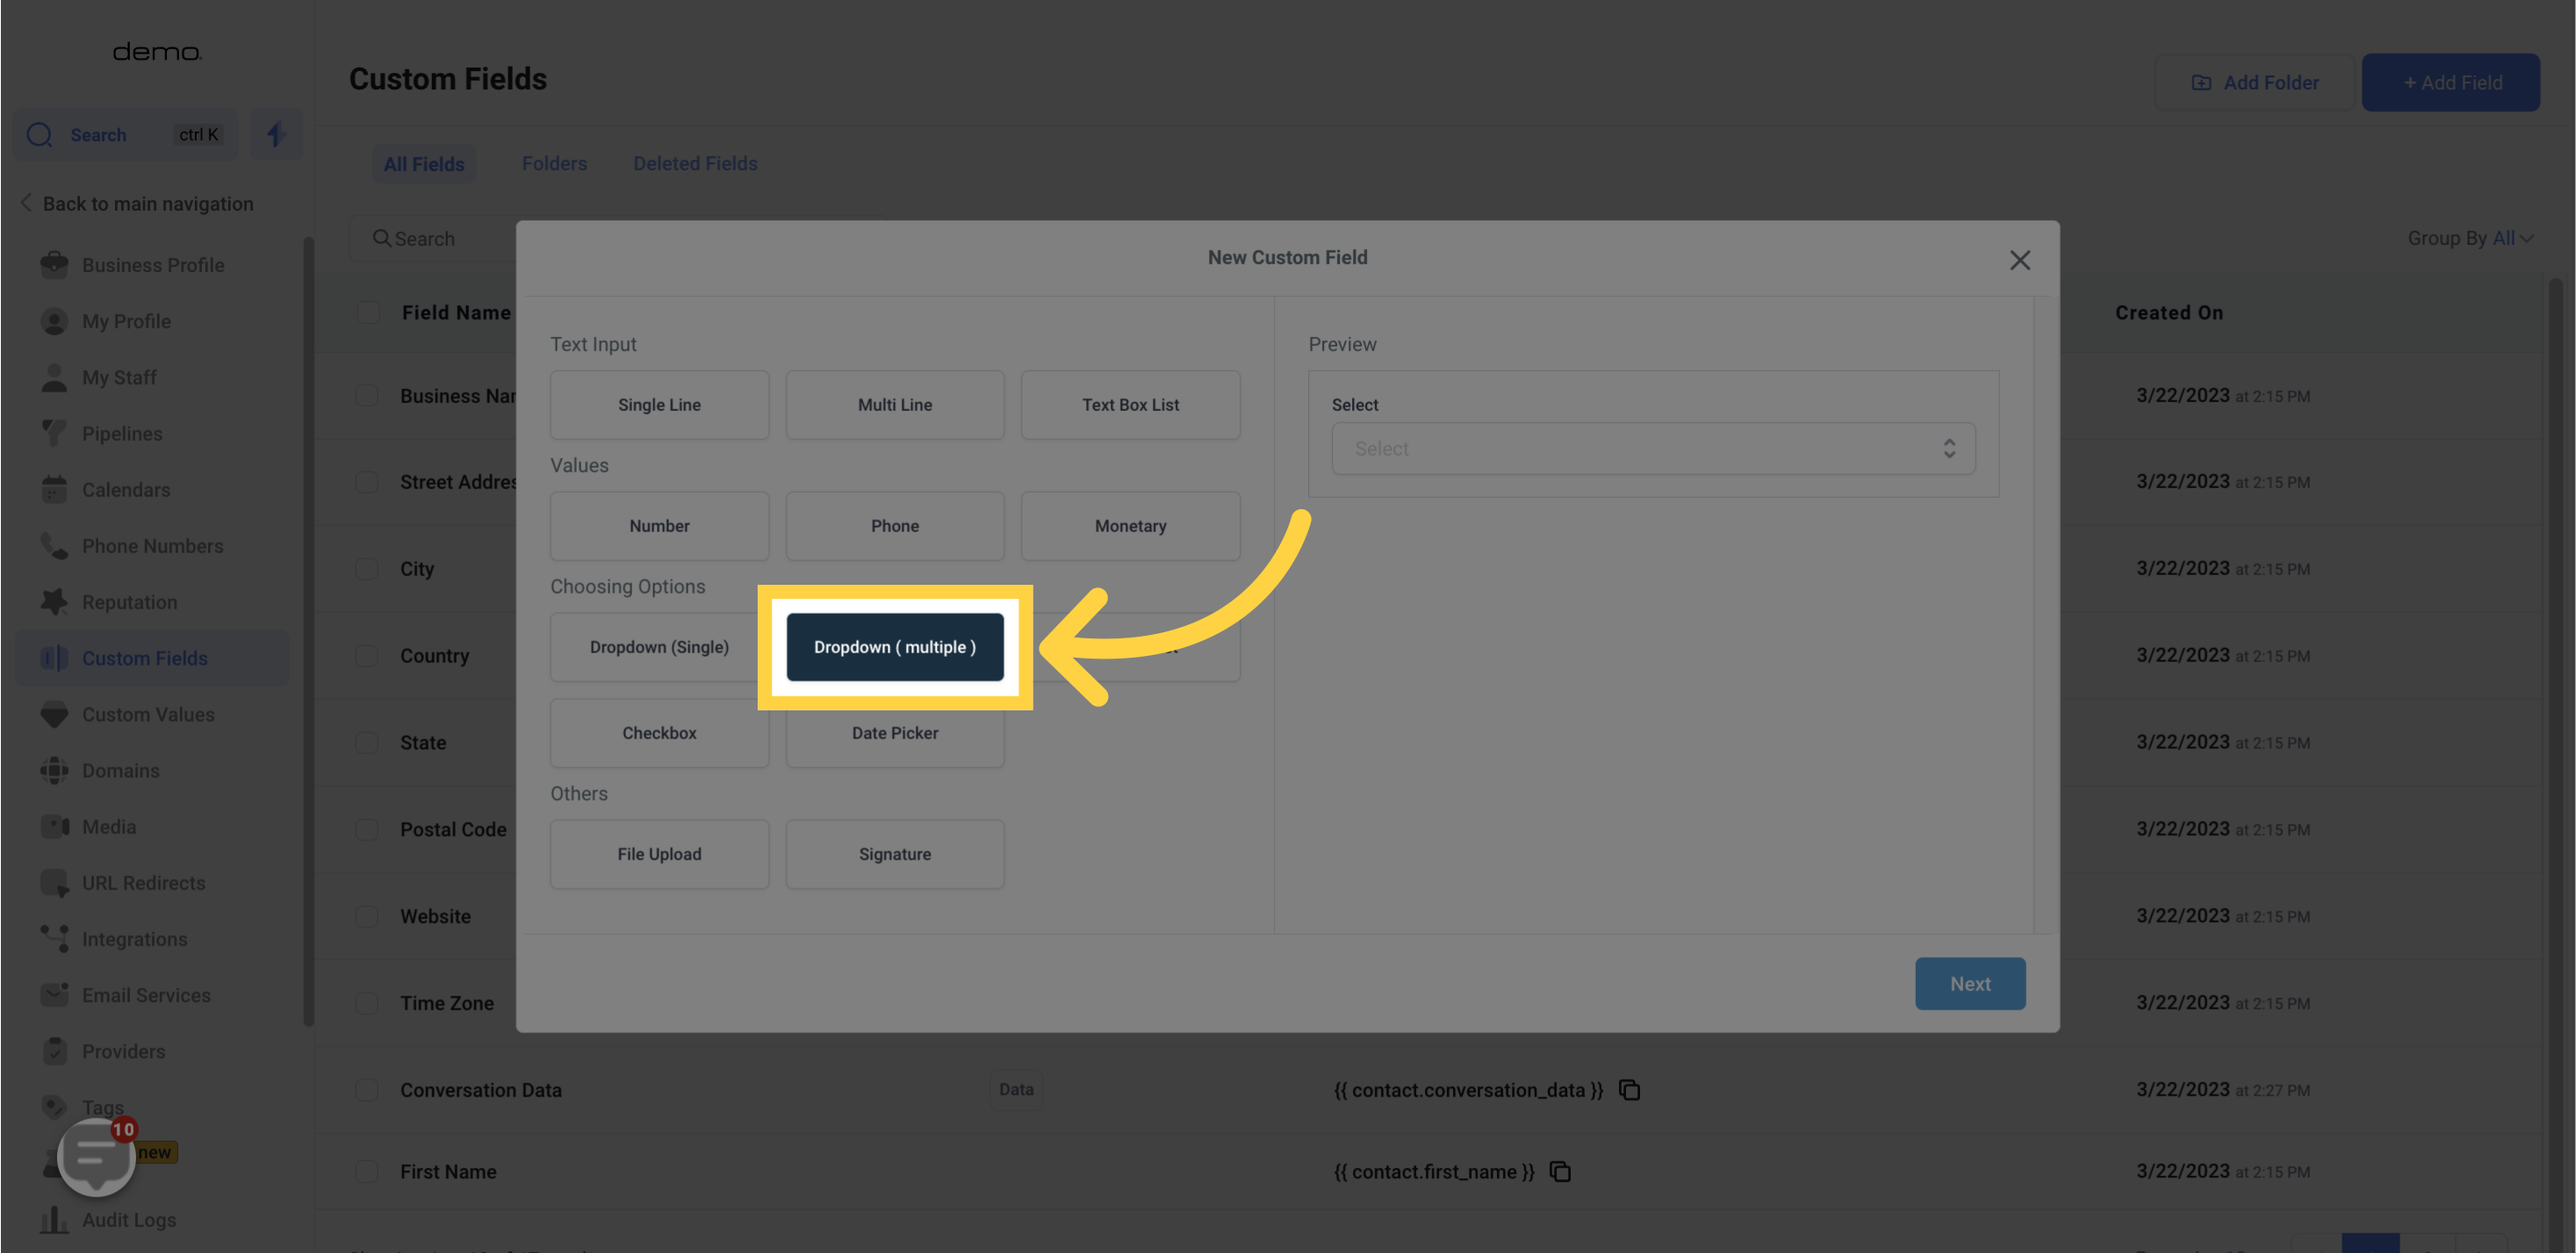
Similar to single options field, but allows for multiple selections.
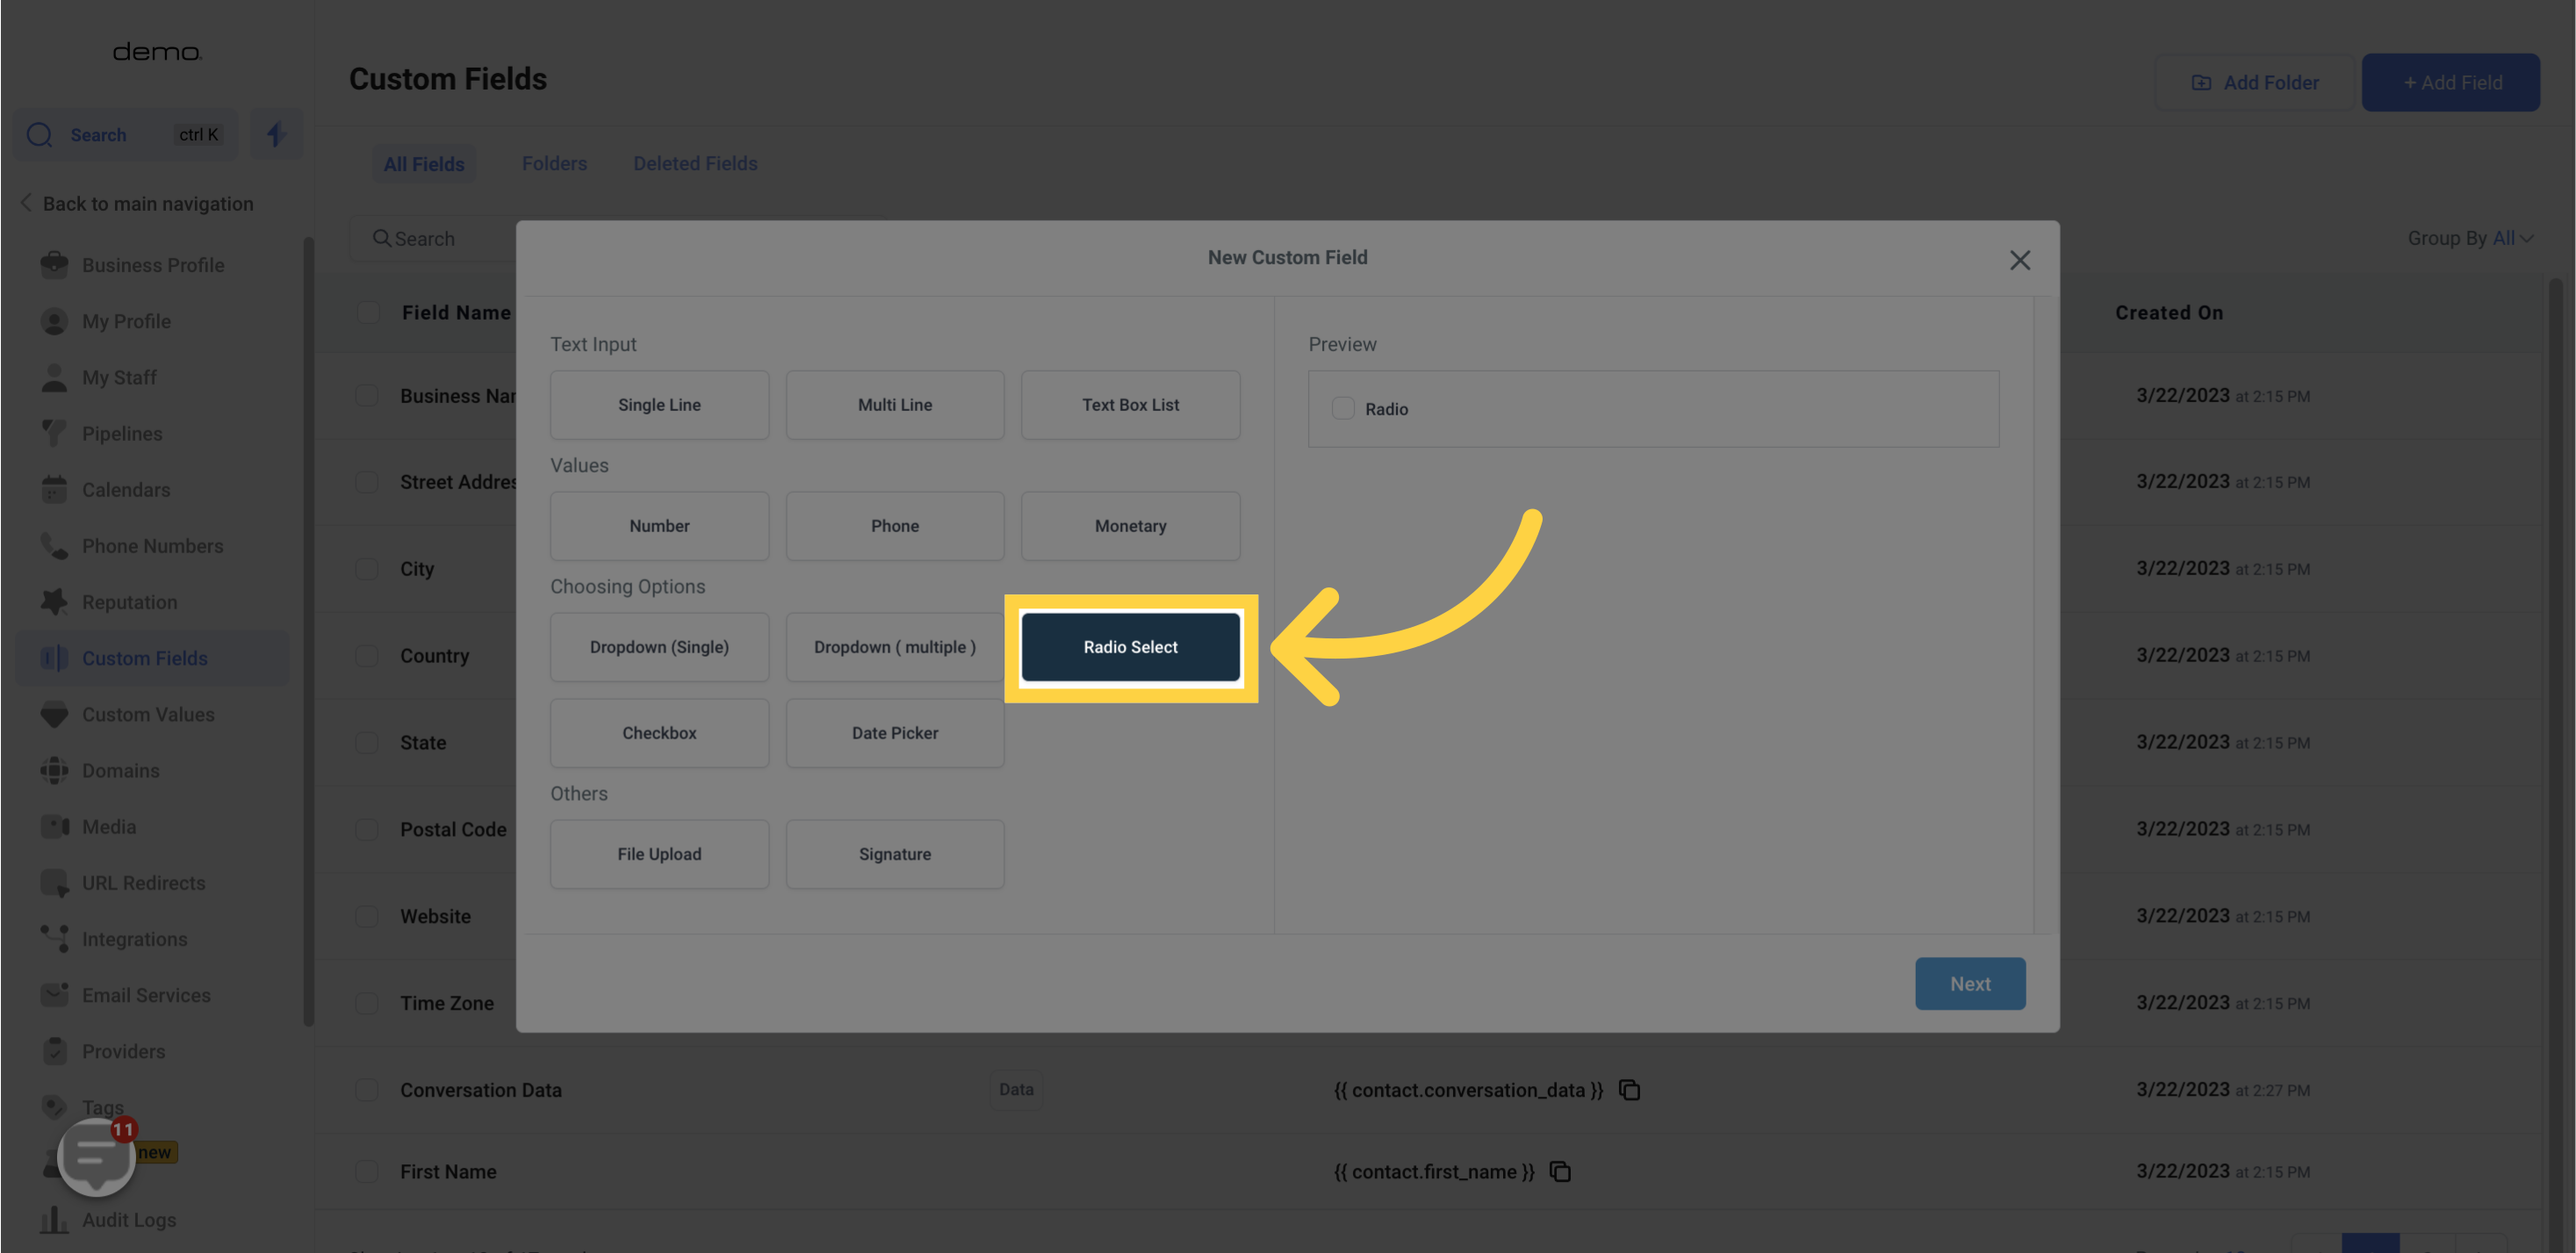
Presents a list of options with only one option selectable.
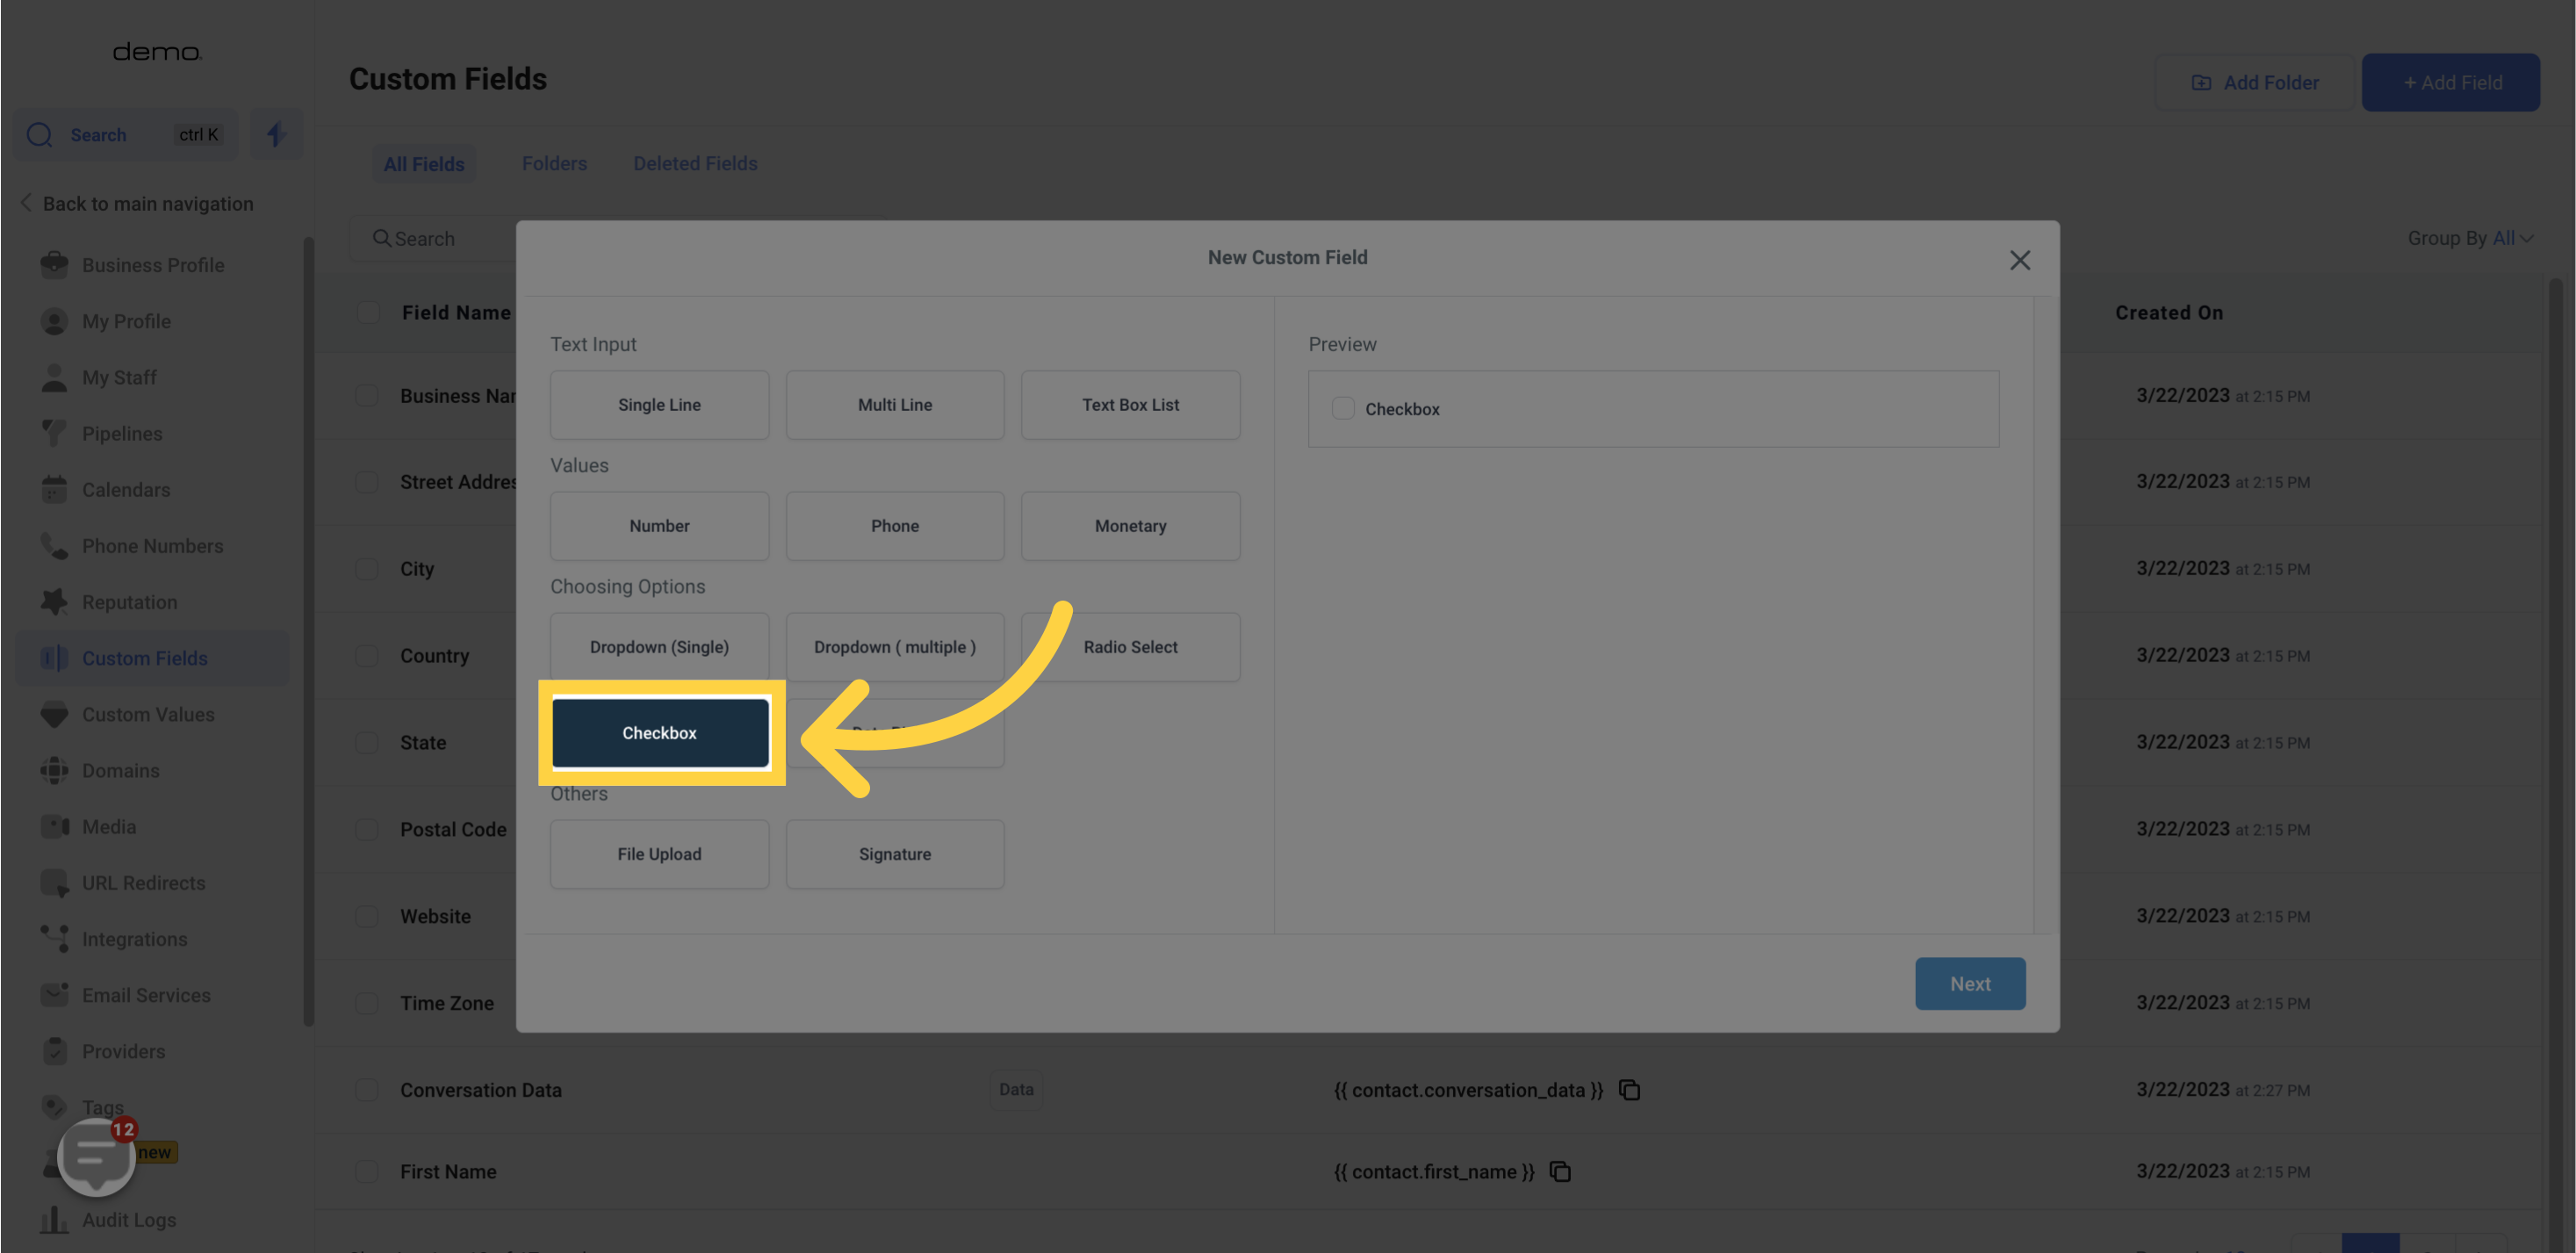
Allows for multiple selections from a list of options.
Opens a calendar for selecting a specific date.

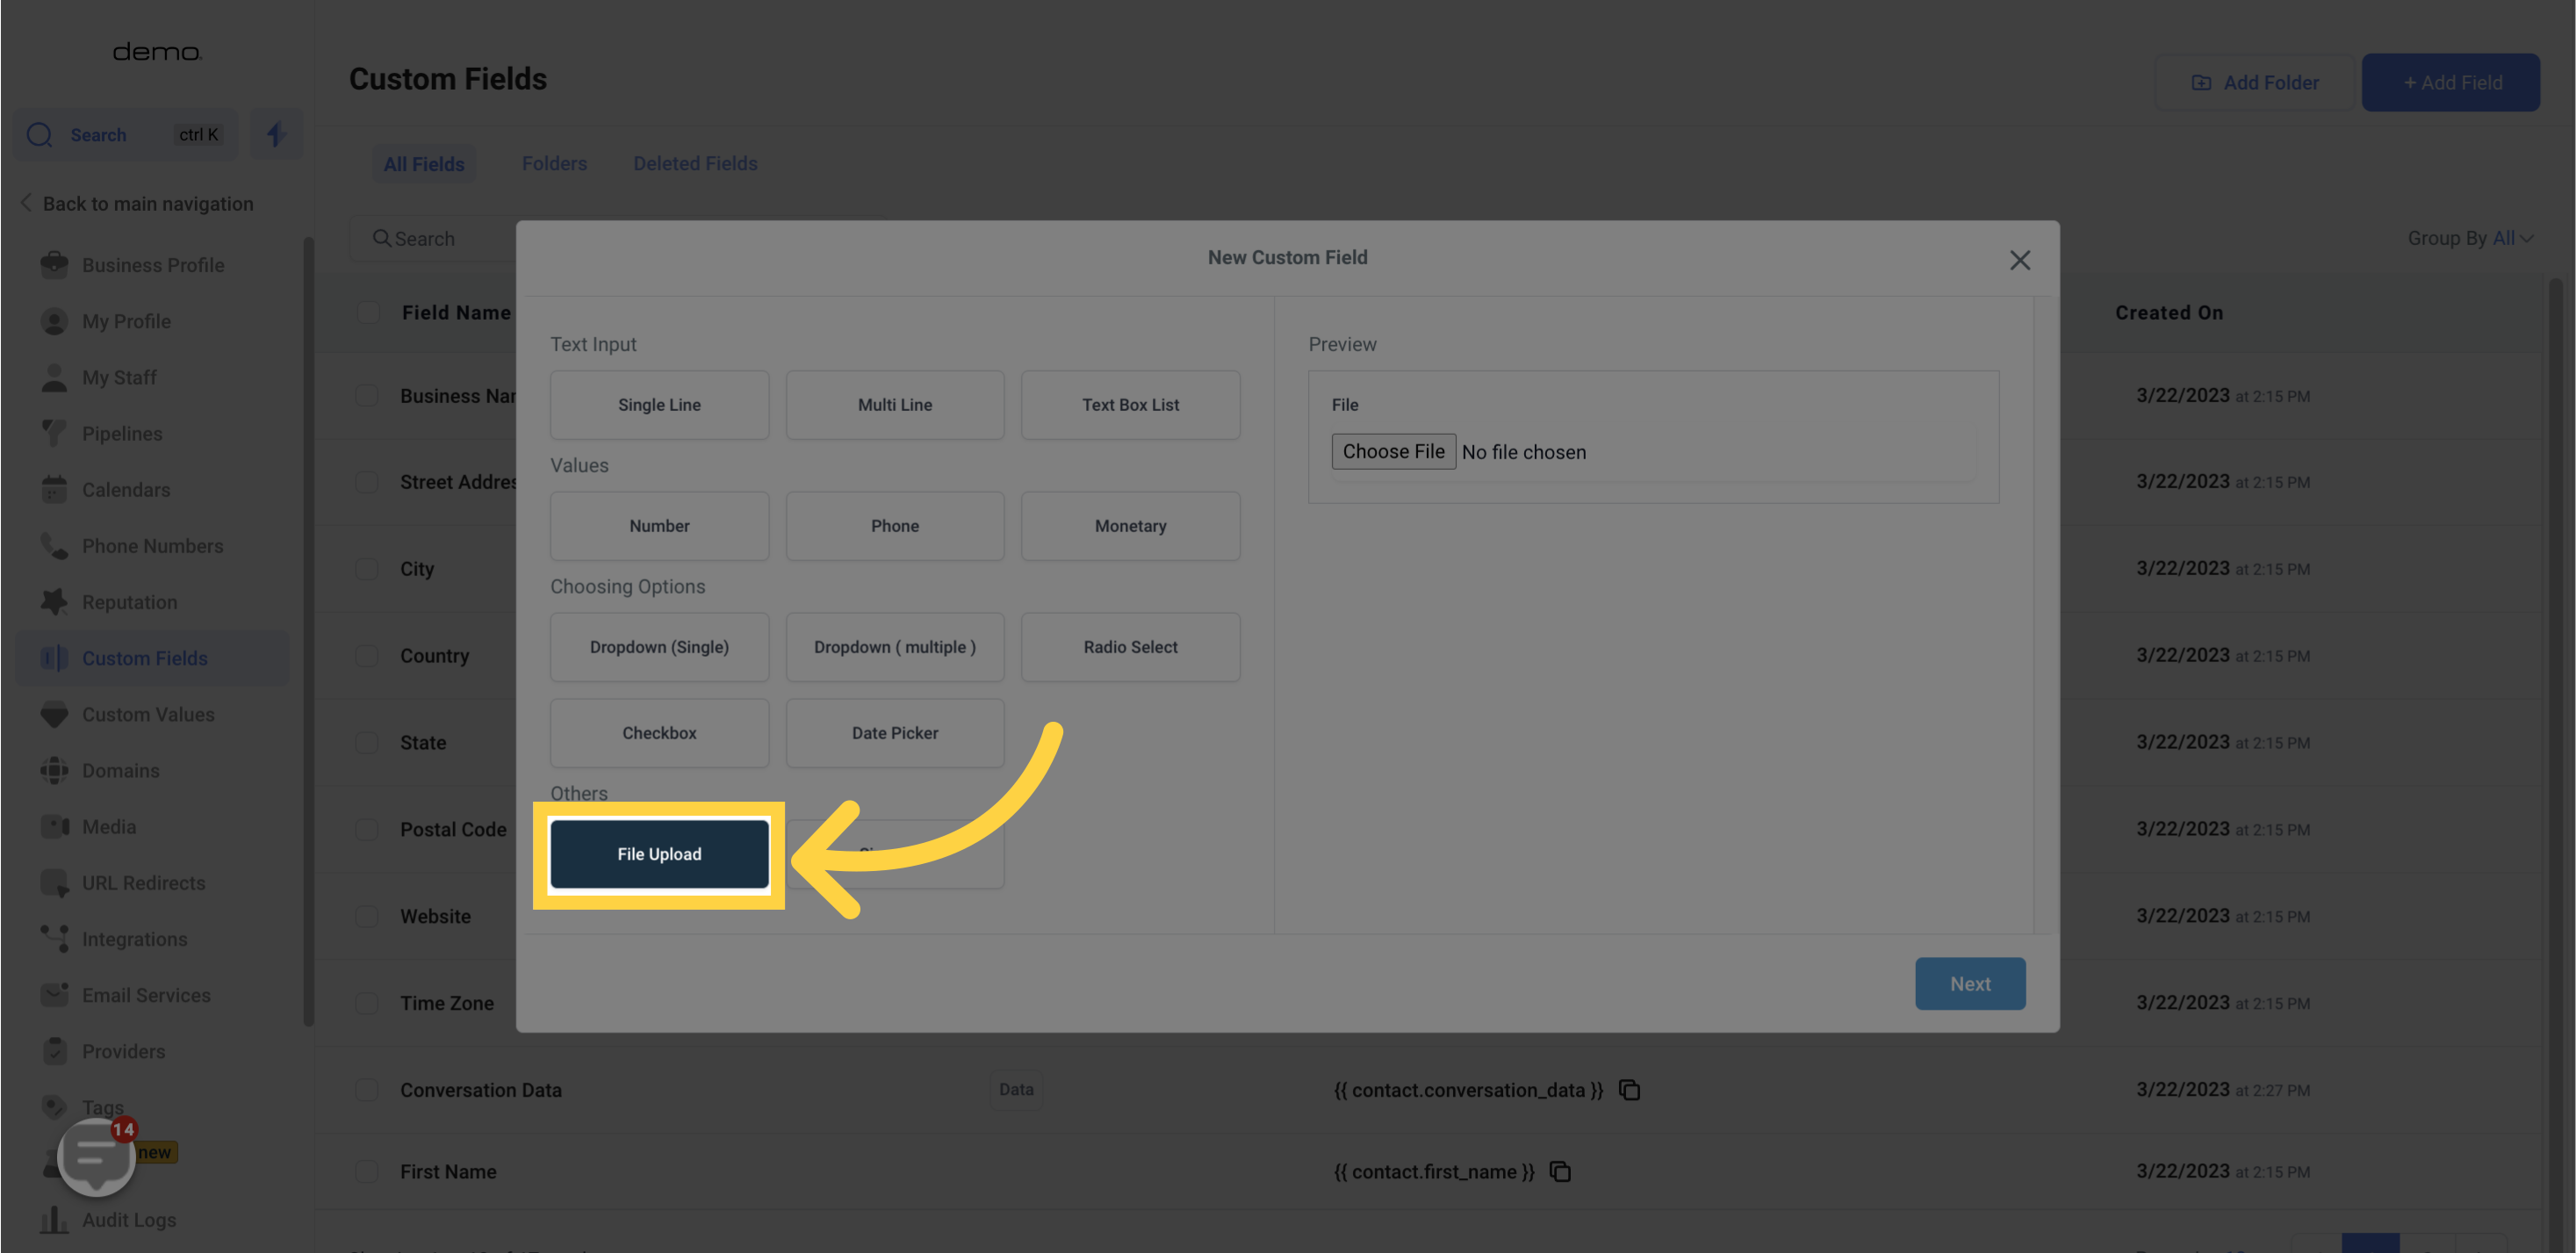
Allows for uploading various file types, with an upload limit available.
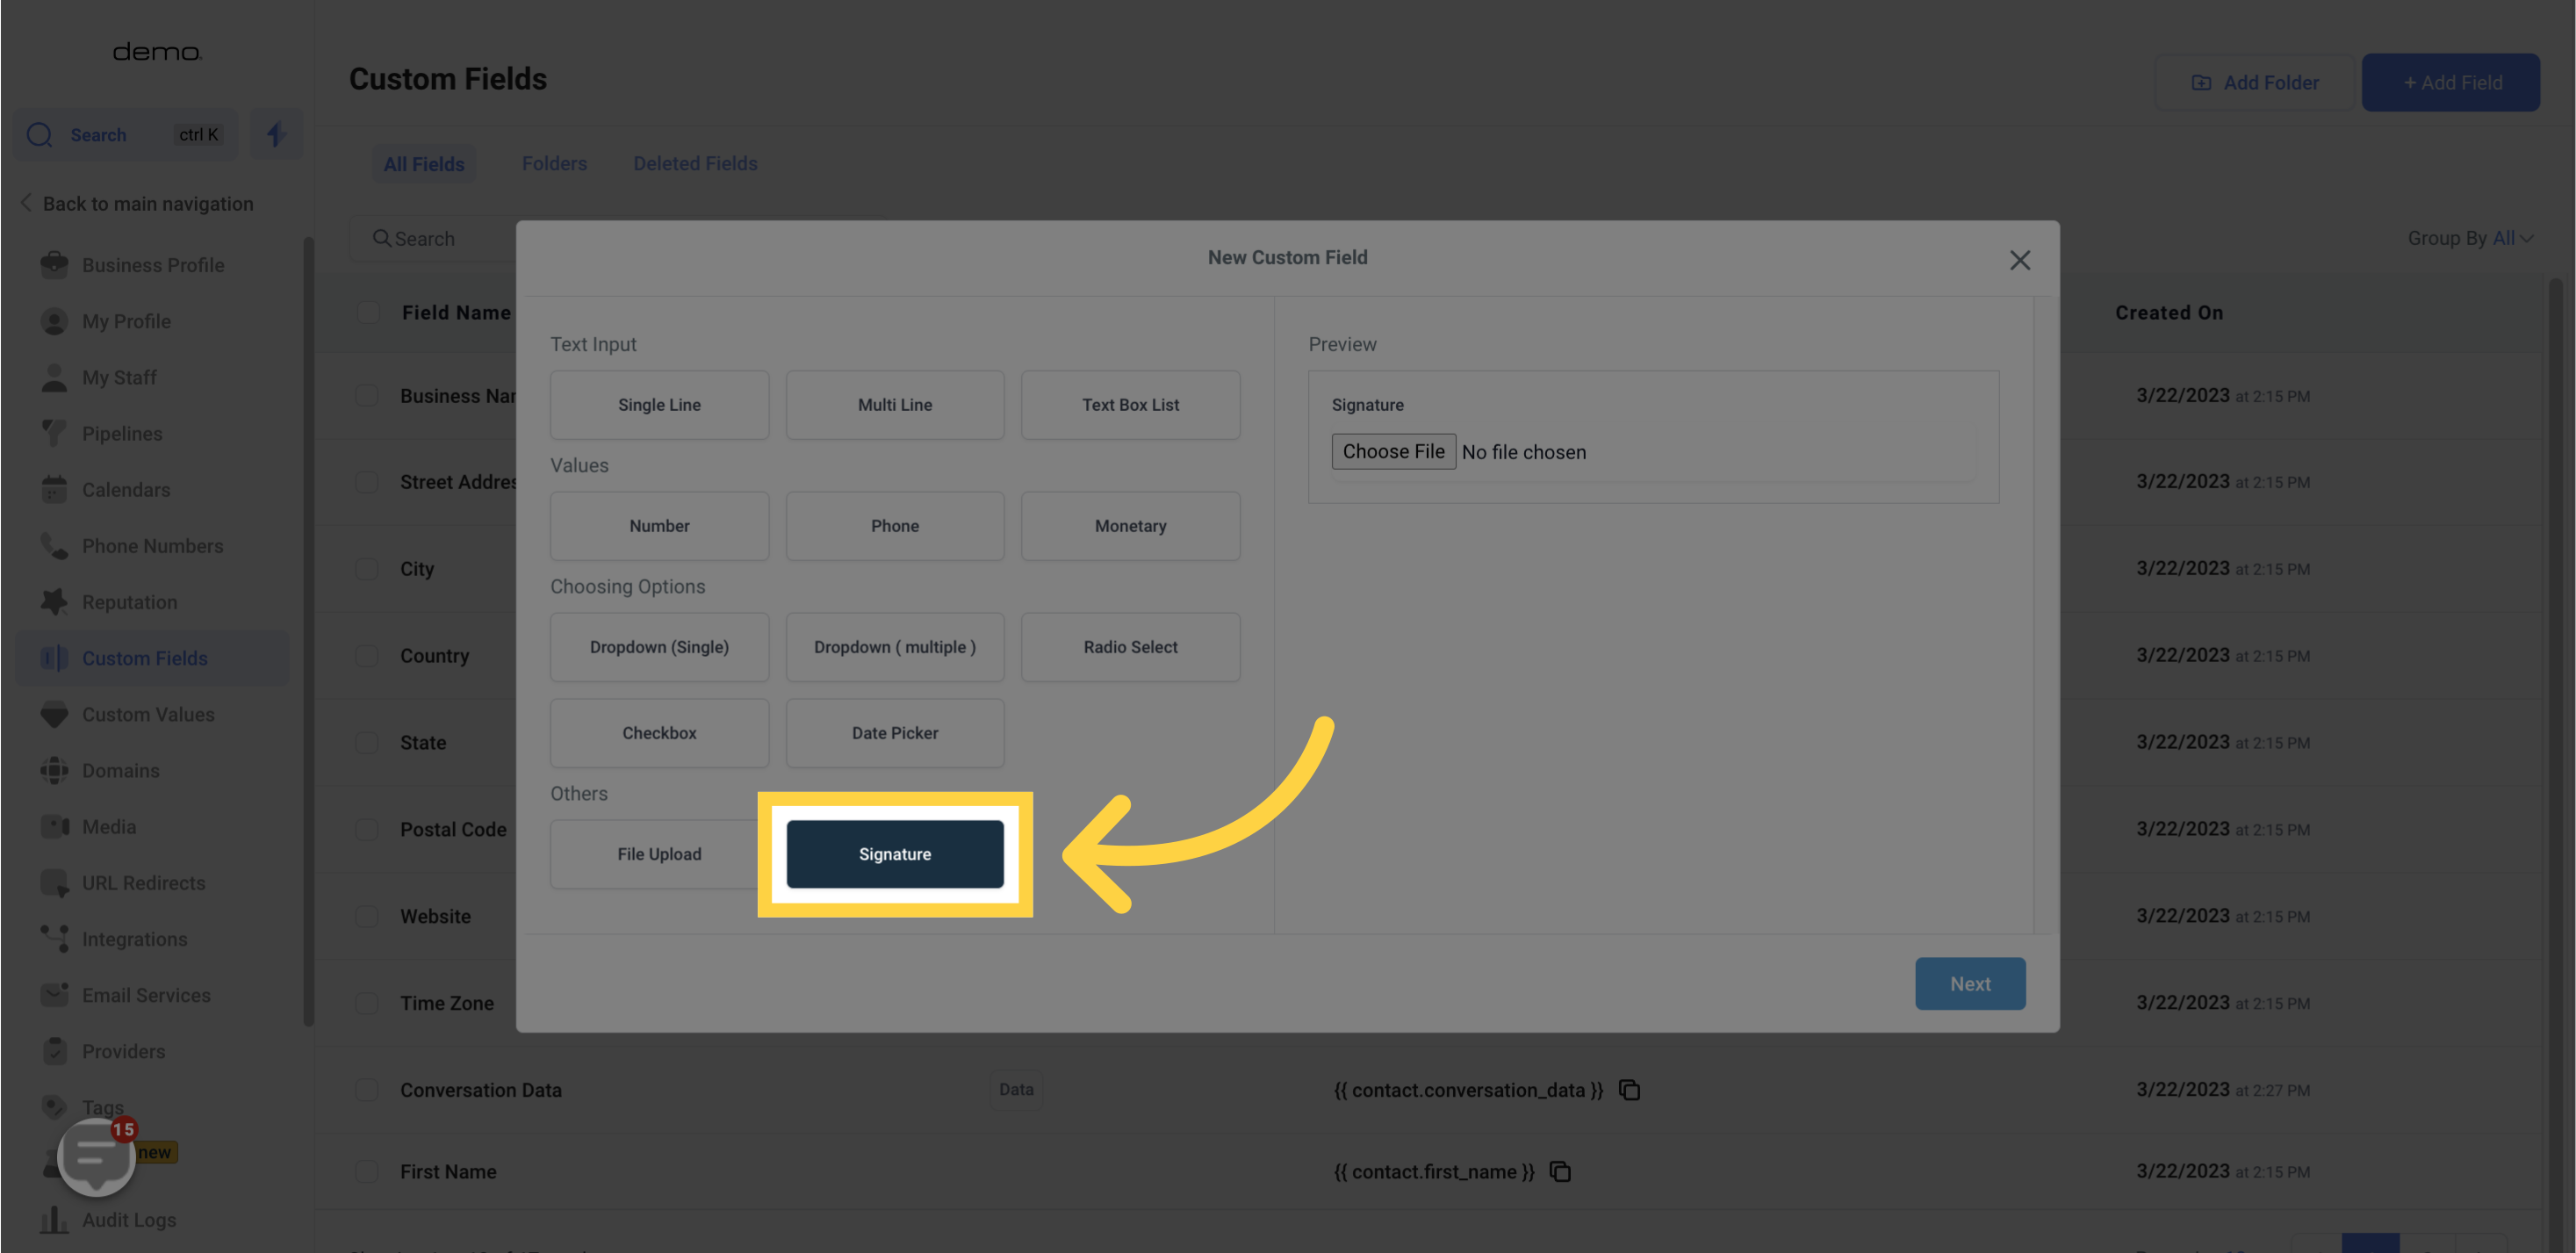
Allows for collecting a signature via computer mouse or touchpad.