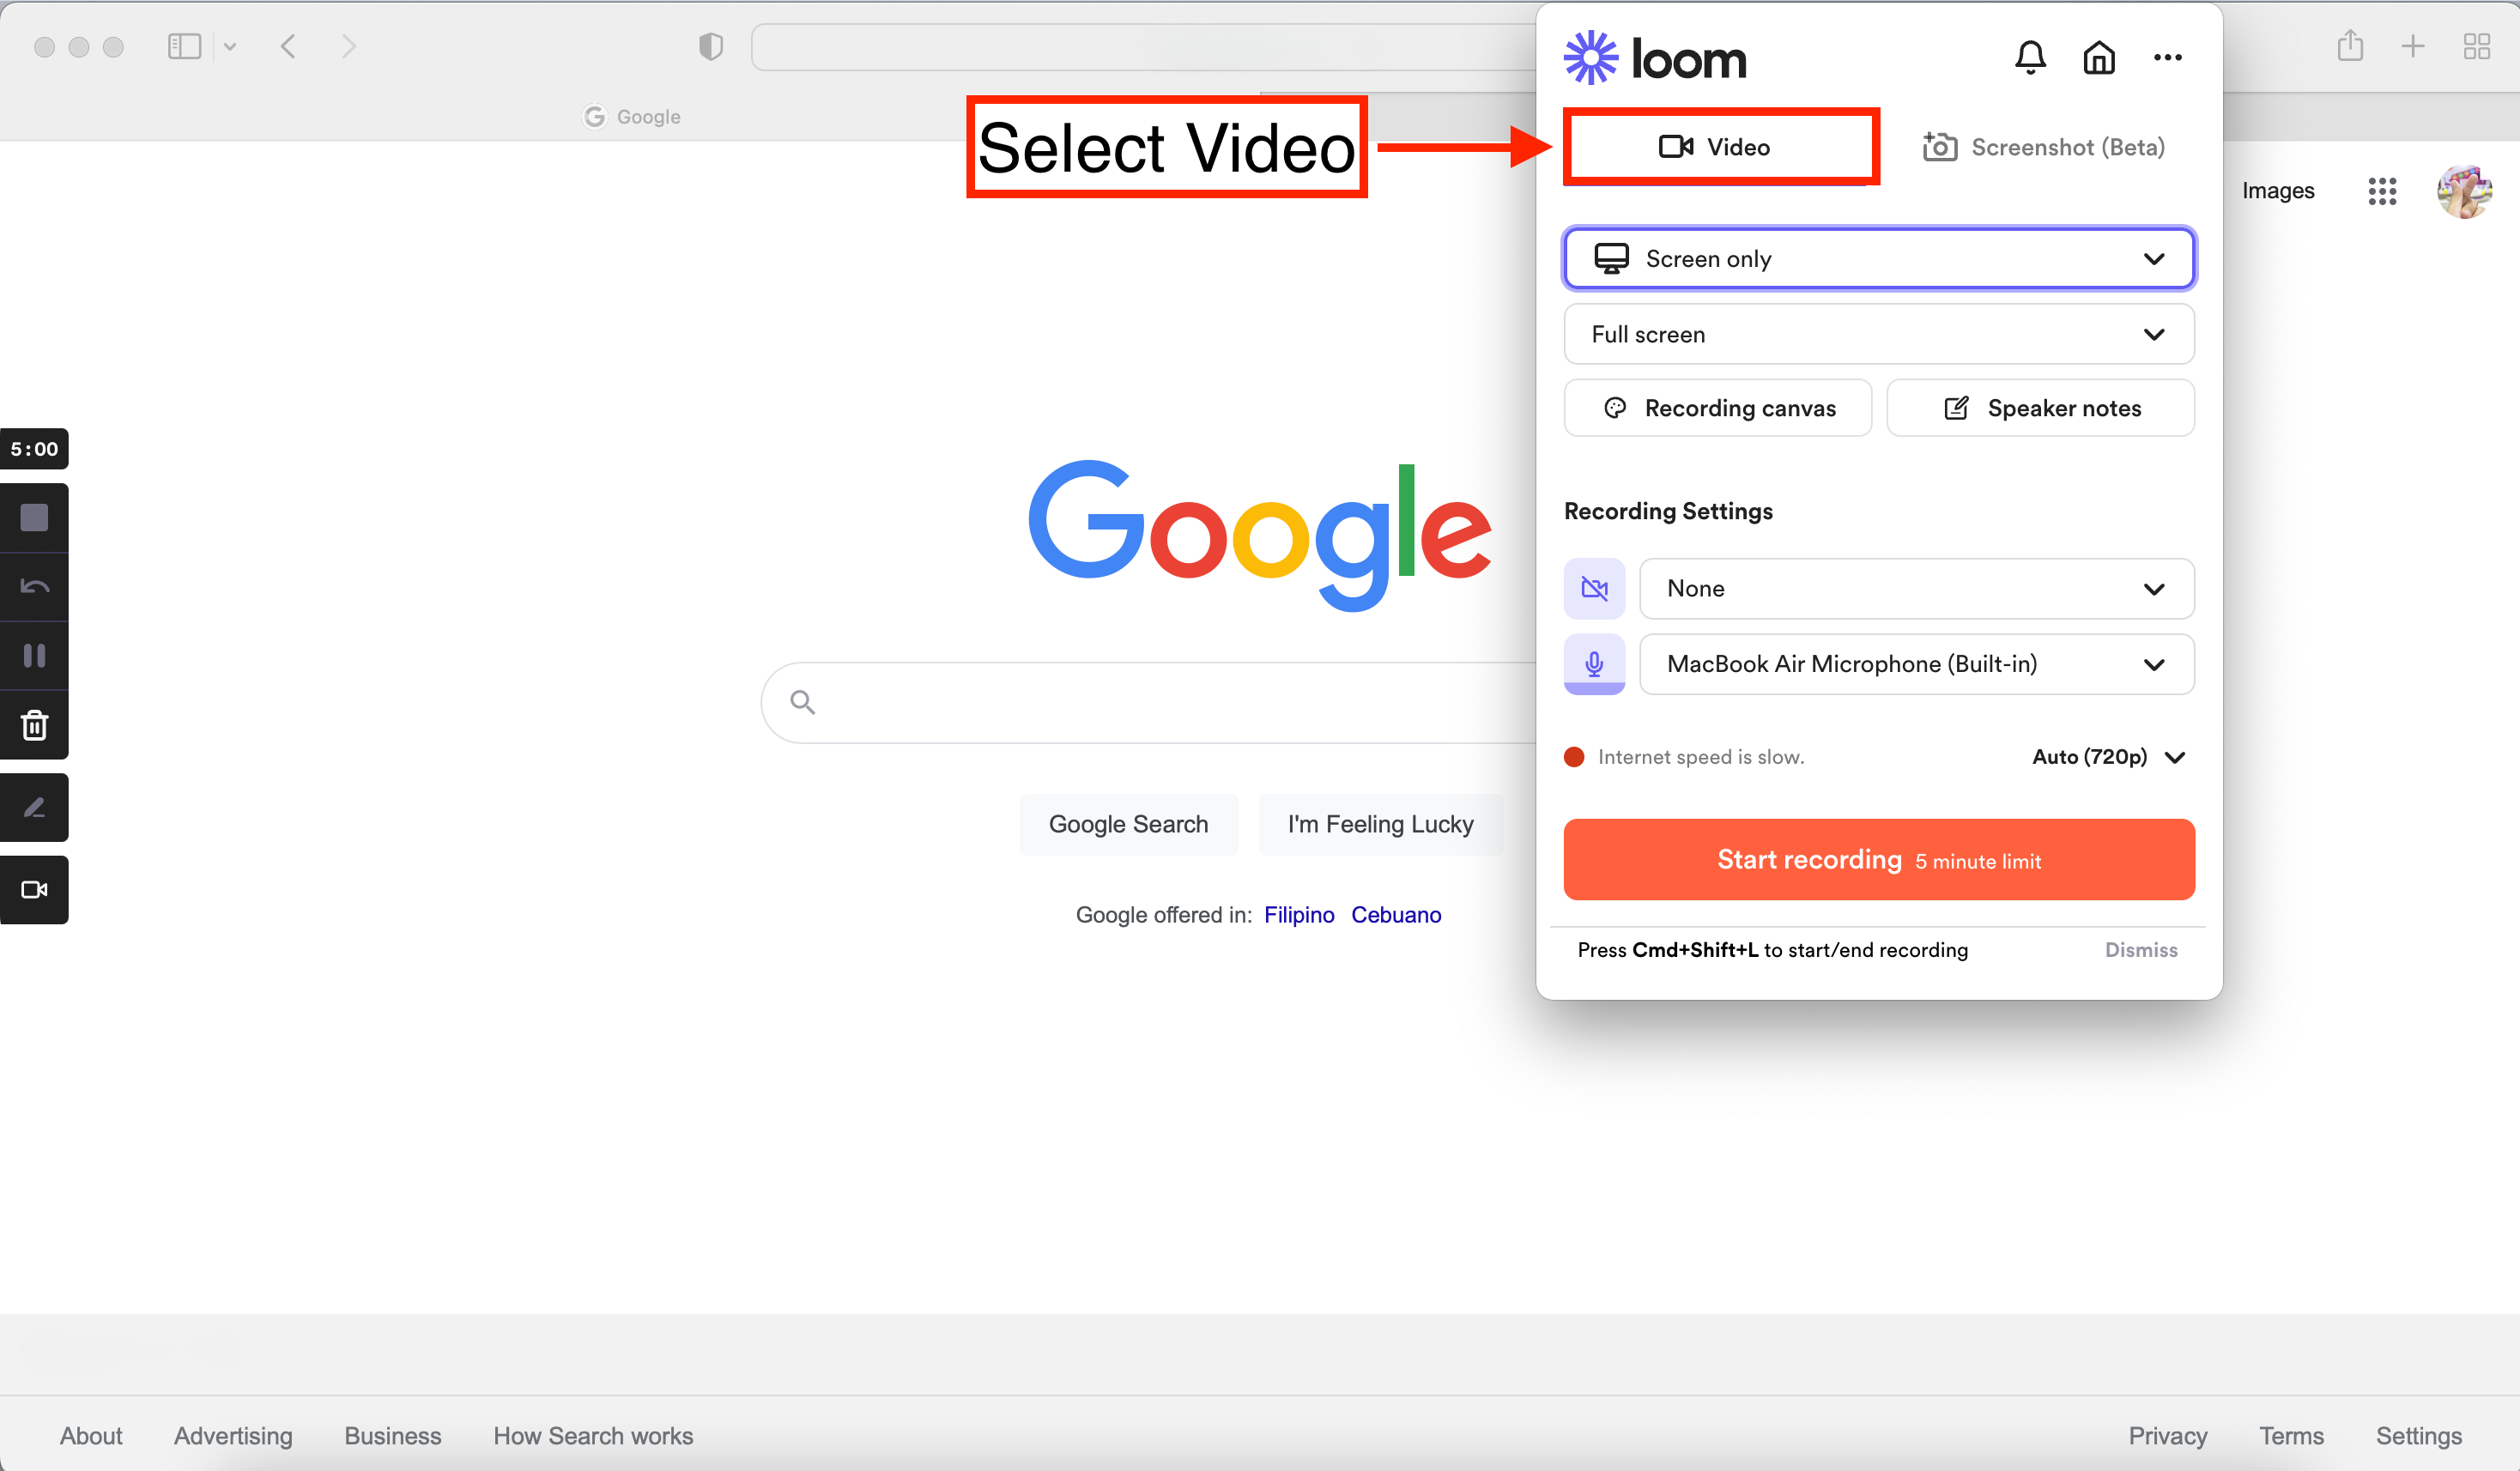
After clicking on the Loom app, a Loom screen will appear, providing you with various options for recording videos.
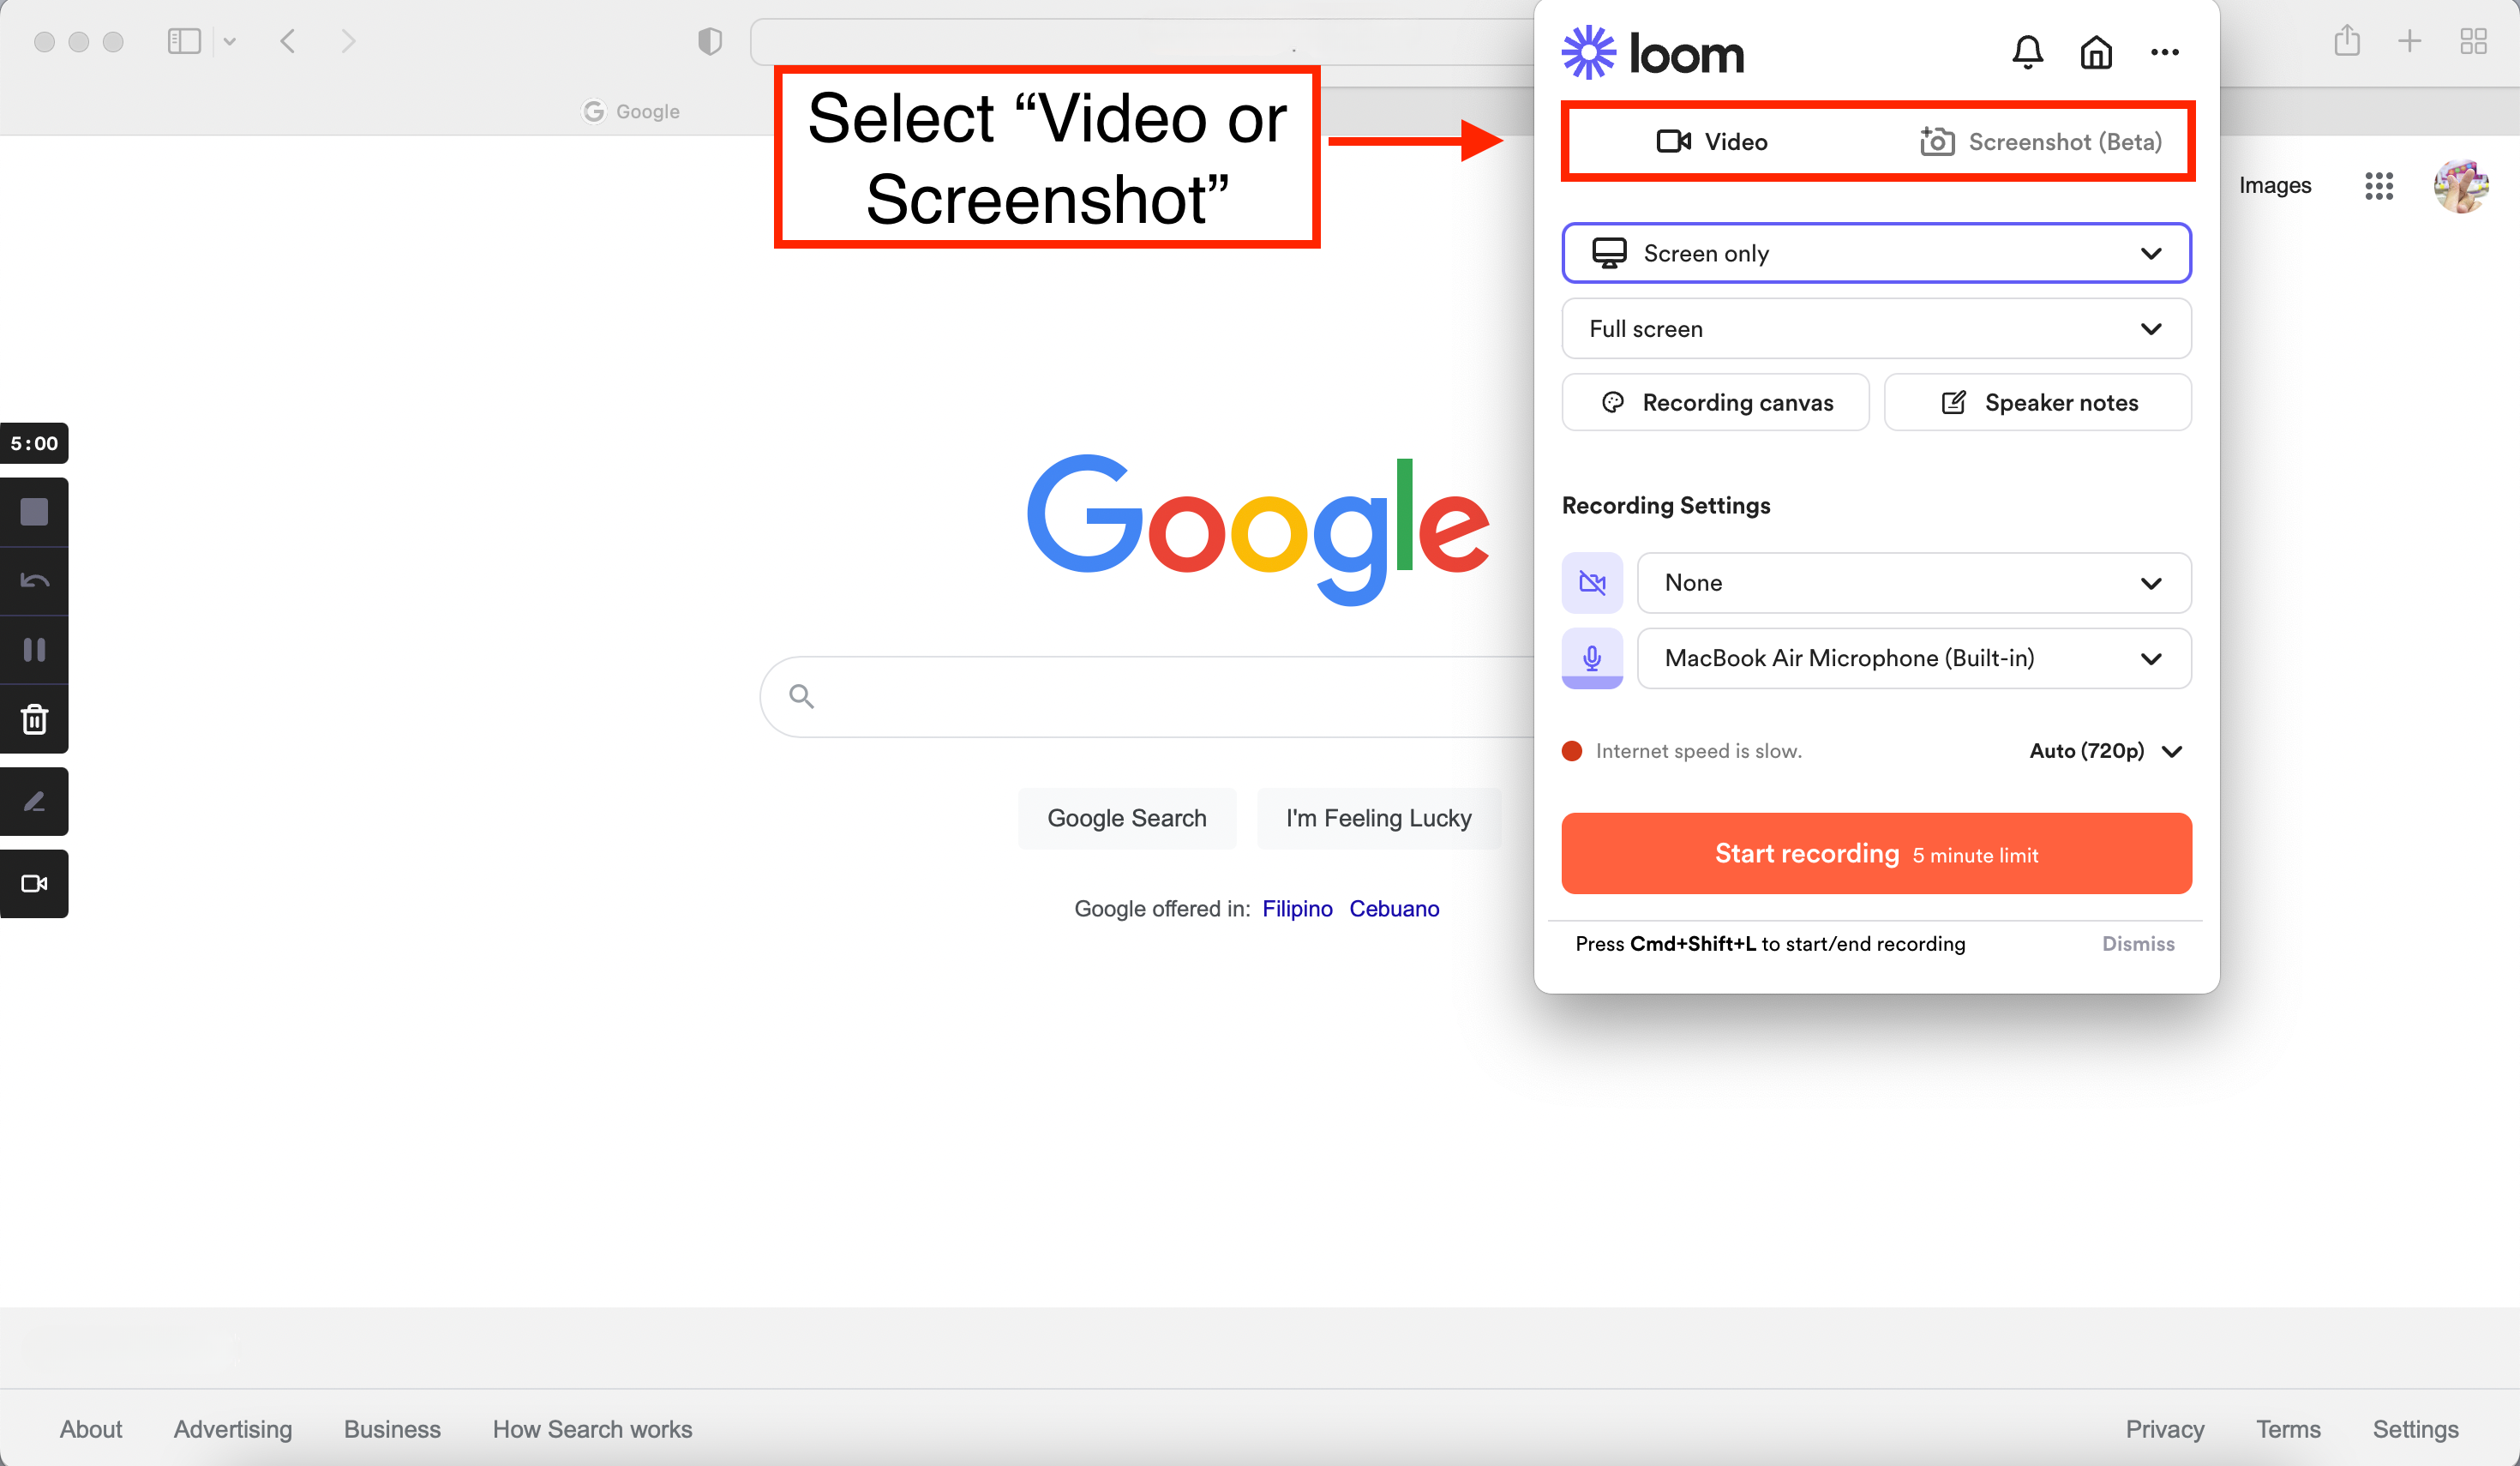
VIDEO- Loom video options are used to create and customize a video recording using Loom's screen recorder
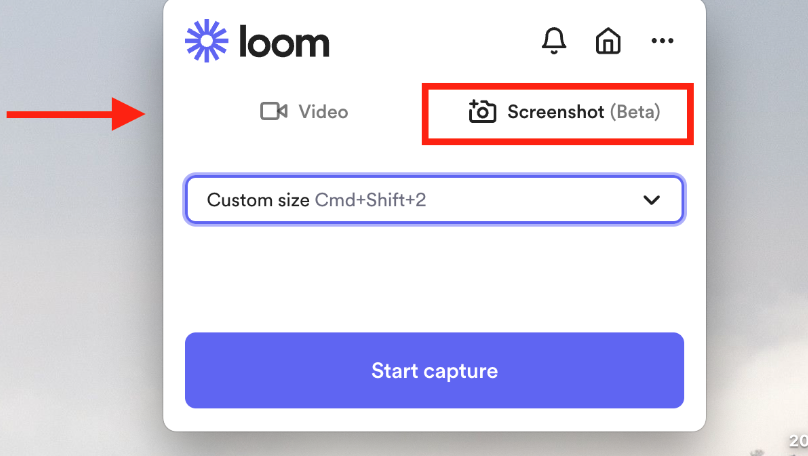
SCREENSHOT- The Loom screenshot options are used to capture a still image of your screen instead of recording a video.
Select which is applicable to your needs
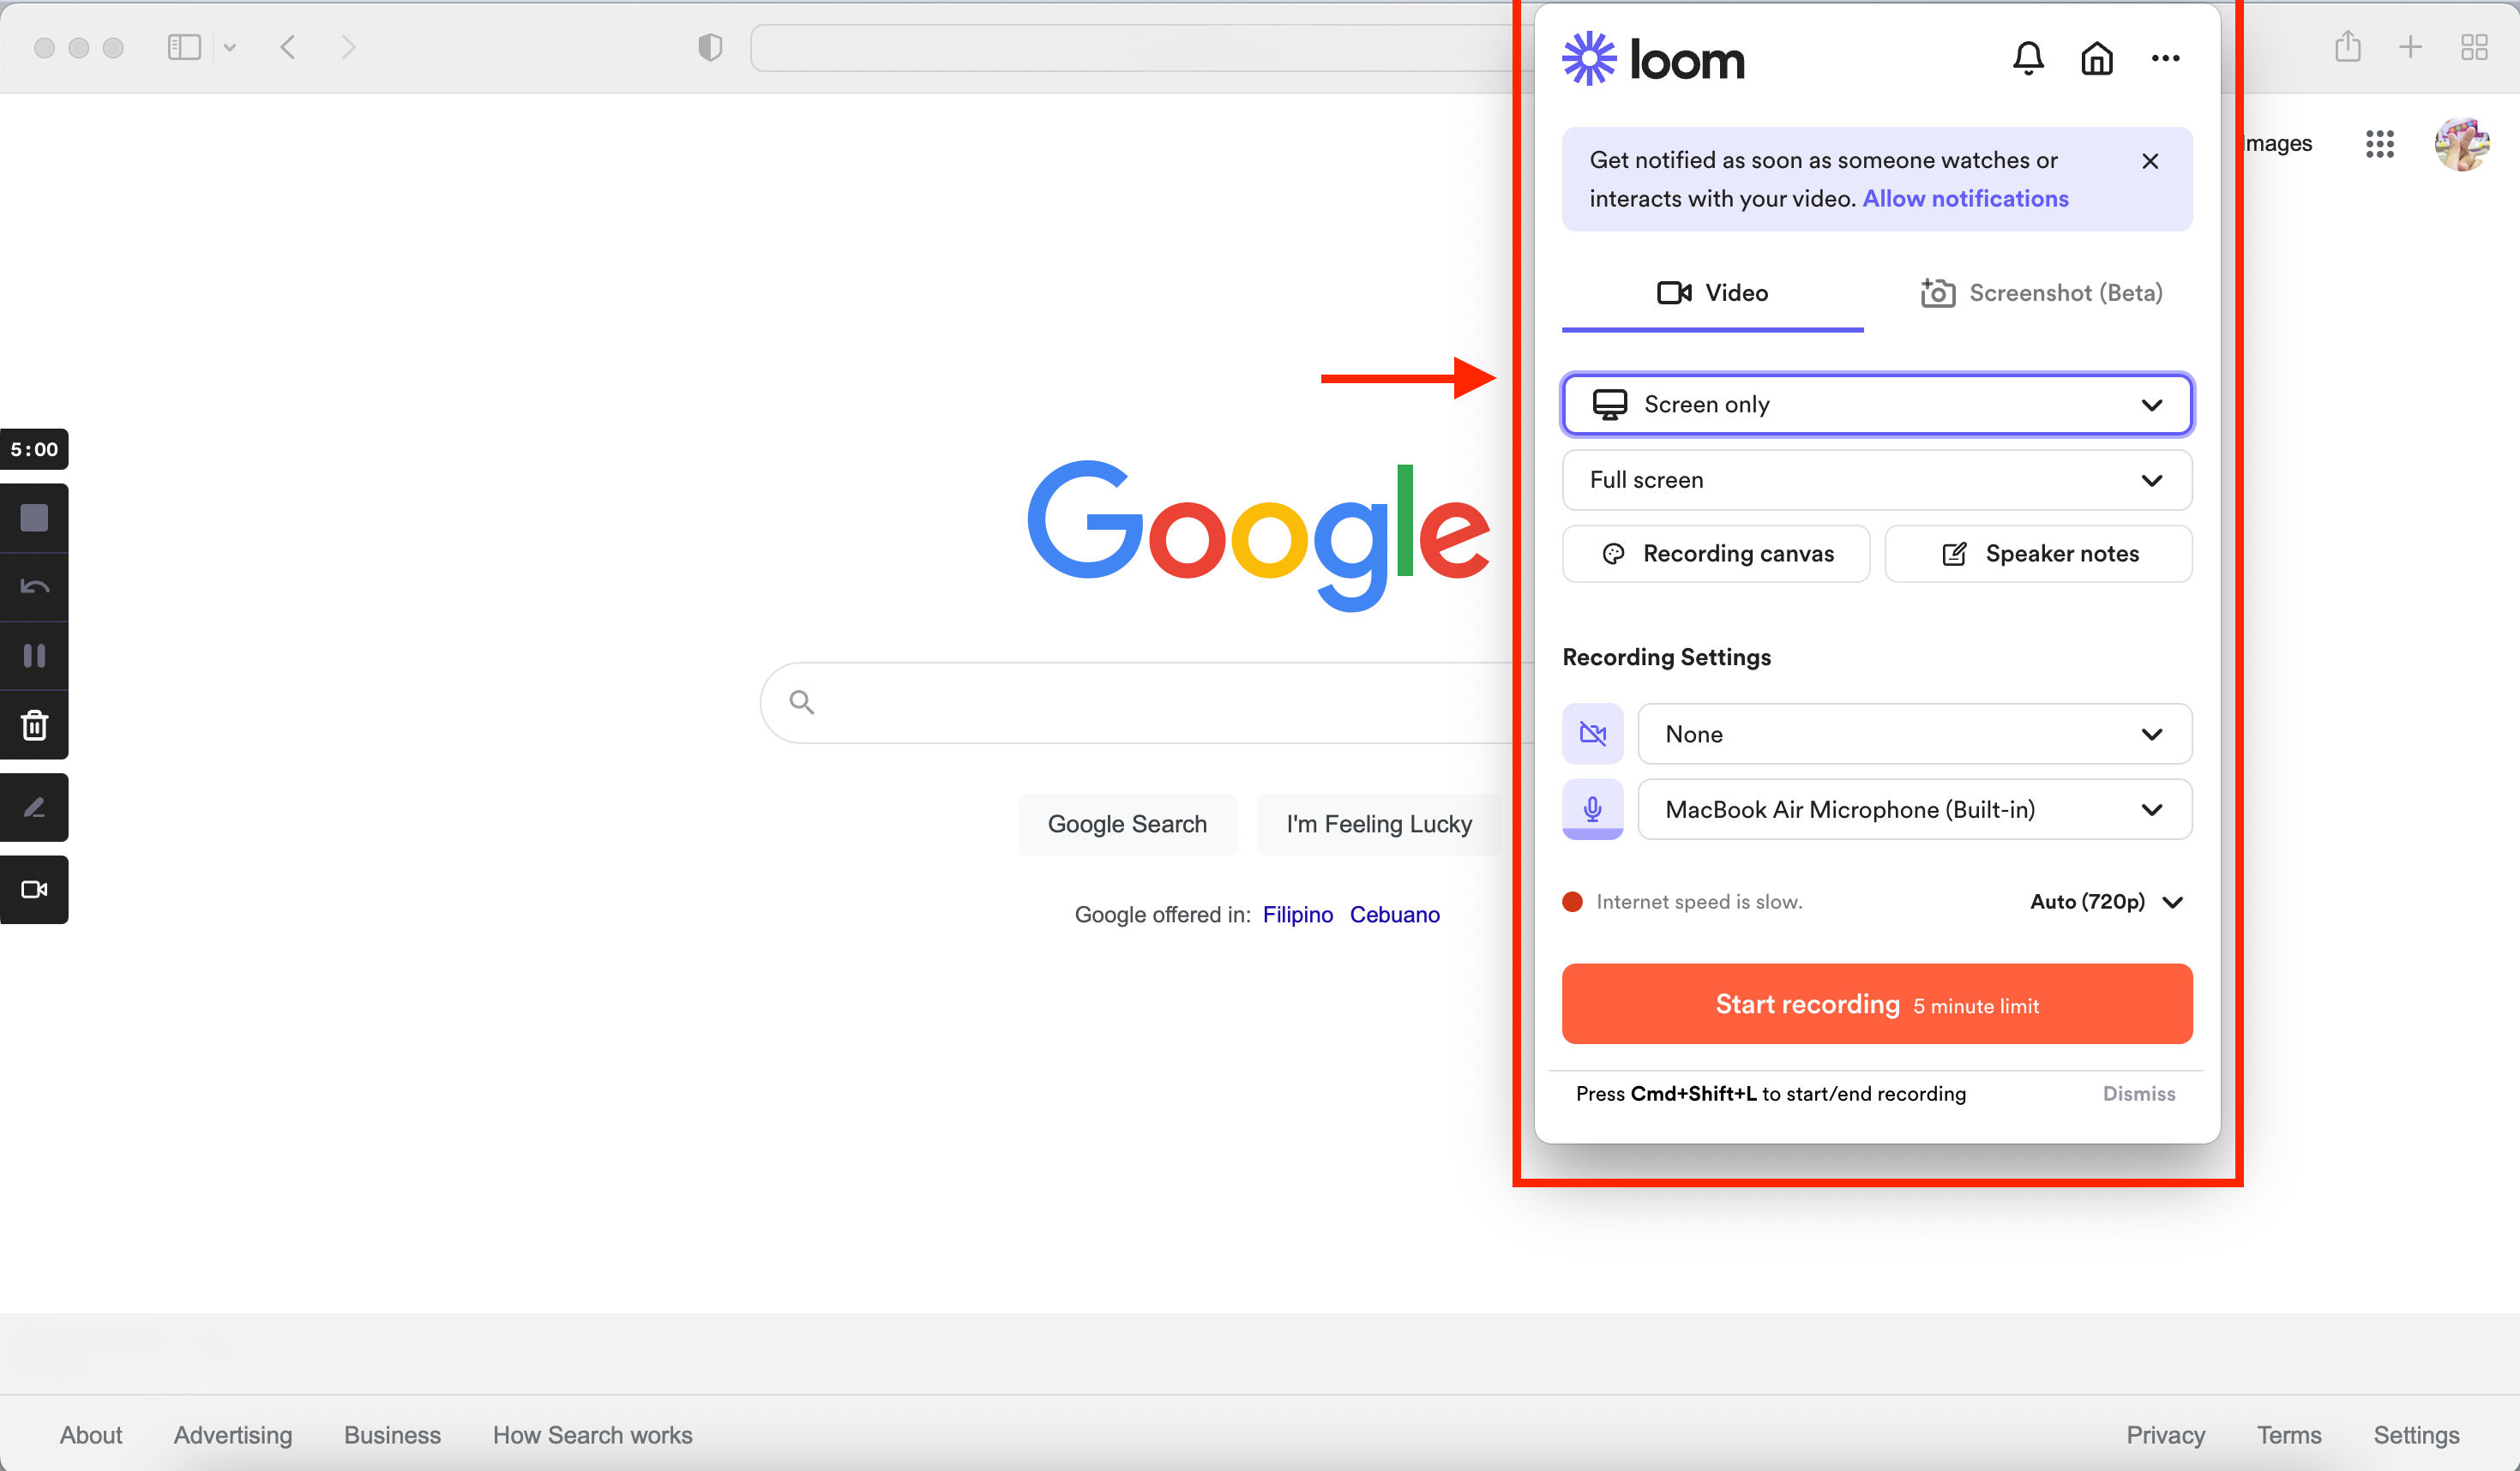
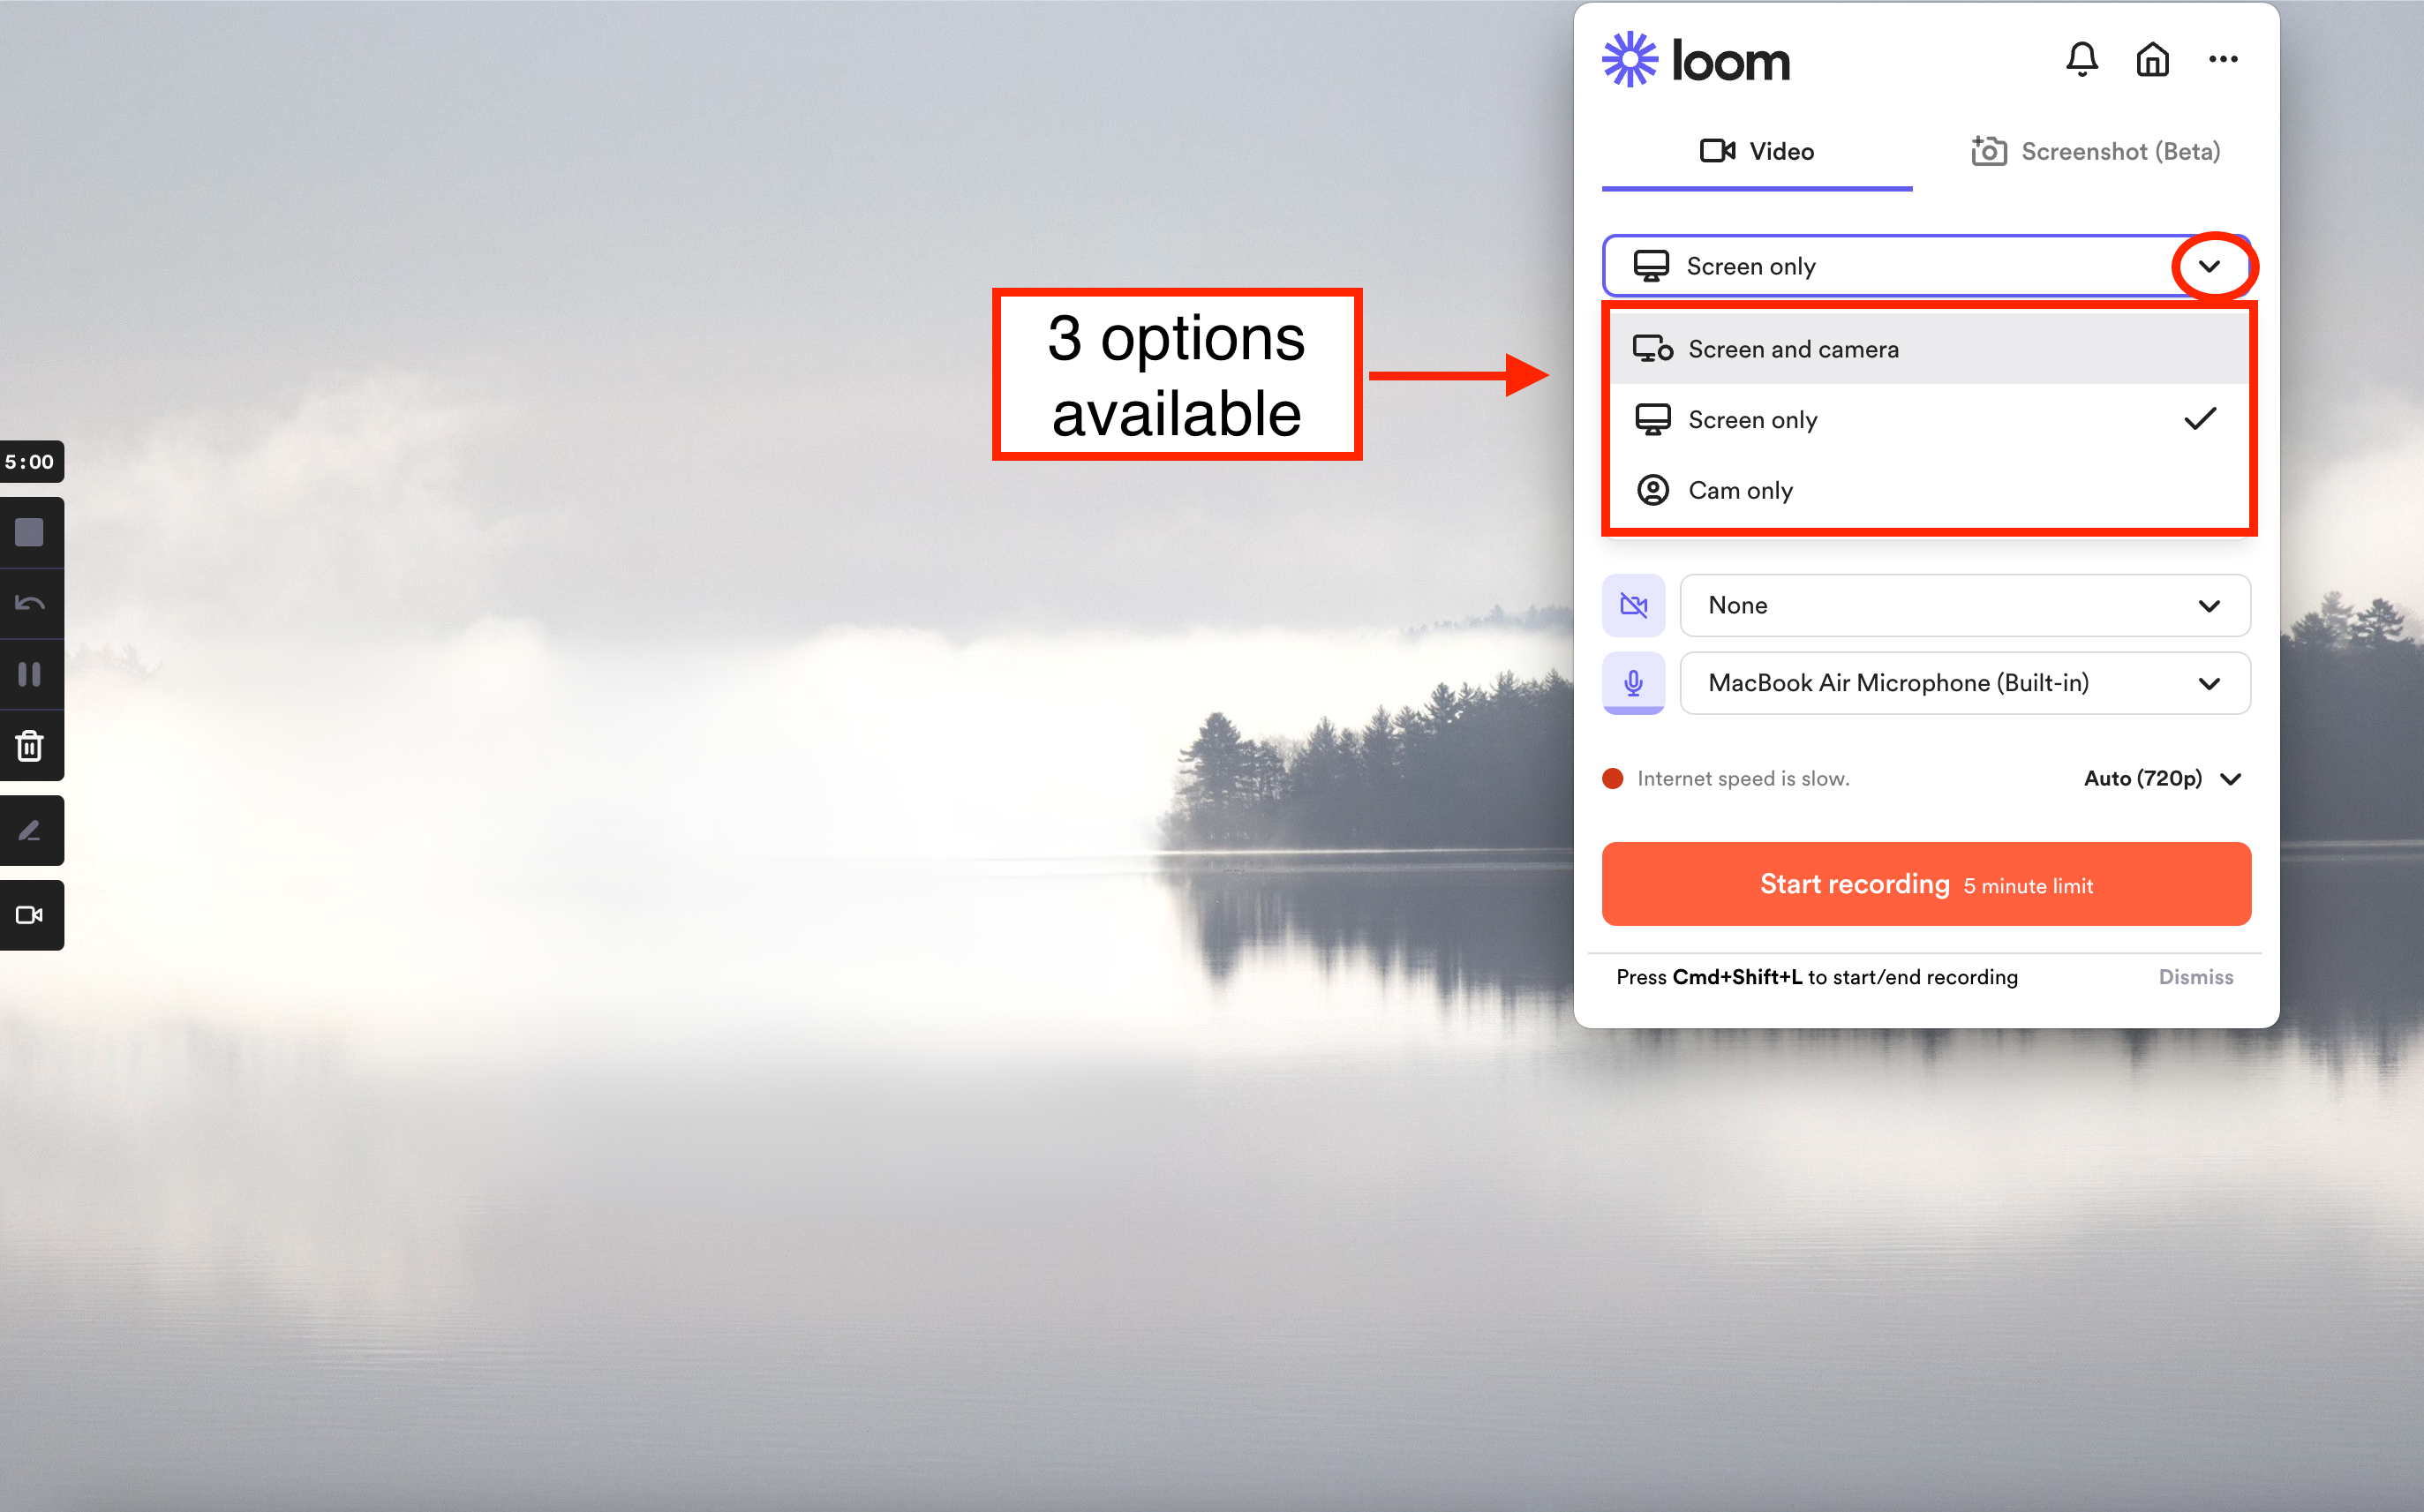
SCREEN AND CAMERA - allow you to customize your video recordings depending on your needs. To use both the camera and screen recording features when creating your video, select "Screen + Cam" from the recording menu. This option enables you to display a small window with your camera feed alongside your screen recording. You can resize or reposition the window to any corner of your screen to best suit your preferences.
SCREEN ONLY - allows you to record your screen solely without showing any camera footage alongside it.
CAM ONLY - allows you to record only the video from your camera. This option is perfect for those situations where you want to communicate your message through facial expressions or body language.
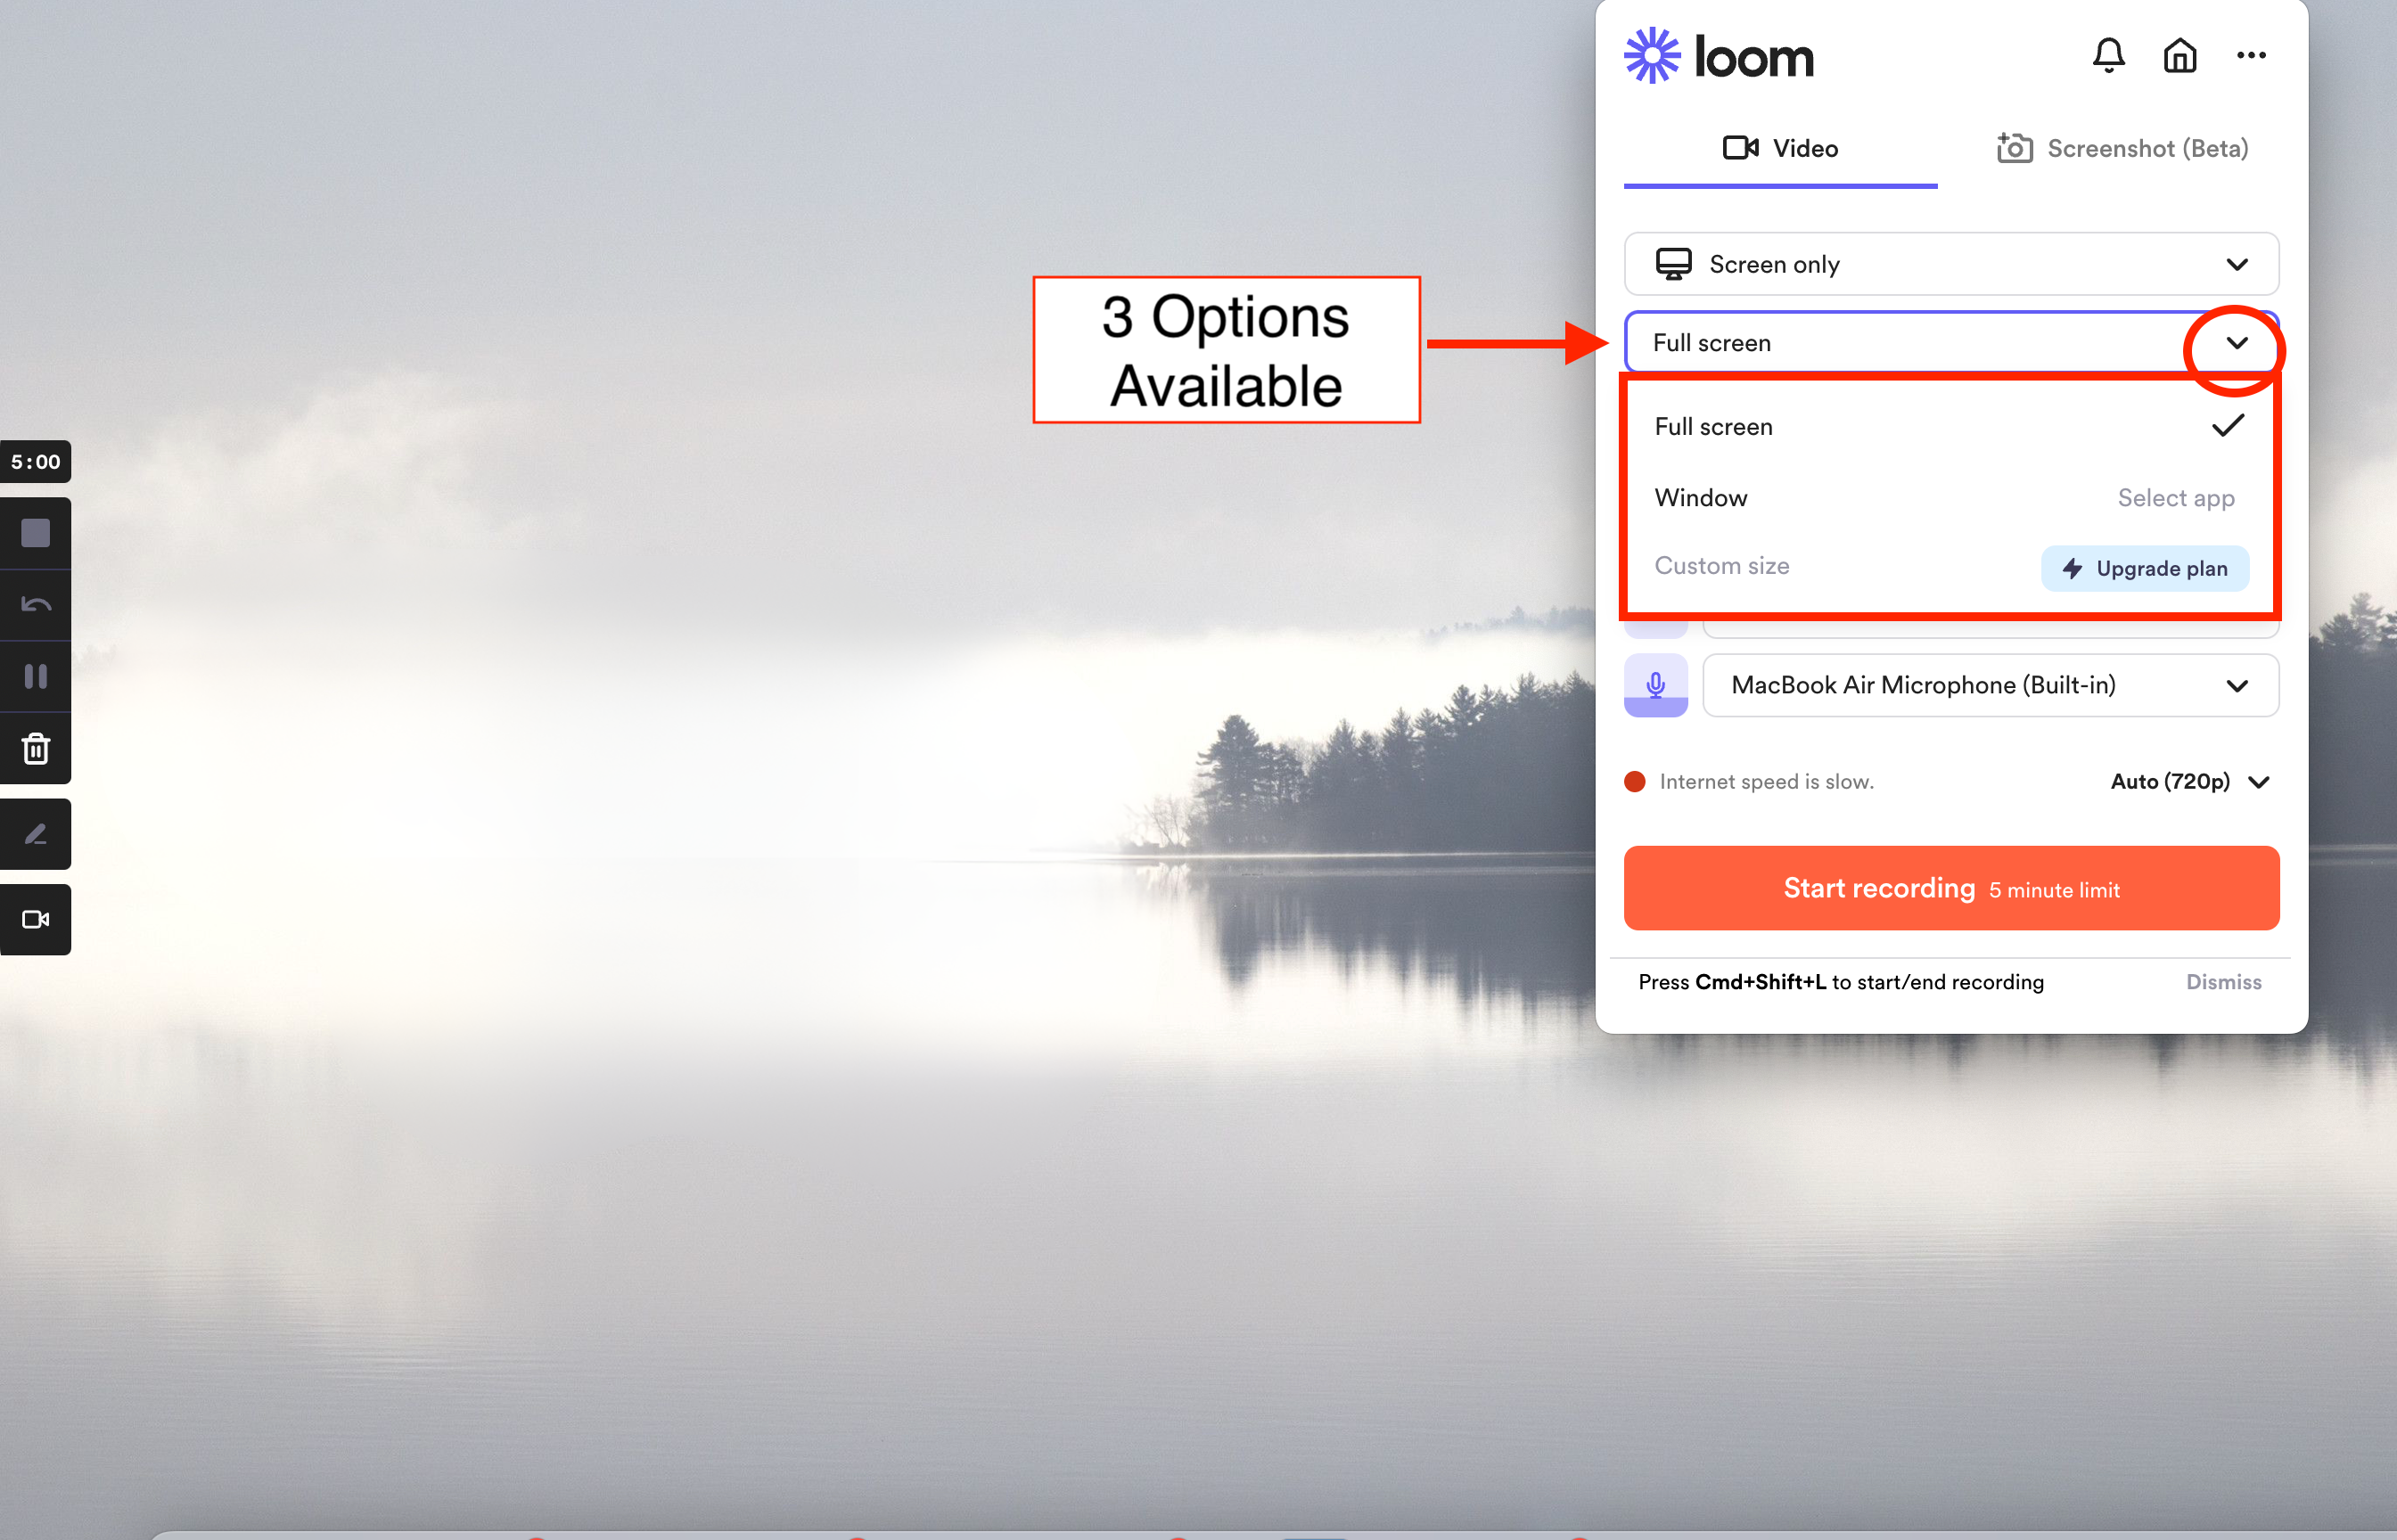
Select which is applicable to your needs
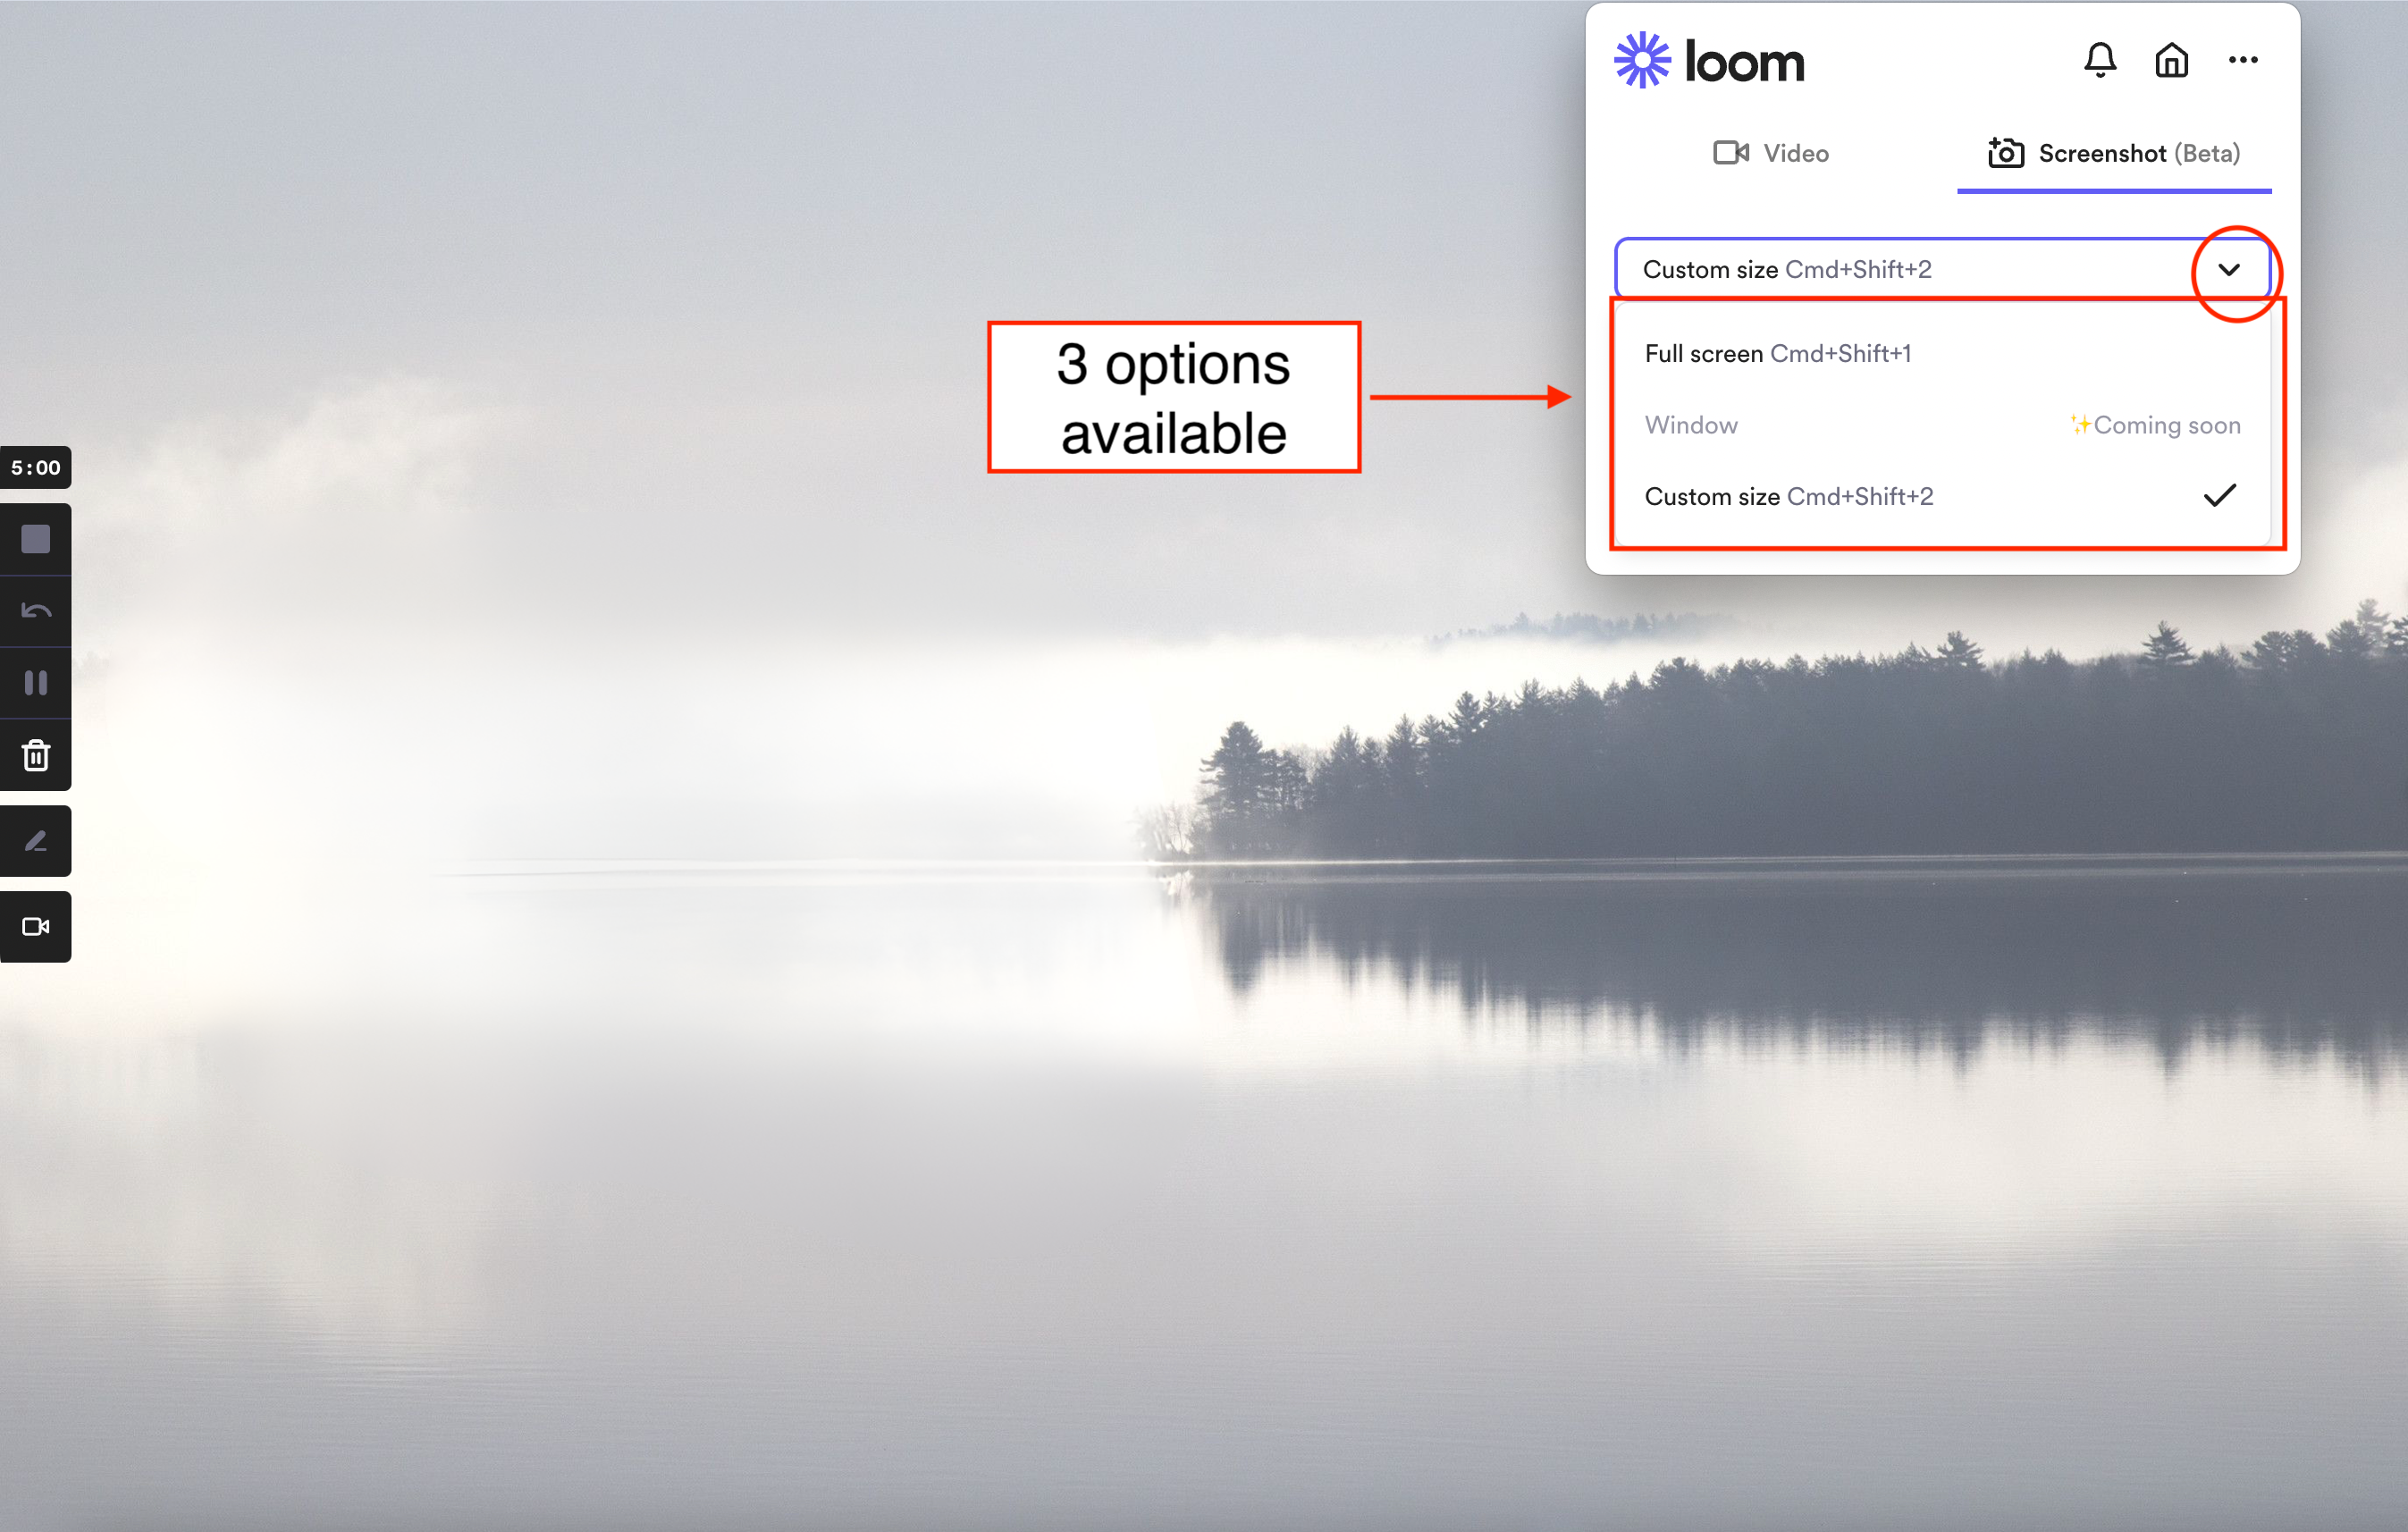
FULL SCREEN - Enables you to record videos of your entire screen or specific applications in full screen mode.
WINDOW - Enables you to record a specific window or application on your screen. This feature is helpful when you want to record a specific portion of your screen, such as a single browser tab or file folder
CUSTOM SIZE - Allows you to record a video at a specific size or resolution rather than a predefined option. This is helpful when you need to record a video with specific dimensions, such as recording a square video for Instagram
This option allows you to highlight specific areas of your screen while recording. This feature is helpful when you need to emphasize specific content or draw attention to certain aspects of your recording.
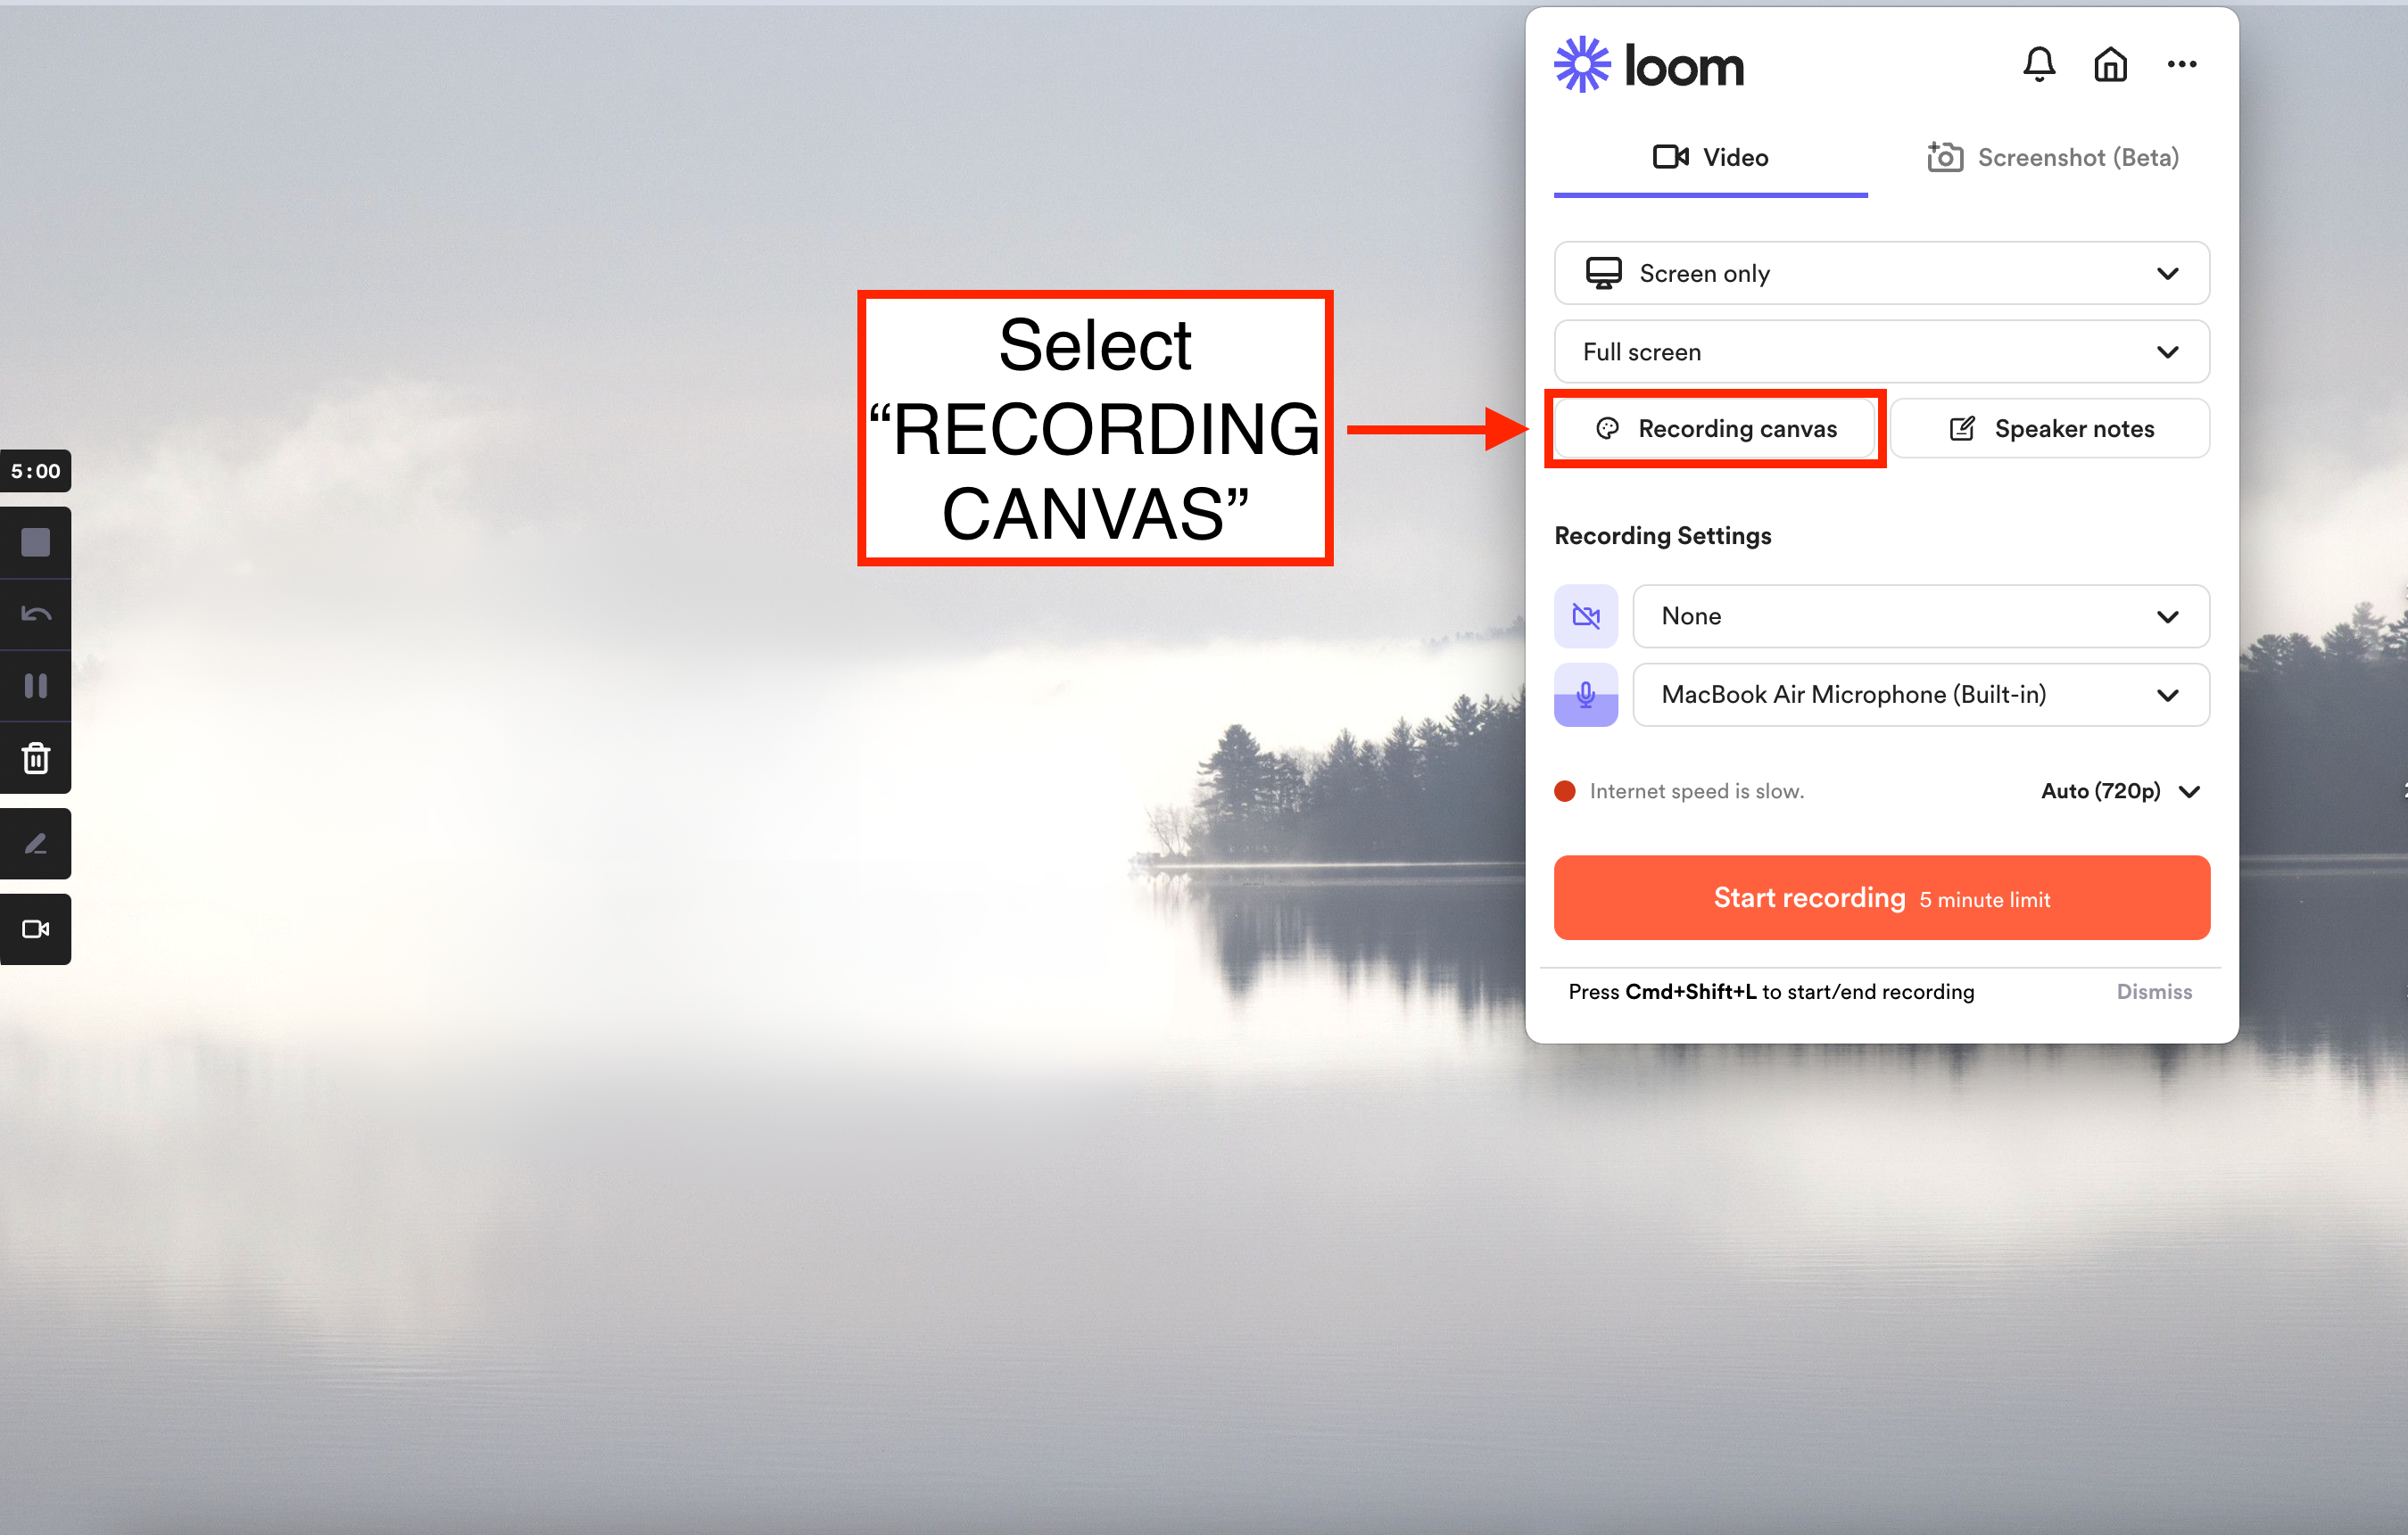
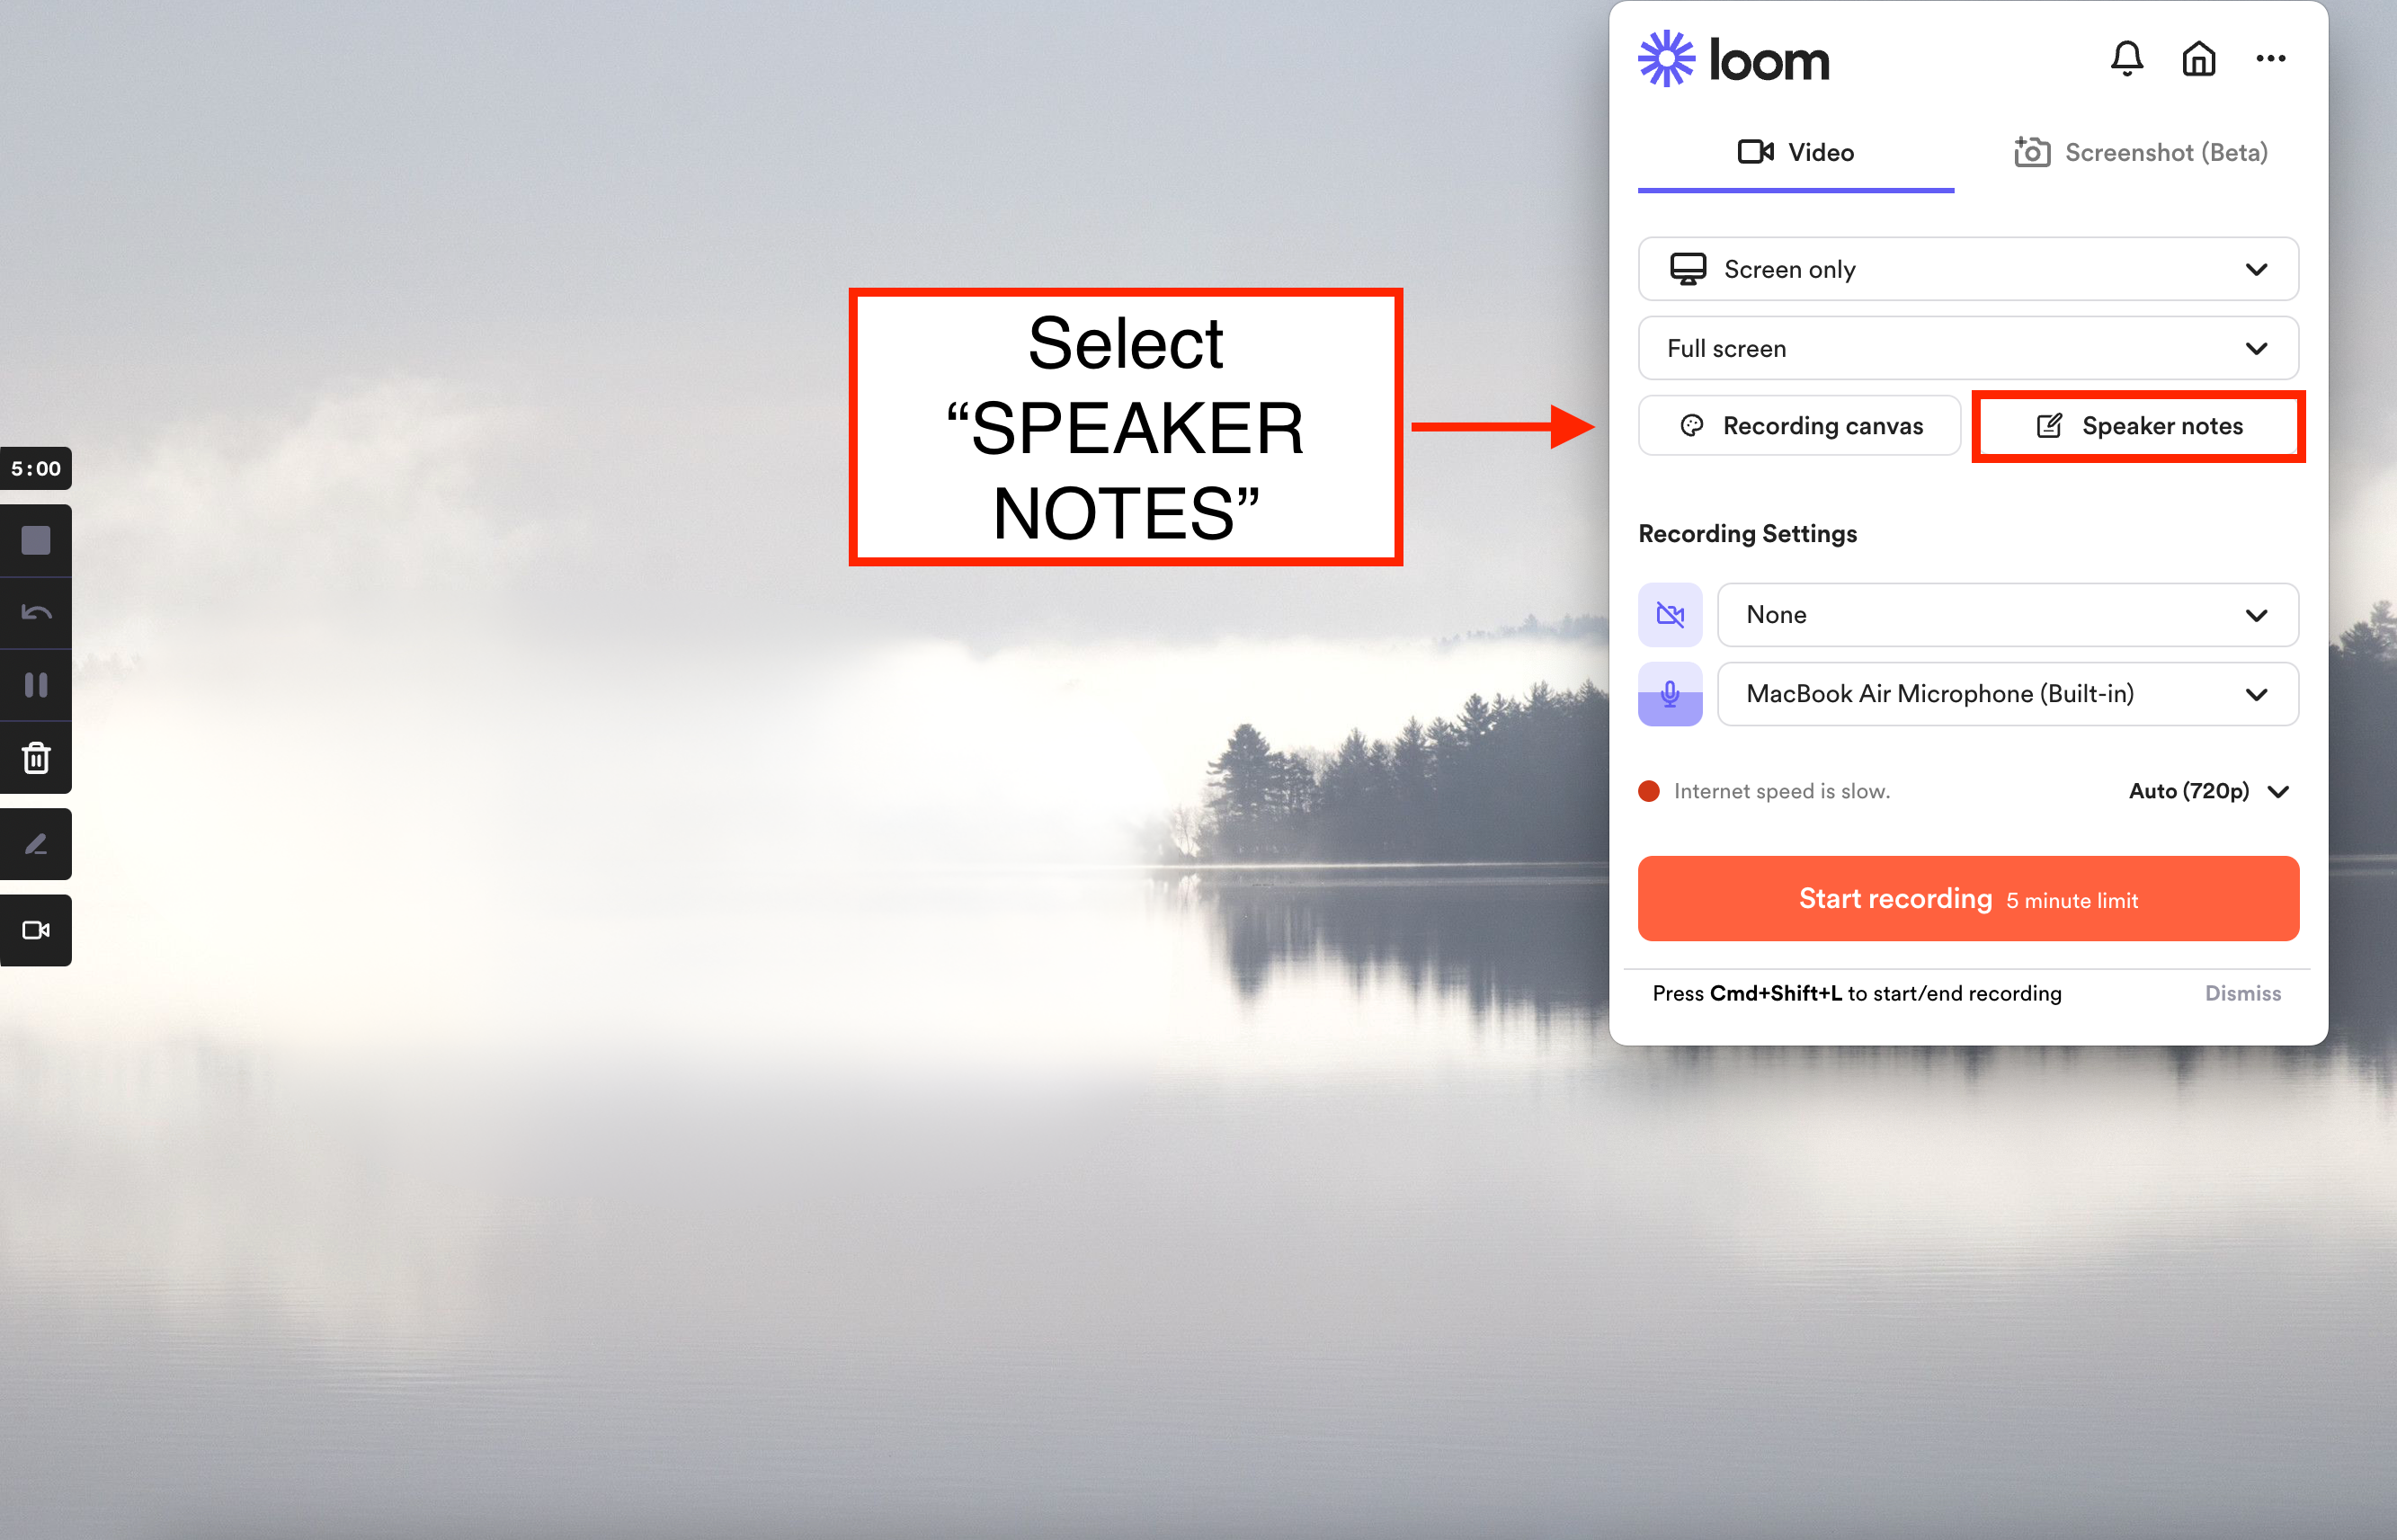
This is a helpful tool to accompany your video recordings with written notes and annotations. This feature is particularly useful when creating educational or training videos.
Once you start recording your screen or camera, Loom provides a space for entering your speaker notes. You can type in the speaker notes as you record, and they will be displayed alongside your video in the final version. Additionally, you can customize the font and placement of the speaker notes as per your choice. After finishing the recording, you can edit your video and speaker notes with Loom's editing tools before sharing them with others.
These allow you to choose the camera device to use during the recording

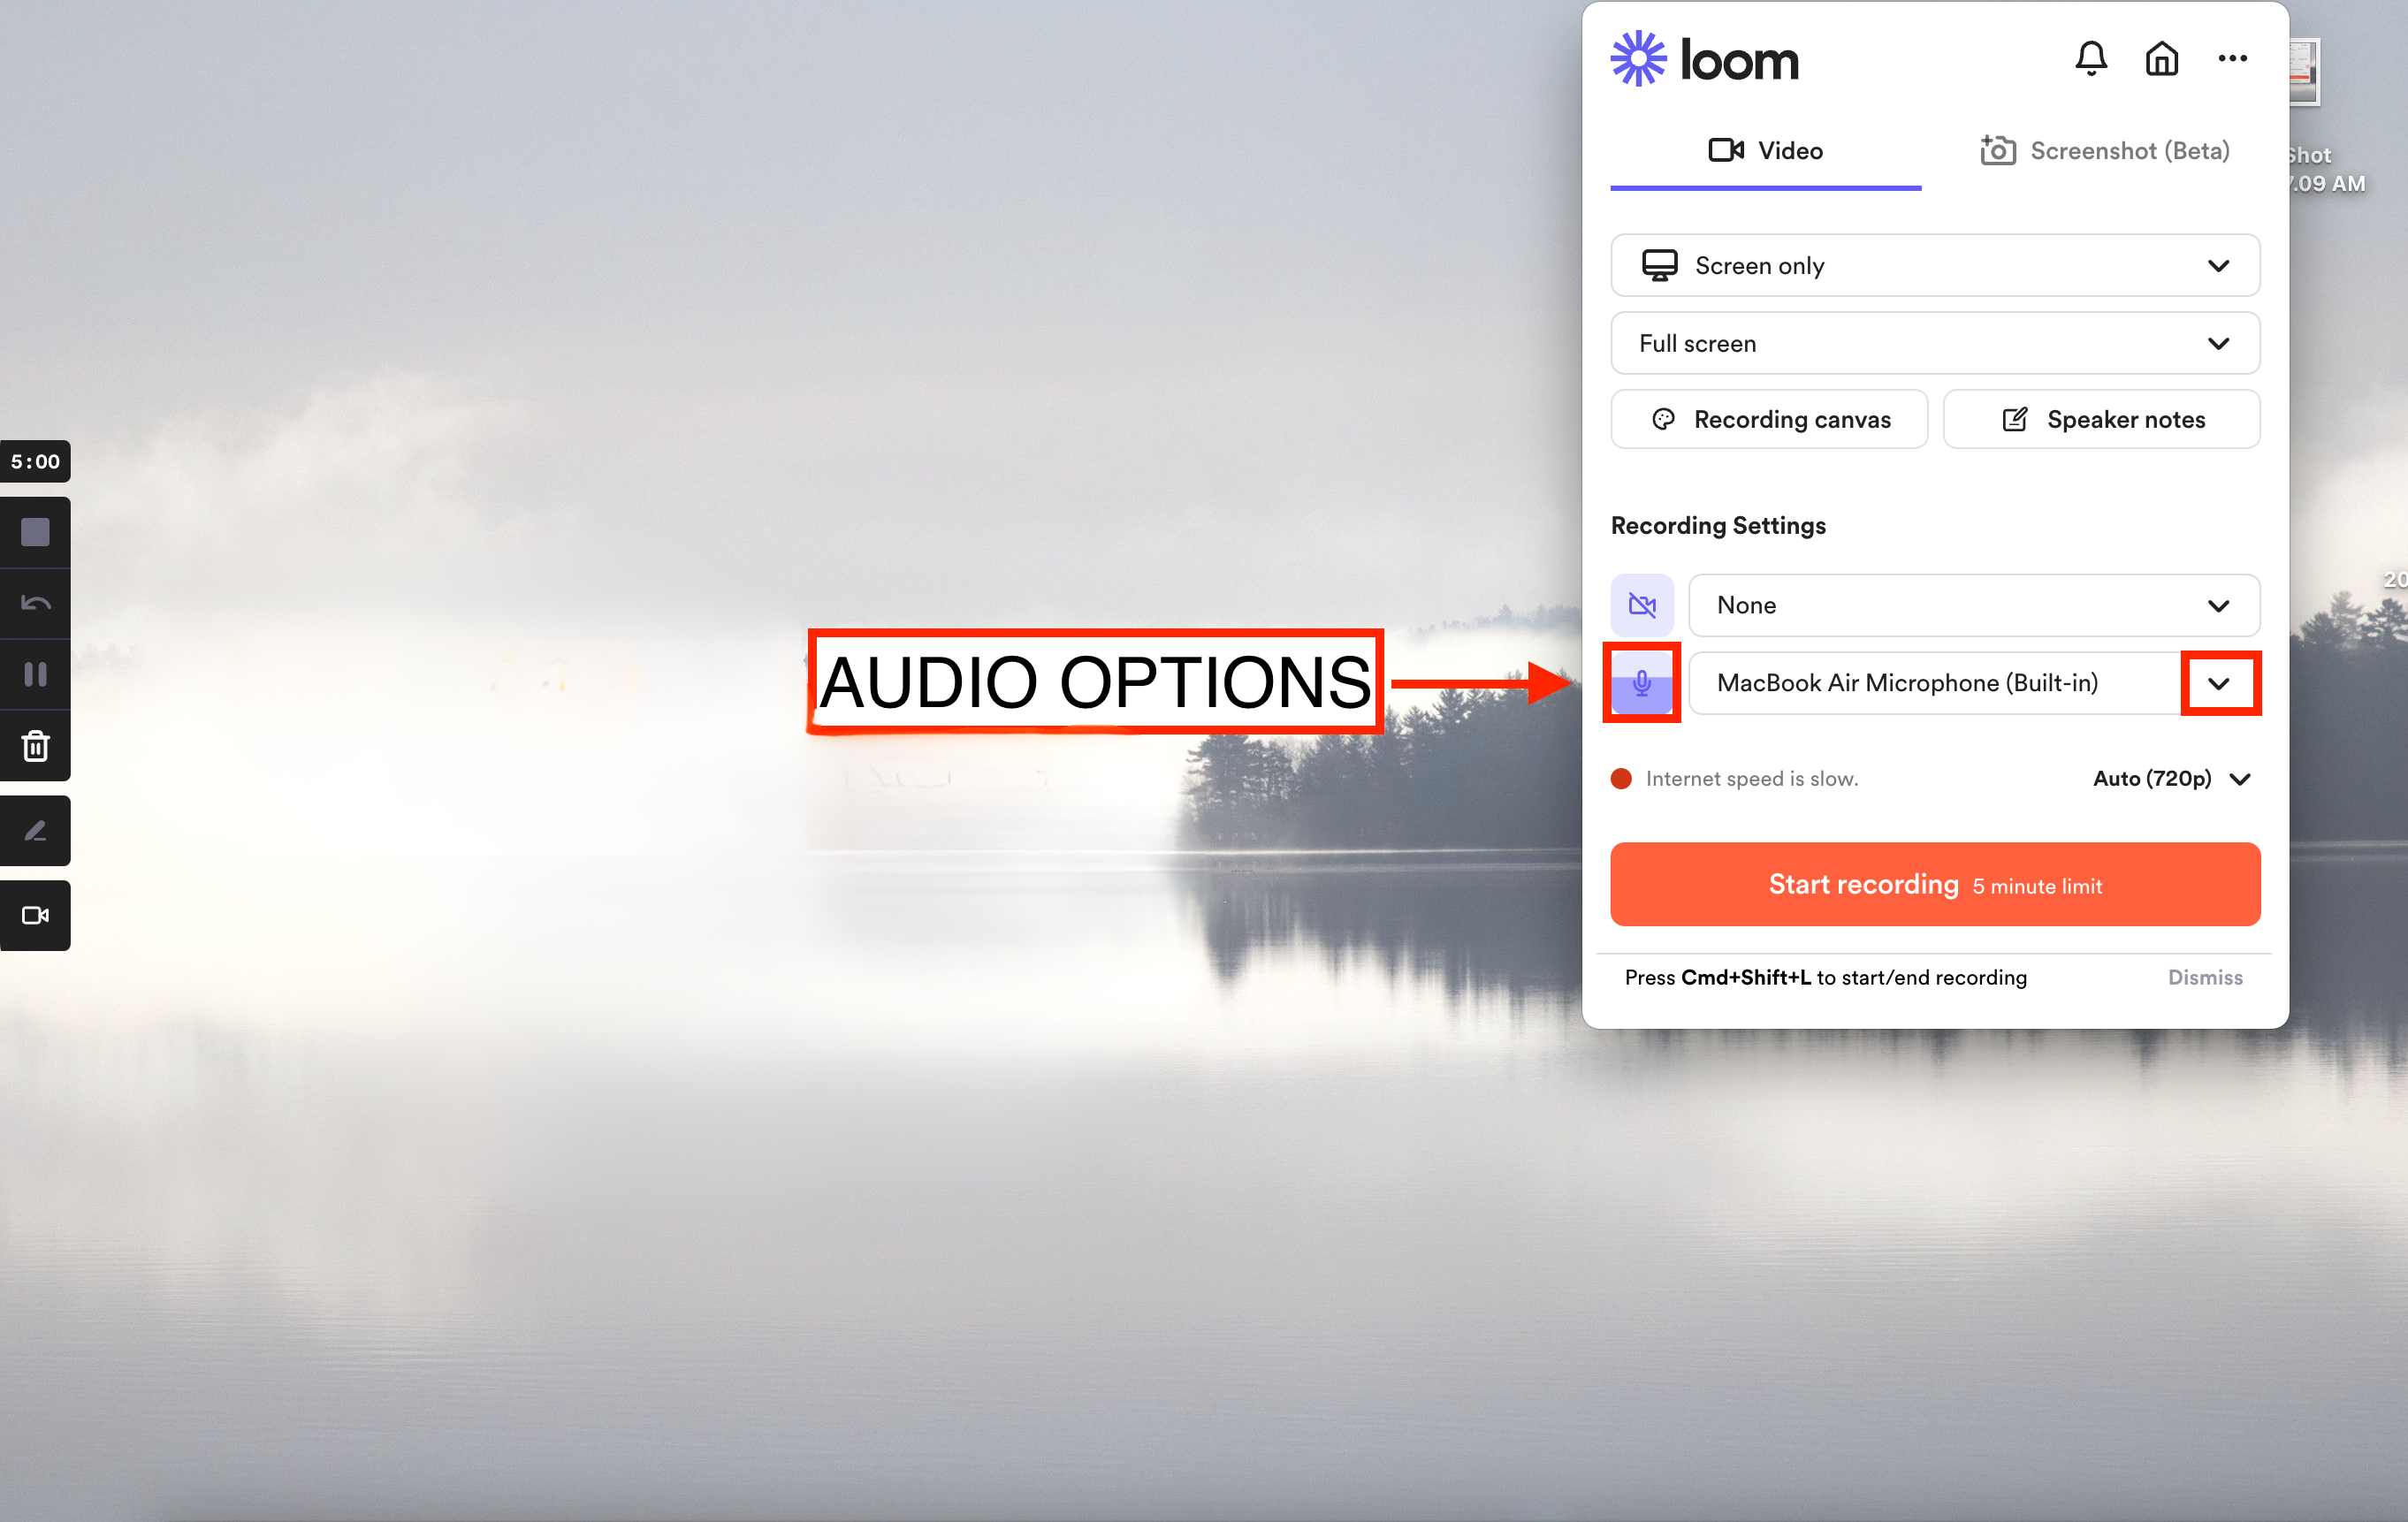
These allow you to choose the audio device (which mic - built-in or external) to use during the recording
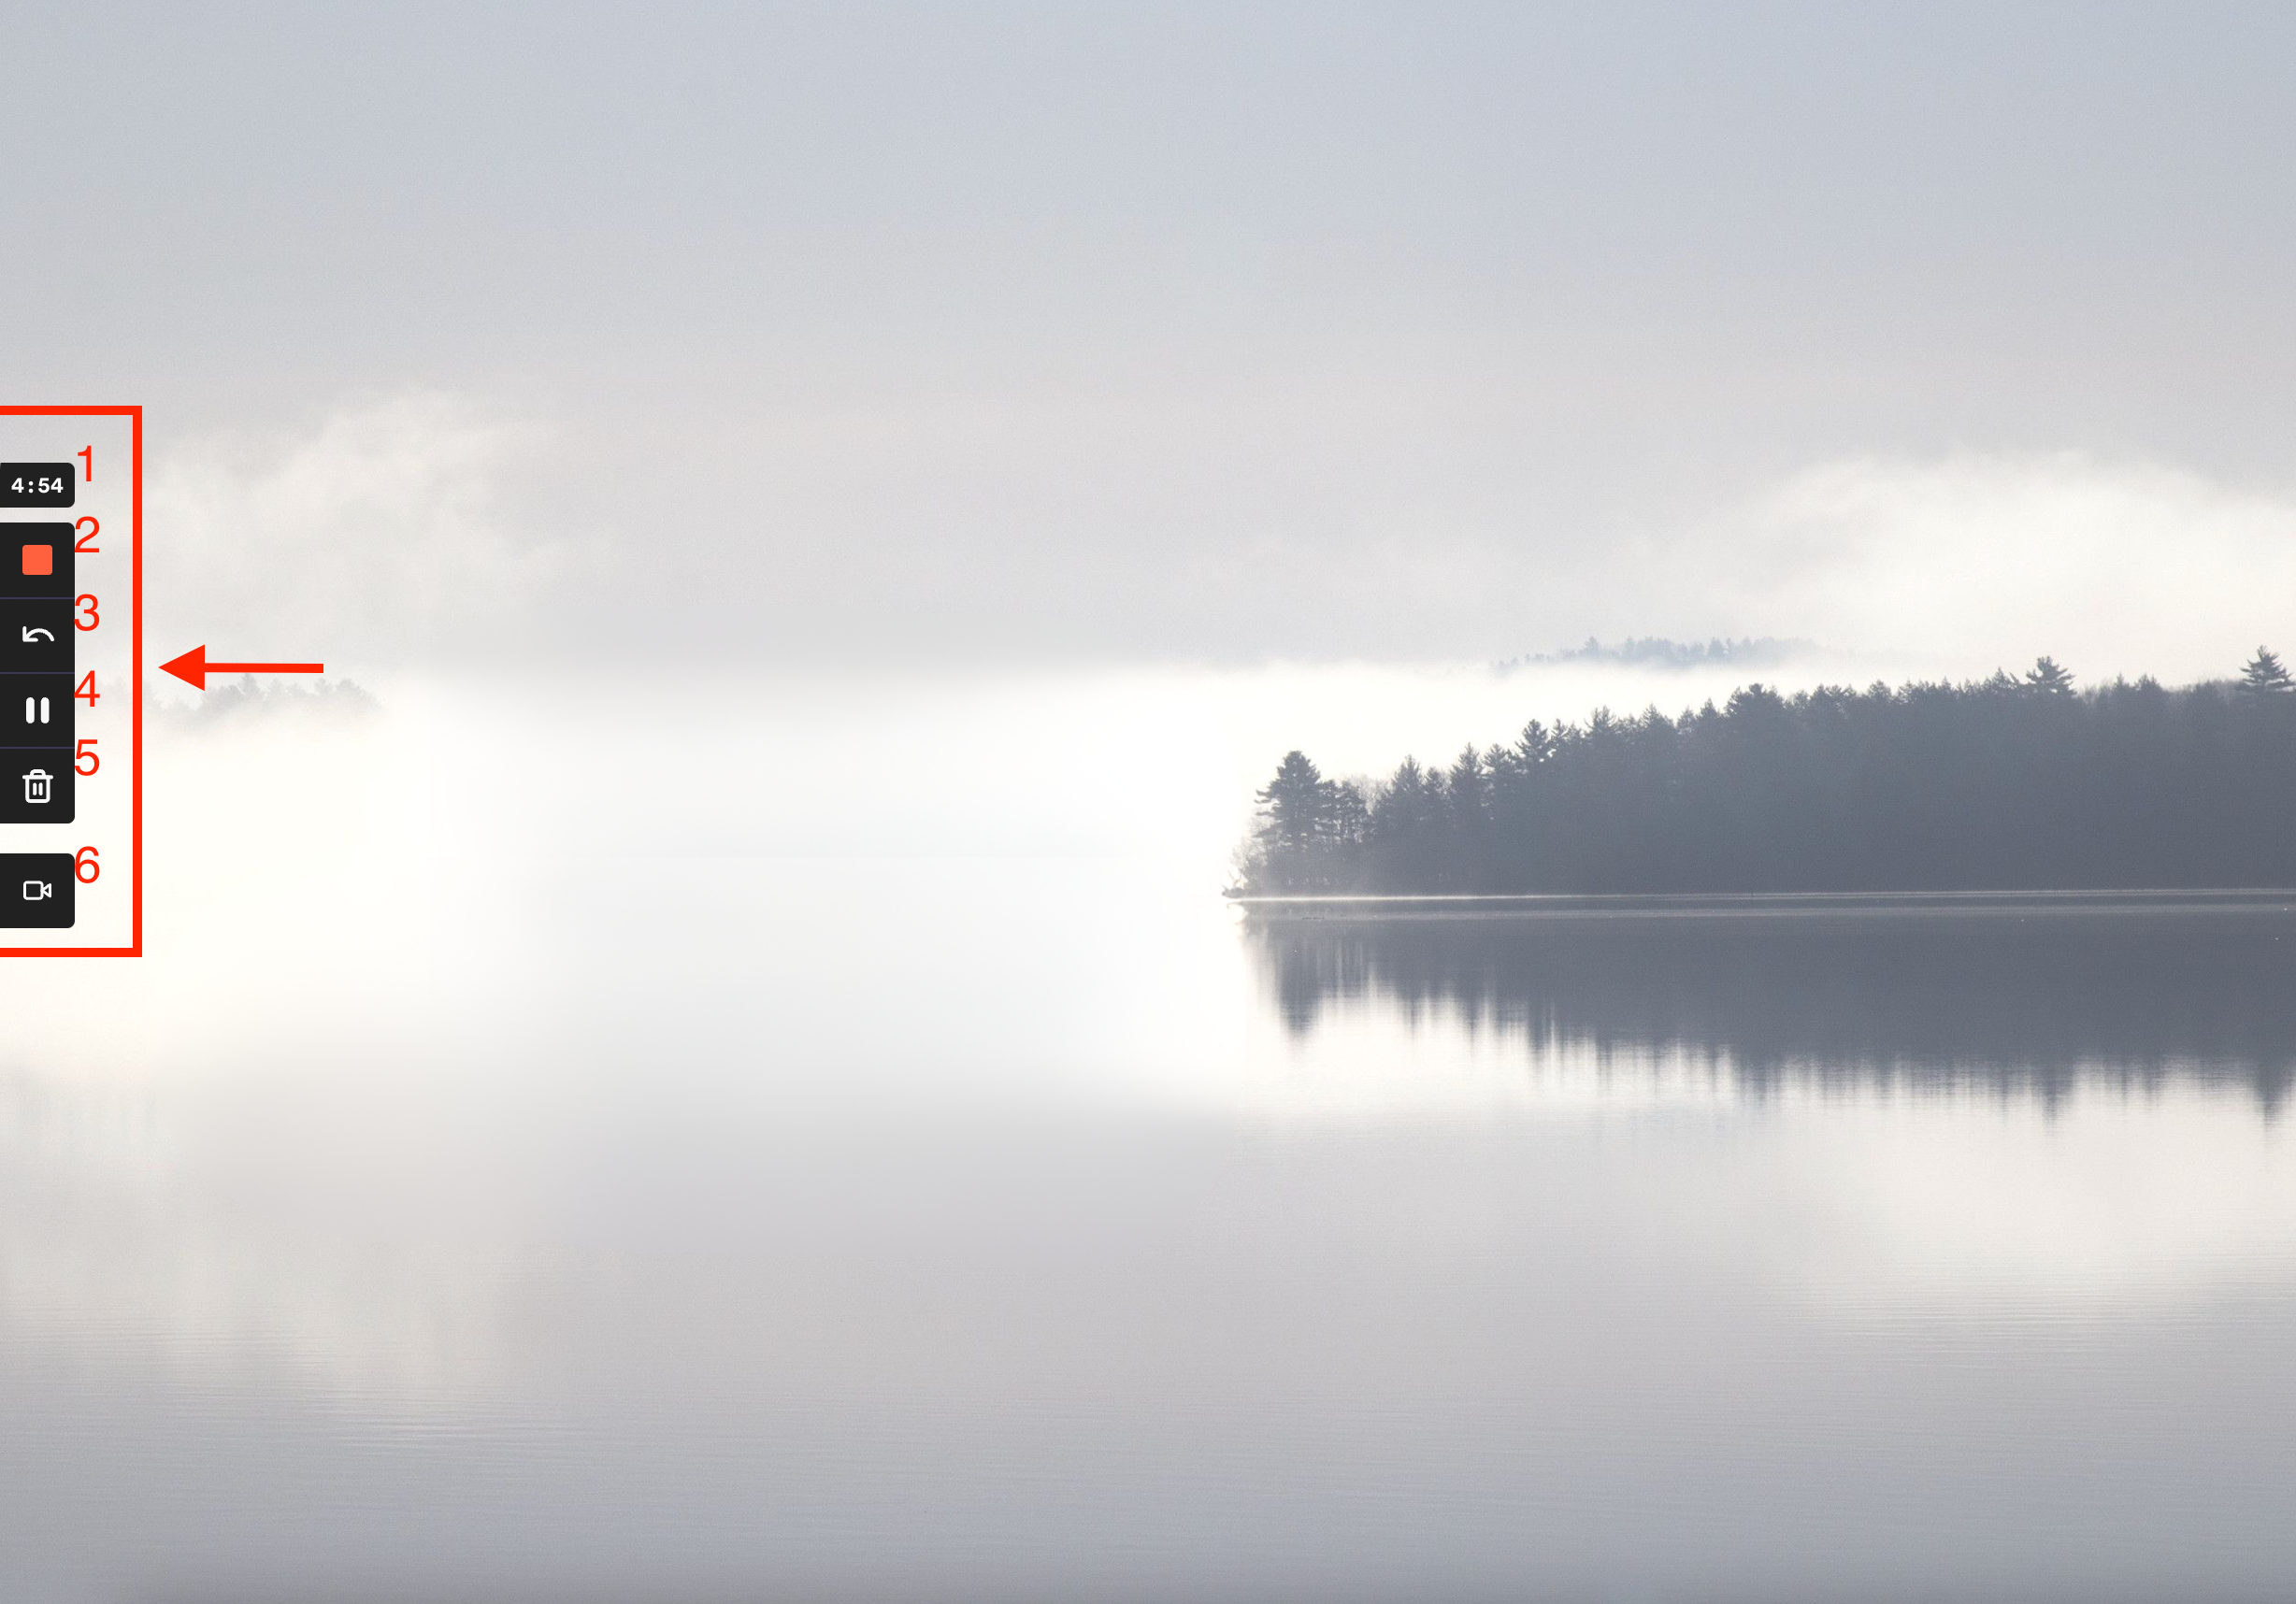
TIME - This shows the time spent recording.
STOP - This allows you to stop. Once you click stop, Loom will automatically save your recording.
RESTART - This allows you to restart your recording again.
PAUSE - This will temporarily pause the recording, and you can resume recording by clicking on the "Resume" button.
CANCEL - This will immediately end your current recording and Loom will save any recorded footage. If you do not want to save the footage, you can choose to delete it afterward. It's important to note that once you cancel a recording, you cannot recover it.
ADD CAMERA - This allows you to add a camera during recording.
FULL SCREEN - This enables you to take screenshots of your entire screen or specific applications in full-screen mode.
WINDOW - (this option is coming soon)
CUSTOM SIZE - This allows you to take screenshots at a specific size or resolution rather than a predefined option.