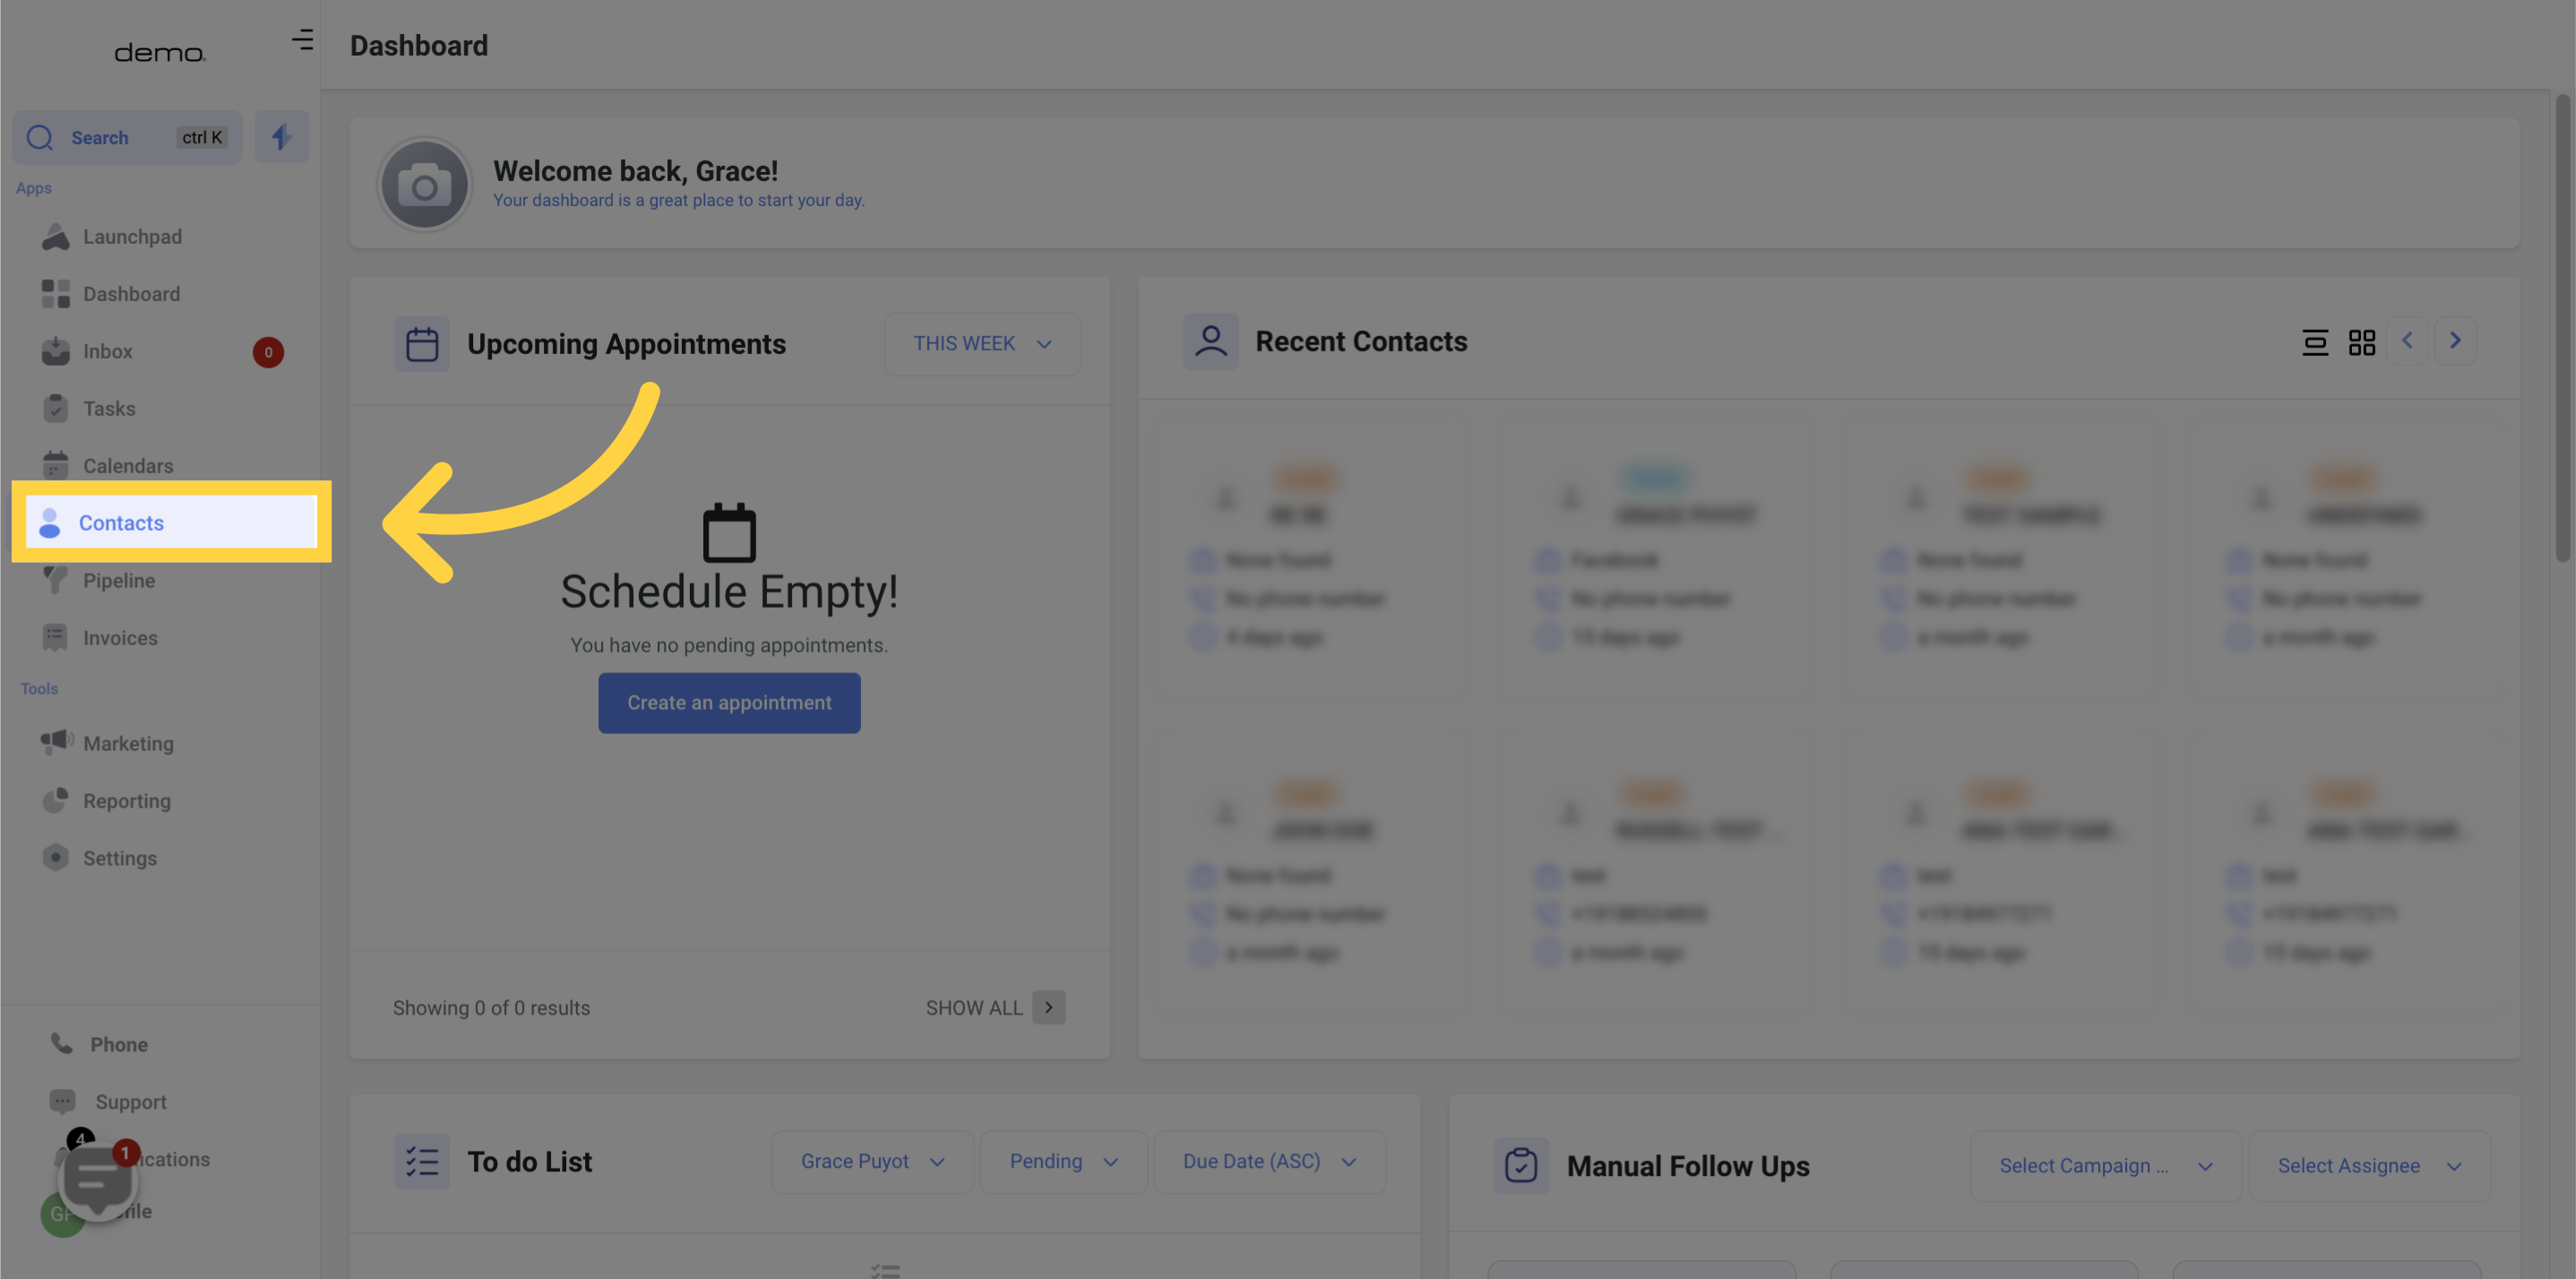
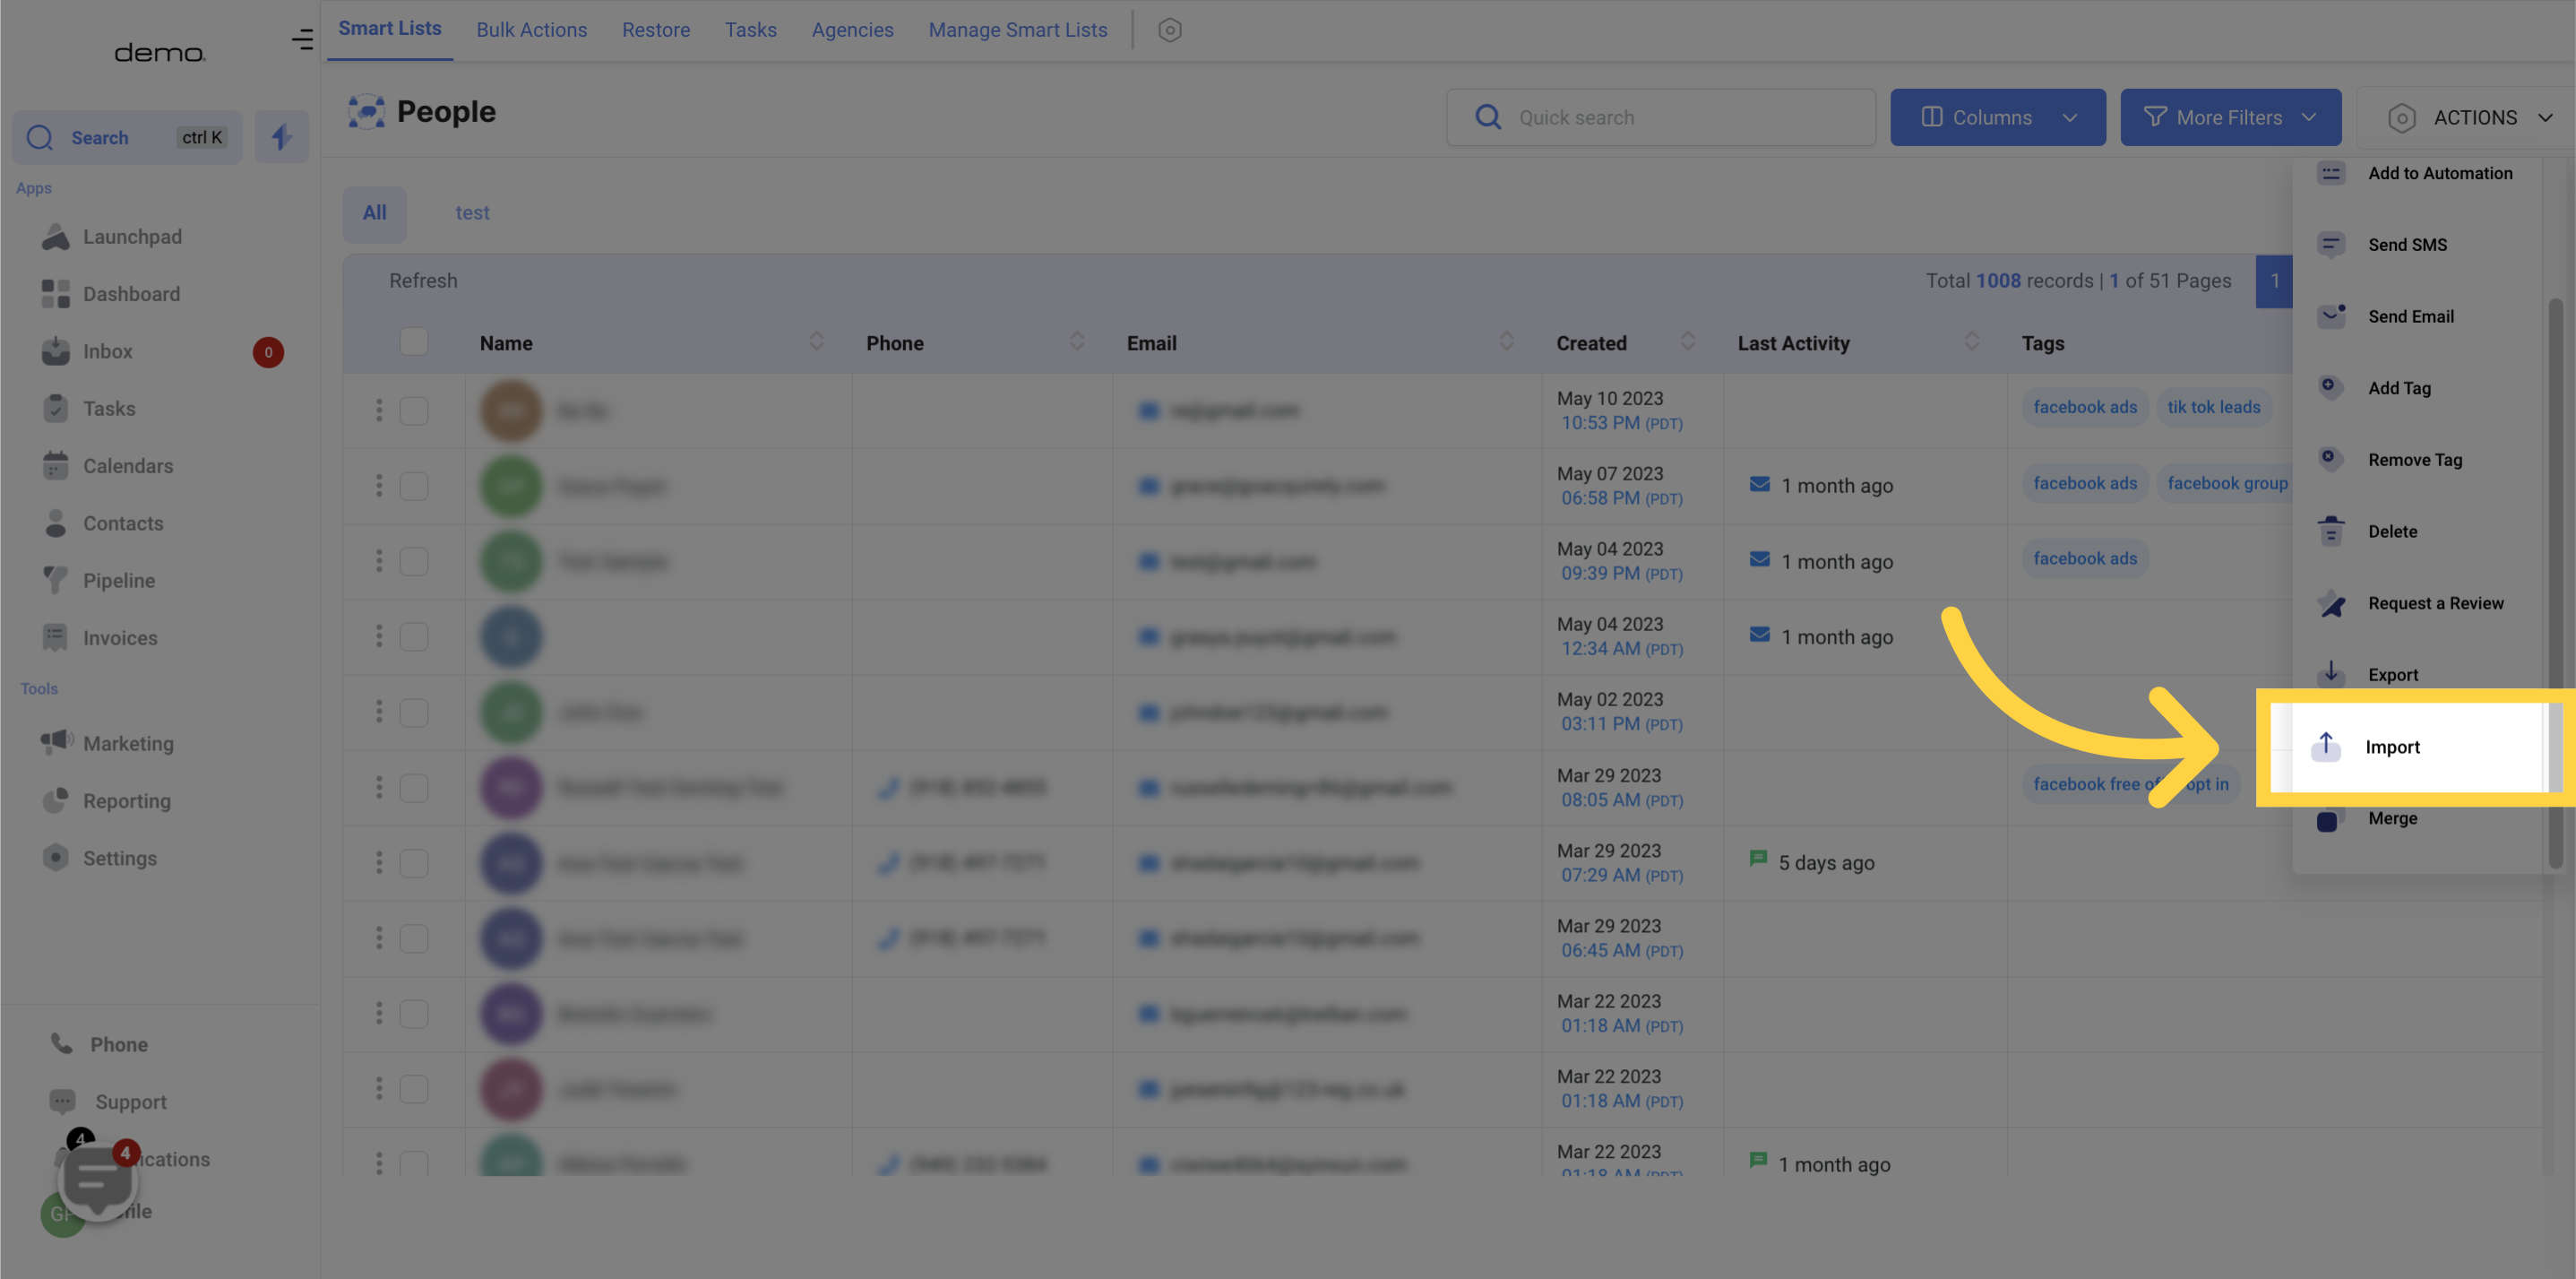
Select the "Contacts" option.
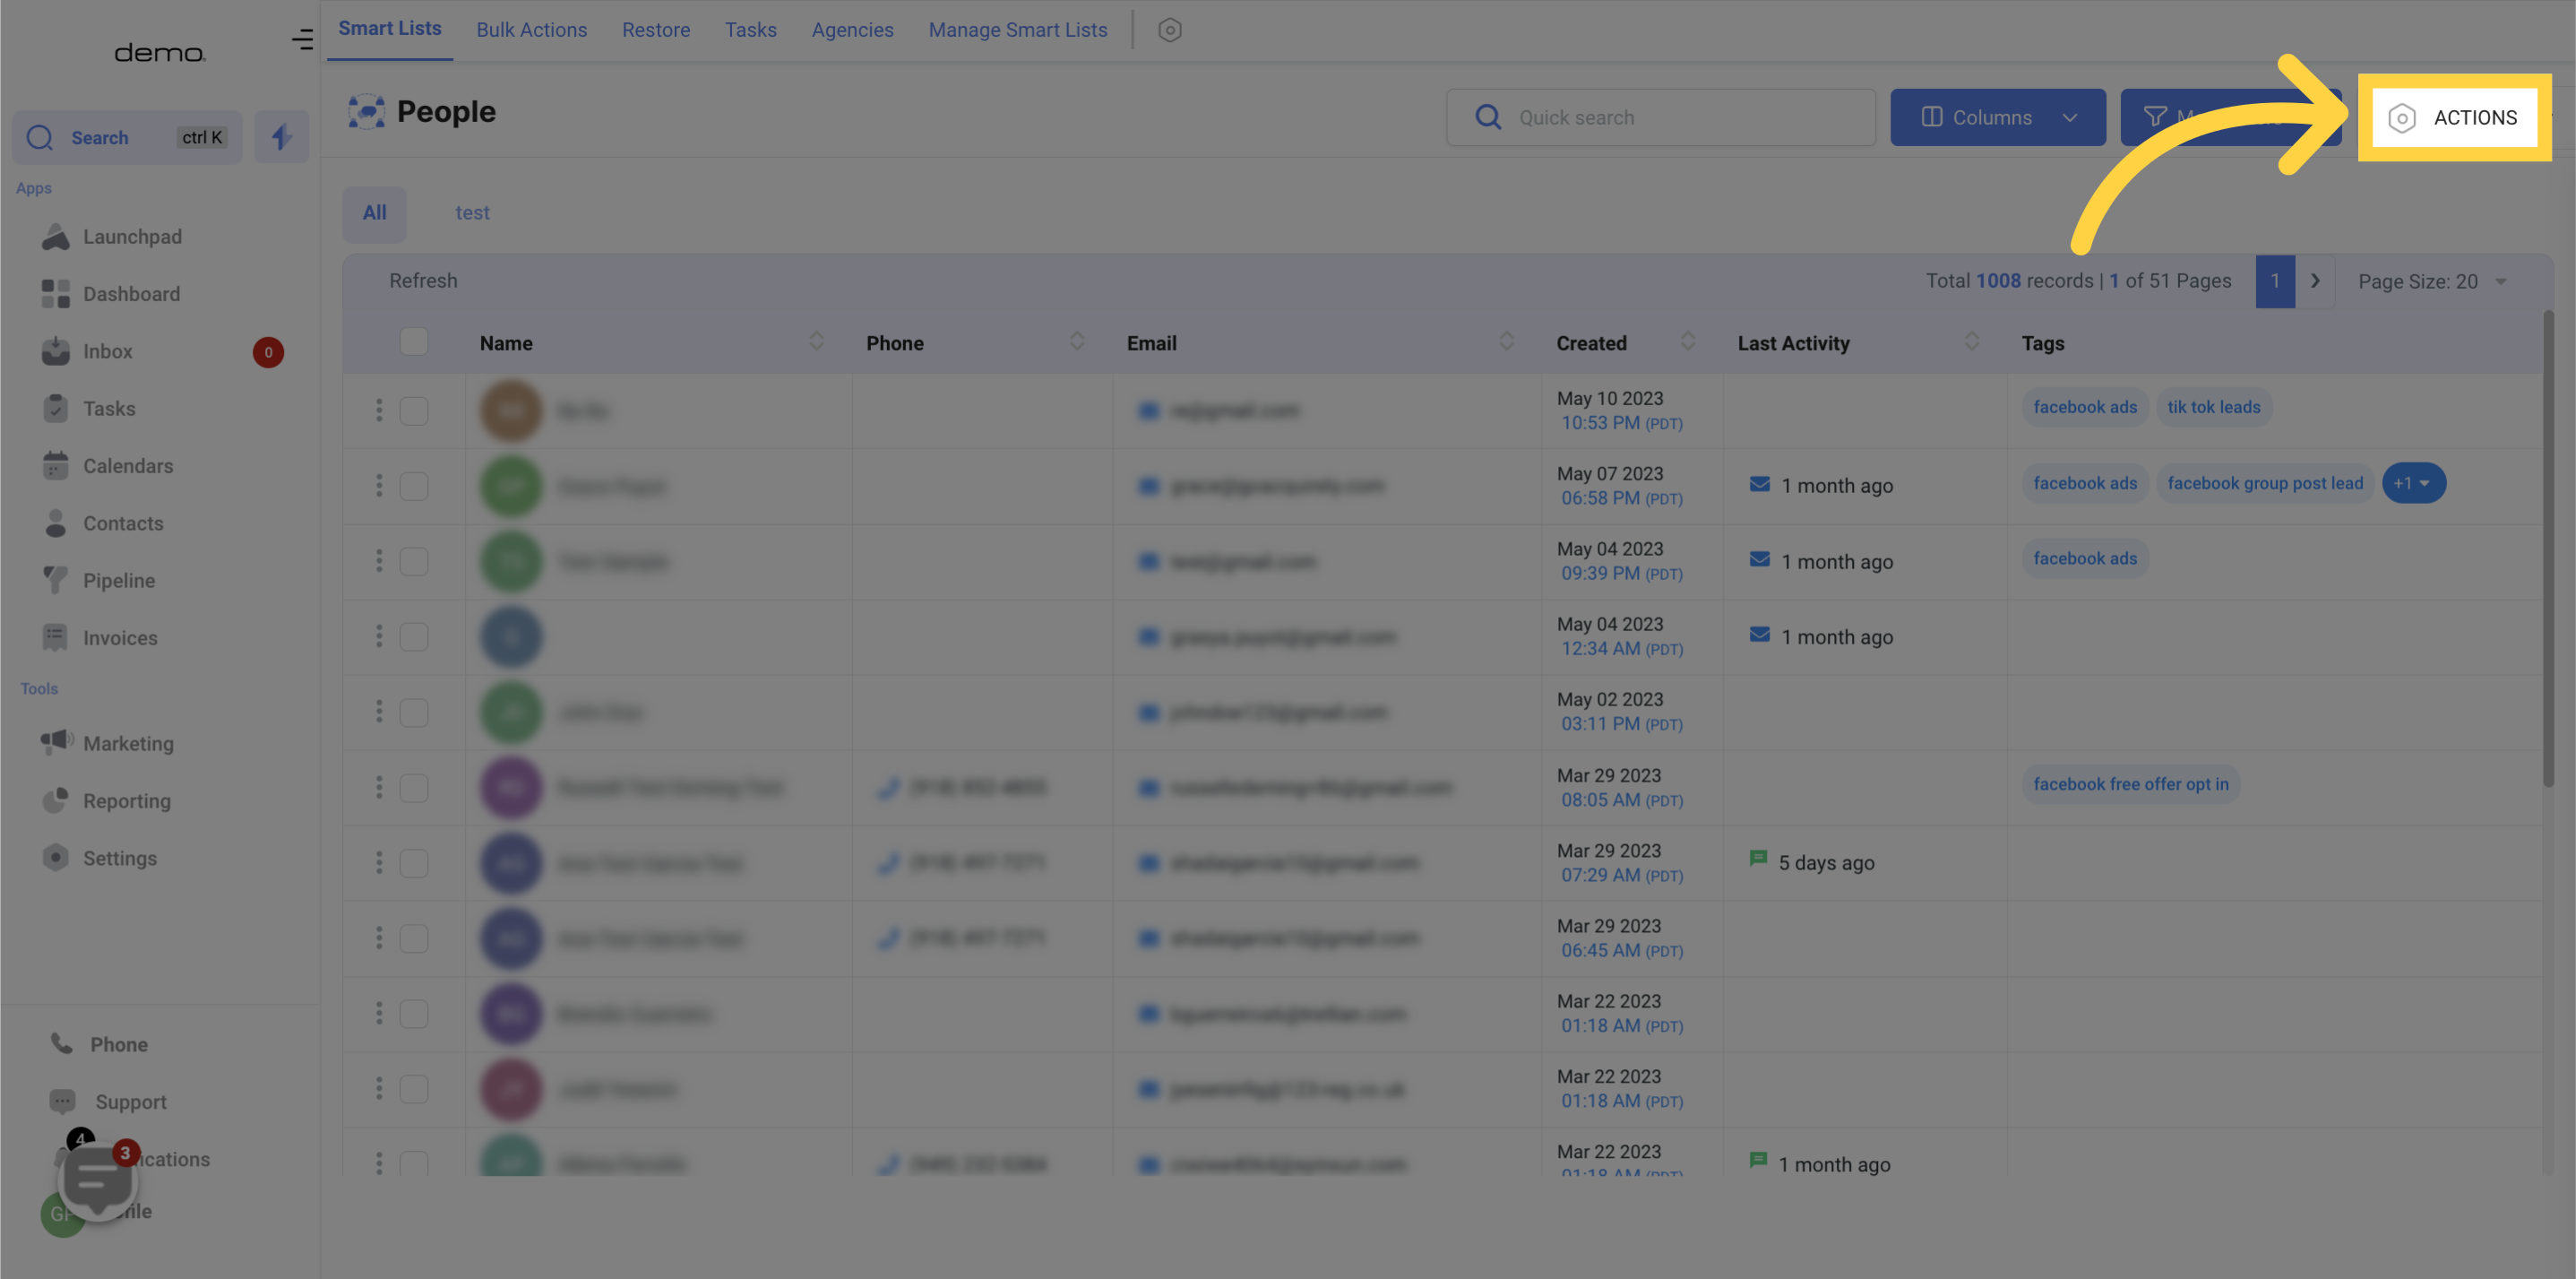
Click on "Actions".
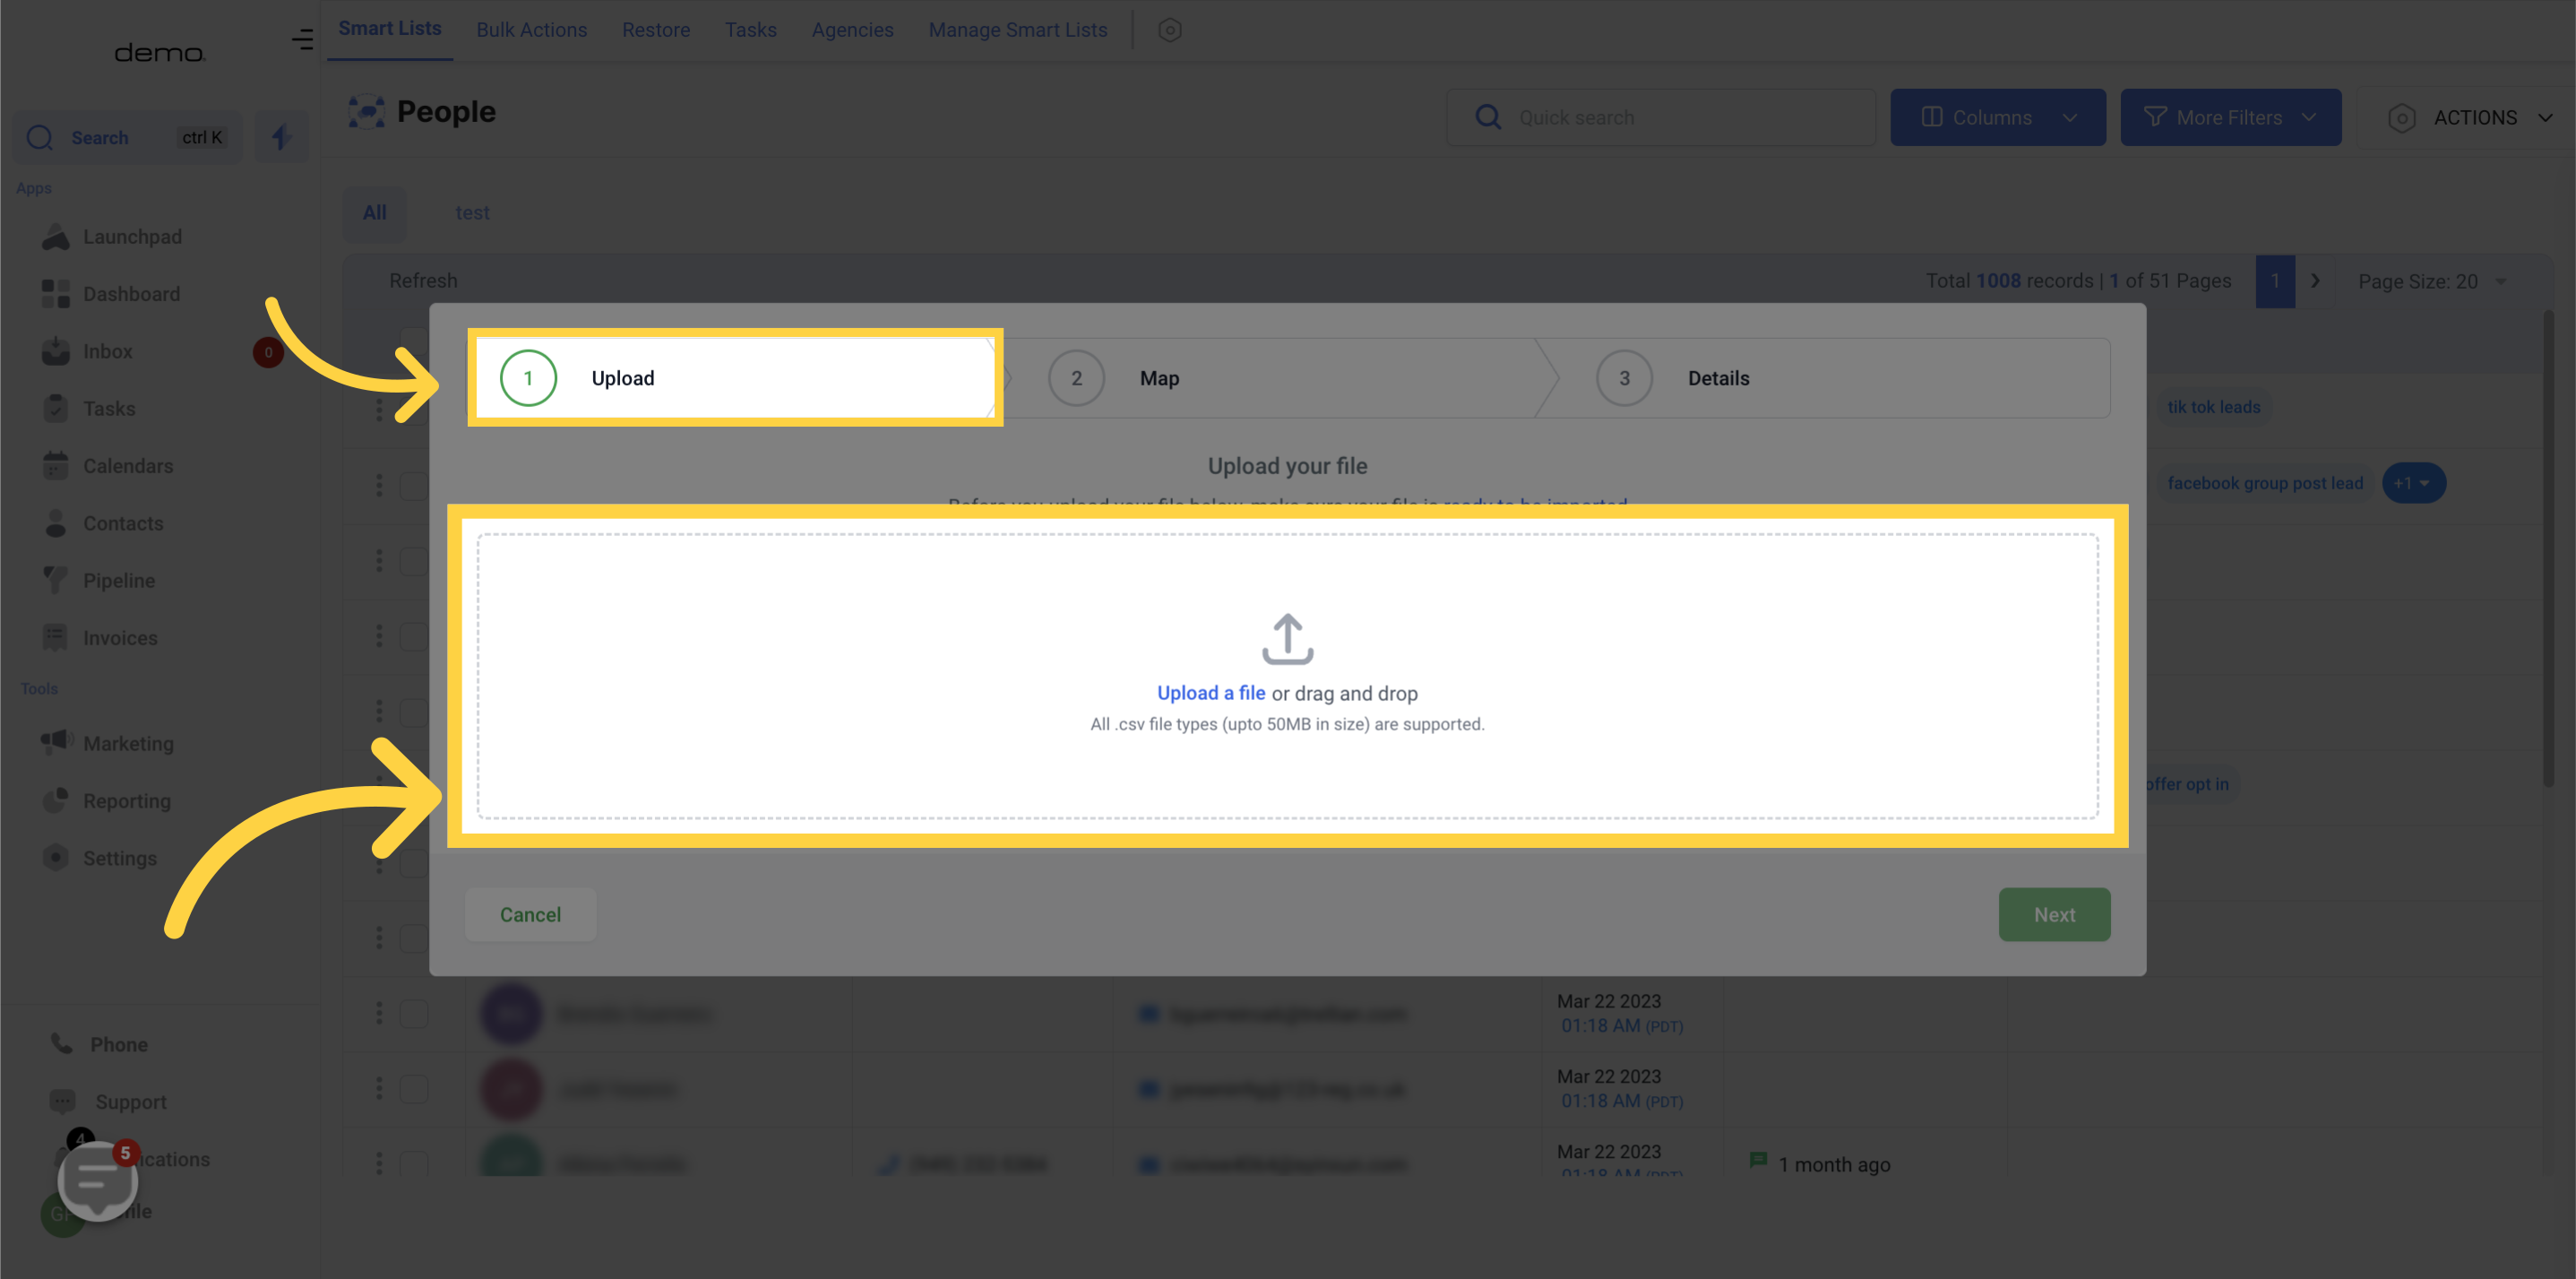
Select the "Upload a file or drag and drop" option, and ensure that the CSV file is of supported size.
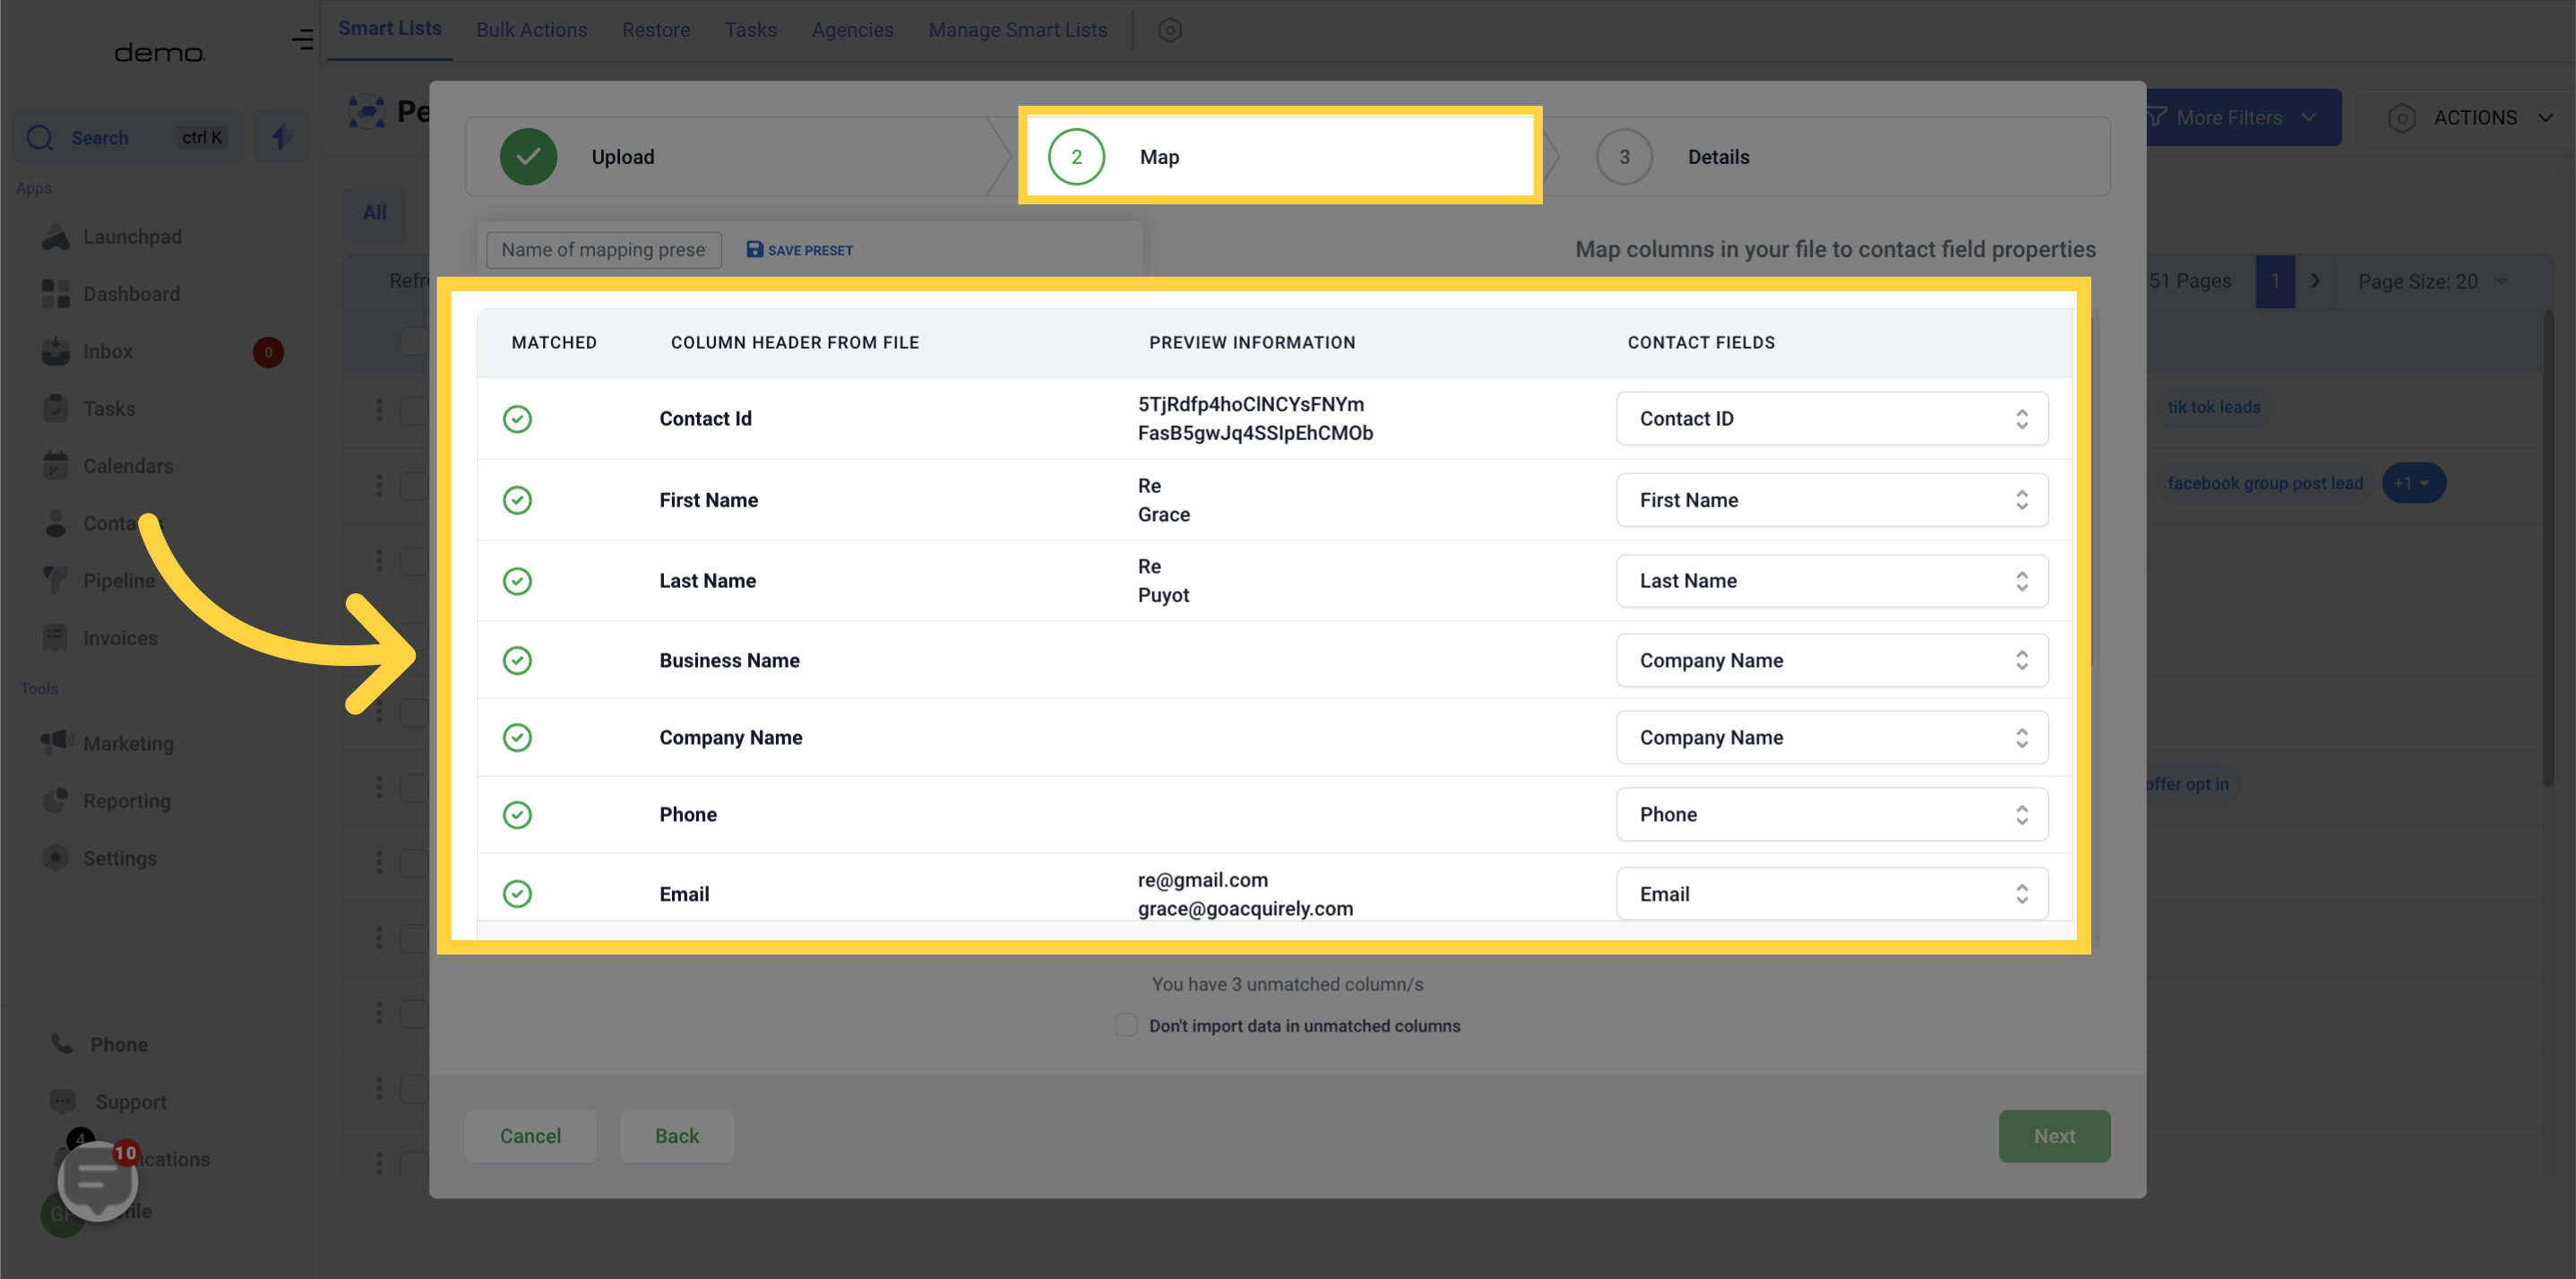
You have the ability to align the column from the imported file with the suitable contact field in the system. Additionally, there is an option to preview the aligned information in the preview column.
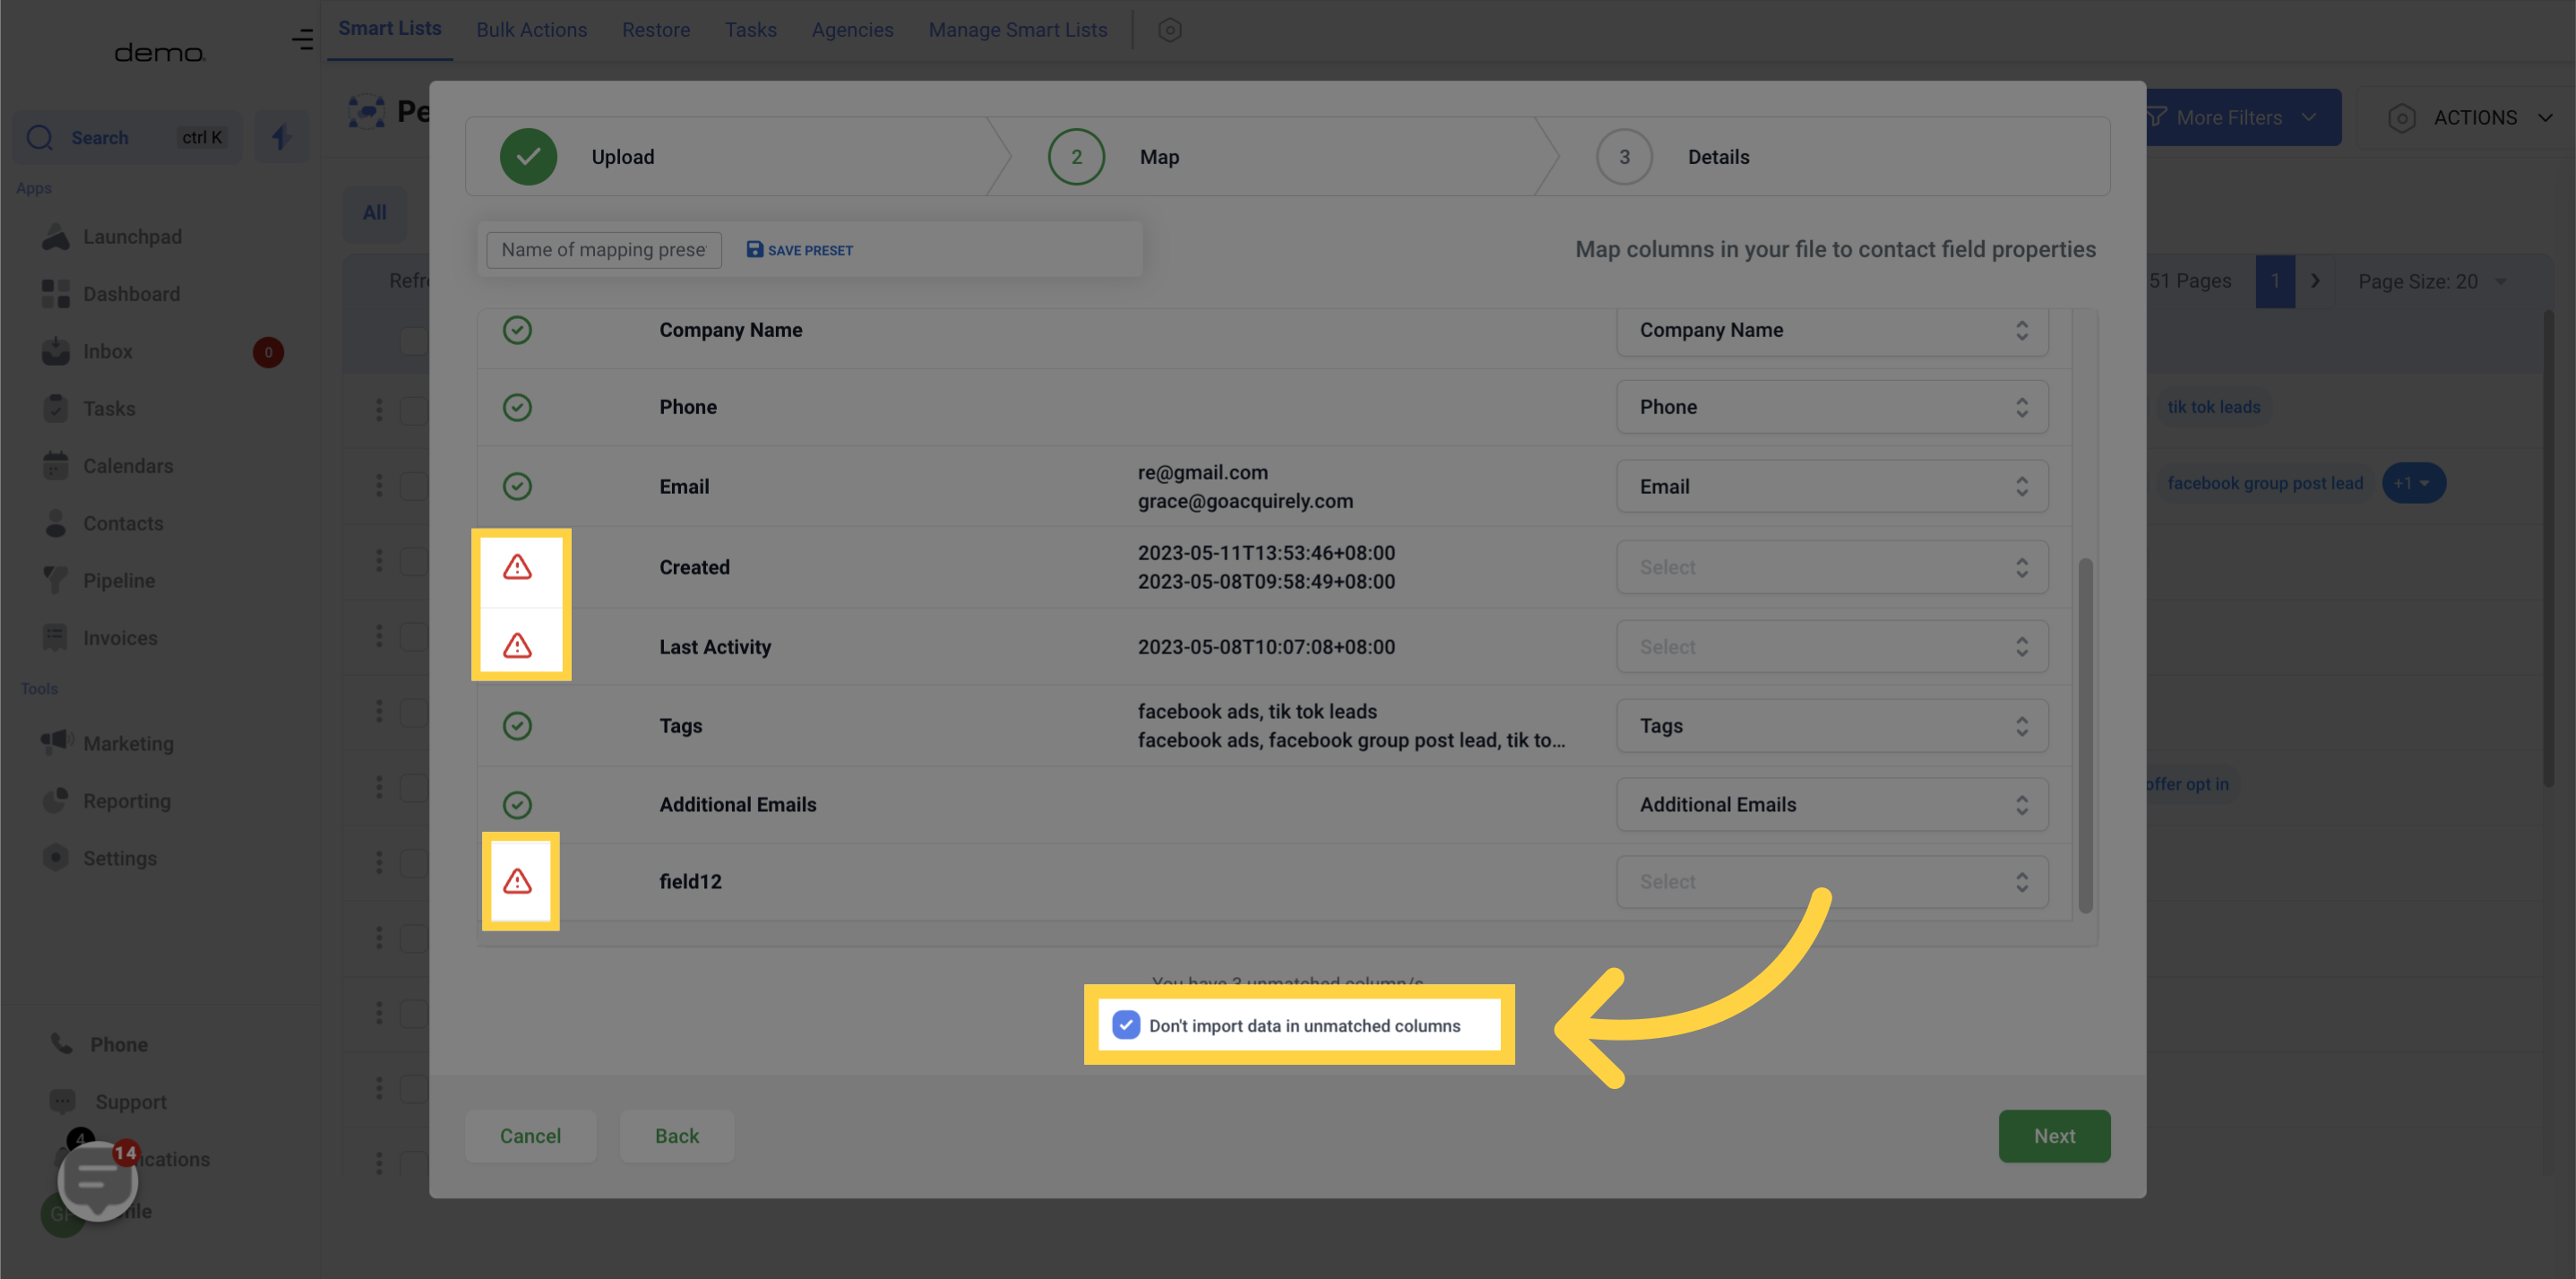
In case you have any column(s) that do not match, you must select the "Don't import data in unmatched column" option to proceed to the following step. Unless you check this option, you cannot proceed to the next step.
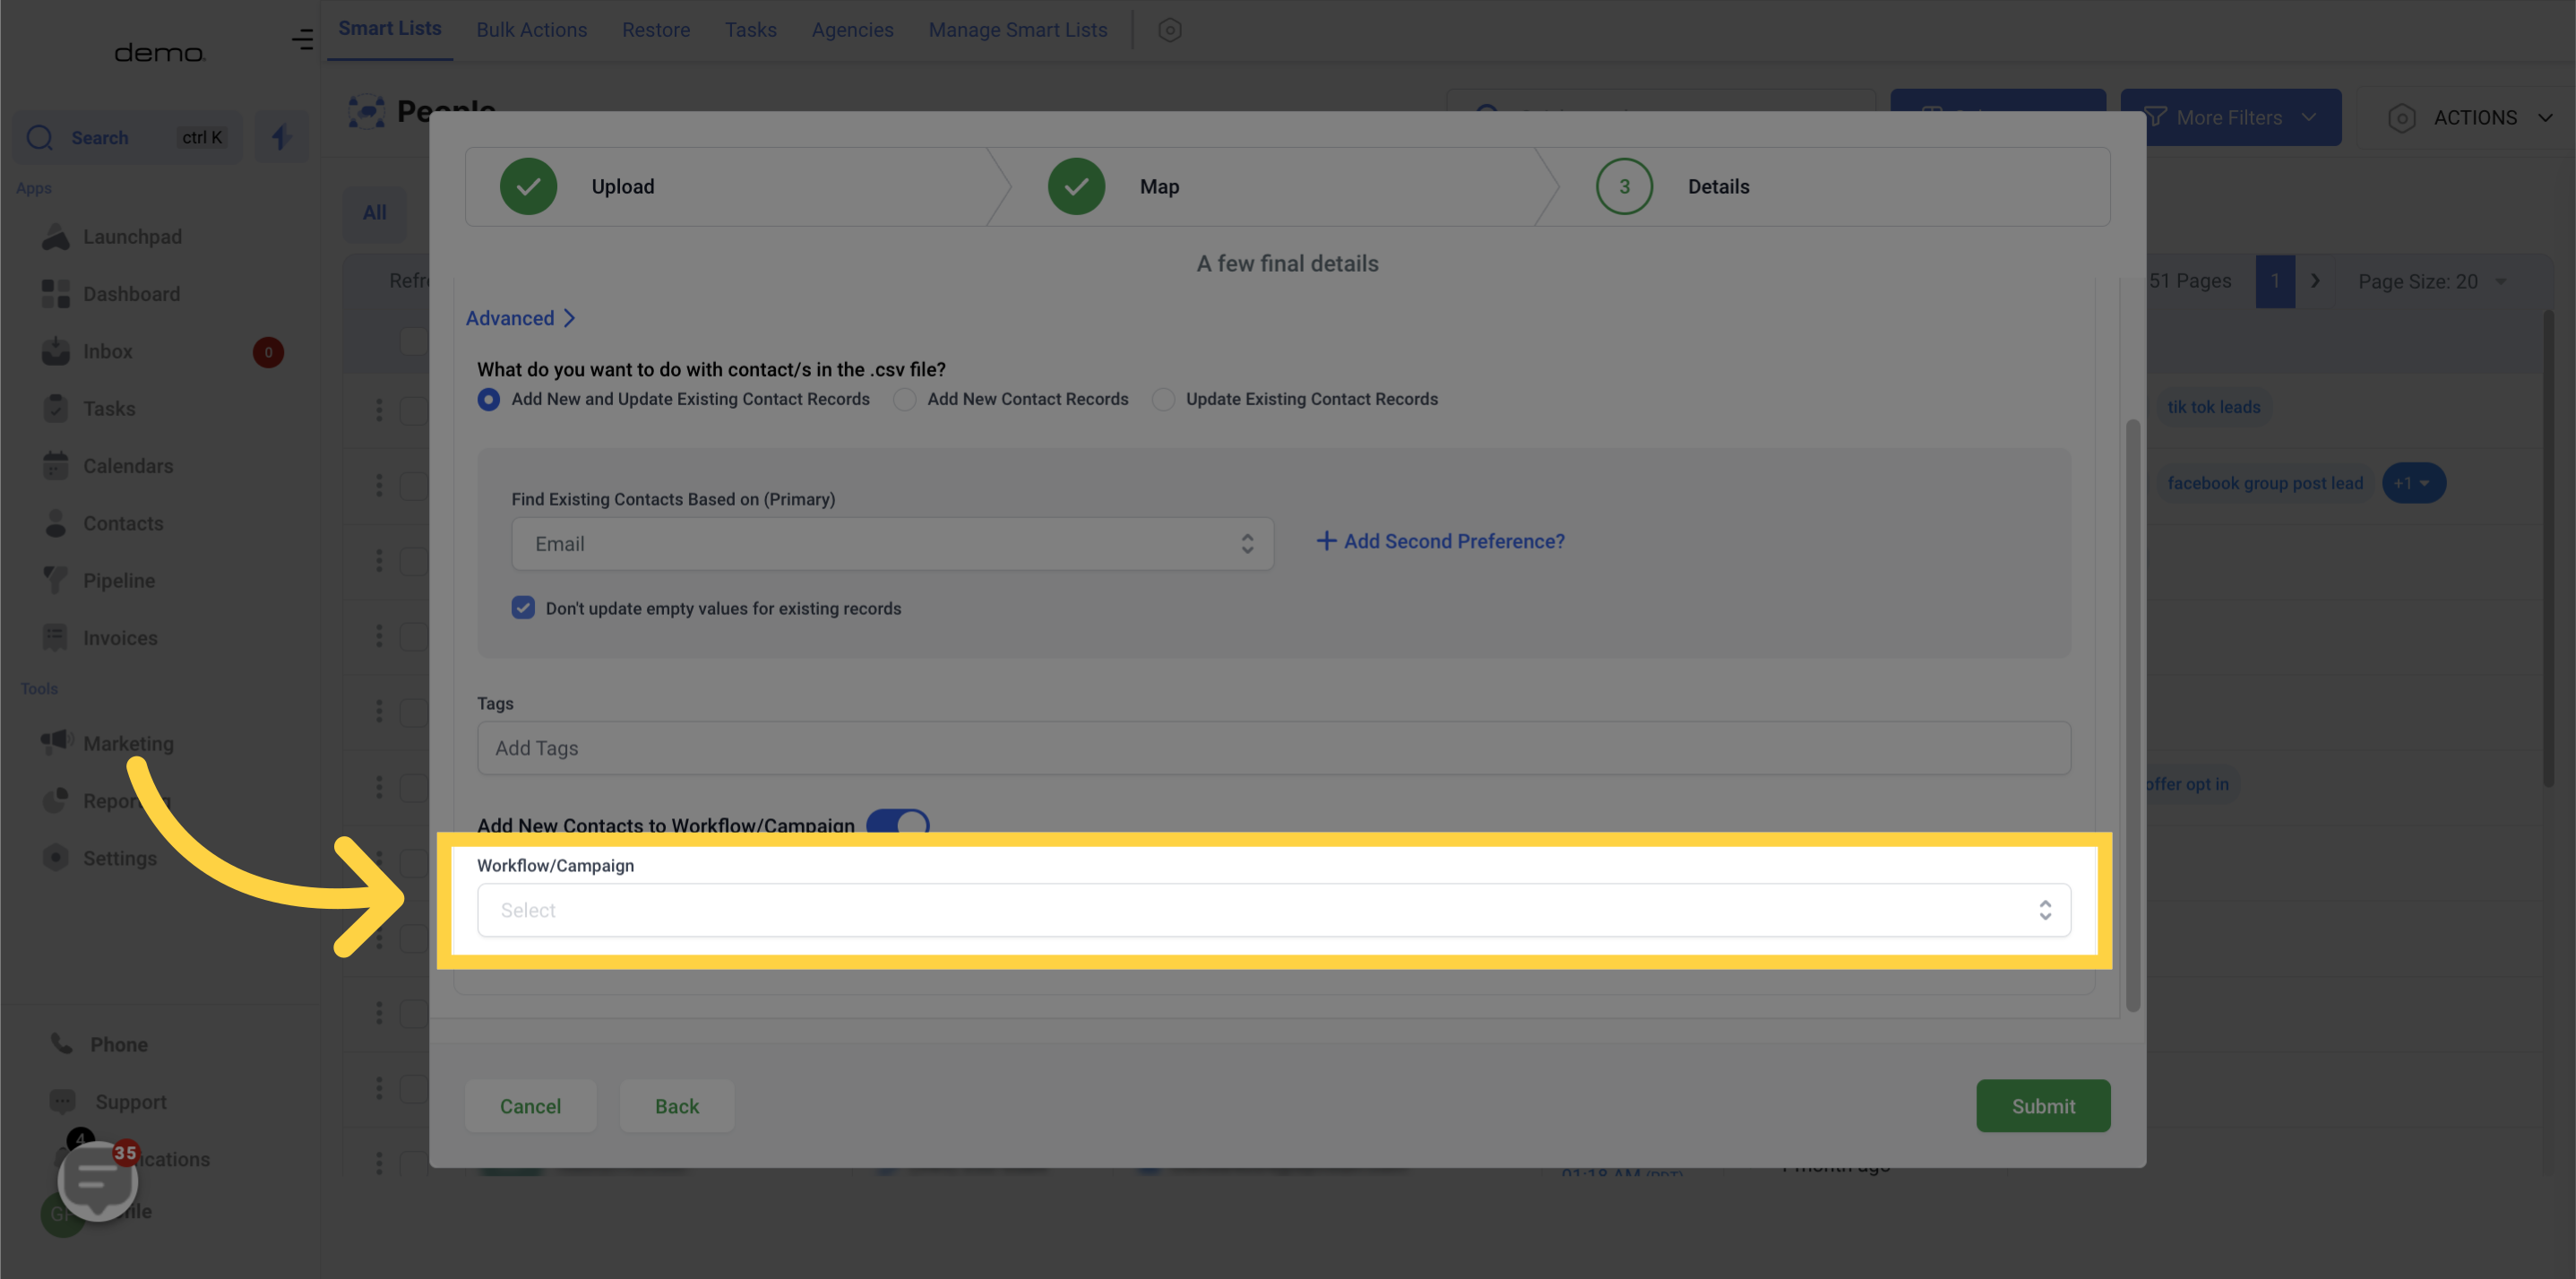
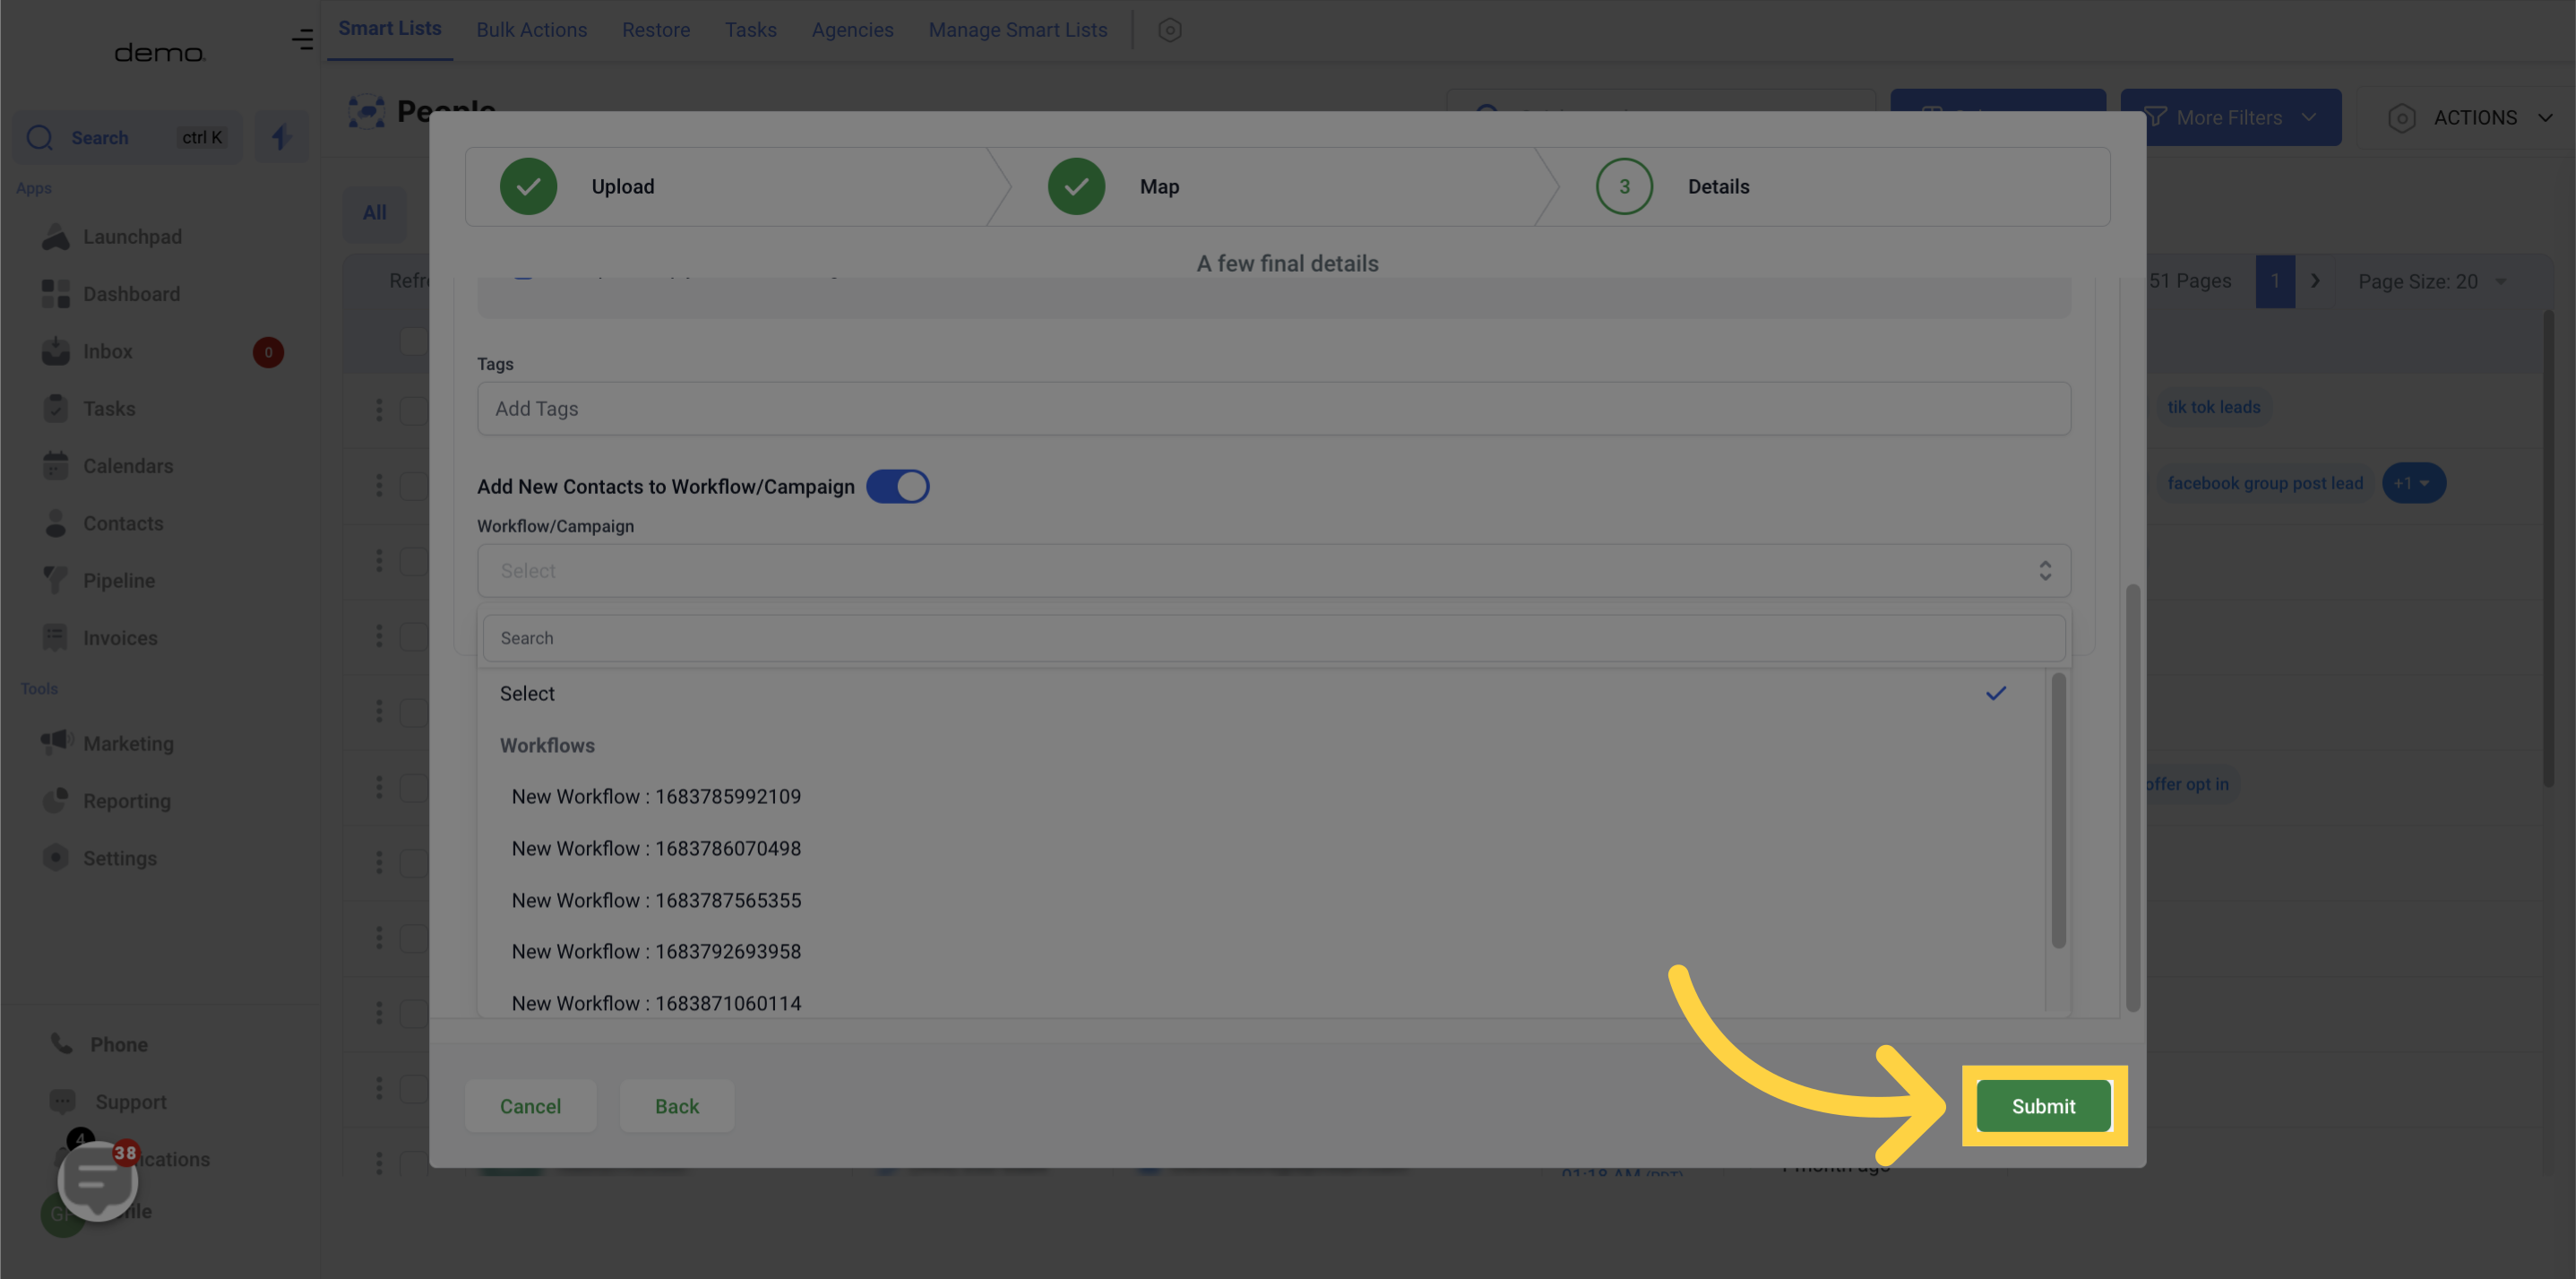
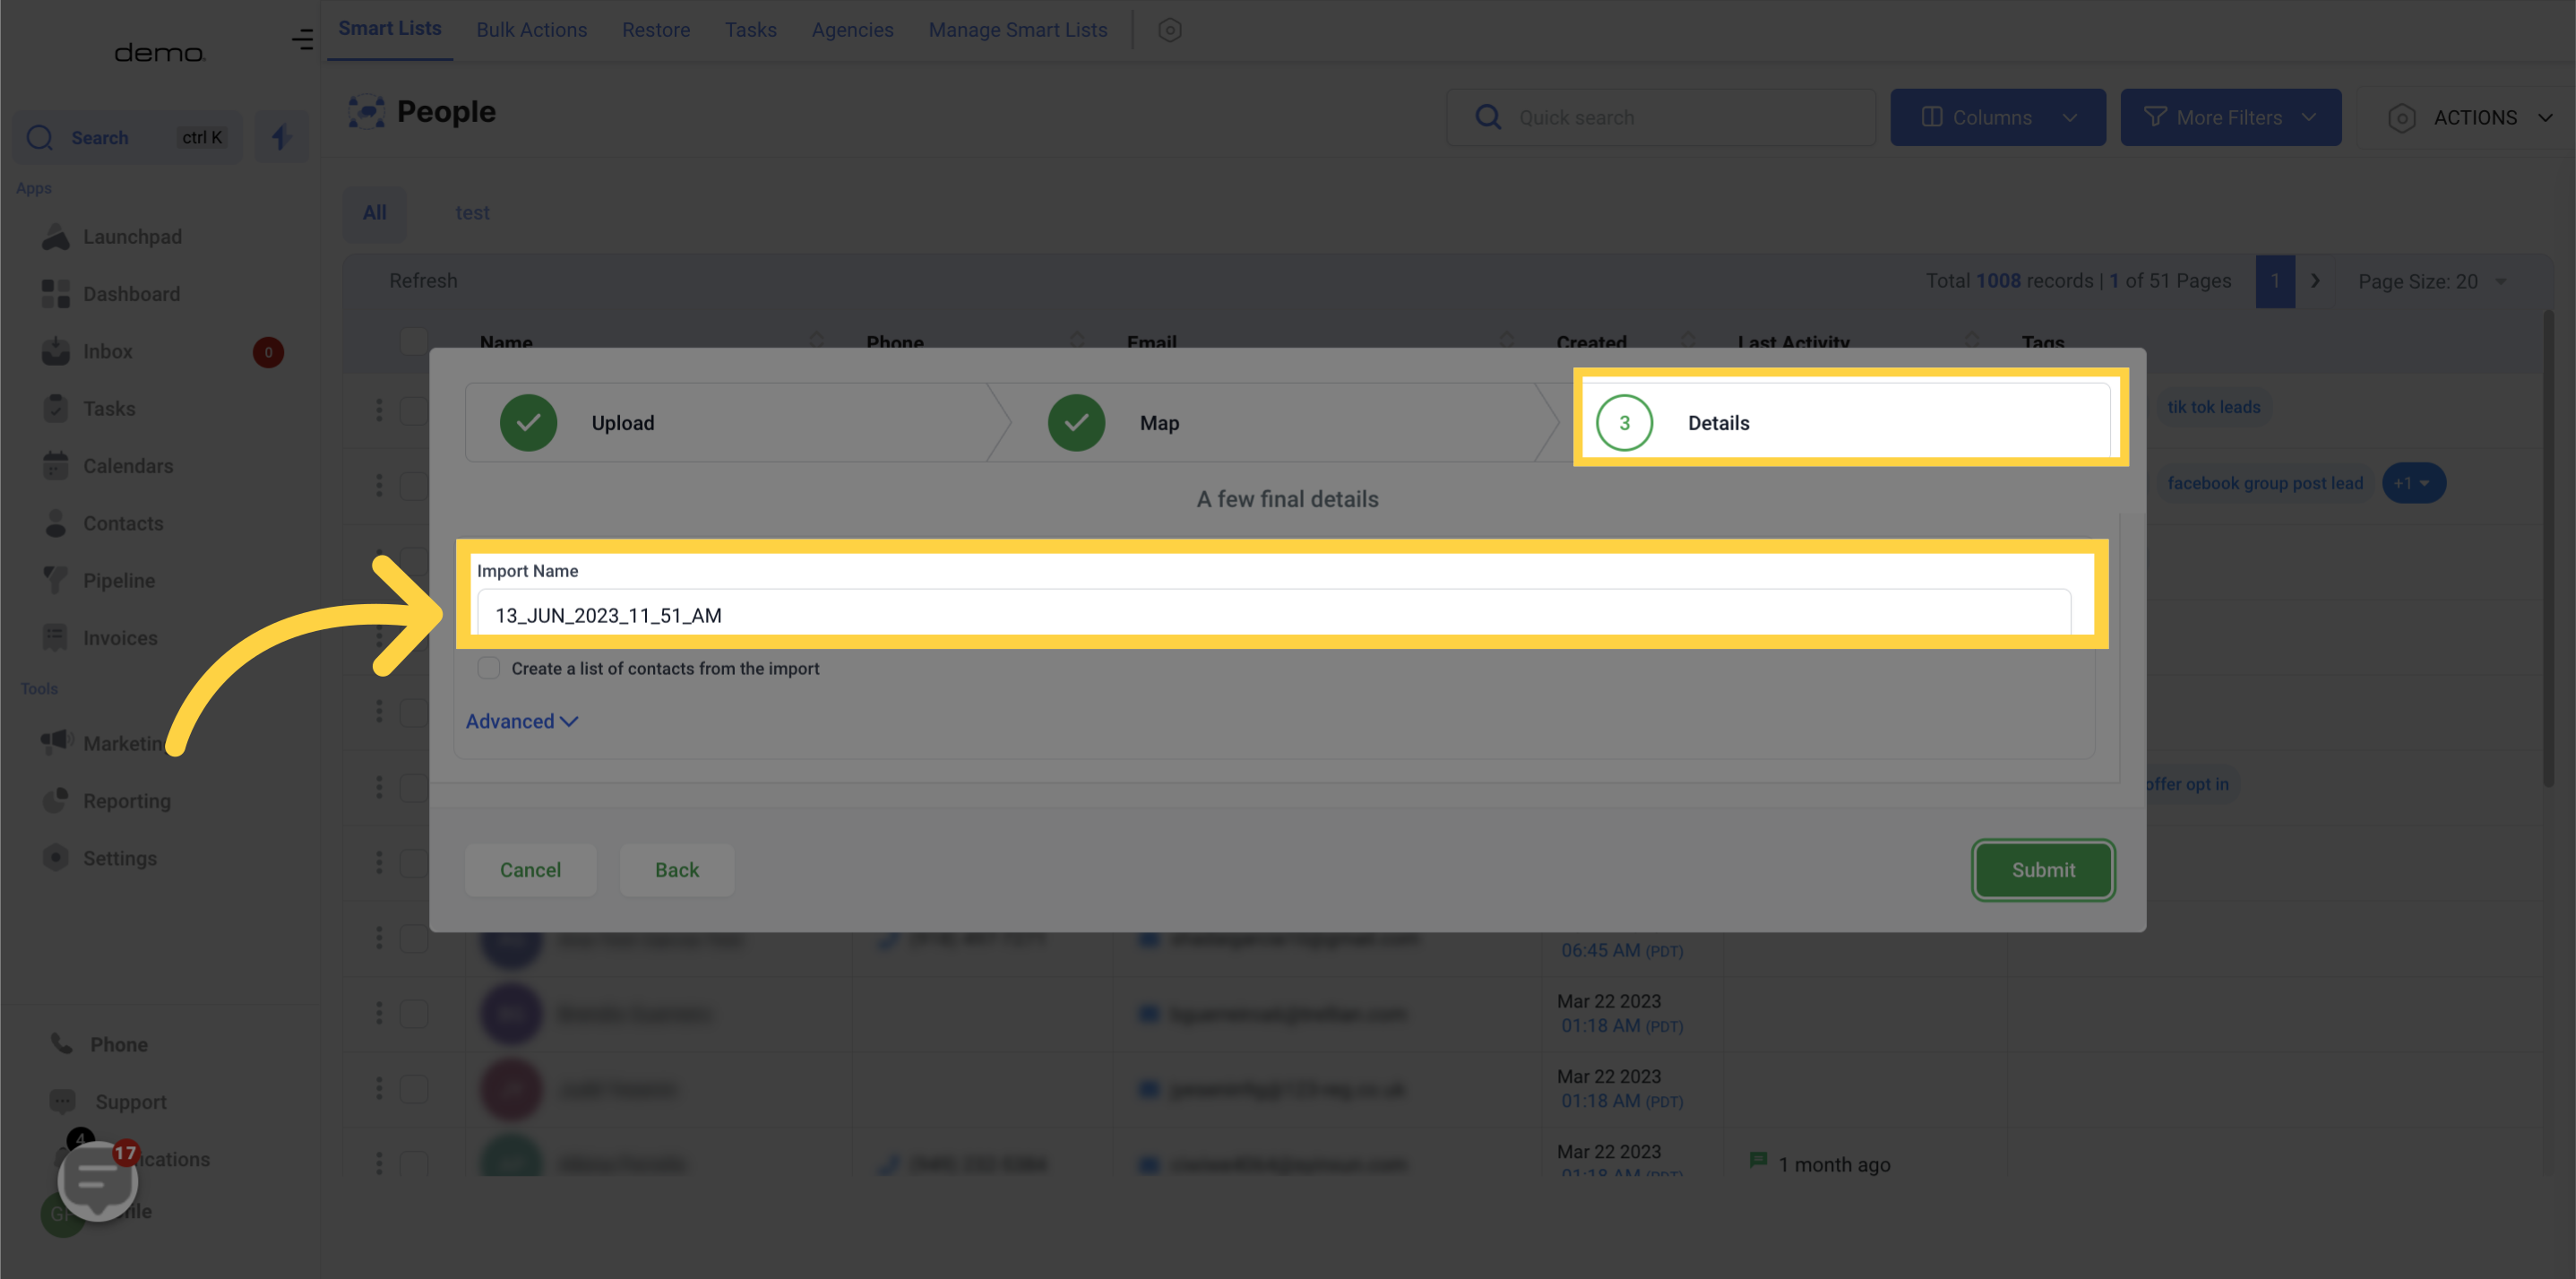
This is the last step for importing contacts.
You have the option to either keep the default name or customize it when importing the contact.
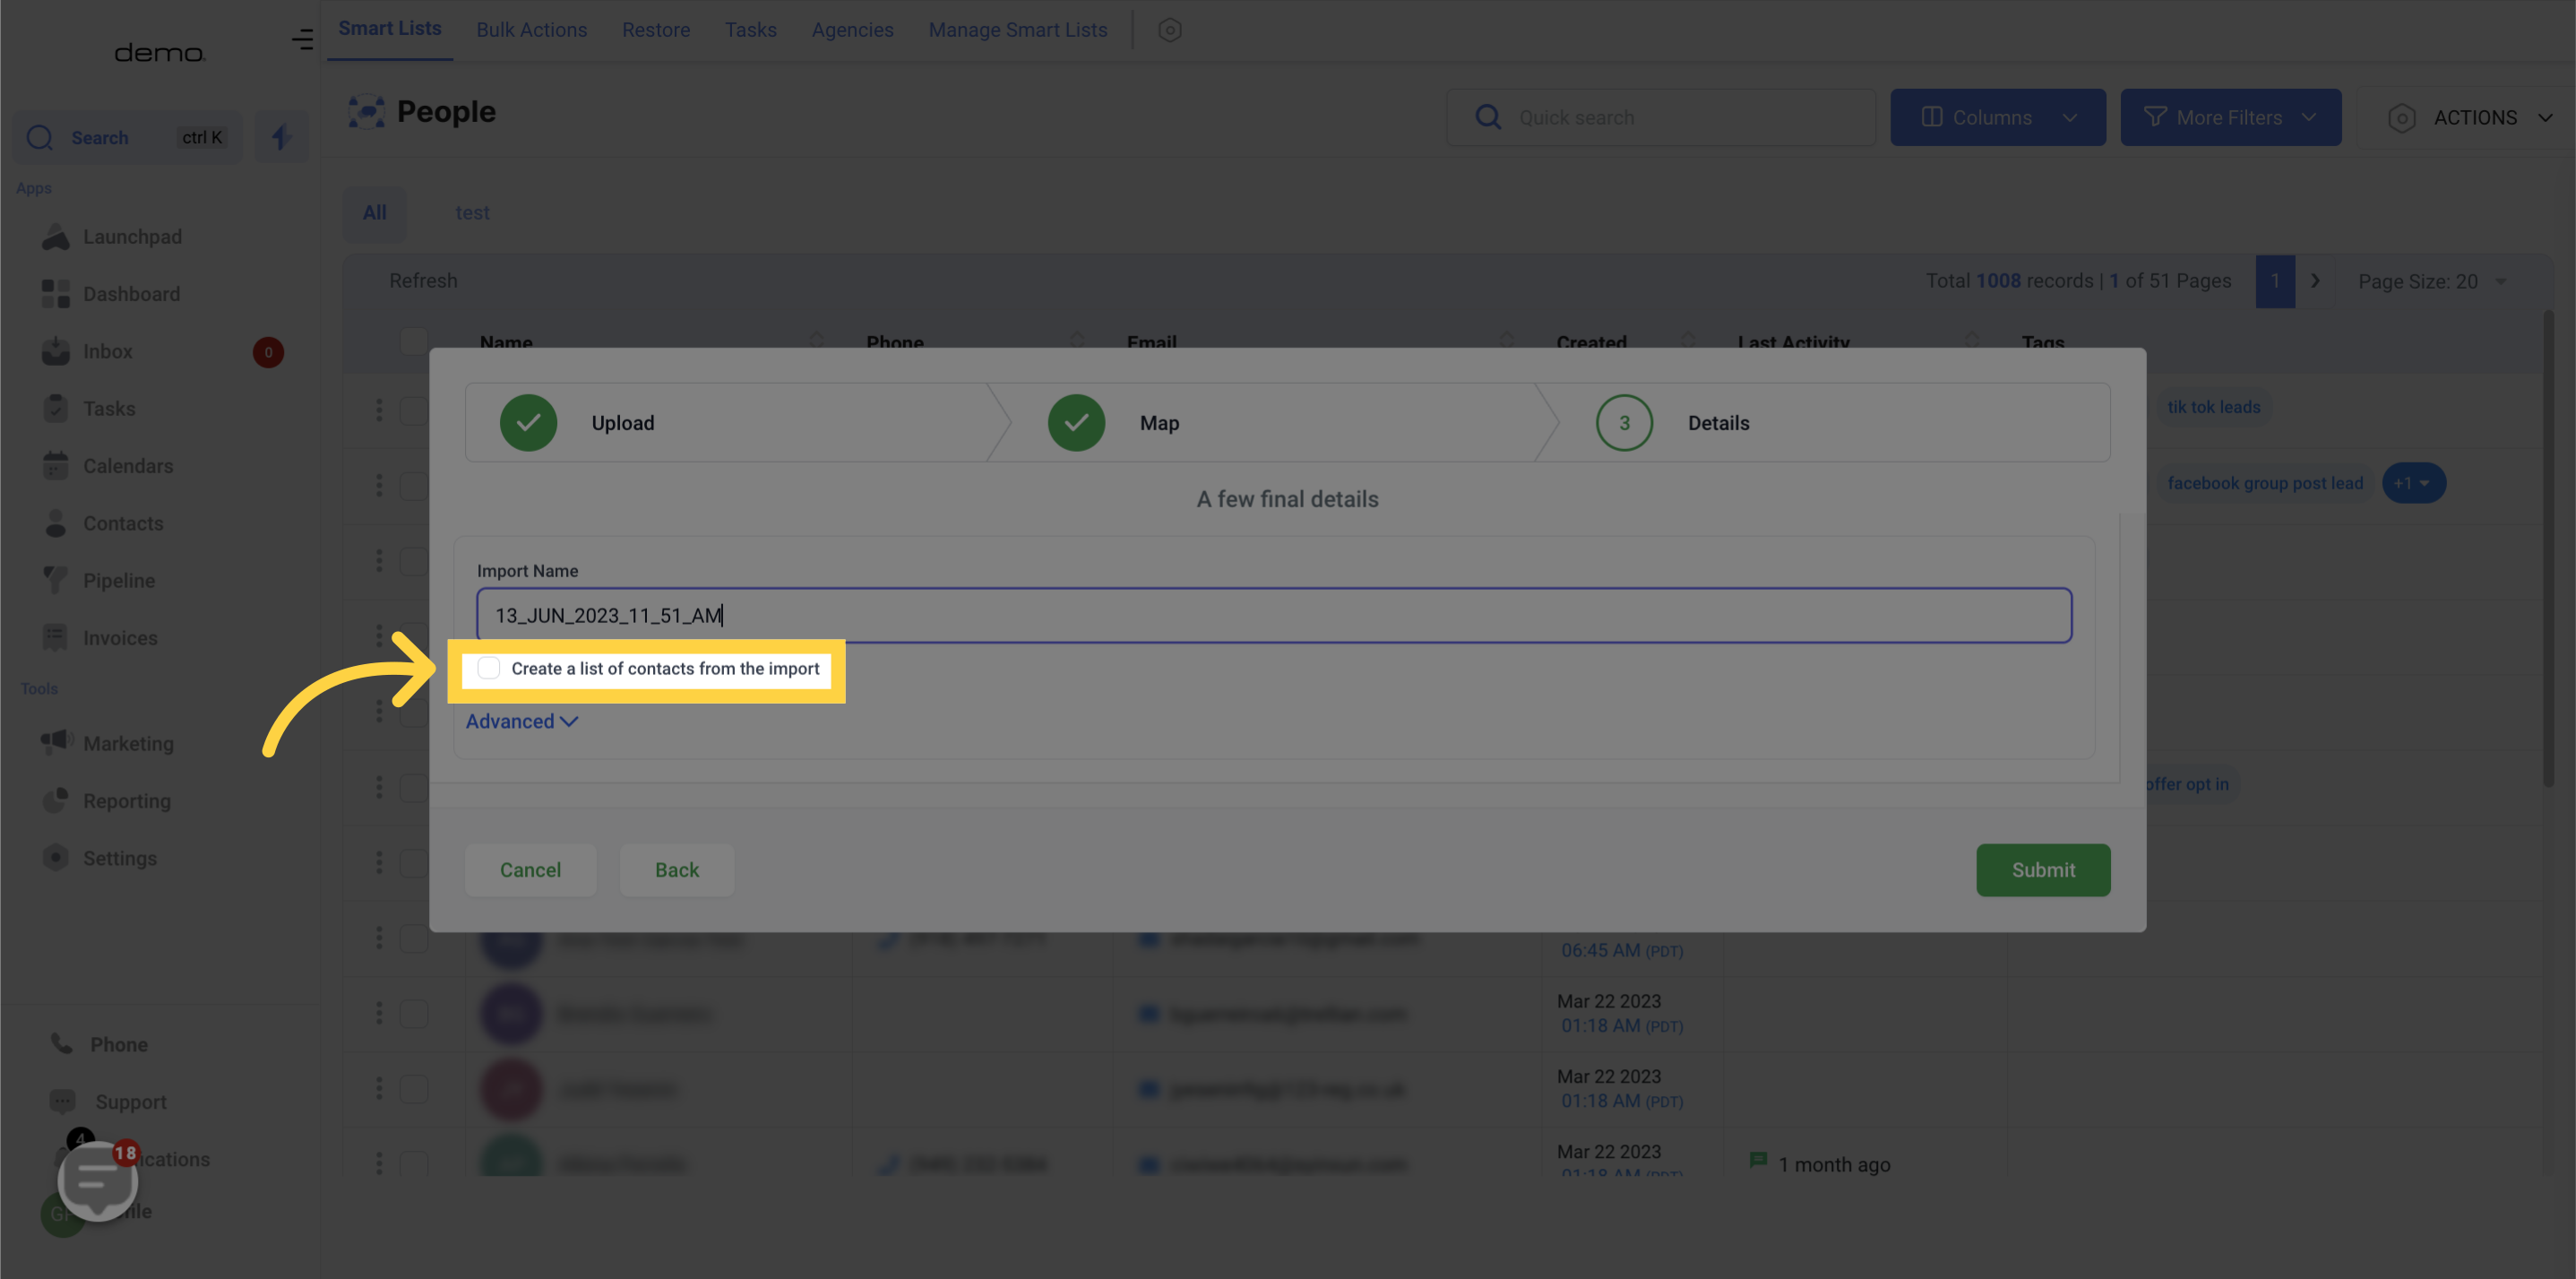
By selecting this checkbox, you have the option to generate a fresh contact list through your import.
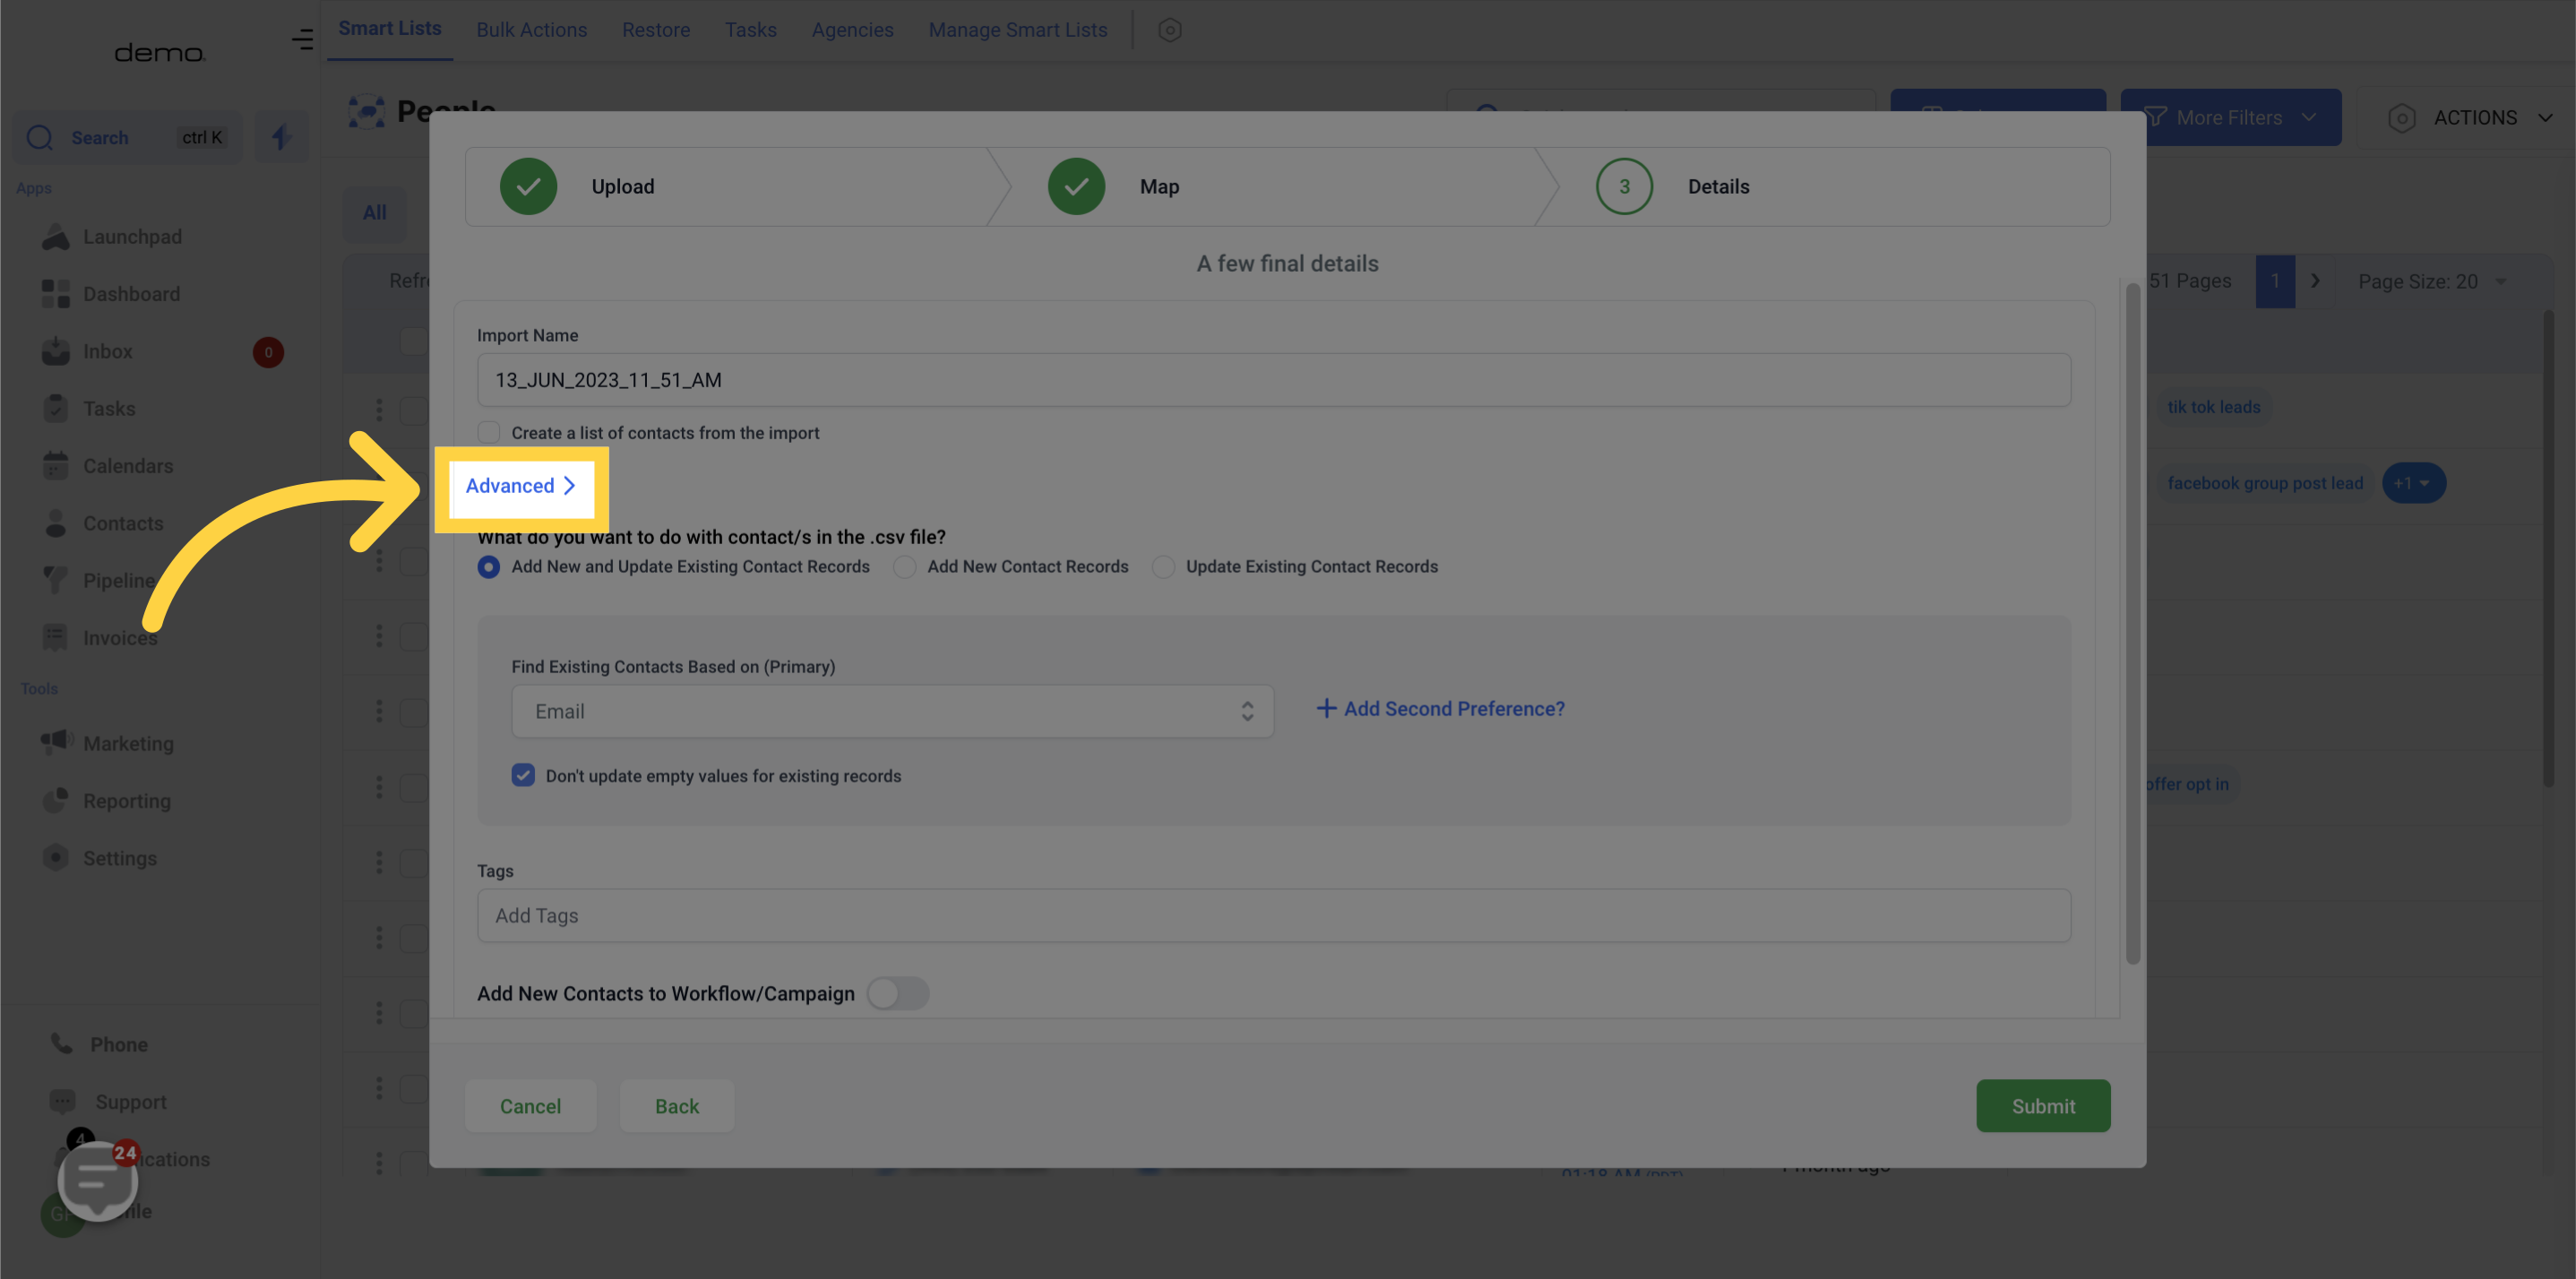
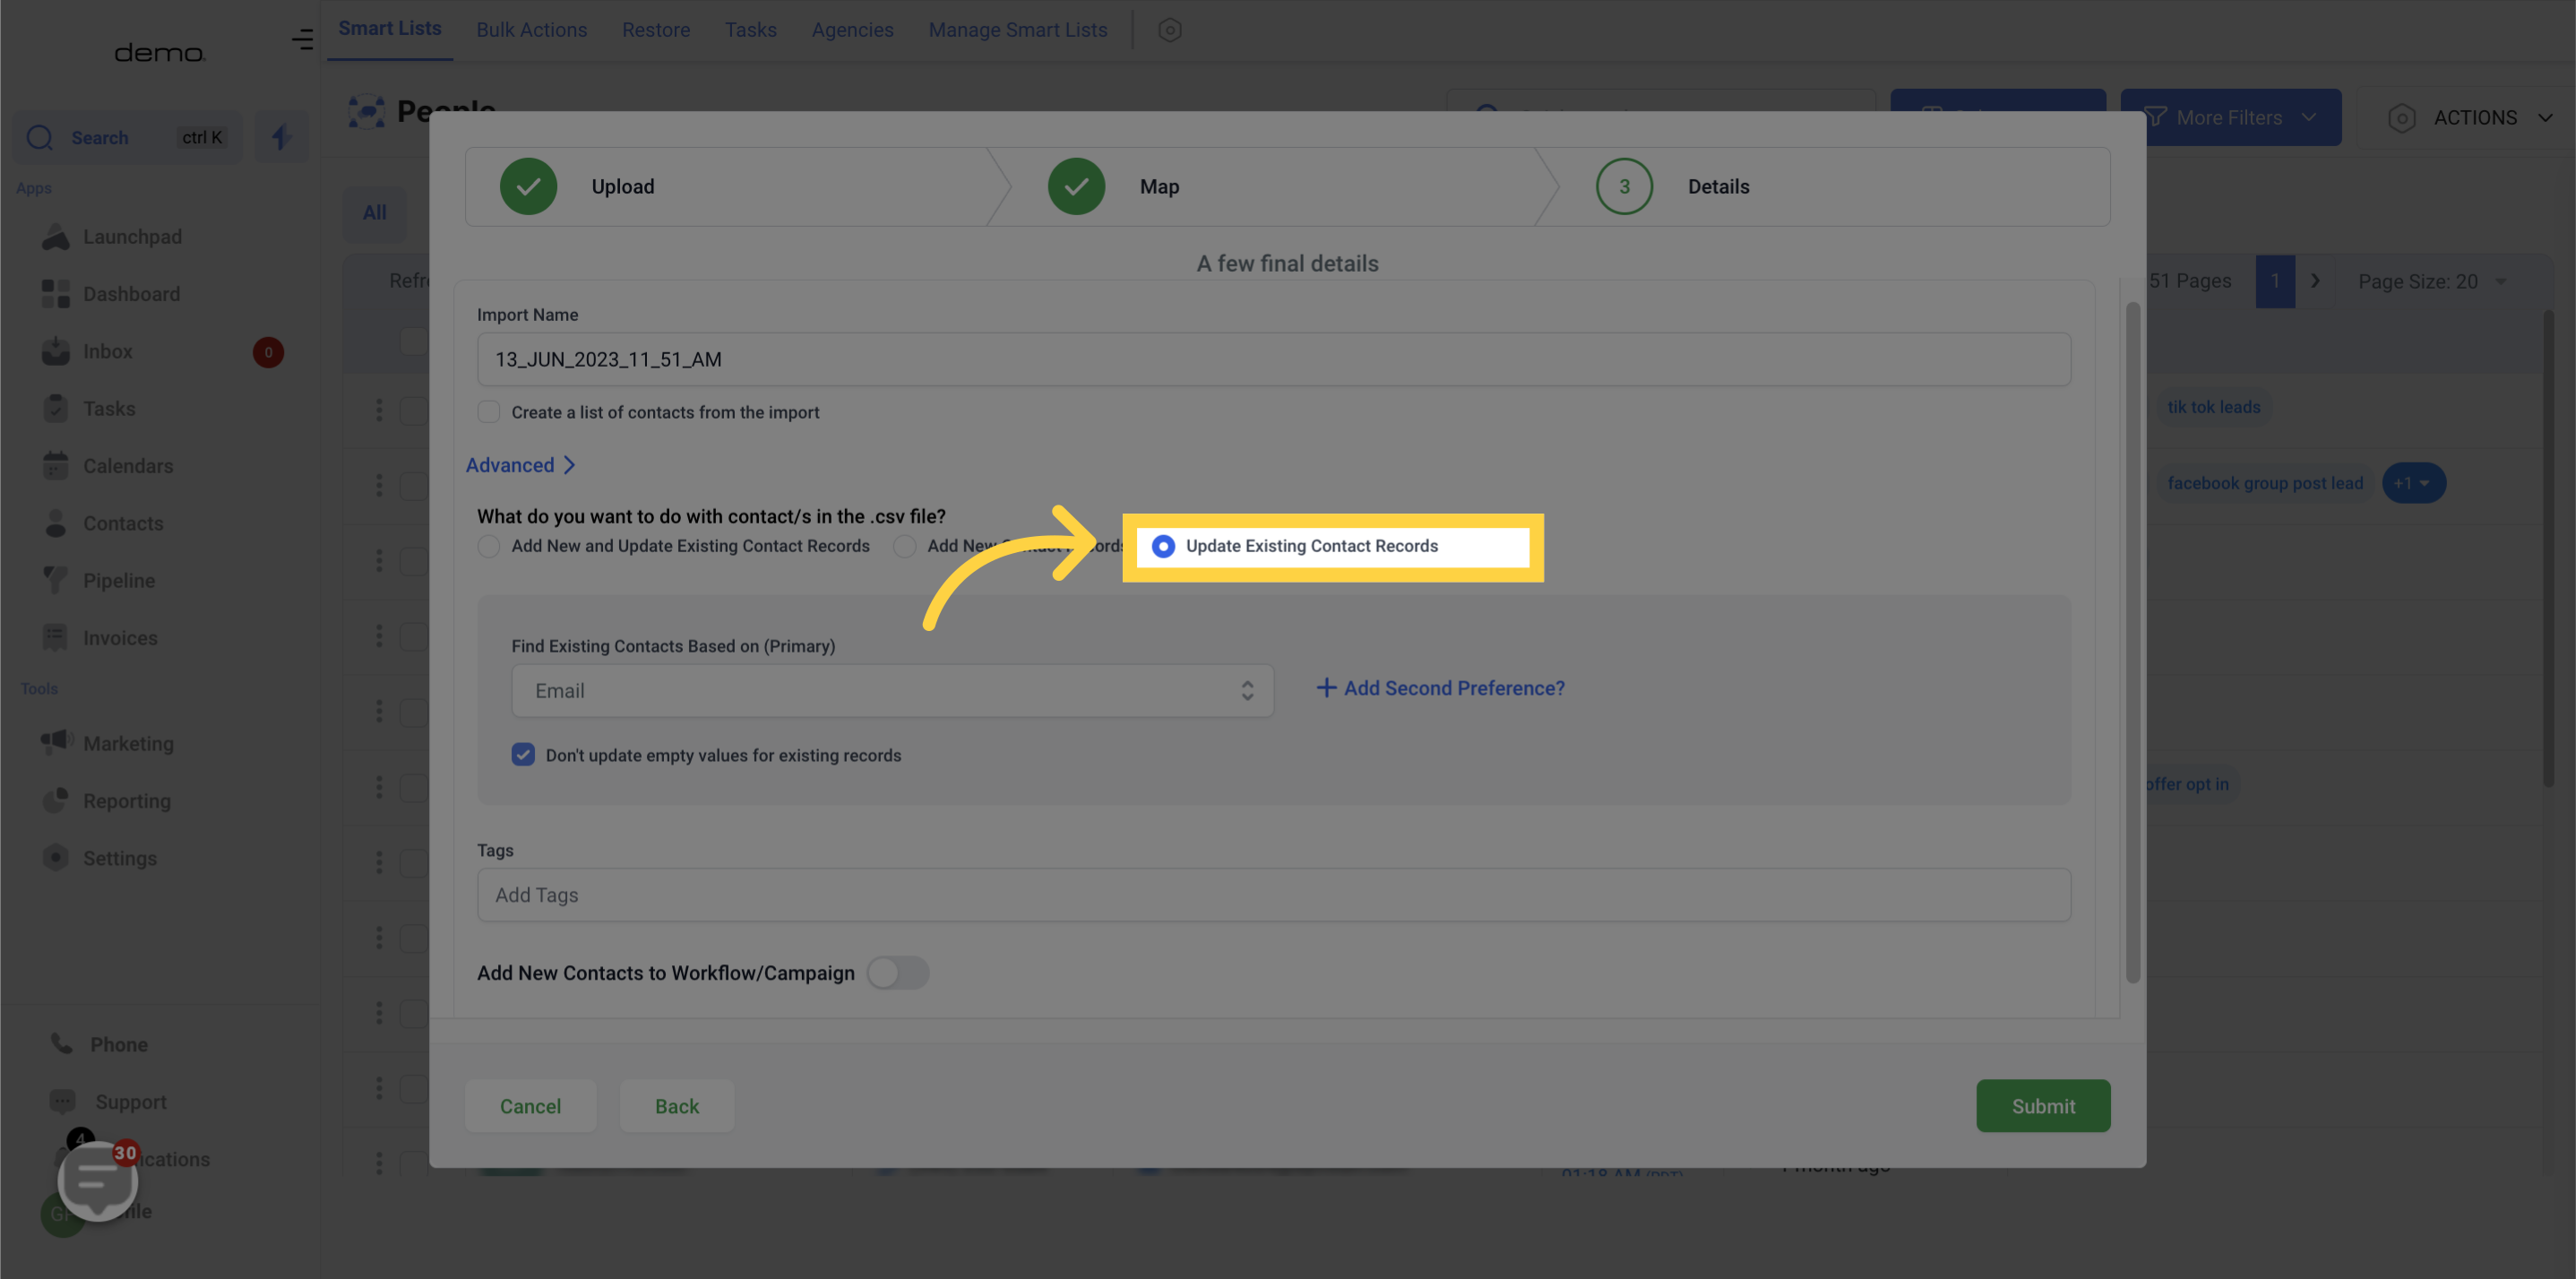
Within the Advanced Settings, there is the option to determine how to handle the contact within the CSV file, with two possible choices:
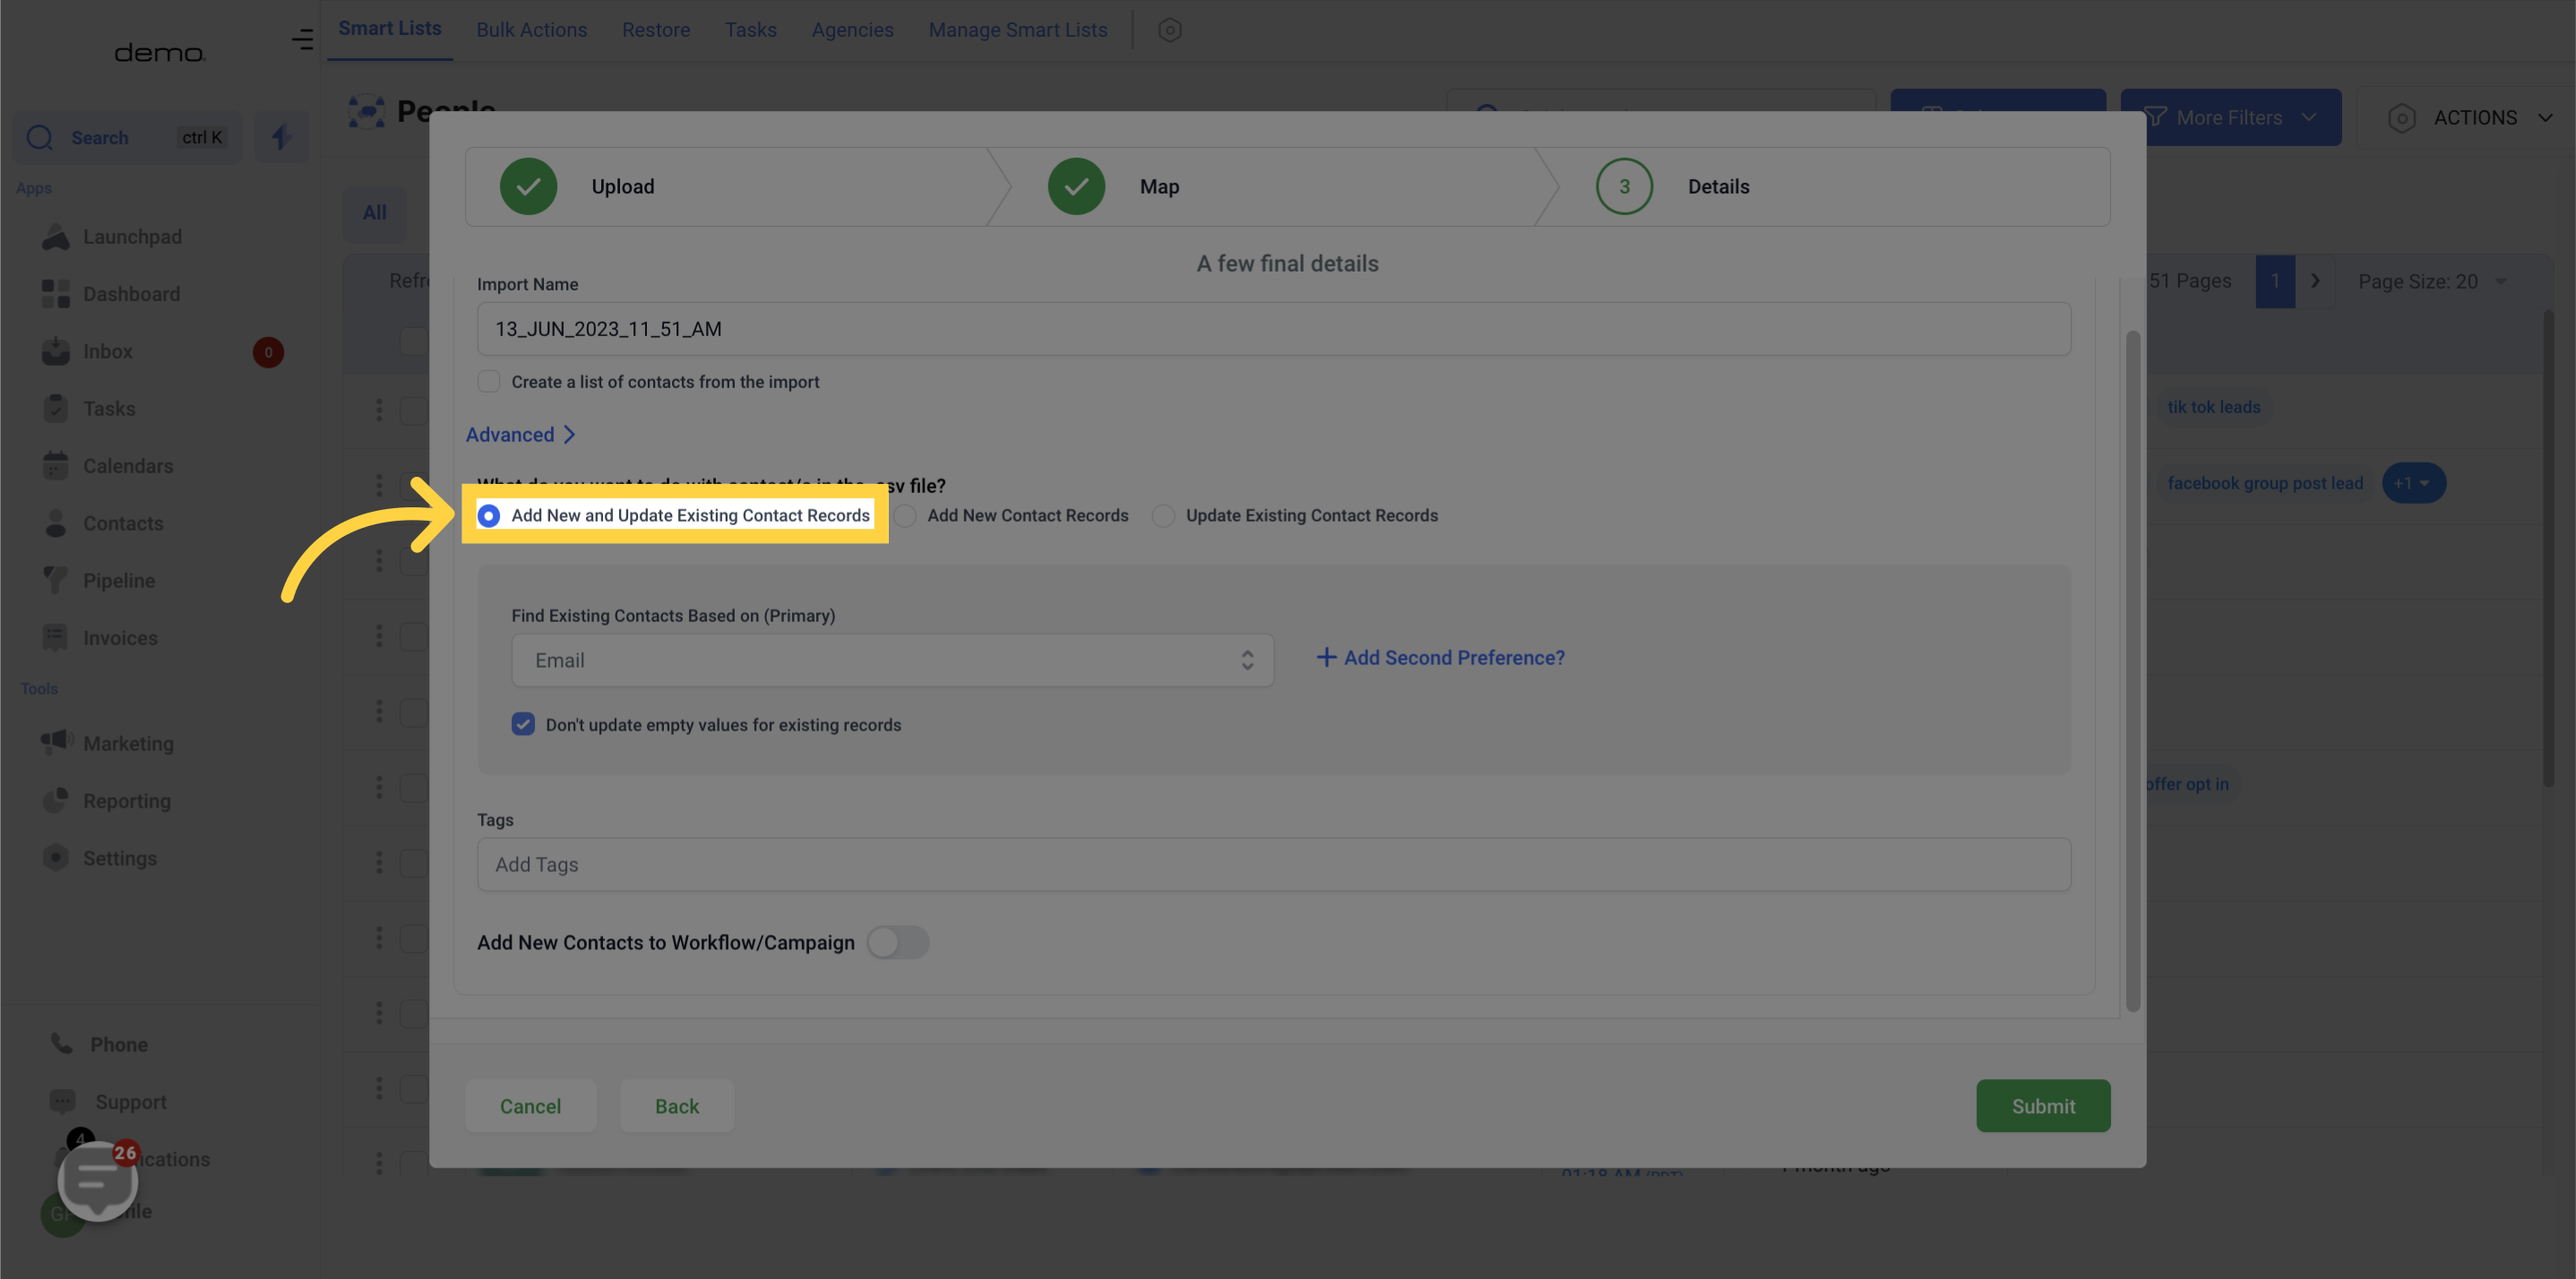
At this point, you have the option to create a fresh list for your new contacts and simultaneously refresh your current contacts list in your CRM by incorporating them.
The option to create a new list and add the contacts is the only available one.
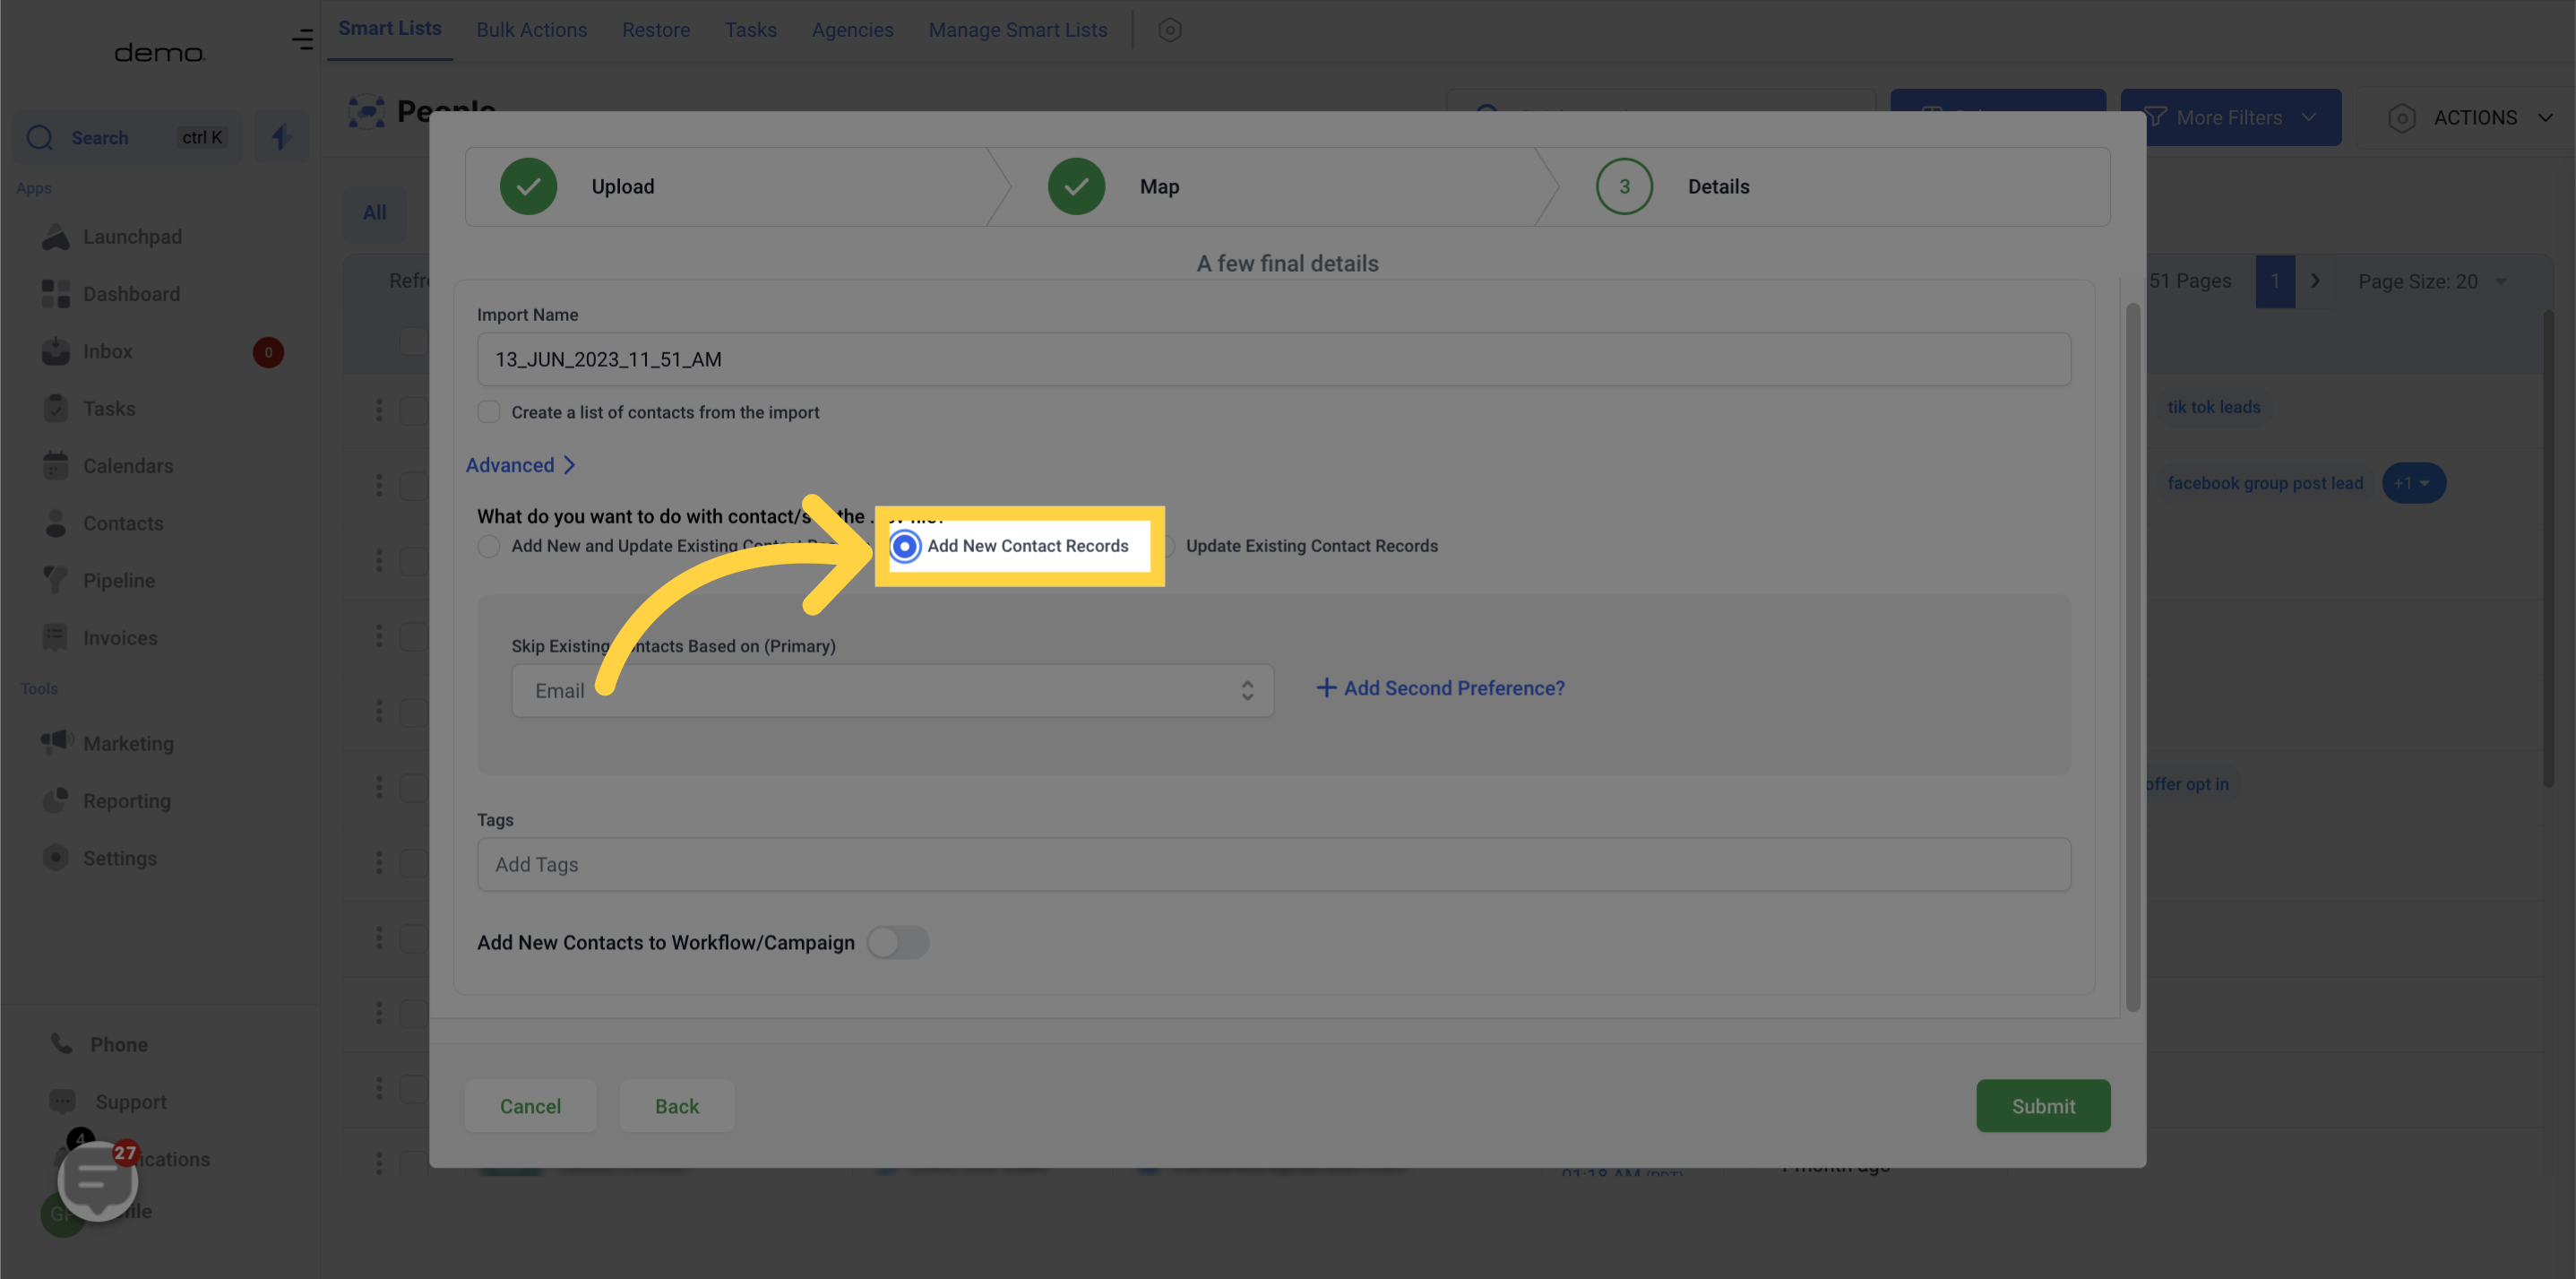
The merging of new contacts is restricted to the existing contacts only.
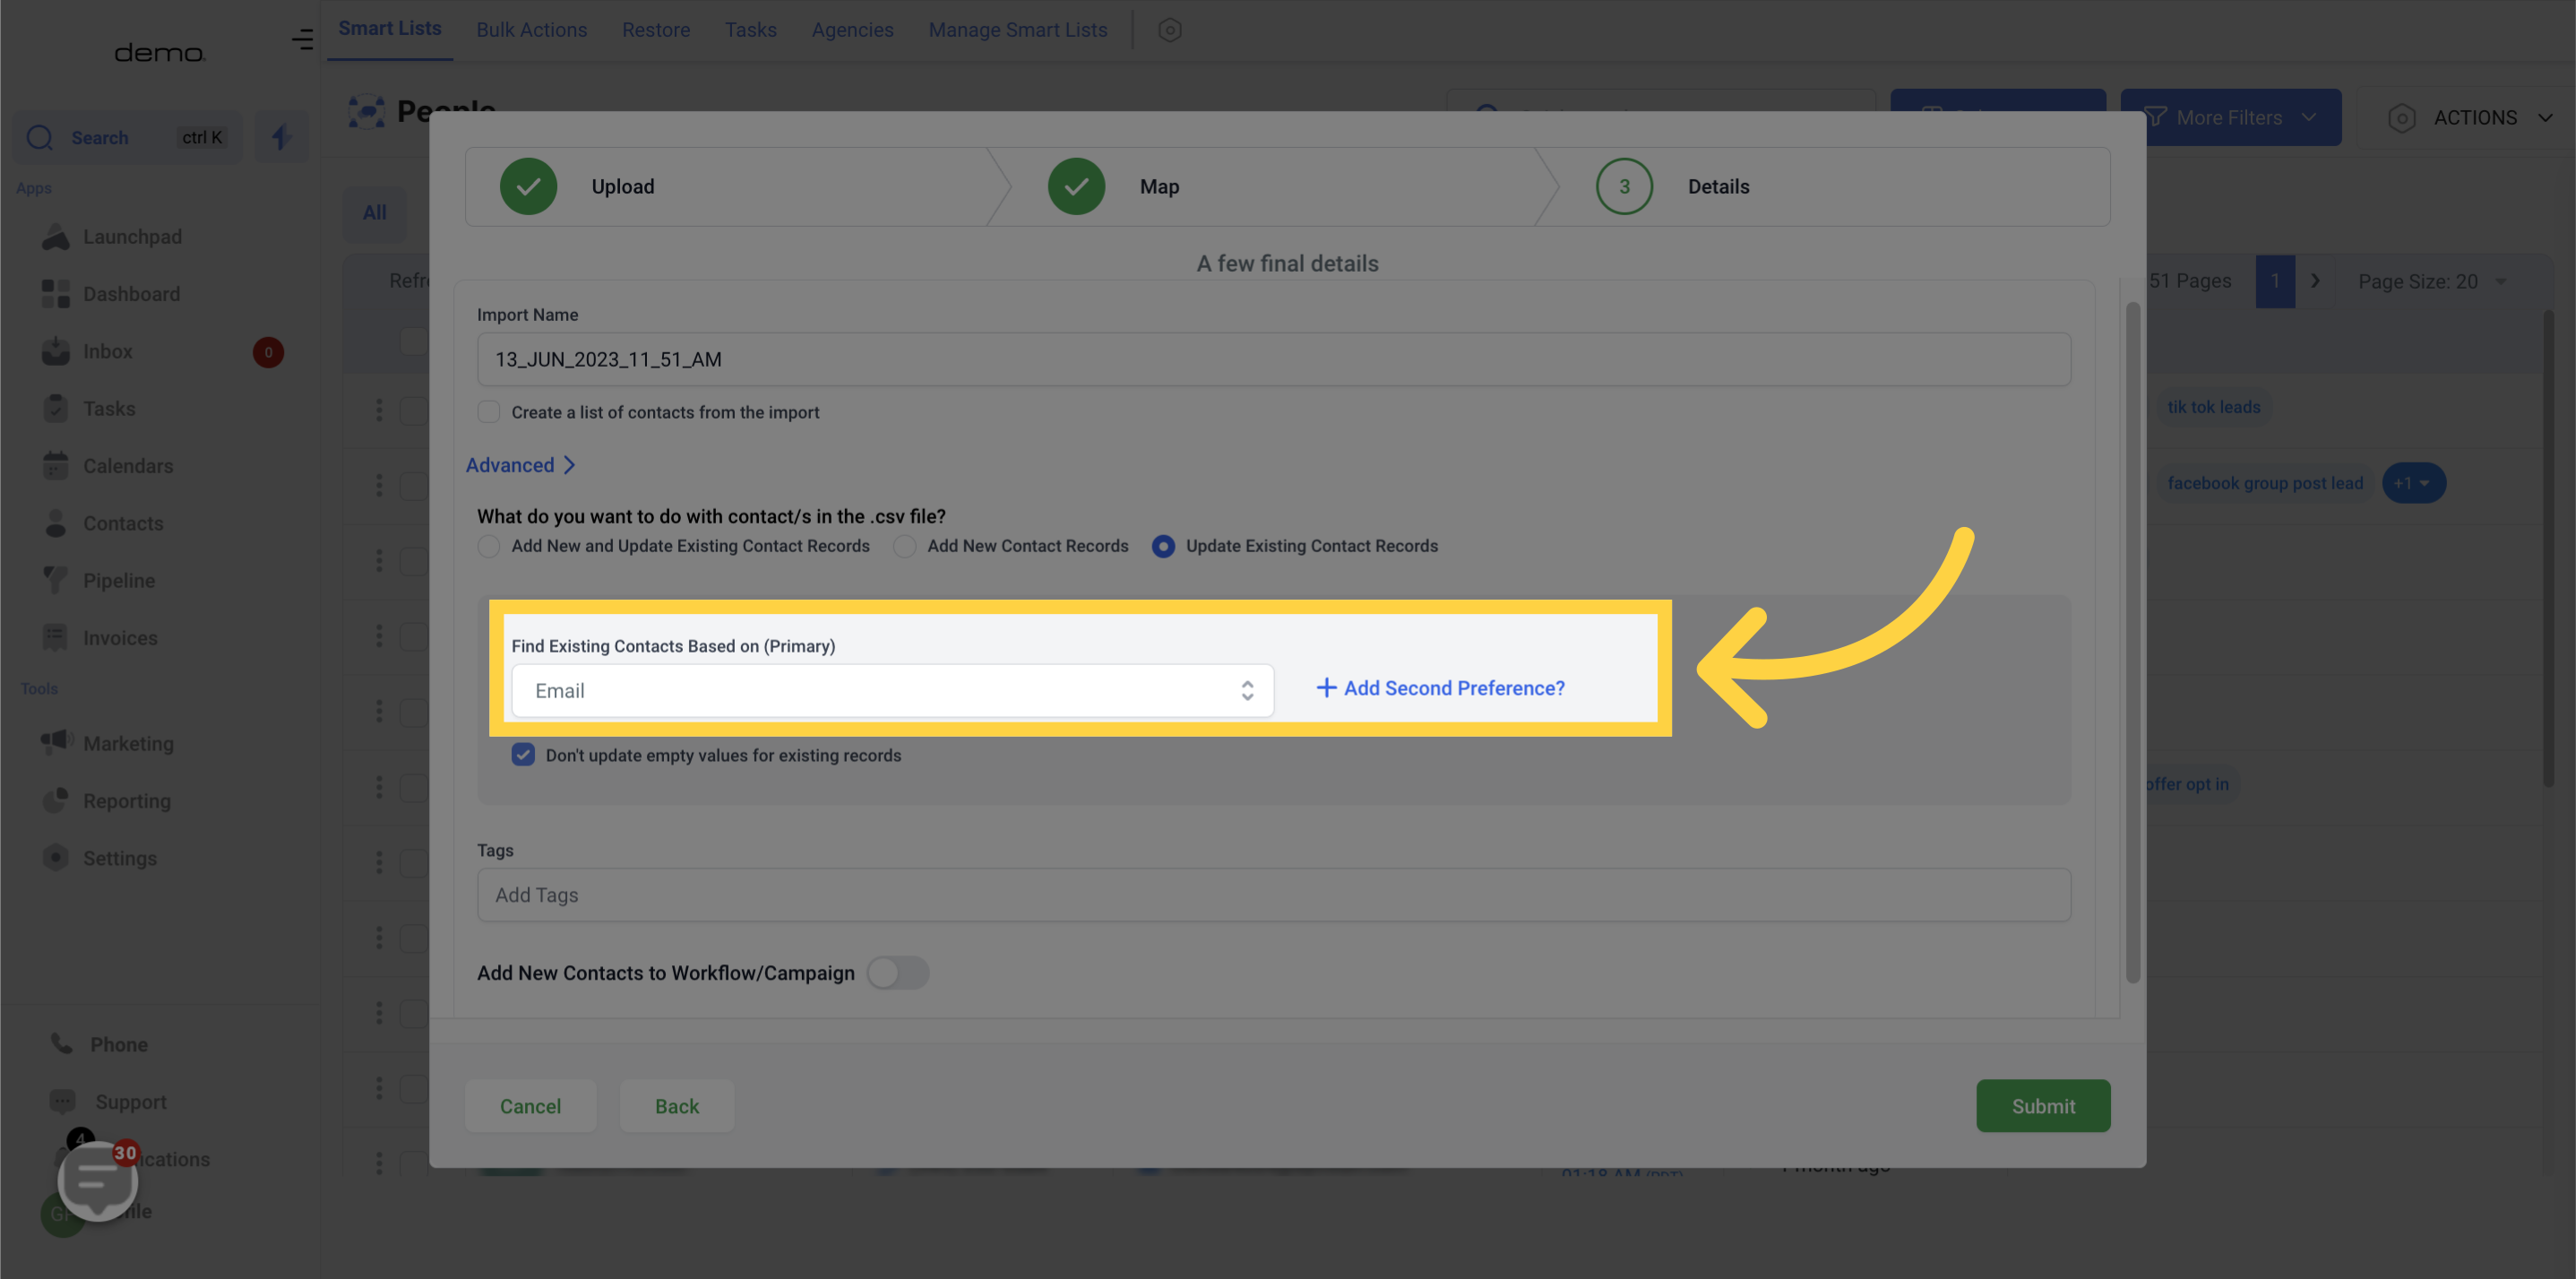
When merging or updating your contact list, you have the option to skip existing contacts that have the same phone number as the primary one, or to include them.
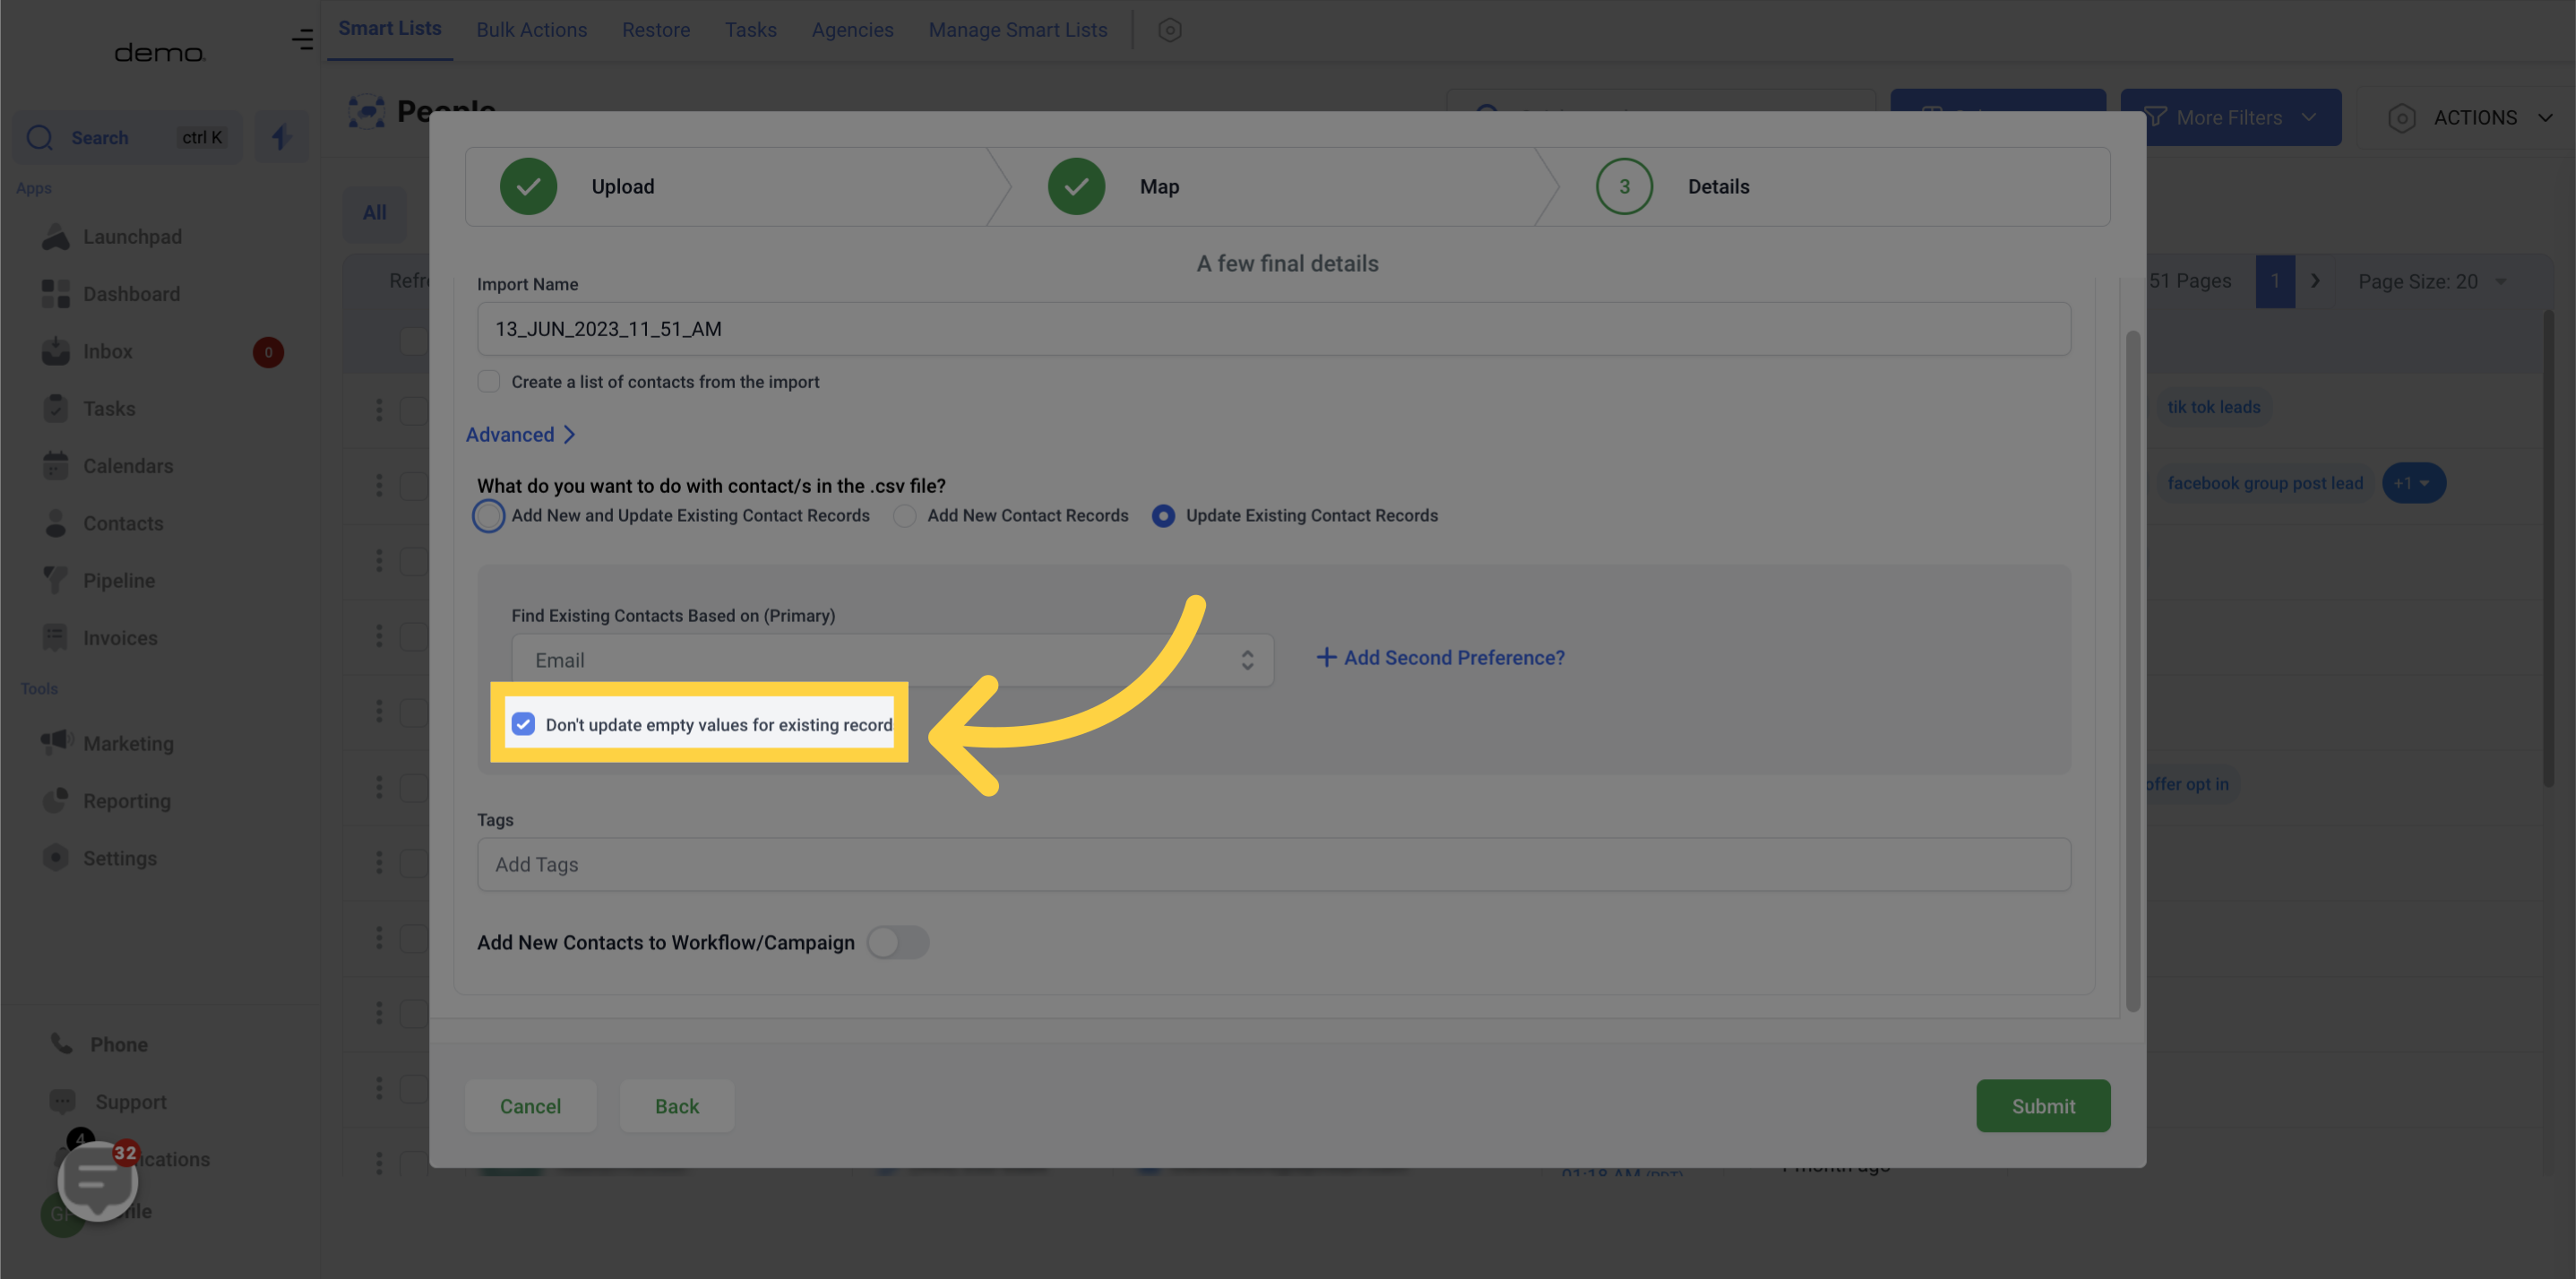
One option is to check the box to exclude updating blank values for pre-existing records.
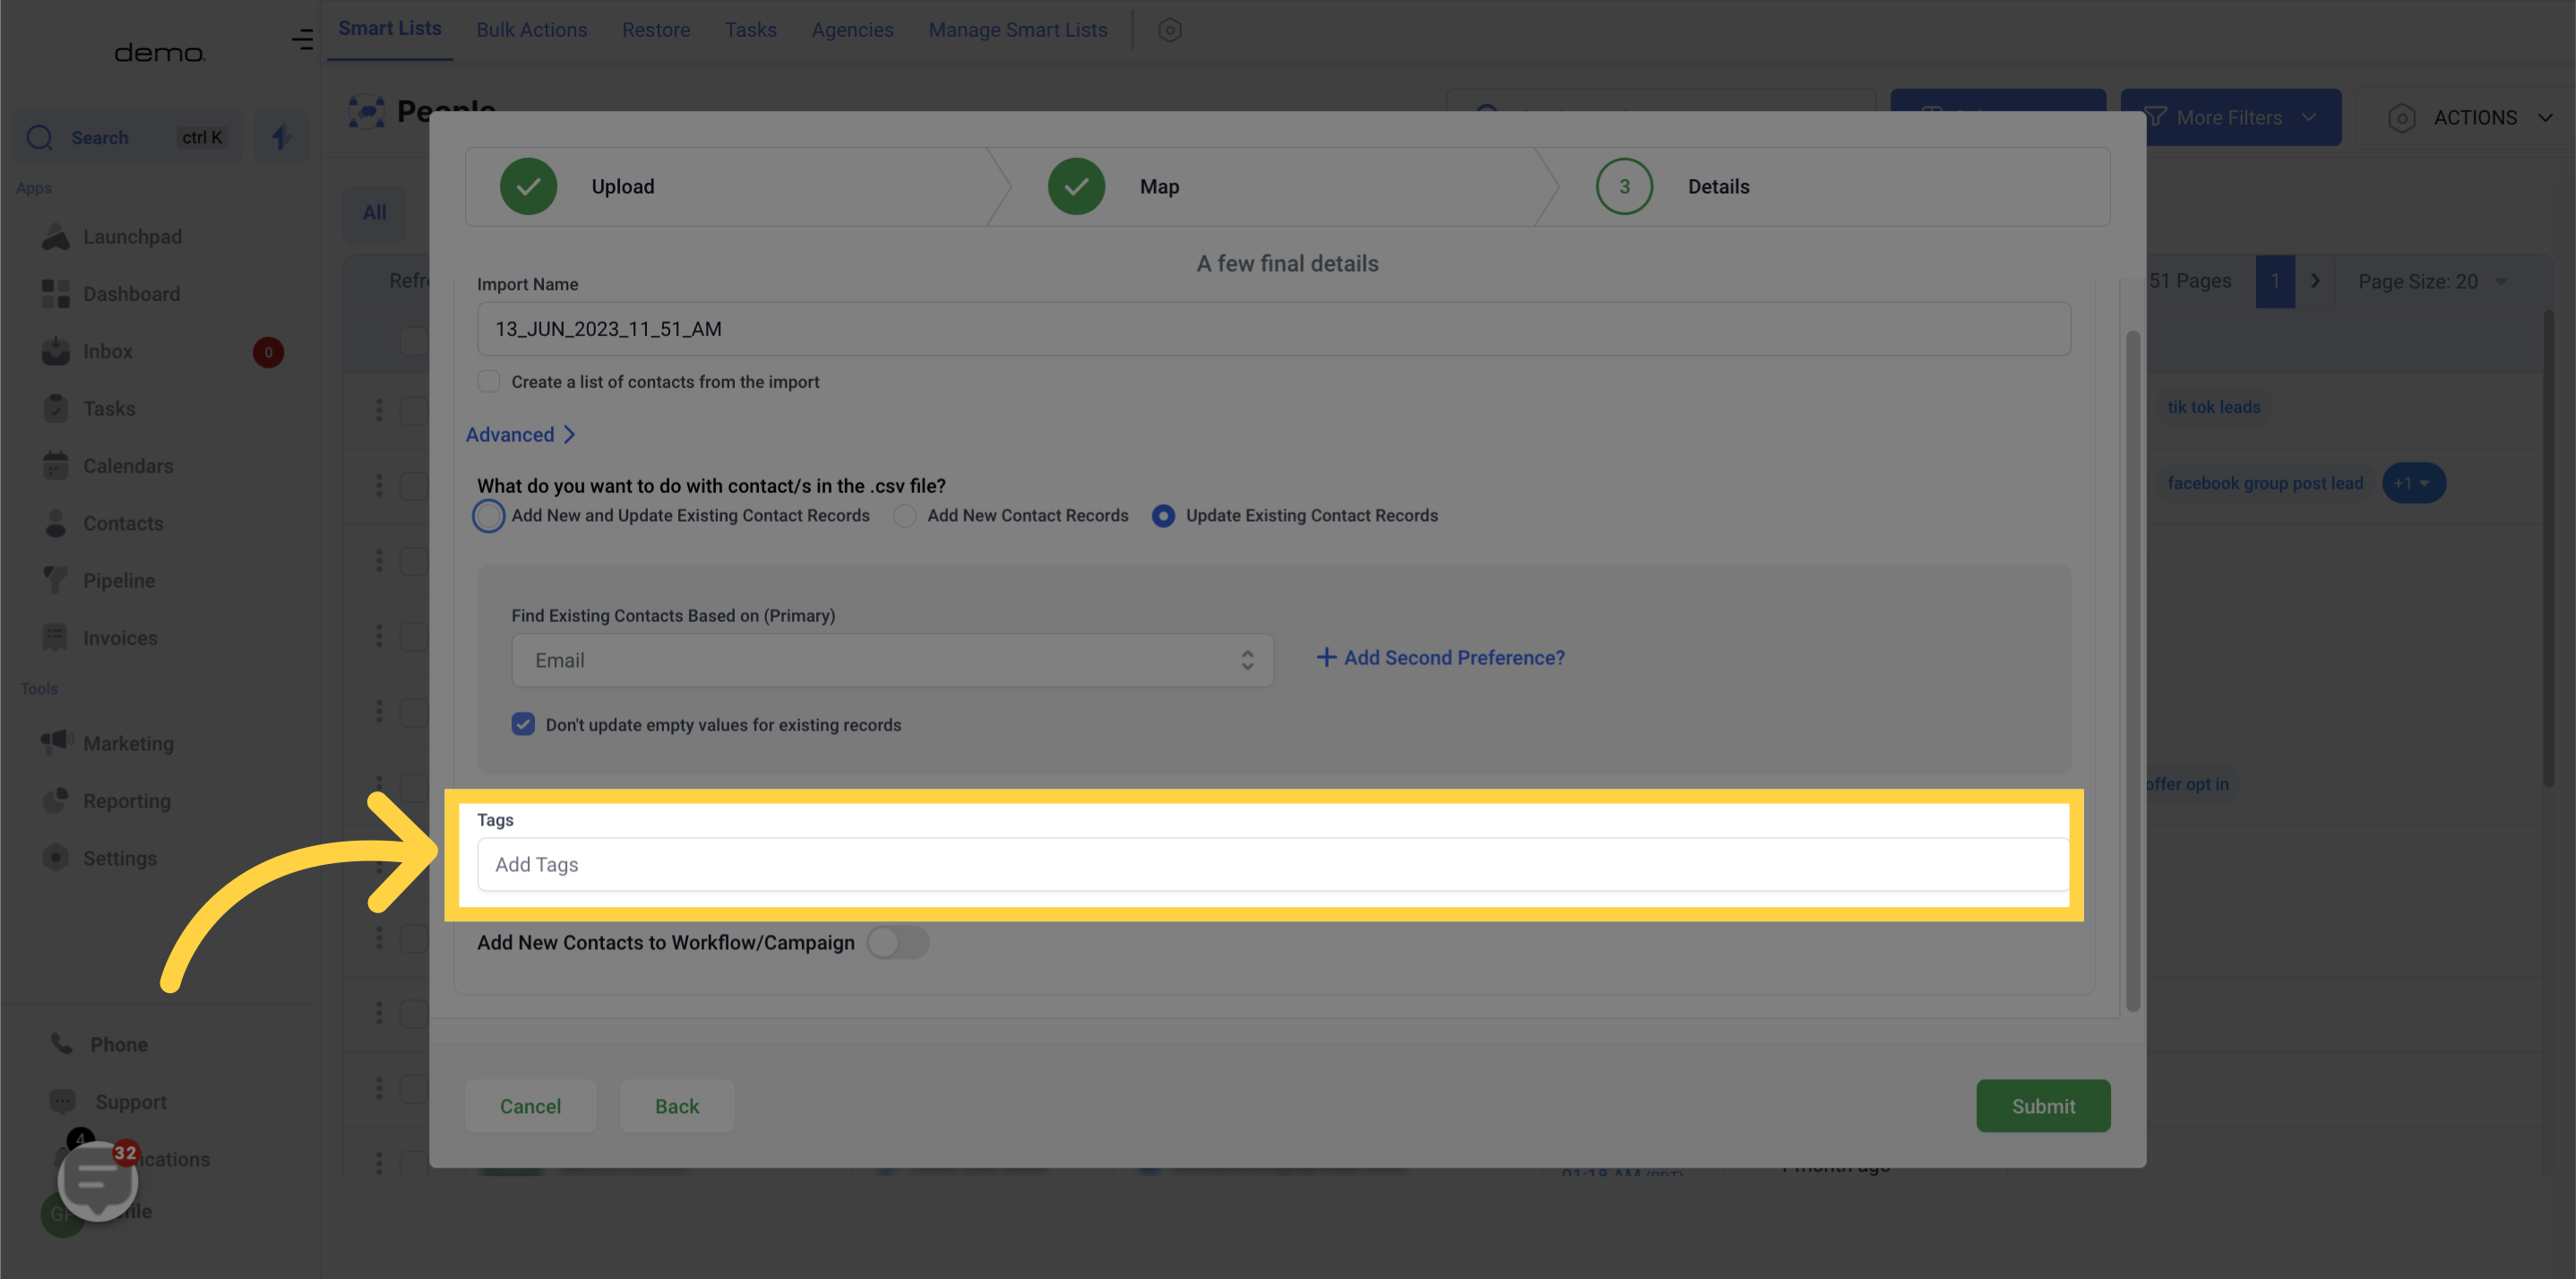
Here, you have the option to either search for existing tags or create new ones to attach to the contacts.
Choose the option to add new and update existing contact records.