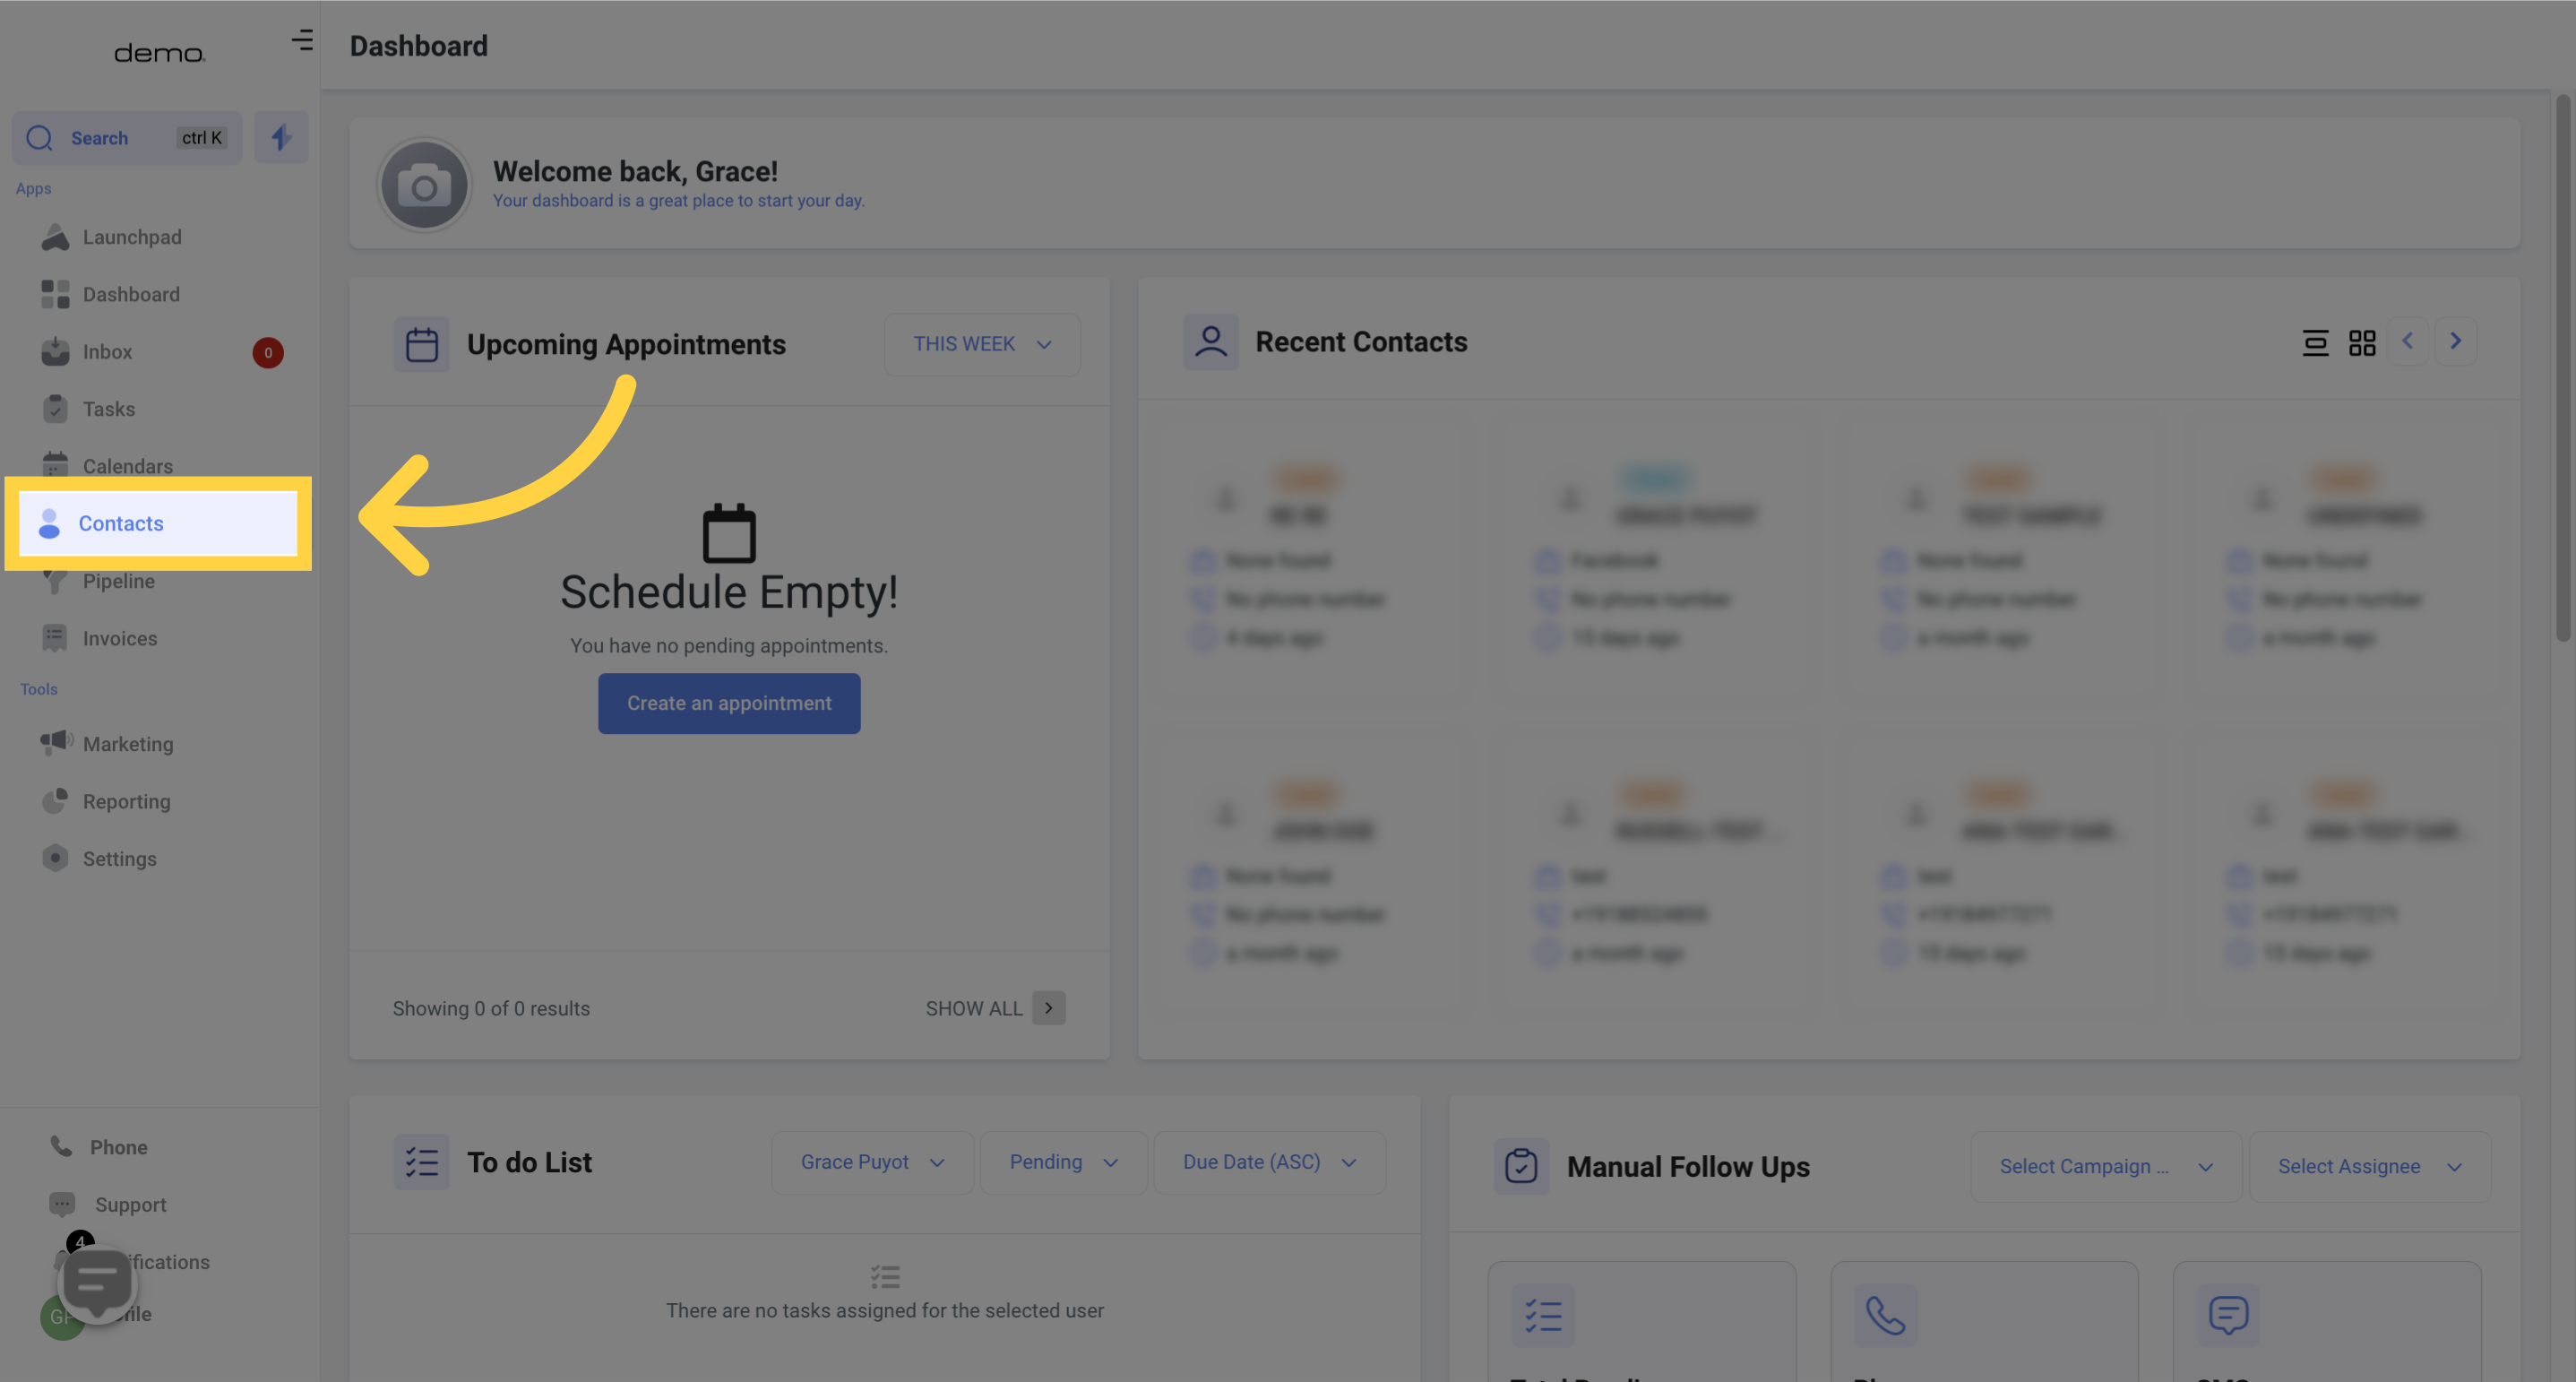
Go to the Contacts section.
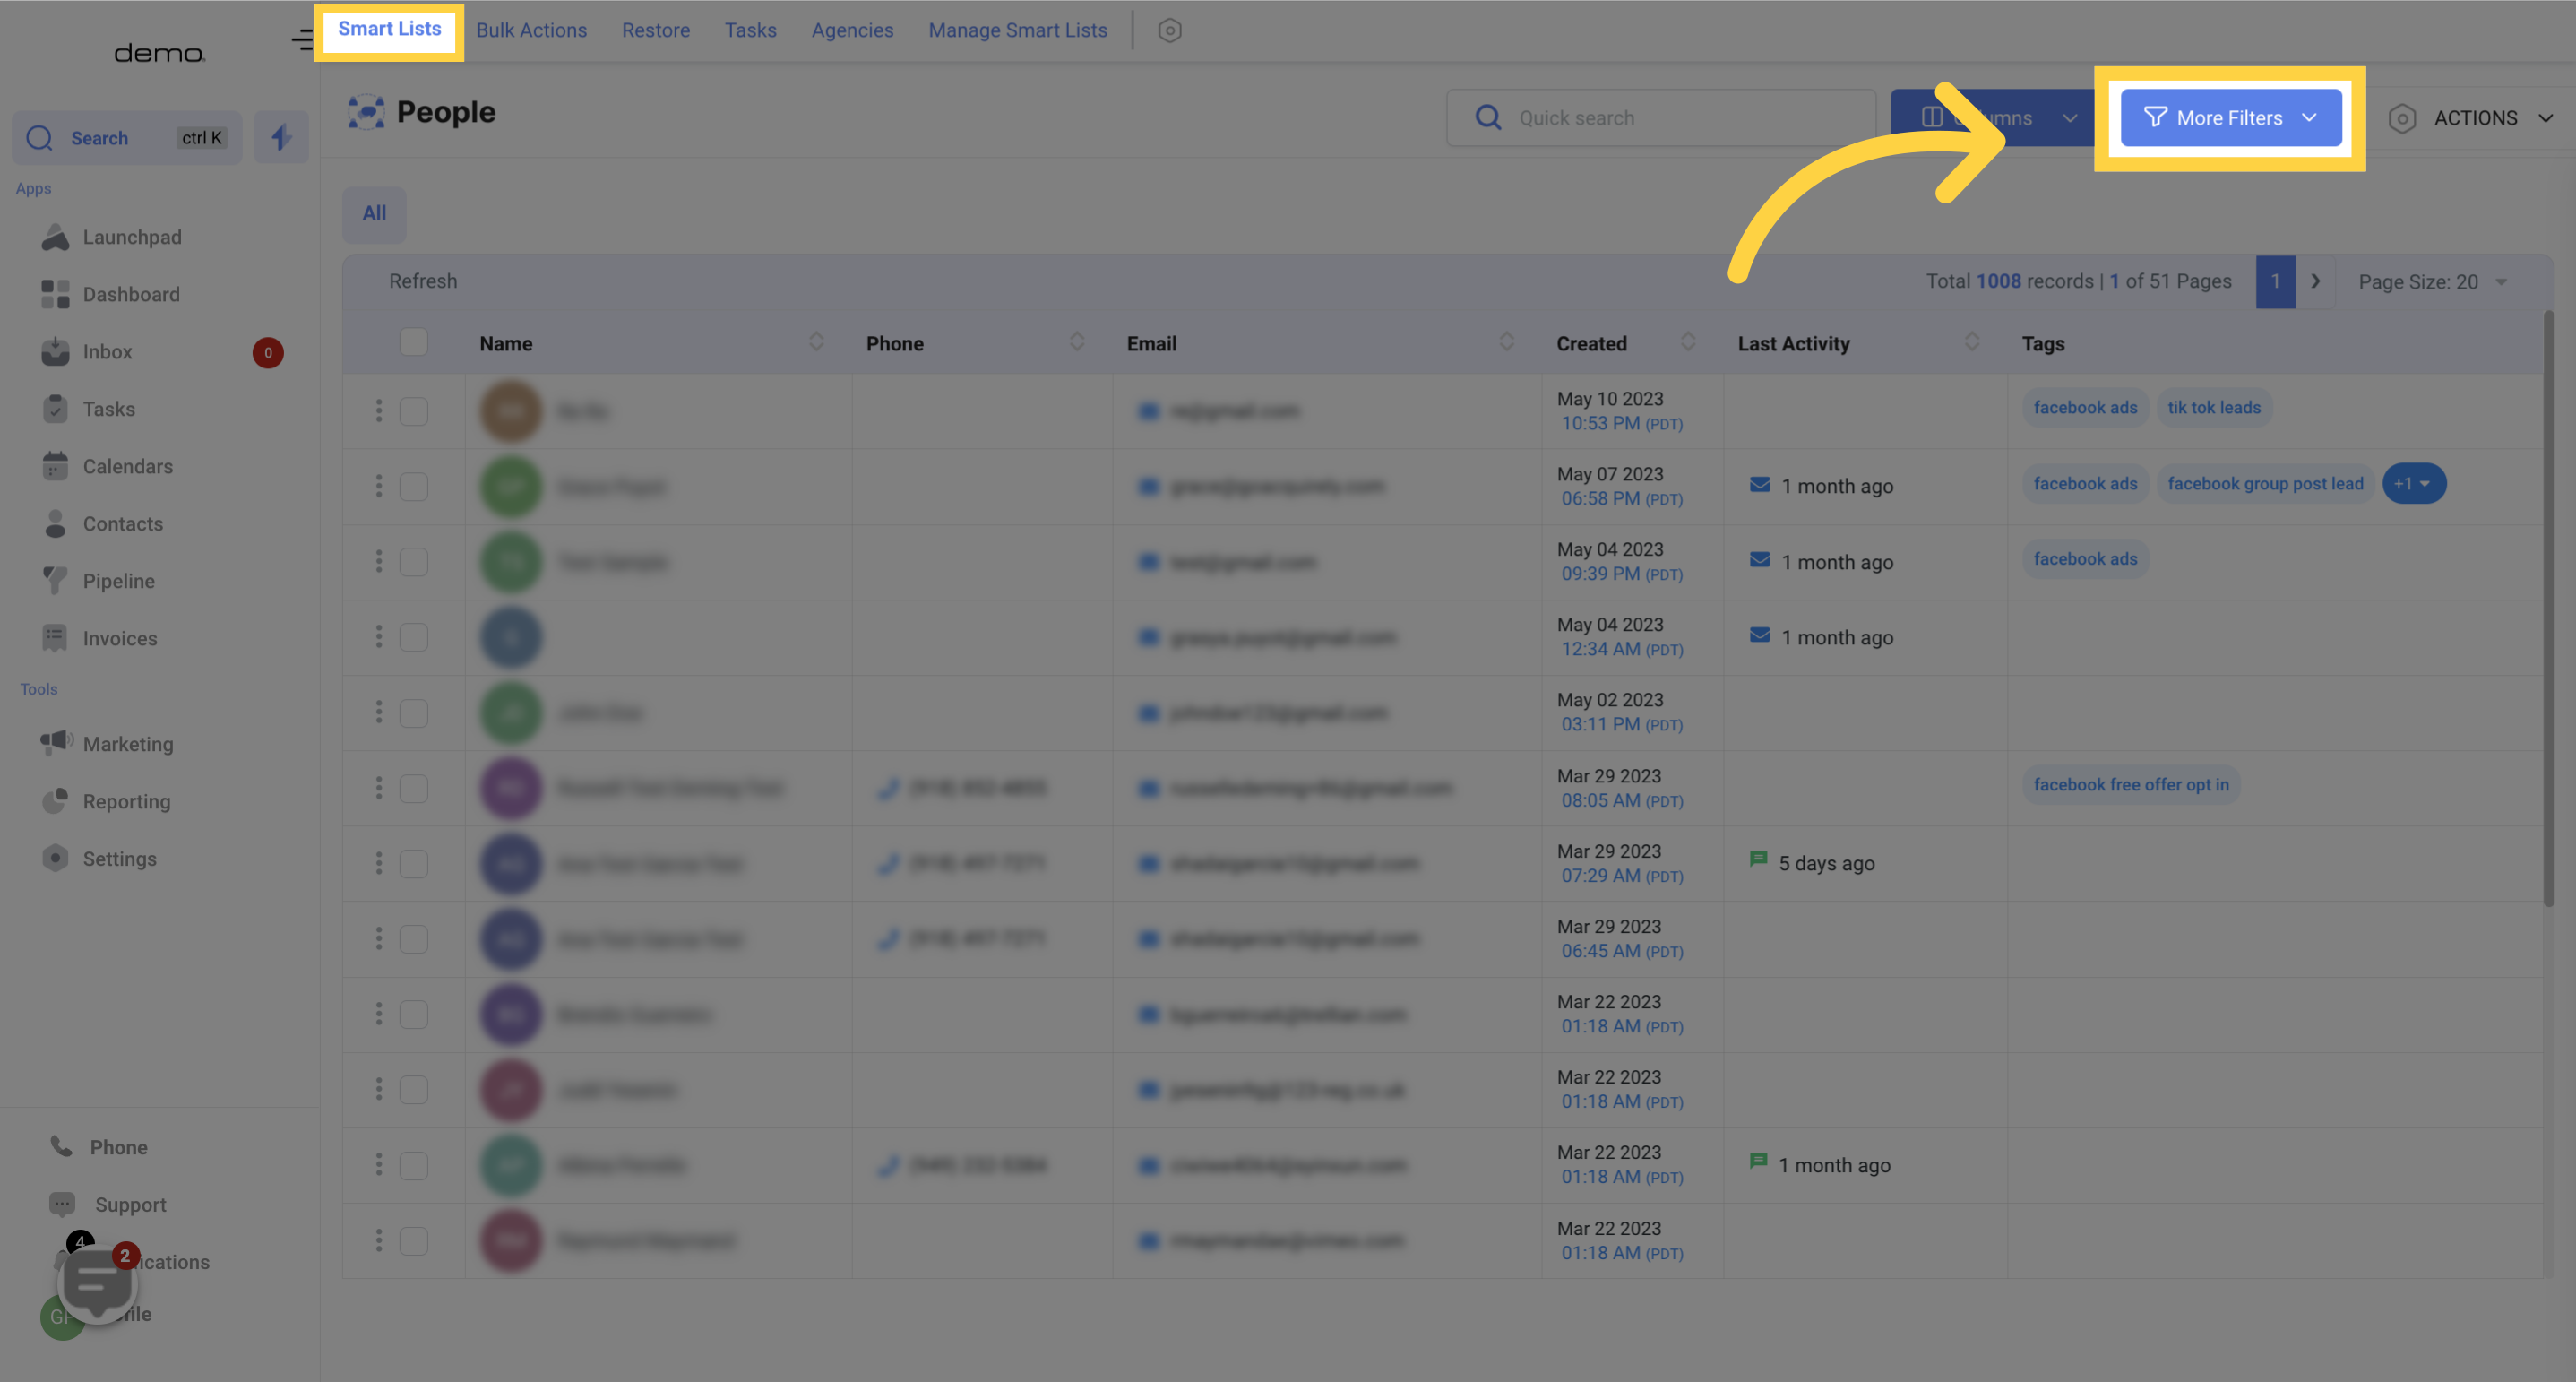
By clicking the "More Filters" button, you can access the filter menu for your smart lists. This menu enables you to choose filters and construct your smart lists. Additionally, you can perform a speedy search using the filter.
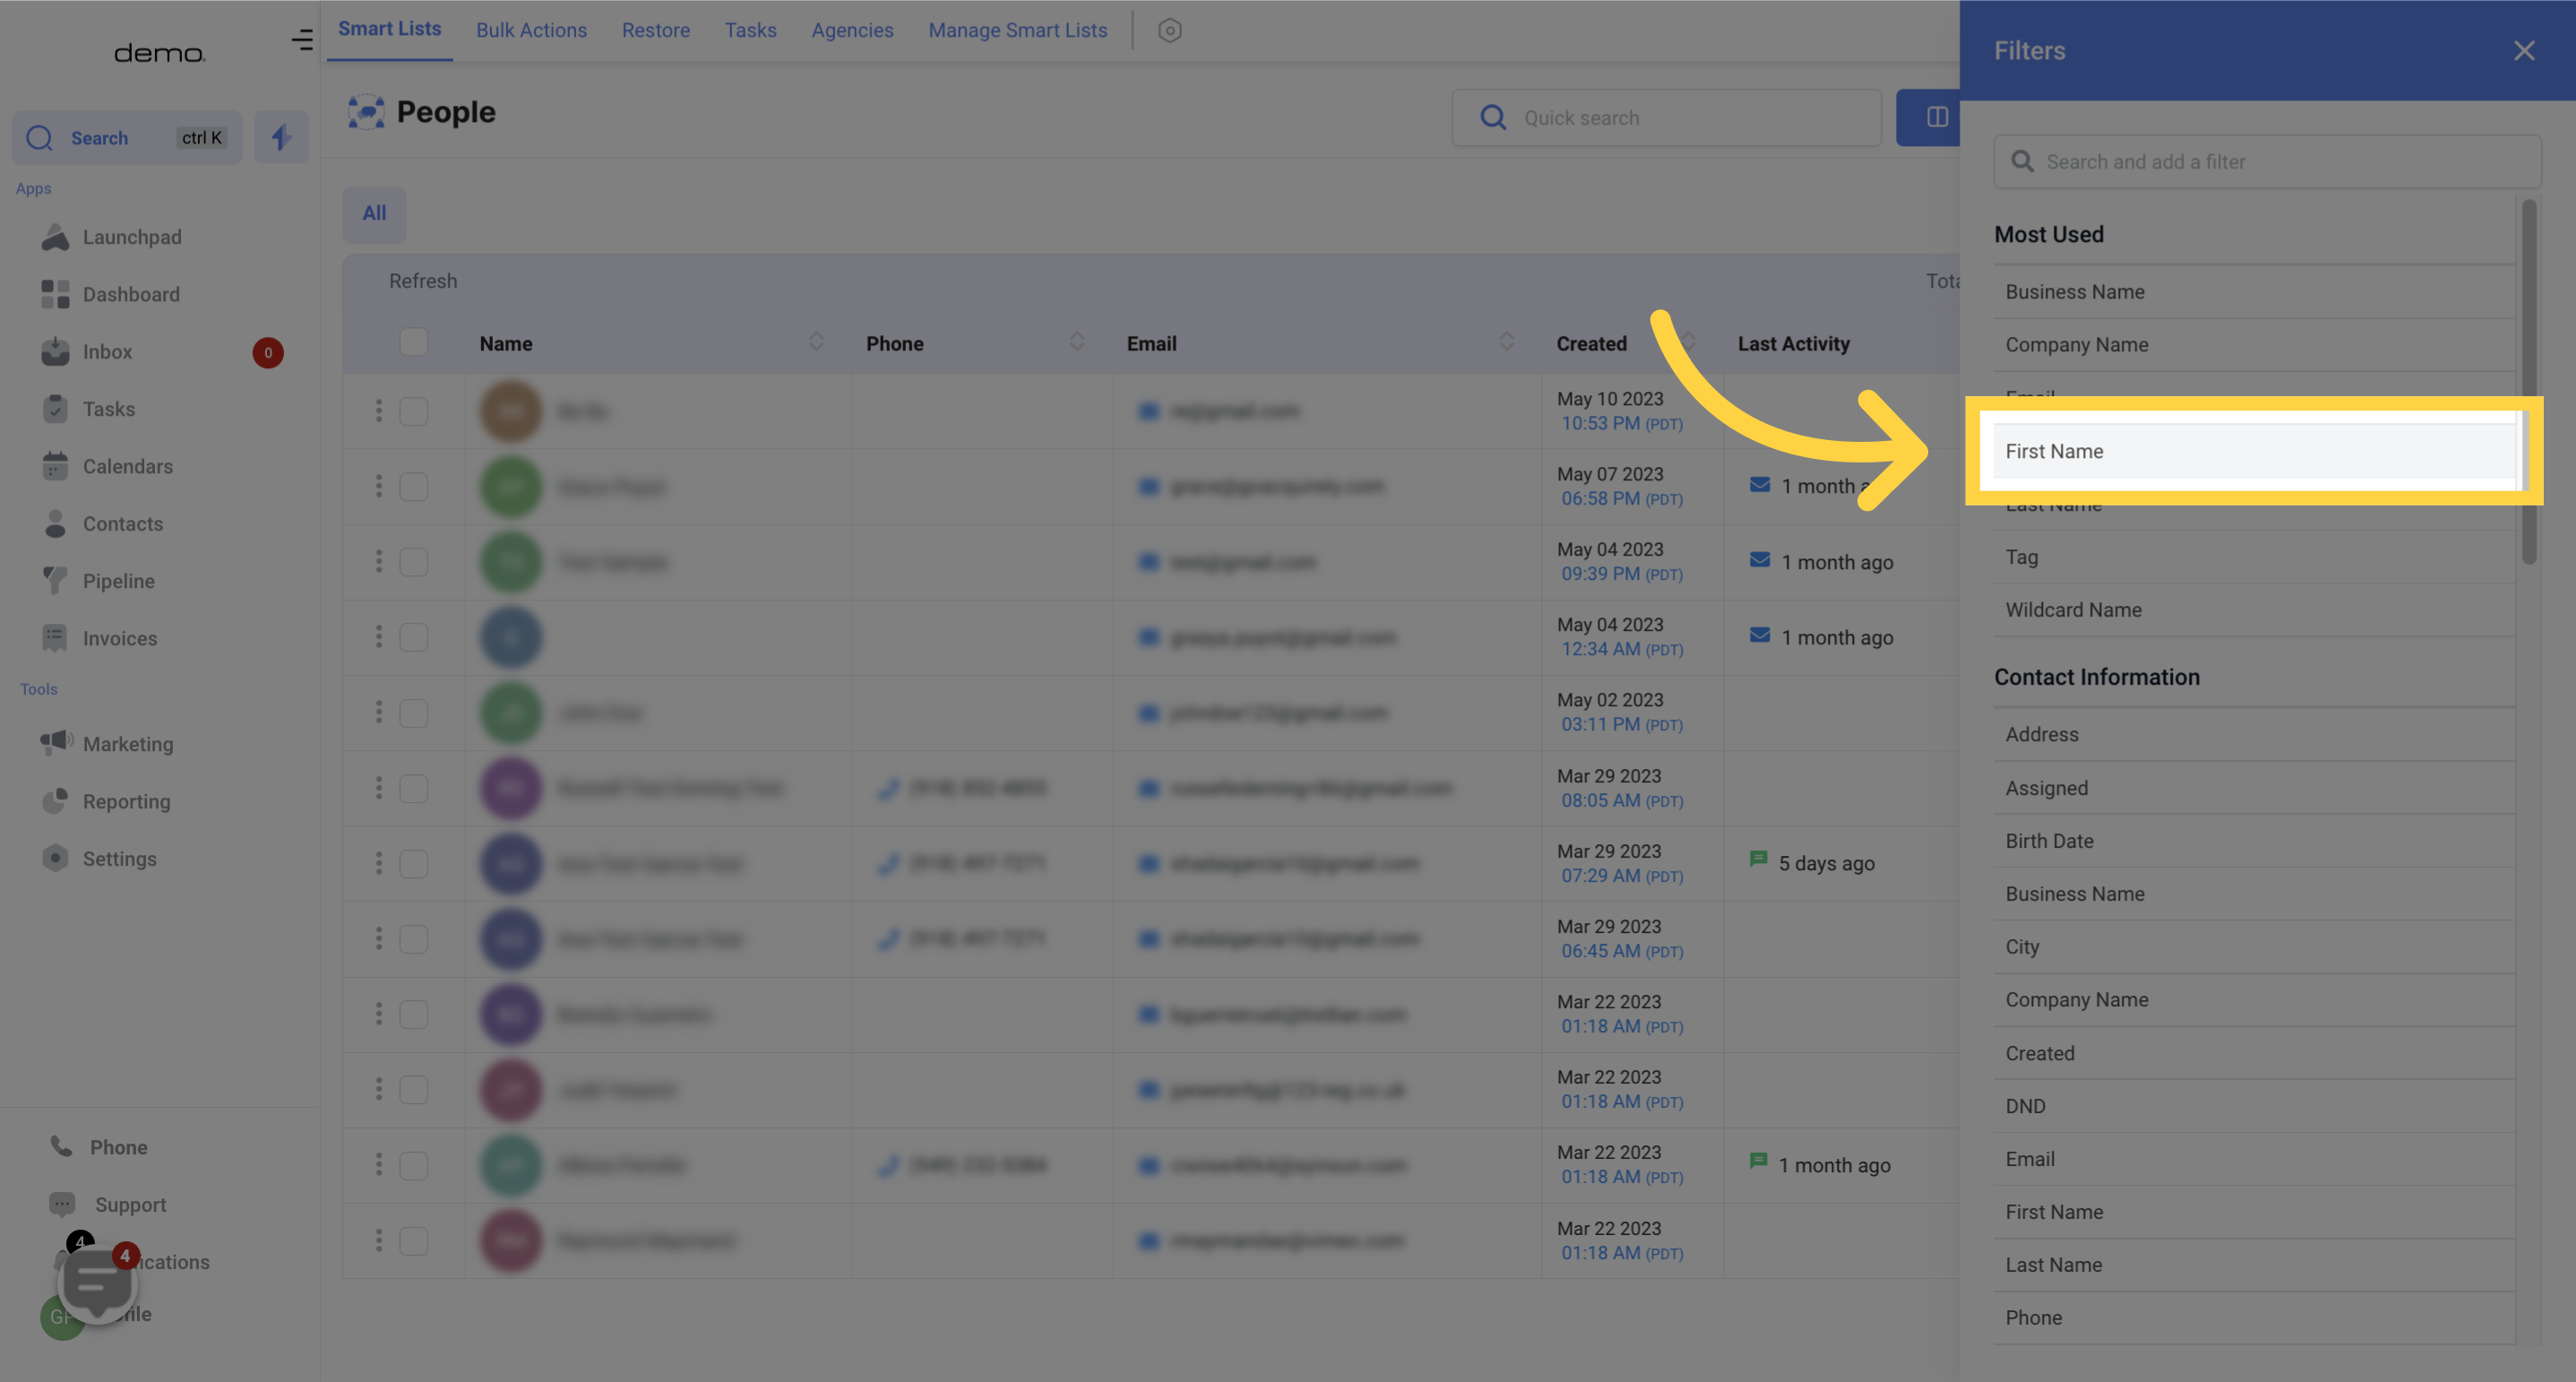
Upon accessing the filter menu for your smart lists, you will be presented with a list of filterable items to choose from. These specific data points, found within your CRM, can be utilized to filter contacts and create new smart lists.
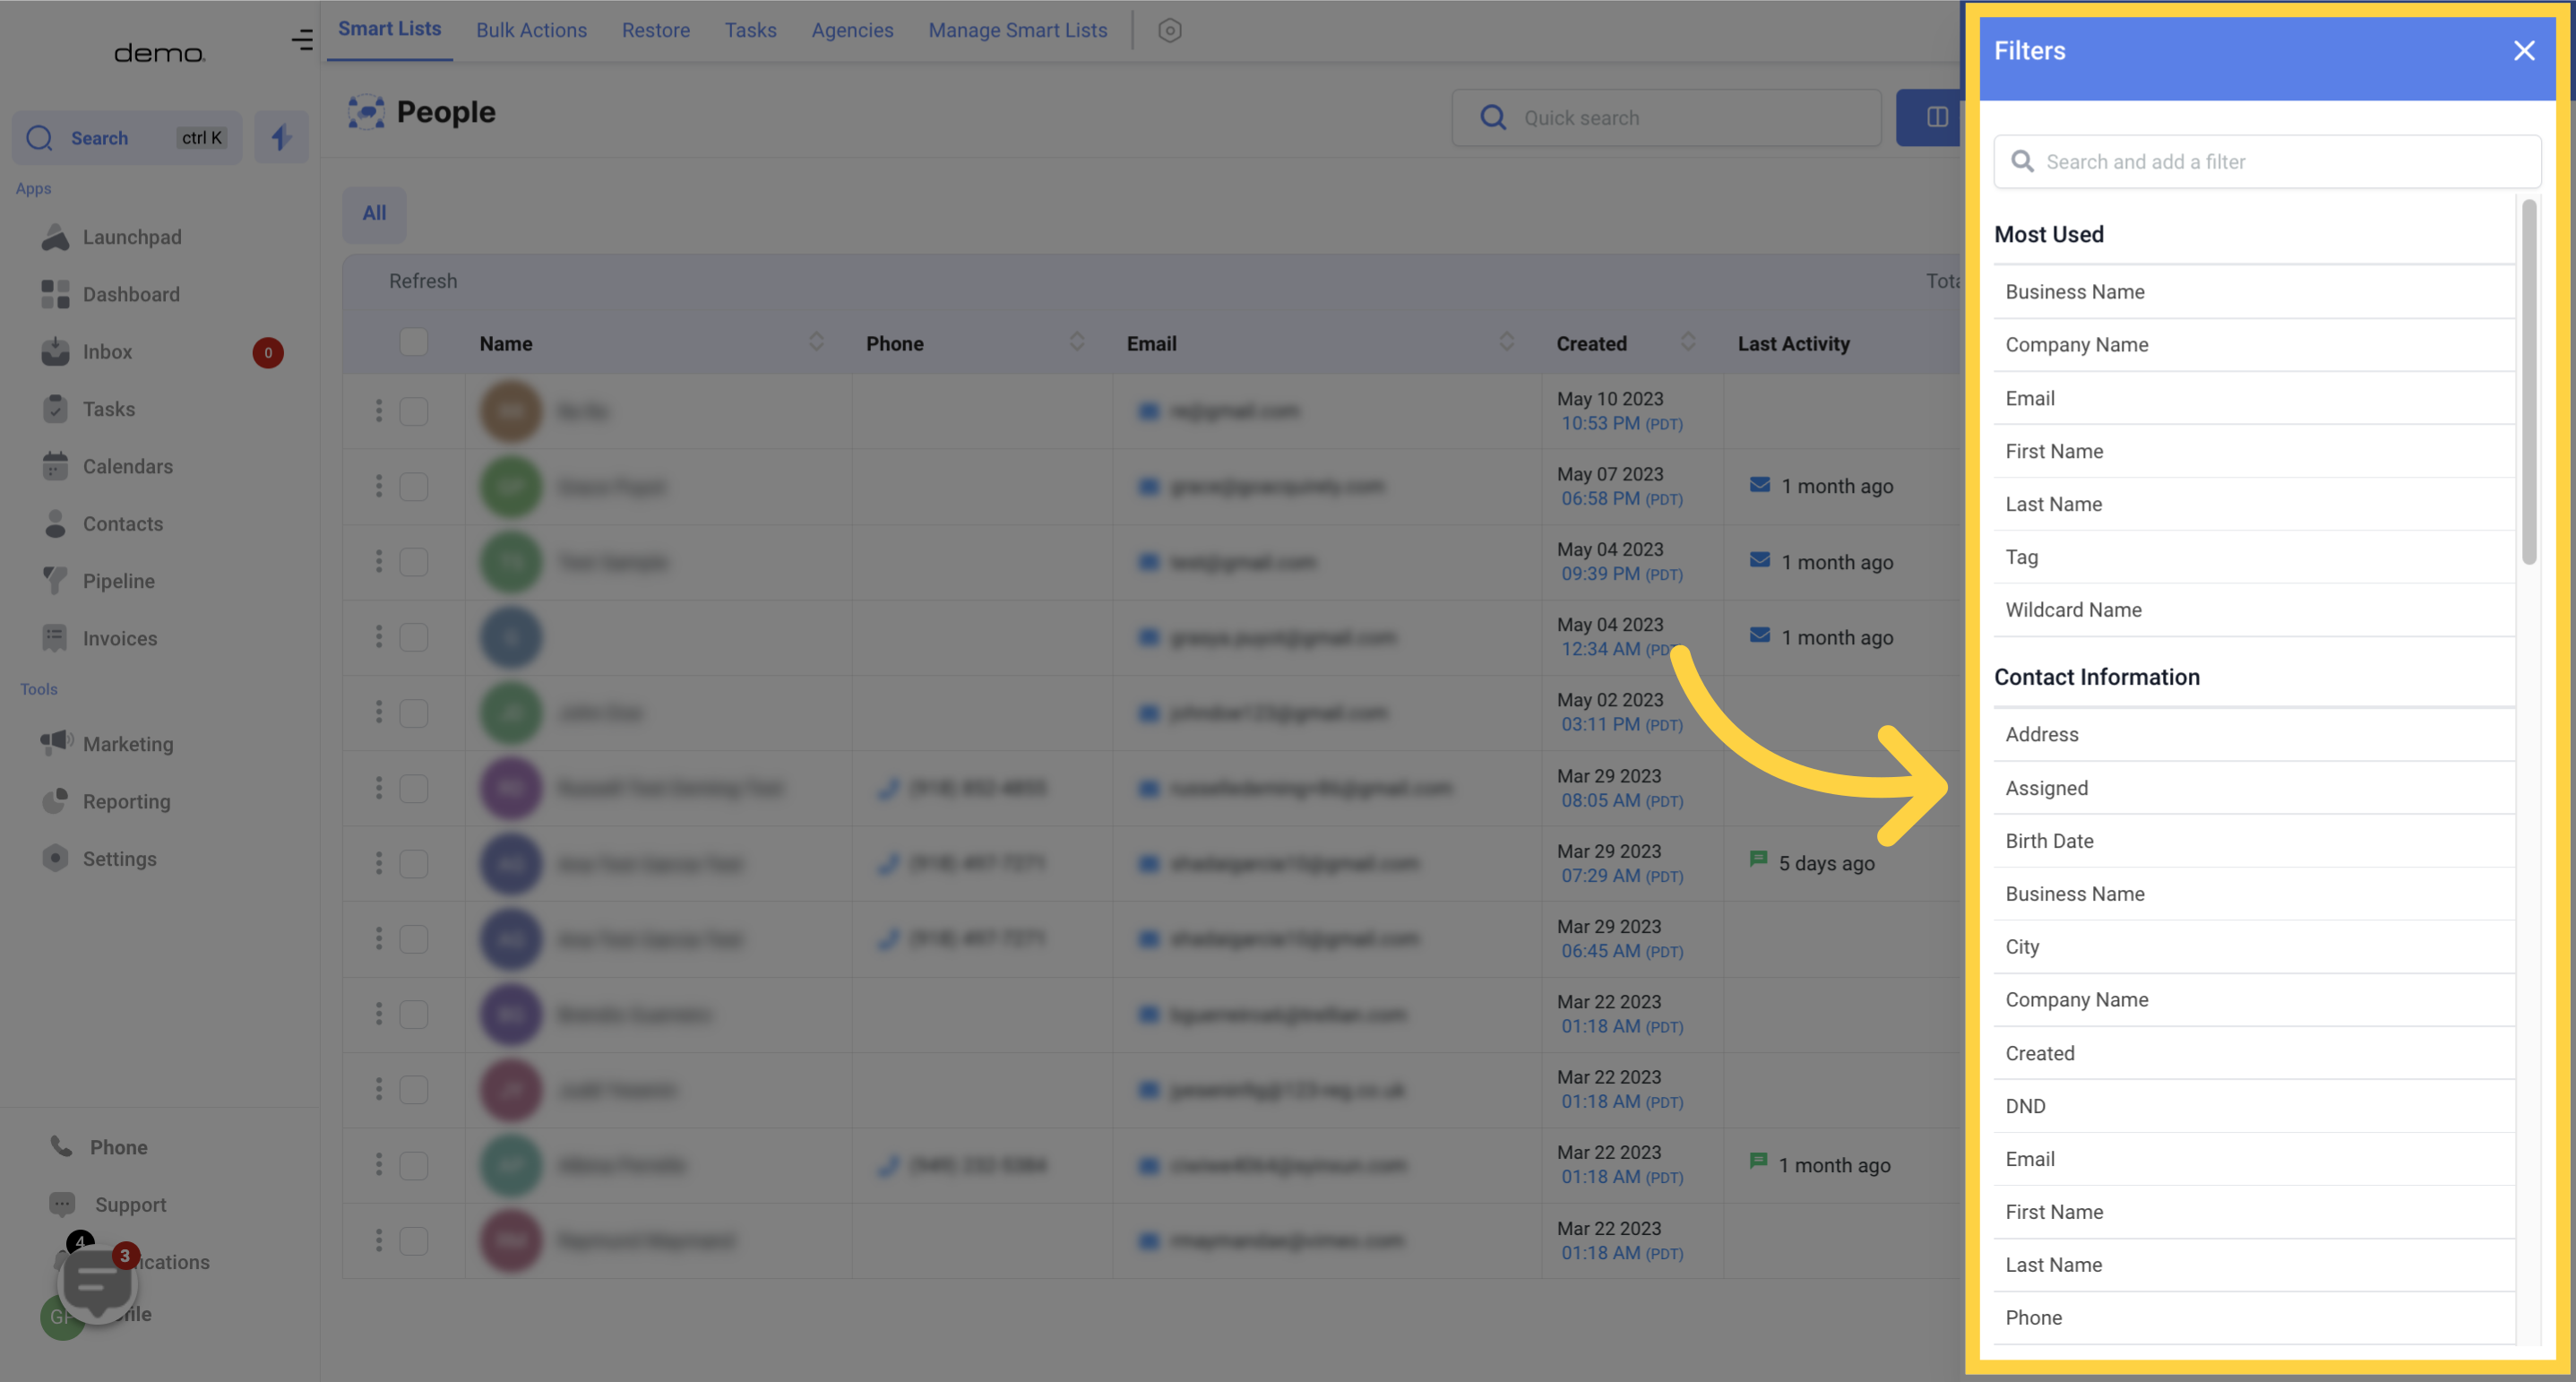
Select the criteria that you want to use to filter your contacts.
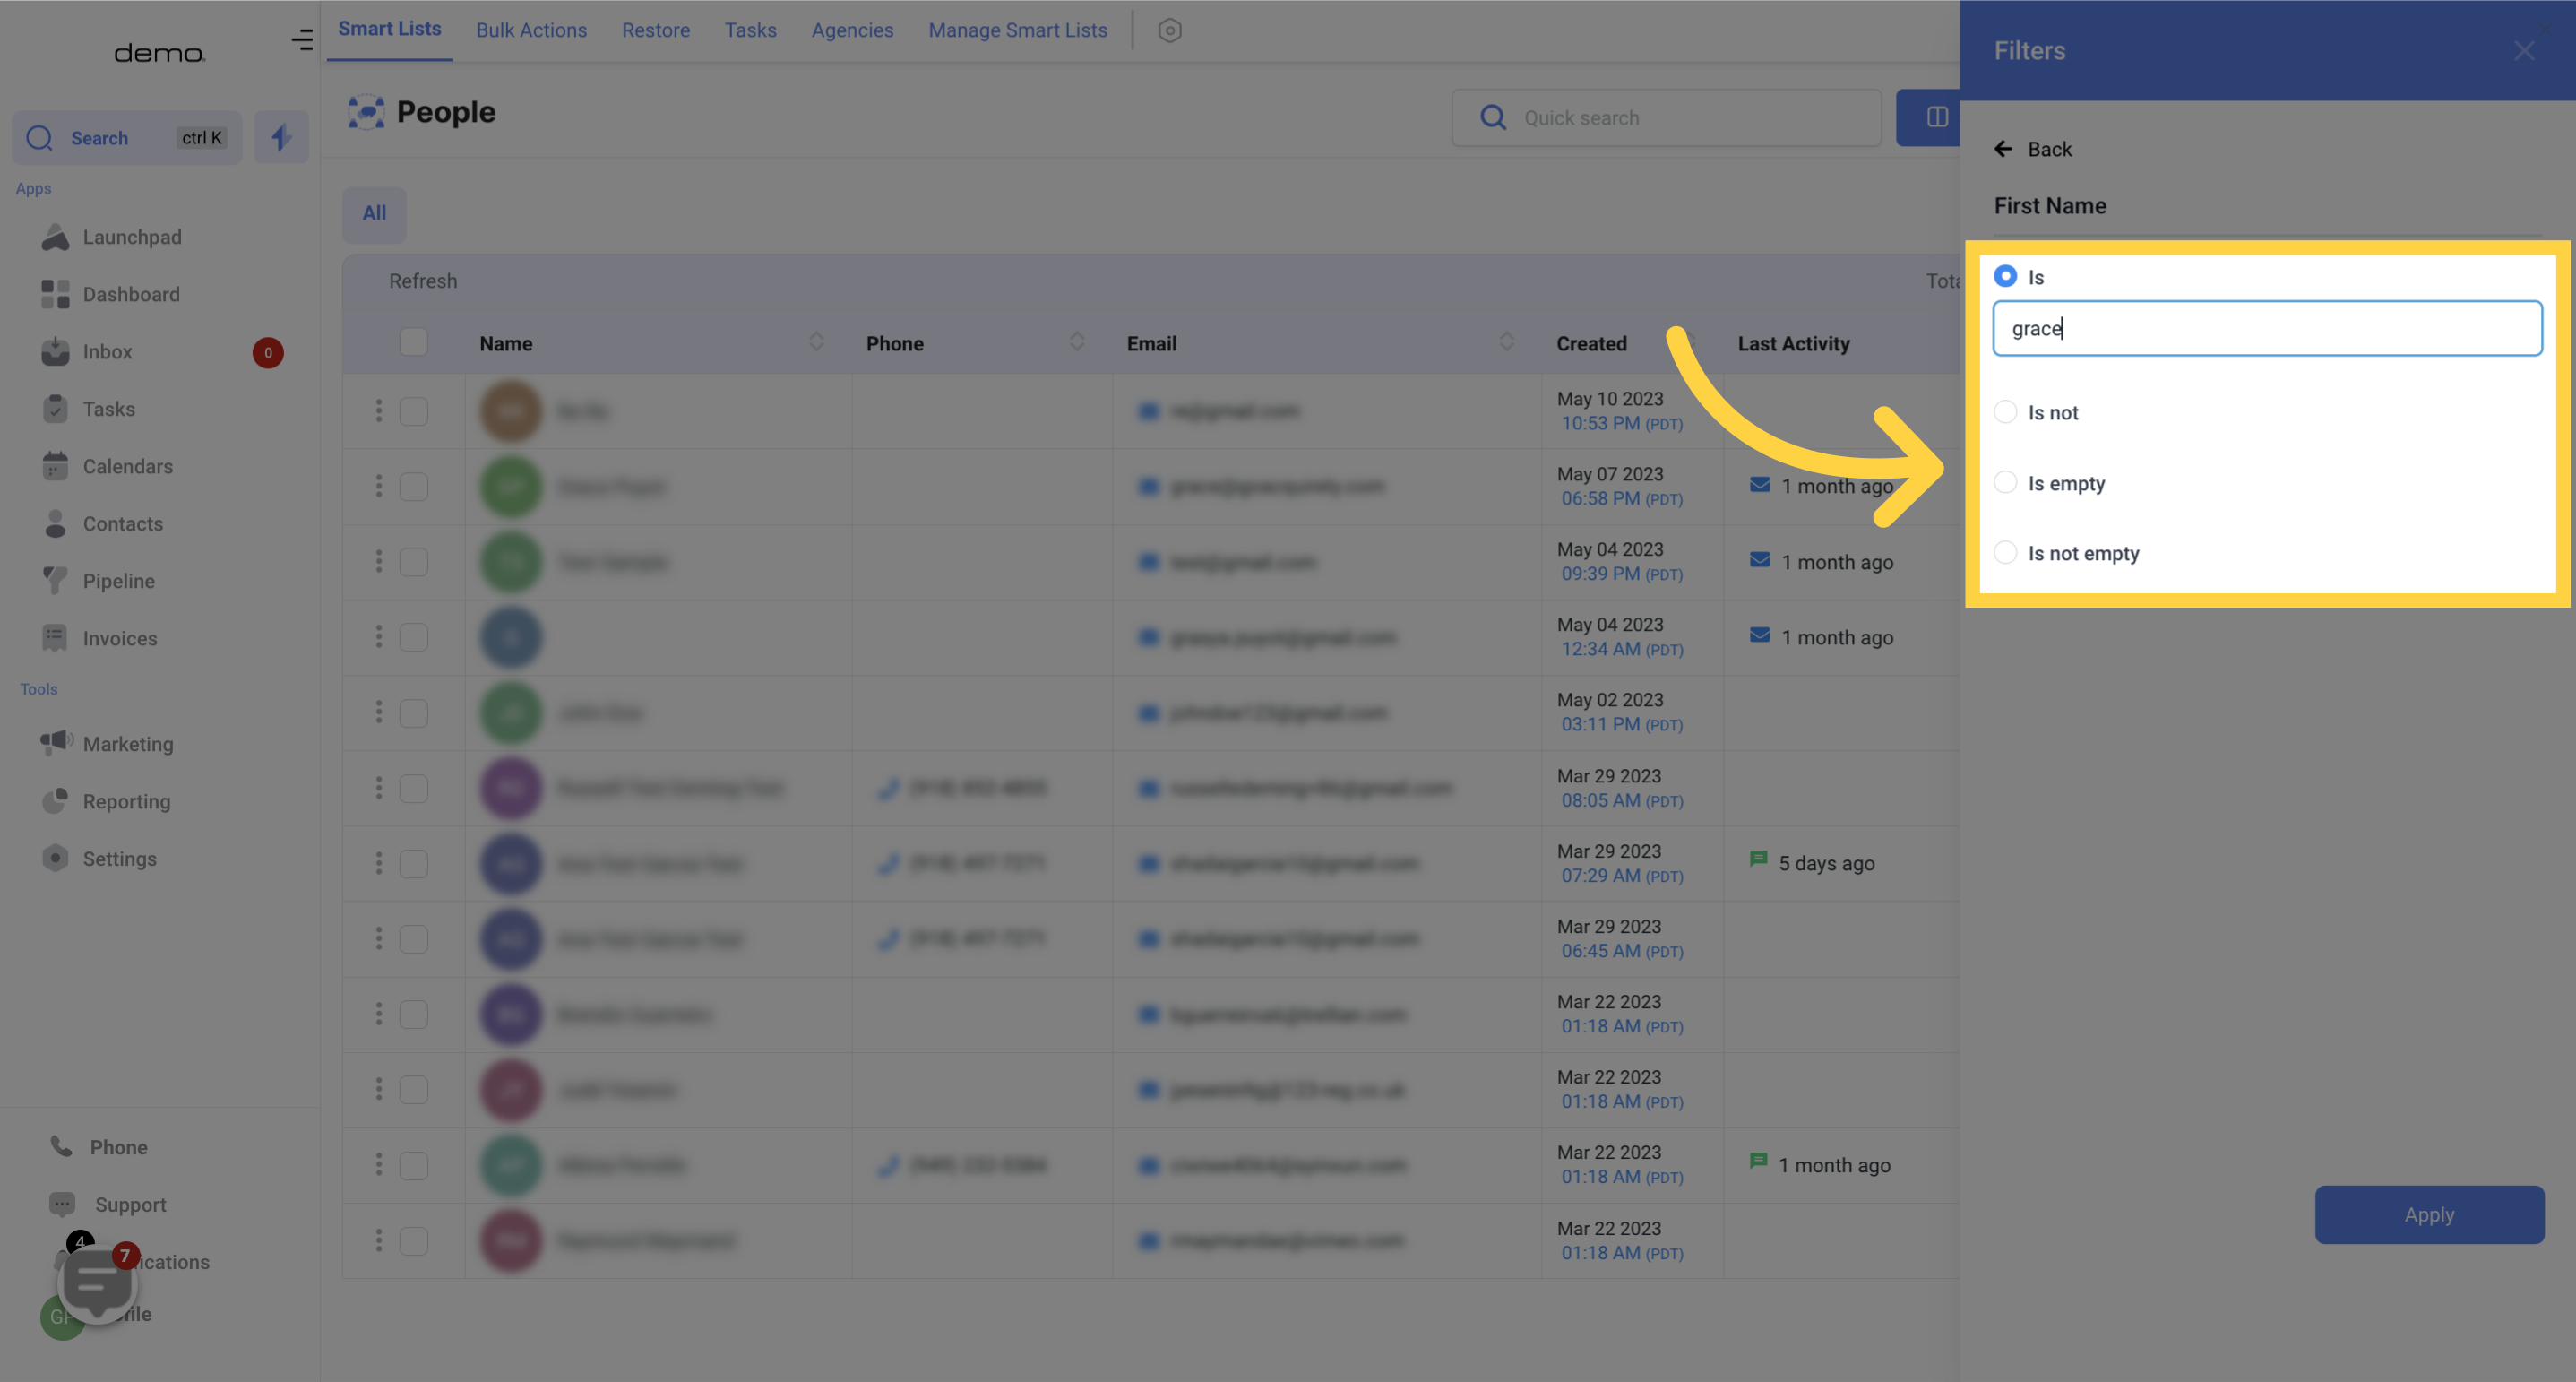
Enter the filter value
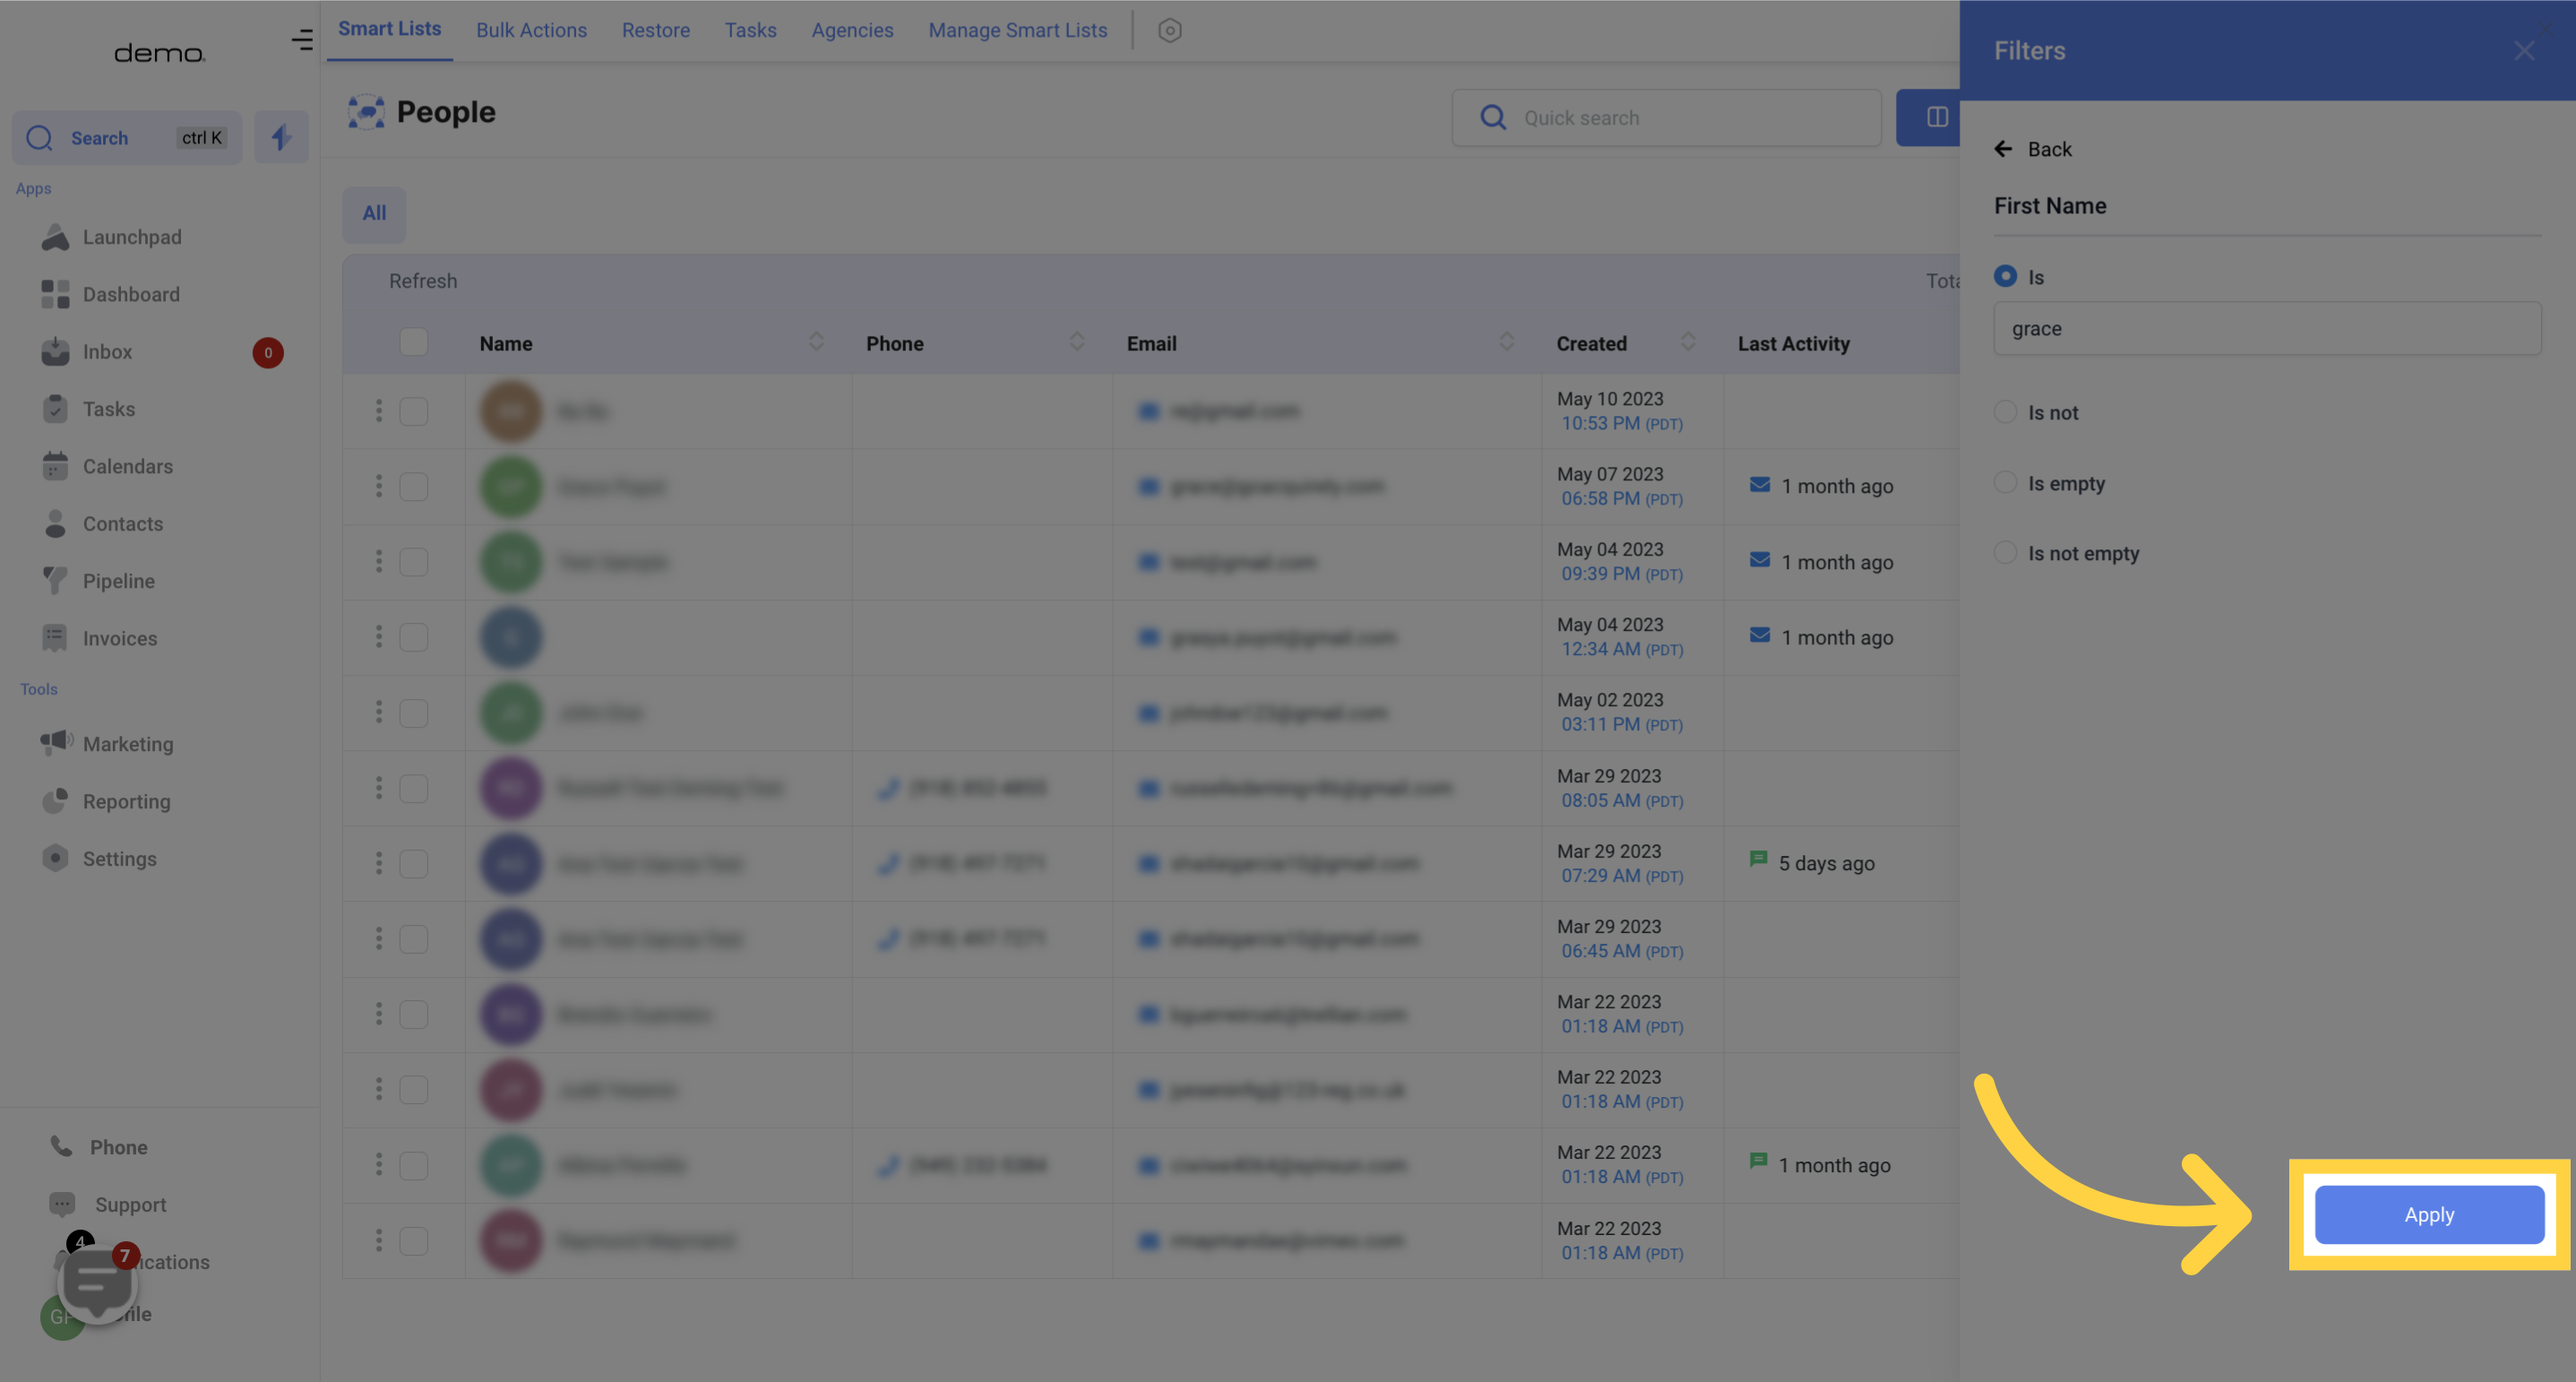
Choose a filter and select your preferred custom fields, then click on the Apply button.
After submitting your application, you will be taken to the filter's information page where you can choose to either Edit, Delete, or Save it as a Smart List. Select the Save as a Smart List option, which will lead you to a page where you can give your list a name.
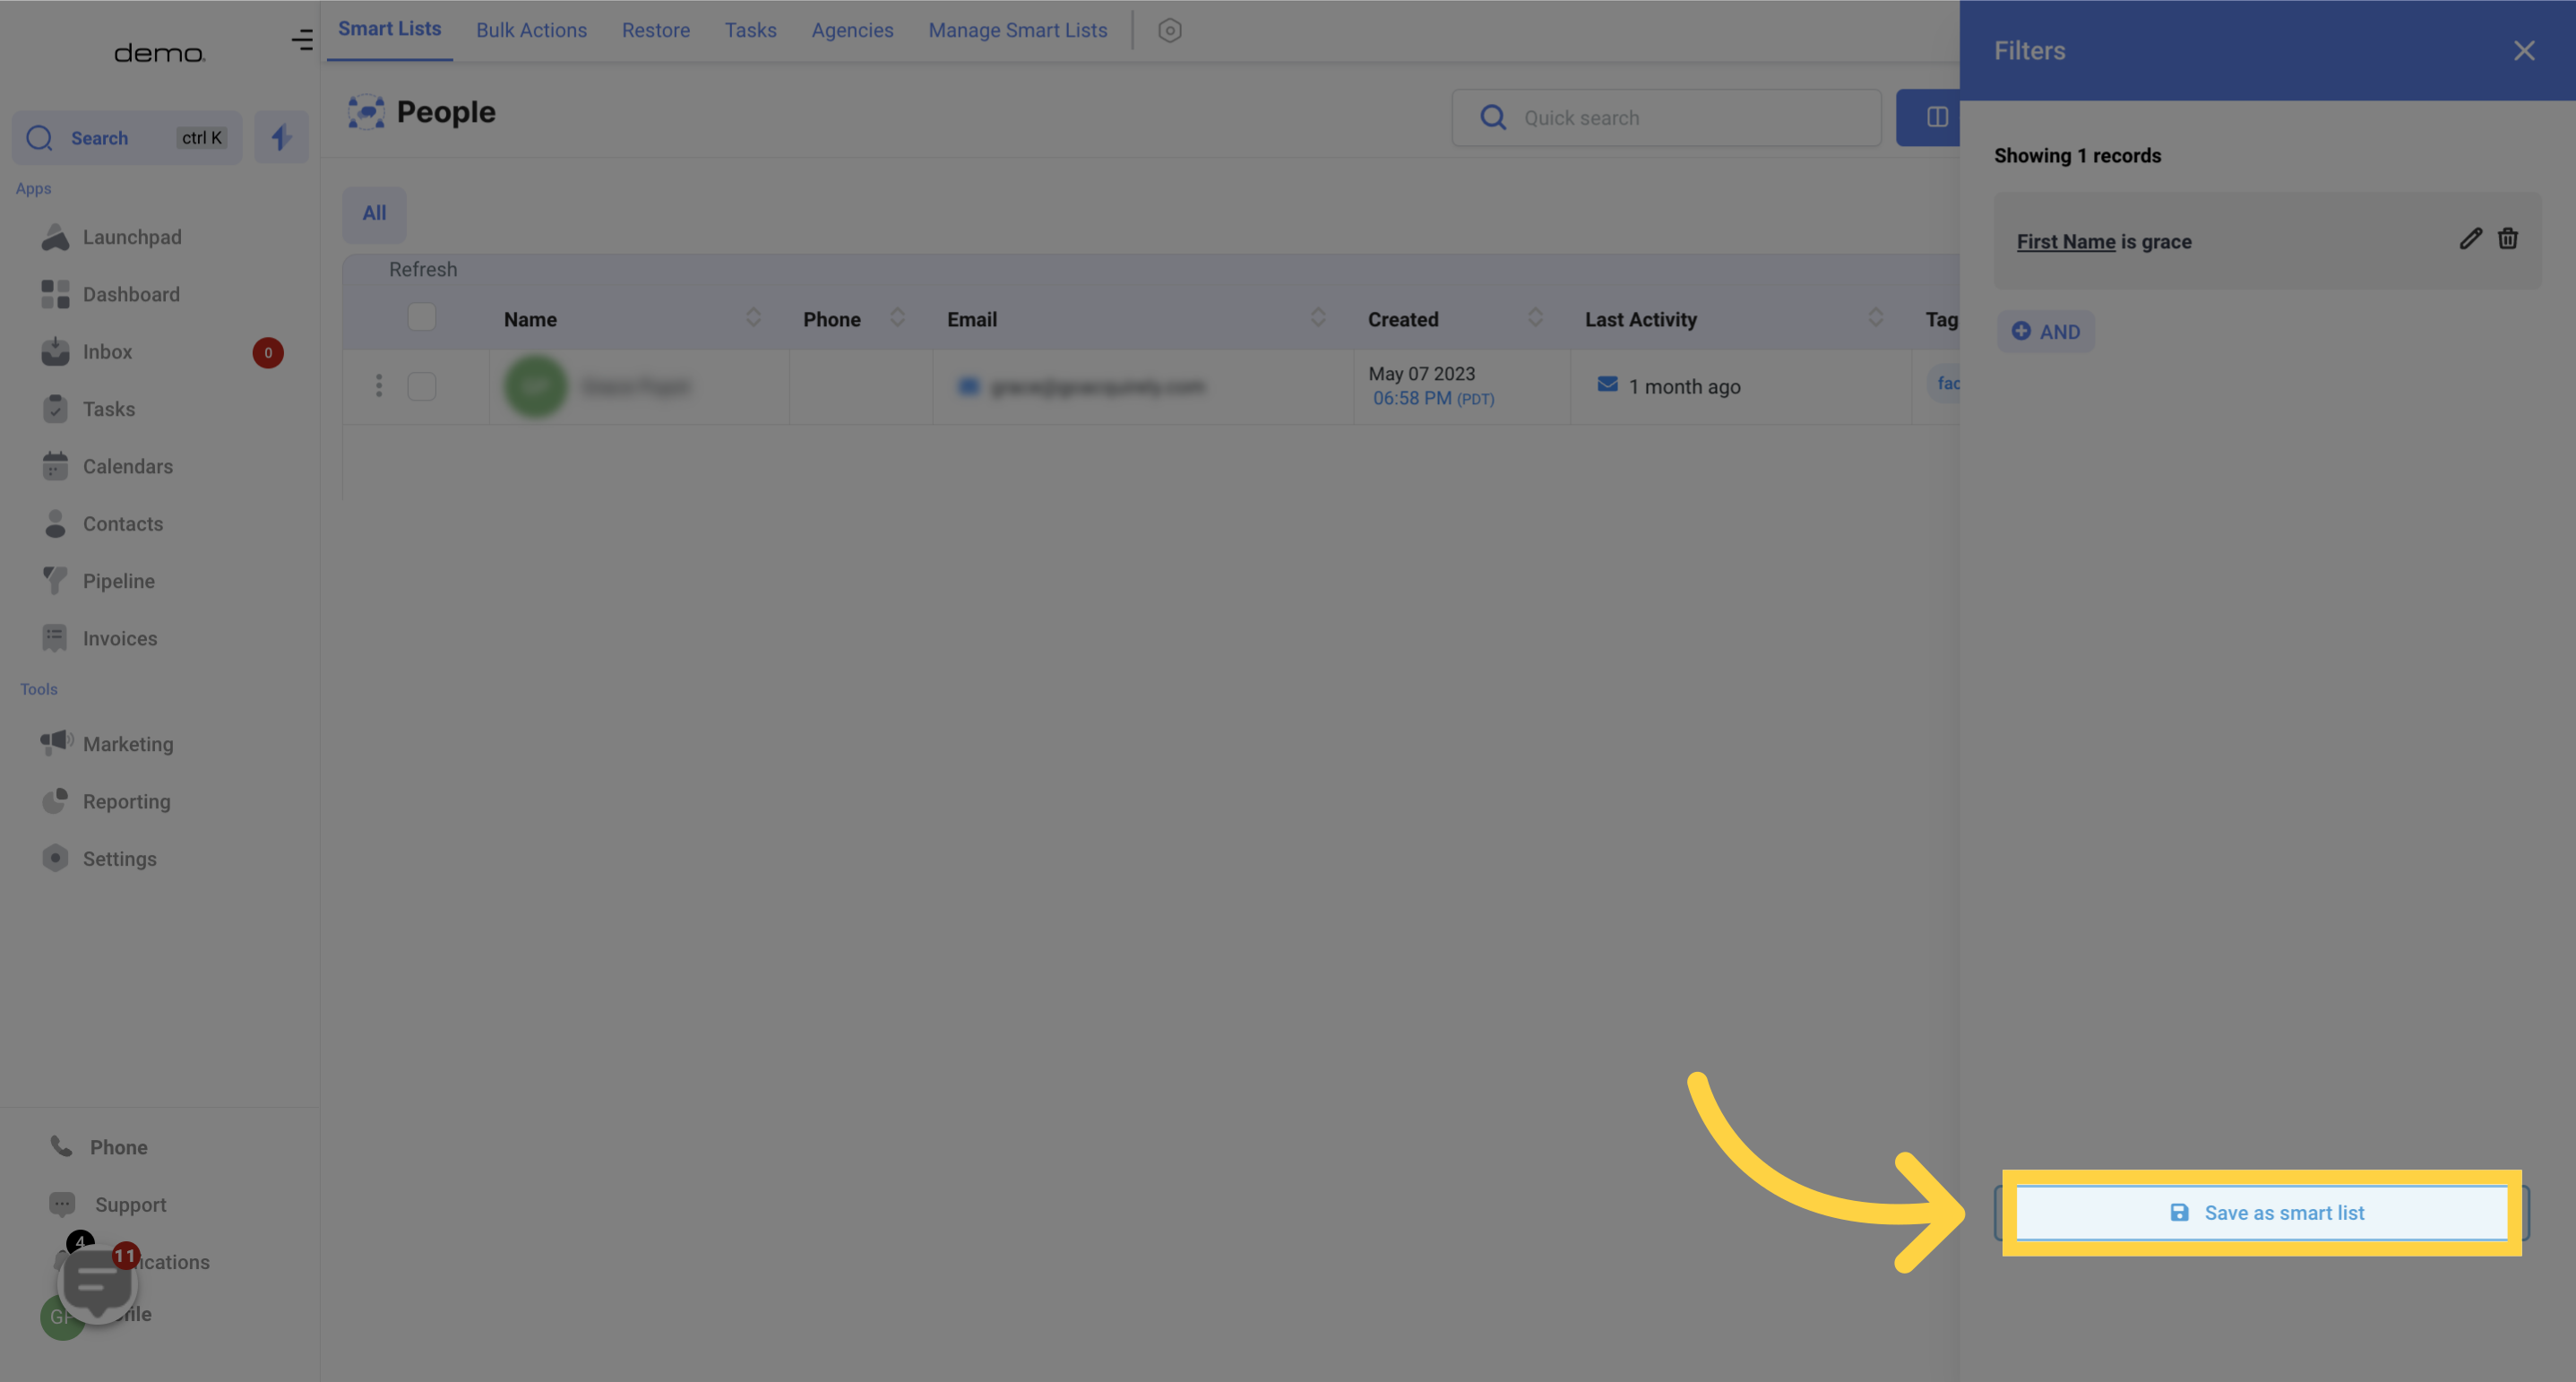

Click on the save button to save the smart list.

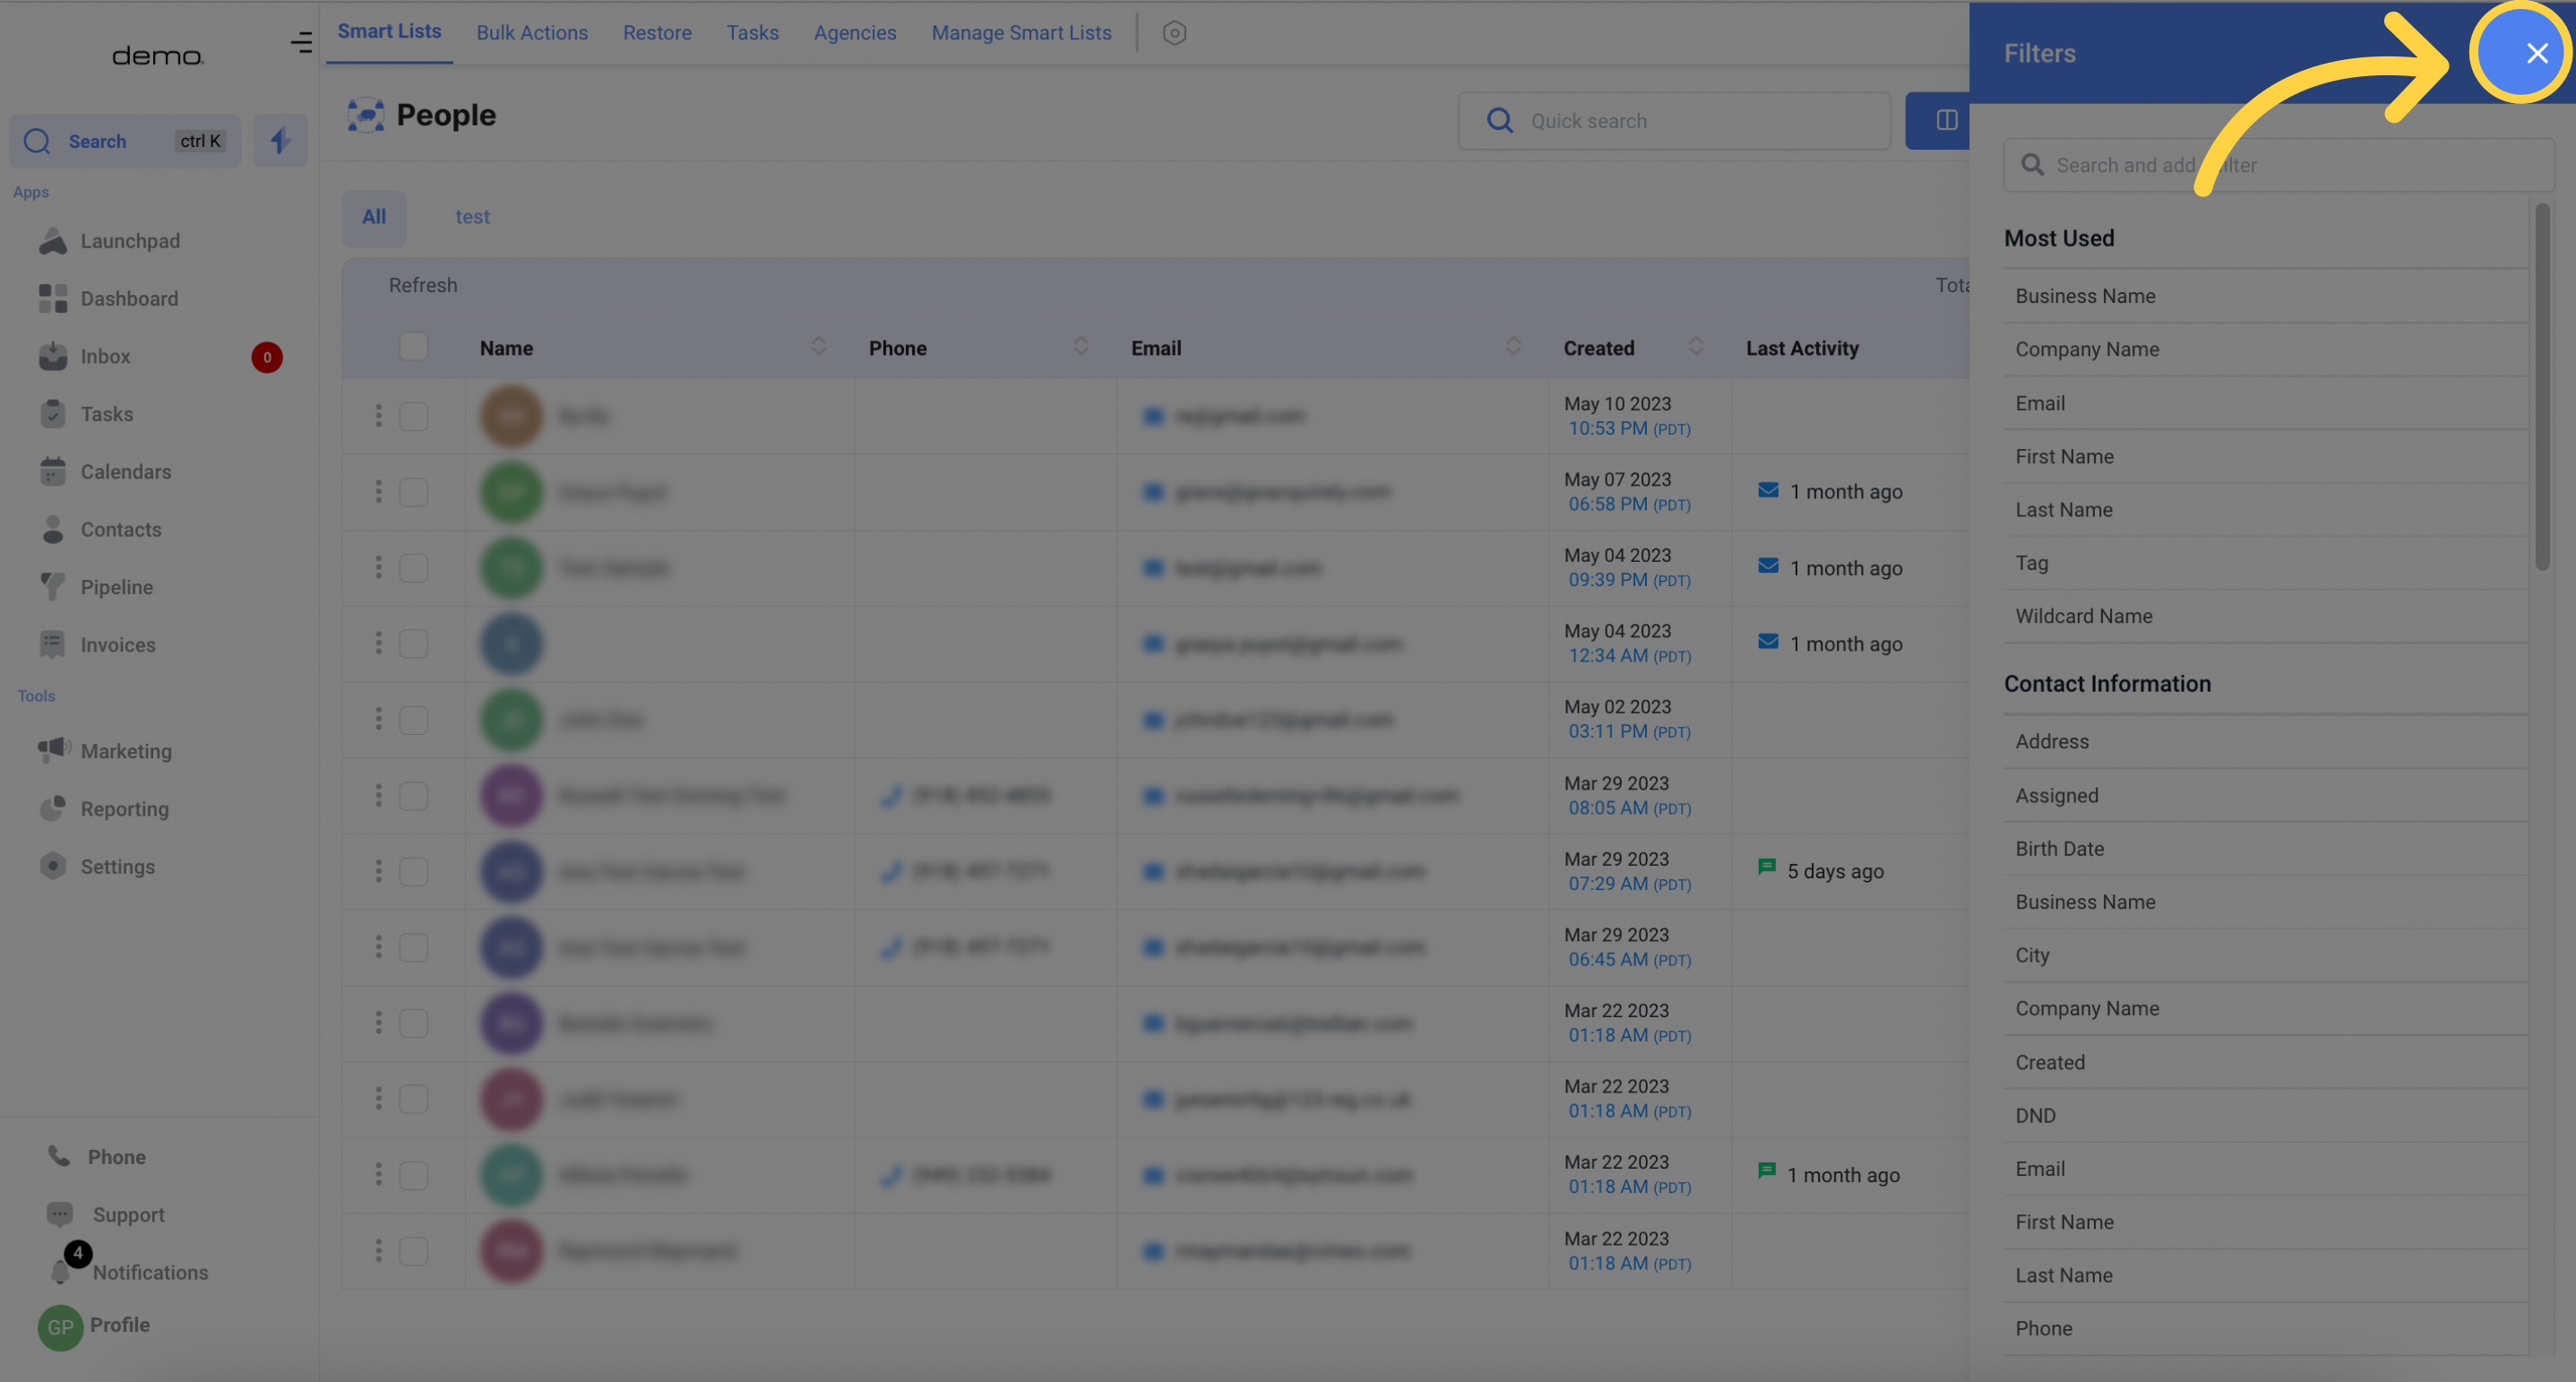
After selecting filters, you can close the side menu of filters by clicking on the 'X' button that opened it.