Welcome to the creation section, where endless opportunities await! While automation is often used for creating opportunities, it's important to know how to craft them from scratch as well. Let's dive in!
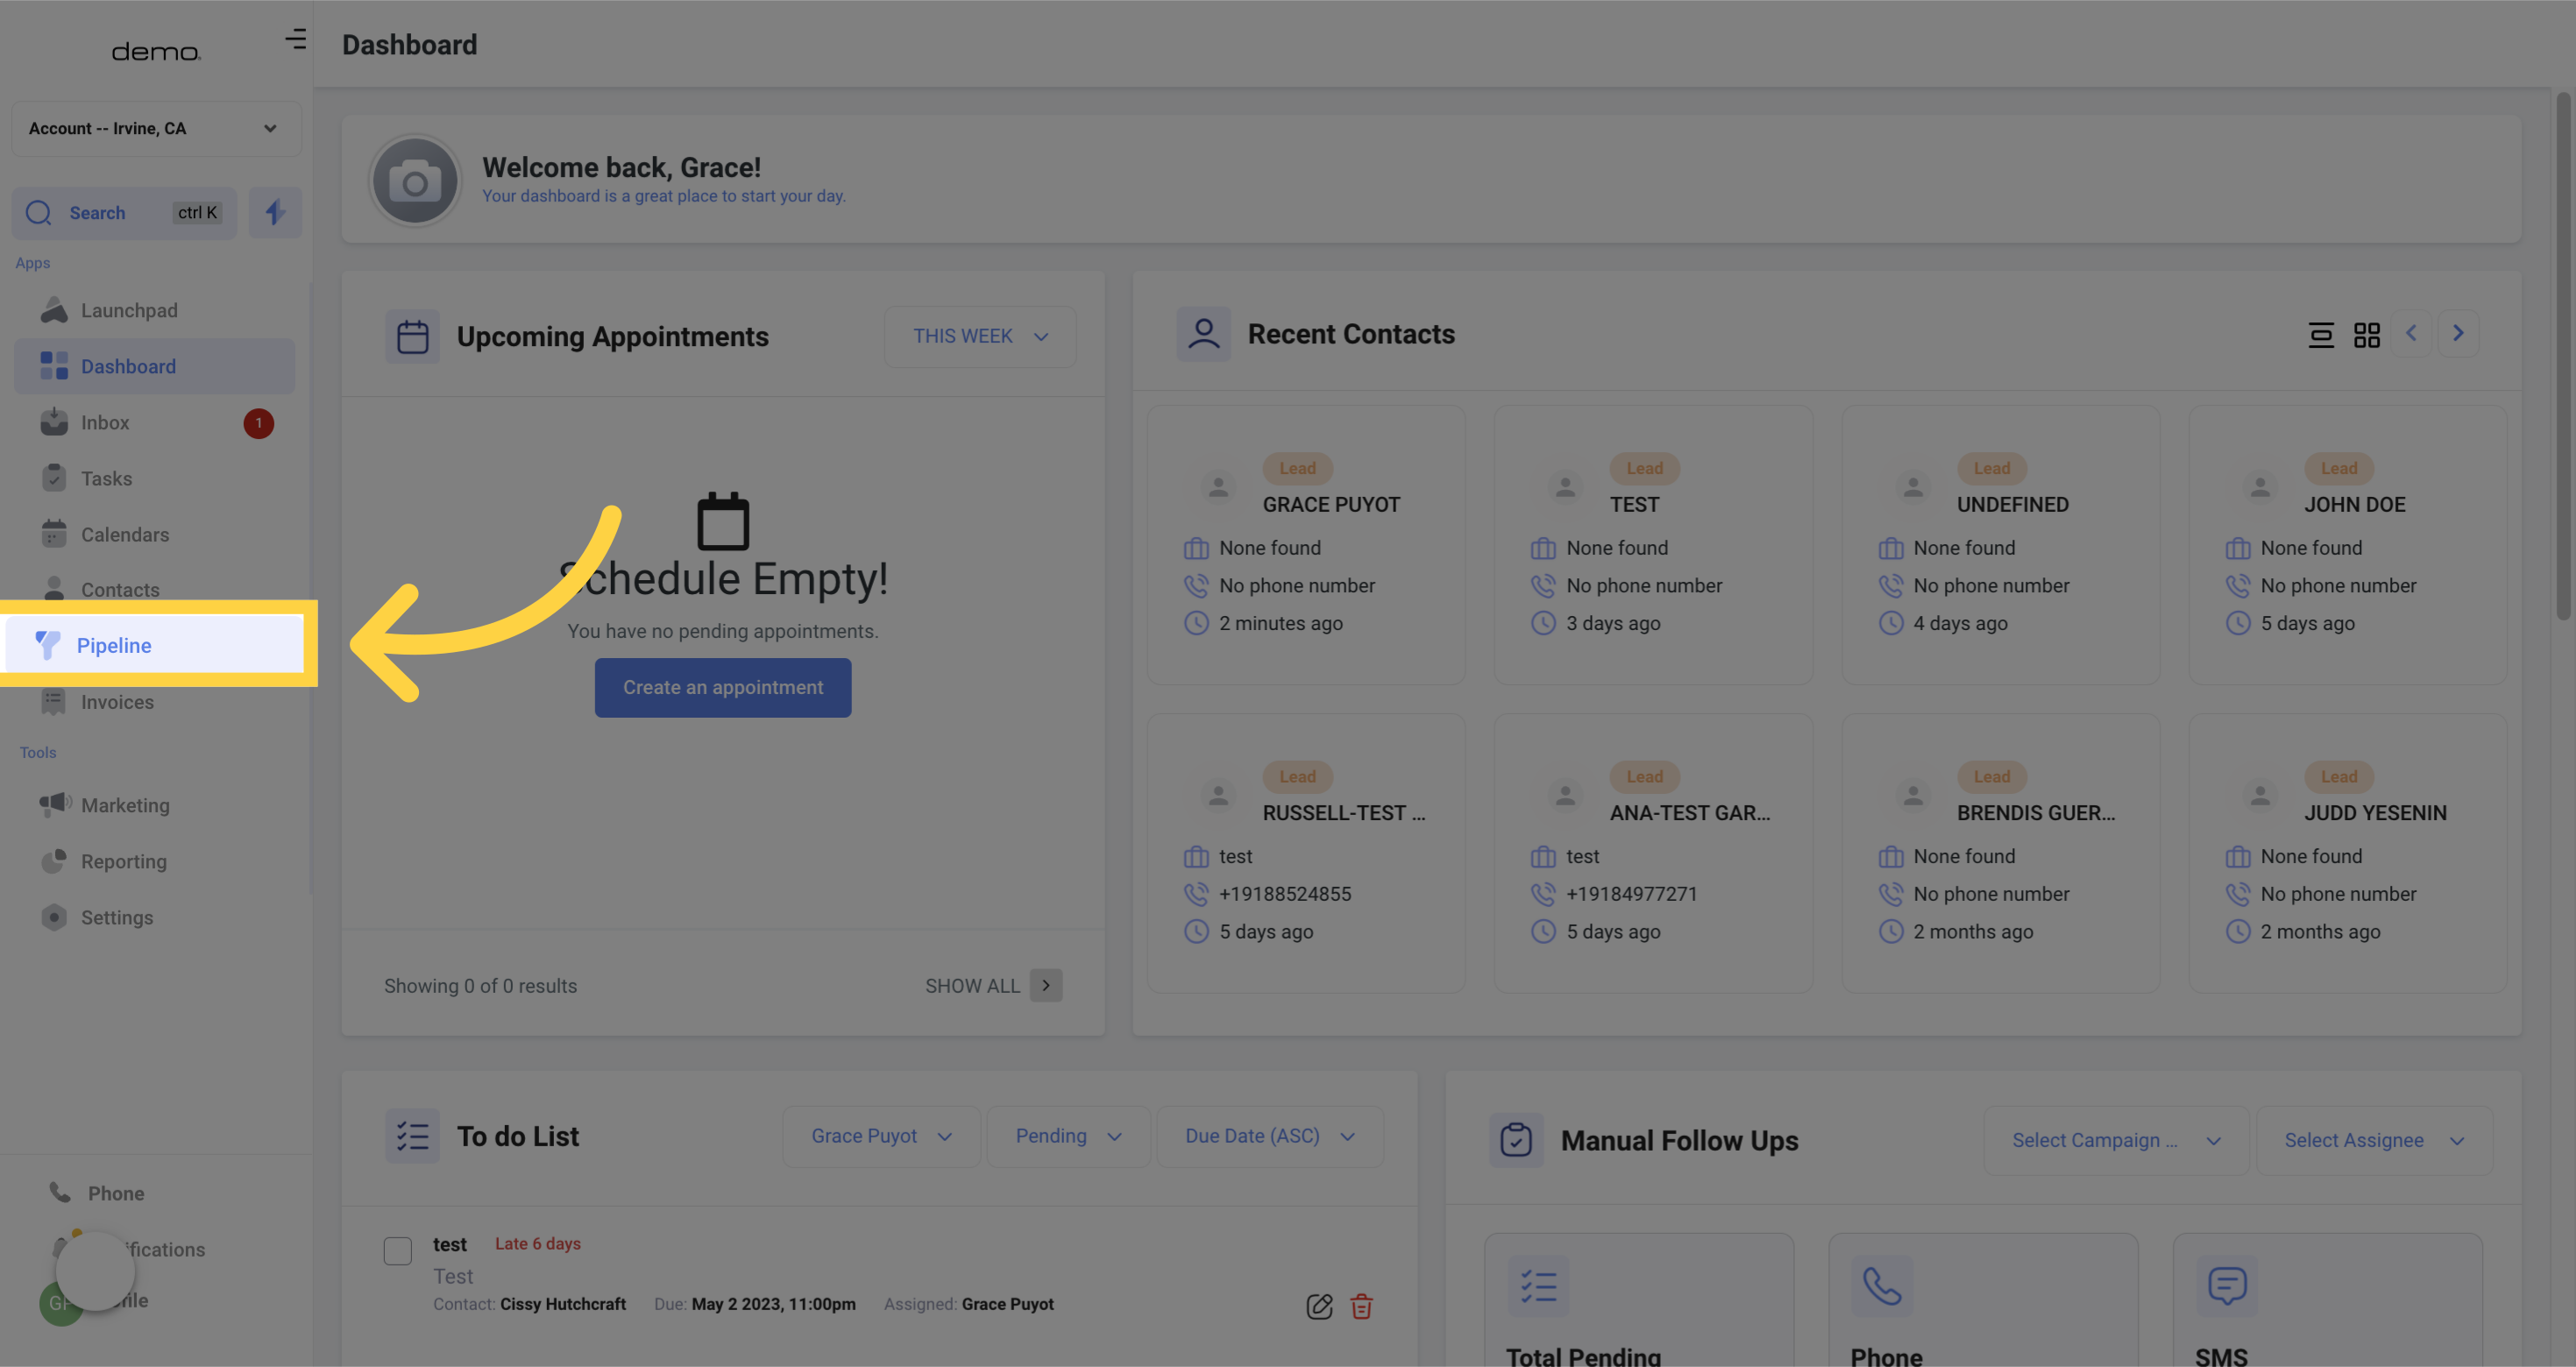
Access the Pipeline section
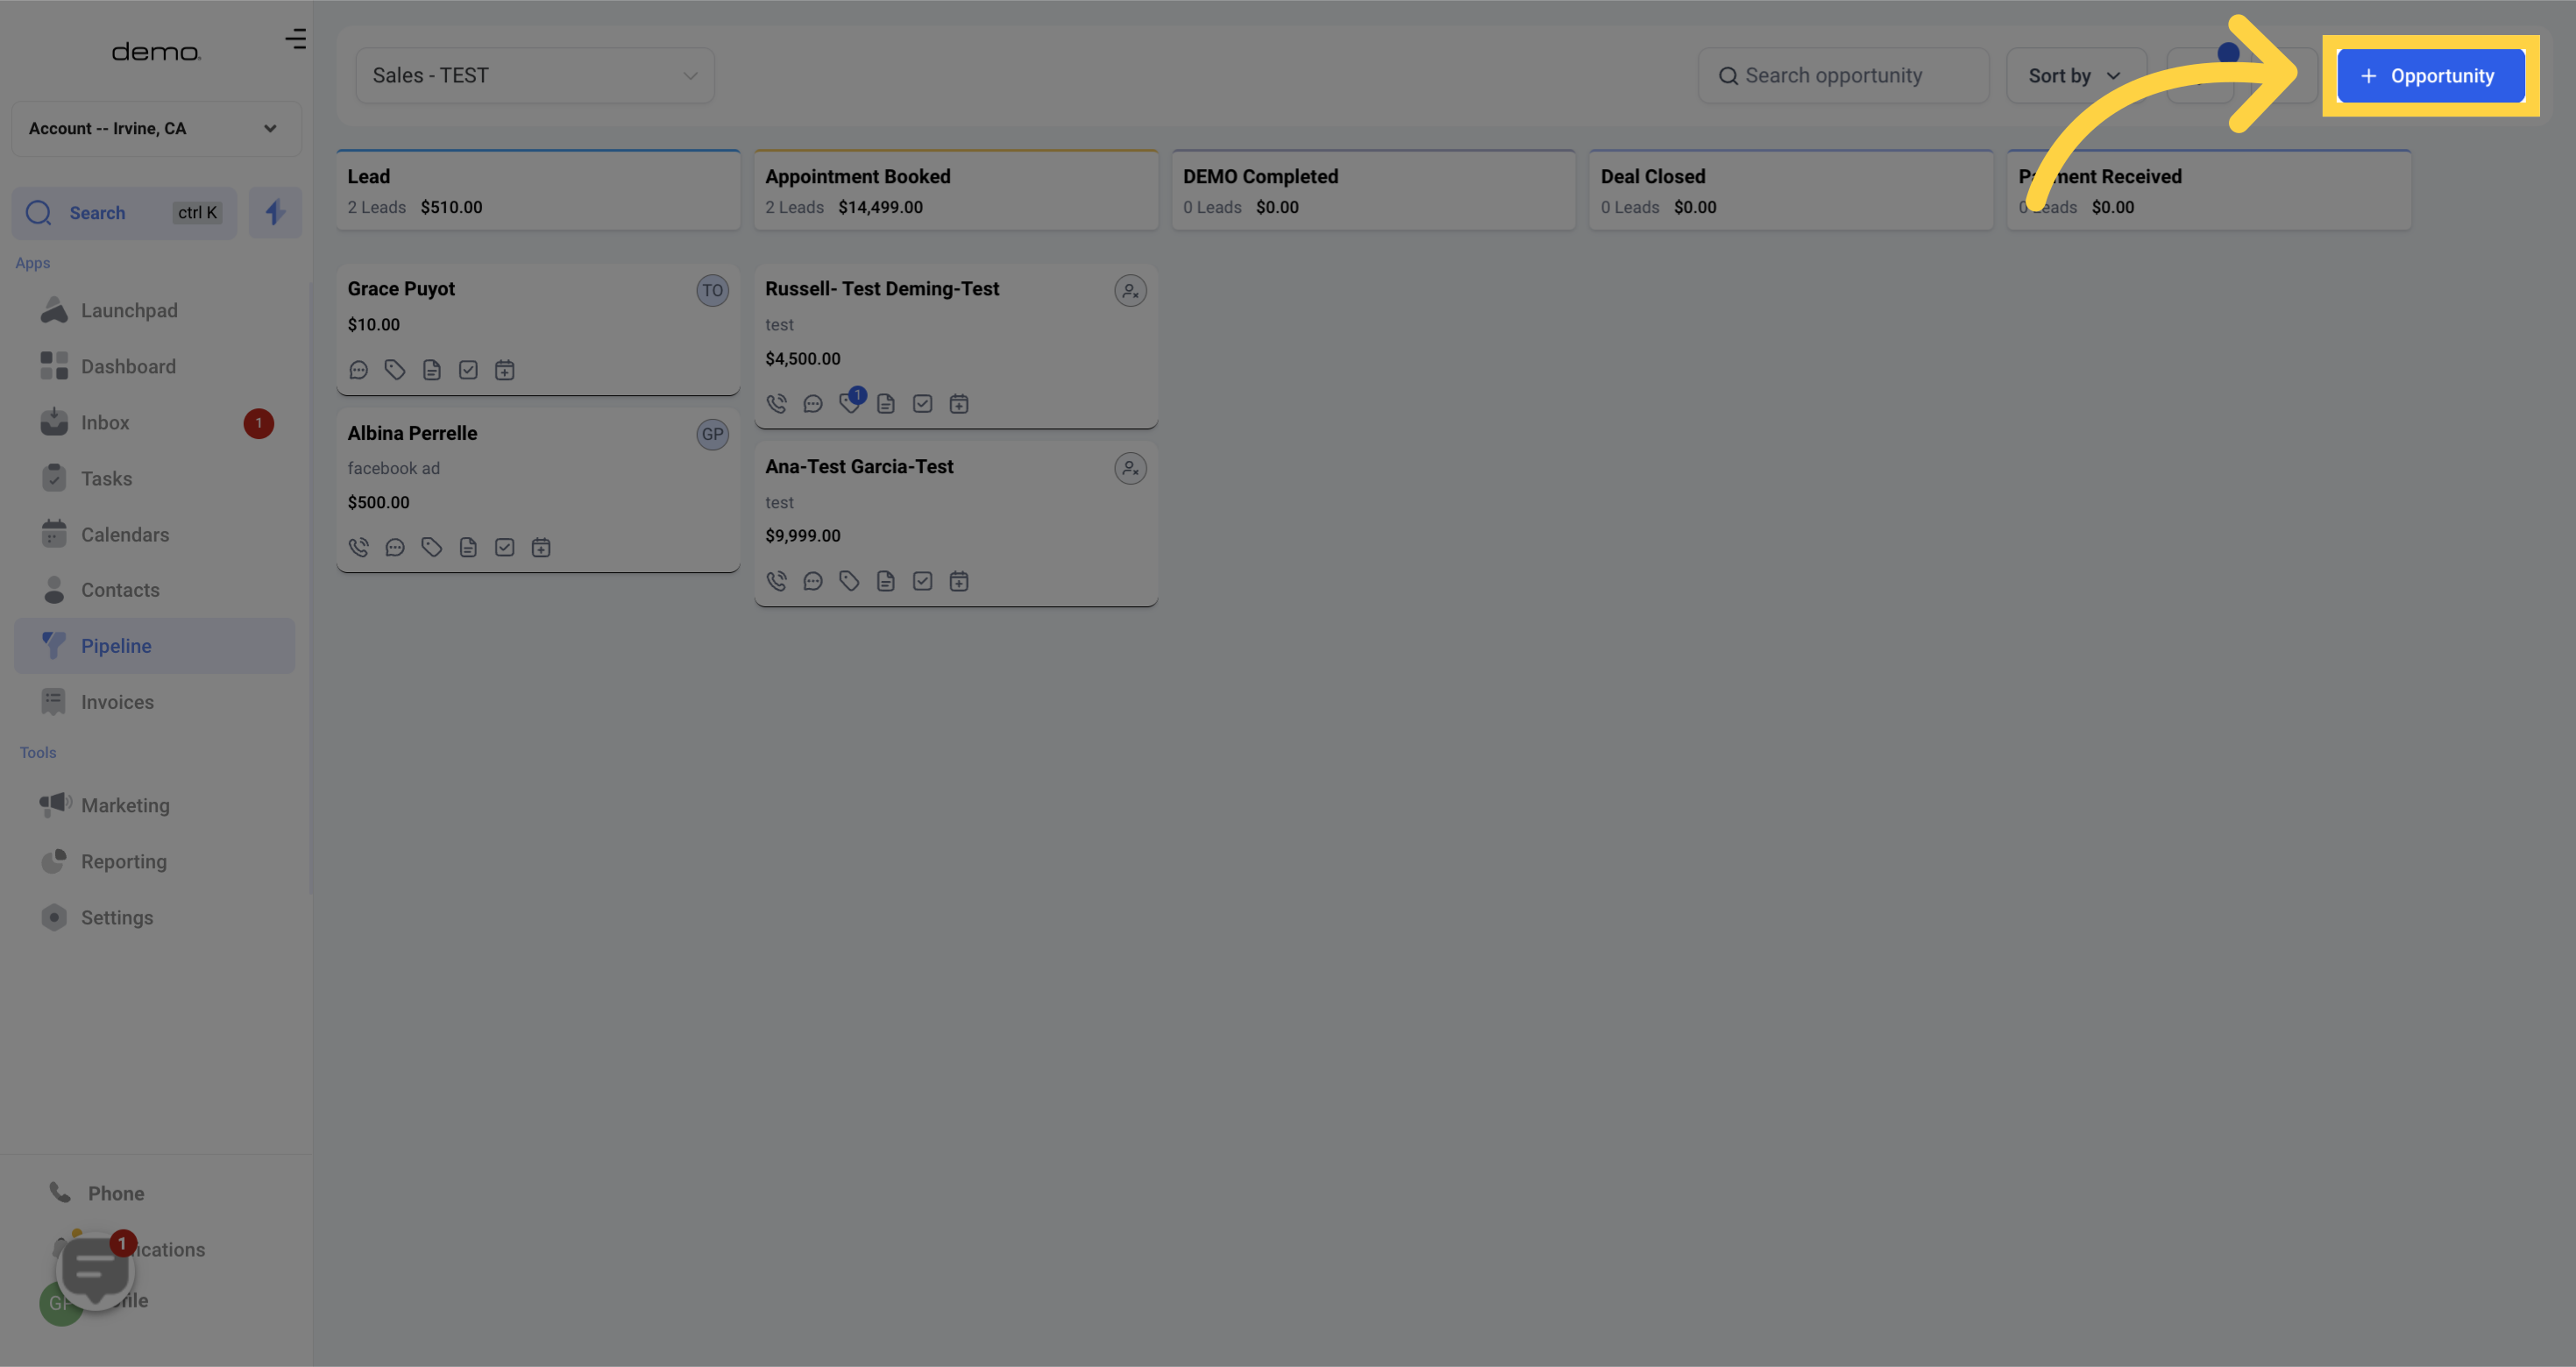
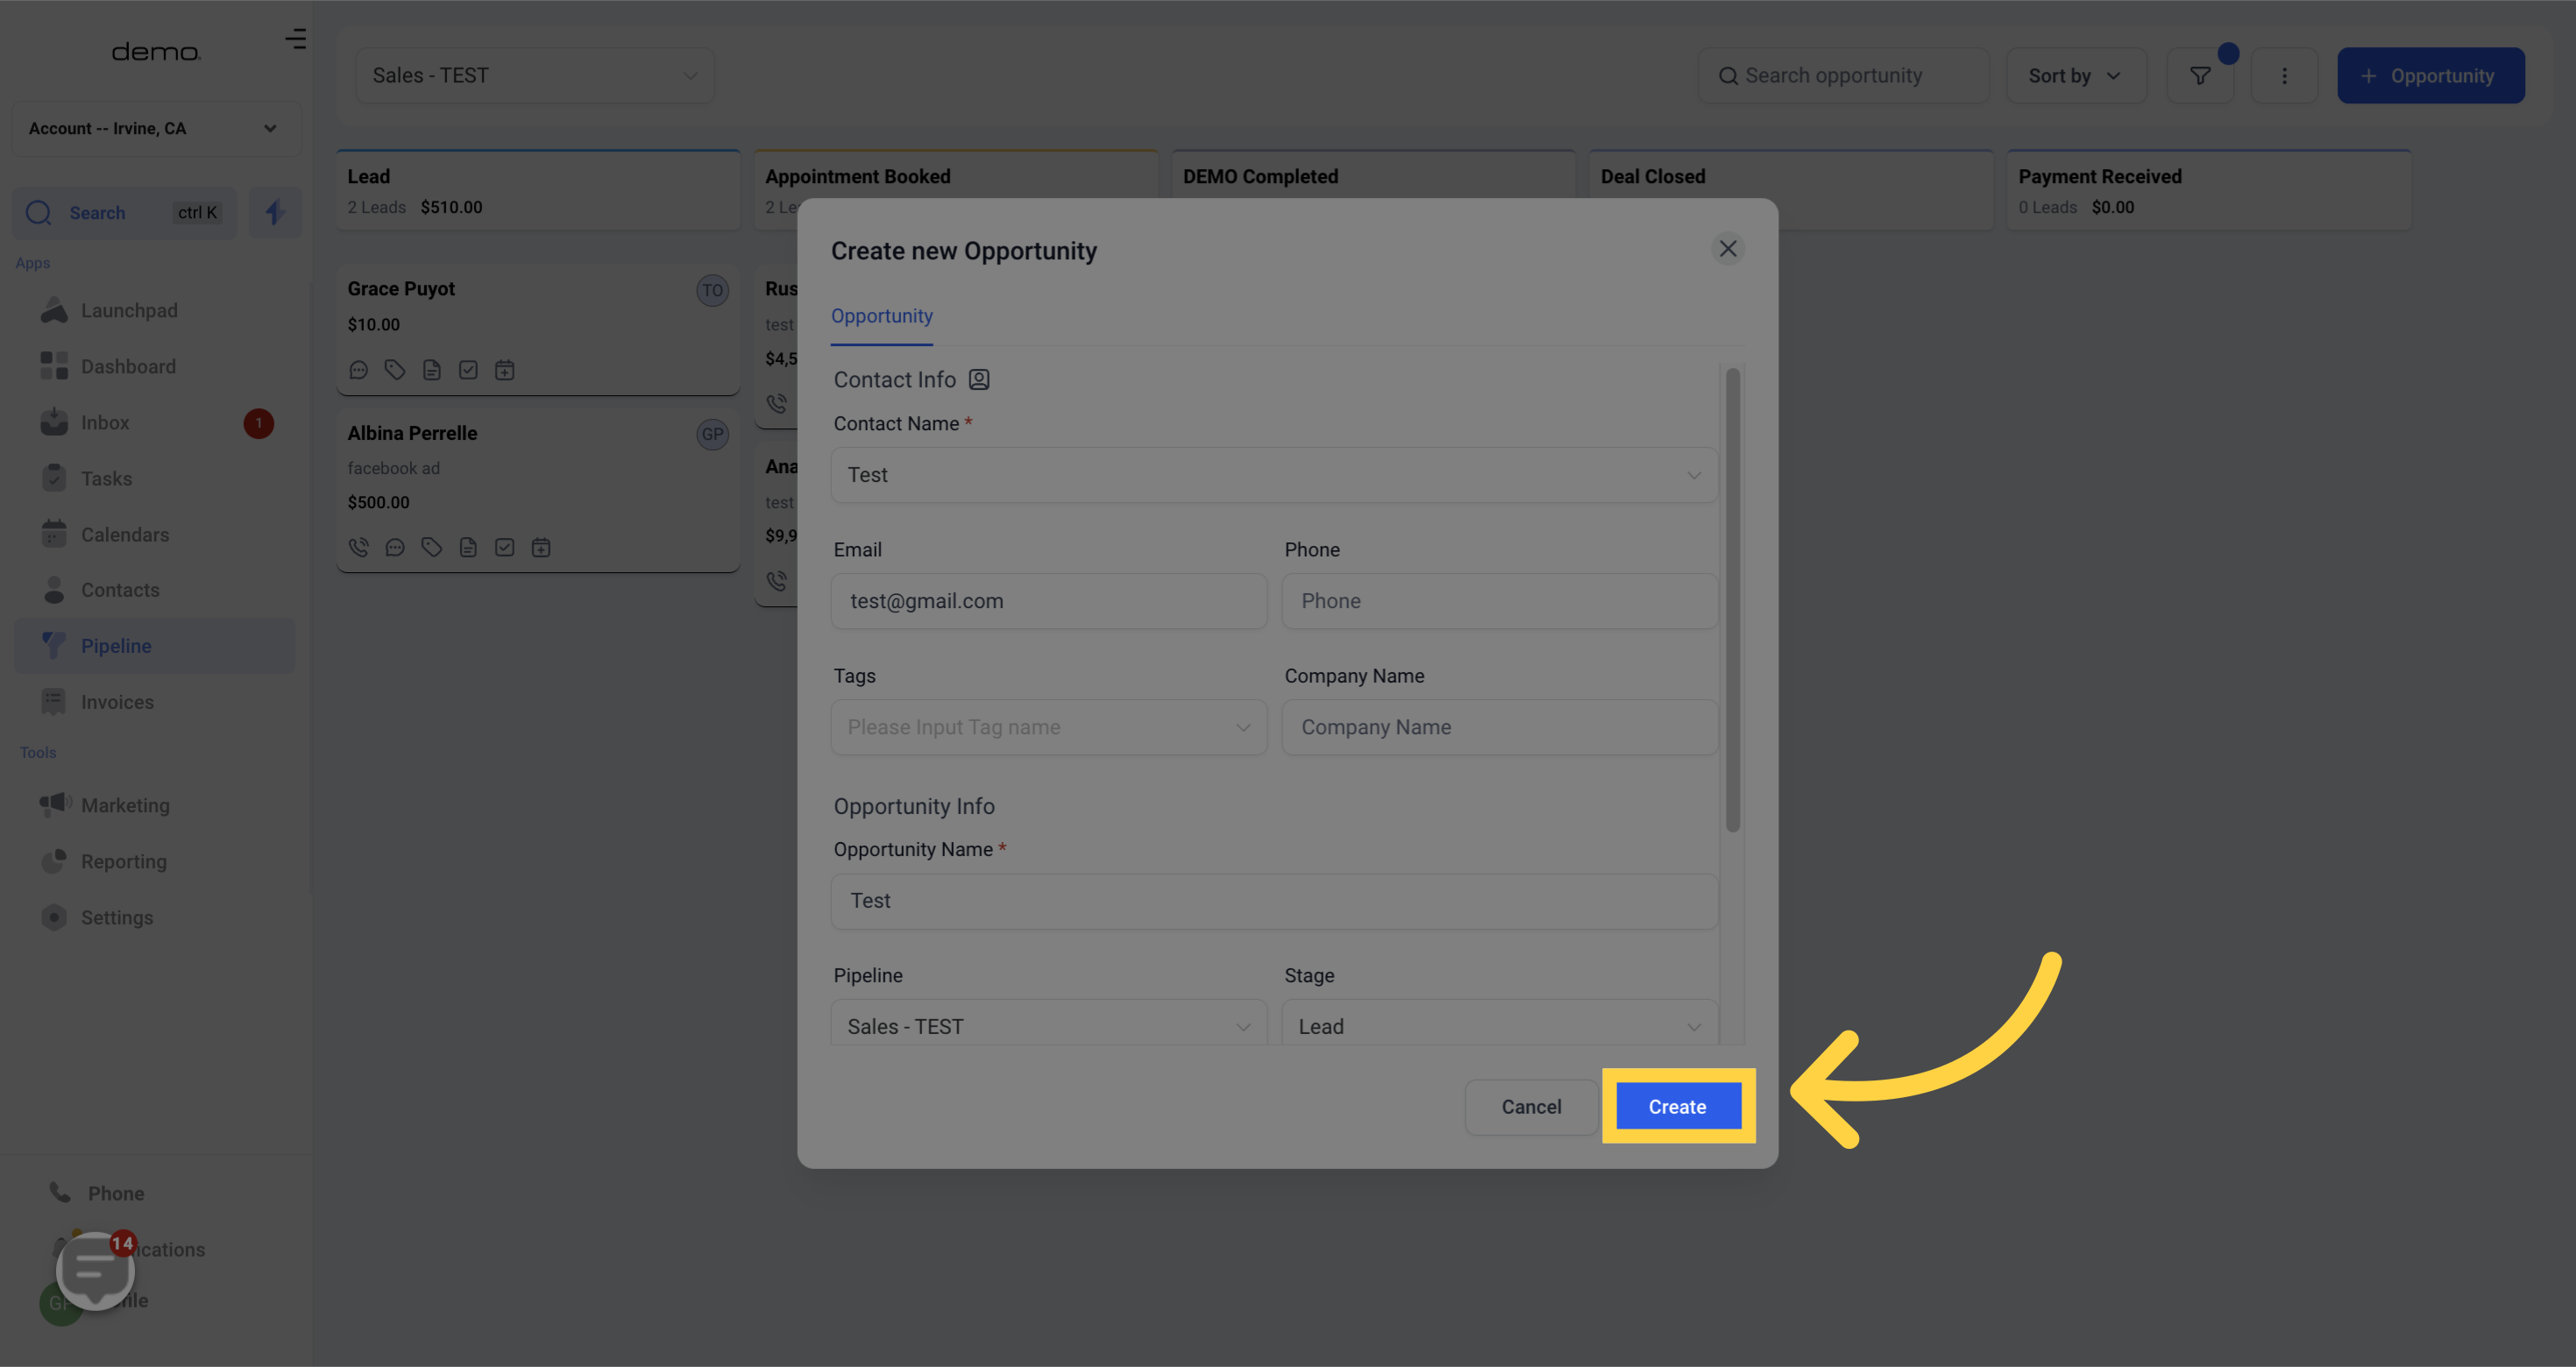
Select the Opportunity button
Input the information needed
Contact Name - To add or edit the name of this opportunity
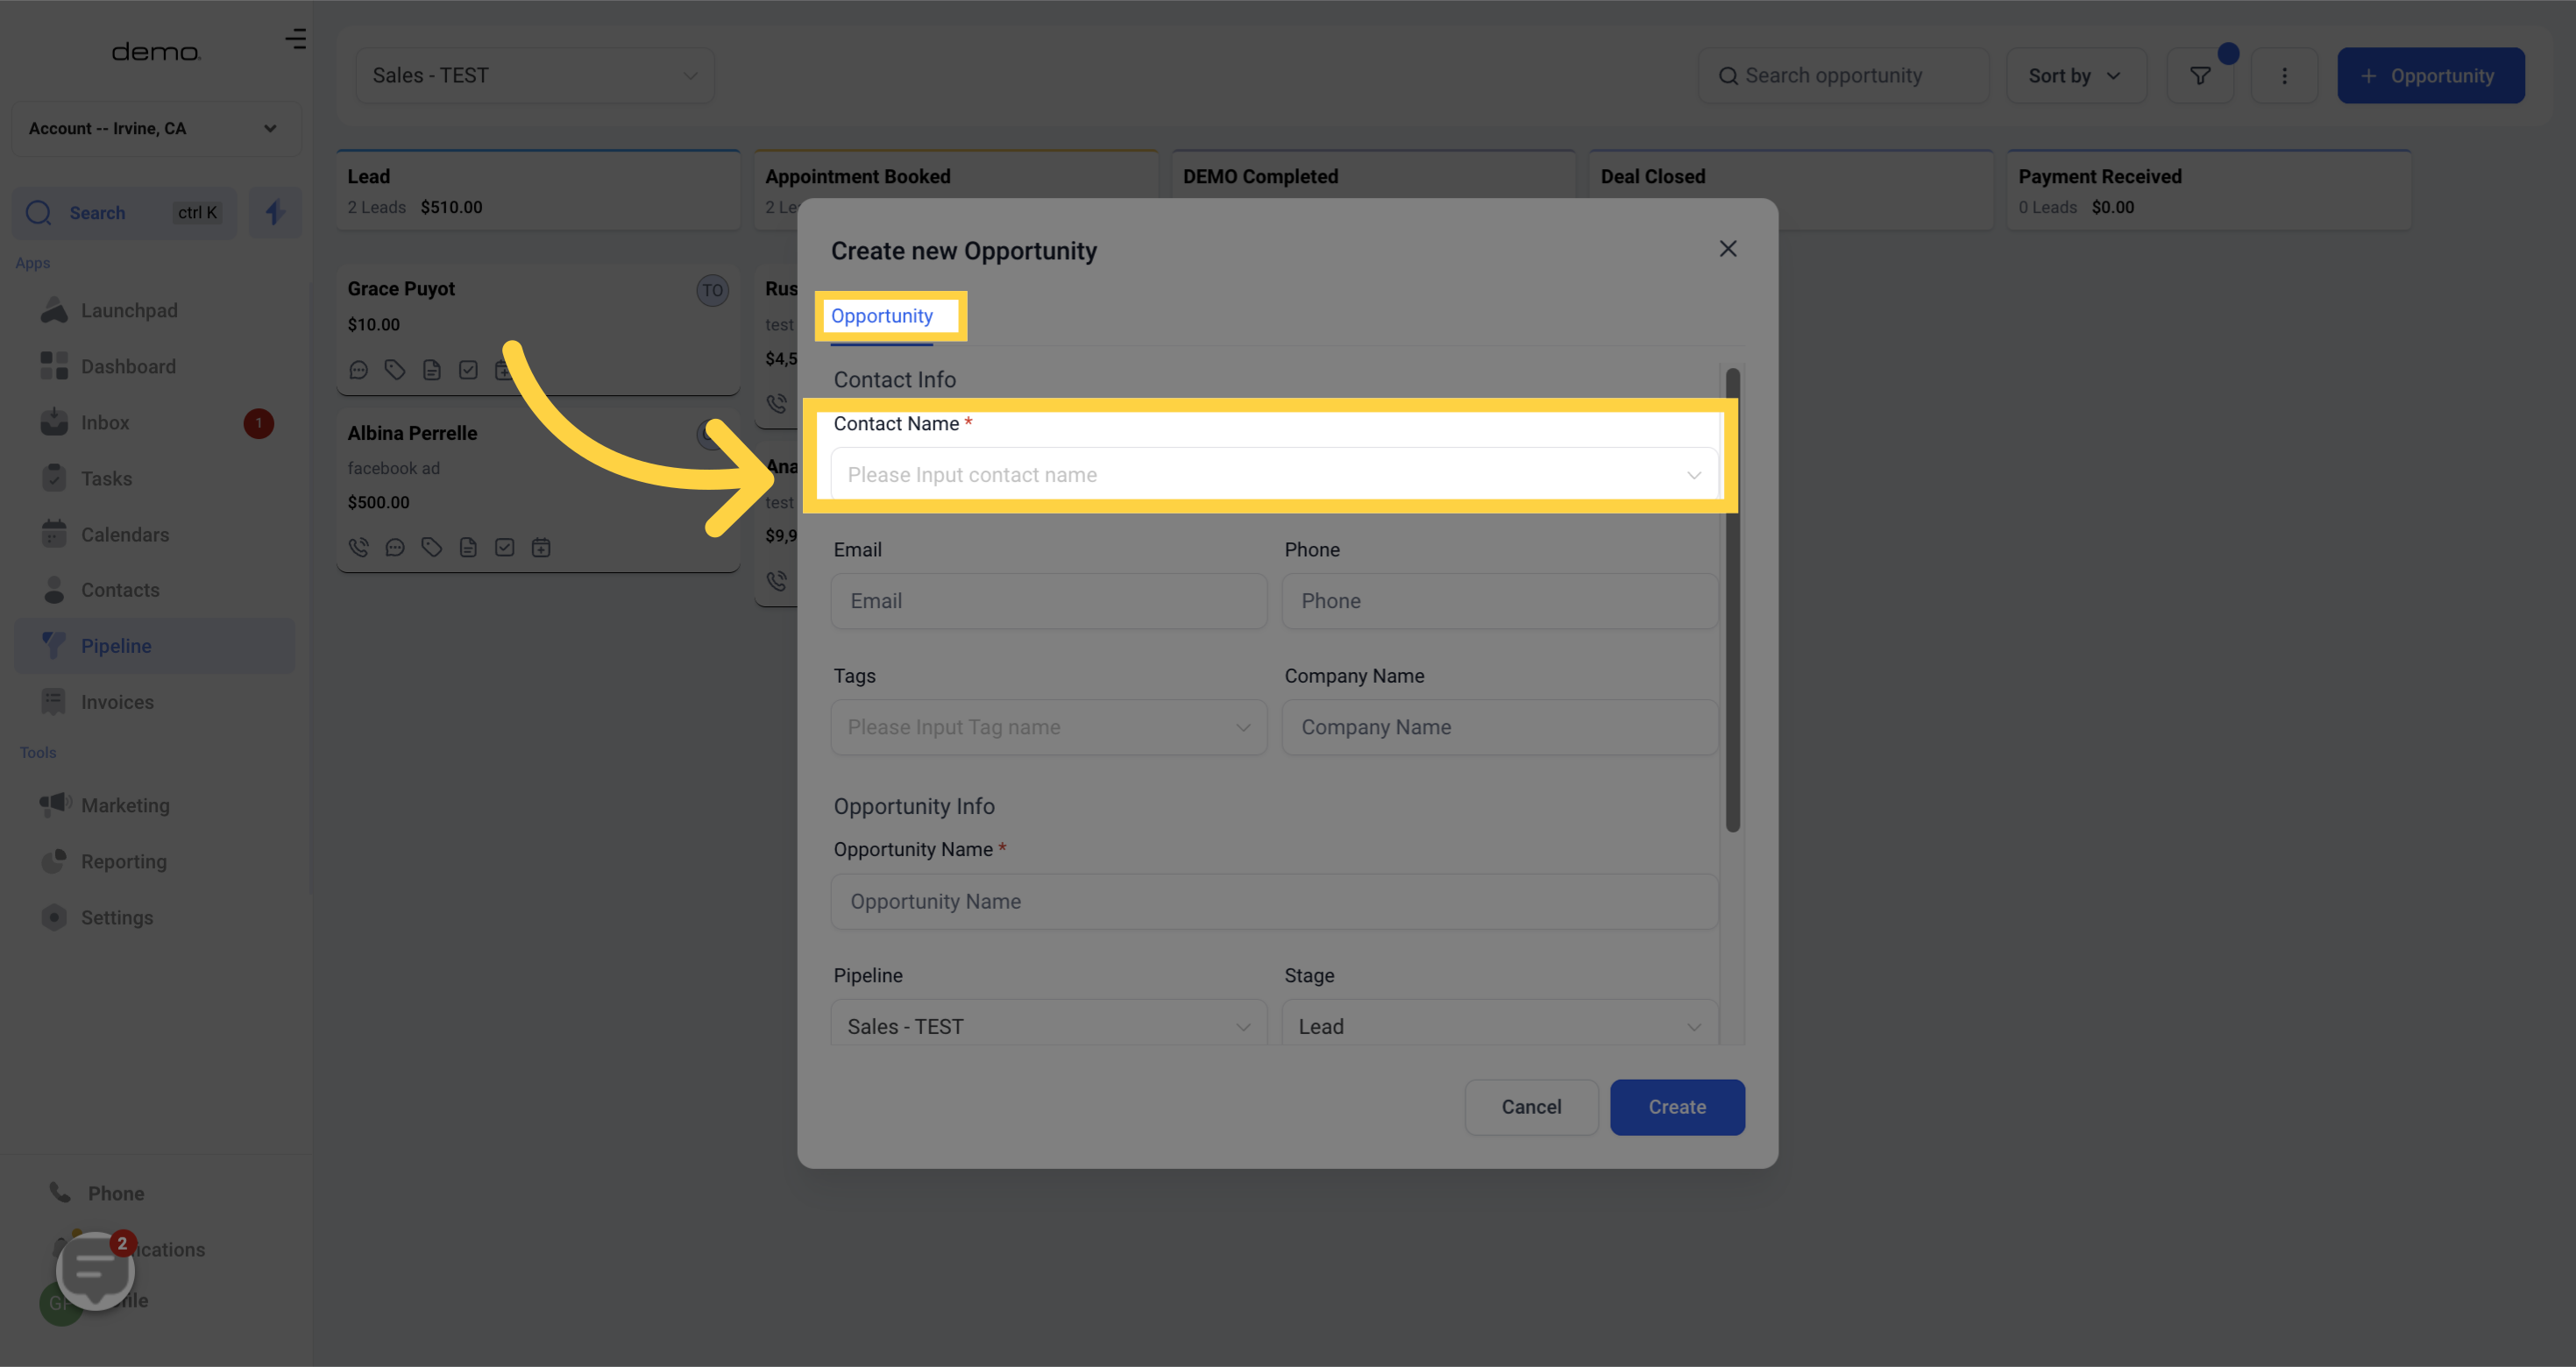)
Email - To add or edit the email associated with this opportunity
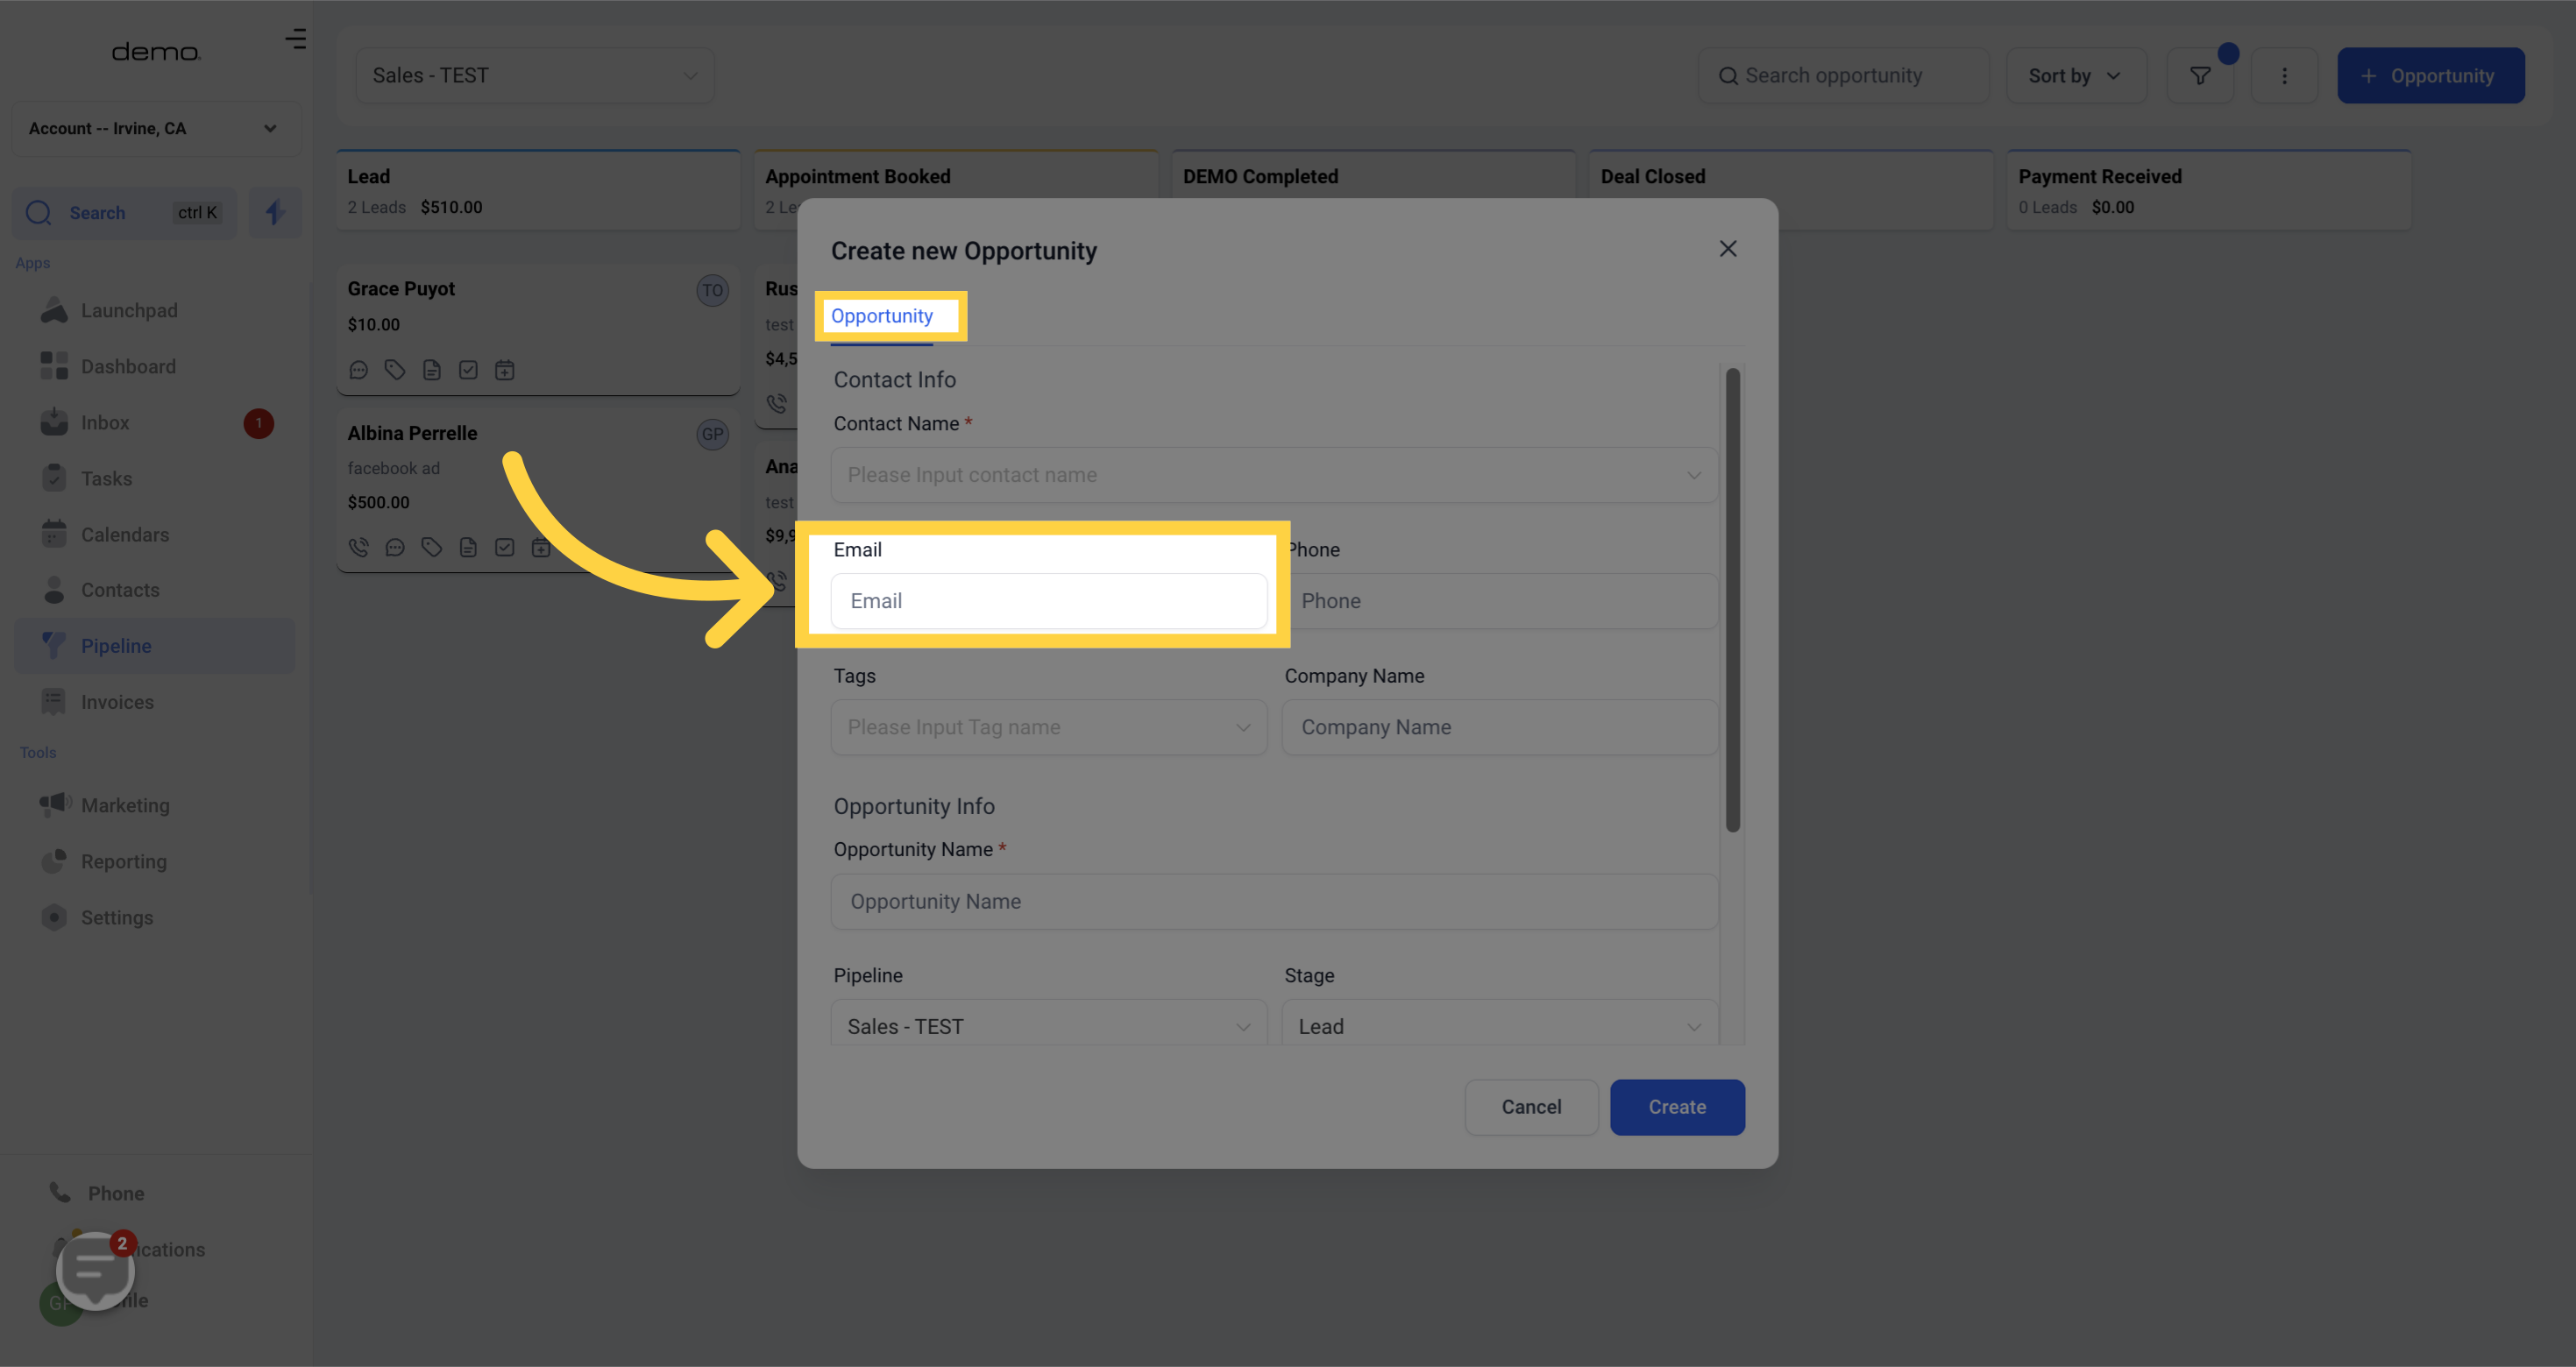)
Phone - To add or edit the phone number for this opportunity
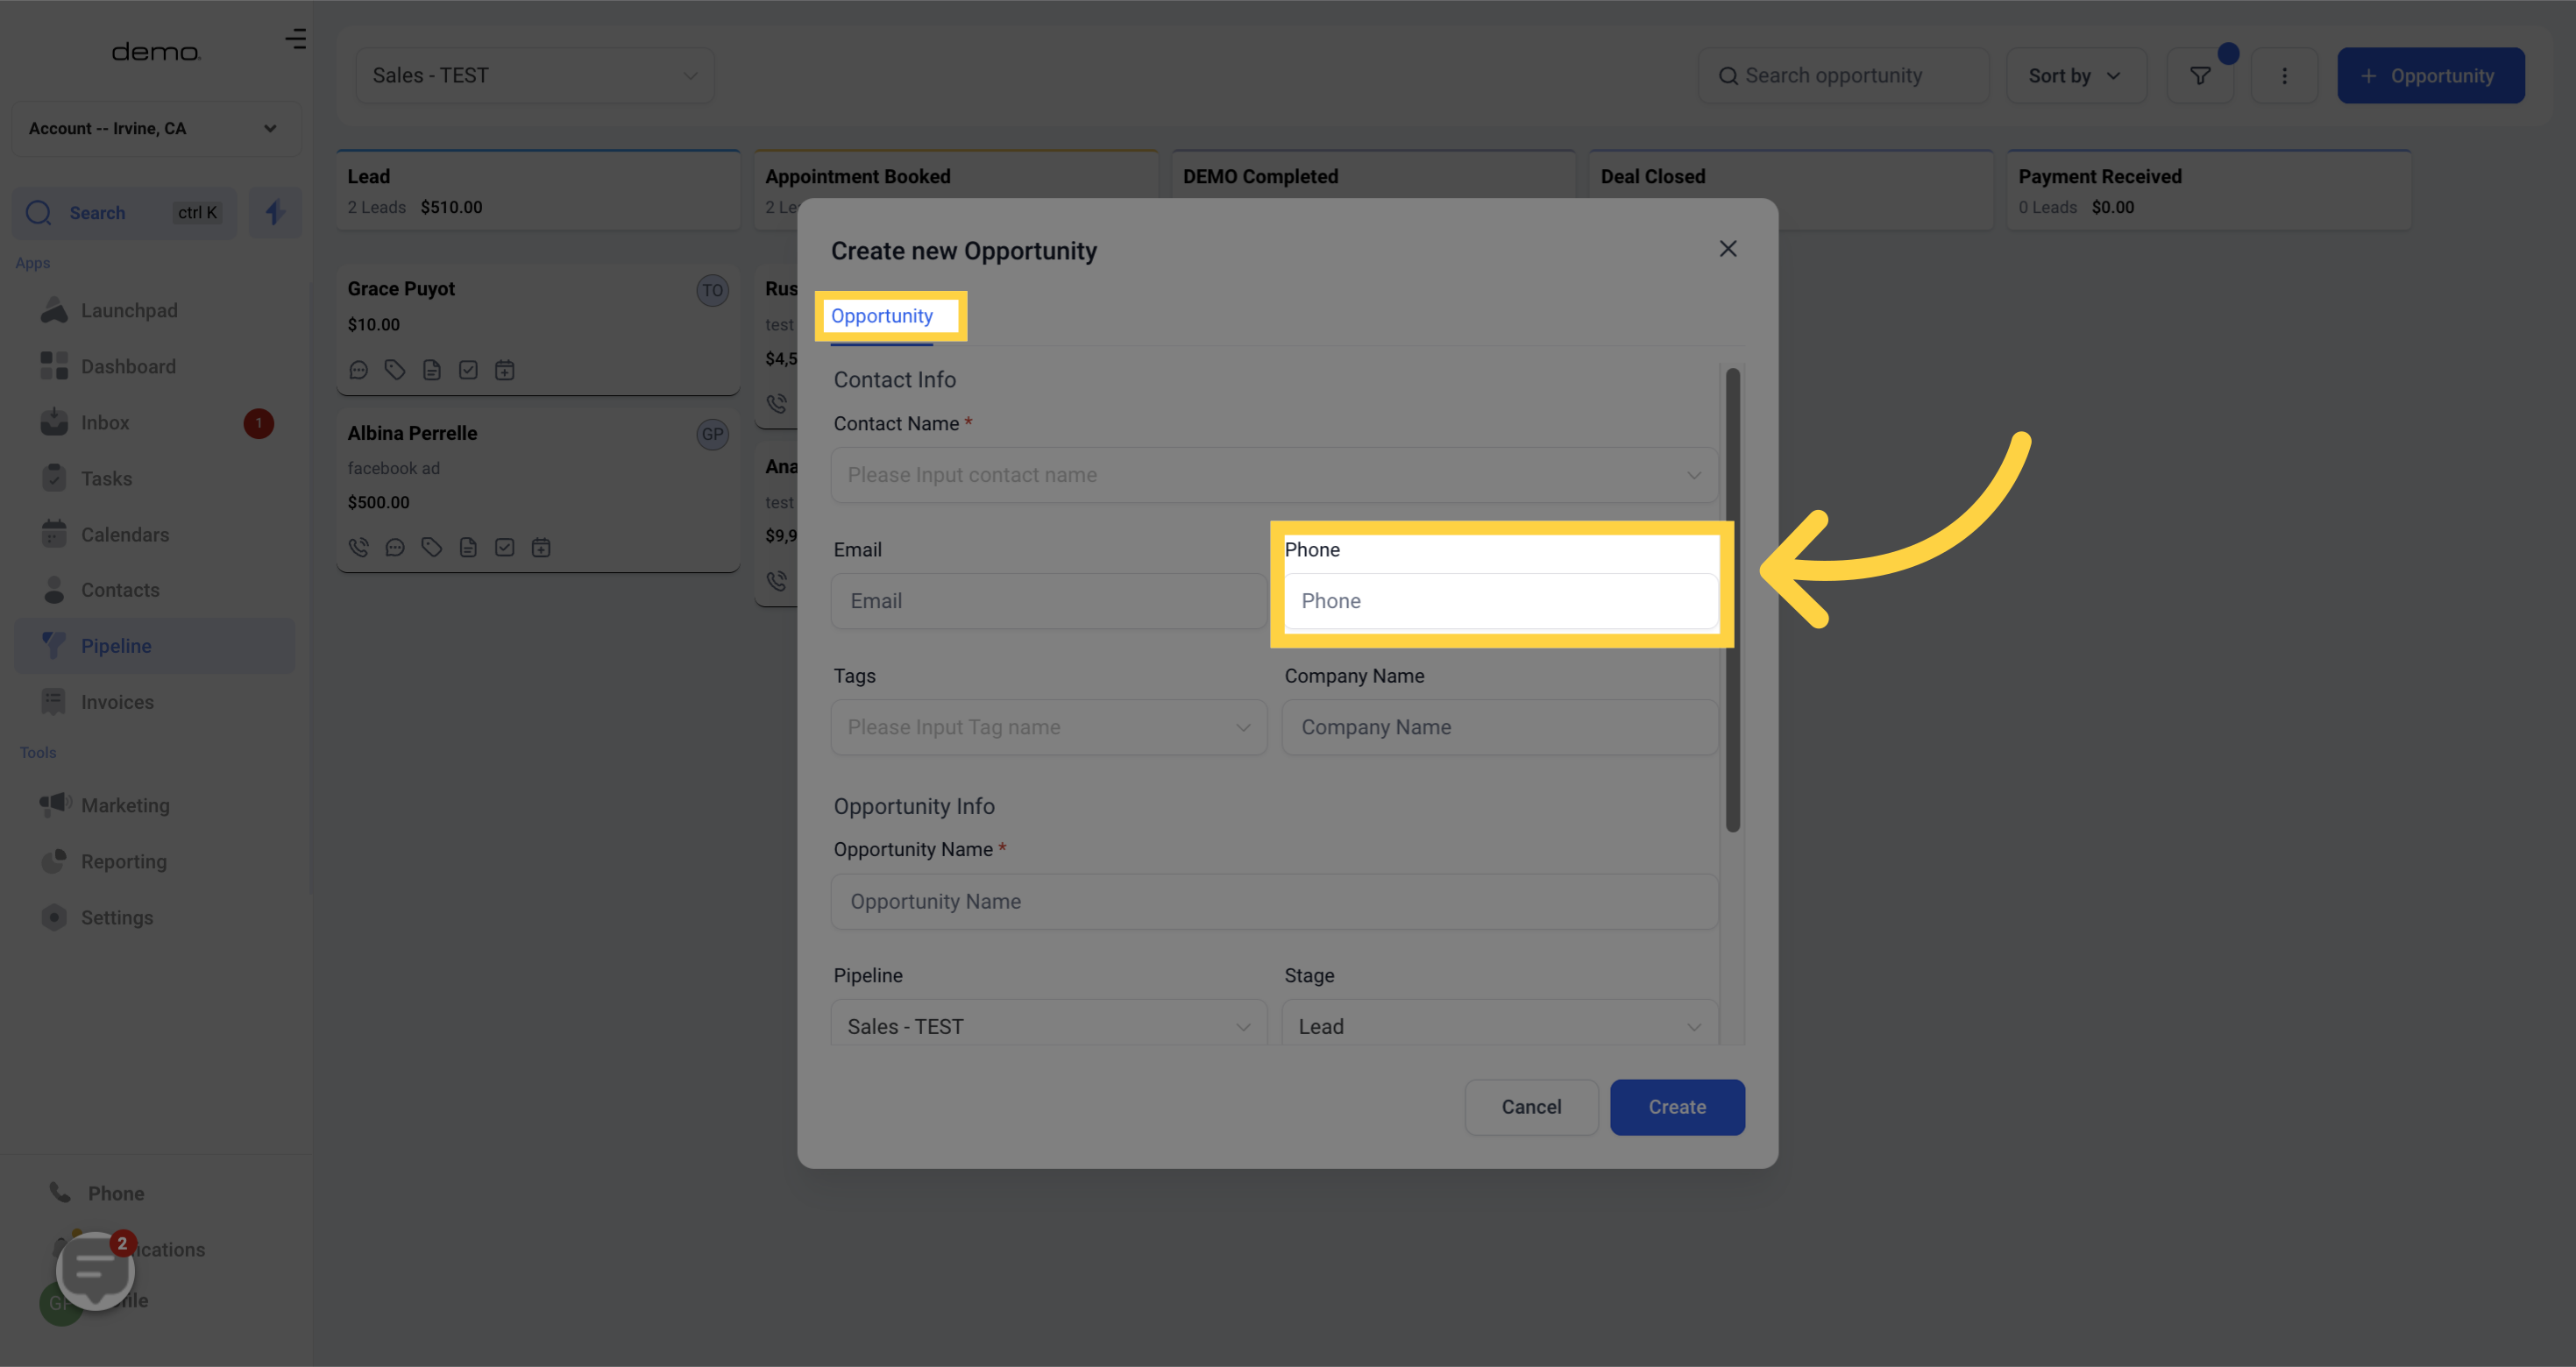)
Tags - To add or edit the tags associated with this opportunity.
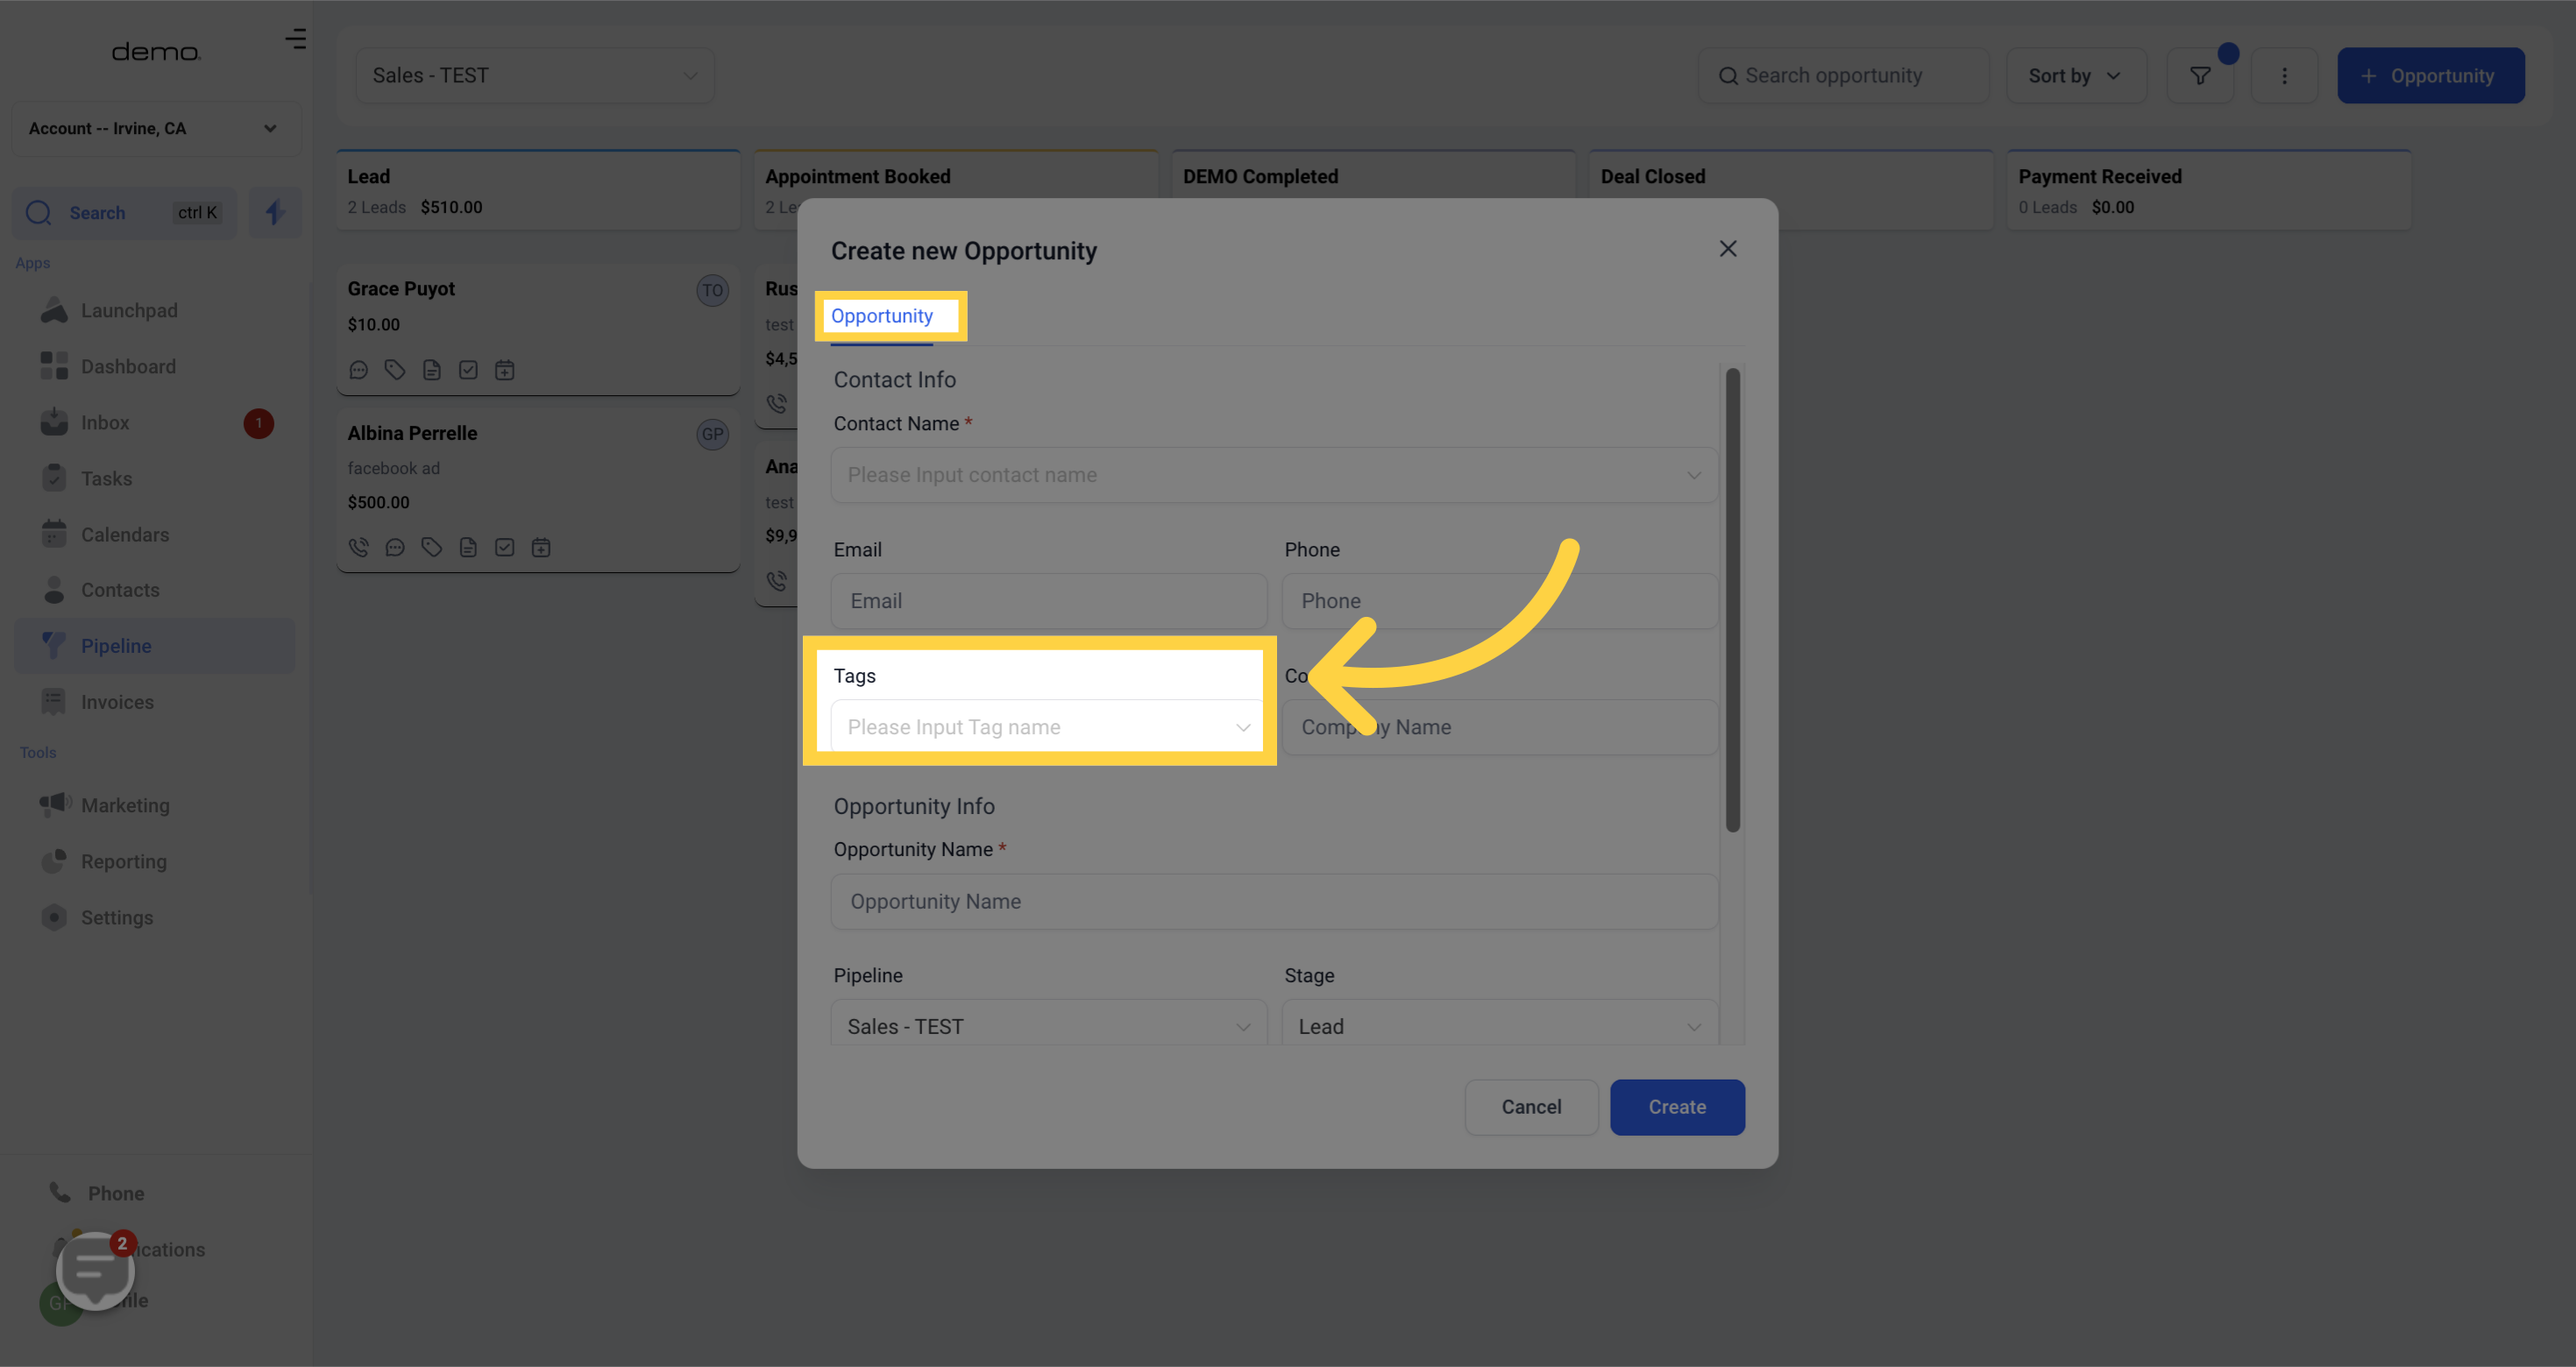)
Company Name - To add or edit the company name for this opportunity
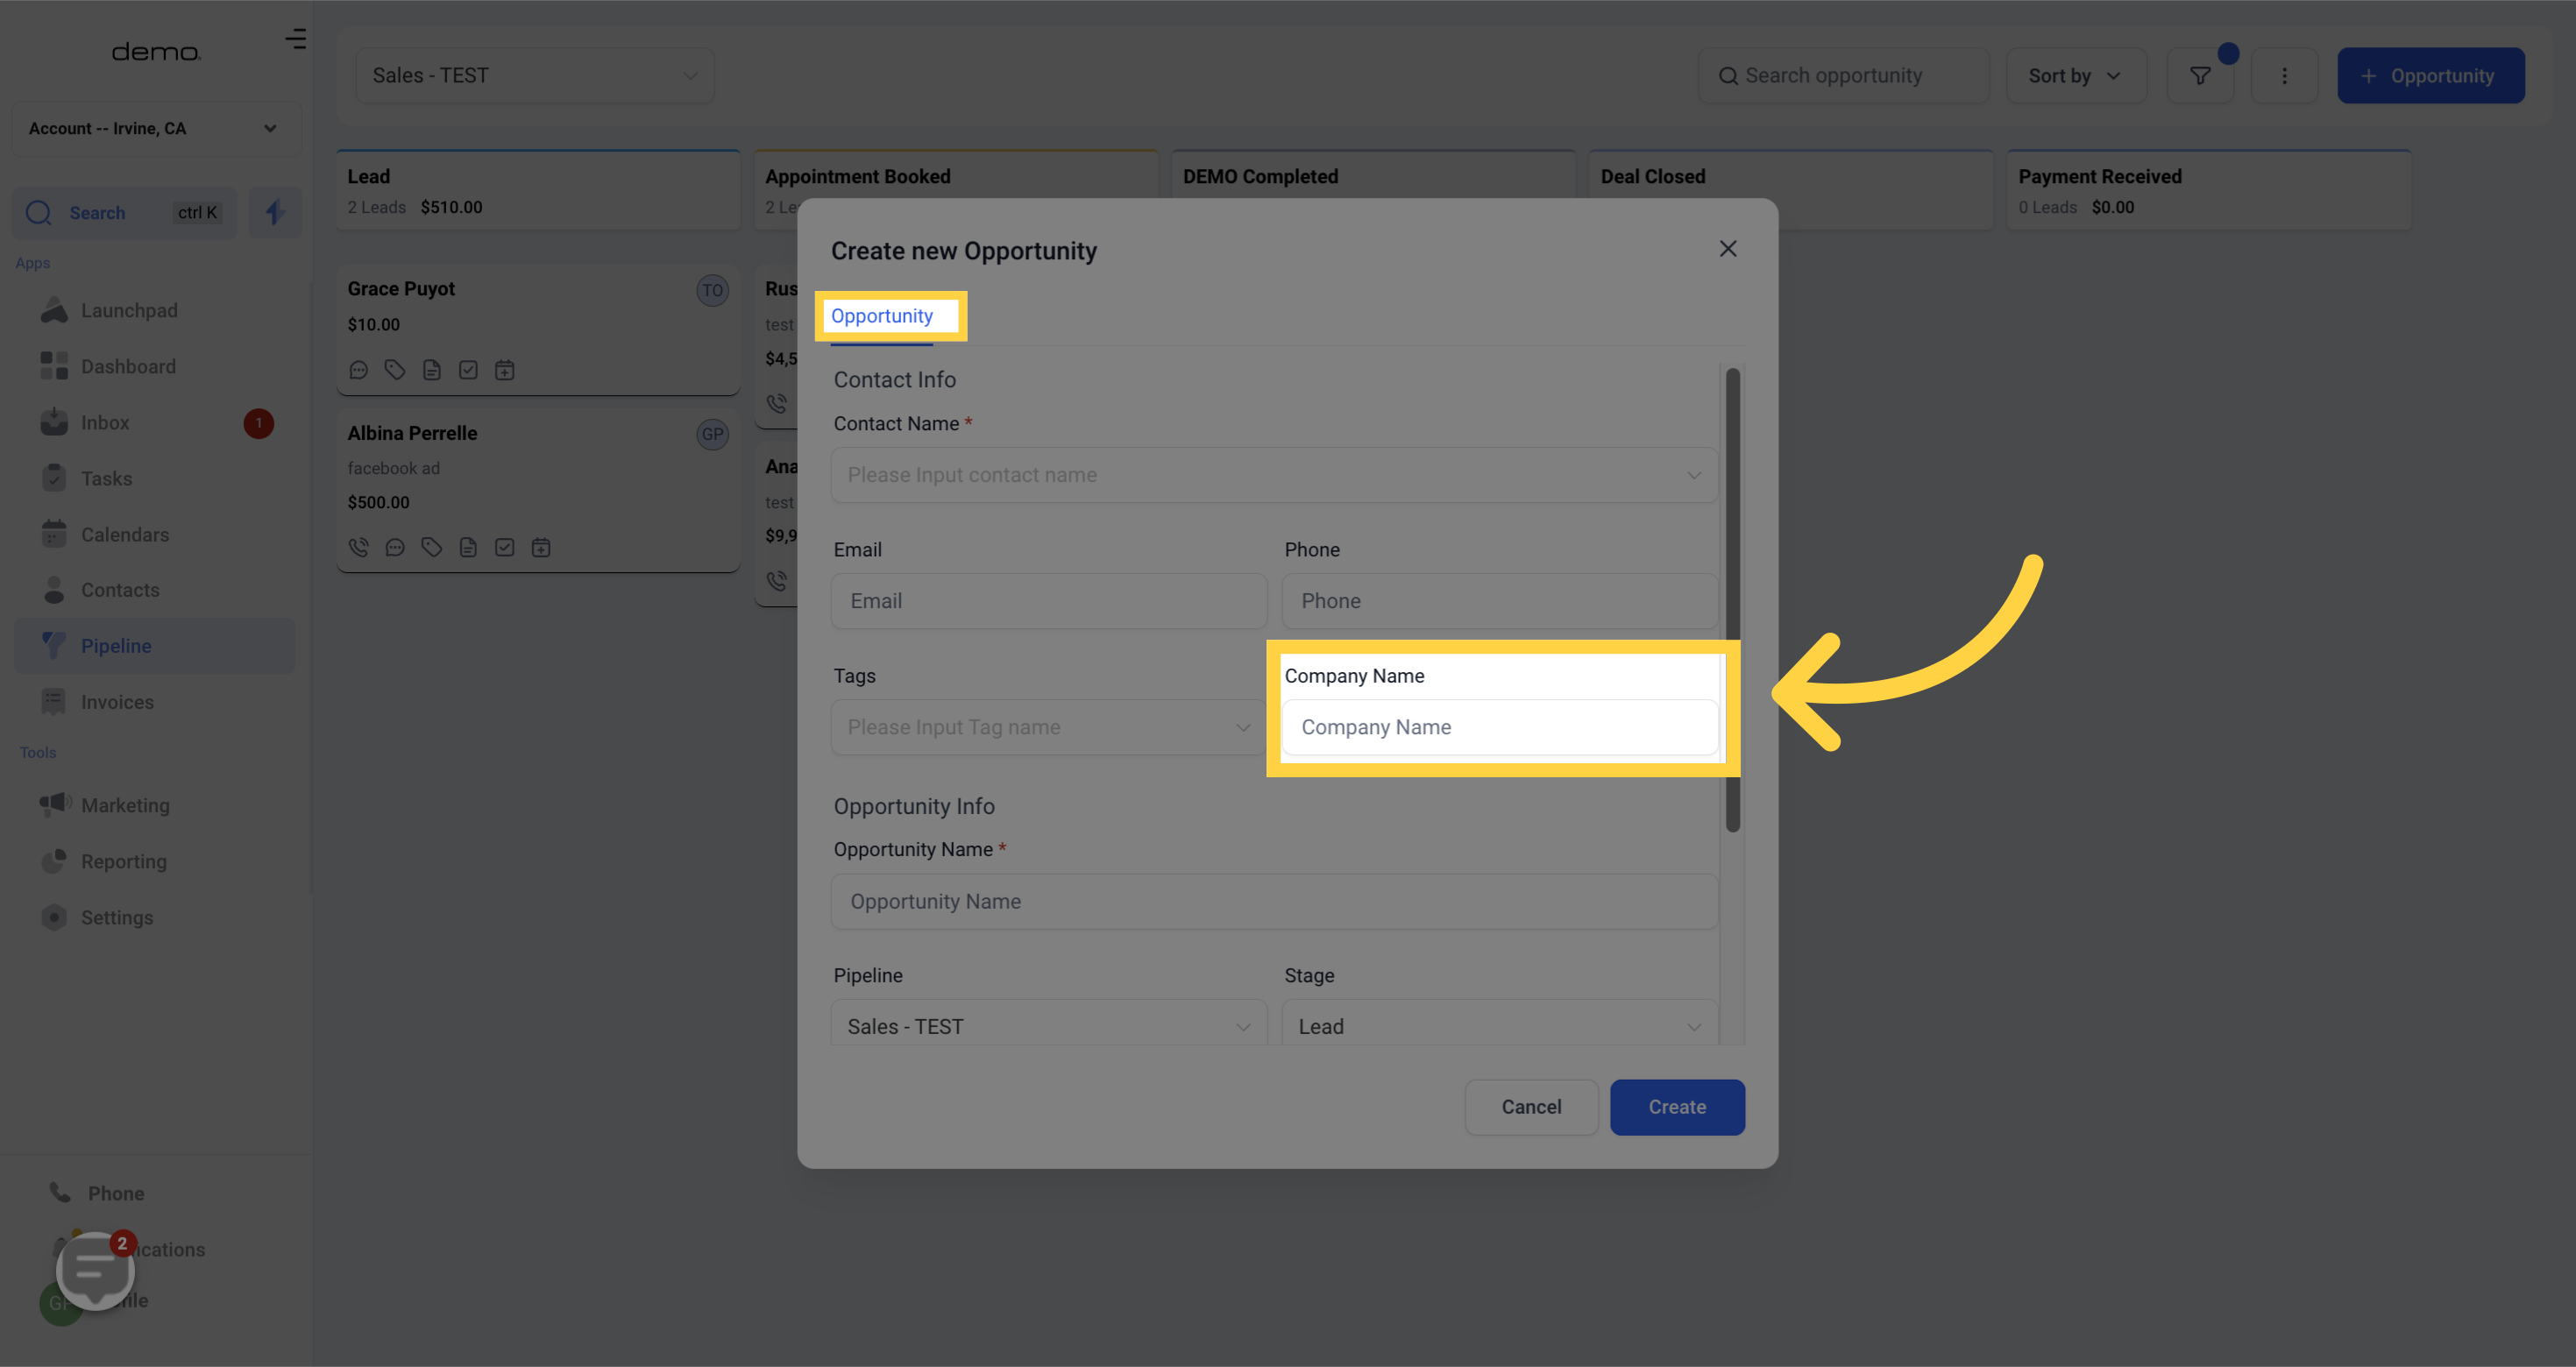)
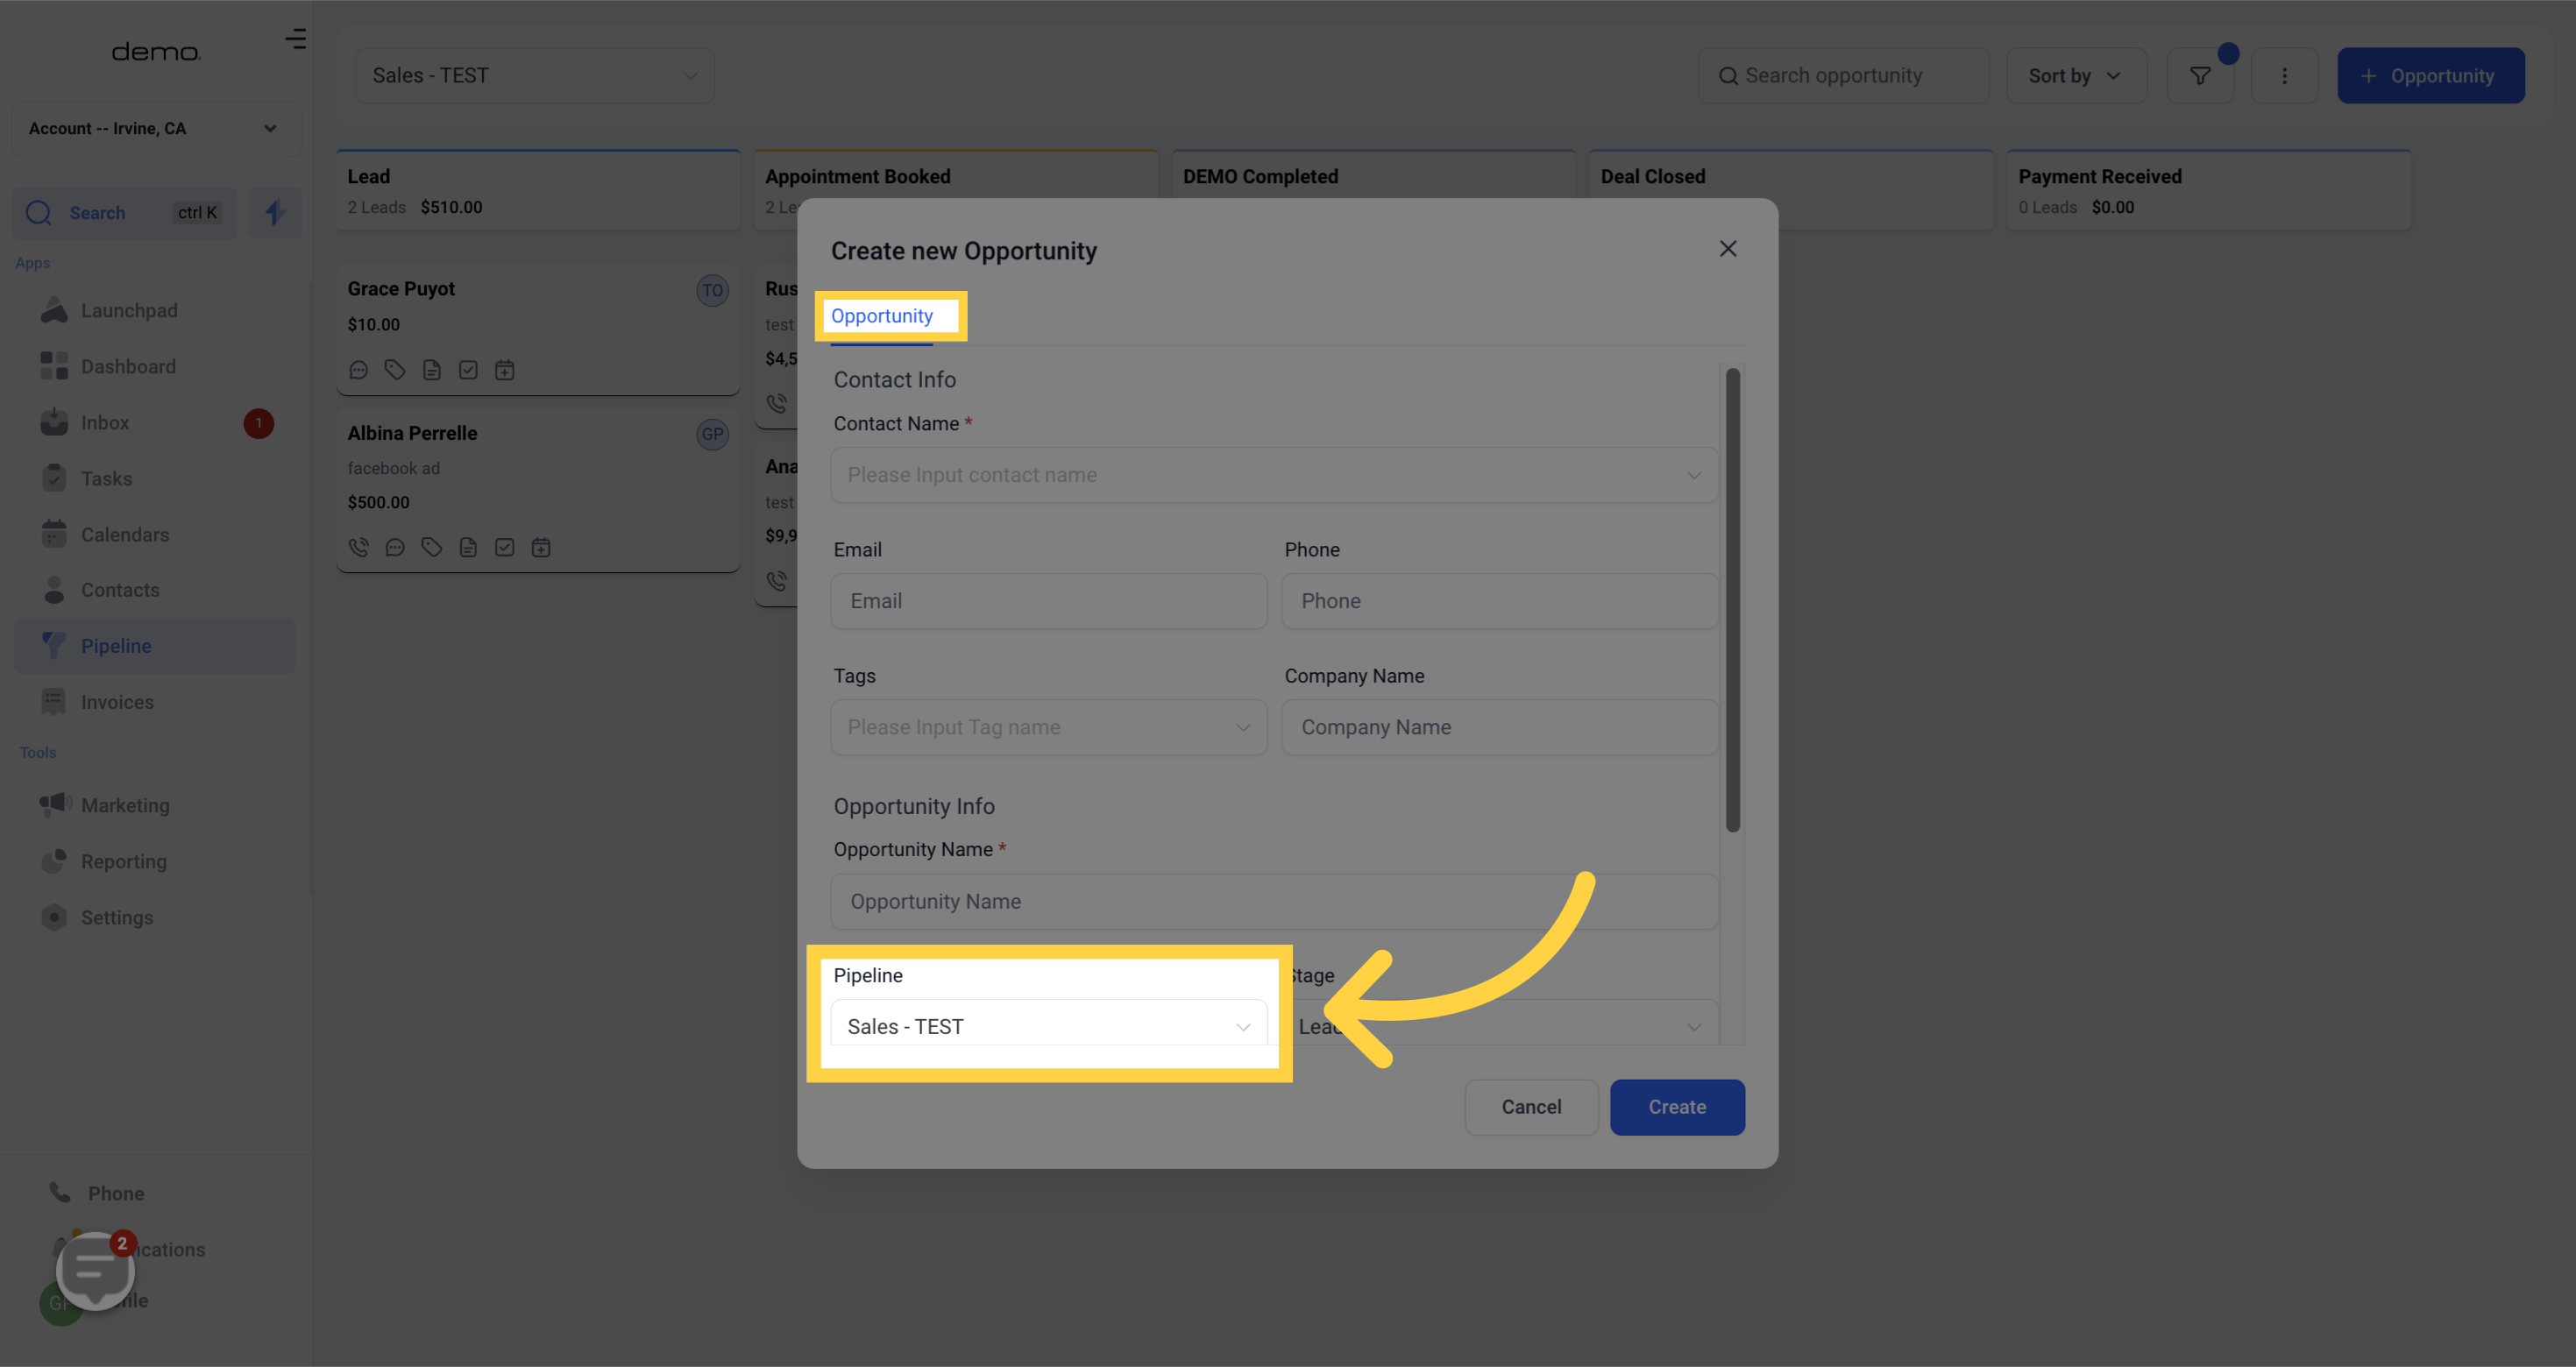
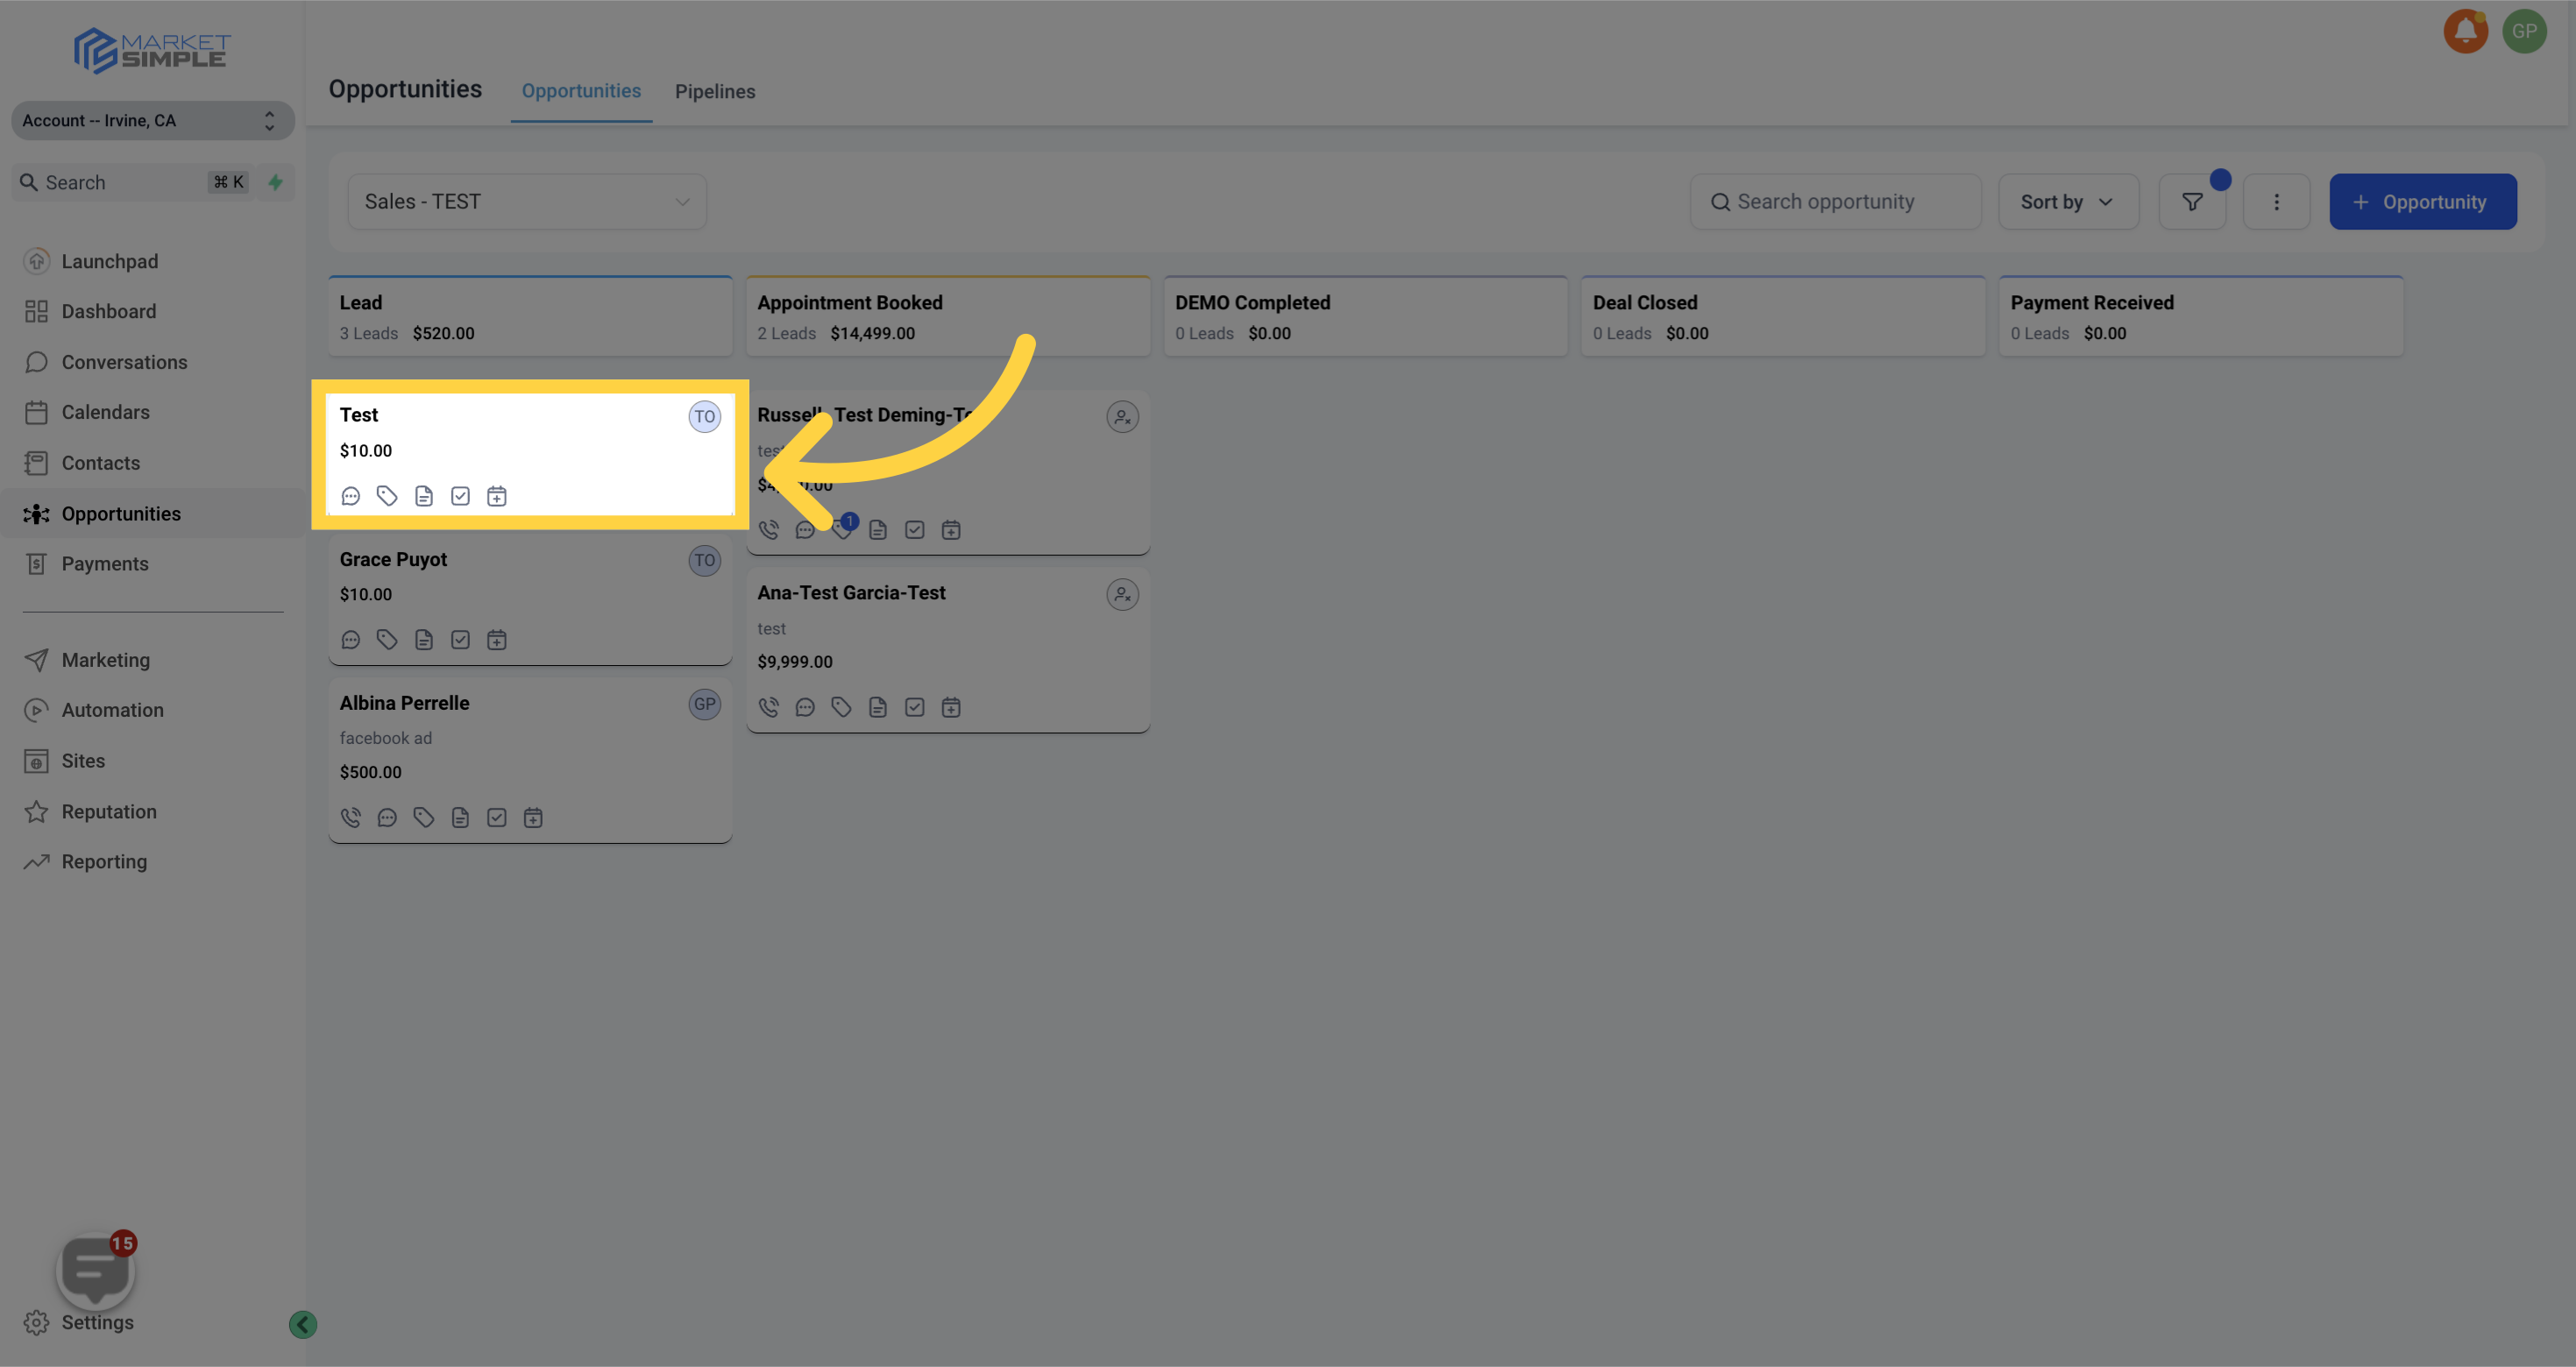
Opportunity Name - You will need to give your opportunity a name. This can either be the full name of the opportunity or the company name.
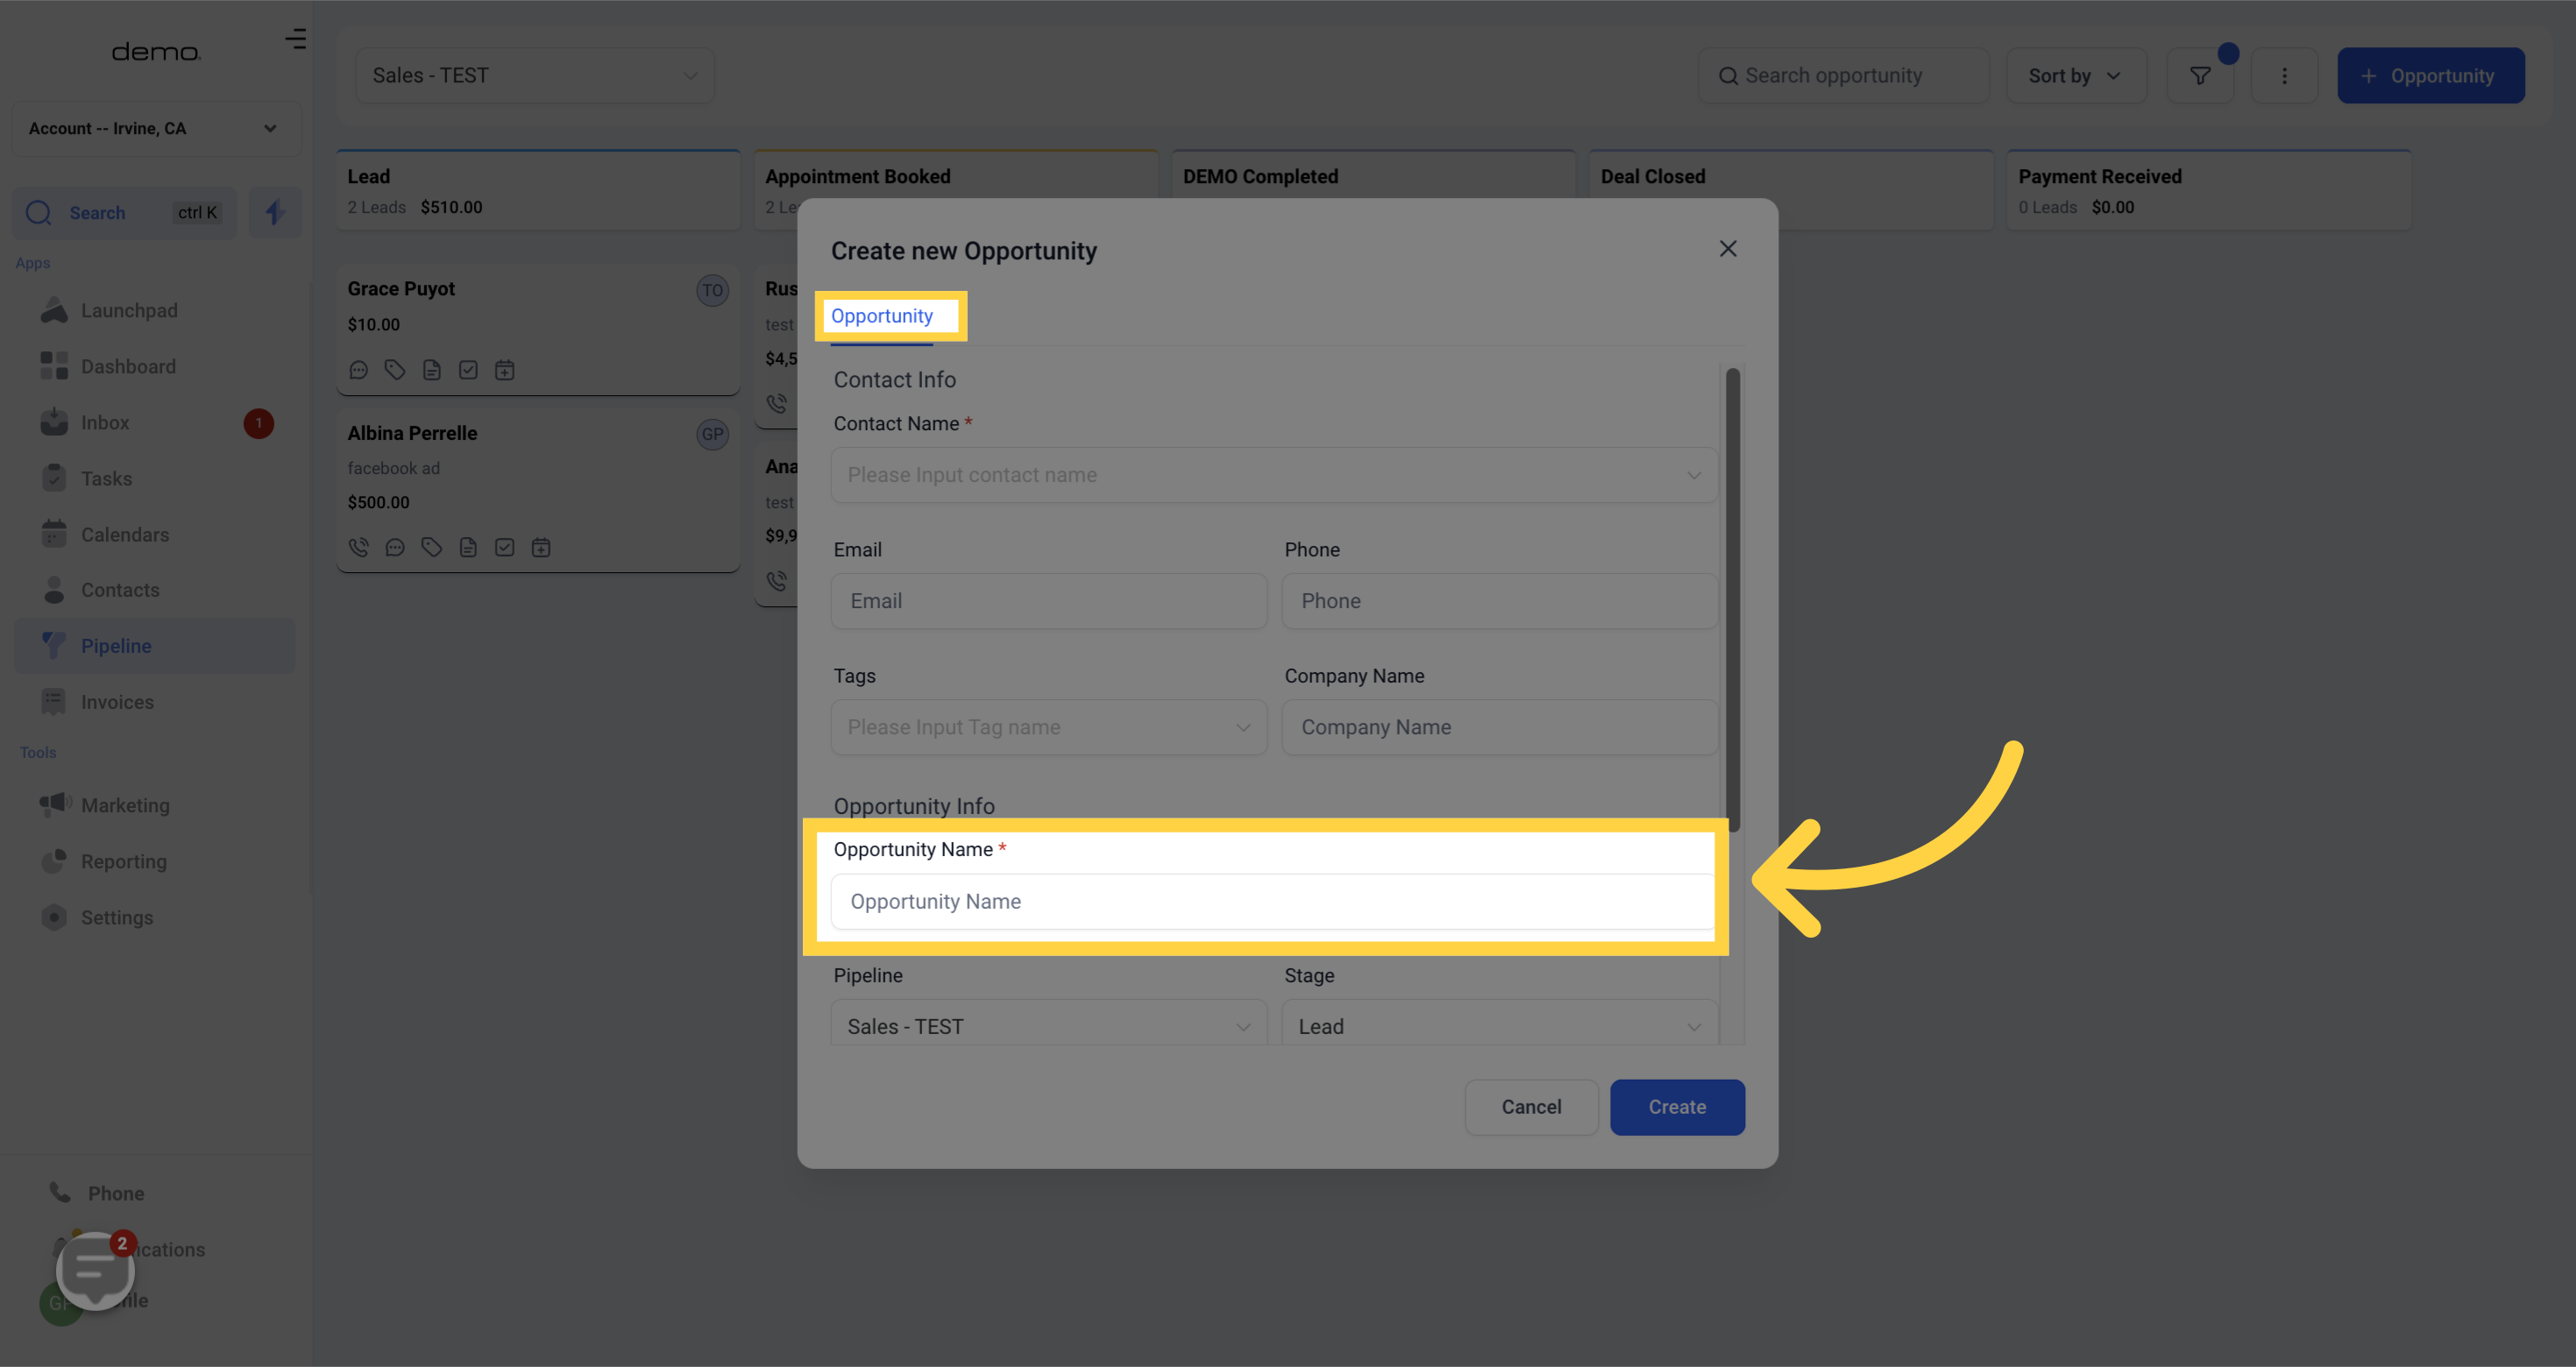)
Select Pipeline - Choosing the right pipeline for your opportunity is essential to keep track of your data and for organizational purposes
)
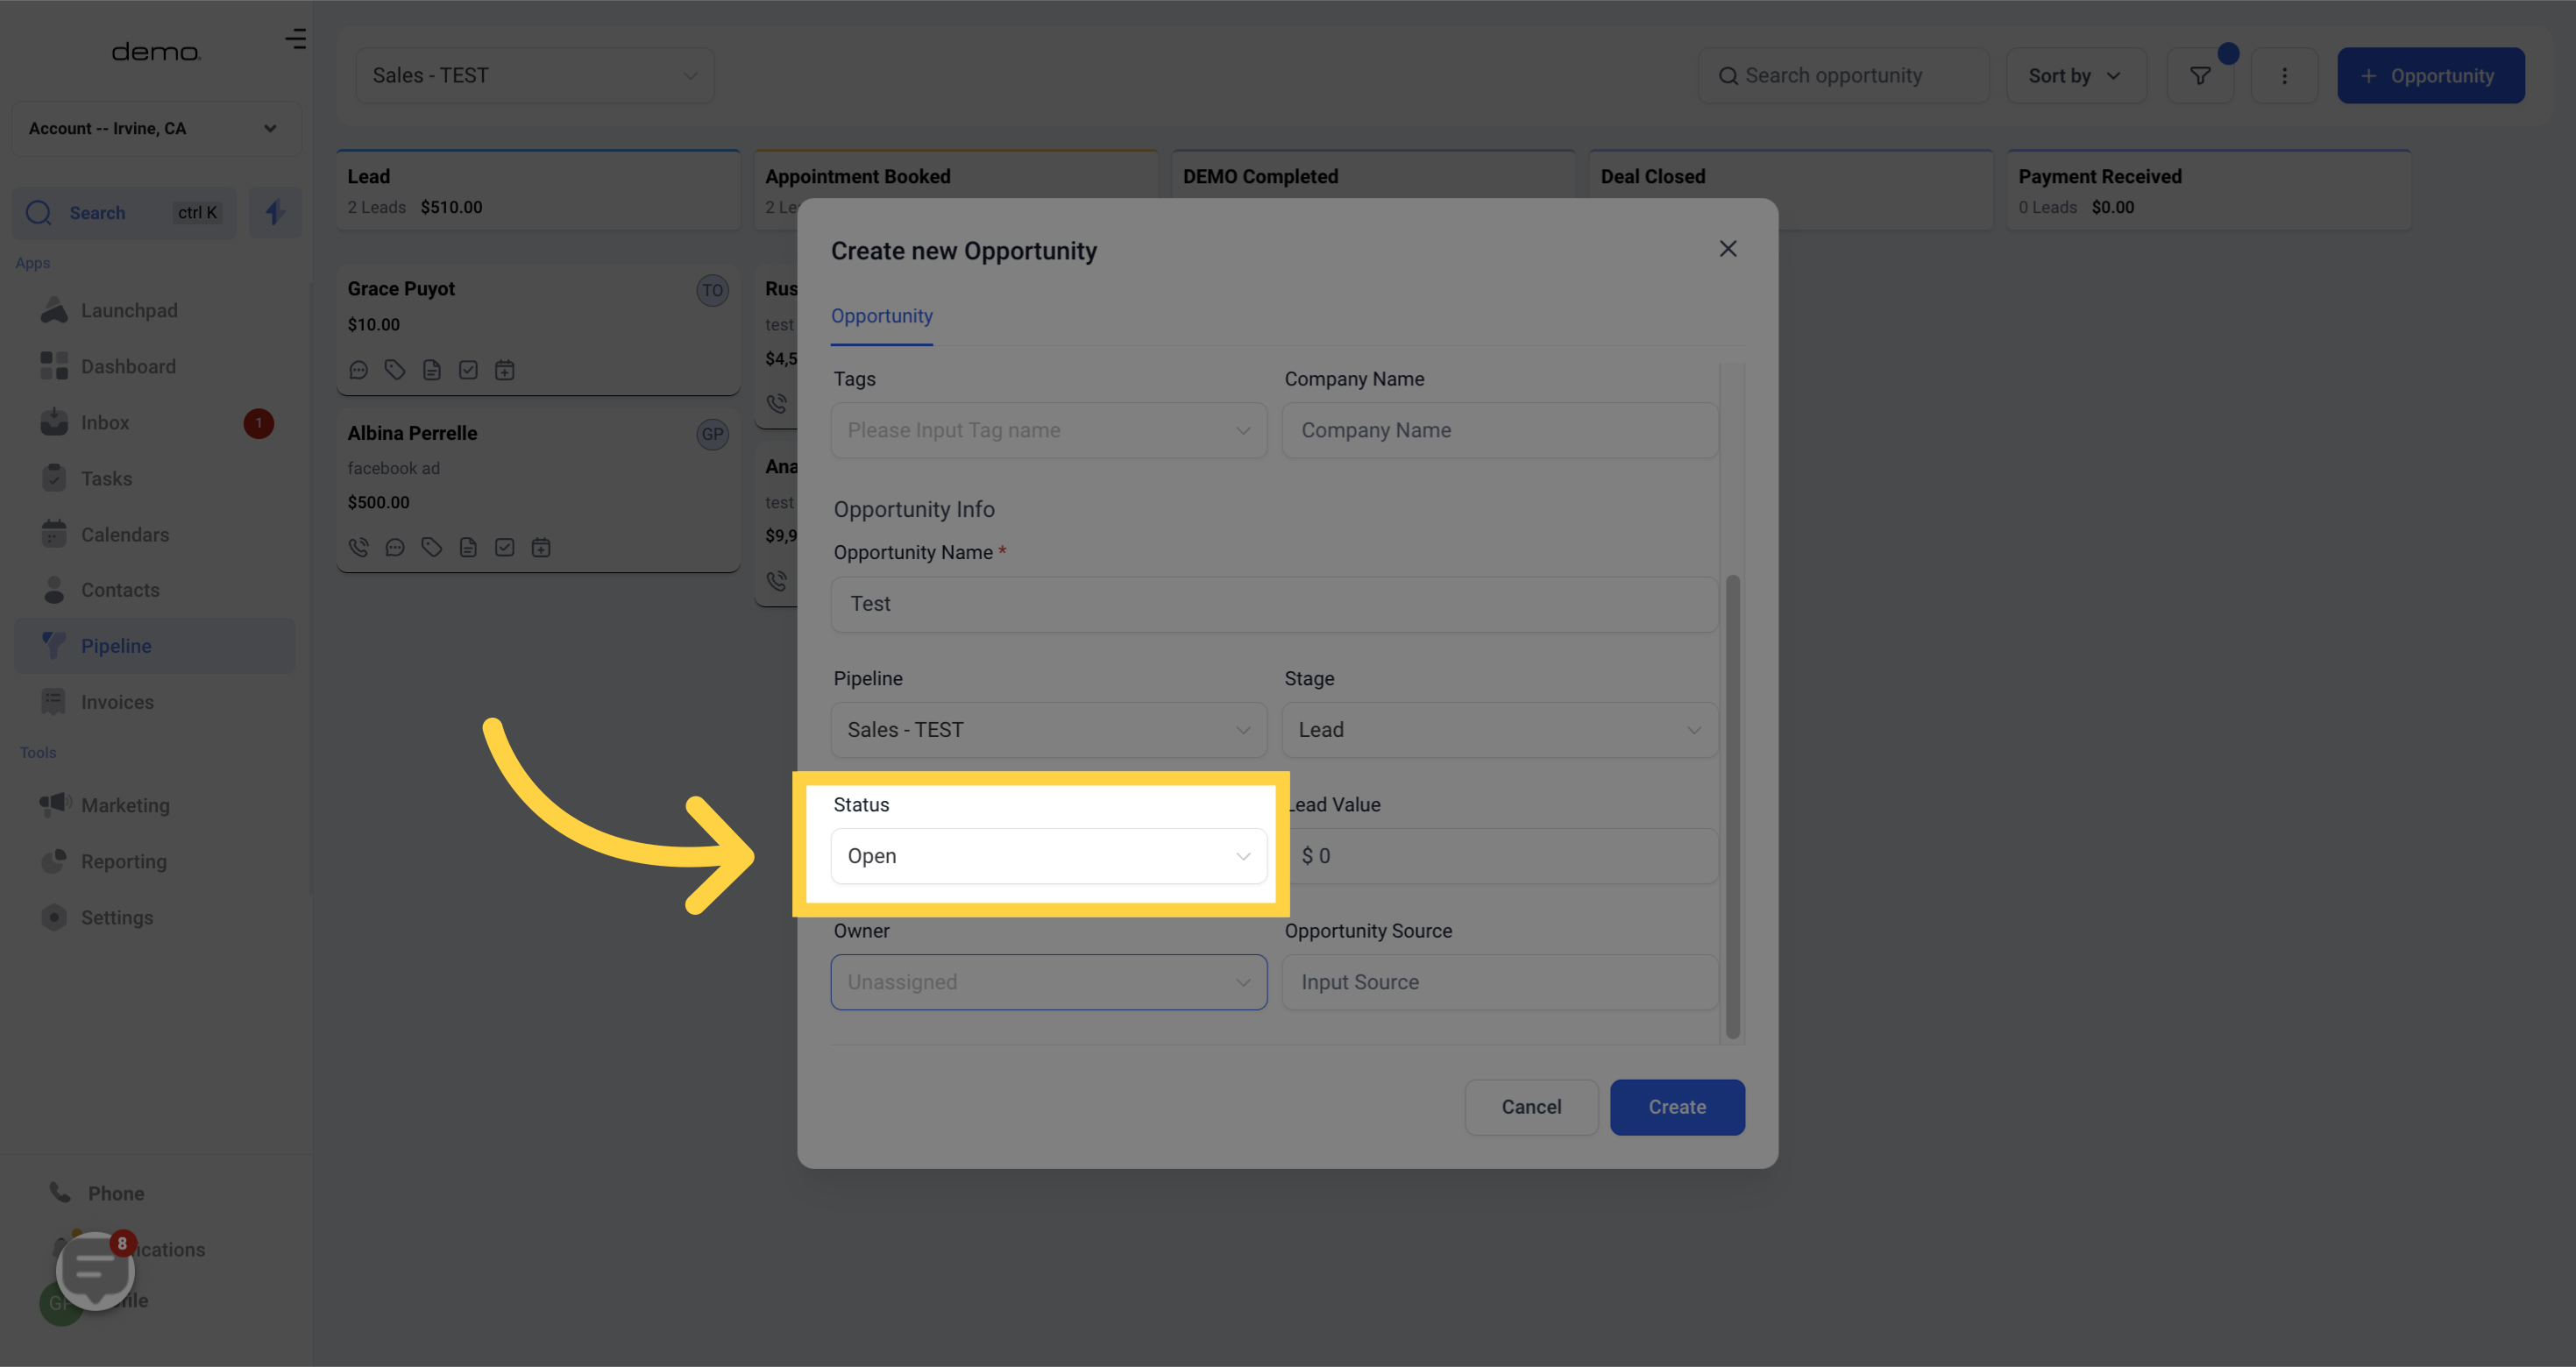
Status - Assigning a status to your opportunity is important to indicate whether it's Open, Closed, or Lost.
)
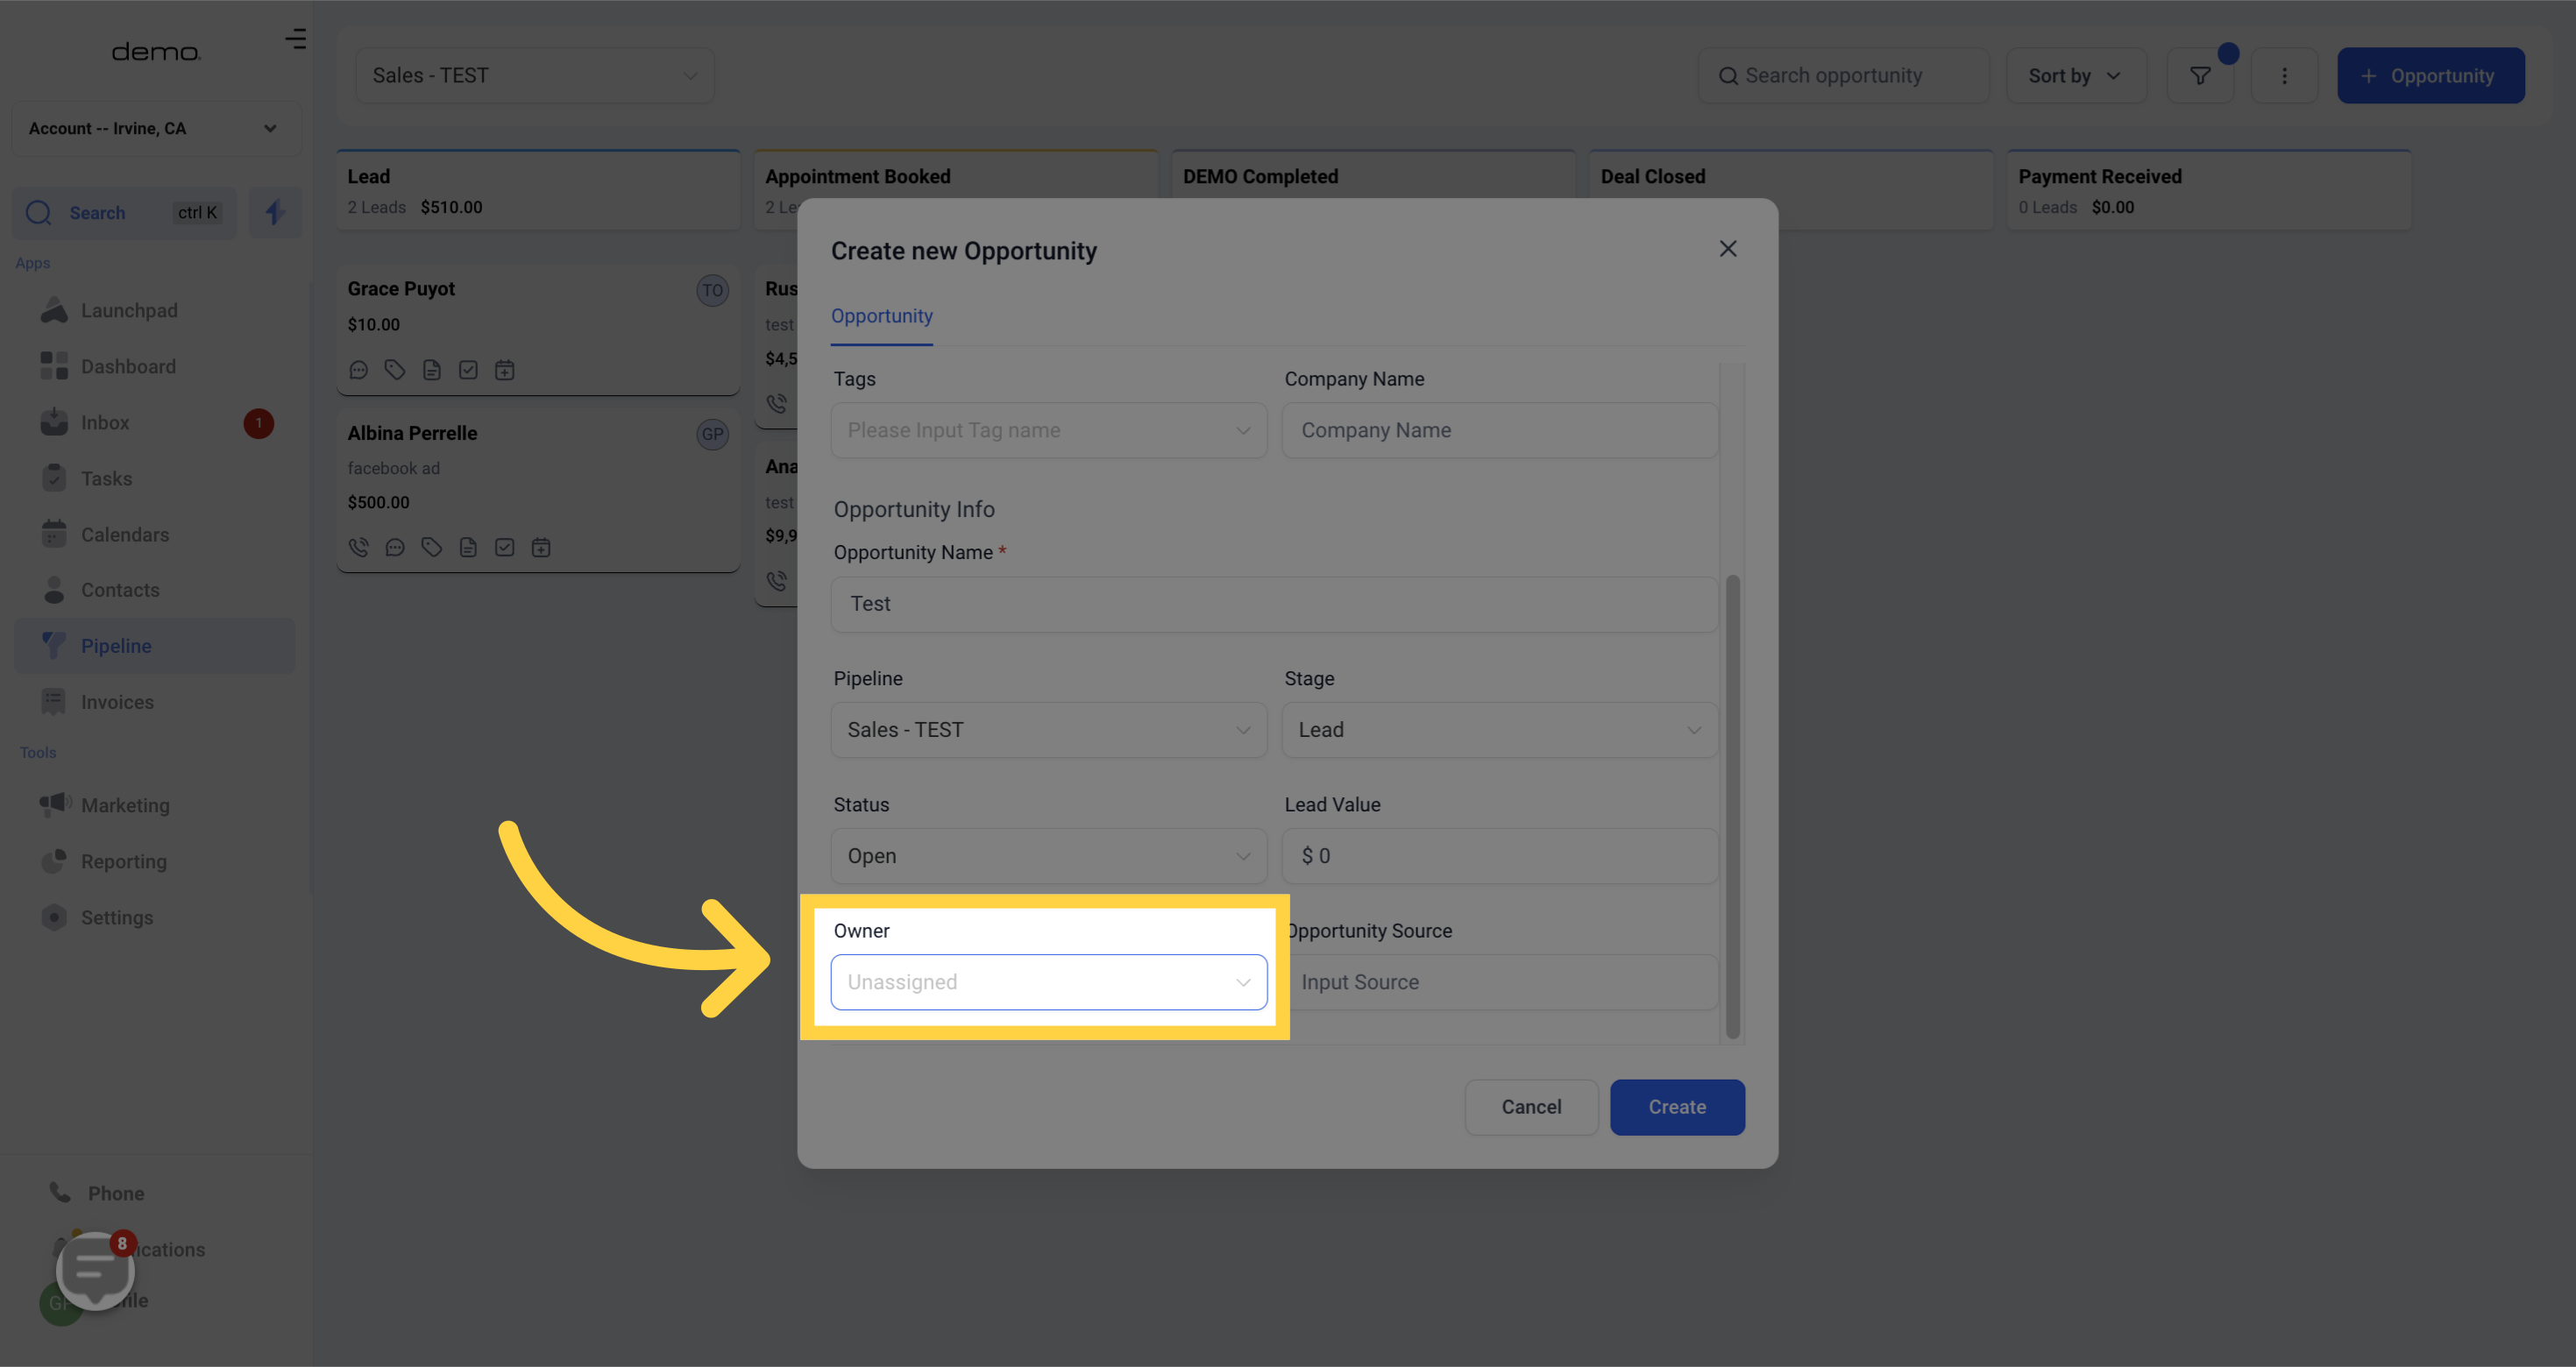
Assign Owner/UserAssign Owner/User - Assigning an owner or user to your opportunity is an effective way to ensure everyone knows who is responsible for it.
)
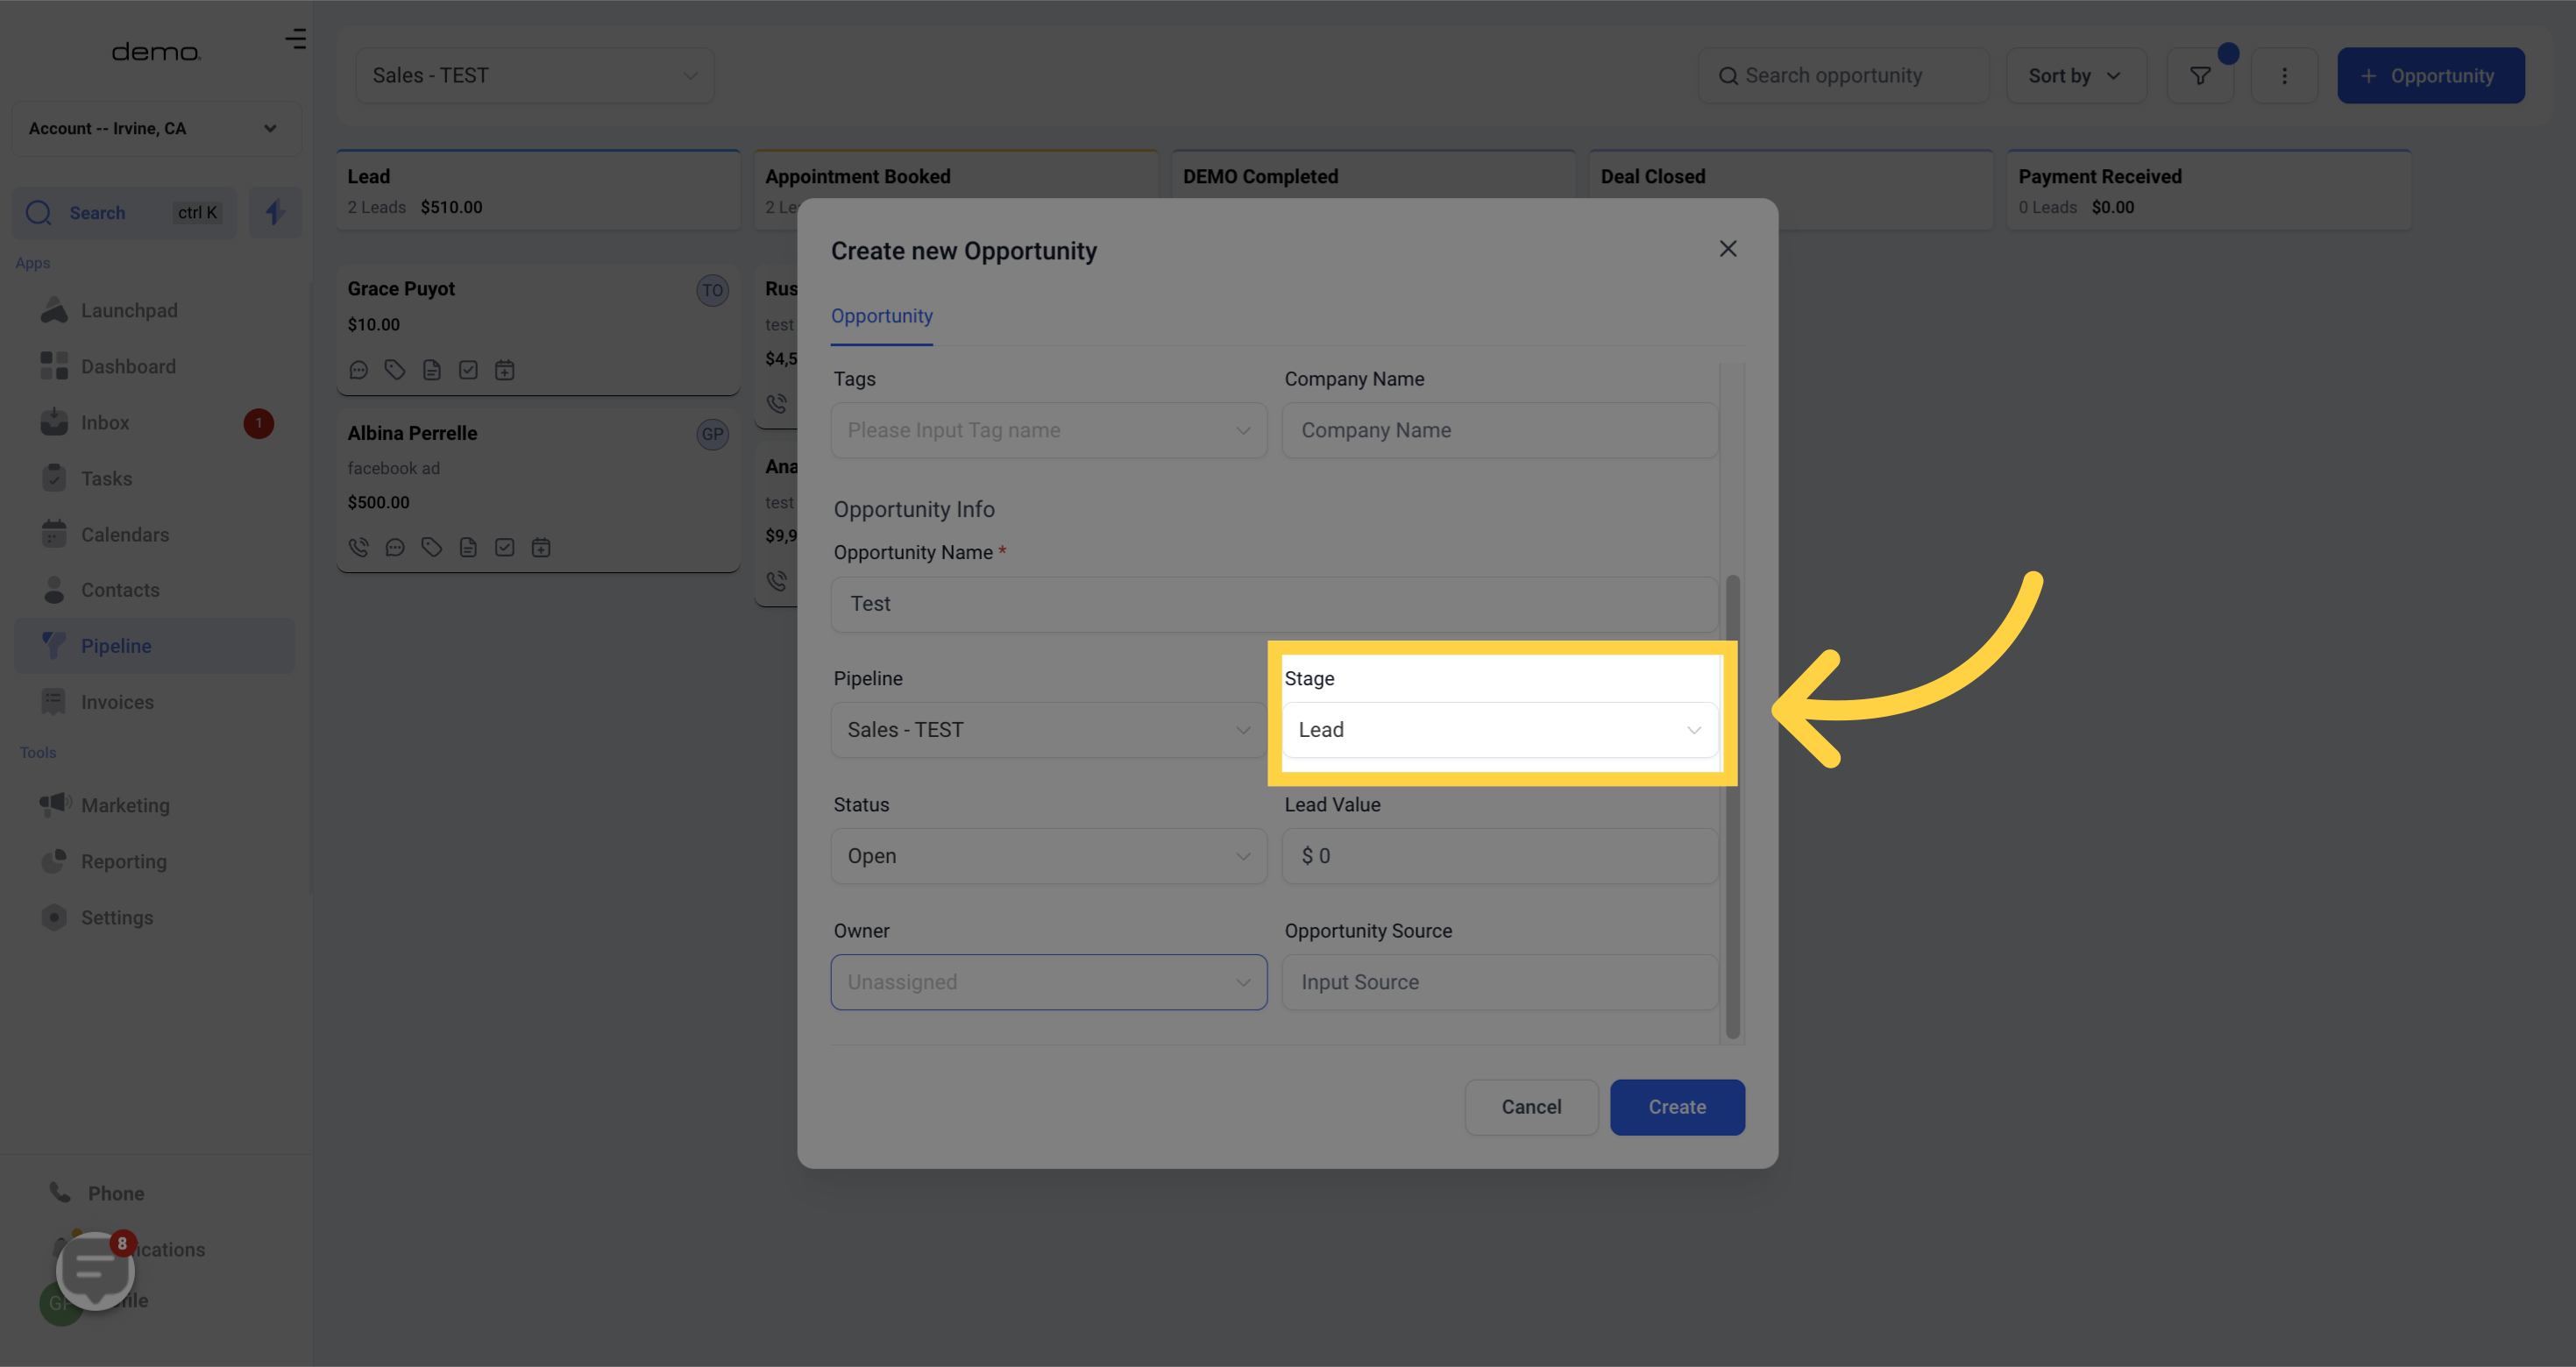
Choose a Pipeline Stage - Assigning your opportunity to a particular stage in your pipeline is crucial in tracking its progress through the sales process.
)
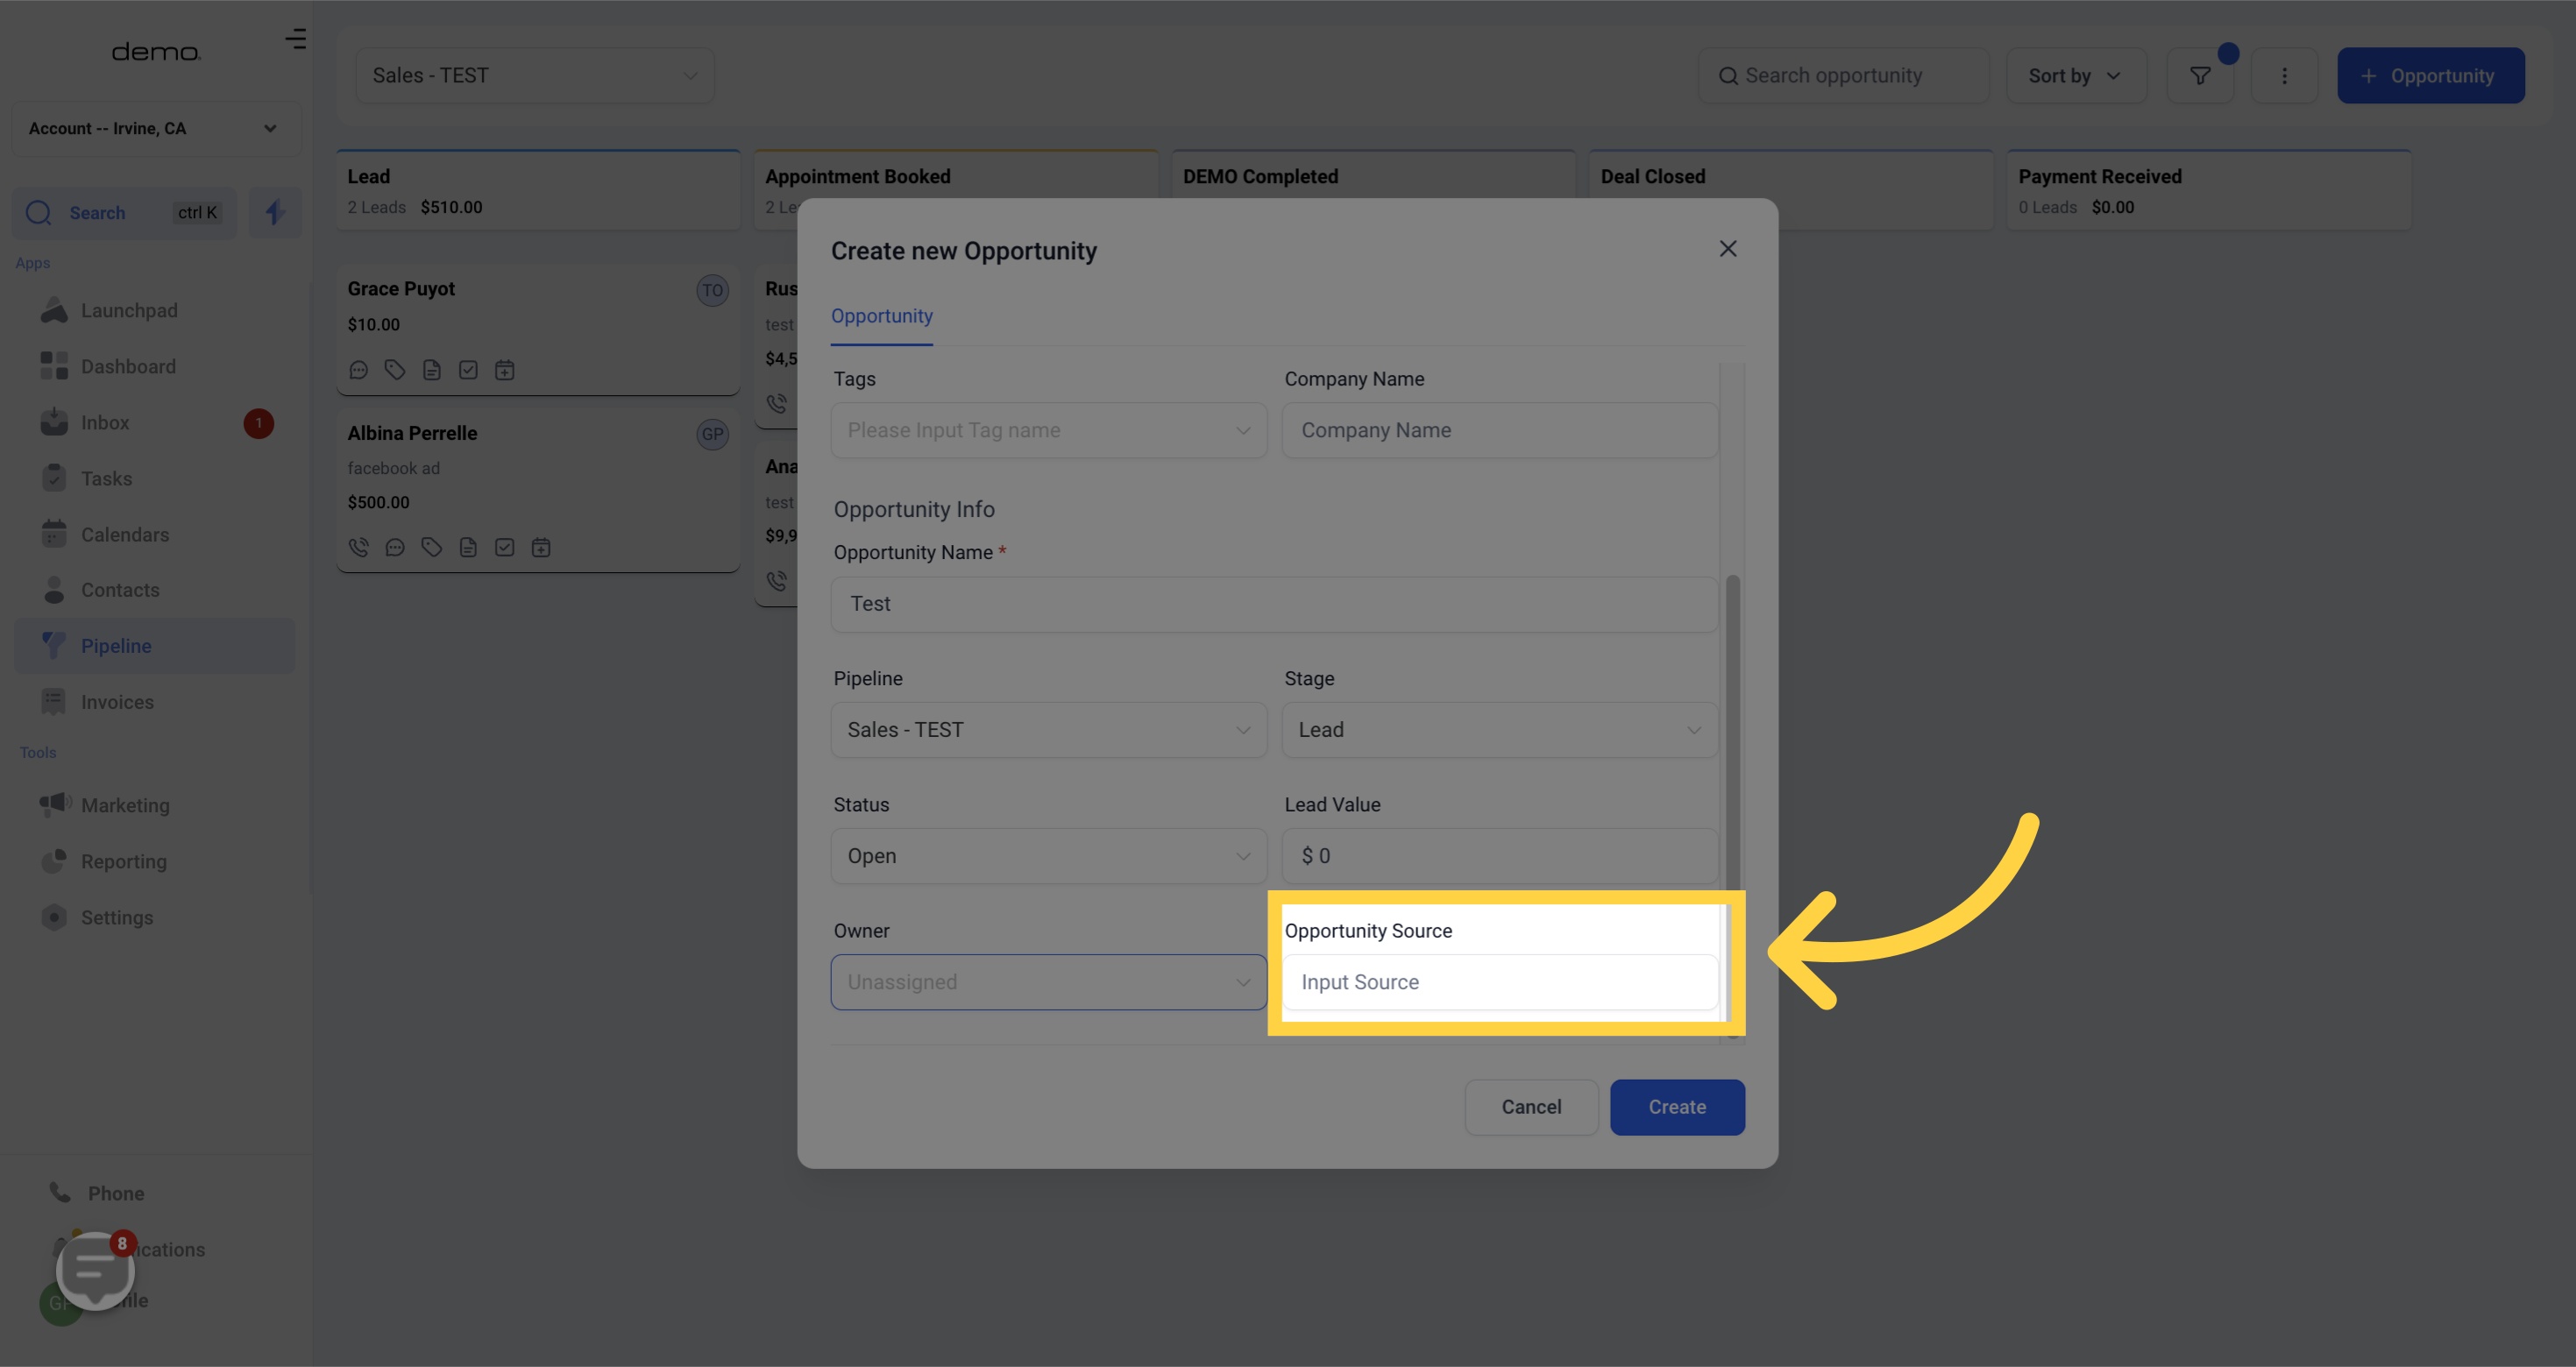
Input Lead Value - Adding monetary values to your opportunities is essential to accurately track conversion revenue and costs. This is typically tracked in USD by default.
)
Input Source - Adding an input source to your opportunity can help you keep track of where it came from and improve your acquisition data
)
Select the Book/Update Appointment option
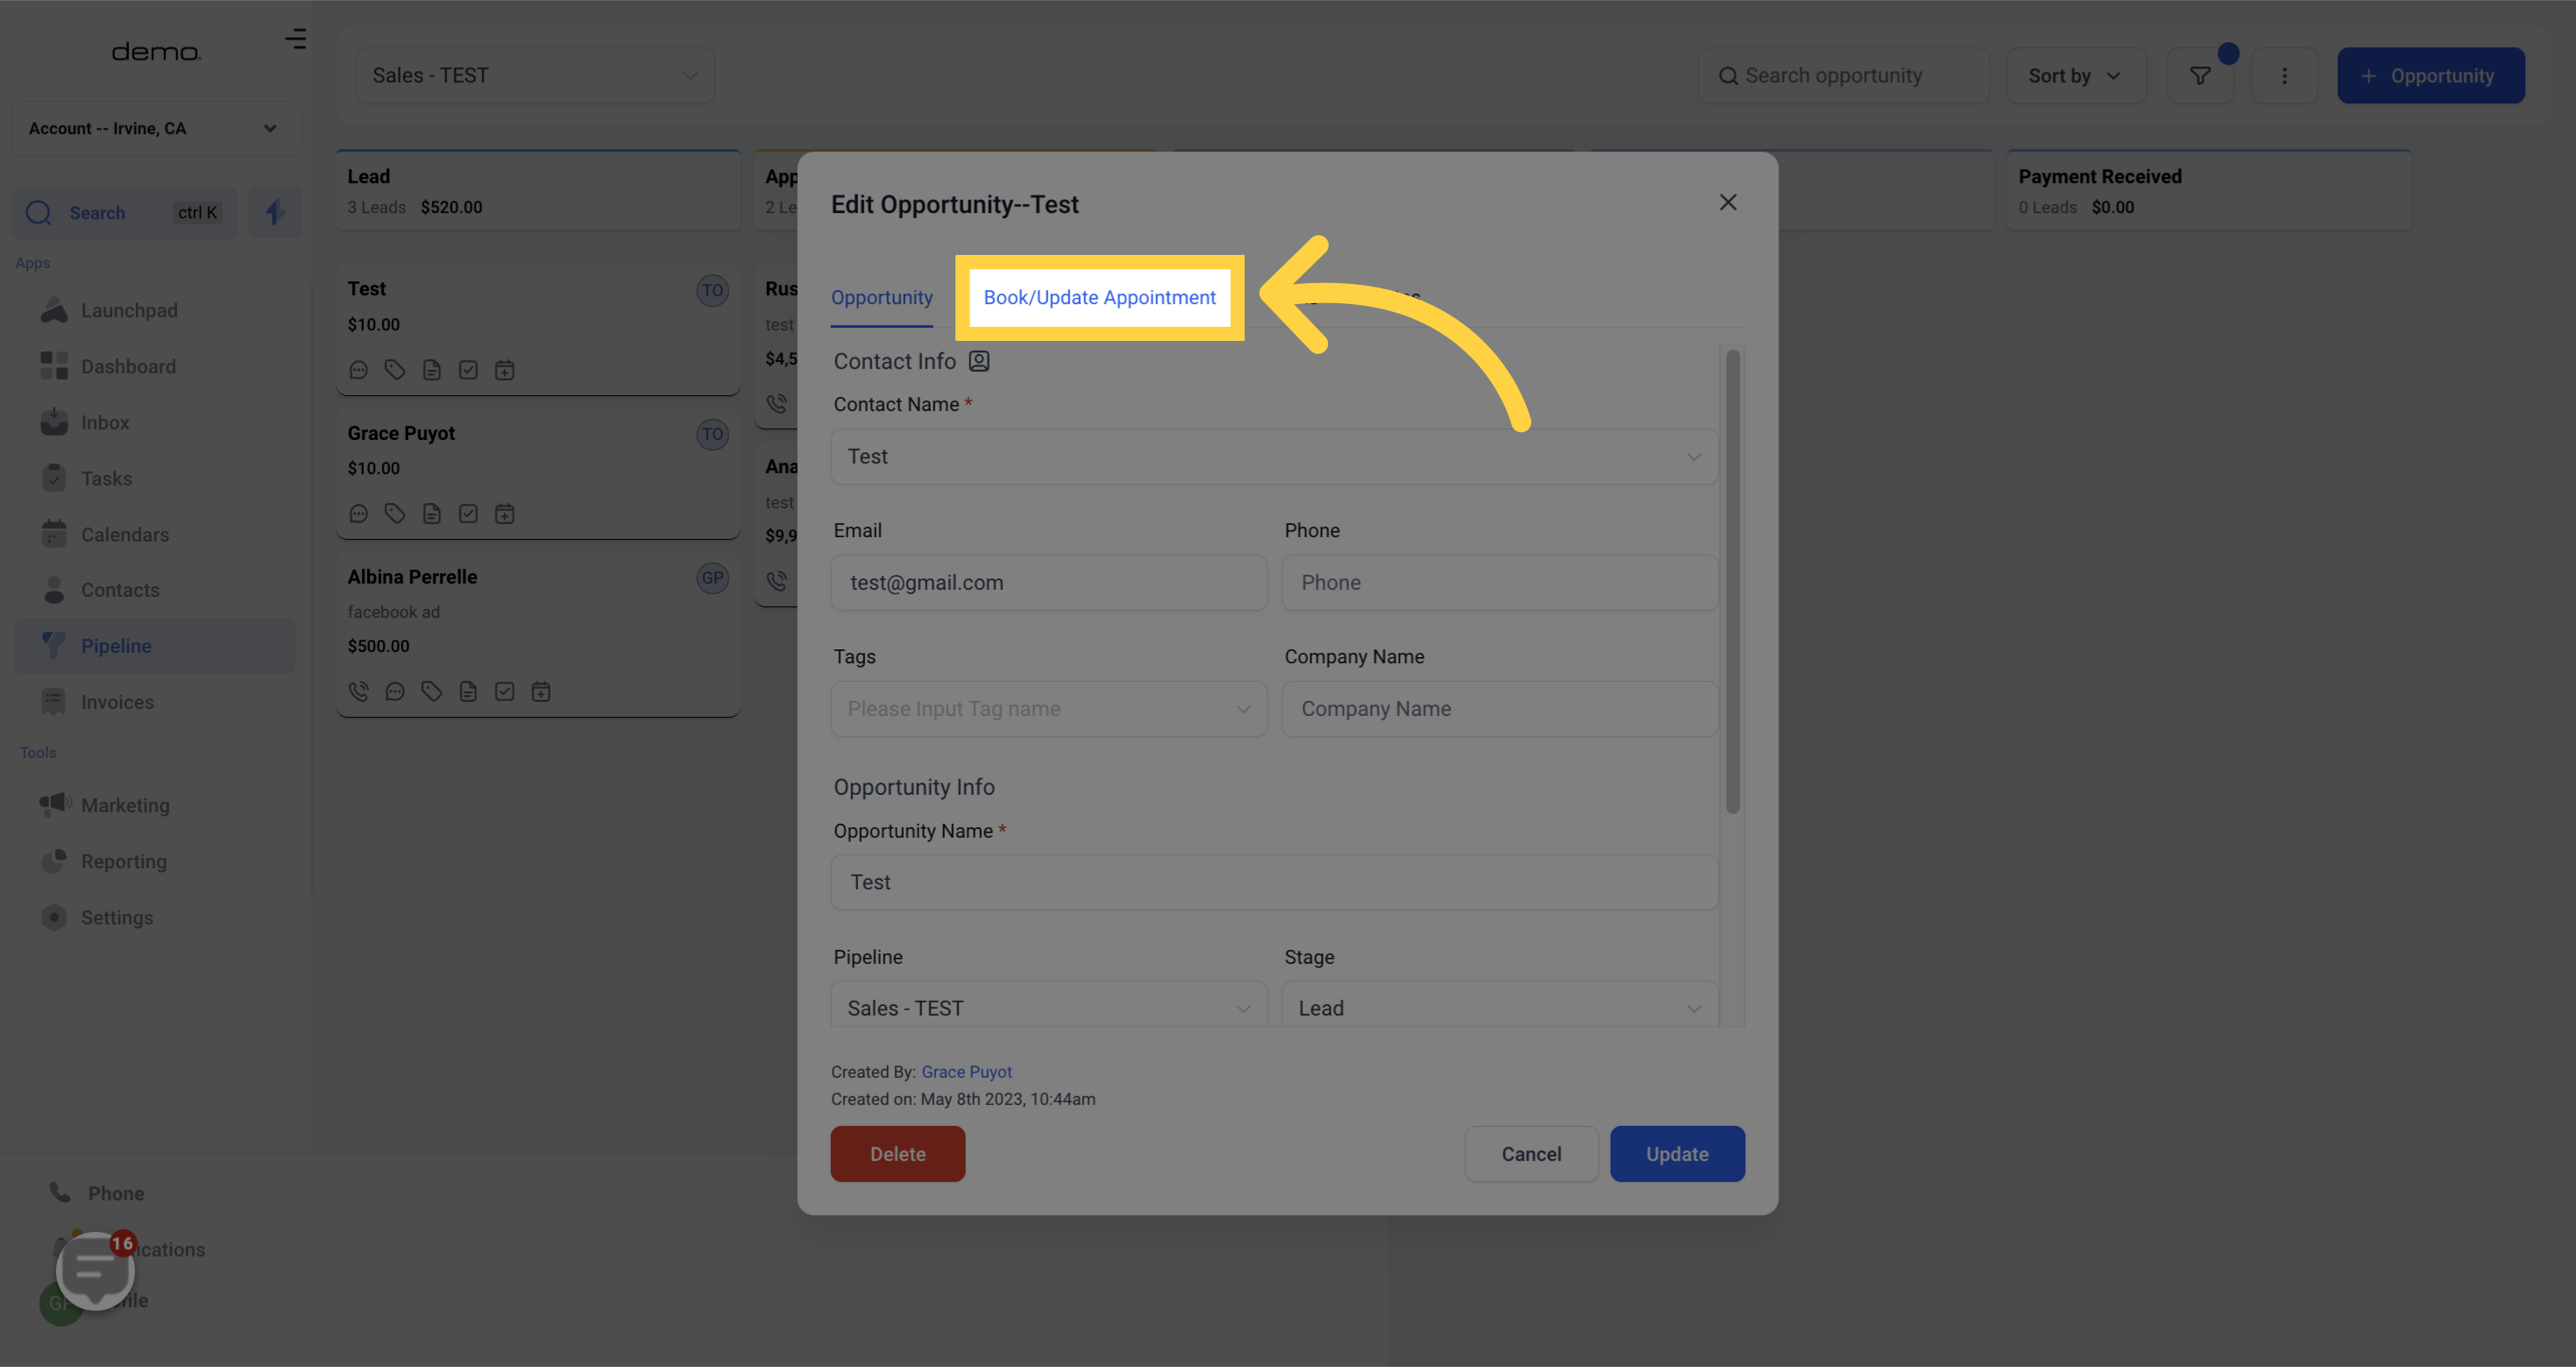
Calendar - To choose a calendar, simply click on the "Select A Calendar" dropdown menu, which displays a list of calendars you have created within the system.
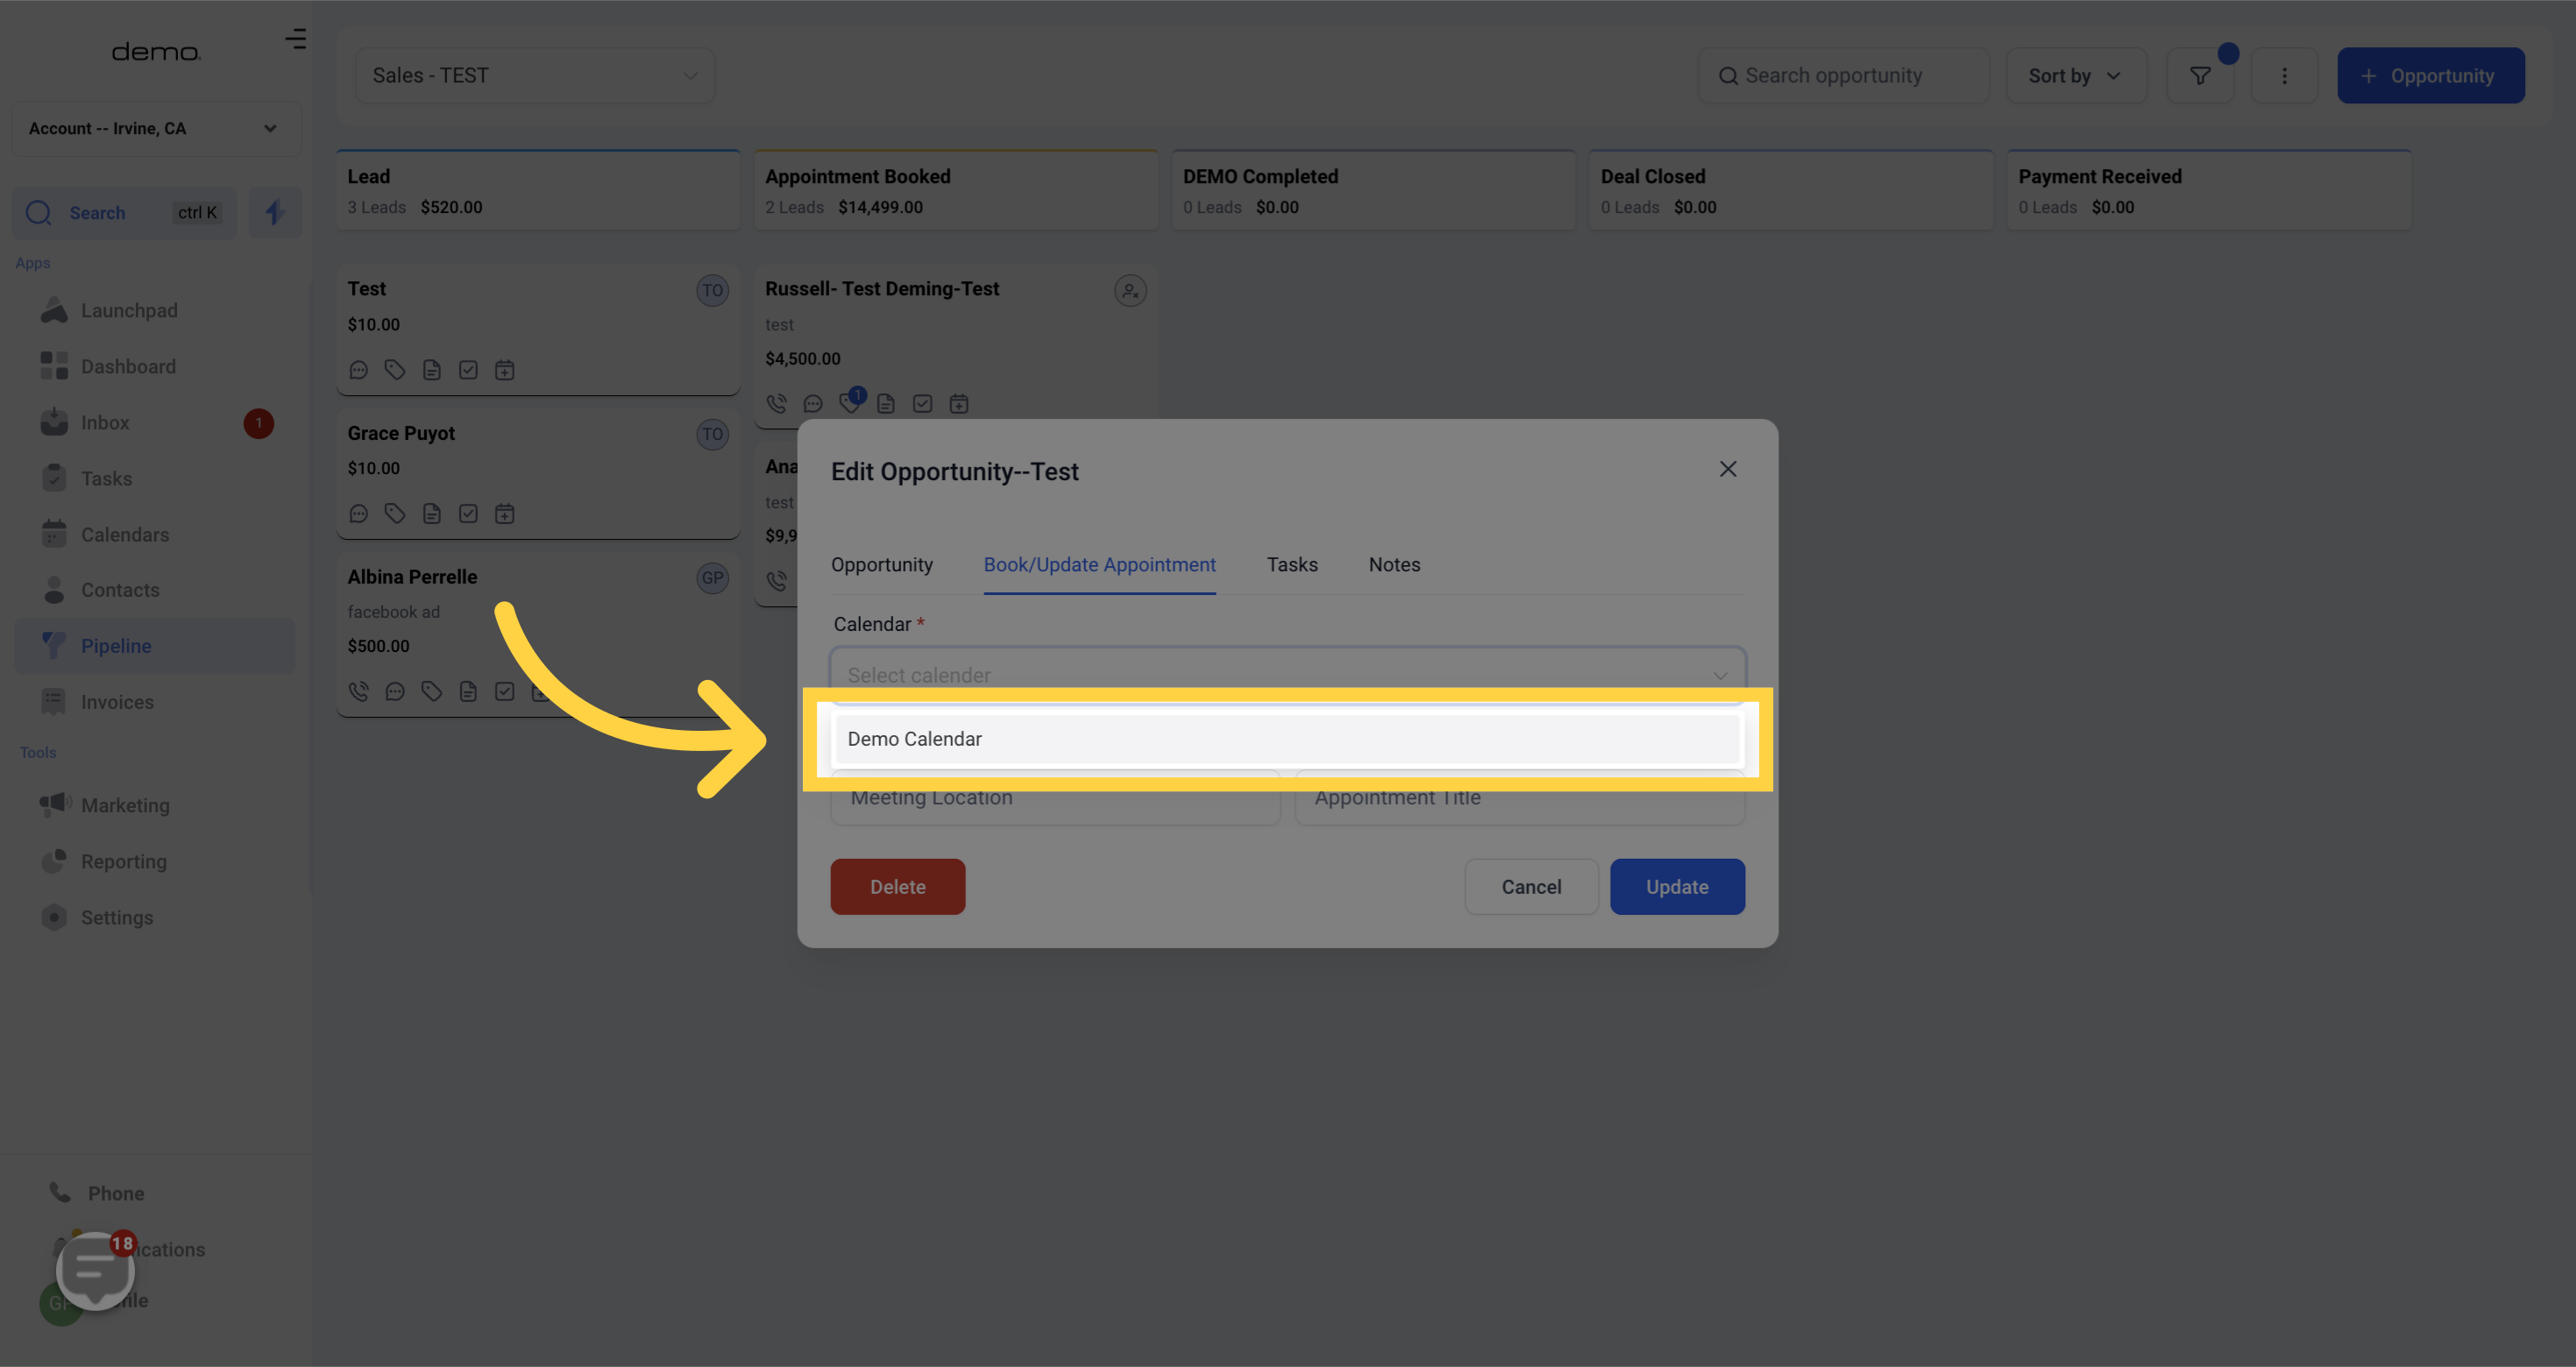)
Day - When selecting a date, navigate to the calendar period and choose the specific day you want
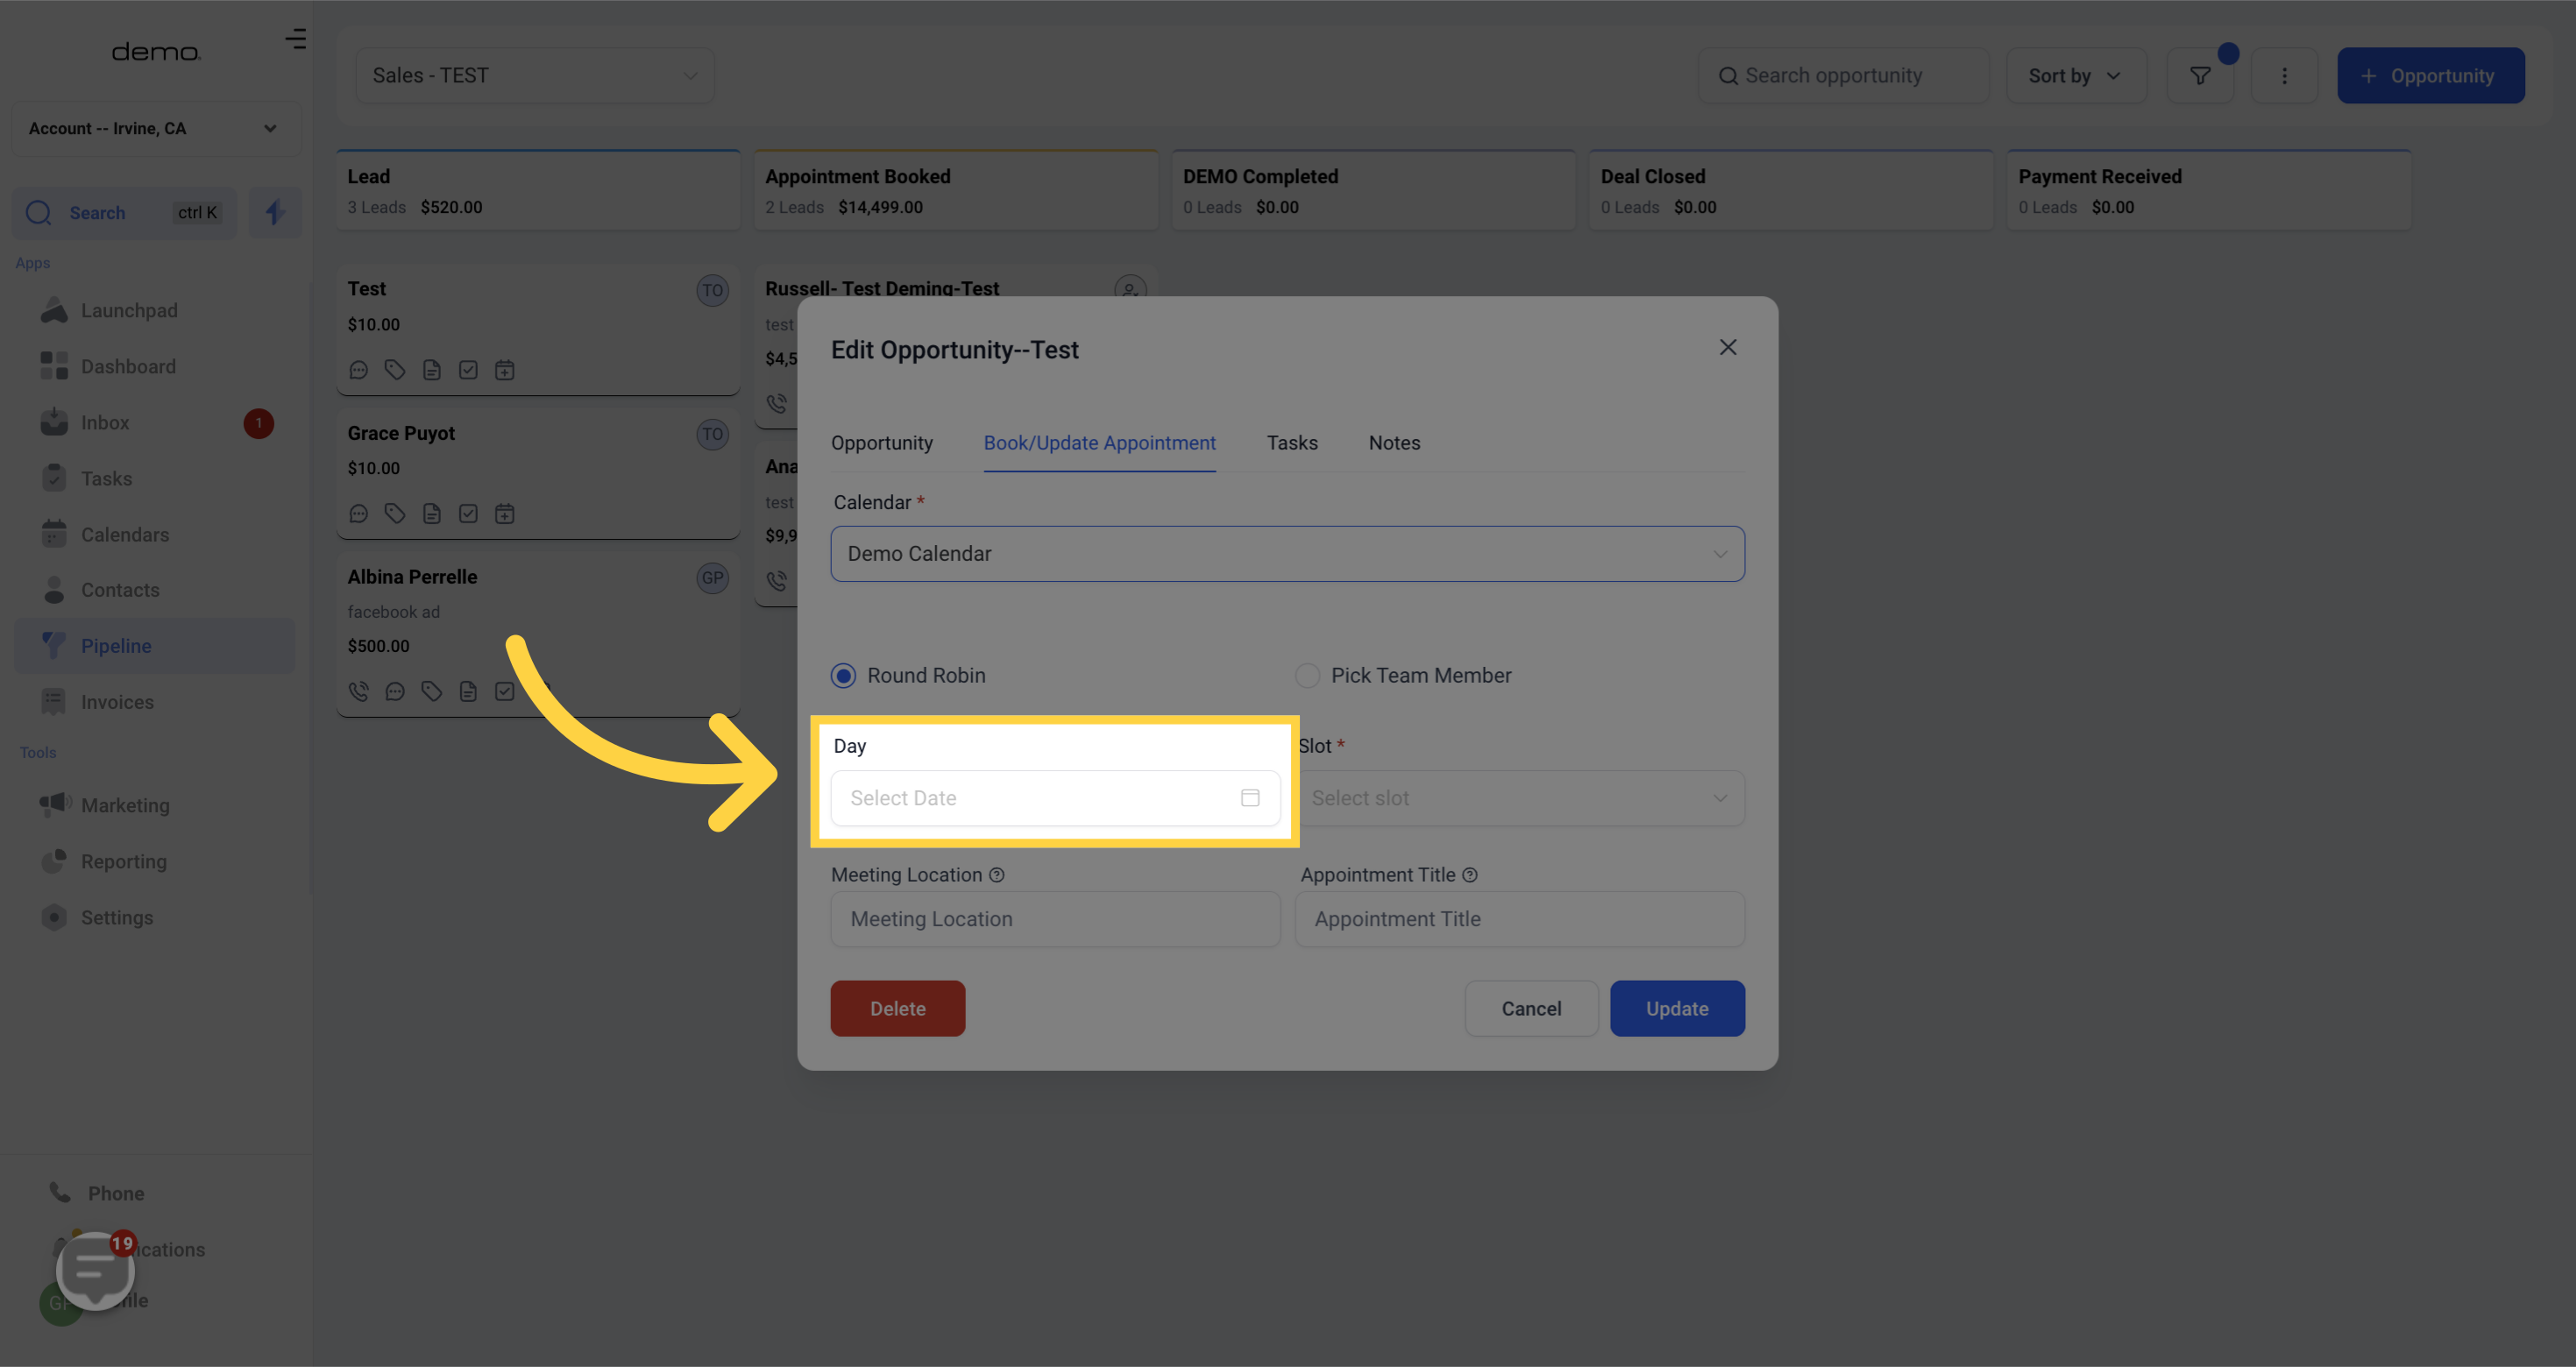)
Slot - You can choose a specific time slot by selecting an available option in this section.
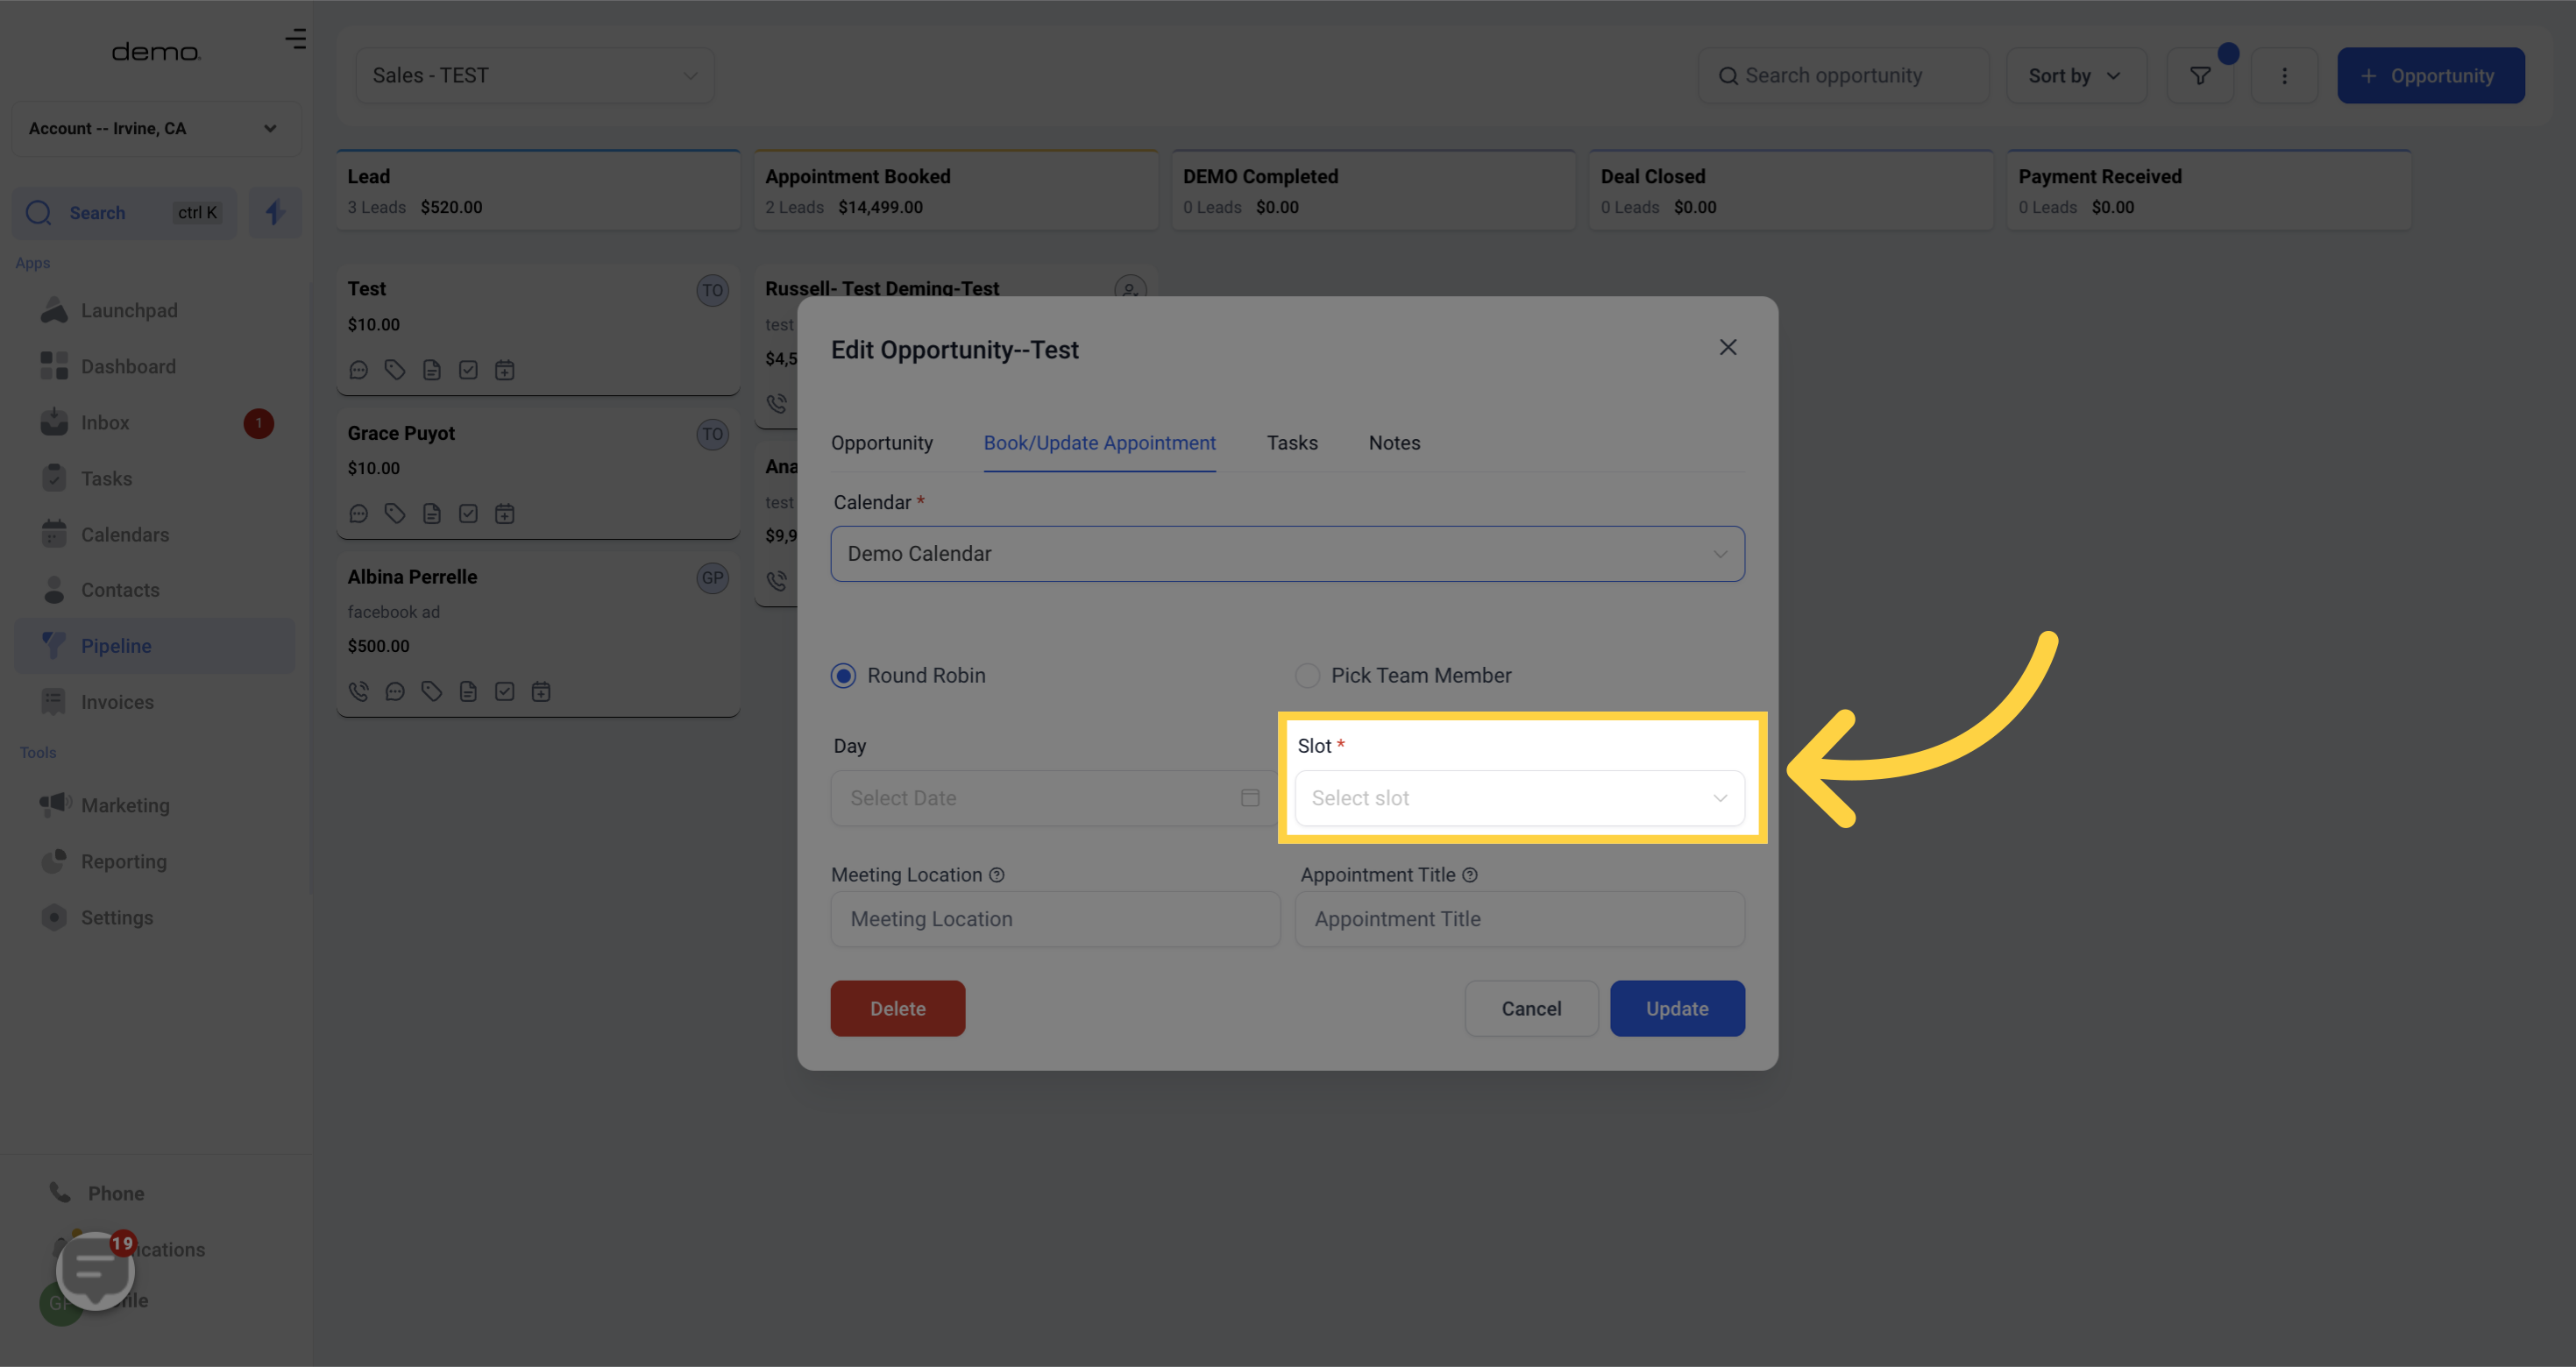)
Meeting Location - Adding a meeting location is optional, but if you'd like to include it, you can do so.
)
Appointment Title - Providing a title for the appointment is optional. However, if you choose to do so, you can specify it in this section.
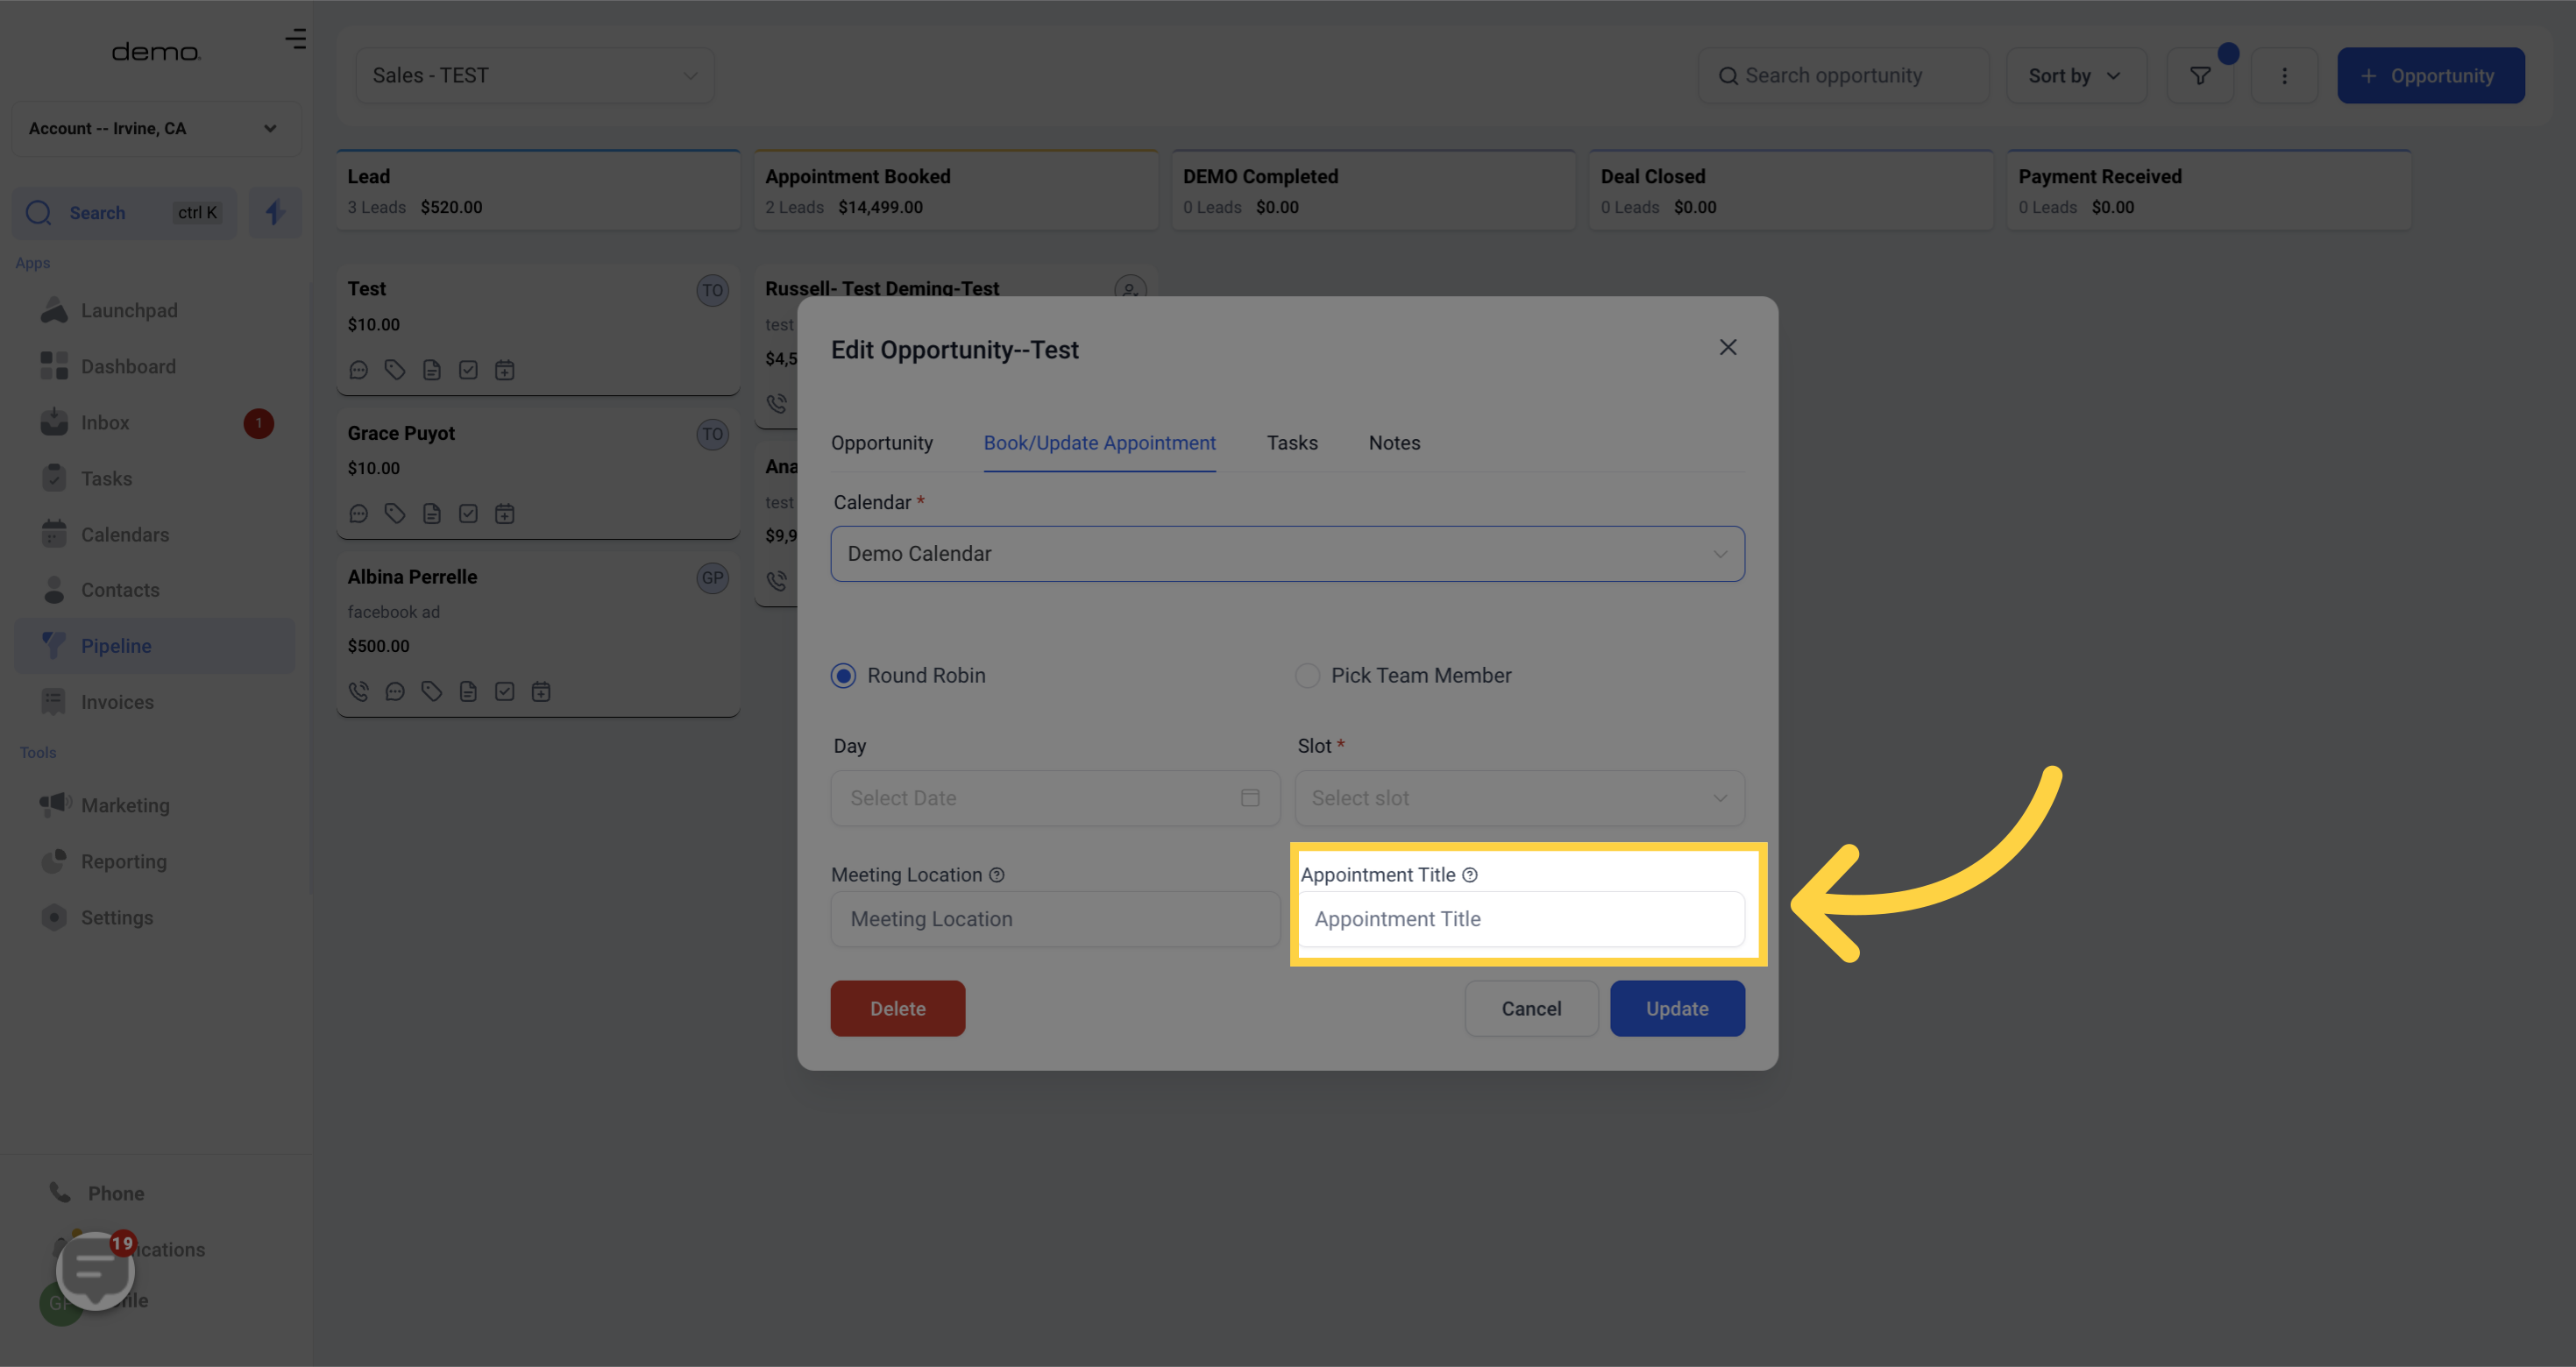)
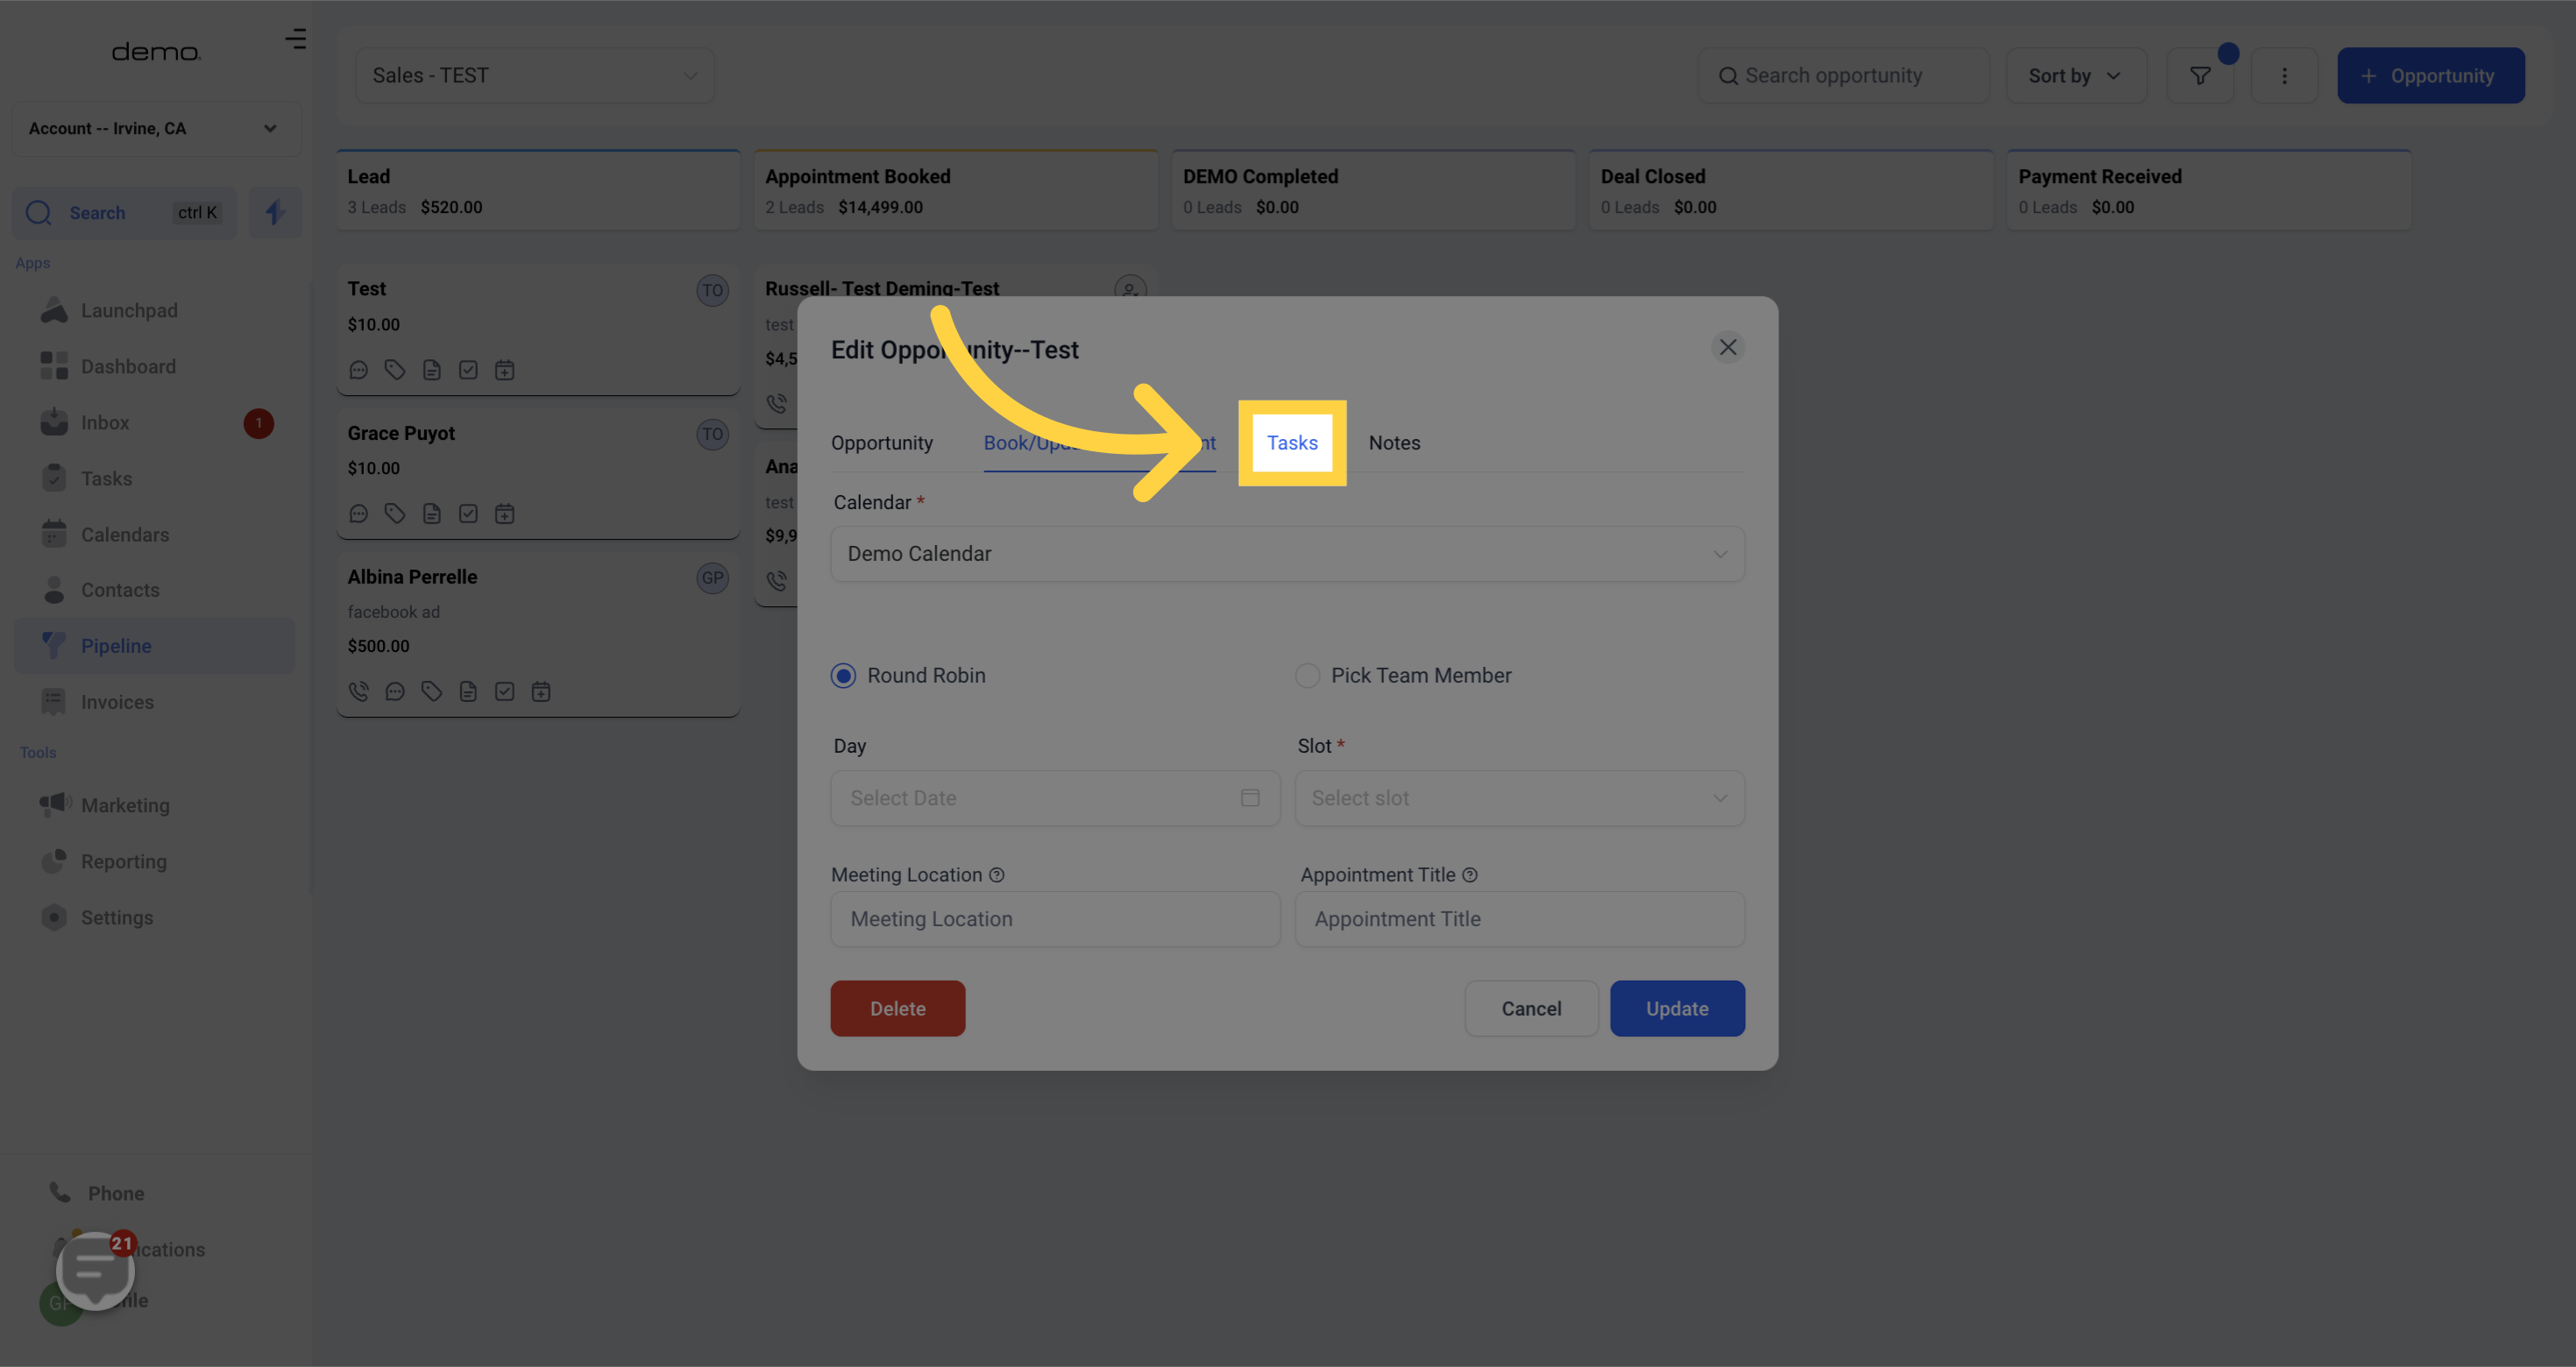
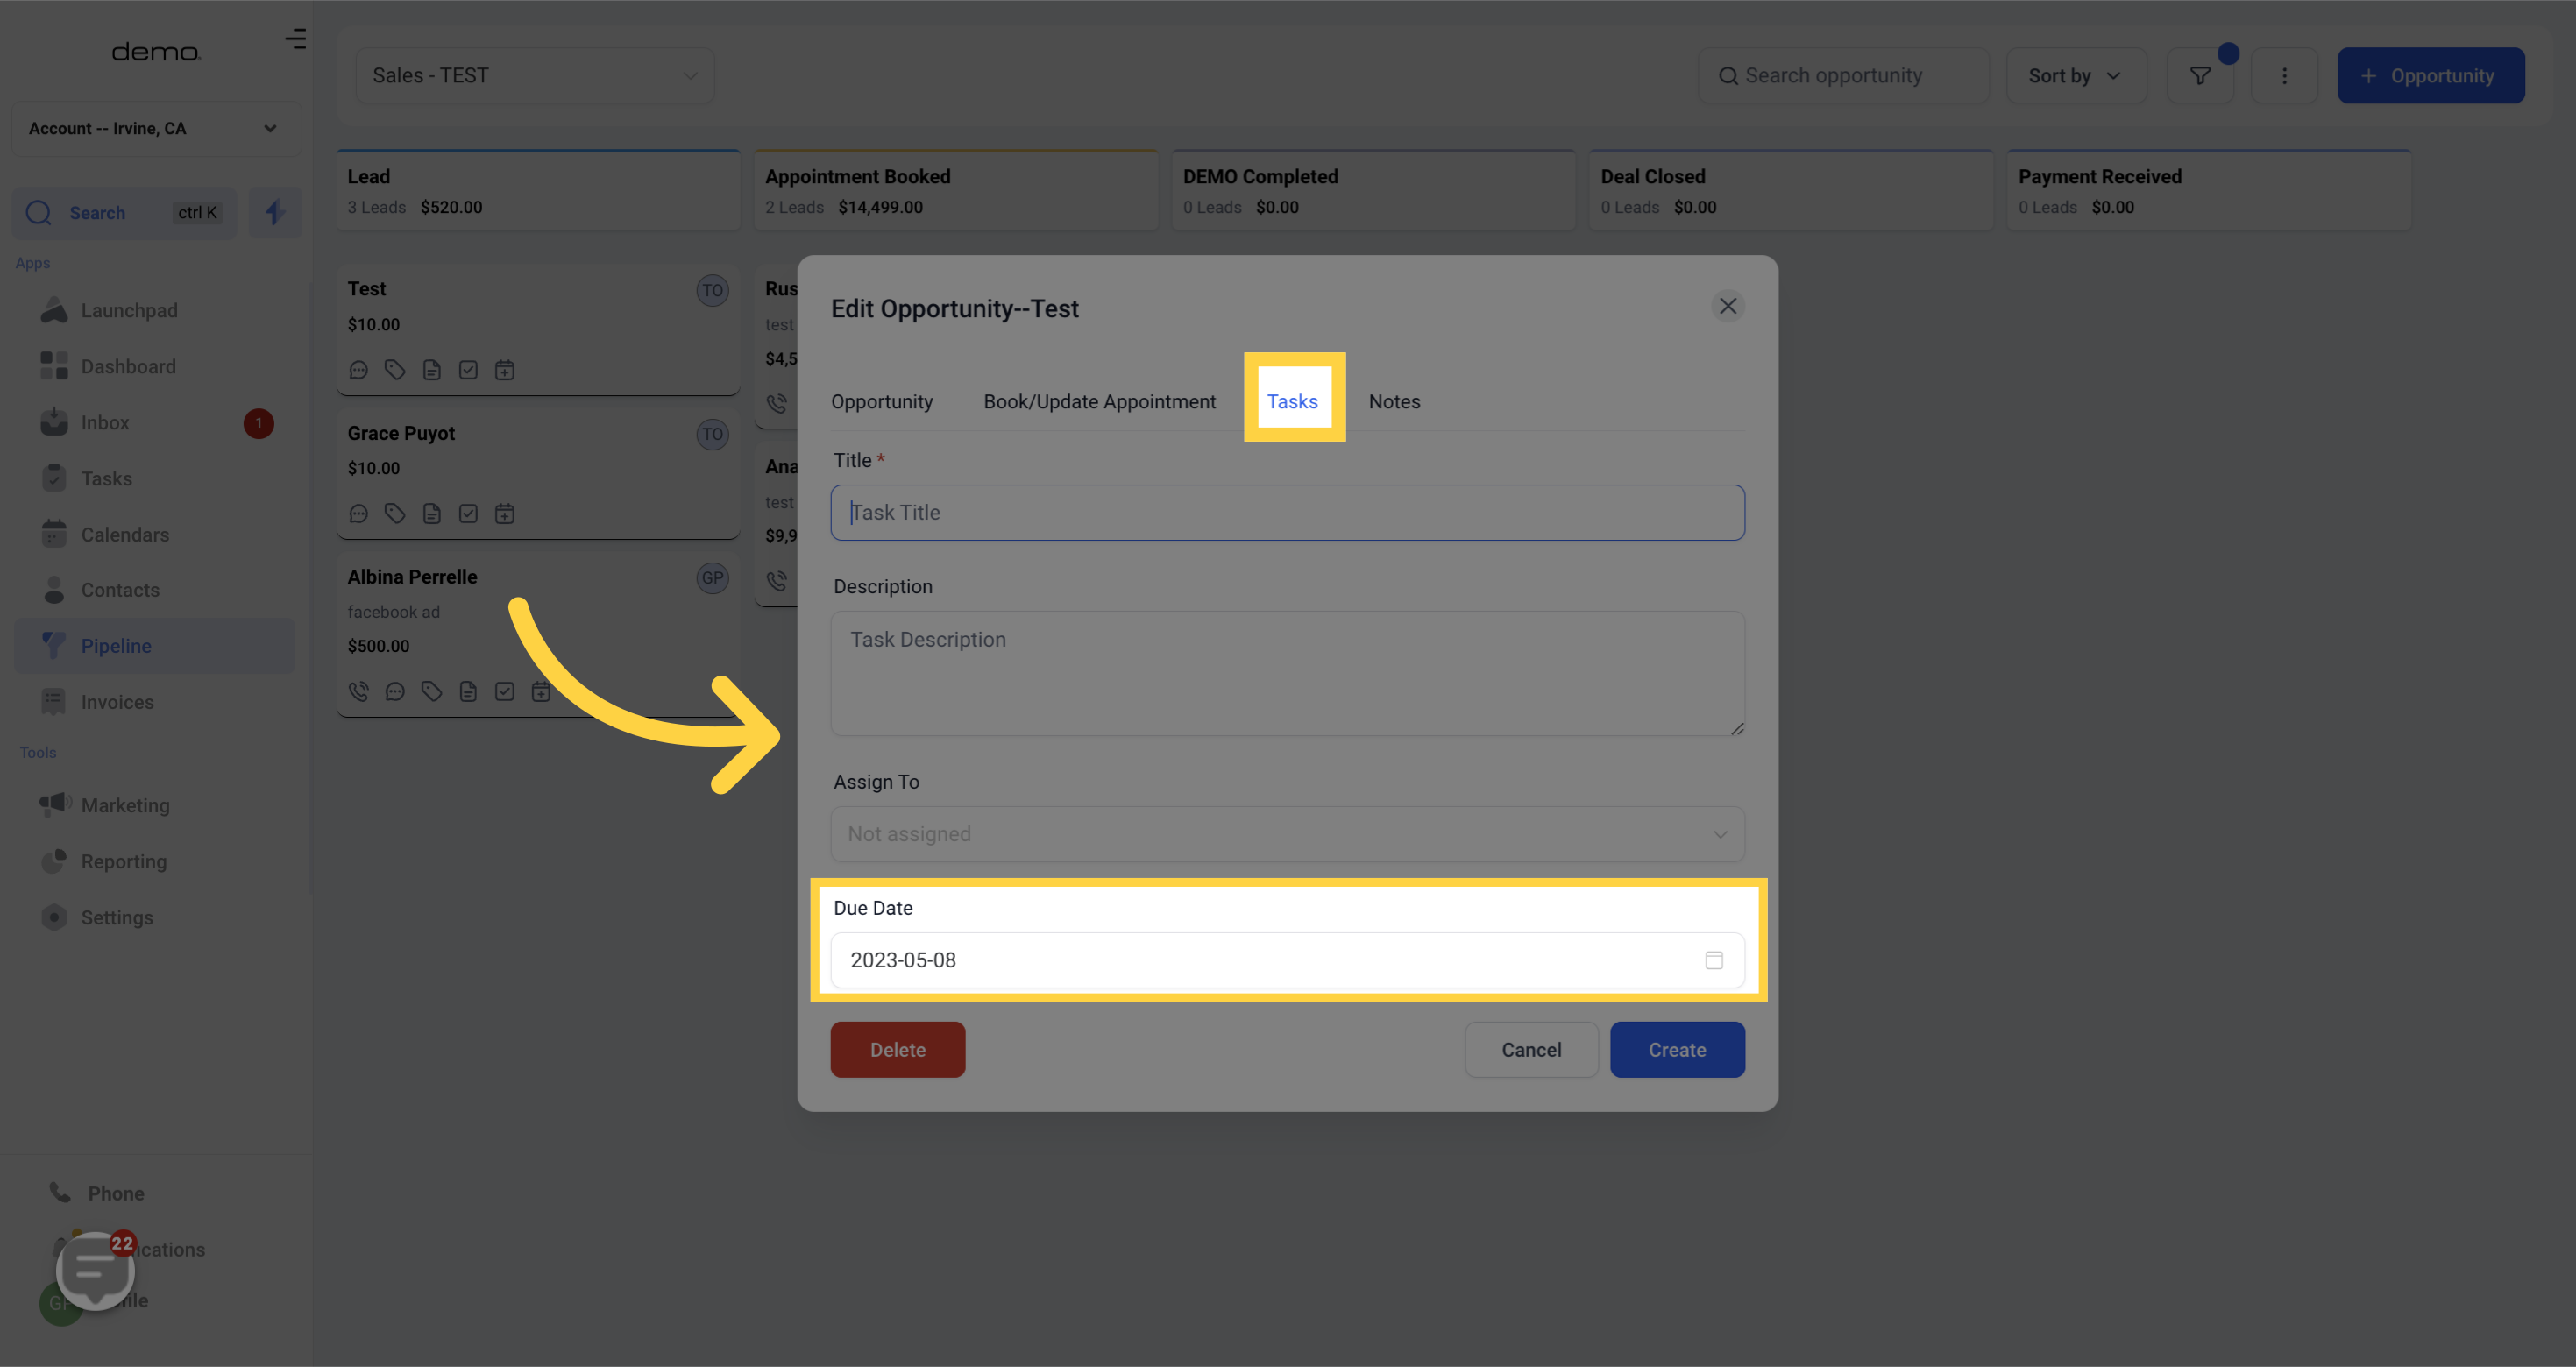
To manually add a new task for a particular opportunity, you can use this section.
Title - To give your new task a clear and easily recognizable title, simply fill in the "Task Title" field in this section.
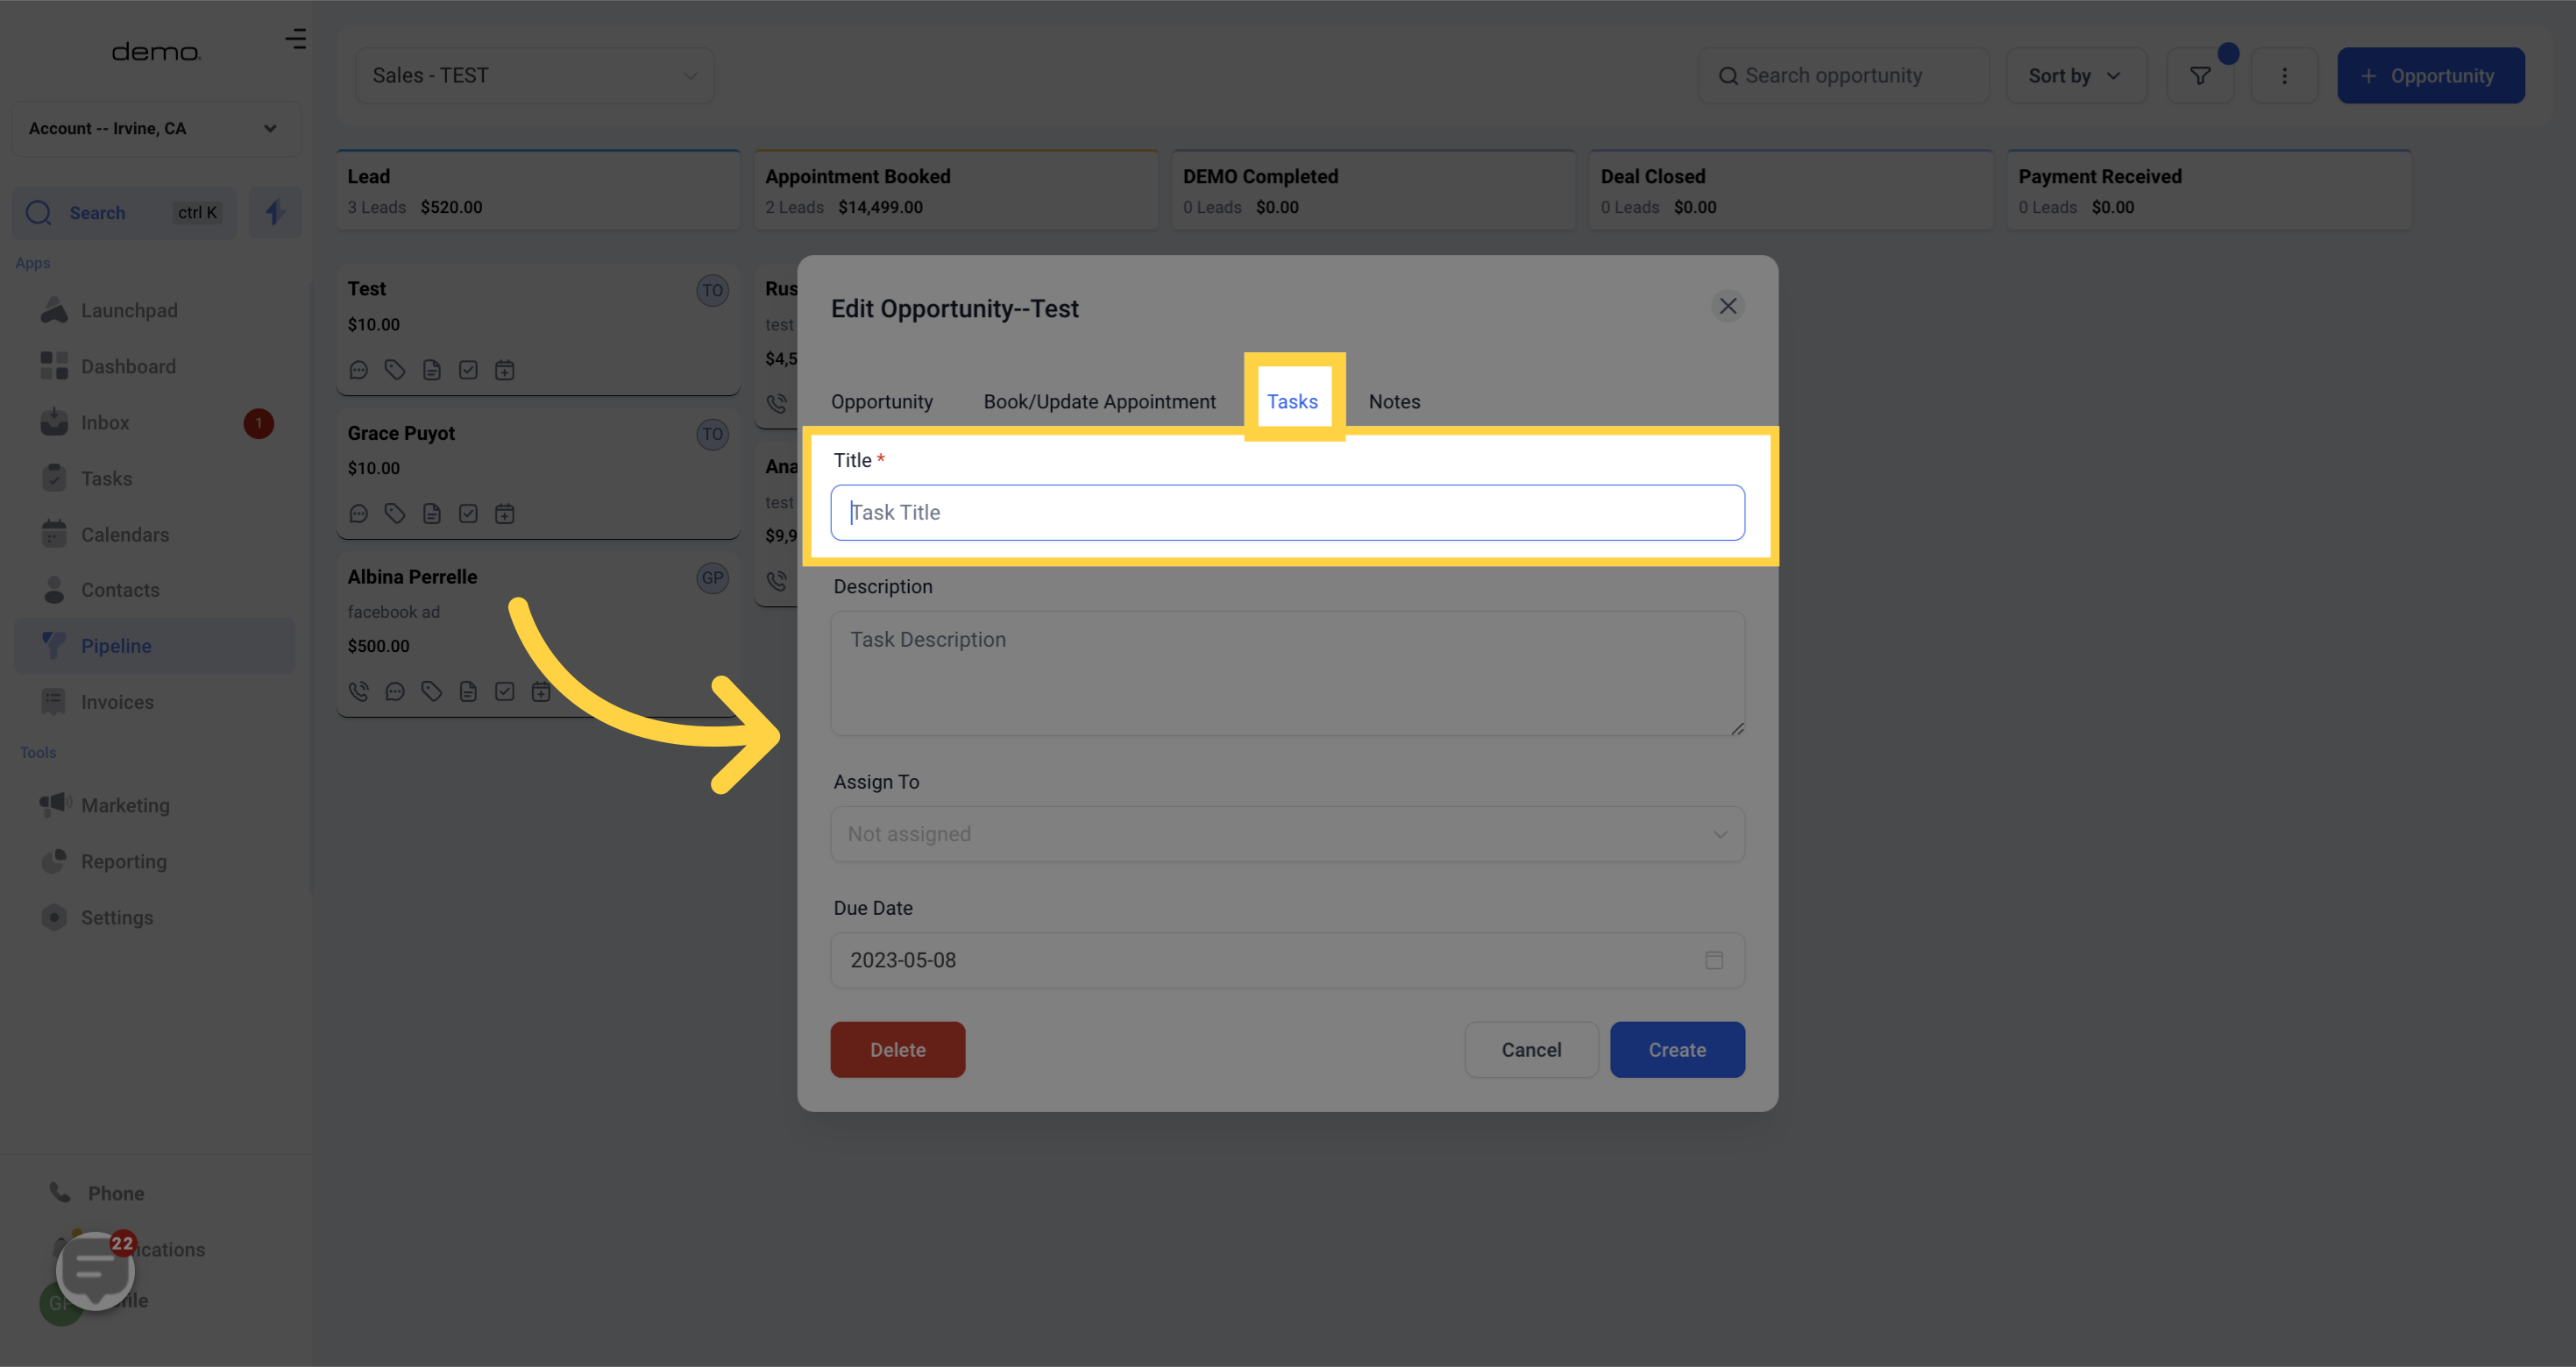)
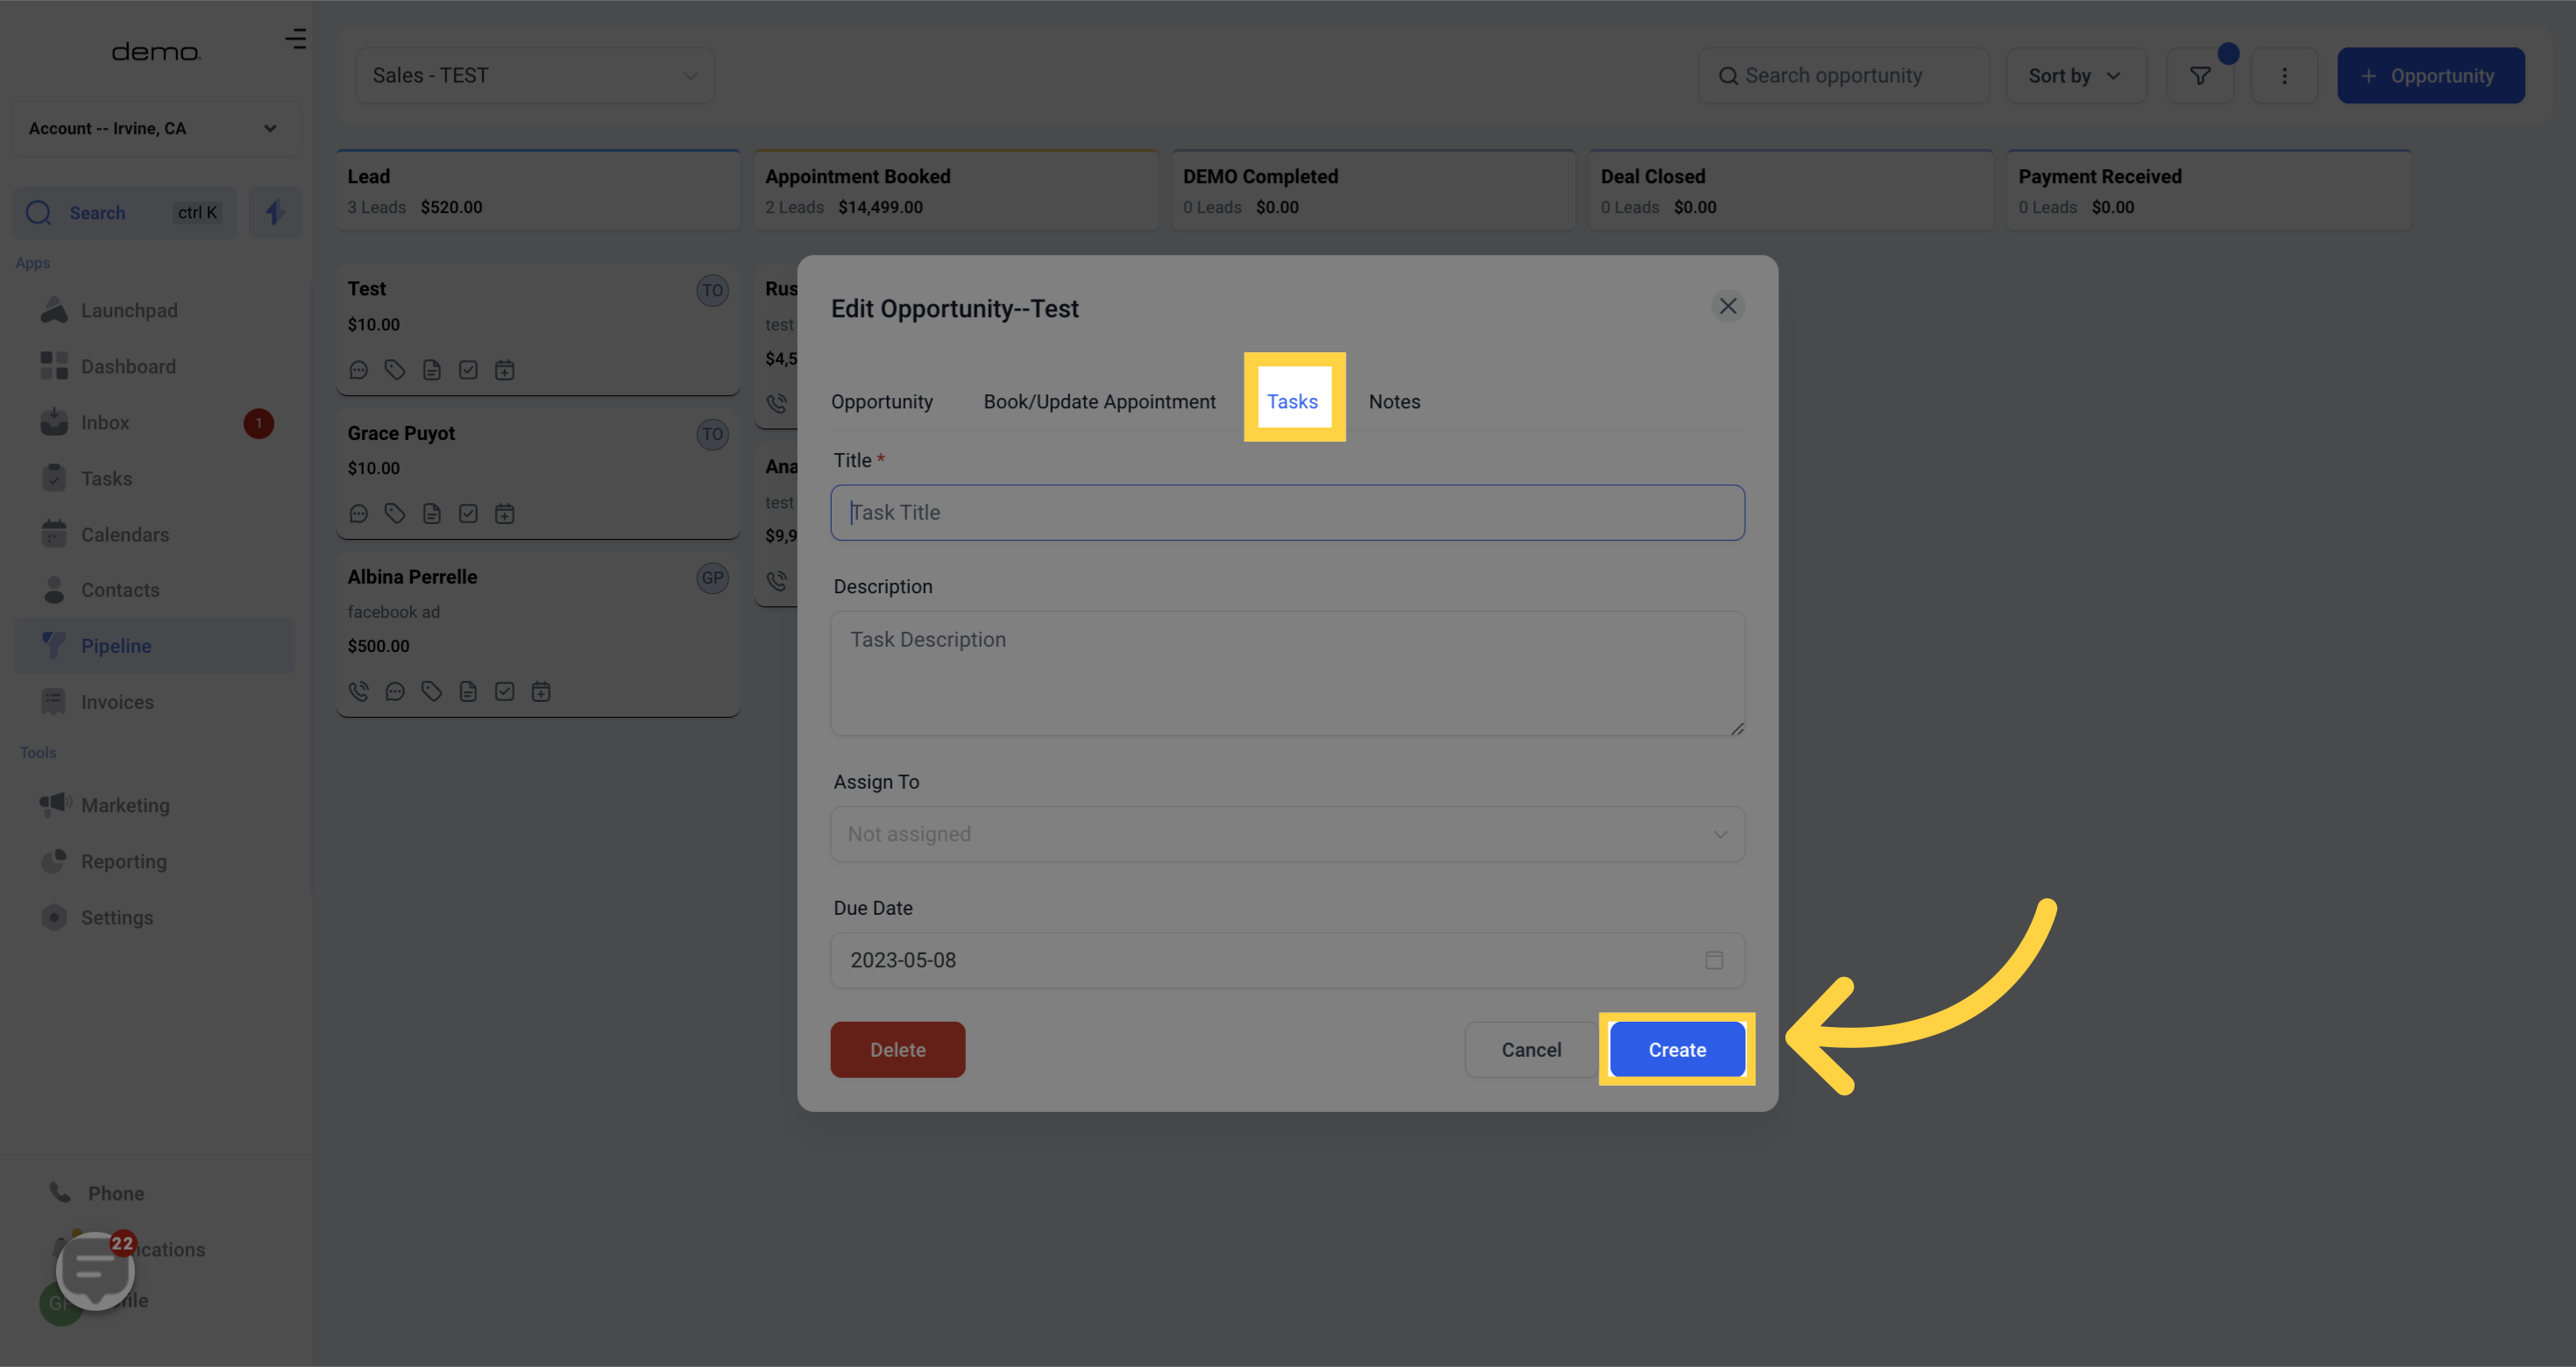
Description - In the task description, you can include the person responsible for the task along with any relevant details.
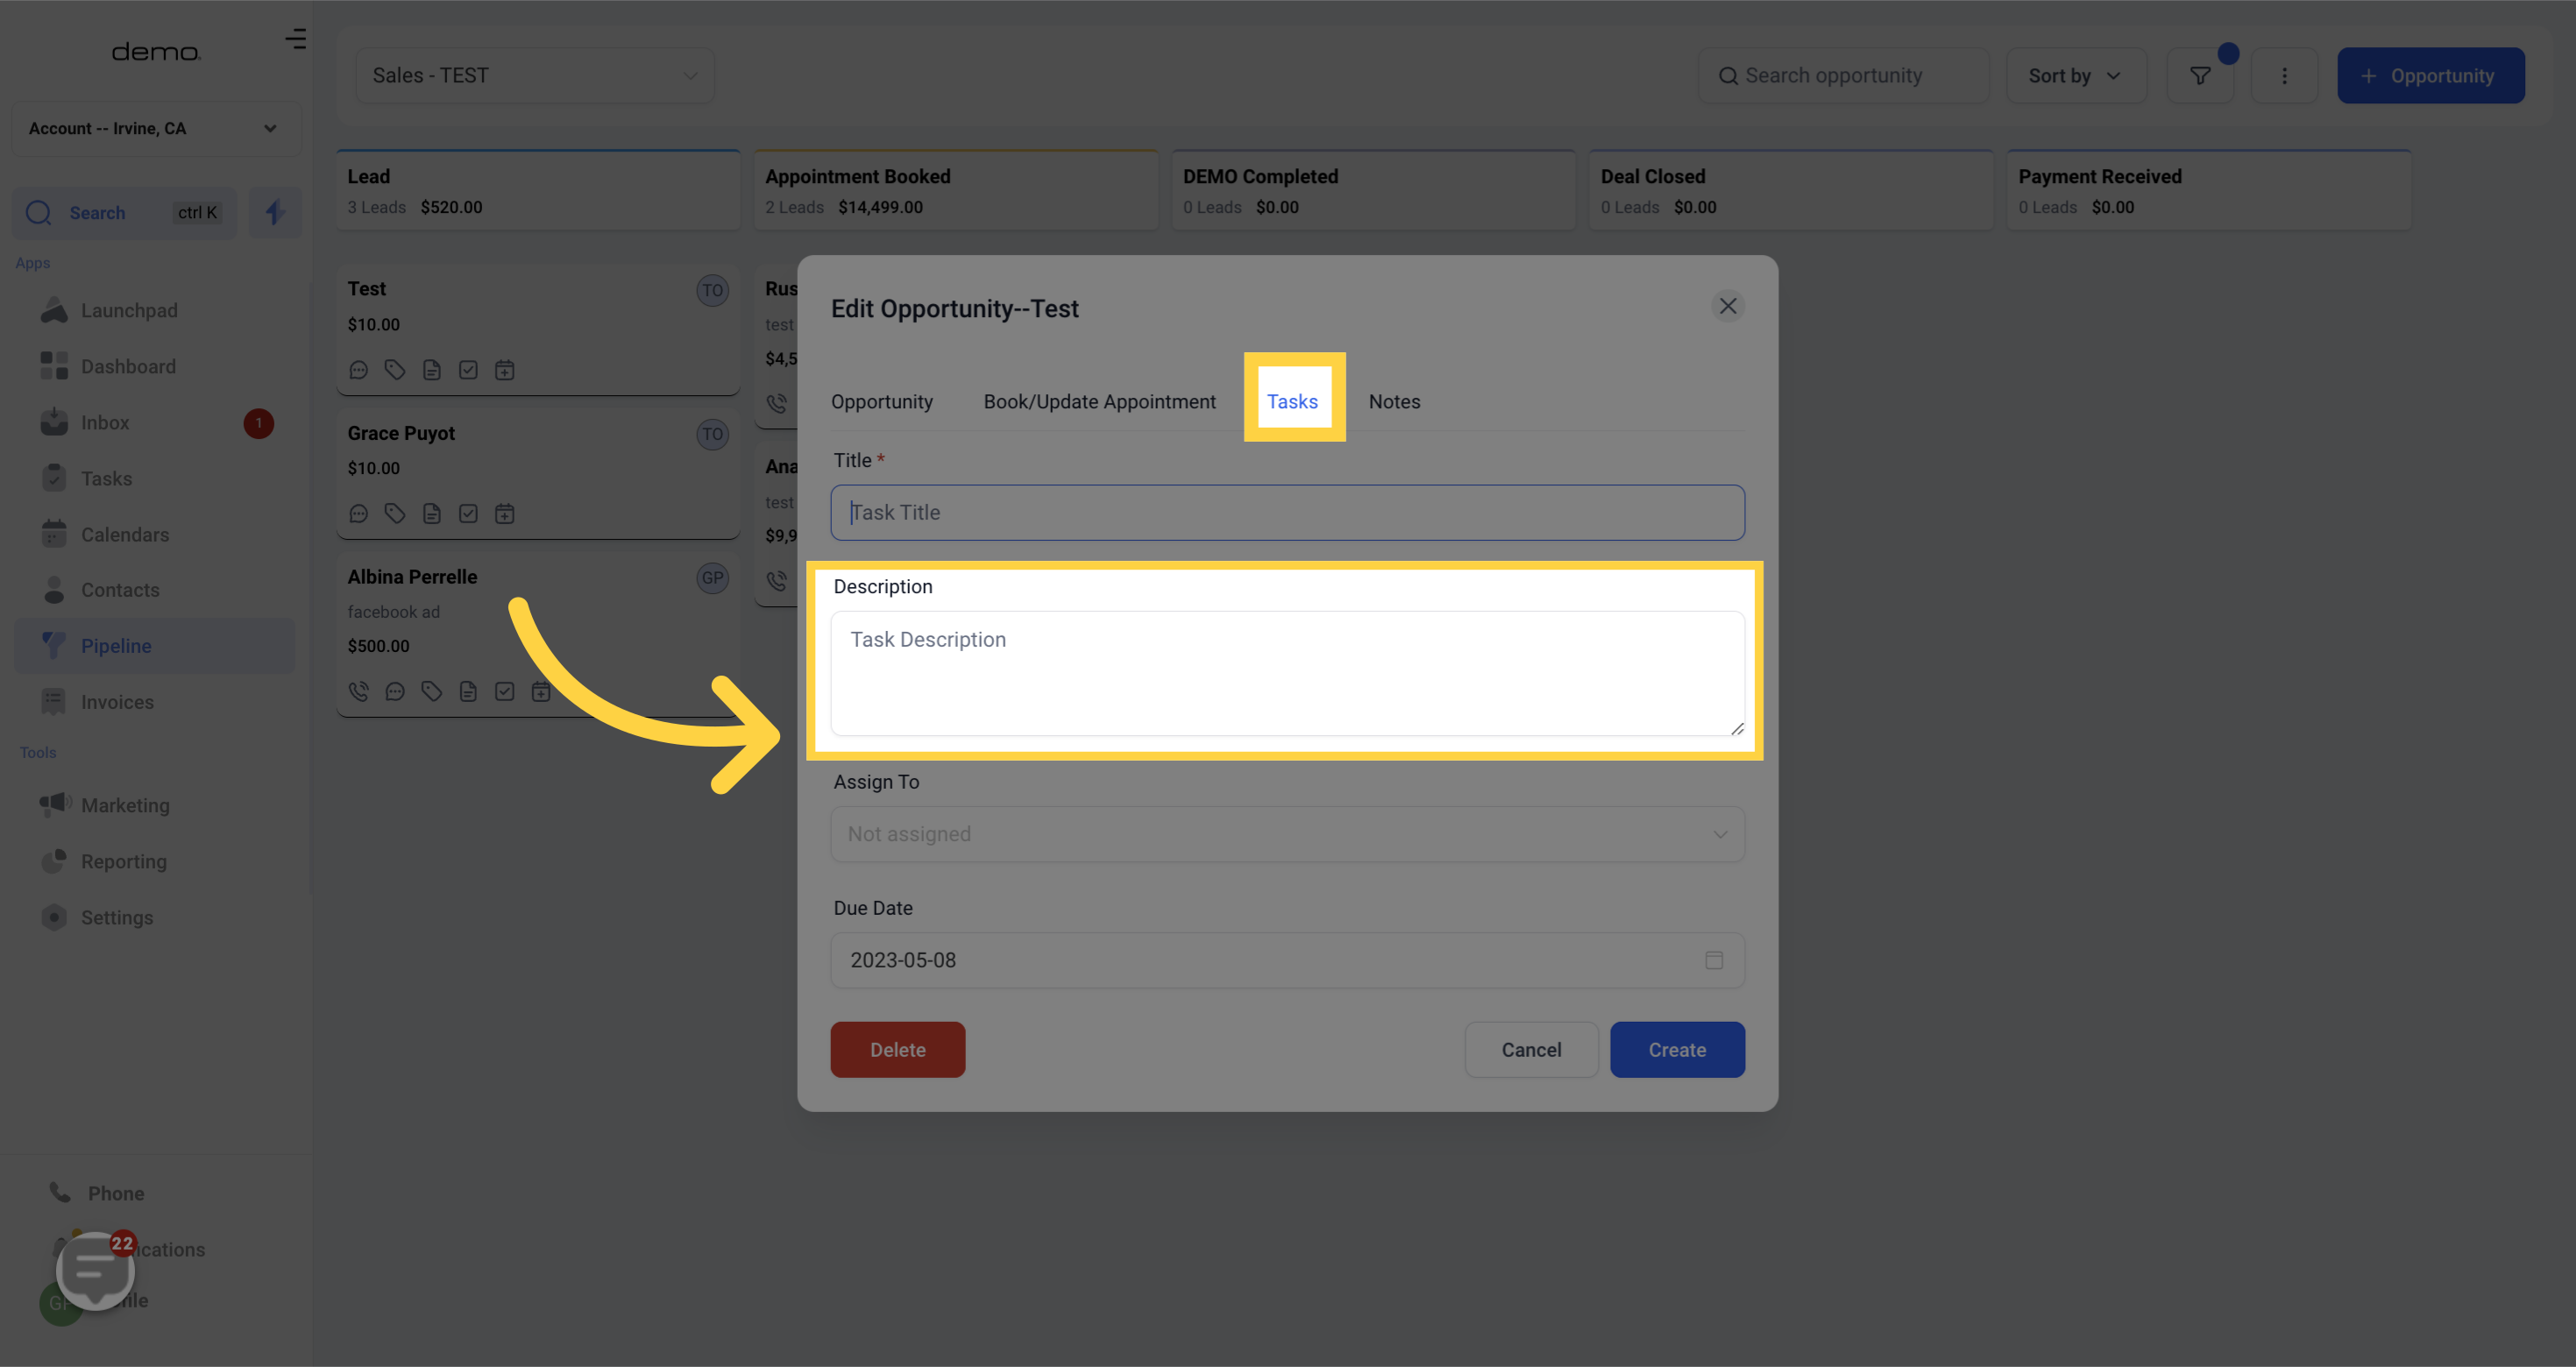)
Assign to - You have the option to assign it to a specific team member or leave it unassigned for all team members to see.
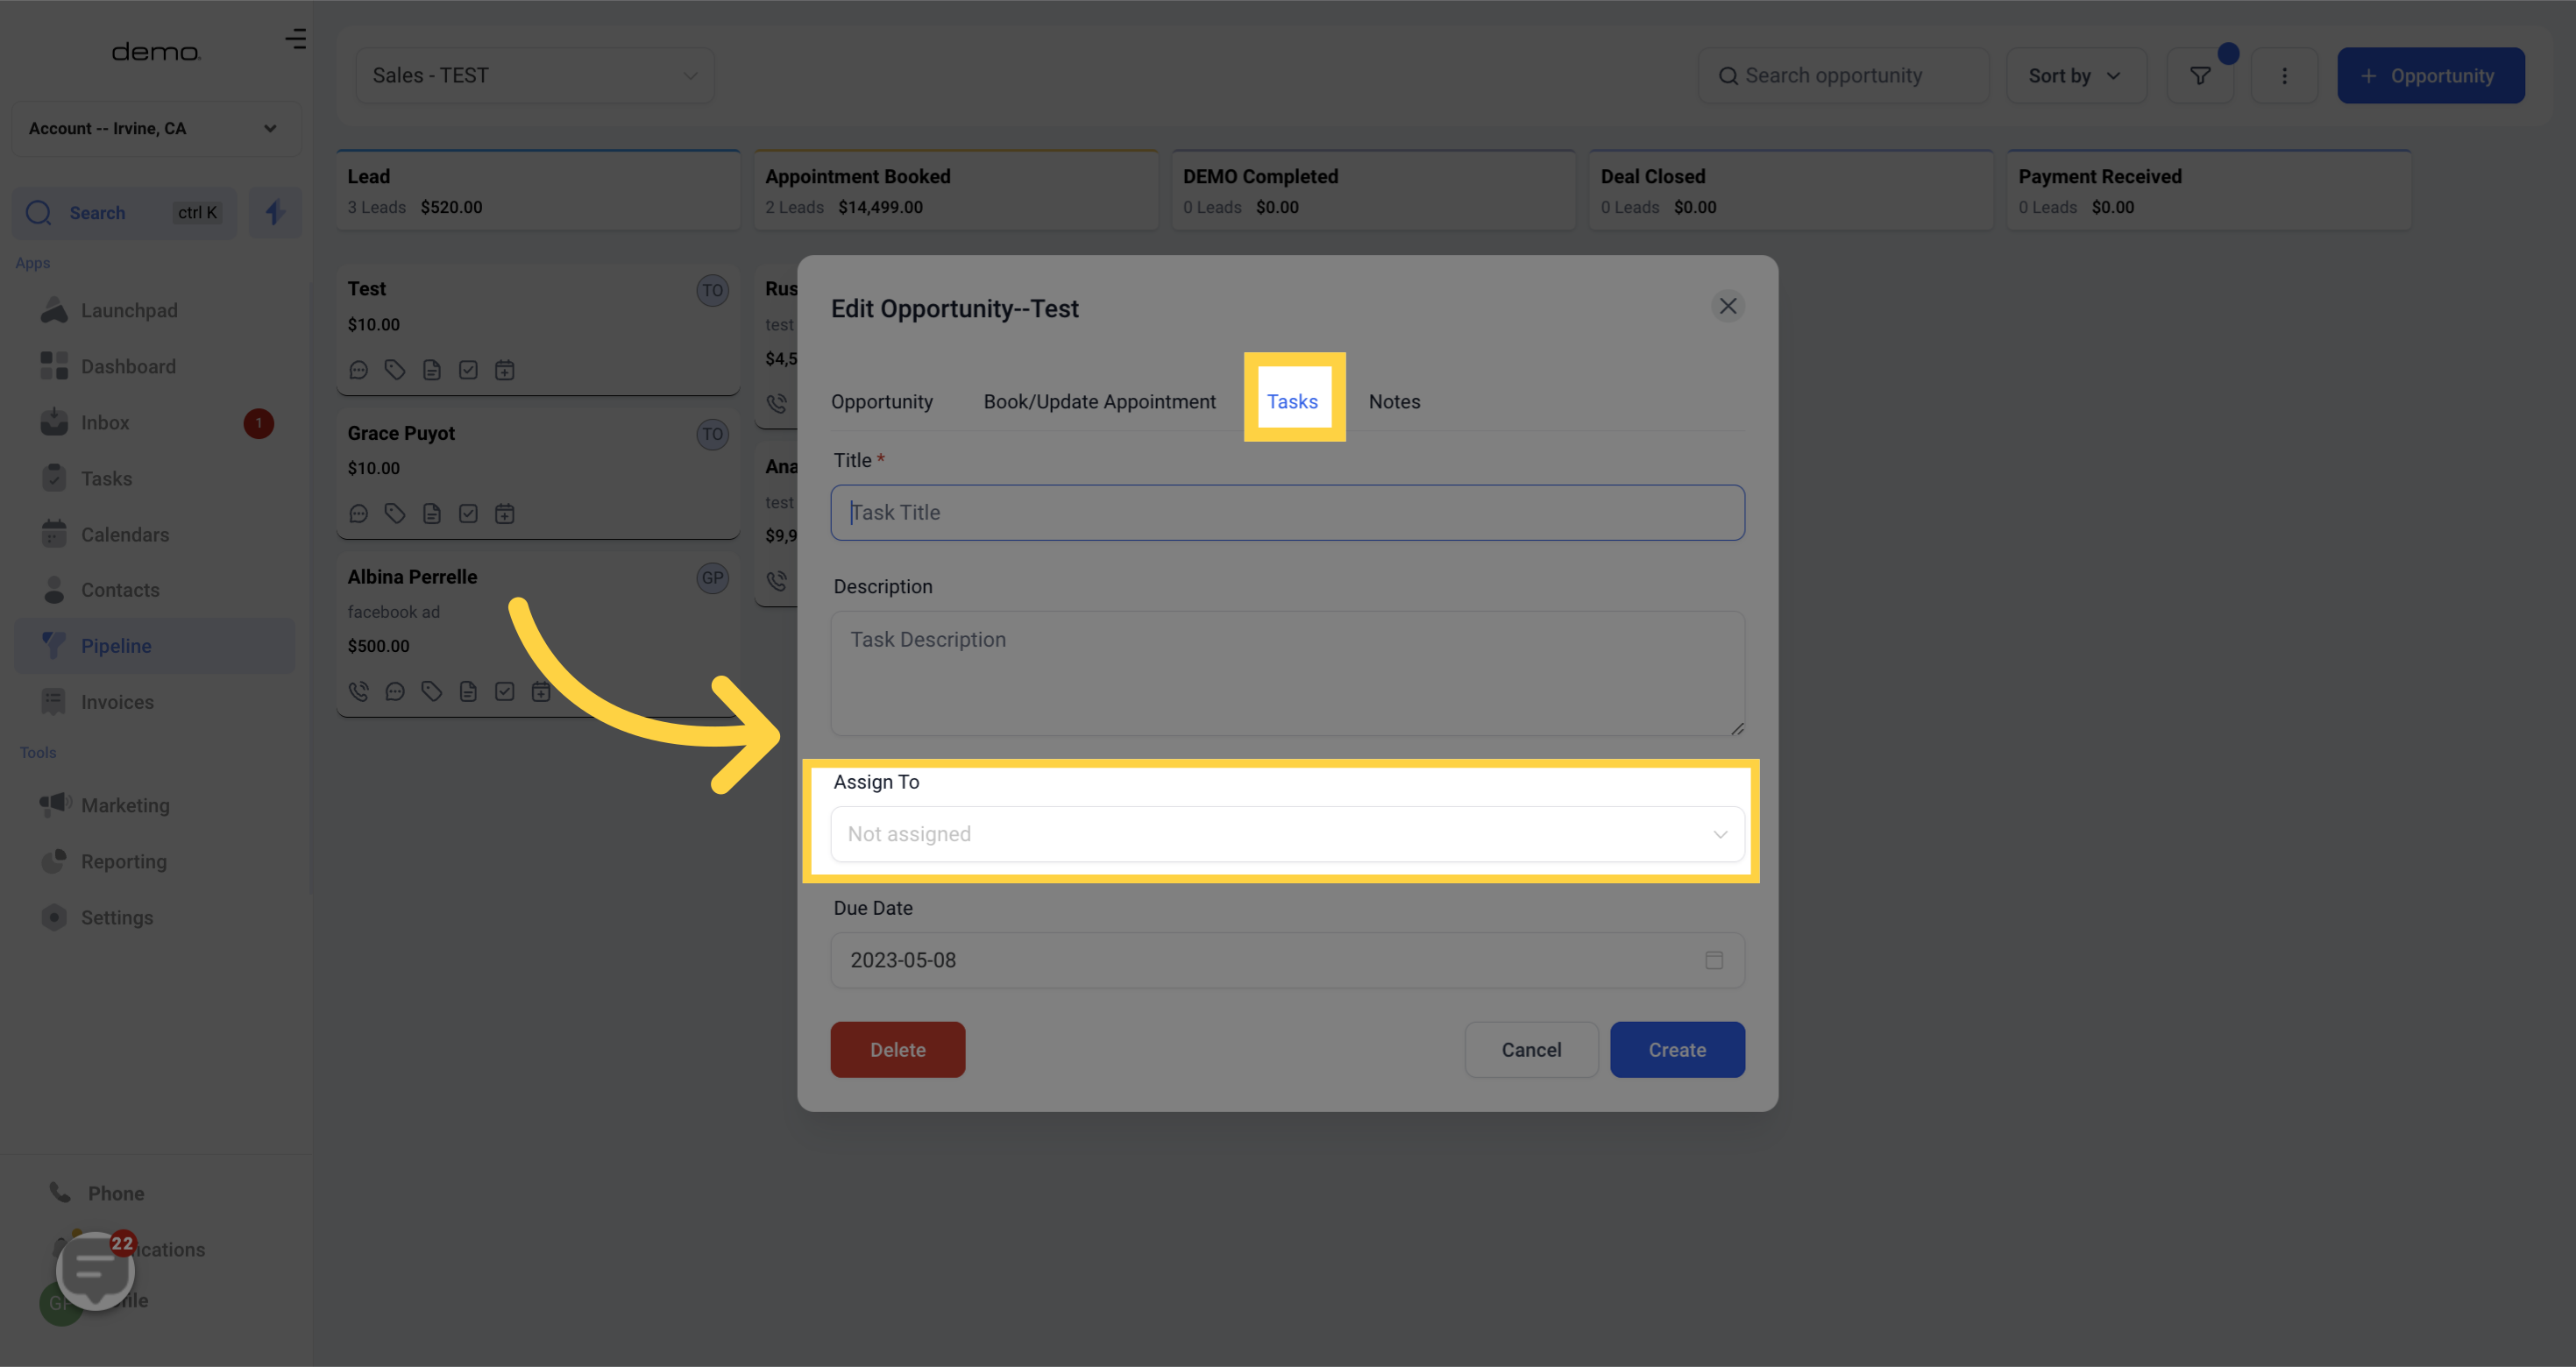)
Due Date - To ensure timely completion of the new task, select a due date in this section.
)
)
